In this video, we learn how to make Naruto gloves. First, you will need to take an old black sock, thread, needle, and scissors. After this, you will cut the top off the sock and then put it on your hand. After this, you will need to use the needle and thread to sew in between the fingers on the sock. When all of these are patched, up you will add a fake metal plate to the top of it. You can glue this on with a hot glue gun. When finished drying, you will be able to wear this out, enjoy!
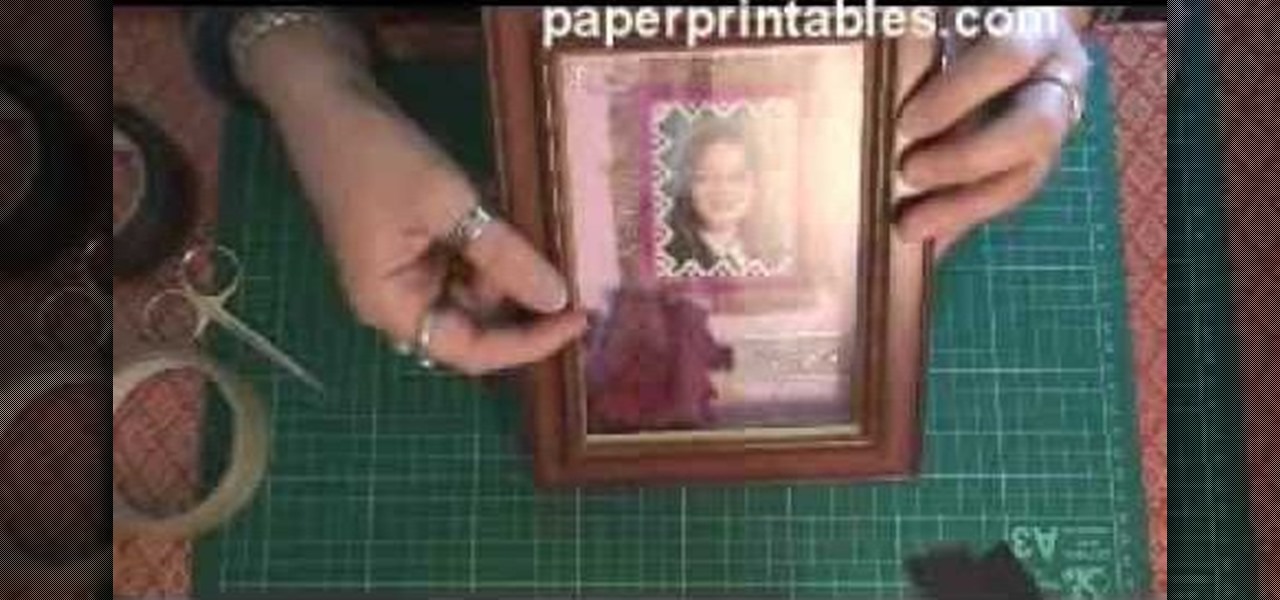
In this tutorial, we learn how to make a shadow box frame. First, grab a regular picture frame and remove everything from the frame. Next, remove the metal pegs that are around the sides. From here, grab a piece of card stock and draw the outline of the glass onto it with a pencil. Then, extend the edges of the box out on the paper. From here, you will cut it out and then bend it into a box. From here, add the picture and anything else you want inside of the box. Stick double sided tape insid...

In this video, we learn how to build a nest box and ladder for a chicken coop. Start off by creating the box with several pieces of 2x4's. Measure each piece individually, then screw them into place. Make sure it's the size that you want it and that it's secure and lays flat on the ground. Once finished, you will bend some metal and place it on the sides of the coup and then fasten the hinges so they are free swinging. Then, pull in a few more piece and you will have created the nest box insi...
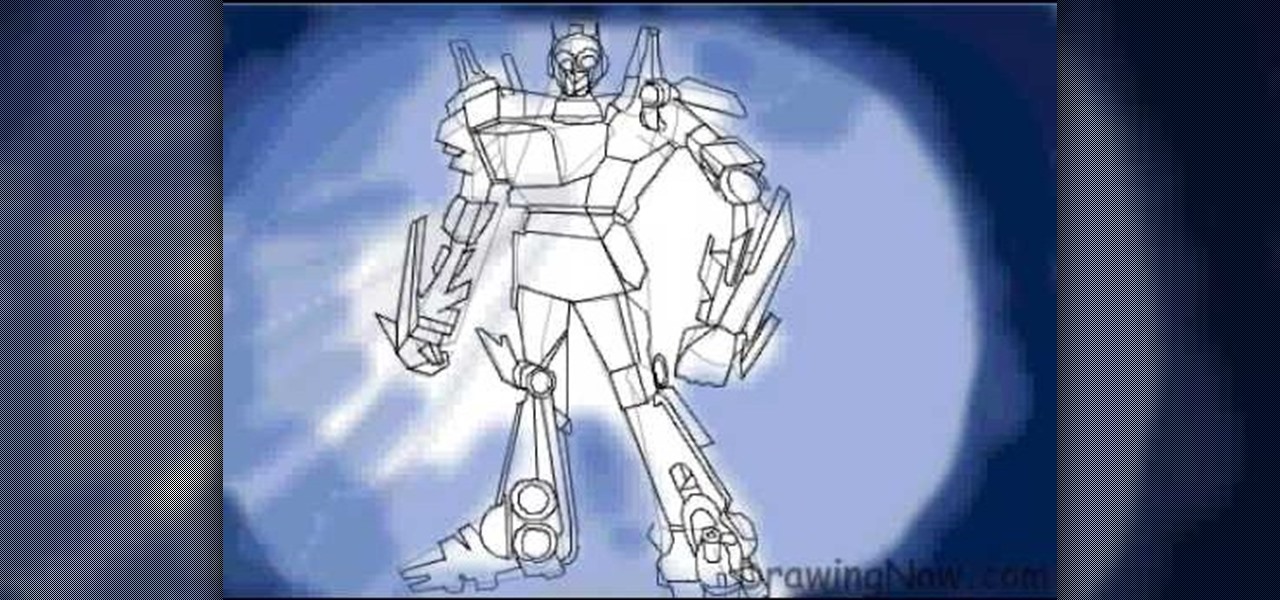
In this tutorial, we learn how to draw Optimus Prime, leader of the Transformers. First, draw the outline of Optimus Prime, use basic lines and circles to show where the joints are going to go. After this, draw the full outline around the character, using a dark line to make it look 3D. Then, draw in the rest of the details for the character, giving him a look like a machine or a bunch of metal. Next, you will start to shade in the different parts and add colors that were used in the movie. W...
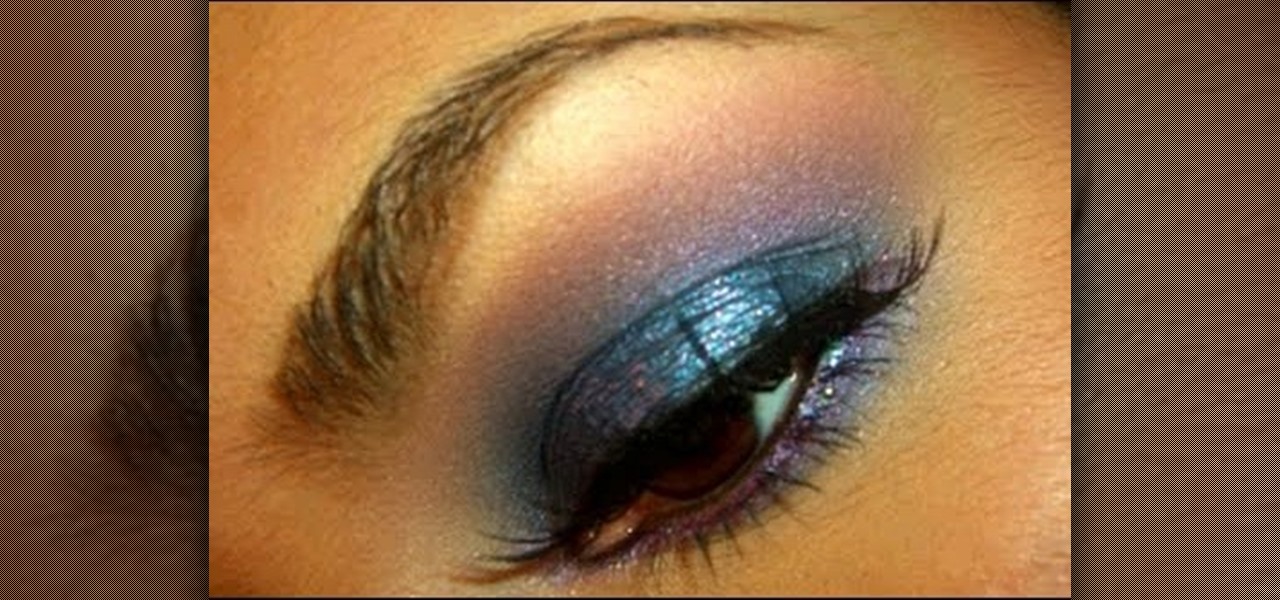
Though it may not seem like it, blue eye makeup is one of the most universally flattering shades out there. We're not talking robin's egg blue or any of the lighter shades of blue; rather, we're thinking a deep, dark navy or an electric, sparkly teal.
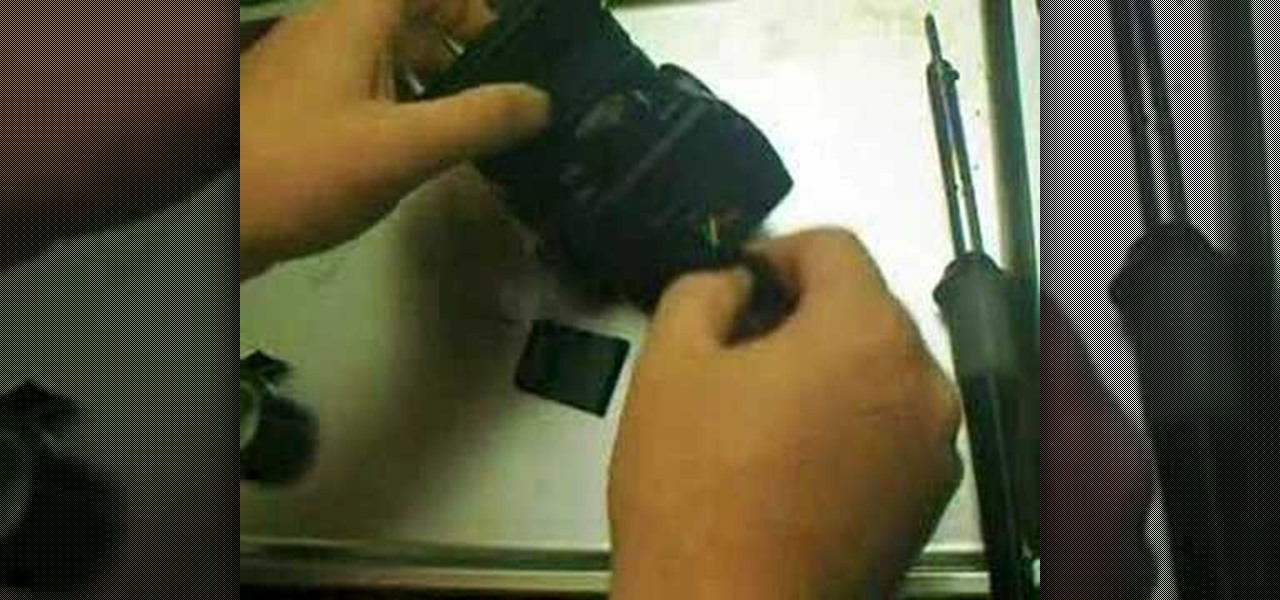
In this tutorial, we learn how to repair the Vivitar 285's Flash Foot. First, remove the flash foot using a soldering iron. Melt the solder just enough, don't ruin the wires or the backing. Now, set the iron down and then short the wires out, you will see the flash go off when you do this. Trim of the exposed wire from the end, then wrap a small amount of electrical tape around the wires. After this, you will repair the metal around where the wires were connected. Then, solder the wires back ...

This is a video tutorial in the Home & Garden category where you are going to learn how to deal with a hollow door when installing bath fixtures. Bob Schmidt shows you how to do this while installing bath accessories such as robe hooks, towel bars or towel rings. The product that you need to do this is called easy anchor. It is a metal anchor specifically designed for the right depth for a hollow core door. Take the anchor and drill it down the door until it is fairly close to going in fully....
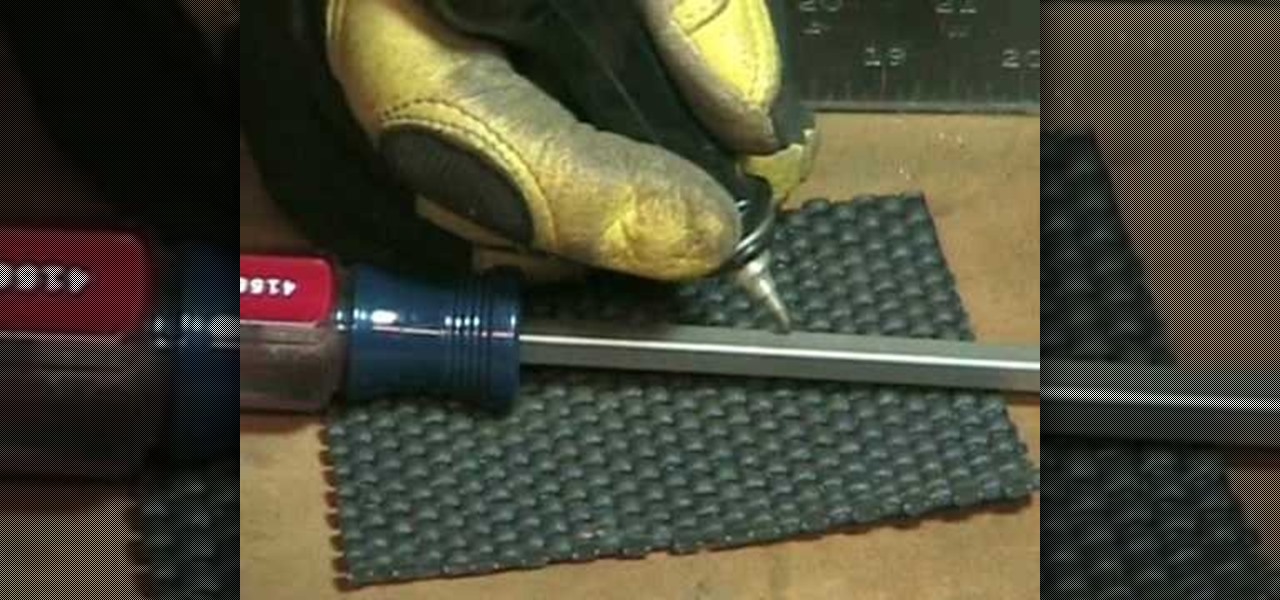
You never know what you might stumble across on your next visit to a flea market or thrift store. Real gold is very soft, so biting down on the piece is a time-honored test for real gold. You can also examine your jewelry for a maker's carat stamp or discoloration that may indicate fake metal.
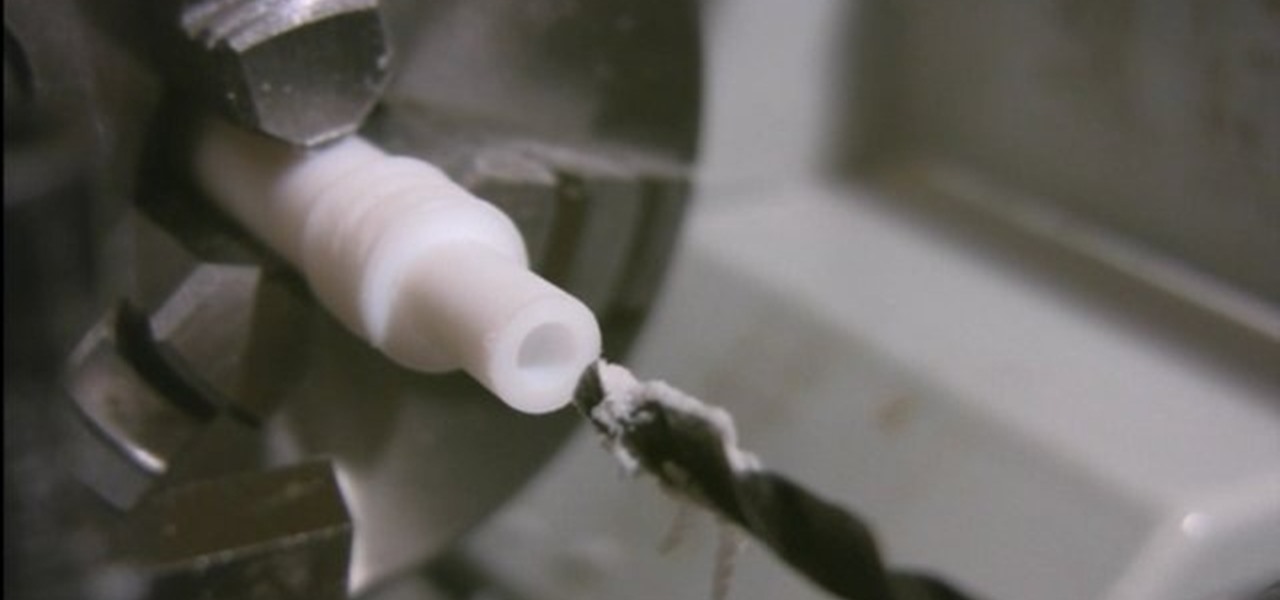
This video will show you how to create wheels for a fingerboard using a lathe. First, you should take a plastic tube and insert it into your lathe, using various drill pieces to cut down the plastic tube to the correct size. After this has been done, a drill which is attached to the lathe and adjusted to go straight through the tube can be made to create a hole through the center of the tube. You can then insert a small piece of metal into the tube in order to create the holder which will att...
Kim Kardashian knows her way around a smokey eye. Like, sister could put her makeup on in the dark and still be the hottest thing on the red carpet. So it goes without saying that we often find ourselves oogling her pictures and finding inspiration in them for our own smokey eyes.
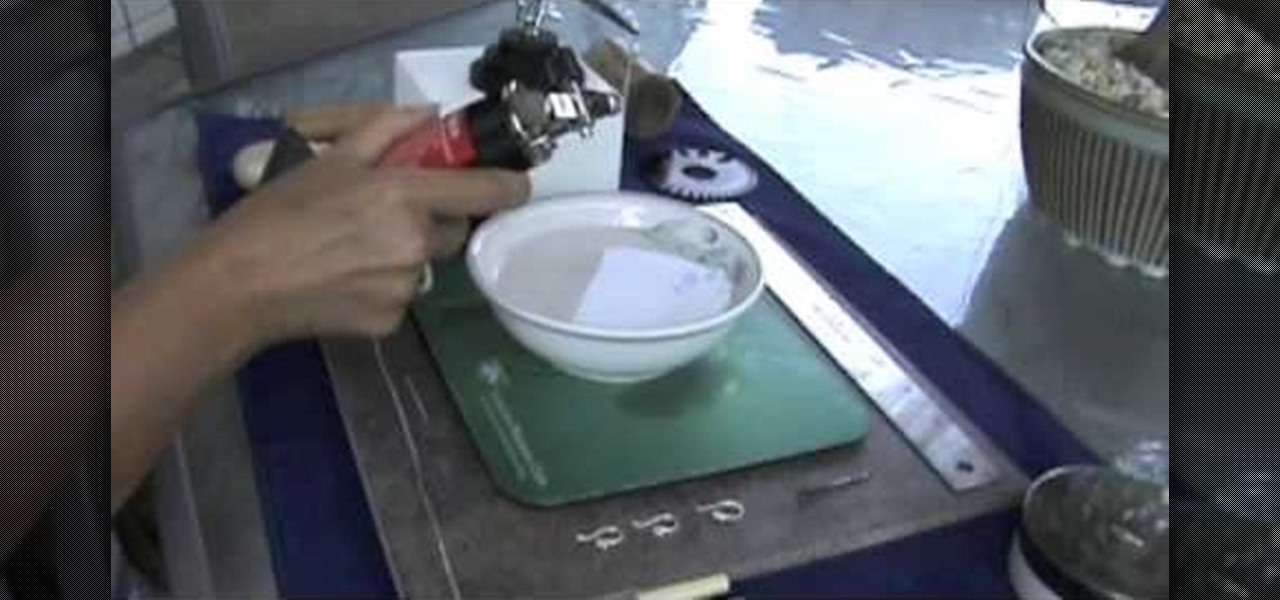
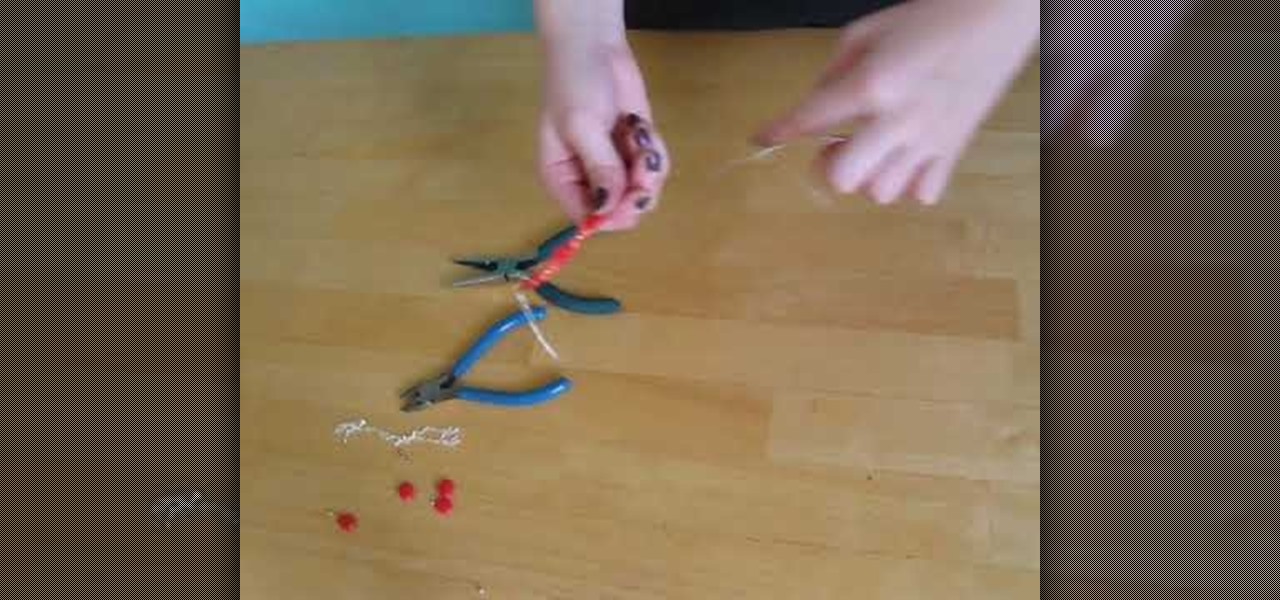
Make fine silver ball earring wires
In this video, we learn how to remove blackheads with Lisa Rhodes. Blackheads are a common problem that occur when dirt and bacteria get trapped underneath the skin. The best way to remove these blackheads from your skin comedone extractors, which is a metal stick with a hole at the end. It applies even skin around the blackhead when you are extracting. This is safer than using your fingers, because your fingers tend to damage the hair follicle, which leads to acne bumps or a larger pore. thi...
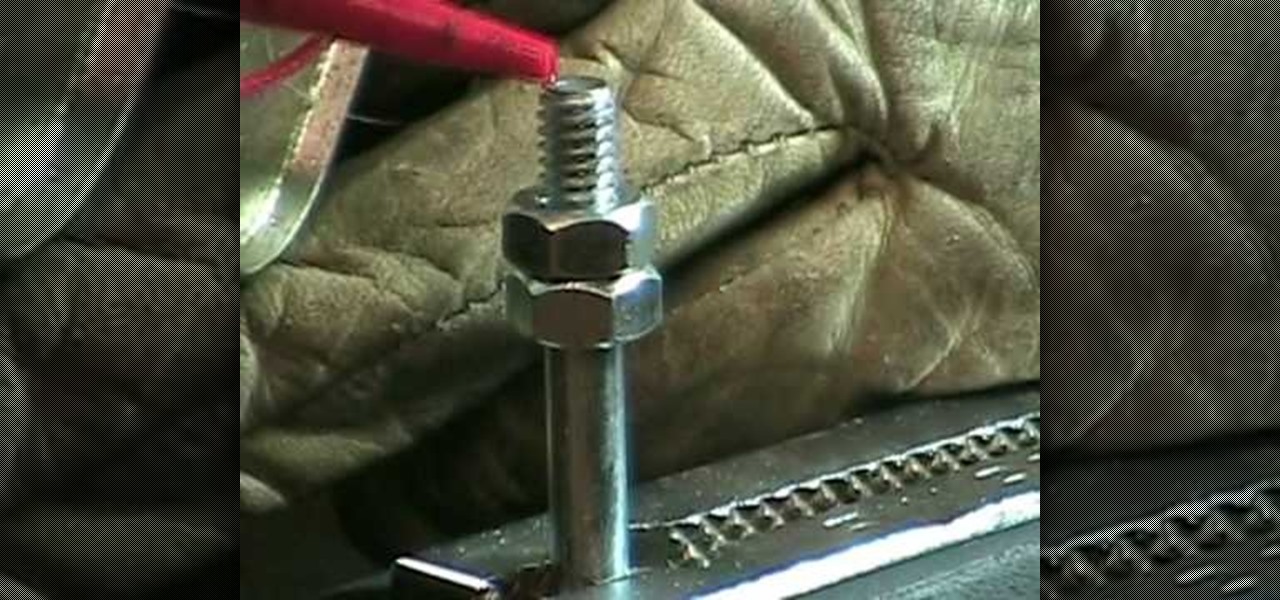
In this video tutorial, viewers learn how to cut a bolt and save the threads. The materials required for this task are: a hacksaw, steel bristle brush, bolt cutters, wrench, oil and a filer. Begin by putting some oil onto the threads of the bolt. Then place the saw on the desired groove and cut across through the thread. Now brush it with the steel bristle brush to remove the debris. Finish by removing the excess metal with the filer and unscrew the bolt(s). This video will benefit those view...
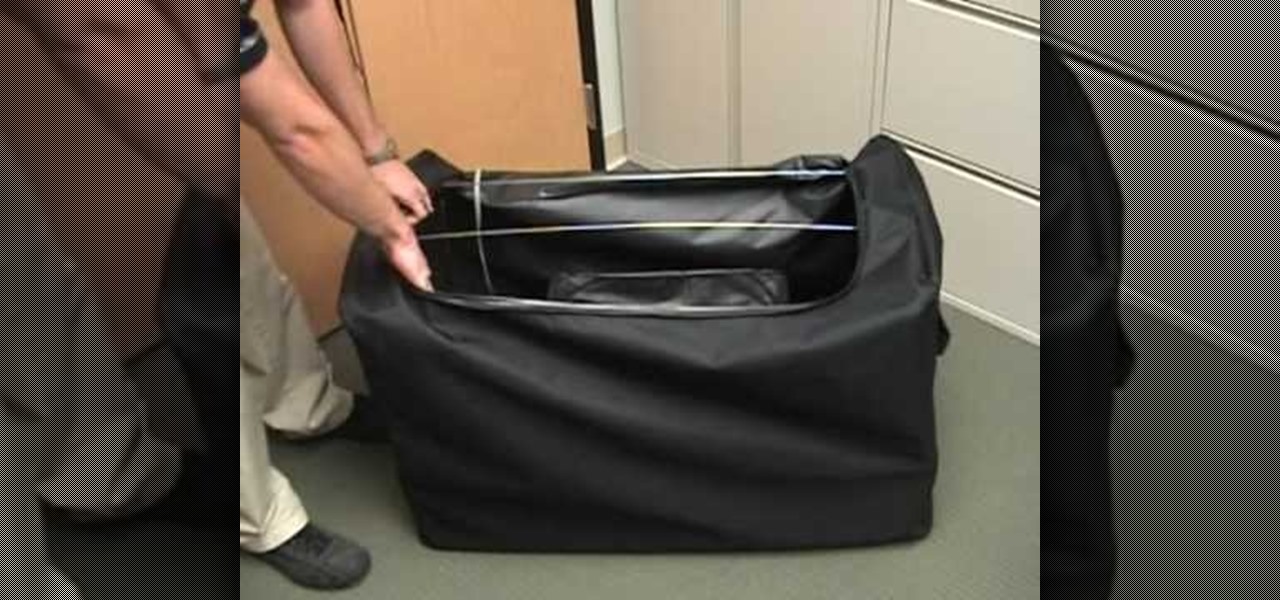
A Pack Tite Unit is used to treat items that may be infested with bed bugs. It can be used to treat suitcases and other items that can't be easily washed in hot water. Be careful not to allow any items to touch the heating unit. Place your item in the center of the rack. Place the metal safety rack on top of your item. There are also side racks available. Zip it closed. Make sure it is zipped as far as it will go. This will kill bed bugs and eggs, because it will heat items up to 140 degrees....
In this video, we learn how to flatten a bottle cap in the Cuttlebug with Sara Sandberg. Before you do this, make sure you purchase bottle caps from a store, the ones from your home beer will not work with the Cuttlebug. Place your thick white A mat in the Cuttlebug, then place the bottle caps flat side down on top. Next, place a dye on top with the metal side down. After this, crank the lever and pull the papers through the machine. When you remove the top, your bottle caps will have flatten...
In this tutorial, we learn how to make a Freddie Krueger glove. You will need: a saw, sandpaper, silver spray paint, black paint, brown paint, old glove, tin from a can, plexi glass, shiny cardboard, and a hot glue gun. Start off by using your paper roll to cut off a strip of it that will start on the joints of your hands, then cut this in half. After this, make a cut in the top of it and on the sides of it. Do this again for the four fingers, then wrap it around the glove fingers. After this...
In this tutorial, we learn how to use an engraving tool. It doesn't matter how old your engraving tool is, just make sure it has different speeds on it to help control it while in use. Now, place a piece of aluminum down and adjust your power level to the lowest level. Push down on the aluminum and write the word you want to so you can see how the pressure effects the aluminum. Now, set the tool at the highest setting and push down on a sledge hammer to see the pressure you need to push to ge...
In this video, we learn how to use your diaphragm to scream sing. This is what you would use if you were doing death metal vocals to scream in a song. You will need to use the voice from the back of your throat, but make sure you aren't using the wrong portion of your voice to breathe too hard, or you will lose your voice quickly. You want to deep breathe and use your diaphragm to pull the deep sound out of your throat. This will take practice to get used to, but it will help you sound deeper...
In this tutorial, we learn how to start a cozy fire with lava rocks soaked in oil. First, grab your lava rocks and place them in a tin can, then fill it up with oil. Now, throw some wood into your fireplace while these are soaking. Use an old pair of metal tongs to take the rocks out of the can, then place them in the fireplace as well. After this, throw a match in with the rocks and wood and then close the fireplace. Let the rocks burn for about 5 minutes the you can take them out and you wi...
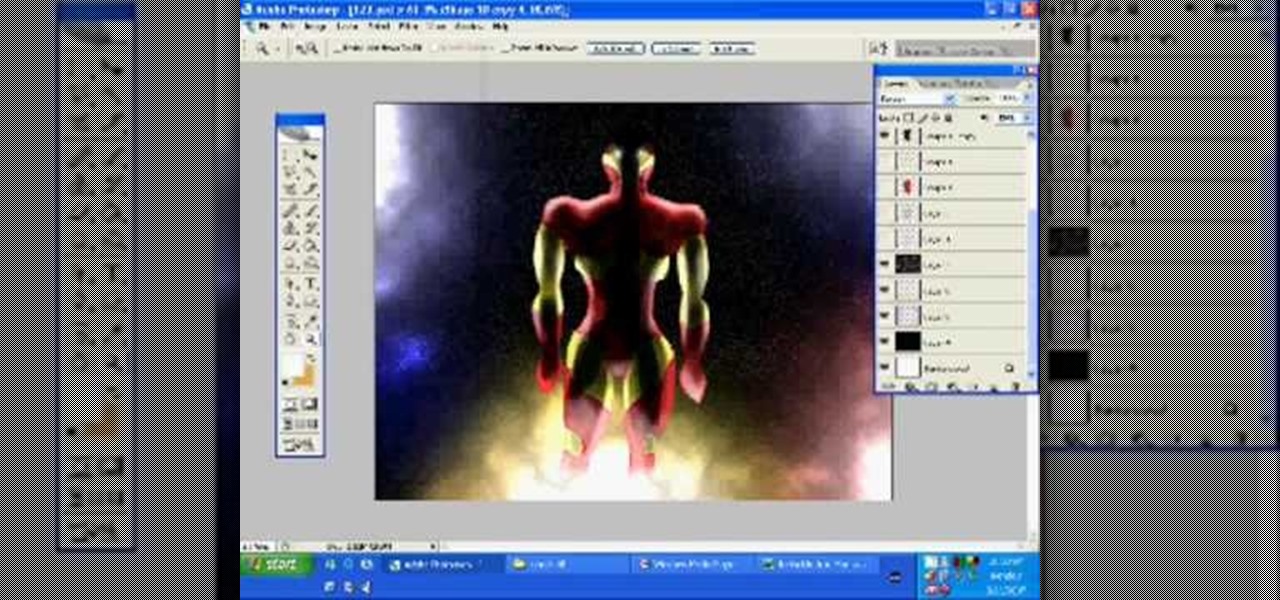
In this tutorial, we learn how to draw Iron Man from scratch in Photoshop. Begin by drawing an outline of the entire Iron Man with a light gray pencil in this program. After you have done this, use a black paintbrush and draw over the lines to make cleaner marks. Next, start to fill in details on the body, such as the metal parts, bolts, and facial features. After this, use red and yellow paint brushes to paint the different colors onto the suit. Next, use a black spray paint brush to color b...
In this tutorial, we learn how to make a window valance. If you have a drop down shade, a valance will help cover up the hardware that is located underneath it. Start out with your choice of fabric, then add in 1 inch to the top, bottom and sides. Next, line the fabric and place Velcro on the top. Now, use a wrap around and mark where you want to fold the fabric in at. After this, sew the valance and then use the Velcro to stick it onto the metal part of the drapes. When finished, enjoy your ...
One of the most annoying things about installing a new car audio system is the constant rattle sounds your hear. Always driving around sounding like a car full of metal junk can be quite annoying.
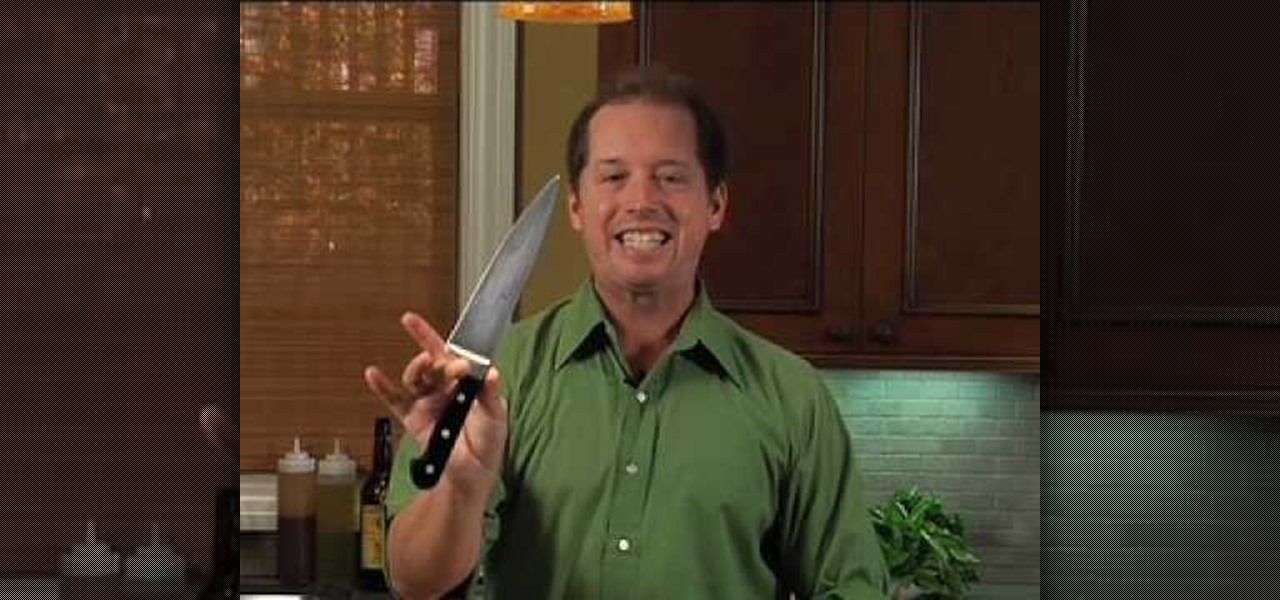
In this video, we learn three different ways to sharpen a knife. The first way is to grab a traditional stone and place either some water or oil on it and sharpen it my scratching it against the stone. Another way to sharpen your knife is to scratch it on a diamond tip, which does the same thing as a stone, takes some of the metal off of the knife. The last way to sharpen a knife is to buy a product called an AccuSharp. It has a sharpener that is built into the side of it. All you have to do ...
In this tutorial, we learn how to perform a brake upgrade on a Ford Mustang. To begin, remove your lug nuts and jack up the rear of the vehicle. Next, remove the brake caliper and all bolts around it. Remove your brake pads and remove more bolts from the back as well. Now, take off the metal ring around the rotor, then slide the rotor off as well. Put on your new rotor after this, then reinstall your bracket and remove the brake fluid from the car. Put all the bolts and parts back into the ca...
First of all, hairpin lace is a knitting technique using a crochet hook and a hairpin lace loom, which consists simply of two parallel metal rods. To use the loom, you wrap yarn around the loops to form prongs, and eventually get a delicate lacy pattern.
Missa teaches us how to create a claspless lariat necklace in this video. First, cut your wire so it's 20 inches long and then make a loop on one of the ends, and attach a chain to it. Now put on the end bead and attach the chain to the metal wire. Now make a loop around the end where the bead is. Now take pliers and clamp the wire on the end down. You can now take wire cutter and cut an inch down on the chain and cut it off. You can now apply your favorite beads to the wire, and any pendants...
In this Home & Garden video tutorial you will learn how to unclog a sink in the bathroom or kitchen. It's extremely simple. Put a bowl under the U joint. Unscrew the plunger rod located under the sink and pull it out. Then remove the sink blocker and remove any dirt from inside the pipe. Now unscrew the PVC U joint at both ends and remove it. This can be done with your hands. Most of the time this part is clogged. Clean it up. Then clean up the pipe coming down from the sink. Look from top an...
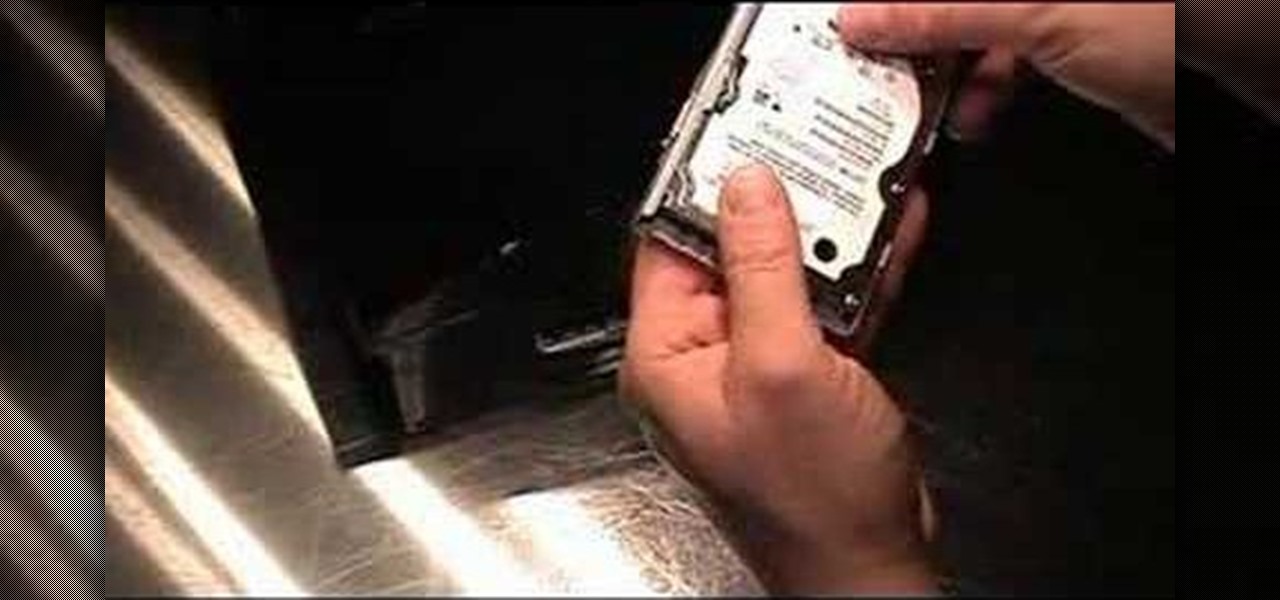
In this video tutorial, viewers learn how to upgrade the hard drive on a PlayStation 3. Begin by removing the plastic side panel on the PlayStation console and remove the blue screw on the tray. Then open the metal latch on the tray, move it to the right and remove the drive. Now unscrew the 4 screws on the tray that hold the hard drive on the tray. Then replace the old hard drive with the new one. Finish by replacing the screws, putting the tray back into the system and place on the plastic ...
In order to repair a dent in a car with a stud nail gun, you will need the following: a stud nail gun, pliers, a grinder, protective gear, and a body hammer.
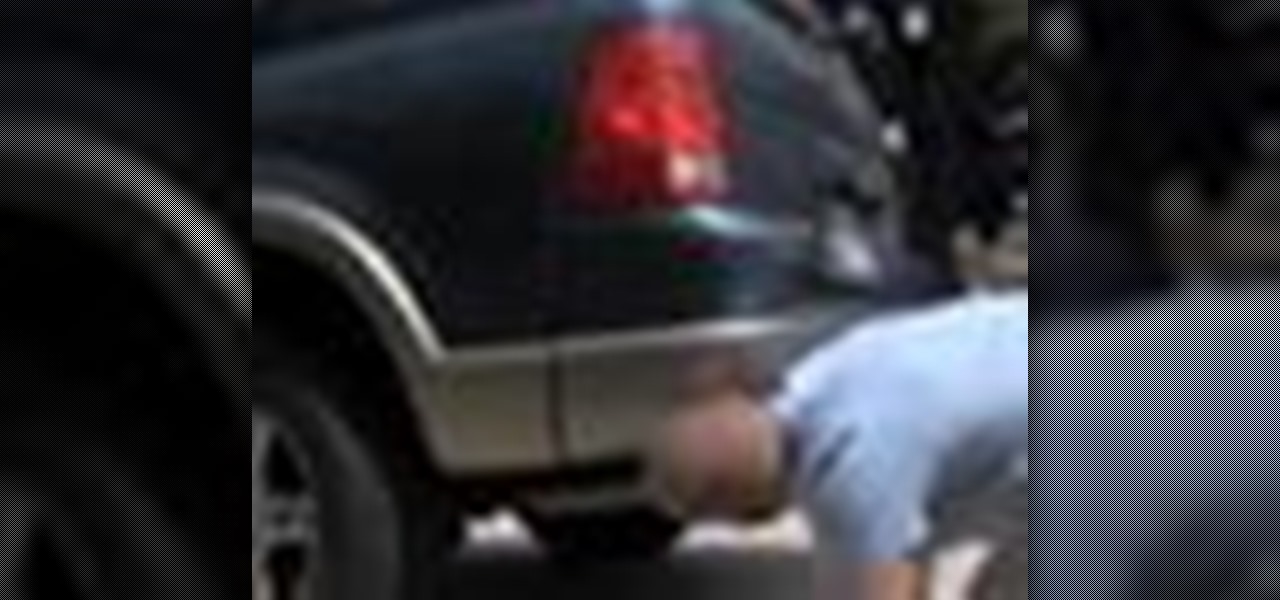
In this tutorial, we learn how to inspect bumper damage on a vehicle. On older vehicles, there is a metal absorber filled with fluid, so you would be able to see the amount of damage done. This would be able to tell you how far the bumper went in, and if it hit anything important in the vehicle. In newer vehicles, they are reinforced with a type of Styrofoam on the outside. Just because a vehicle doesn't show damage on the outside, doesn't mean there isn't damage underneath the car. So, alway...
In this video tutorial, viewers learn how to install a PlayStation 3 hard drive upgrade. Make sure to turn off the system and unplug it before installing the new drive. Begin by removing the plastic side panel and unscrew the blue screw. Then open the metal latch, move the tray to the right and slide out the drive. Now remove the 4 screws that hold the tray of the hard drive. Then swap in the new hard drive and replace the screws. Finish by inserting it back into the system and place on the p...
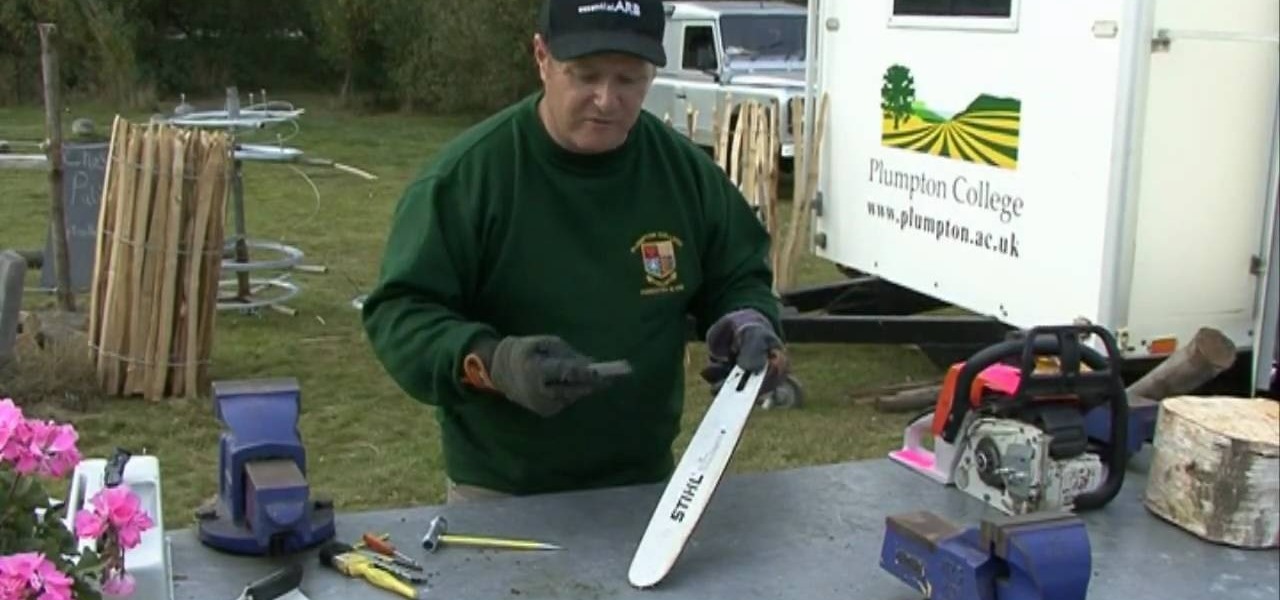
In this video tutorial, viewers learn how to maintain the guide bar of a chainsaw. Begin by removing the guide bar from the chainsaw. Unscrew the two nuts on the side of the saw and then remove the chain. Now rest the guide bar at an angle and scrape off the metal bur, using a flat file. Simply run the file down the guide bar until it is clear of any bur. Then use a tool to scrape any debris that is inside the groove of the guide bar. This video will benefit those viewers who are in the const...
This is a video tutorial describing how to modify a nerf nite finder toy rifle. The first step is to take the nerf nite finder toy rifle out of the box and unscrew all of the screws on the gun. Then unscrew the light in the gun and then unscrew the back wiring and pry the metal out of the back. Next pull out the plunger tube assembly by unscrewing the two screws. Next add a pvc pipe to the connector piece from the gun, connect it to a piece of brass. Then add springs to your gun, and add a pi...
Try to use the same brand of spray paint throughout the project, read the instructions, follow them. Different brands may have different instructions, this is why we advise against mixing brands. Begin by lightly sanding your project with 600 grit sand paper, anything lower can potentially scratch your project. Use a sturdy tape to cover the parts you want to leave unpainted. Use a very light coating of primer, sand it with 600 grit sand paper (lightly). To add 'special effects' to the job, u...
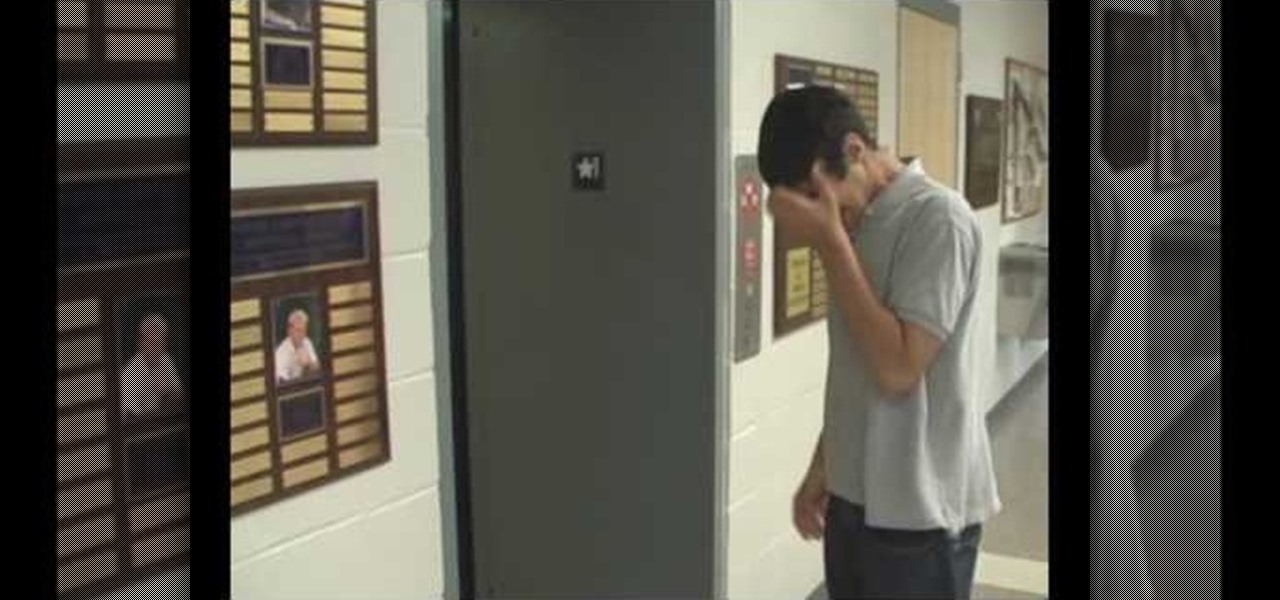
Do you hate that awkward silence in an elevator? Everyone is thinking the same thing.. "How long until my floor comes up so I can get out of this awkward small box I'm trapped in with a stranger?" Well, this tutorial offers advice on how to strike up a conversation with your fellow passenger. Kiss those quiet rides goodbye and maybe make a few new friends! Try these techniques and topics next time you are on your way up to the office, or wherever you are headed in that little metal box.
Why use a regular wall clock when you can have an awesome clock make out of spoons that you make yourself? Let your character show through or make a cheeky gift with this clock. You will have to buy a basic boring wall clock. Use the battery of the clock and attach it to a great metal strainer as the mount. Then use cut out a picture for the front ant but the hands back on. Glue some spoons on the back to complete the look, add a mount and your ready to enjoy telling time in a whole new way. ...
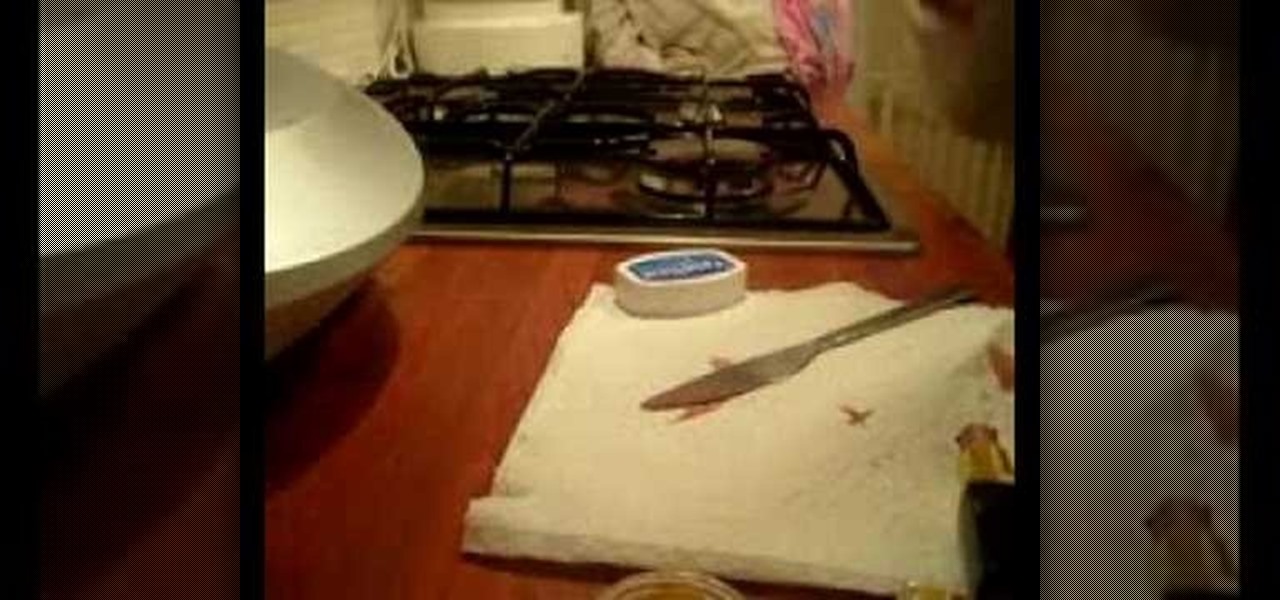
This video demonstrates how to make a fire without any matches using the Swedish Firesteel magnesium fire starter. You need to have some good tinder, such as dryer lint or a cotton ball. To make it burn longer, you can use petroleum jelly. He puts some Vaseline on the cotton ball. He demonstrates the fire starter by putting one metal part on the dryer lint and scraping the other part on it. A spark lights the dryer lint and it burns quickly. He demonstrates again with the cotton ball soaked i...
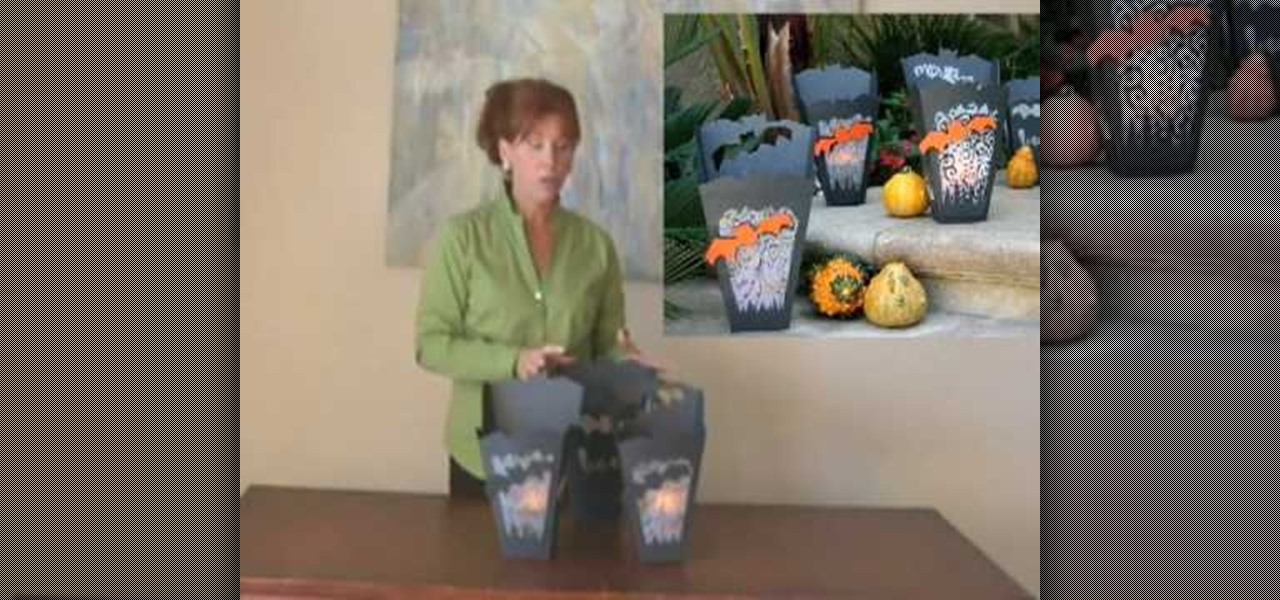
In this video tutorial, viewers learn how to make a Halloween lanterns. Users will need to visit this website: jennadeangeles/] and download the Halloween template. The materials required for this project are: download template, vellum, poster, rubber stamps, metal ruler, glue and orange card stock. Begin by cutting out the lantern with the openings as well. Now stamp the vellum with some black acrylic paint. Finish by closing the lantern with glue. This video i...
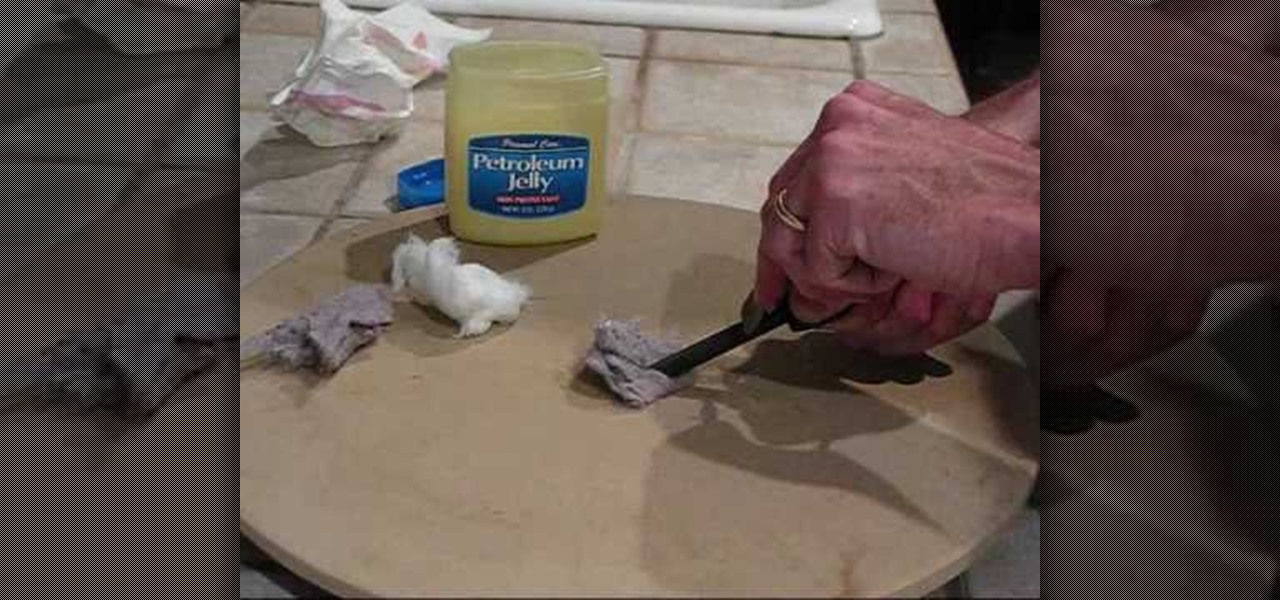
This video demonstrates how to make lip balm. For ingredients you need petroleum jelly and lipstick. For tools you need a large metal spoon, a teaspoon, a knife and a small jar. Take a couple of teaspoons of petroleum jelly on the large spoon. Cut off a bit of the lipstick and add it to the large spoon. Turn on a gas stove to the lowest setting. Hold the large spoonful of ingredients over the low flames. Use the knife to carefully mix the petroleum jelly and lipstick together in the spoon ove...
In this how-to video, you will learn how to take apart a Blackberry 9700 Bold. First, set the Blackberry on a sturdy and flat surface. Next, pry off the bottom front plate with a non-metal tool. Remove the battery and place it aside. Next, unscrew the front plate with a screw driver. Be sure not to lose these screws. Now, carefully pry the front bezel off. The keyboard pad will come off as well. Now, remove the screws around the area where the screen is. Once this is done, you can easily remo...