You will be using a picture of a Nintendo character and perler beads to make the necklace. Start by making an outline of the character using black perler beads. Then begin using colored beads to fill in the character. The color beads allow you to fill in the character and they also allow you to create all the detail on the character. You can shade and use multiple colors in making the characters. After you have put all the beads on the card put a sheet of waxy paper over the character and iro...

This Software video tutorial shows how to create a glass text effect in Photoshop CS3/CS4. Download a free trial version of Photoshop CS4 from Adobe. Open Photoshop, go to ‘file’ and click ‘open’. In the next box, give it a name, select width and height at 90 pixels, background contents to ‘transparent’ and click OK. Select the color palette and choose the background color and click OK. Now open ‘paint bucket tool’ and fill in the color. Then go to ‘text tool’, select the font, size and posit...
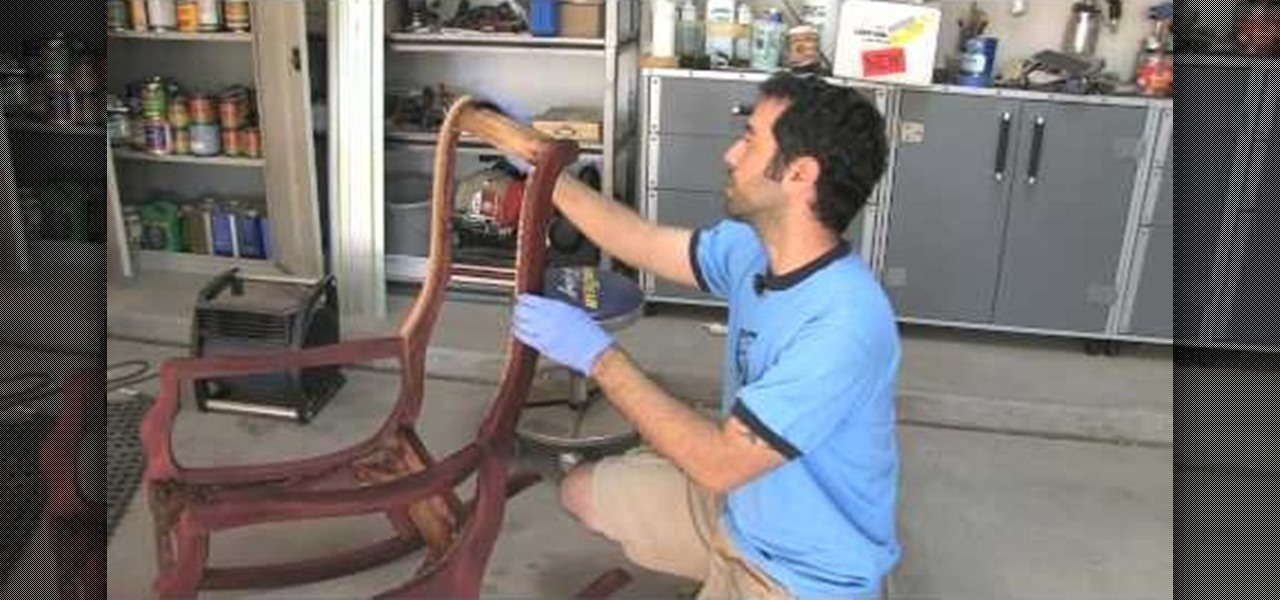
Add shimmer and color to your wood furniture with a Deep Red Mahogany Finish. Watch as The Wood Whisper's Marc Spagnuolo shows you how to apply this look to anything wood in your home. First Marc tells you about narrowing down whether or not you have to mask the wood or enhance the wood. After you figure that out you must choose how to color your wood. There are stains, oils, dyes and more! Marc chooses both a Merlot General Finishes Water Based Dye and Brown Mahogany General Finishes Gel Sta...
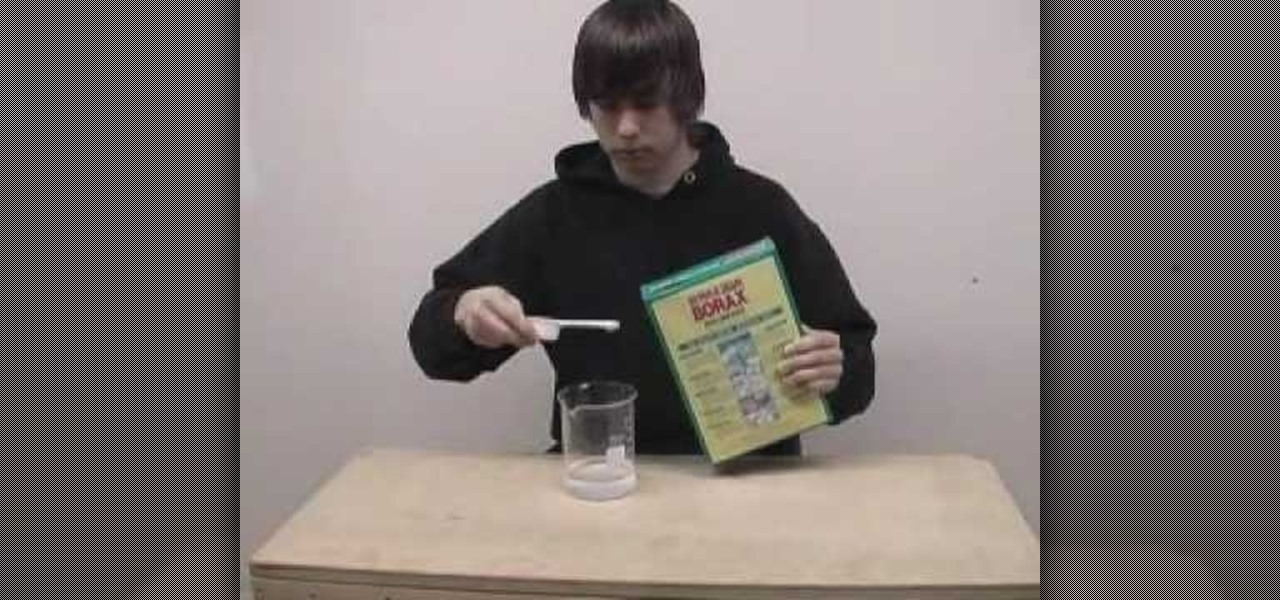
This is a hobbies and toys video tutorial where you will learn how to make flubber with household supplies. Put three fourths cup of warm water into one jar. Measure half a cup of glue. Take food coloring or any other color and pour it into the glue. Stir the glue so that the color mixes well. Now add the glue into the warm water and stir well. For the second mixture, take two teaspoons of borax and half a cup of warm water and stir. Now combine both the mixtures together in a jar. With both ...
This video teaches you how to make a steampunk bunny. You want to start off by making a blob with a fairly light color. Then you want to use a sharp stainless steel tool to create a round head. Make sure to make the head of the bunny is forwarded a little bit so that it looks like a bunny. Next, using your hands create a tail in the back of the bunny. Insert one of the bigger eyes using the little wire. Go ahead take your tool and carve out the nose, the cheeks and the mouth. Next you want to...

This video from fahimuk teaches you how to easily draw a very realistic looking Corvette. Fahimuk takes you through the drawing step by step and shows the drawing when it is sketched all of the way up to when the car is finally completed and in color. He goes very slow and is very explanative in his video. Even though the video is without sound it still adequately shows how to draw a very realistic looking car. The final product of the car is in full color and fahimuk even shows you how to co...

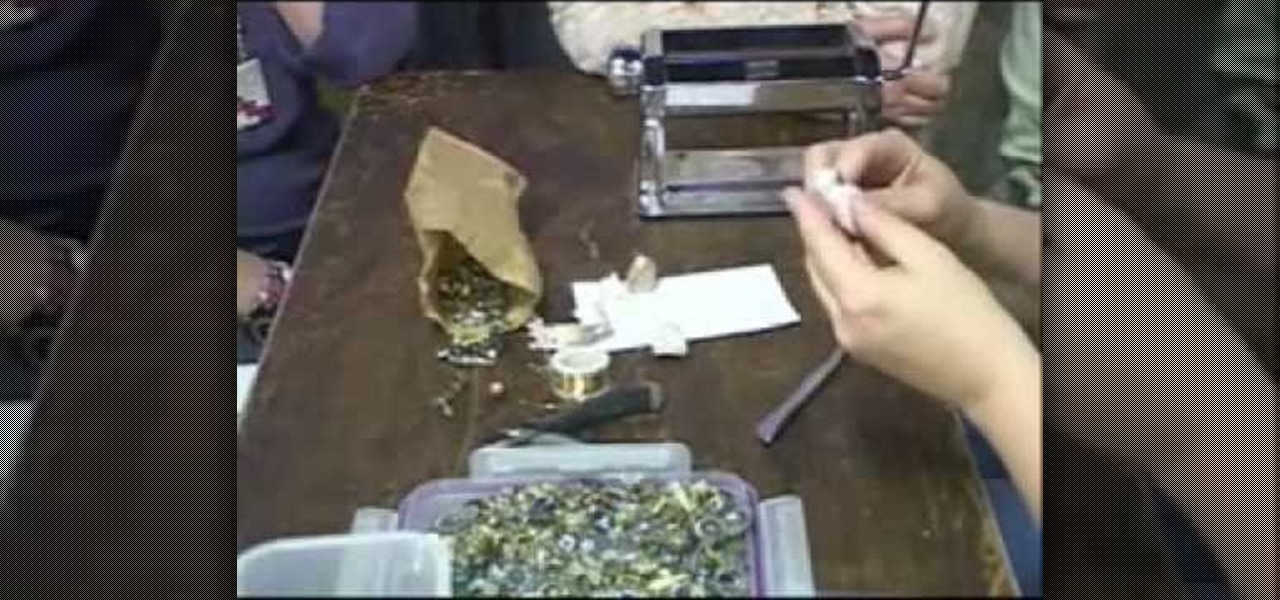
Follow the easy instructions of this video to create the perfect kitchen accessory for your dollhouse! The instructions for the mini polymer clay watermelon are quick and easy to follow. First you need red, black, green, and translucent clay. You want a very light green color for the watermelon. Use the pasta machine to mix the colors together. Slice the pieces of green clay and lay them on top of the light green clay. On the largest setting run them through together in the pasta machine. Rol...
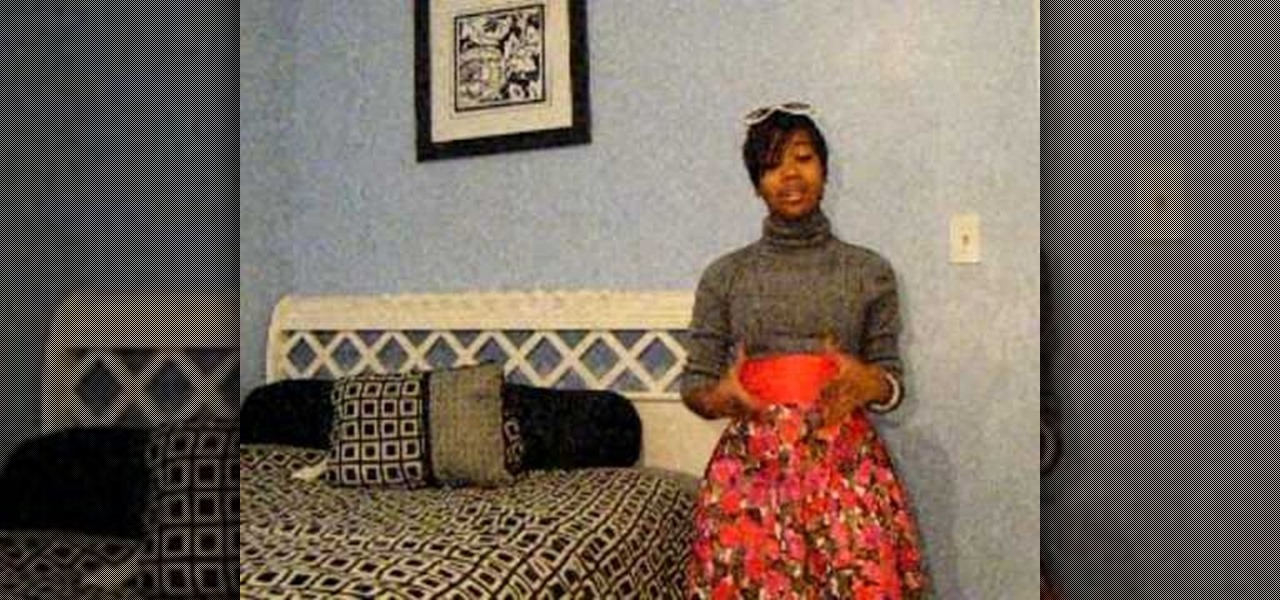
In this video, you will learn how to wear a bold flower print skirt in three different ways for going to school, a job interview or going out to a club.
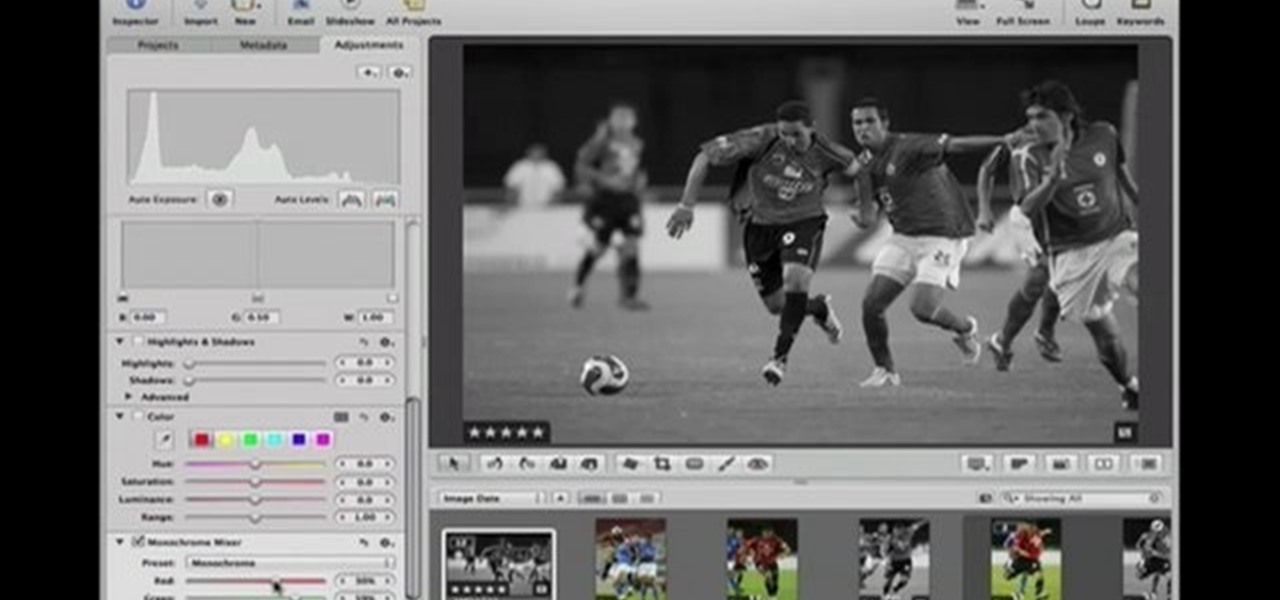
This Software video tutorial shows how to convert color images to black and white in Aperture. Scott Bourne presents this video. Open up ‘aperture’ program and select a color photo that you want to convert to black and white. Now move from the ‘projects’ page to the ‘adjustments’ page by clicking on it. Then click on the ‘+’ sign and select ‘Monochrome Mixer’. When you do this, the picture instantly turns to black and white. It’s as simple and easy as that. For editing the picture further, on...
In this video we learn to make a zigzag Chinese staircase friendship bracelet. You can go wild and make it all different colors or all one color. You start off with 5 strings about a yard long and fold then in half. Then you make a knot creating a loop for the end and to hold to a nail or clip while you make it. Take a strand and make 5 forward knots. With the same strand you then do 5 backward knots. Repeat this one time, so in all are 20 knots and then switch color, or to another strand. Do...
The video shows you how to make three simple flowers. First, draw a circle. Draw petals around it. Remember to make a little big petals. Then make a stem. Draw a leaf on it. Color the petals with red and the inner circle with orange. Color the leaf using a dark green color. First style flower is ready.
Watch this video to learn how to draw a rose in just seconds. • To draw a rose, you need a paper and three sketch pens of light green, dark green and red colors.
In this art tutorial, you will learn how to draw and then paint an orchid. You will need a Chinese paintbrush, a plate for the paint, water and paper. For paint colors, you should make sure you have red, yellow, black, green, blue and purple. First, dip your brush into the water and then mix yellow, red and black, dabbing some of each color onto the brush. When doing this, do not actually mix the colors on the brush. You want the red on one part of the brush, the yellow on another part, and t...
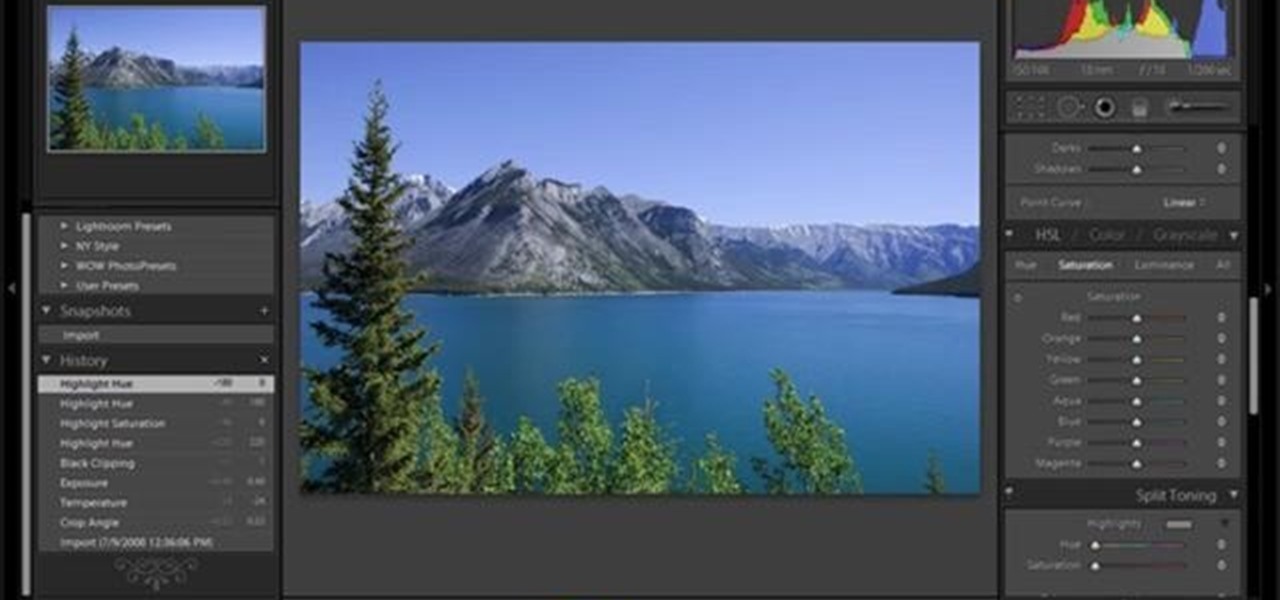
This video shows the method to split tone in Lightroom. Firstly, go to the 'Grayscale' button to change the photo into black & white. Go to the split toning section and change the tint into the color you want using the 'hue' option. You can also use the 'Highlights' option to select the color and see the preview. Bring the saturation down to get the right color. Repeat the same procedure with the shadows. Choose the right tint for shadows. Hold the 'Alt' key down to see the effect of change i...
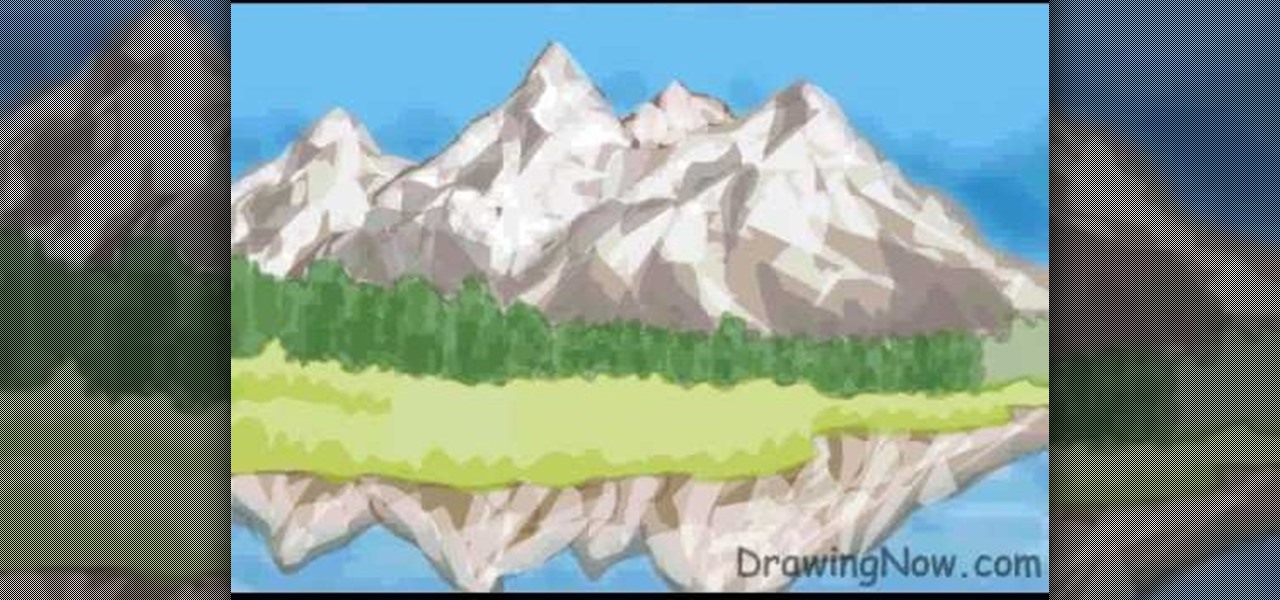
DrawingNow teaches you how to draw a mountain scene. You start with simple triangles on top of each other, which will serve as the sketch for the mountains. Use horizontal squiggly lines, which will act like a sketch for trees and water. You can color the sky blue to get that out of your way. Color each mountain a different shade of brown and make regions of white on the tops, to simulate snow. Then you have to color in the water and the mountains that are reflected in it. Next, draw grass ne...
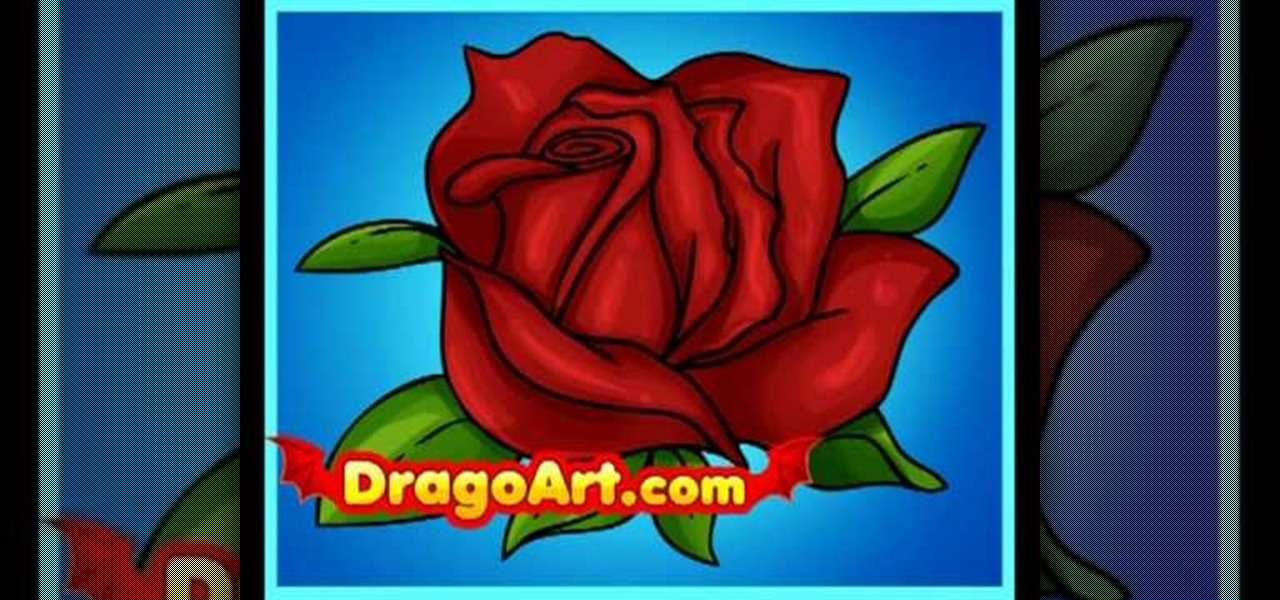
This video shows you how to draw a cartoon rose. Step by step, this silent clip shows the best way to draw this and then fill it in in color, including the leaves. First you draw a circle and a cross positioned above the centre point of the circle. Then you follow the drawing as it's shown, first outlining the bud and then expanding to the outer petals and finally on to the leaves. It's done in two colors on the video just so you can see the latest section of the outline. Then you color it in...
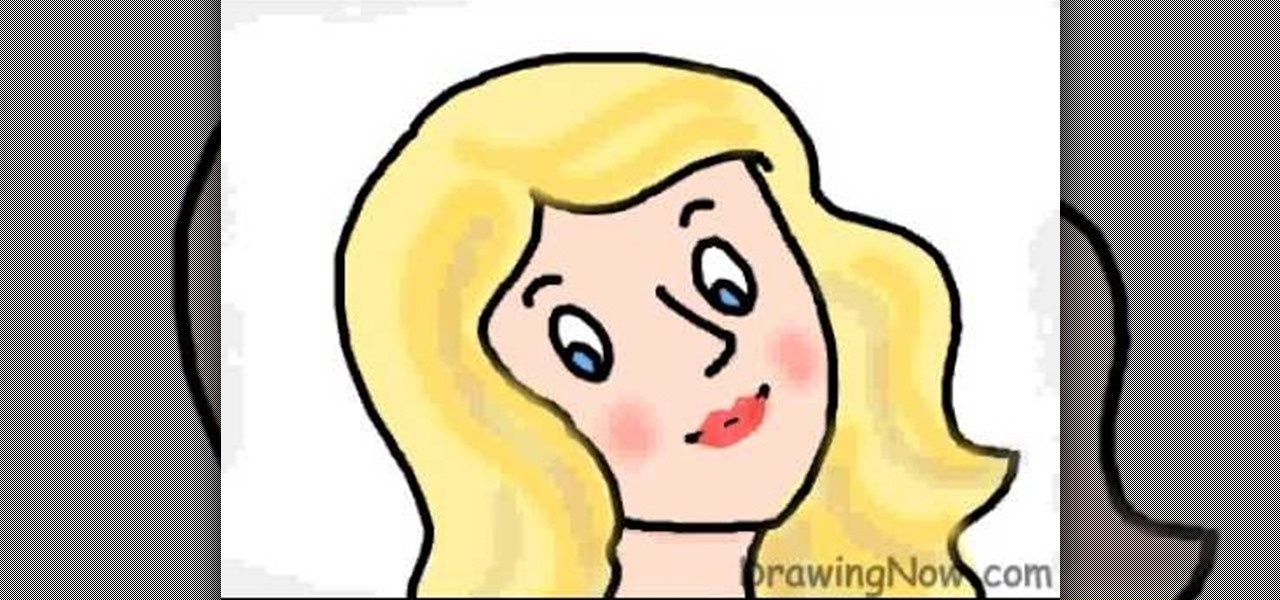
DrawingNow teaches you how to draw a cartoon mom on a computer in Microsoft Paint or any other drawing program. You start with a basic oval, but tilted to one side. Then, add the contour of the long hair. Next, you can start adding details to the face. Draw a nose and two equally spaced ovals with circles inside each one. These will be the eyes. Draw eyebrows and full lips. Now that you are done with the sketch, you need to color it in. Use yellow for the hair, blue for the eyes, a pink flesh...
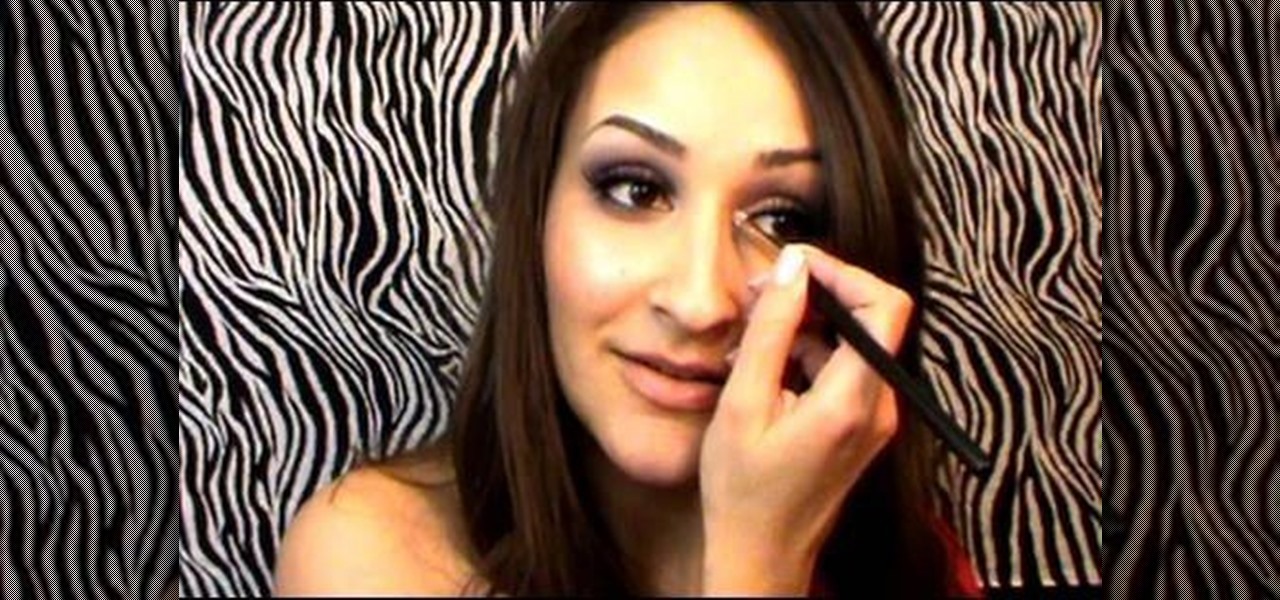
This simple video is a quick description of a woman applying makeup to her face in small, descriptive steps. She already appears wearing small amounts of makeup including large amounts of blue eyeshadow as well as lipstick. She then takes a brush and starts to apply tinting hues of color to her upper eyebrows-followed by that, she takes the same brush and applies tinting color to her lower eyelash line. Next, she goes over the pigment once again with her fingers to remove any excess pigment a...
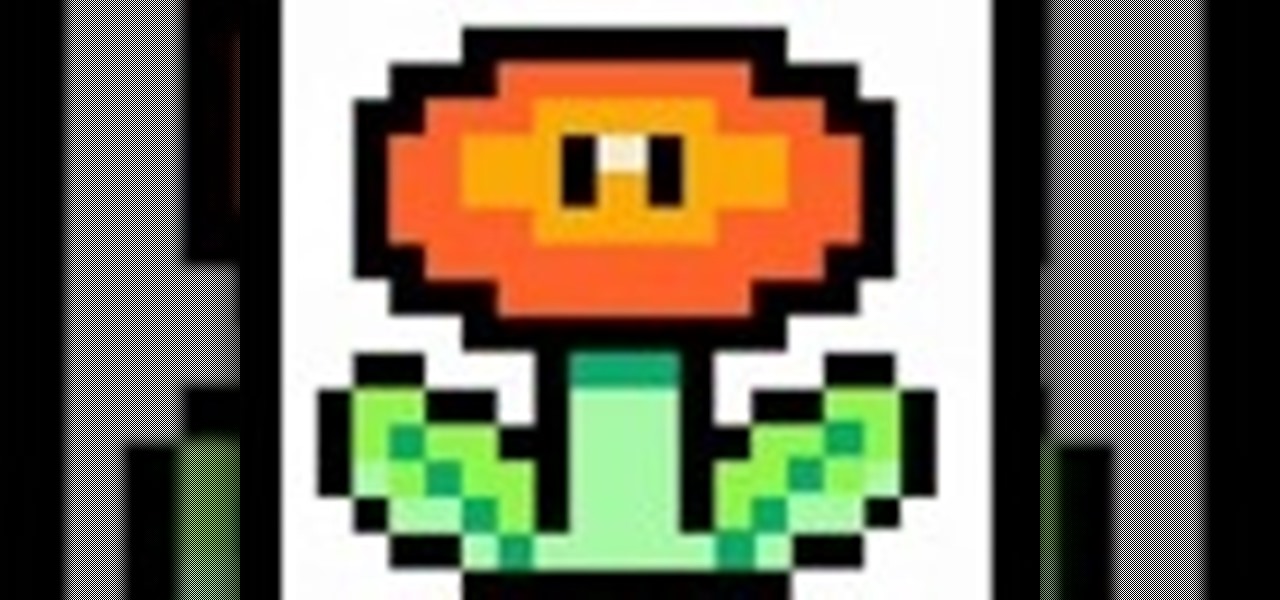
The video illustrates step by step on how to draw the flower by showing every pixel that is being painted. It includes the shape of the brush used and the color. Towards the end of the video, the 16 bit painting of the bullier flower is compared with an 8 bit painting of the same flower by the same artist - zed gamer. It is a 2 minute video at the end of which we can see how to draw and color the bullet flower
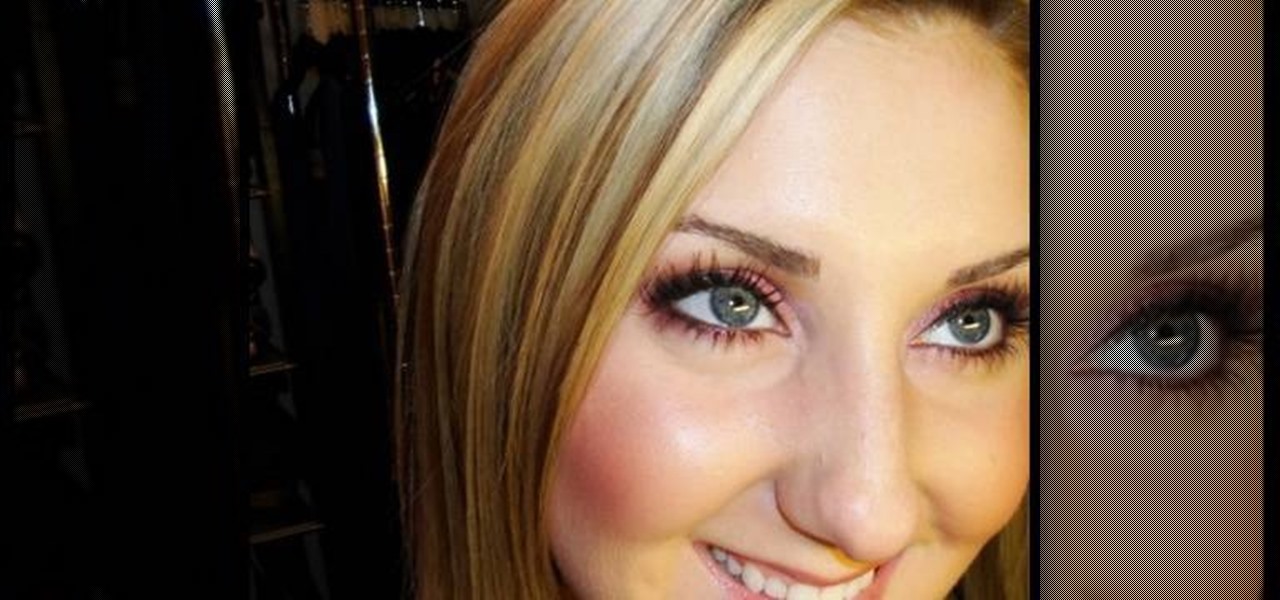
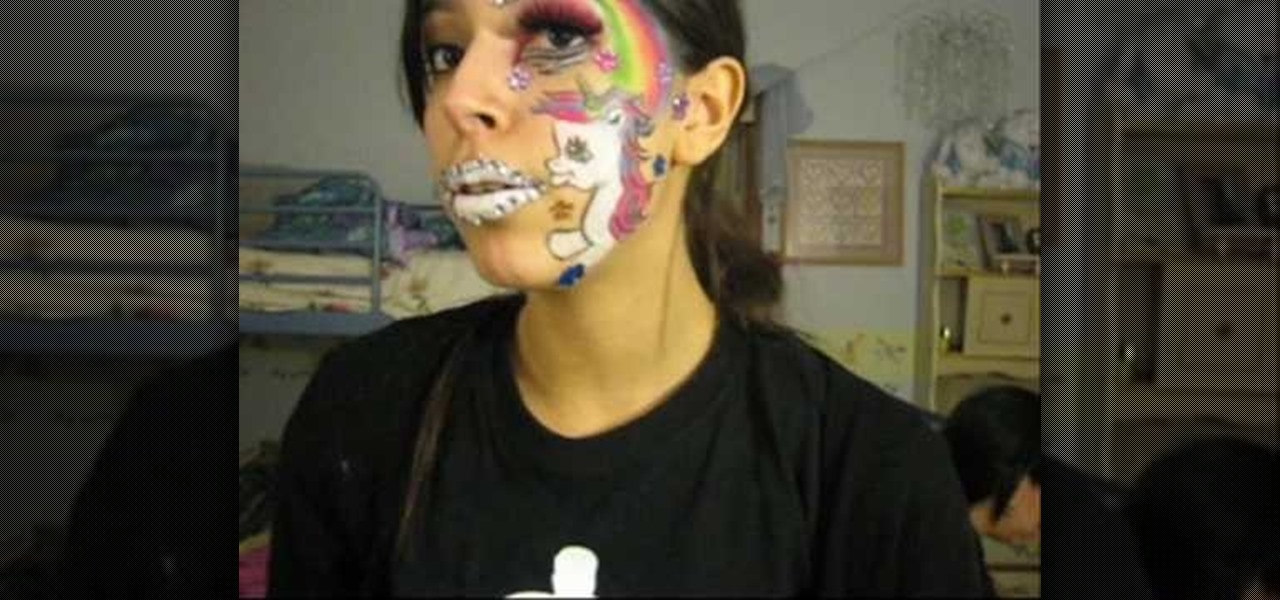
In order to achieve the Kat Von D look, first you must use eyebrow liner that gives off a strong presence. Next, a matte brown palette should be applied to three quarters of the eyelid; the remaining quarter will be used for the highlight. A pencil brush should be used (or cotton swab if you don't have a pencil brush) for eyelining the edge of the eye. A matte black color is then applied to the outer corner of where the brown was applied, to add more depth. (Try your best to blend the colors)...
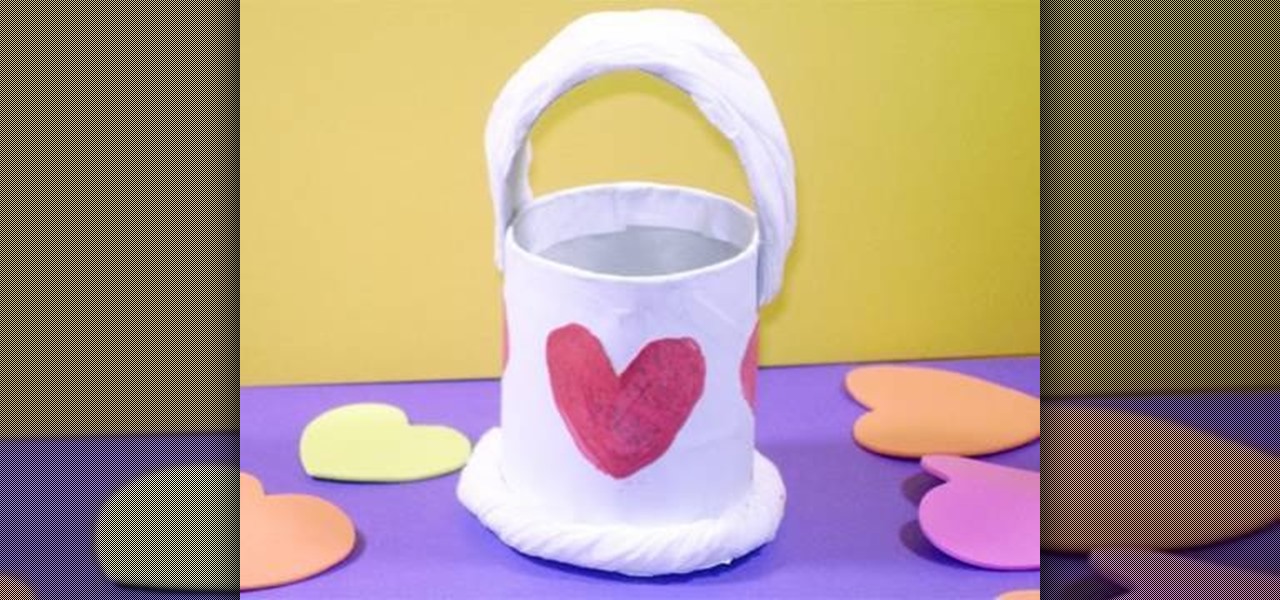
Supplies you will need. 1 toilet paper roll
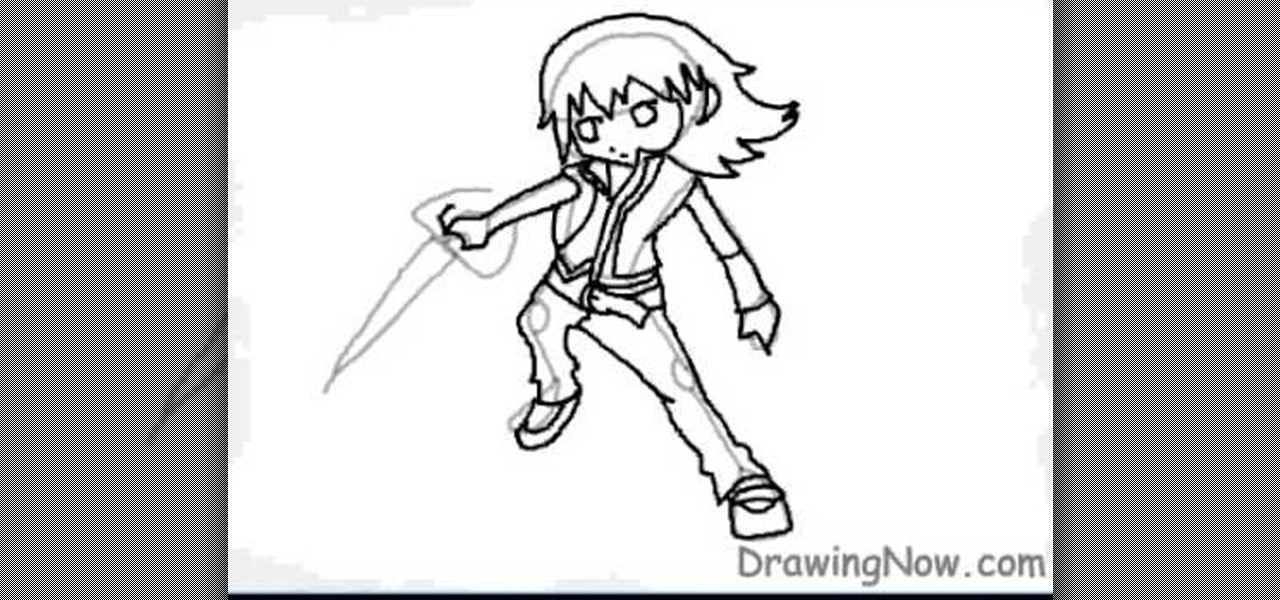
The video shows us how to draw Riku from Kingdom Hearts. Firstly draw a rough circle and then draw a center line to it. Then draw the rest of the body parts along with the sword aligned to it along the way down. Draw all this using a lighter shades and once you are done creating the body line roughly, use the darker shades to highlight that and also start drawing the other important parts like parts of the mouth, costume, limbs and the shoes. Then erase the parts which were in lighter shades ...
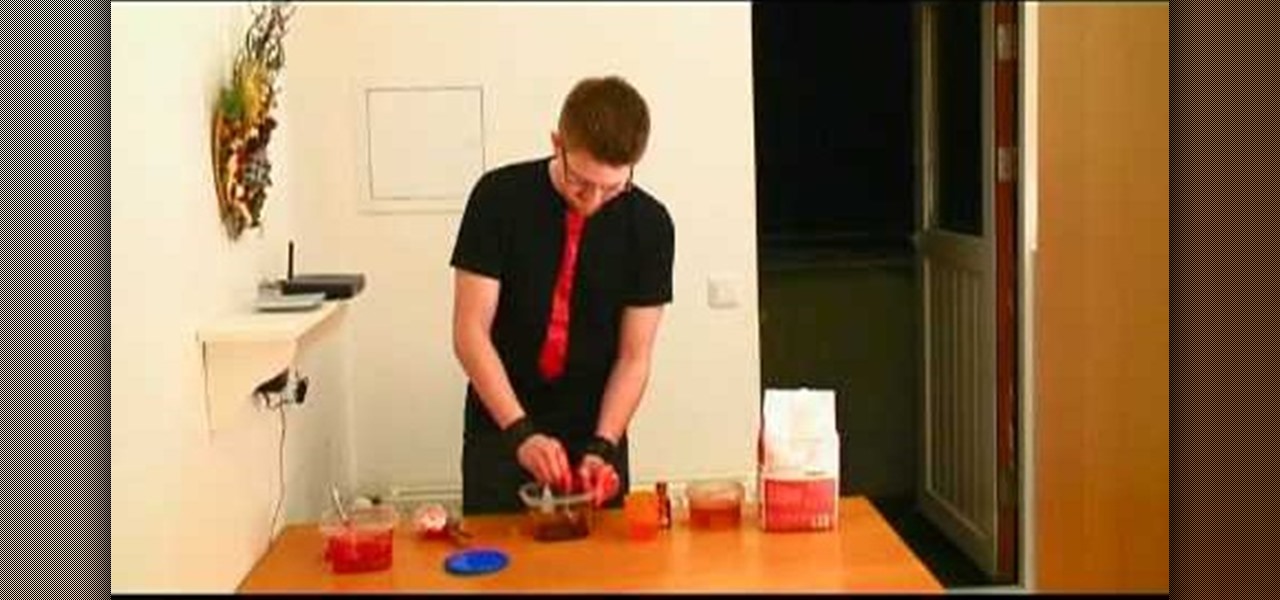
This video will show you how to make realistic edible fake blood. You will need the following: A tablespoon, container, red food color, a glass of water, syrup and flour. Mix three tablespoons of syrup, one tablespoon of food coloring and one tablespoon of water. Add one tablespoon of flour and mix well. You will end up with a very realistic looking edible fake blood.
Learn the Cranberries inspired eyeshadow makeup tutorial by Tiffany Apply dark brown shade to the eyelid, covering the whole area of the eye. Lightly pat the cranberry eyeshadow to the applied brown eyeshadow to make a bright and shiny color. Create a thin line of the cranberry eyeshadow to the lower lash line. Use a blending brush after applying the cranberry eyeshadow to remove harsh lines. To brighten up the eye, use a flat brush with very light pink eyeshadow and apply a little amount to ...
Learn to make a beautiful spiral rose of paper, by watching this video. Things you will need to make this rose are: Red colored paper (or any color of your choice for the rose), a toothpick or small stick, glue, scissors. Begin by drawing a spiral on a square piece of red colored paper. With the help of scissors, cut along the lines of the spiral till the centre. Next, begin winding the spiral strip onto one end of a toothpick, from the outer end. Keep winding till you reach the other end of ...
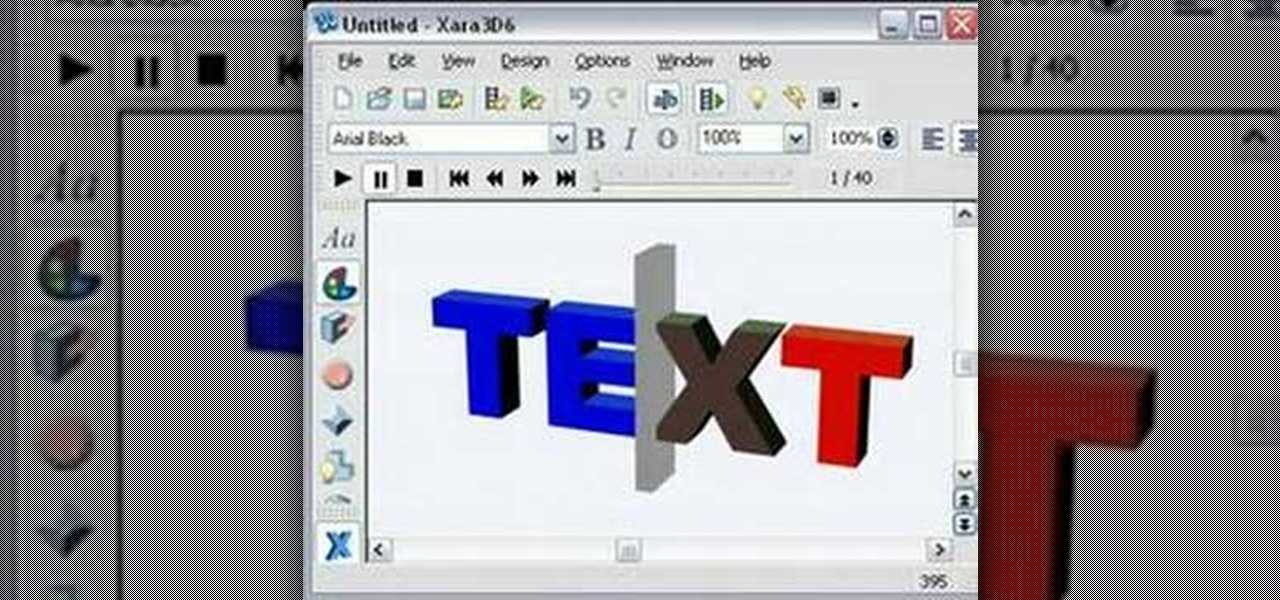
Do you want to know how to create multicolored text in Xara3D? Watch this video and be guided through the process. You can actually see the application window as the presenter shows the process. First, he guides you through the steps of bringing up the color options, selecting the text to be changed, and then changing it. In addition to that, he shows how to make text fatter or thinner by using the extrusions menu. Last, he shows the use of the bevel menu. So, to make your text more interesti...
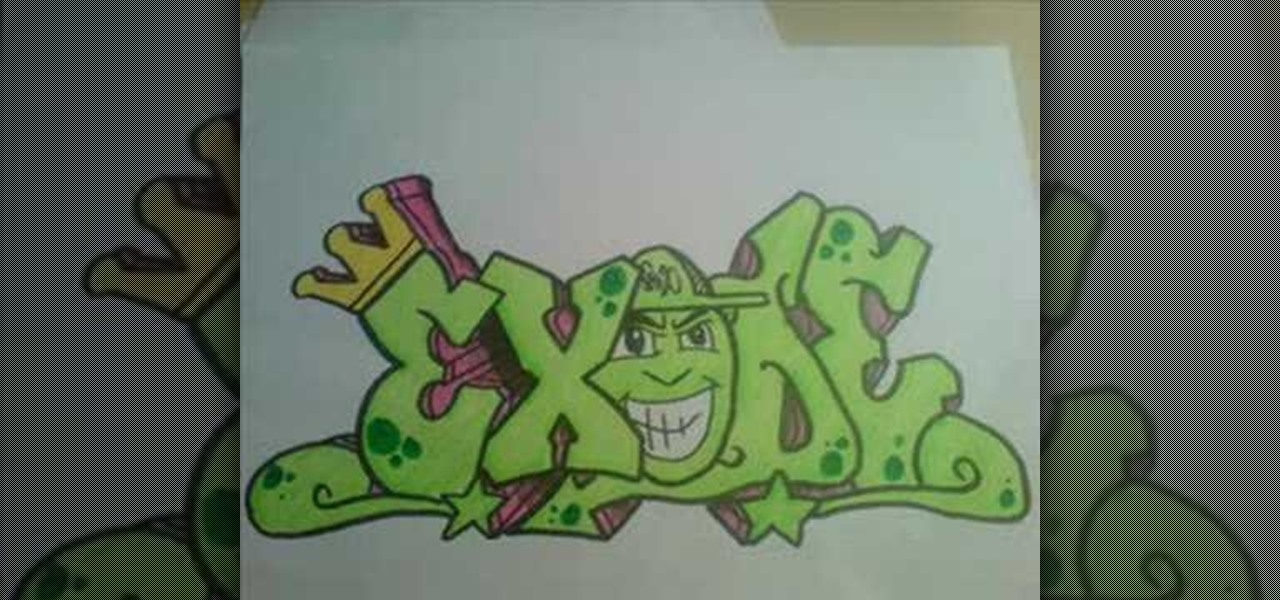
Have you always looked at graffiti and wondered how they got such perfect lines and great color with just a spray can? Watch this video tutorial set to funky music and learn how to create a sketch of the finished product. Draw it on paper first and, with this easy to follow guide, learn how to make the finished product "Exode" with just a set of markers. Each picture shows the progression of the piece, from just a simple sketch to the fully colored product. In almost no time you will be makin...
Producing a friendship bracelet is made easier in this step by step video. After picking your colors and cutting the thread, you can follow this video exactly for the perfect bracelet. If you already know the basics of the forward and backward knots, you will have no trouble repeating the steps of the crisscross design in this special friendship bracelet. All you need to do now is pick your colors and your on your way to creating the perfect gift of friendship.
This instructional video shows you how to be creative and paint your shoes. You will need acrylic paint, paint brushes of different sizes, waterproof permanent markers, and spray lacquer. You should create a base coat with white paint. Draw whichever designs you want with a permanent marker. Next color the design with the acrylic paint. Using one color so your paint doesn't dry out. Fill in the background with whichever color you chose. Then spray with a lacquer and you are finished.
Thanks to technology, art savvy users can visually edit pictures with the click of a button. This video tutorial demonstrates how to color hair in Adobe Photoshop CS. In Quick Mask Mode, color over the hair area with a fairly large brush. Under Filter, select the Blur category and apply a Gaussian Blur to soften the edges of the mask. Revert back to Standard mode where the mask will appear as a selection, and under Select, choose the Inverse option. Finally, adjust the hue and saturation to s...
This video is a tutorial on how to create "friendship bracelets". In particular this style is called the "Egyptian" which is a particular style. You need to make two forward knots on your most left strand, you then do it with the next strand only this time you make a backward knot (two of them.) The most inner color you pick (you must pick four different colors, two strands each) will be your most prominent color. You continue this front knot, backward knot pattern etc, and eventually you wil...
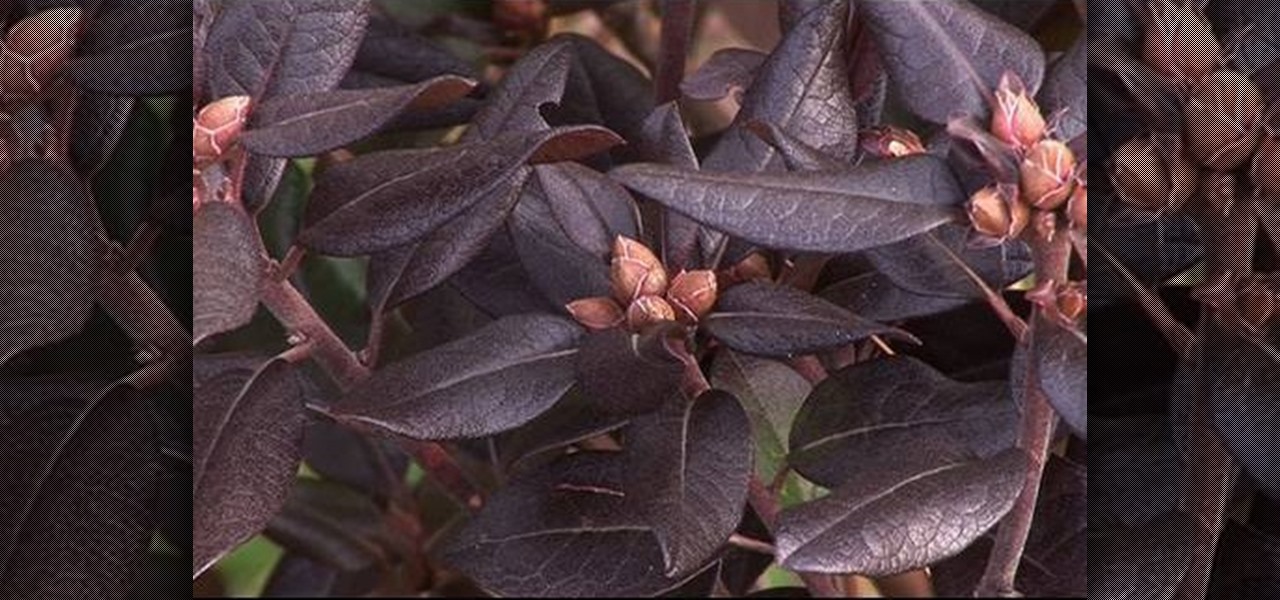
David Epstein shows a simple and yet creative way to add contrast to any garden with bare or no interest areas. To add a little extra winter color, David introduces three varieties of the "Small leaf Rhododendron" including; "Midnight Ruby", "Westons Mayflower" and "Dora Ainateis". Although these smaller leafed varieties require a little more sunlight, they do however produce flowers in Spring and hold their leaves all winter long. So, for a continuation of color throughout winter, be sure to...
This video is about how to create a "tropical bird" eye makeup look. Add your powder foundation and concealer. For a base use Two Faced Shadow Insurance. Pat on a yellow color to the entire lid. Now take MACs mixing medium and primary yellow pigment and mix them using a small angle brush start from a point near the tear duct create a shape over the eye going up at an angle at the outside of the eye. Take orange color paint the same shape as the yellow right above it. Above the orange do the s...
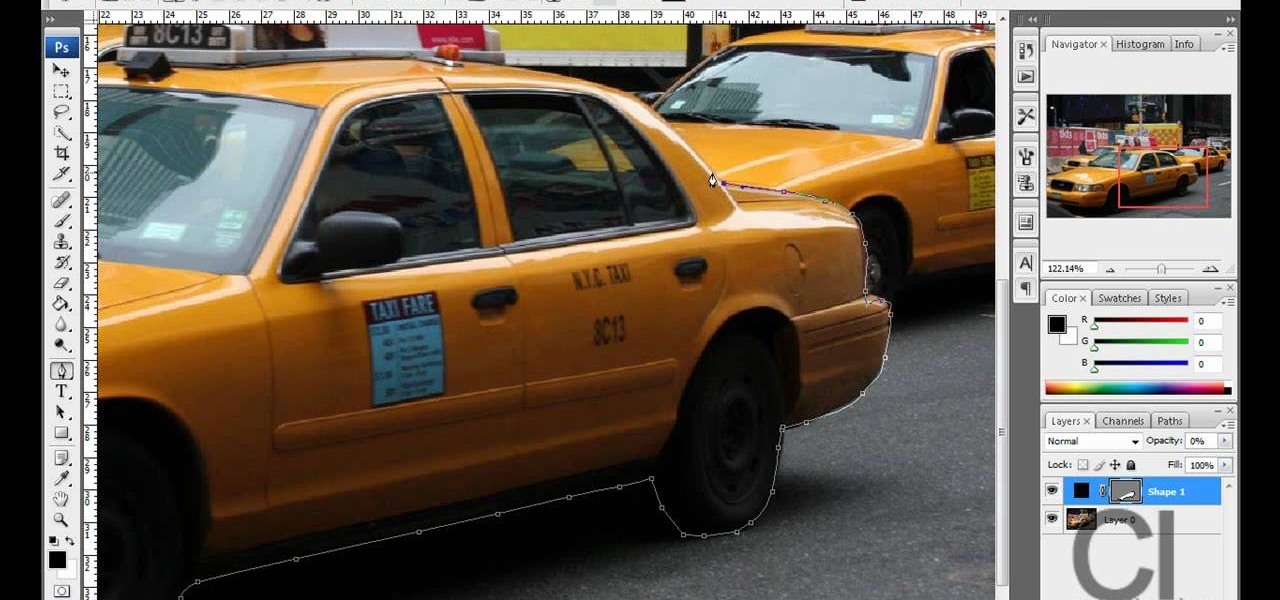
The step by step methods to isolate colors in Photoshop have been shown in the video. In a layer we have to place an image and first select the particular part to be isolated with the pen tool which has free form pen tool, add subtract, intersect and exclude overlapping path options. After that make a right click and select make selection option. Keep the feather be in 3 and click ok. Paste this in a new layer by pressing control+d keys. Create a copy layer of 2 and open Hue and saturation pa...
This video will show its viewers how to get nice seductive eyes for the Valentine Day. The video will show step by step, the use of different colors and different brushes in addition to the brand and line of makeup to be used, including the use of colors on different parts of the eye lids. The video also explains the effects of colors and brushes on your eyes. For example some brushes give you more of a smoky or concentrated look. It also shows how to highlight your eyes with the use of other...
Starting by looking at your wrists if you look at the colors of the veins you can start to see what kind of undertones you have. If you have blue veins then it would be more cool, green veins would be warmer, and if you see both then you are more likely to be neutral. The next way to check is by holding a white piece of paper up to your skin so you can see in a mirror based on what color the paper looks like, is it reflecting? One of the final tips is whether you look better wearing gold or i...
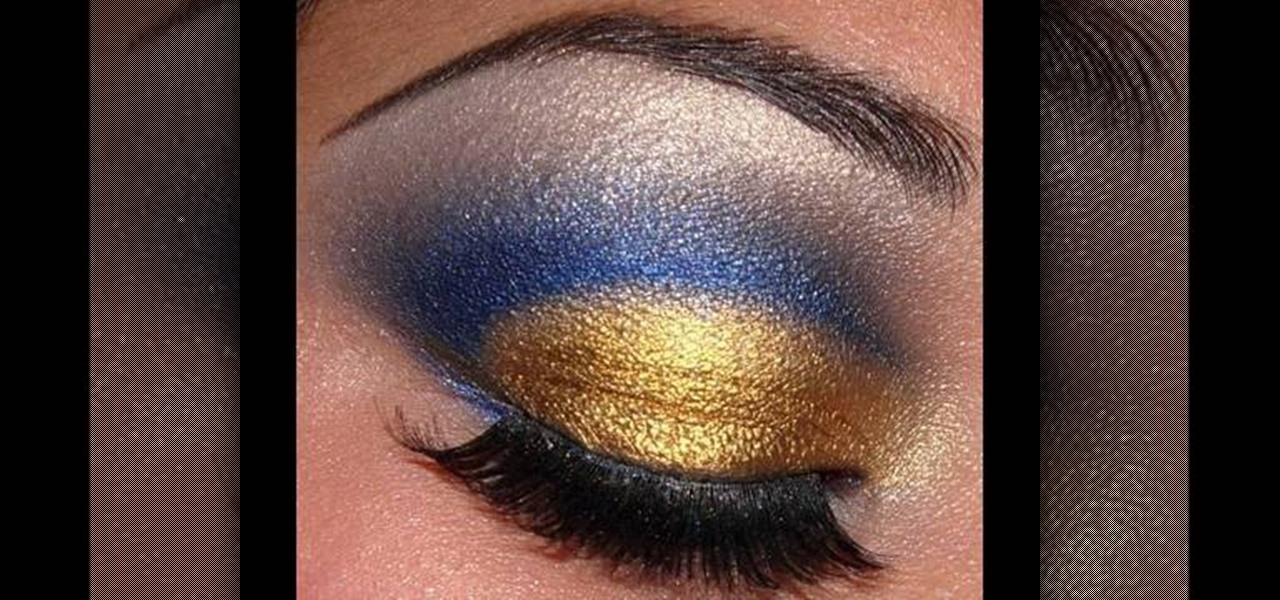
This tutorial teaches you how to create a blue and gold cut crease makeup look. Use MAC's uppity fluid base on the lid and inner corner. For the lid, use Shock Tart and put it all over. For the inner corners use Obsessive Compulsive Cosmetics called Oric. Blend it into the lid color. Now take MAC's technical color in Auto Day Blue from the outer corner going through the crease. With a small smudge brush, use a dark blue color to cut the crease. Blend the blue out towards the eyebrow making it...
Watch Princess Pinkcat as she shows you how to touch of the roots of your hair in a hurry. Have you ever been heading out the door when you realized your roots were showing? Have you ever been asked out at the last minute and left without time to dye your hair or touch up your roots? Here's a quick tip to help you take care of those roots in less than 2 minutes flat.
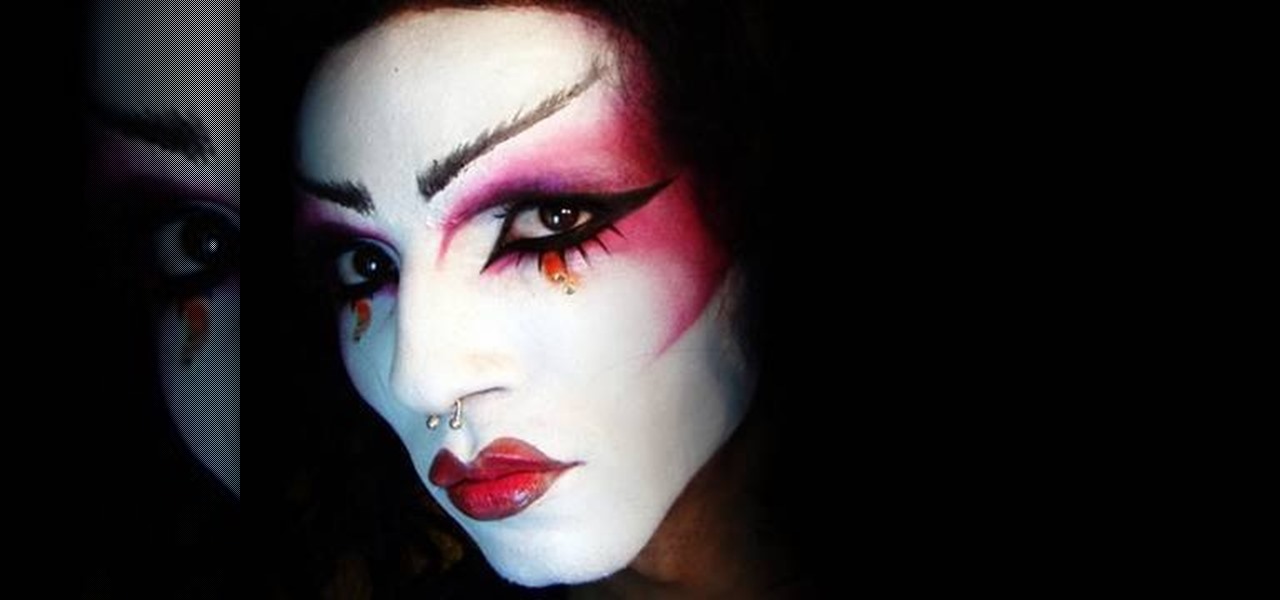
This video is about how to create a twisted geisha makeup look. - Step one is to cover your eyebrows and to cover the entire face in white makeup.
This is a very cute look and if you like pink you will like it especially if you are a girly-girl that really loves pink.