In this video, we learn how to control flies around your home with Rick Steinel. The common house fly can be found everywhere in the house and are full of disgusting germs. We can now make a type of liquid that attracts flies and kills them. These are safe for humans so it won't hurt your home or you. This liquid can also be placed inside of a container which will collect the flies outside, before they have a chance to enter your home. They are also very easy to install and it's very easy ins...
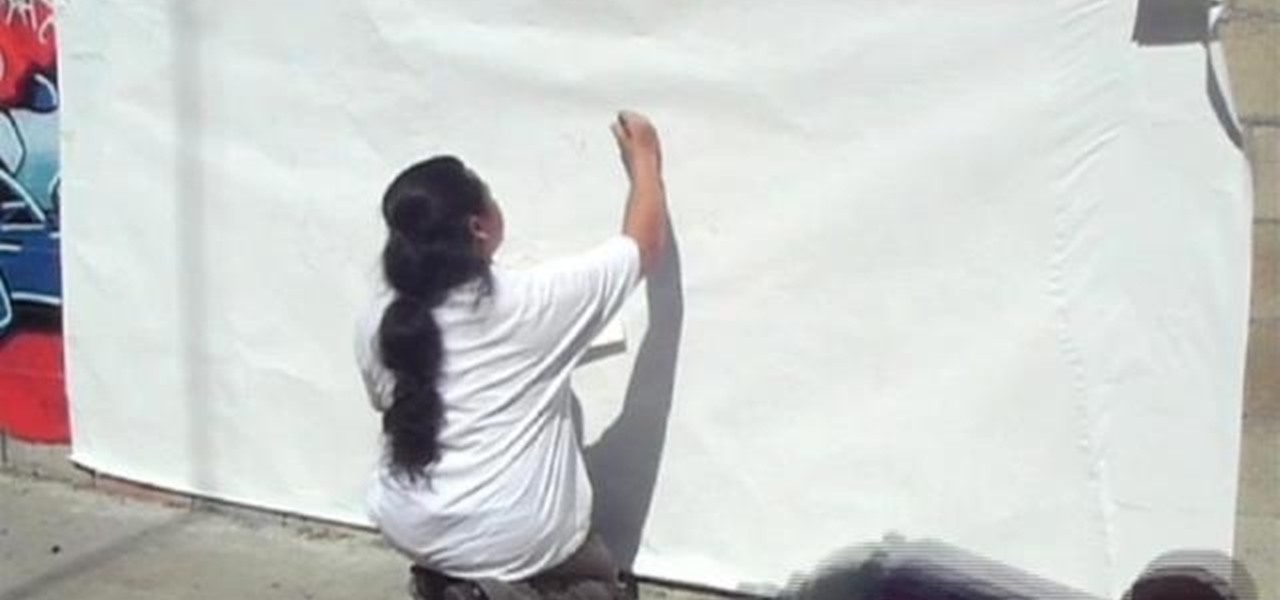
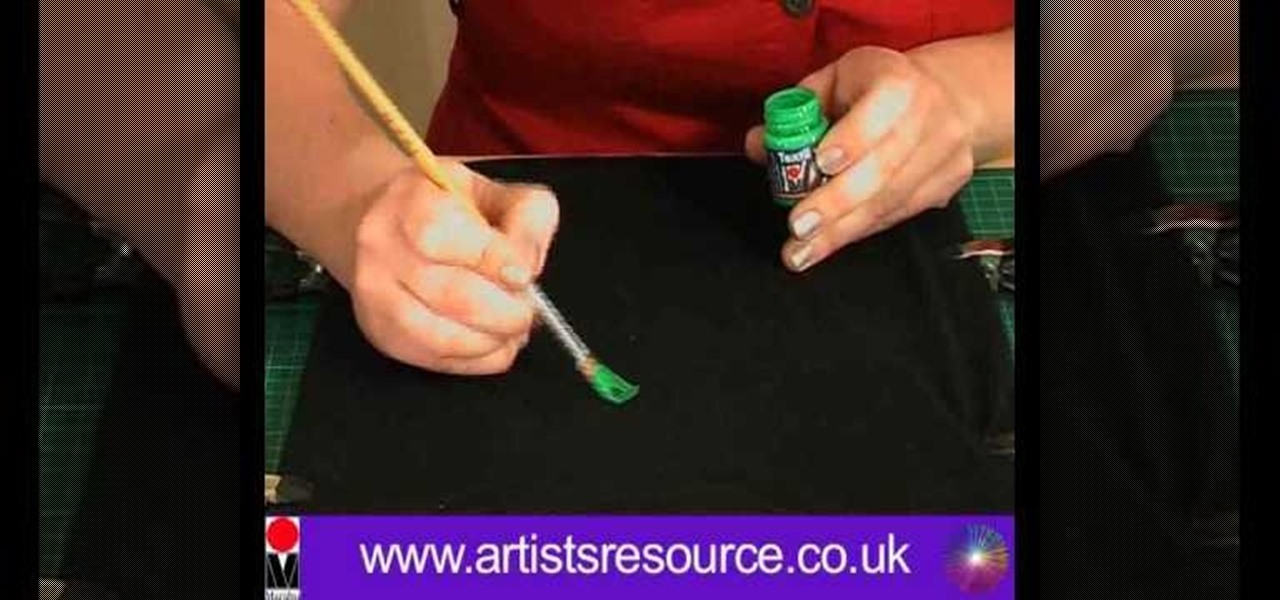
This is your basis step by step on how to do graffiti on walls - in your house for decoration, of course, not on the streets for vandalism! The best spray paint is made with krypotnite added into the paint. While you will want to paint directly on the surface, you don't want to be exposed to excessive winds or temperature when doing your graffiti, so you may be somewhat at the mercy of mother nature. Start by sketching your design with pencil, making sure that it takes the maximum amount of s...
1. First of all select 'filter' at the ‘top tool bar’. Now select the 'artistic' from the ‘drop down’. Then select 'fresco' and then click 'ok'.
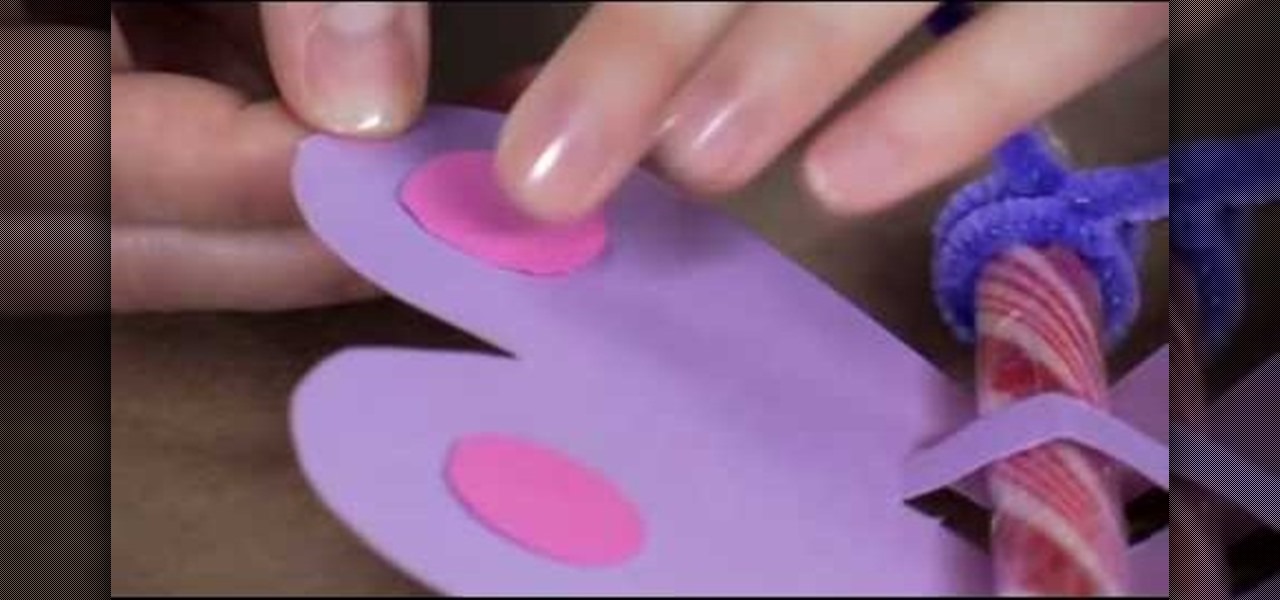
To make a butterfly Valentine card, you need scissors, coloured pencils or candy stick and pipe cleaners. The first task to do, is go to Family Fun and print the butterfly template, which you can find on the site. Print your template into coloured cardstock. You can find cardstocks in the scrab-booking section of your craftstore. Cut out your butterfly from the template. Cut along the dotted line to create a slot for your pen or candy stick. Next we rap the pipe cleaner on the top of the cand...

To create glossy or reflective vector image, you will need to know how to use the offset options in Adobe Illustrator and the basics for pathfinder. You will be creating a vector image that can be resized without hurting its quality. To start select you text style, which be glossy for this. You will have first a white layer, a shadow, a radiant layer, a white outline and a shadow going underneath. In this video the Oh Gizmo Logo! is being used as the template. Right click create outlines. You...
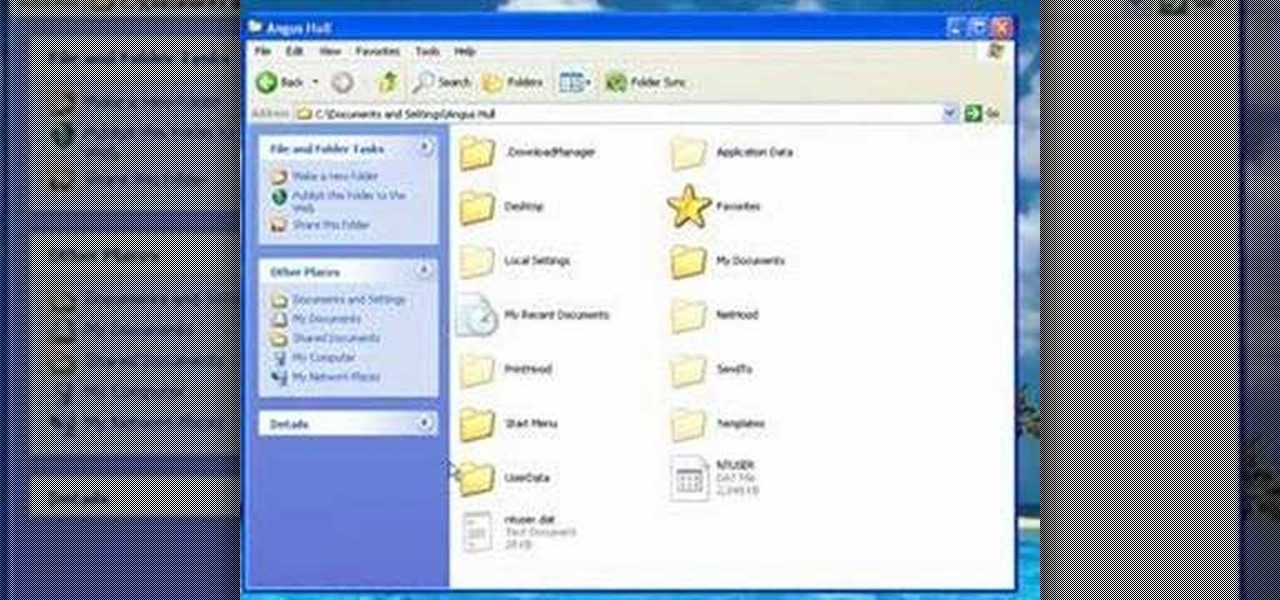
First of all you have to click on the ‘my computer’. Now you have to click on the ‘C drive’. Now go to ‘your name’ folder. Then click on ‘tools and settings’ from the top. Now click on the ‘folder options’. Then click on the ‘view’ option. Now check against the ‘show the hidden files and folders’ option. Then click on ‘apply’. At the last click ‘ok’. Now go to ‘your name’ folder. Click on the ‘temp’ folder. Open it and then you shall find some light...

James from DreamWeaverTutorial.co.uk shows you how to use collapsible panels with the spry module in Dreamweaver CS4. The spry collapsible panel works similarly to an accordion widget, except it only has one section which features a tab panel and a content panel. When you click on the tab panel the content panel either appears or disappears (toggles on and off). You can add background colors, text colors, images, rollover effects and more, and James shows you exactly how to do all that in thi...
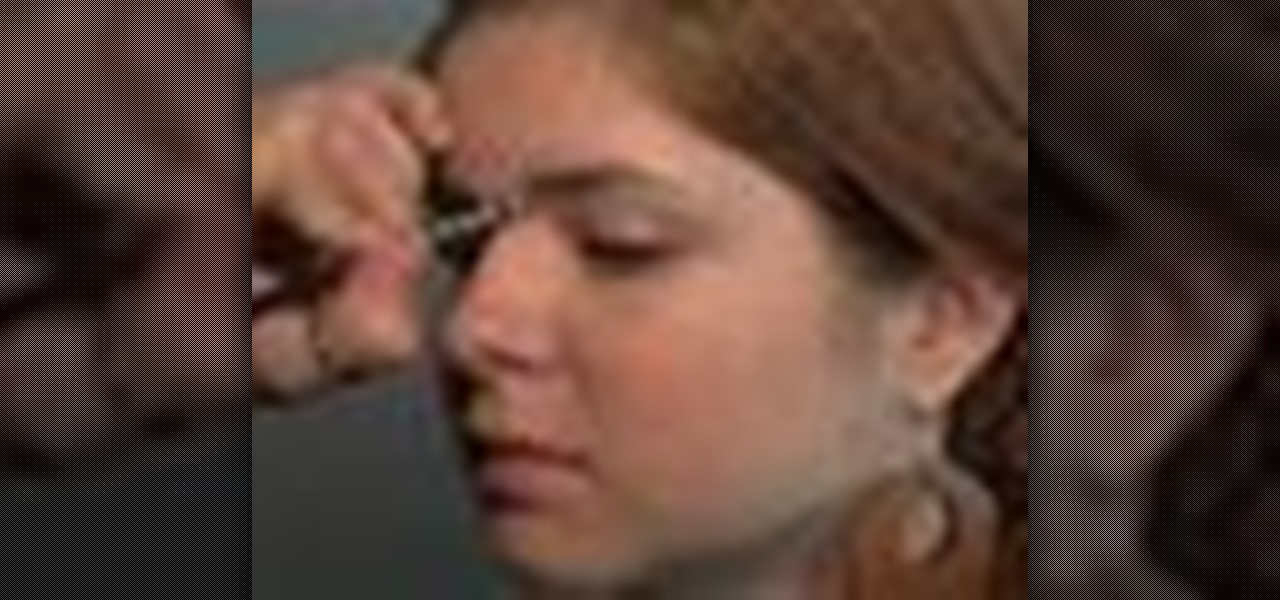
Beau Nelson gives tips and a demonstration on eye brow make up. He says that brow trends change often, but right now the style is to have a more full looking brow. To accomplish this, he says that the first thing you need is a good brow brush. To the brush you apply a shadow color that is a shade or two lighter than your hair color. Start with just a little shadow on the brush, you can always add more. Brush upward for the inside half of the brow, and outward on the outside half of the brow. ...
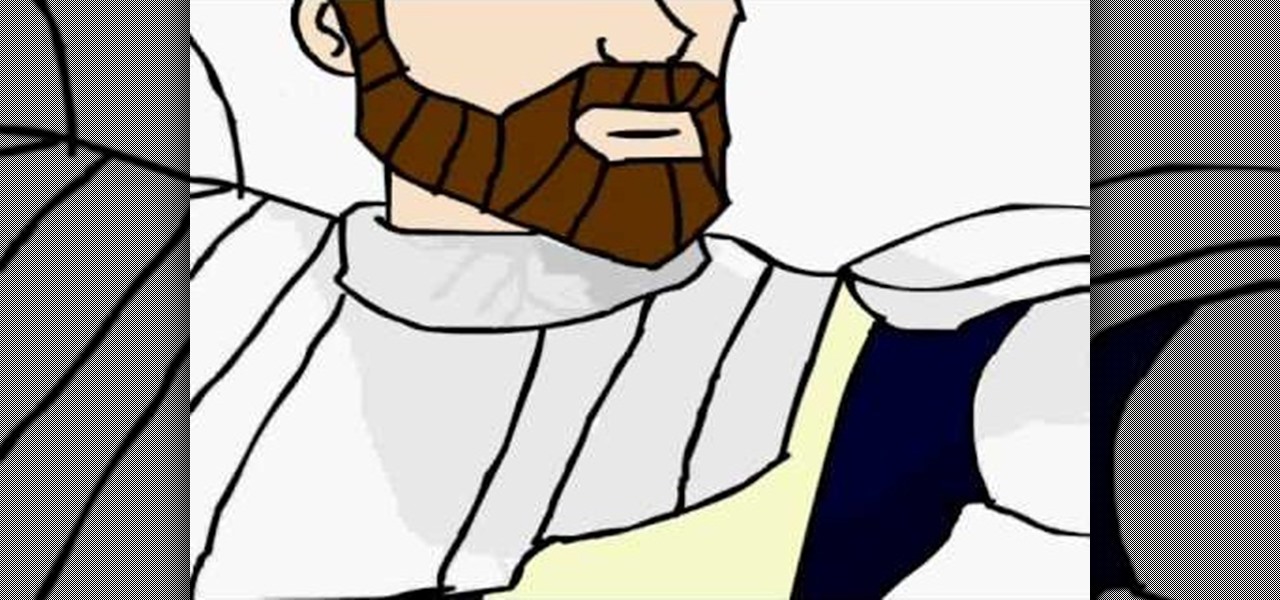
This artist shows how to quick paint/draw Obi-Wan Kenobi utilizing his mouse and pc. He starts out with a rough sketch of his character, making a black outline of his figure. He then goes back over his initial sketch with blue lines, cleaning up the lines, making them smoother. Once the blue lines are completed, the first black line sketch is erased and the blue lines smoothed out even more! Piece by piece, color is applied to each part of the character. It is placed roughly at first but smoo...
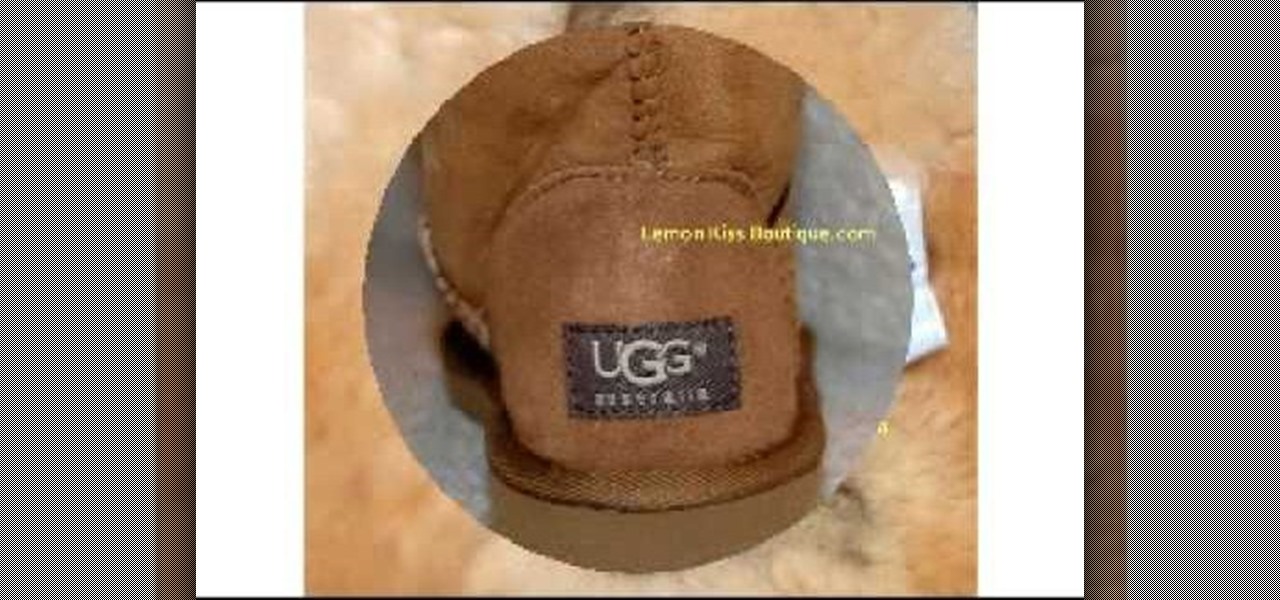
Real UGG boots or fake? You can tell if your Uggs are authentic by looking for the authentic sheepskin interior. It should have a creamy color and a full texture. Fake Uggs use an artificial fur interior that is grey in color and feels thin. Real Uggs say they are made in China on the label. Fakes claim to be made in Australia or New Zealand. Check for the registered trademark mark (R) on the sole. Real Uggs have it, fake ones don't. Finally, the uppers on real UGGS meet the sole smoothly, wi...
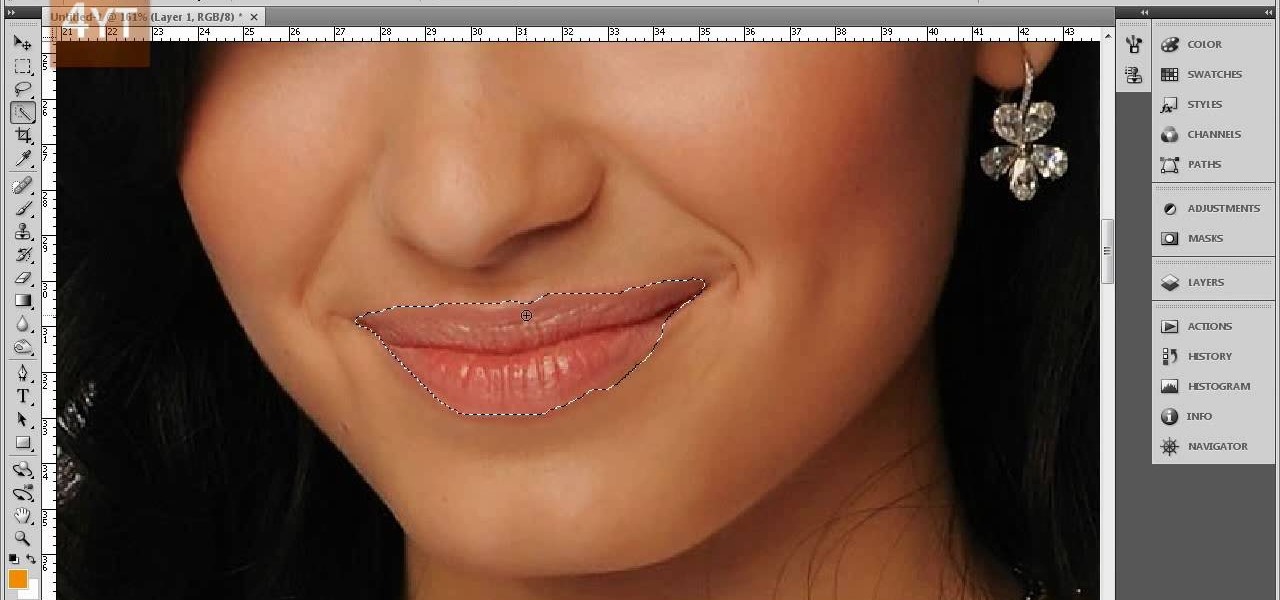
Forget to put on lipstick before a photo? Or perhaps you want to spice up an old photo of someone you love. Well their is a way, as 4YouTutorial demonstrates step by step using Photoshop CS4. First upload a photo or image into Photoshop. Next access your Photoshop layers and delete the default locked layer. After, activate the zoom tool and zoom in on the photo where the lips are located. Next choose the quick selection tool (make sure it's on plus) and drag it over her lips. This process can...
How we dress can matter a lot when it comes to our professional advancement? Christina Vonges gives useful tips on how to dress professionally yet fashionably in this how to video. Adding a bold scarf will add a punch to any basic outfit. When looking for a job Invest on a suit in classic and solid colors. Paring black with a pop color like blue and red signals for a after office party evening. Keep your dressing style clean and simple. This will give a conservative and traditional look. Peop...
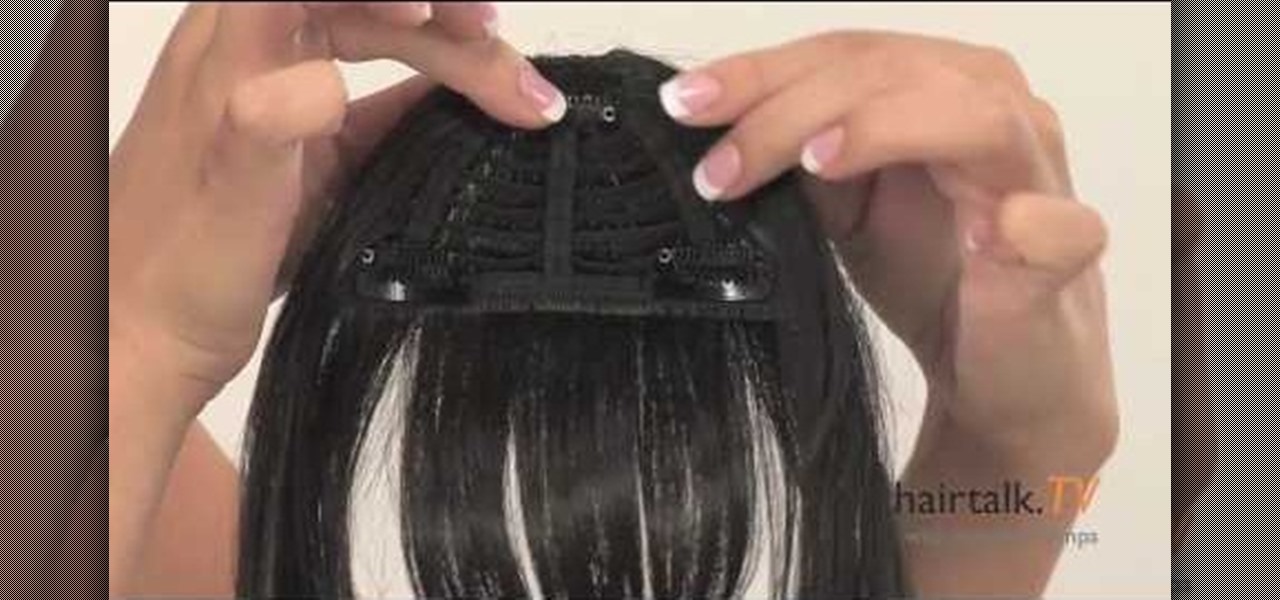
In this video, we learn how to use the new clip-in bangs created by Hairdo. These bangs are made of synthetic fiber and will mix right into your hair, there are several colors available so you can match the piece to your existing hair color easily. The piece has three clips, one on top and two on the side that will slide right into your own hair without causing any damage. All you have to do is clip the hair in and make sure it's secured. Once you you've done this, you can clip them and style...
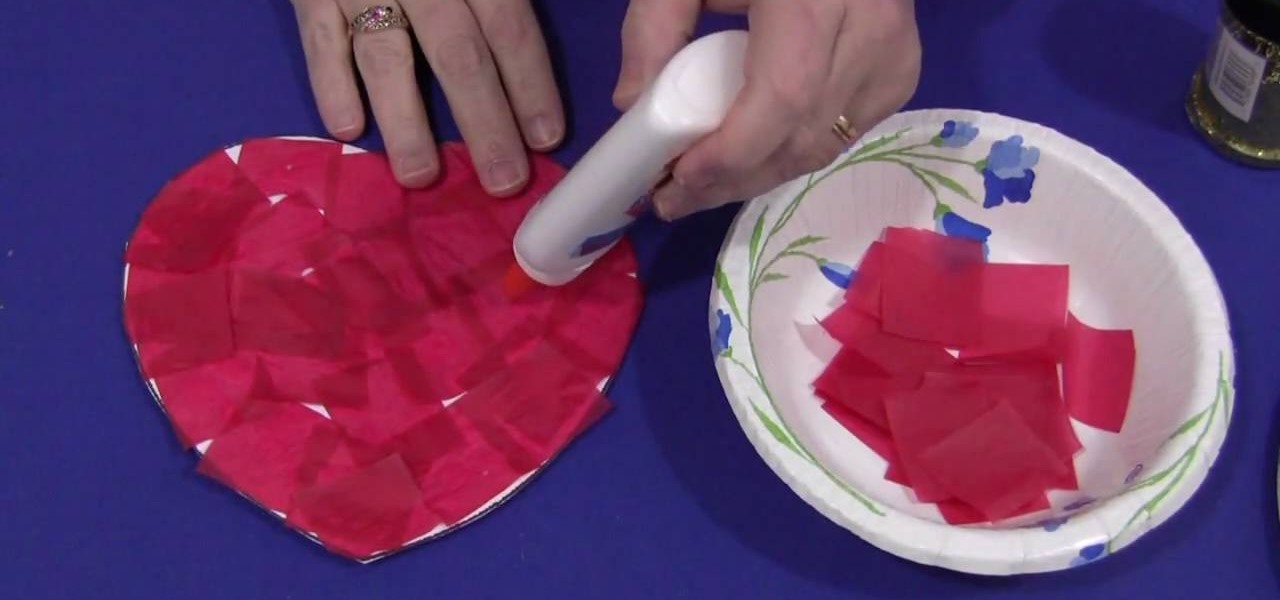
This video explains how to make a tissue paper heart with your kids. The first step taken by the instructor is to cut about thirty small tissue paper squares with the color of your choice. The instructor then takes a large piece of construction paper and cuts out a basic heart design then puts light dots of glue all over the construction paper heart. The heart is then covered in the tissue paper squares until the entire heart is evenly covered with the colored tissue squares. The last step is...
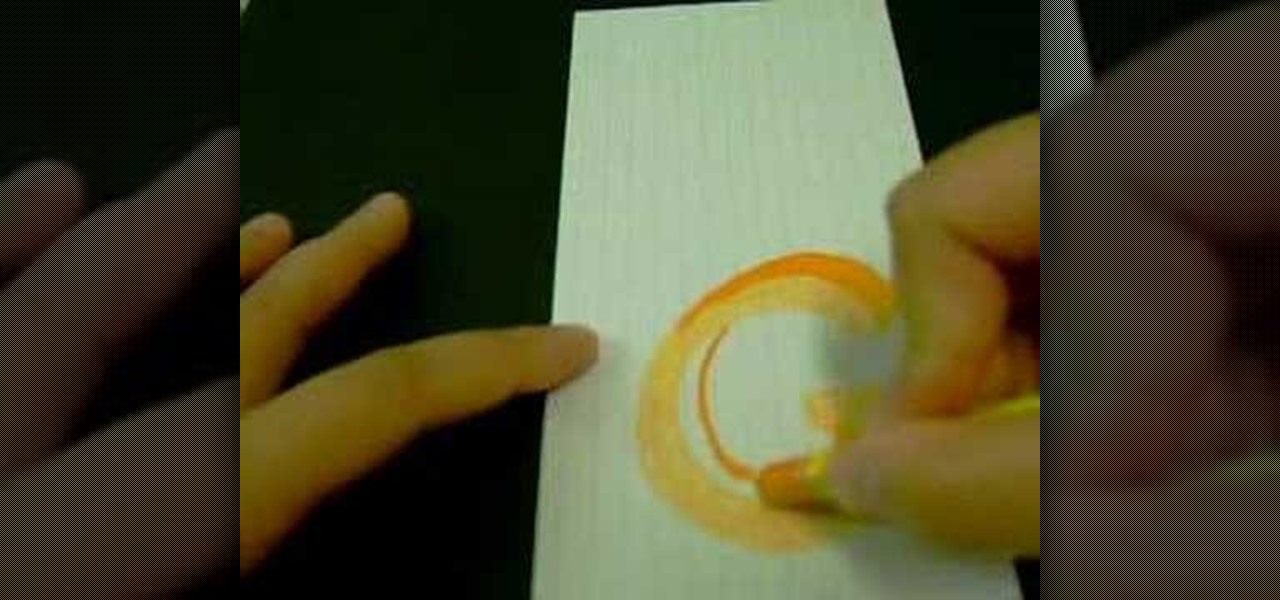
The instructor in this video is showing viewers how to make a Block G in 3D. The process involves drawing the initial capital G. Then a line is made as an outline around the top of the letter and another line is made the same way at the bottom of the letter, so it appears to have a G made with 3 lines. Then the whole G is colored in to make a solid block letter. At the top of the G, a parallel line is drawn and filled in to appear the top is 3D. Another parallel line is drawn at the bottom in...
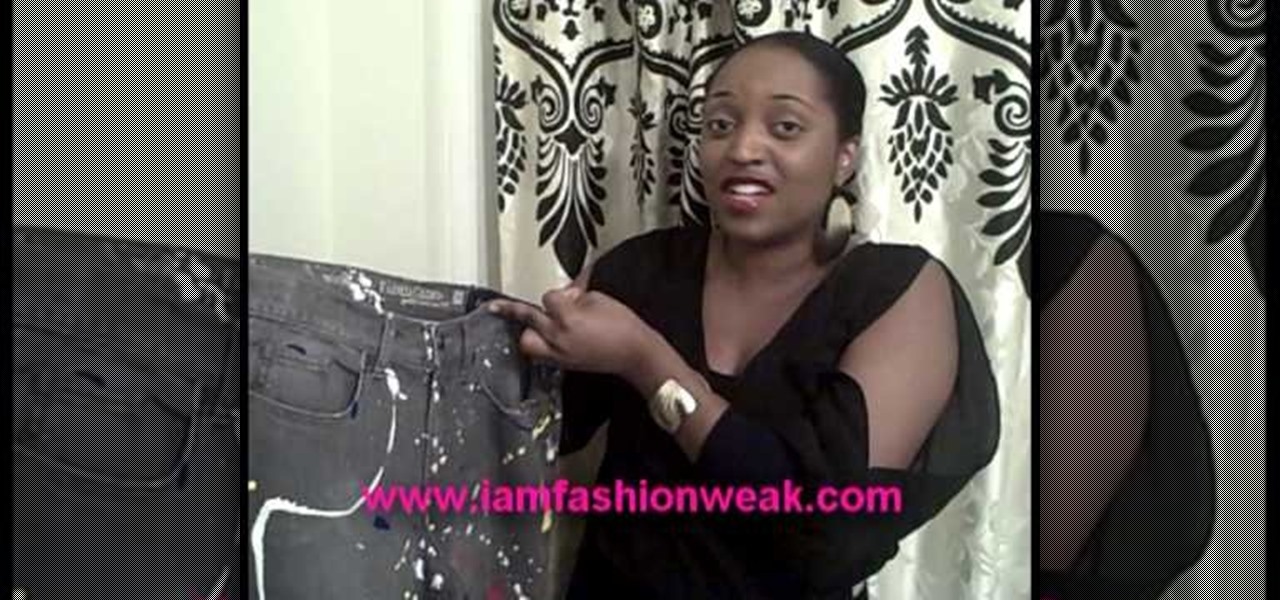
Angela and Shane from I Am Fashion Weak demonstrates how to bleach and paint splatter your own jeans. All you need to bleach your jeans is bleach and a measuring cup. If you bleach black jeans, you can get tan and gray shades. A bathtub is a safe place to bleach your jeans. Crinkle the jeans and pour the bleach over the crinkled spots until it changes into the color you want. After you bleach the jeans, wash them and dry them. You can also use a sanding technique to give the jeans a distresse...
Make light saber glow effects in lsmakerThe author found freeware that helps create light sabers. The freeware is not as good as adobe after effects, but it will serve the purpose. Download the software from the website http://www.lsmaker.uw.hulpage.php?main=lsmaker.html. Extract the folder. Open lsmaker.exe. Save the extracted file to the desktop. Select import. Add either picture or video file. Change the saber color to red. Click ok. The blade needs to be white. In the dialog box change pi...
A simple and creative way to make your own wallet. A few folds and snips of the scissors and you've created your own pocket wallet. You can even use different color of the carton to achieve a different and unique kind. It is extremely simple, the only things you need are your hands, scissors, tape and stapler. Open the carton, flatten it out, cut, tape the cut sides, staple and apply adhesive strips. You can apply whatever color of tape you want, this can make the wallet even more personalize...
Watch this video and teach yourself how to make an easy and cheap clutch wallet using duct tape. The materials required for this are a pair of scissors, a rod, Velcro sticky tacks and duct tapes of different colors and you can use as many colors as you want. Cut out 12 inch strips of duct tape and stick five of them slightly overlapping one over the other. Then stick five more of the duct tape strips as in the above procedure so that the sticky sides of the two layers will be stuck together. ...
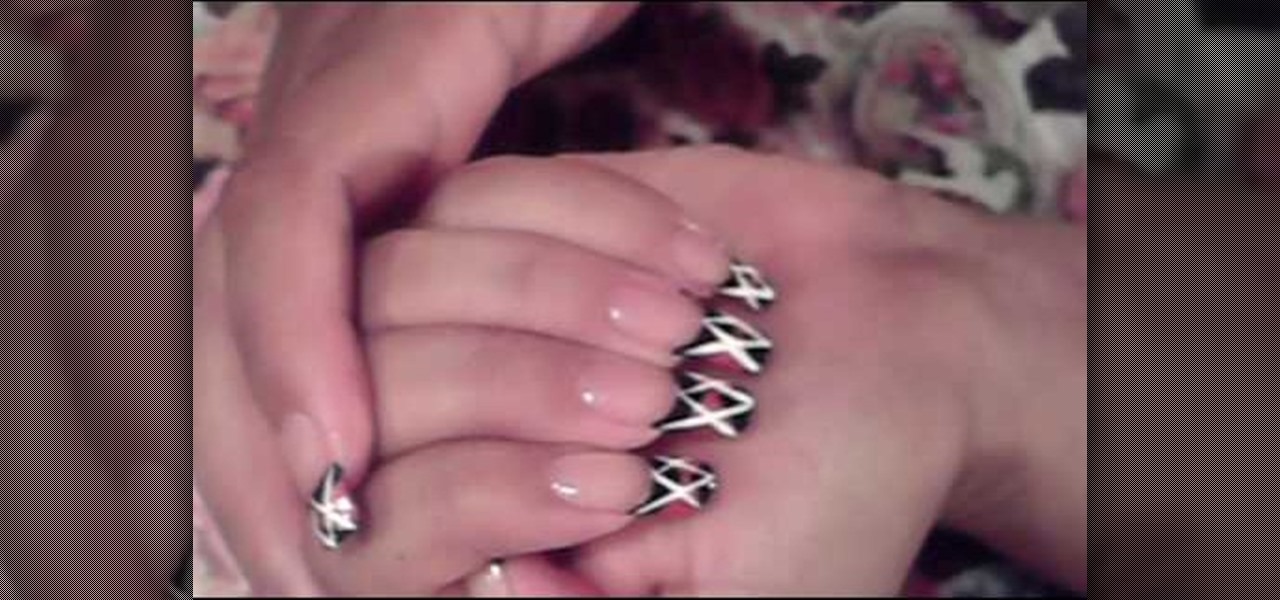
Make sure you nails are already clean and dry. Choose you colors. Add the lightest color first. Using a makeup sponge works great to apply the fading effect. Apply to French manicure area not straight. Reapply pink polish just at the tip of the nail. Apply glitter polish over the pink on the tip of the nail. After applying the shimmer get the nail art polish and make your deign. Make sure your brush is thinned out. Add your design then you can add your gem stones and finish it off with some c...
This video explains how to paint nails with a cobalt blue and flower dot design. The first step taken before applying the paint is to do a white wash manicure. The instructor begins by covering her makeup sponge in a dark blue color and then makes many small dots along the whitened part of the nail. The instructor then makes many more small blue dots along all of the boarders of her nails. After the blue dots have dried a white coloring is used to make flower pedal like designs within the blu...
This video illustrates the method to Make a nuno felt purse. You need colored paper, a piece of cloth and a pair of scissors to make it. This process is comprised of the following steps -Step 1Cut a oval shaped figure from the sheet of colored paper. Make a crease in the middle and fold the paper.Step 2Cover the paper with the cloth piece. Stitch the end of the piece of cloth and cut the cloth in a proper manner.Step 3Make the oval shaped figure into a rectangular figure. Add some nuno paste ...
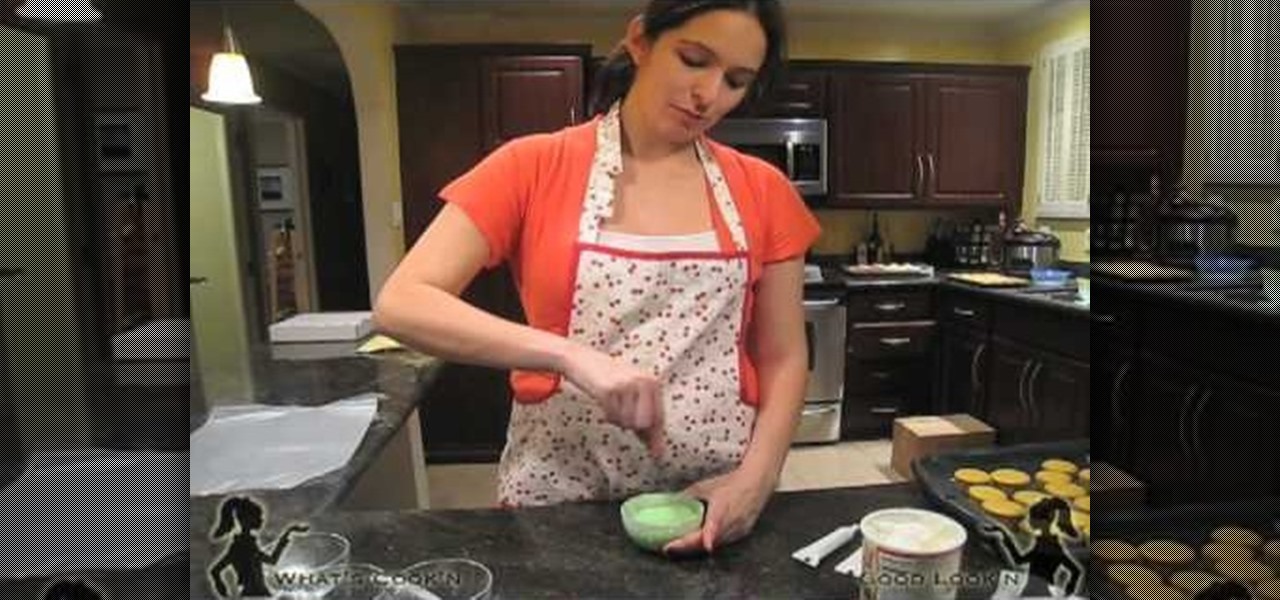
Stephannie teaches us how she prepares her "not so famous" mini cupcakes for a nephew's birthday party. After mixing up the yellow cake mix and putting it into a large plastic bag, you cut the end off the bag and squeeze the batter into cupcake cups within a pan. You should then proceed to cook them at 300 degrees F for 15 minutes until they are done. With a bit of humor Stephannie shows us how to mix food coloring into white frosting and a neat icing trick. By placing it in the microwave aft...
this short video shows how to paint nails in a black, pink, and white art design. The steps are simple and easy to follow. The first thing to be done is a regular black, French tip manicure. Once the black French manicure is completely dry, a pink thin tip nail polish is taken. From the middle of the nail , on the black tip, draw a V mark facing sideward on both sides. The next step is to fill the two "V"s, inside with the pink color. Once dried, with the white thin tipped nail polish, a line...
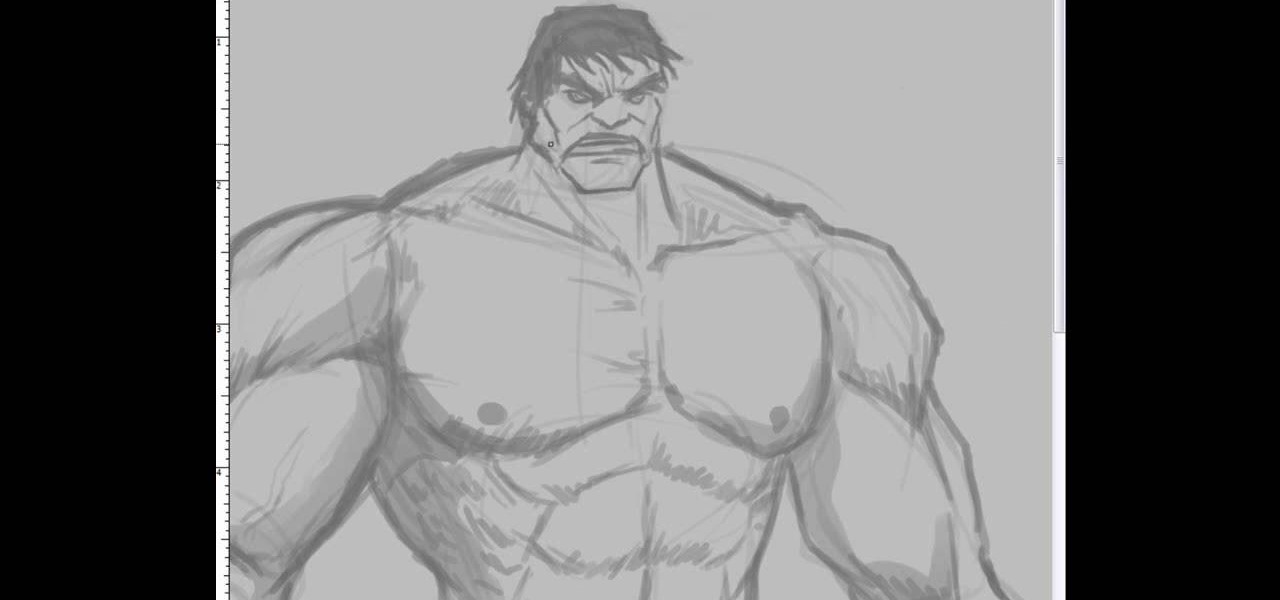
This video illustrate us how to draw the incredible hulk. Here are the following steps:Step 1: First of all take a sheet of paper, pencil and pencil color.Step 2: Now draw a square with round edges representing the face of the hulk. Within the face draw eyes and a big mouth and hairy eyebrows.Step 3: Now from the bottom of the circle draw an oval with wavy structure on it showing the six-pack abs of the hulk.Step 4: Now from the down side of the abdomen extend two legs with muscular legs and ...
This video is a tutorial on how to paint nails with cheetah print and rhinestones. The tools shown by the instructor consisted of nail polish and makeup sponge. The first step taken where to cover the tip of the nail in a white polish with a burnt orange colored finish. A sharpened pencil is used as an art tool to shape round circles onto the corners and center back of the nail made of a dark brown nail polish. The instructor then takes a glittery gold color to make river like patterns runnin...
Learn how to ‘Paint onto your T-Shirt’ by watching this video. Materials required for this include the following:•Marabu Textil Plus Start Kit – 6 colors included with paint brush•Marabu Metallic Outliner Paints•Crocodile clips•Masking tape•Pencil•Design printed from the computer•Tracing paper•A large cardboard wrapped in cling film•A dark colored T- ShirtBegin by placing a tracing paper over the design and secure it to the table using masking tape. Next, use a pencil to trace the design on t...
In this two-part video tutorial, learn how to paint a neon orange & silver nail art design with the help of a nail professional. Although this orange & silver color scheme is used, one can choose any two colors they like to complete this look. Use this video as a guide and get this simple nail manicure done in no time!
Sugar skulls, or "calaveras de azucar," are used to celebrate El dia de los Muertos, in honor of deceased friends and family. This video tutorial shows how to make sugar skulls with basic household ingredients. Once you've shaped the mixture into a skull shape, decorate and design with food coloring to suit your personal taste.
This video shows you the basics in understanding how to use Copics pens. In this video you'll focus on the basics of coloring. You'll learn the do's and dont's in order to achieve a perfectly colored piece for everyone to enjoy. This is a great video if your familiar with Copic pens or just curious how to properly use them.
Danielle Proud shows you how to make a beautiful Christmas table centerpiece for your Christmas dinner! Your guests will be amazed at how incredible your table looks. This amazing display catches light and looks simply magical. All you need is an old pair of deer or elk antlers, some sticky-backed crystals, and a little time and creativity! First, take your antlers and sand them until they are smooth and the color you like. Then, take different sized crystals, even different colors if you pre...
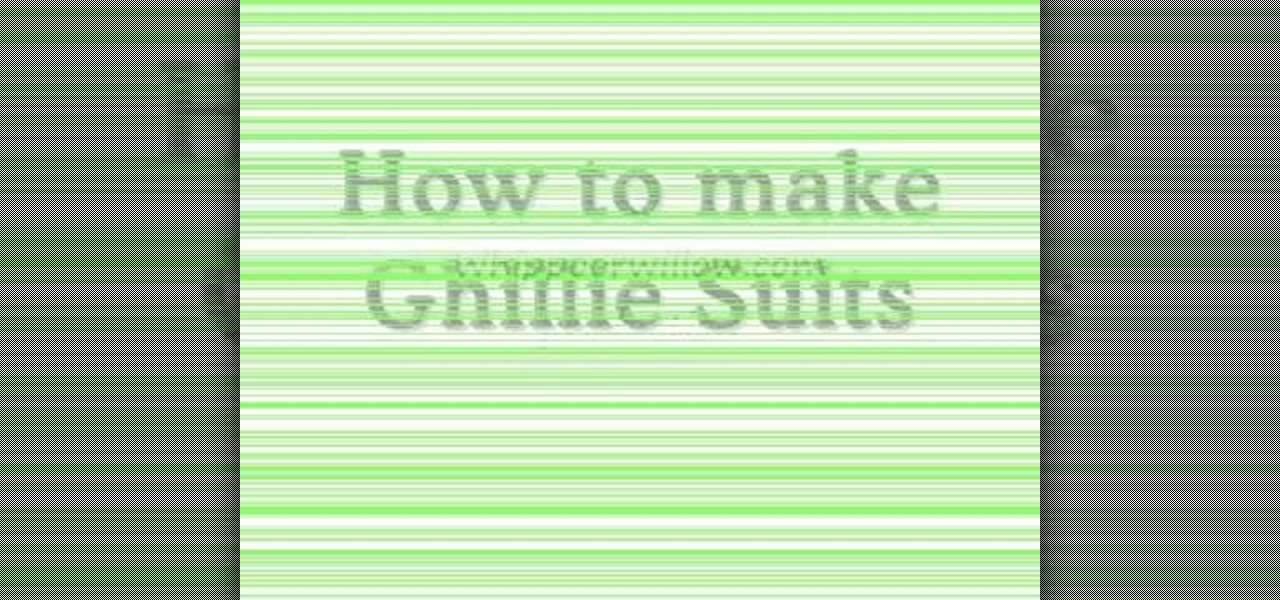
Learn how to make a simple Ghillie suit in easy steps. 1. First find out some burlap bags and cut them up. 2. Now dye your burlap by choosing the proper colors that are suitable to the environment you are going to be in. 3. After selecting the dye color, soak them in it, let it dry and string it. 4. Now attach a netting to your selected base and then tie on the dyed burlap strings to the net. 5. Finally make any changes if needed and then test it out to finish.
This video shows how to make a bay girl and boy head made of clay. The first thing you need to do is get a small round ball of clay that is a skin color color. Then you get the small black beads and place it firmly on the ball they will act as the eyes. Then make the eye creases on the side of both eyes. After that you add the other physical features like nose, mouth, ears, and eyebrows. The last thing you do is fold two square pieces of clay into the shape of a bow then place it on the top o...
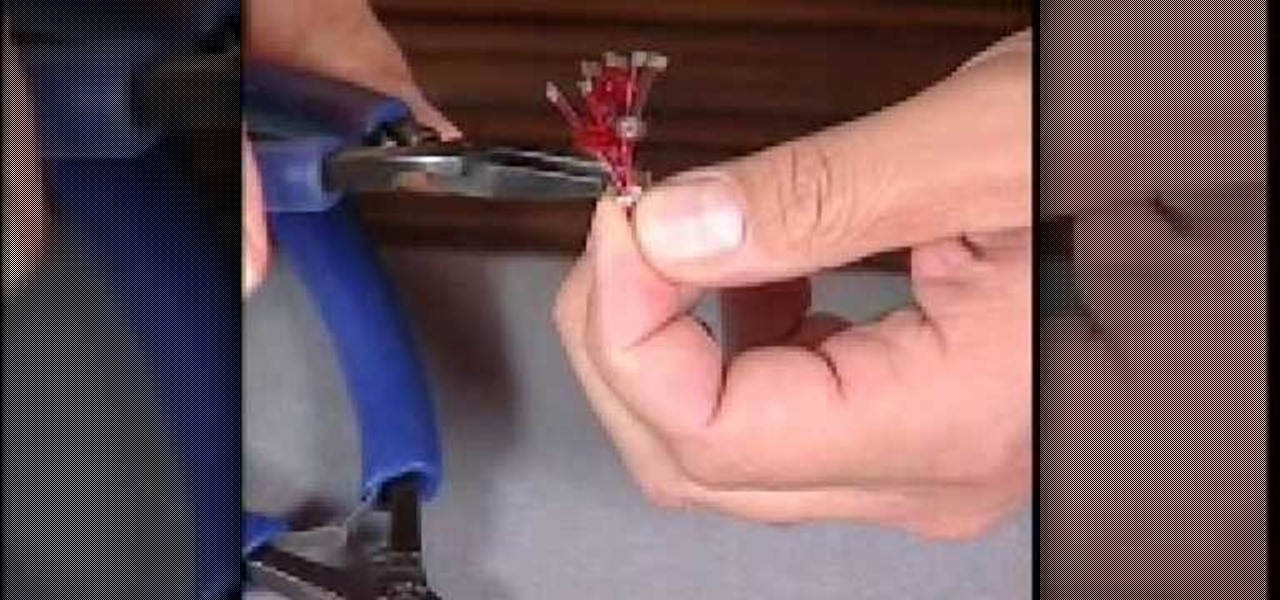
Mark Nelson accompanied by Rio Grande demonstrate by the start where you need a wire with stiffeners to it of various colors. 3 pieces of different colors of wire each 2 ½ inches long is needed for the earring. Pick a clamp where you can pass the 3 wires twice. First push it half way once and put the other end back in the hole and pull the ends through. This can also be done in an asymmetric way. Now you add 6 beads in any combination of colors. Use it in a 2 mm length and then cut off the en...
Yanik Chauvin demonstrates how to create a batch using Photoshop and them Lightroom so you can decide which is faster and more convenient for you. In Photoshop, he first changes the color in the image, which he explains step by step the process, then saves the image as an action. He then shows you the process to batch the images so they will appear on your desktop. He also does the same thing with the image in Lightroom and shows you the process in which you would change the color and sync th...
Joey Logano paints the #20 Home Depot Toyota race car with Home Depot orange color. 1. Paint up the chassis. 2. Dry the paint for about 4 days using a grill specially made to fit the body of the car. 3. Bake the chassis in the oven for 160 degrees F. 4. Get some orange stickers that is exactly the Home Depot orange color. Design the body and headlights.
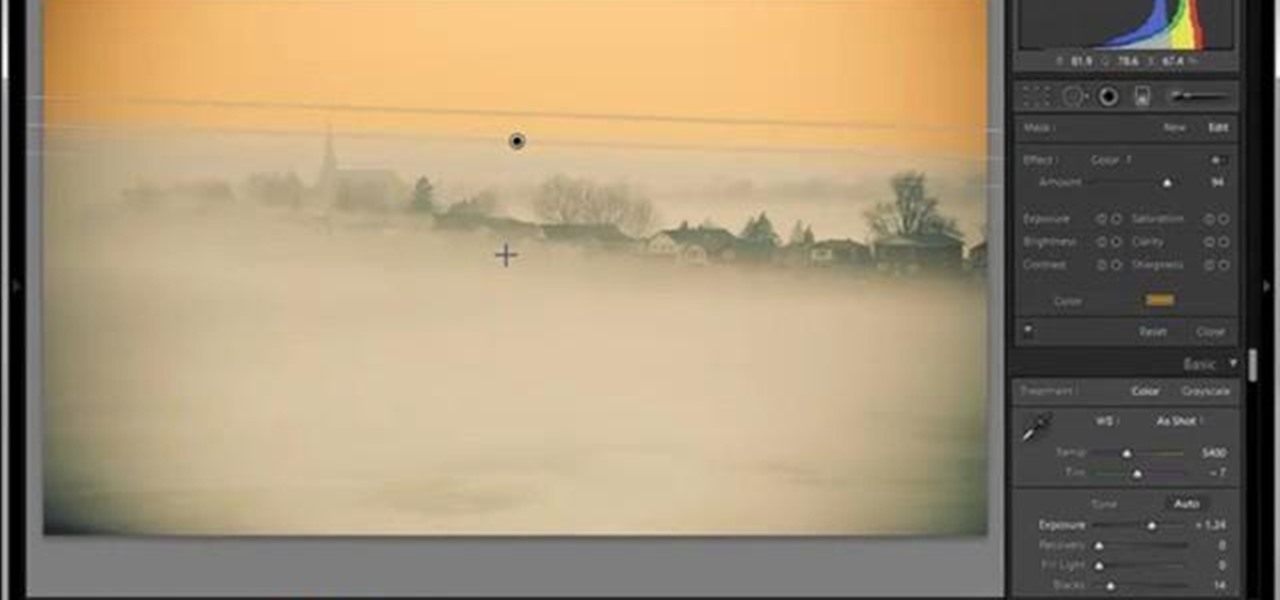
In this tutorial, Yanik Chauvin teaches us how to create an old-style looking photo starting from a grayish, underexposed one, using the software "Lightroom". He starts by creating a virtual copy of it, and then he adds a Camera Calibration preset named Camera Landscape and increases the exposure. After that, he crops the image removing the blank parts of the photo, and adjusts Contrast, Blacks and Clarity to strength the image borders.
Garden of Imagination shows viewers how to make realistic looking bread loaves for a dollhouse. First, you need a beige ball of clay or a color that looks like that of bread. Take your ball of clay and warm it up in your hand. Lay it on your table. With the center of your palm, press the ball of clay down. This will give you a nice bread shape. Now, take a twisted wire and make a tic tac toe board on your bread to act as creased. Use rolled up tin foil to give the bread texture. Now, use chal...
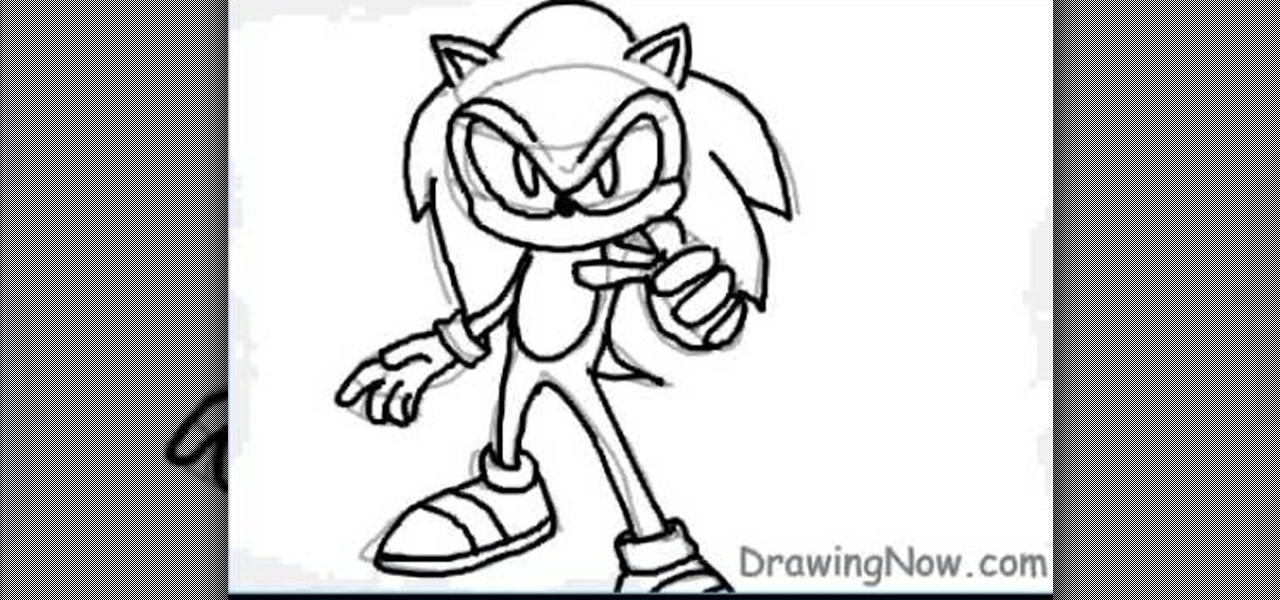
In this video tutorial, viewers learn how to draw Sonic from the Sonic the Hedgehog. Begin by drawing a circle for the head and 2 triangles for the ears. Then draw the lines for the spikes and a small oval for the stomach. Now draw the hands, legs and feet. Draw the eyes. Now draw the tail and outline the image. Add the details and delete the guidelines. Start adding color to the image. Add some darker colors around to create shading. This video will benefit those viewers who enjoy drawing on...
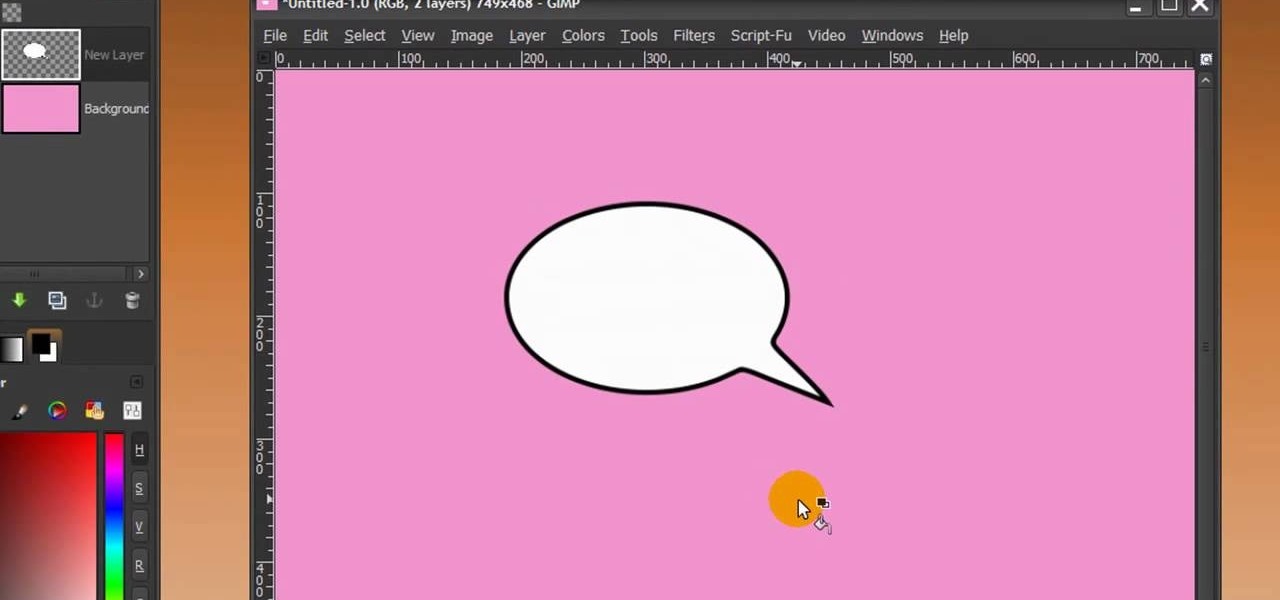
First of all open any image and create a new ‘layer’ and add it to your image. Click on the transparency and then click ‘ok’. Now from the right menu bar choose the ‘elliptical’ icon to make a round balloon. Now select the 'free select tool' and select ‘mode’ to 'add to current selection' and then draw a triangle with the base inside the previous balloon and the pointed end outside the balloon. Now select the 'bucket fill' tool and make sure your ‘background’ color is selected as white and th...