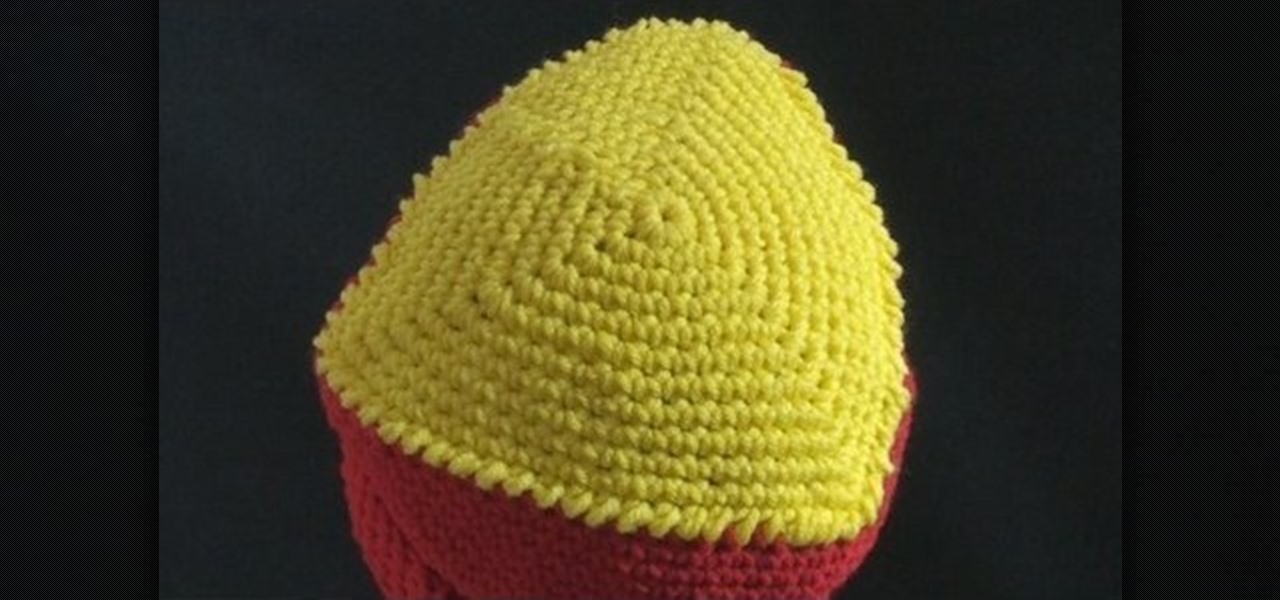
In this video, we learn how to crochet a triangle-shaped bikini beanie hat. First, crochet nine single crochets through a simple loop. After this, join with the beginning single crochet and work a single crochet three times. next, work one single crochets in each of the next two, then three single crochets in the next stitch. Now, go join with the first single crochet. Continue to go around until you have a large circle shape, going down on the sides to make the entire beanie shape. After thi...

In this video, we learn how to capture your holiday in eight digital photos. This is a challenge for most people, but it can help you remember your vacation without taking hundreds of photos. First, make sure you have different lenses to capture shorter and longer distances. Find photographs of the most beautiful places, using travel guides and locals as help on where they are. Capture a beautiful sunset or a memorable church with your camera, this will help you remember your surroundings. Al...
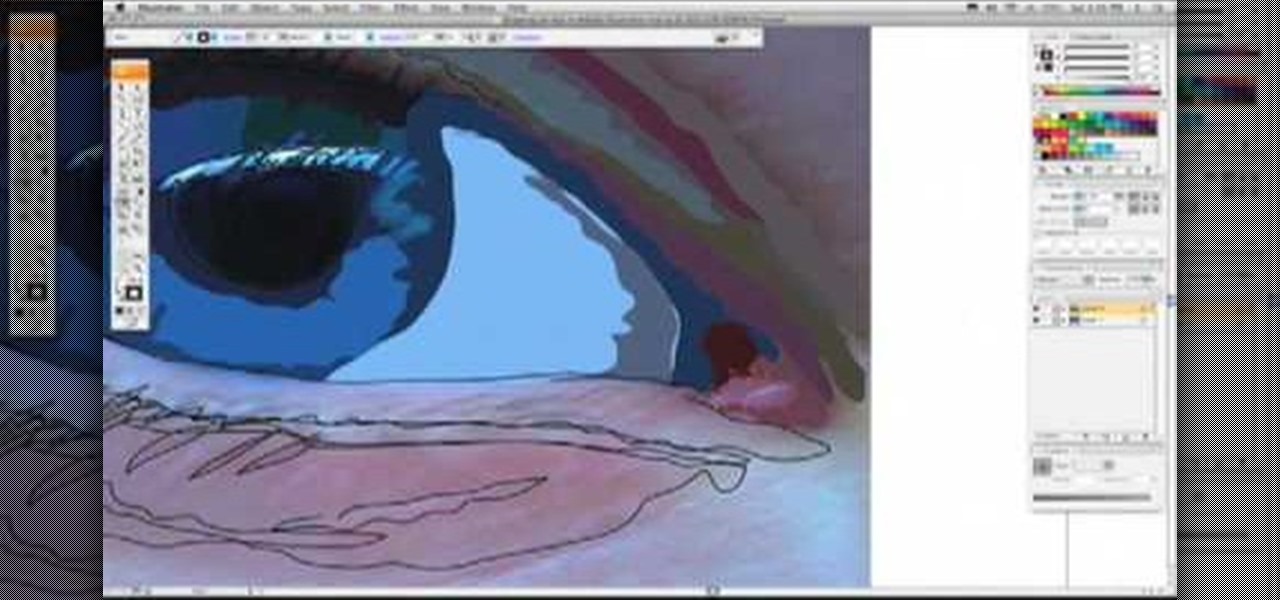
If you love Adobe Illustrator and are looking for an interesting and creative way really to bring the life out of your pictures, this video has an interesting twist. If you remember the movie, "A Scanner Darkly" and the art style that they used, it was quite impressive and unique and called rotoscoping. In this video Karl Gude goes into great lengths showing you his method of tracing the picture and then adding the right colors all the way to the finished product.
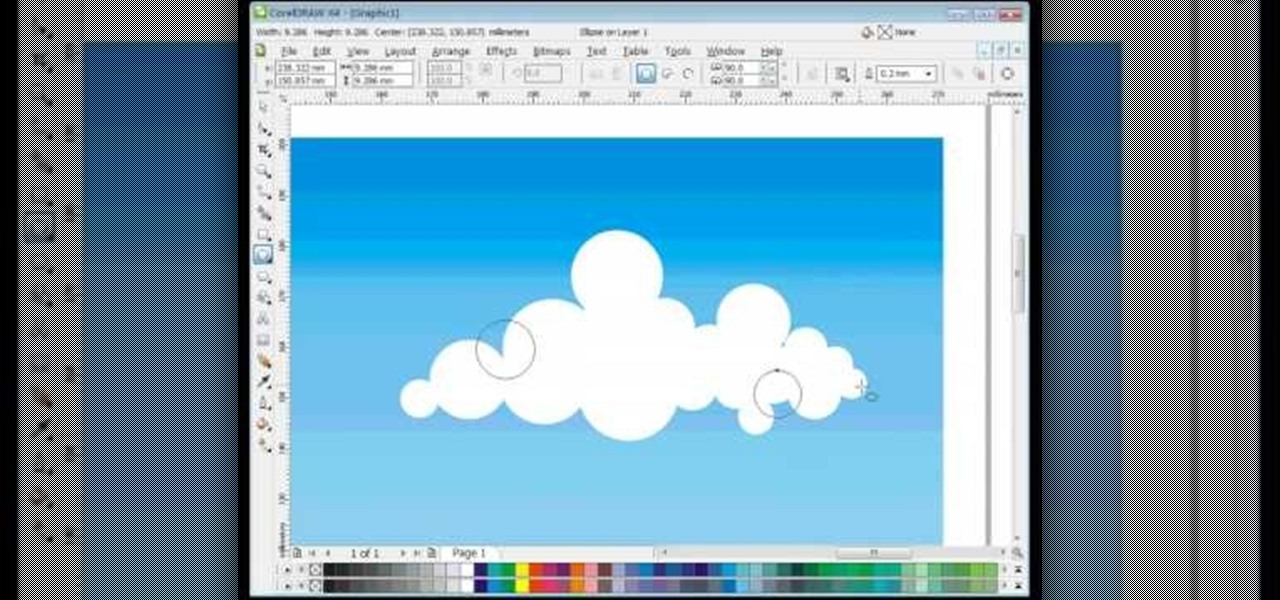
In this video, we learn how to draw vector clouds in CorelDraw X4. First, open the program and make a circle using "ctrl+shift". Make these circles touching and overlapping each other on the top of the page. After this, select all and then weld it. Next, press "ctrl+k" to break the curves apart, then erase the parts inside of the clouds. When this is done, select all, then copy and paste for additional clouds. Trim the bottom to make the clouds sit on a mountain or straight edge, then you are...
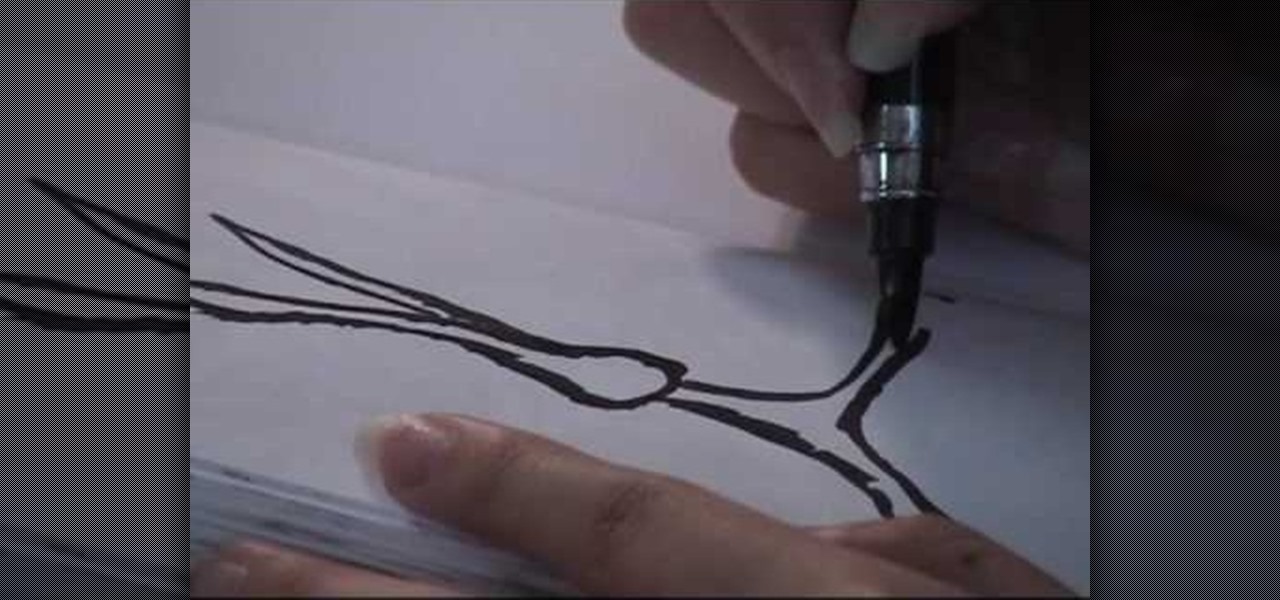
In this video, we learn how to refill ink a pocket brush pen with Henry Lee. First, mix water with the ink, depending on the color of ink you want. After this, you will take the pen and soak it in water, then into the ink. Turn the knob on the handle as you do this so the ink starts to infuse into the pen. To get more ink in, point the brush to the sky and turn the knob slowly to drive the extra air out of the pen. Then, dip the pen into the ink and turn the knob in the other direction. Conti...
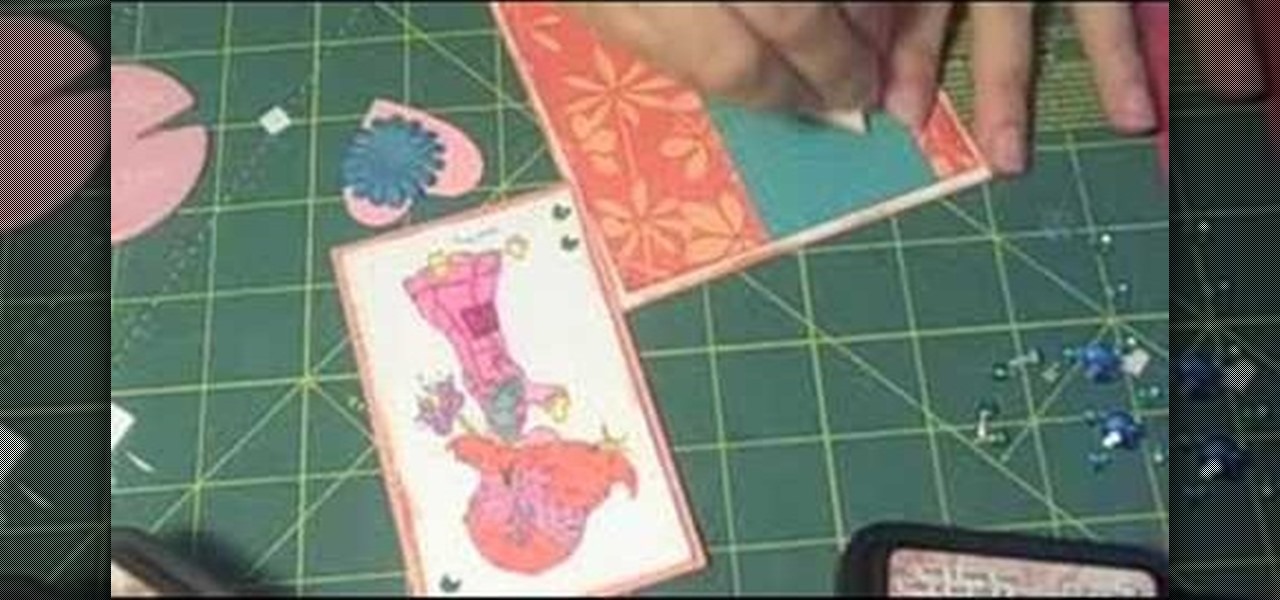
In order to make a pocket card out of an envelope, you will need the following: a used envelope, printed paper, adhesive, card stock, paper cutter, cuddle bug, an ink pad, stamps, markers, and crystals.

In this video, we learn how to fake confidence. First, you need to look your best and tell yourself that you look great. Your breath should smell good, you skin should be soft, and your teeth should be brushed. Also, wear bright colors because this shows confidence and will make you stand out to a girl. Also, smile at girls. This works because girls love to see men smile and want to know that they are kind and happy. Also make sure you are making eye contact, and not looking away from the gir...
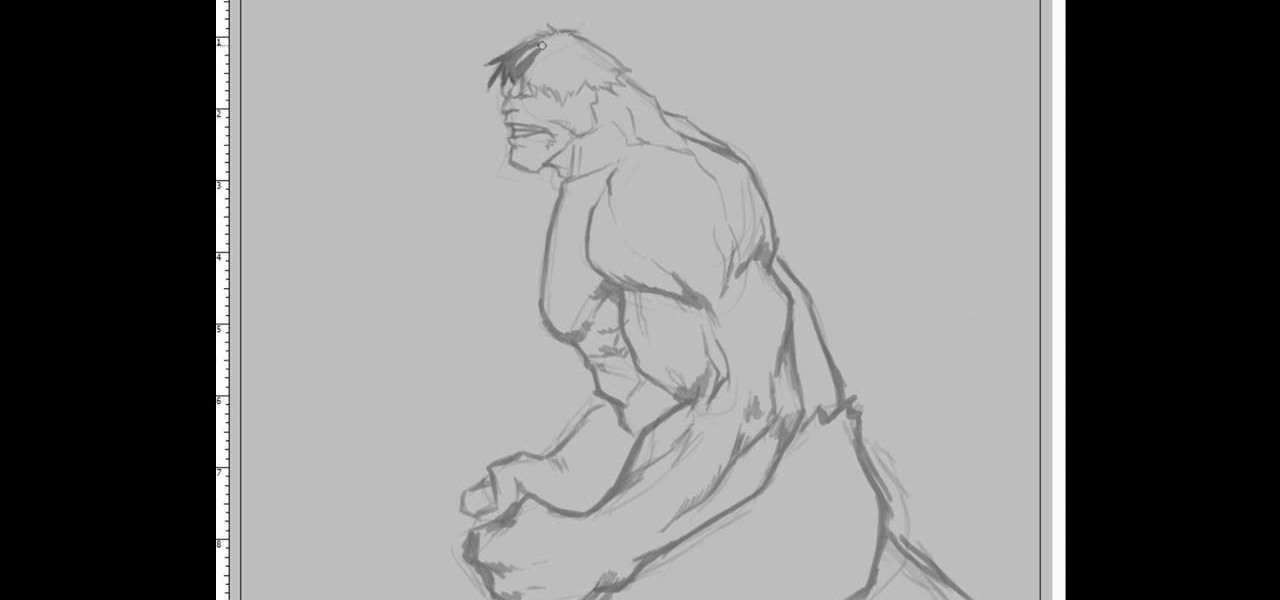
The Incredible Hulk, the result of Bruce Banner being exposed to an intense amount of Gamma Rays. Gets stronger the more you hurt him, and can break tanks in half no sweat. Wouldn't you like to be able to draw the green giant? In this video you will learn how to draw The Incredible Hulk from a side view, watch him start from the outline all the way down to the coloring of the finished picture.
When it comes to clubbing, it's hard to stand out makeup-wise. After all, when girls hit a club with their gal pals it's pretty much a given prerogative that they make their makeup look as sexy as possible and their hemlines as high as possible as there's fierce competition with other girls in the club.
Illustrator Frank Frazetta knew women. At least, he knew what men desired in the "perfect" woman physically: Sumptuous curves that made men weak in the knees with a single shake, deep-set eyes, and bombshell assets.
In this video, we learn how to create a white, purple, and black swirl nail art. Start off by applying purple glitter to the side corner of the nail. Next, draw on a black thick line underneath the purple, followed by a swirl at the end of the line. Then, take white nail polish and make the same line underneath the black line. Make sure you let the black dry before you paint the white on underneath it. When all colors are dry, apply a clear coat of nail polish over the designs. Now your swirl...
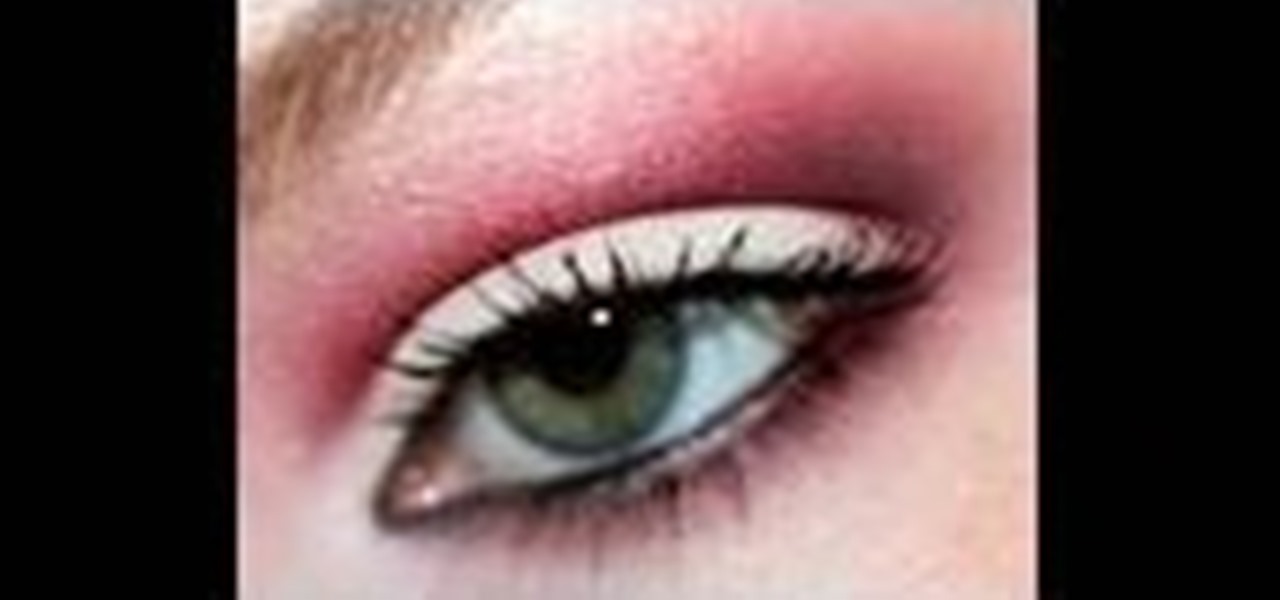
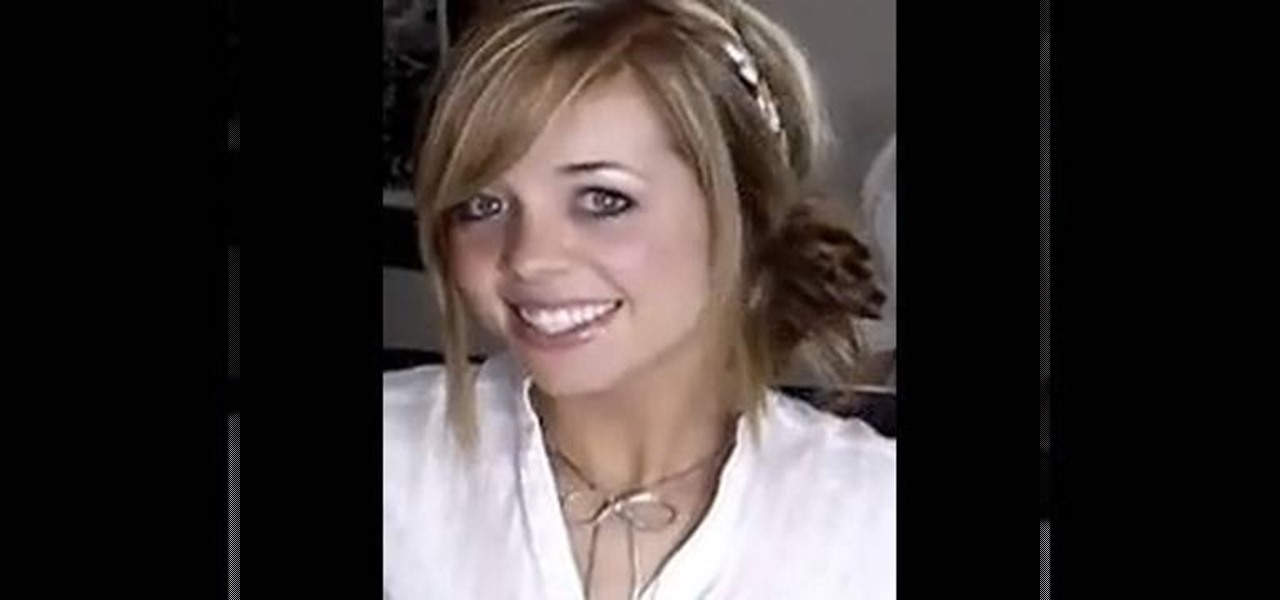
In this video, we learn how to get a chic and sophisticated look with light makeup. First, you want to prime your face and then spray brush on a foundation that matches your skin tone or is slightly darker. Next, set your face with a powder and lightly dust your entire face. Define your brow after this, using light strokes and a pointed brush. Next, apply a matte brown shadow into the crease of the eye using light motions and blending with the other eyeshadow colors. Now take a light shimmer ...
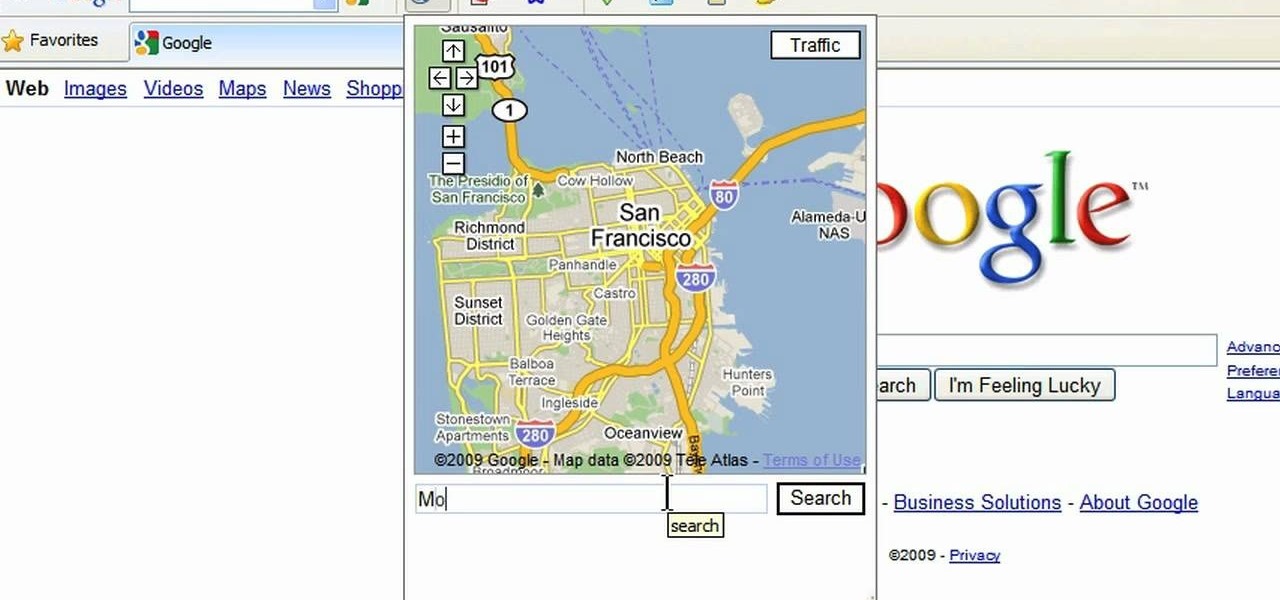
This is a video tutorial in the Computers & Programming category where you are going to learn how to avoid traffic jams using the Google Maps button on the Toolbar. Click on the Google Maps button on the toolbar. This will bring up the maps window. Here you type in the area in the search box, for example, "mountain view, ca" and click 'search'. On the next window click on the 'traffic' button and the map will then show you the roads that are clear of traffic jams in green color. There you go!
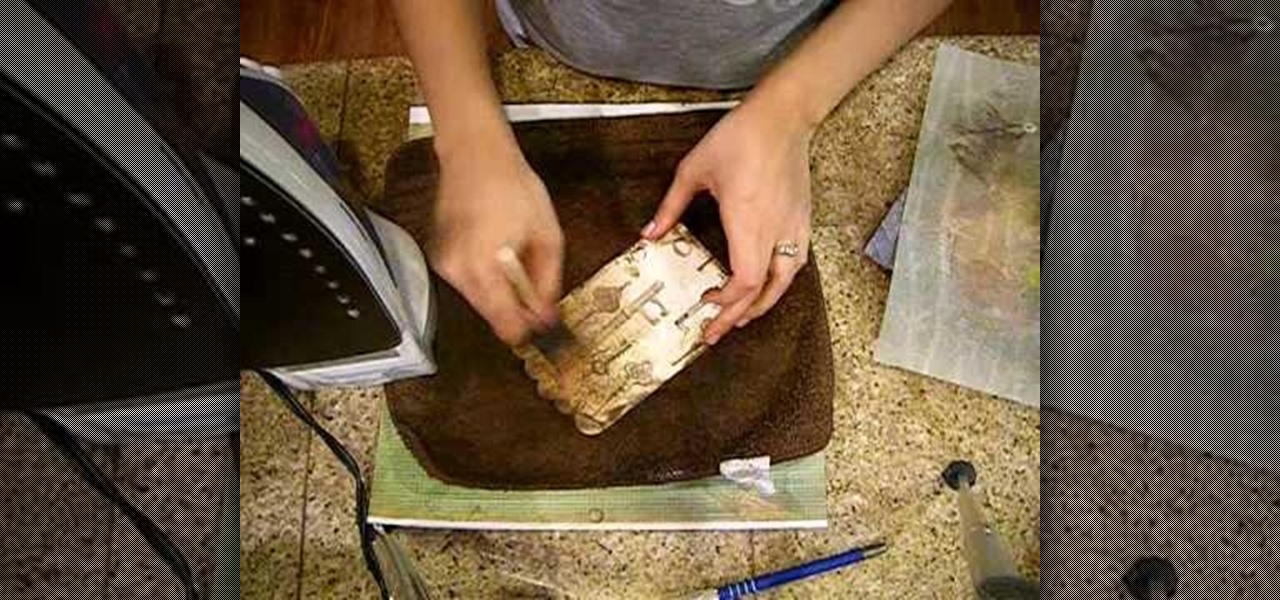
Crinkle top part and go over it with distress ink. Do edges front and back. Put extra ink on scallops. Spray with mustard seed and tattered jewels, olive vine and pine cone to add color. Place paper on pocket and iron on both sides. Spray with iridescent gold. Use brush to spread out. Iron again on both sides. This process makes it look aged. Take a film strip and spray with tattered leather. You want to use an iron when spraying grunge board with tattered jewels because it will make it seep ...
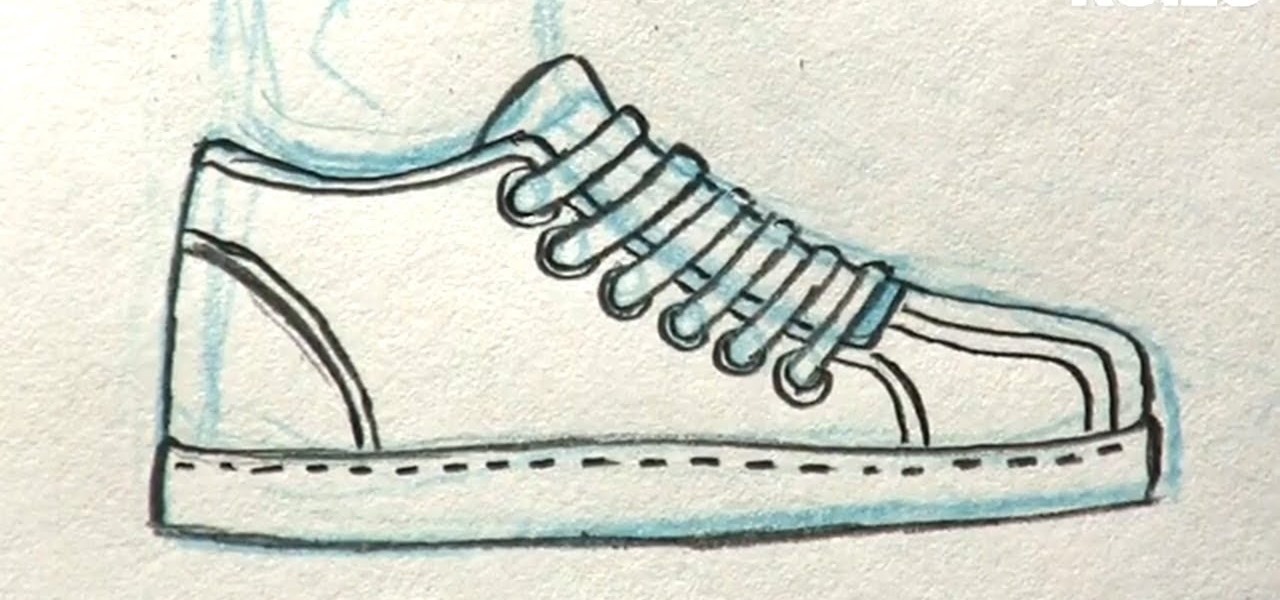
In this tutorial, we learn how to draw manga shoes. First, you want to sketch the basic shape of the foot. On top of this, you will draw a rough shoe shape with a different colored pencil. Next, draw in the details of where the laces are going to go, and where the lip of the shoe will be. Also draw in the soles and any other details you feel you need. Switch over to a black pencil to draw in darker details and add in shading throughout the drawing. When you are done, sign your name by your dr...
In this tutorial, we learn how to tune your car in Photoshop. First, open up the image of your car and then add in a picture of different wheels. Then, place these wheels over the existing ones on the car and blend them in, then change the color as you prefer. Do this for the wheels that you are able to see on the image. After this, lower the car and add in a bumper to the front of the car, importing images in from various sources. Continue to add in parts to the vehicle, using shading and bl...
In this tutorial, we learn how to draw Neopet cartoon cats. First, use a small brush to create the outline of each of the cats. Use light strokes to make the outline, then start to add in the details onto the cat with a darker colored brush. Add in the details of the face, including the whiskers, mouth, and eyes. Don't forget to add on the ears as well. Erase and lines that are on the back of the drawing, so all you see is the darker and more exact lines. Continue on drawing the body, making ...
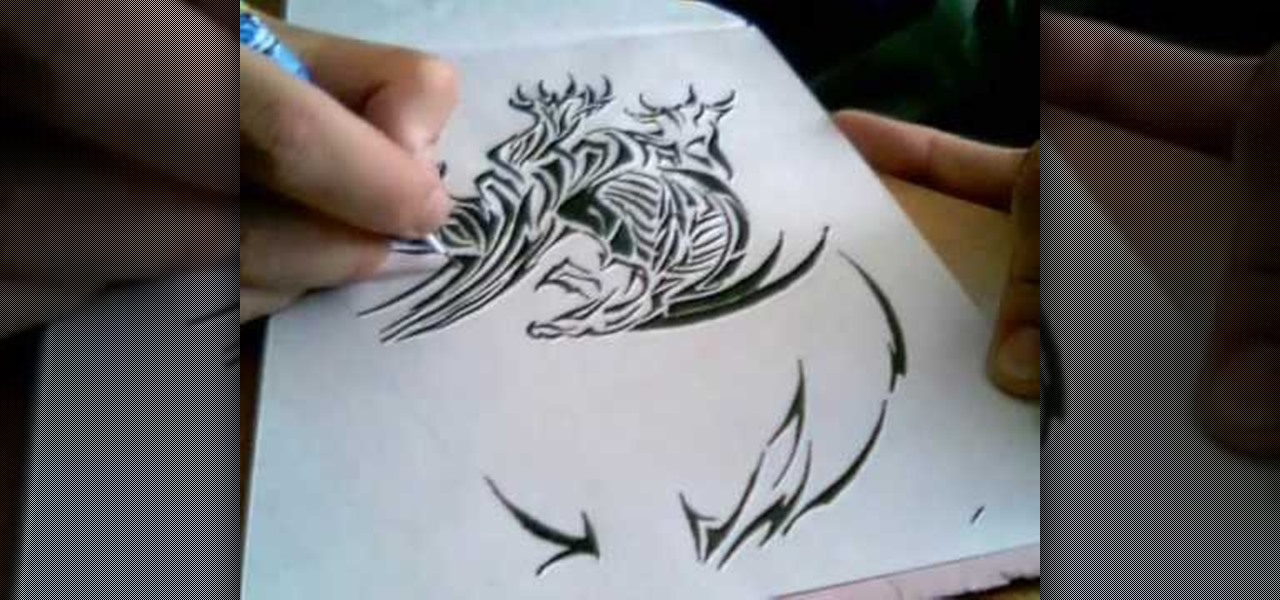
In this tutorial, we learn how to draw a tribal style dragon. Start off by drawing the wings of the dragon, adding in tribal designs on the inside of it. After this, start to draw the head of the dragon, as well the inside of the face. Also, draw the legs and the claws of the dragon. Add in more details until you have a full dragon design. Use a pen to fill in the lines on the tribal design. It will sort of look like a zebra pattern with the black and white colors rotating. When finished, sig...
In this video, we learn how to draw Naruto. Start out by drawing a circle as the outline. After this, draw the jawline. Next, draw lines in the middle so you know where you are going to draw the eyes and the rest of the facial features. Next, define the features on all the different parts of the face. Start to add in shading to the face, then draw in the hair. Next draw in a hair band at the top of the head, followed by spiked hair coming out of the top and ears on the side of the face. When ...
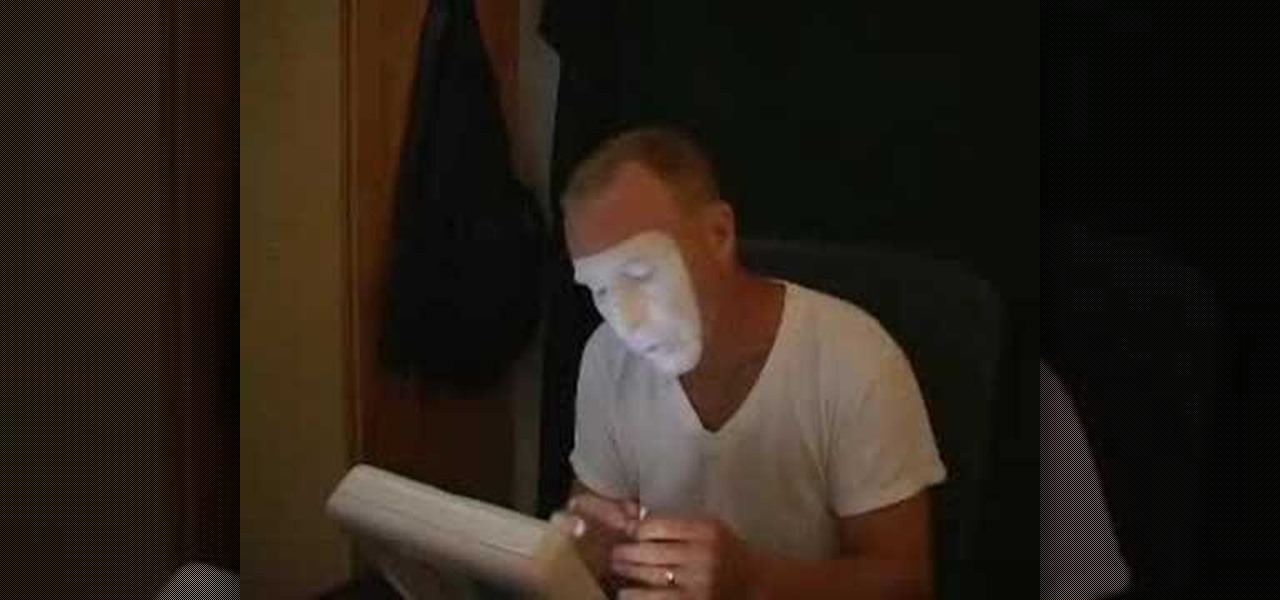
In this video, we learn how to apply mime and clown makeup. To start, outline your face in a mask shape. When you are done with this, apply white paint to the face until it's on thick and you can't see your skin color any longer. If you make mistakes, use a q-tip to clean up, then run it around the edges to make it a clean line. After this, use a q-tip to remove some paint from the eyebrows. Now, take black paint and paint it onto where the eyebrows are at. When you're done with this paint th...
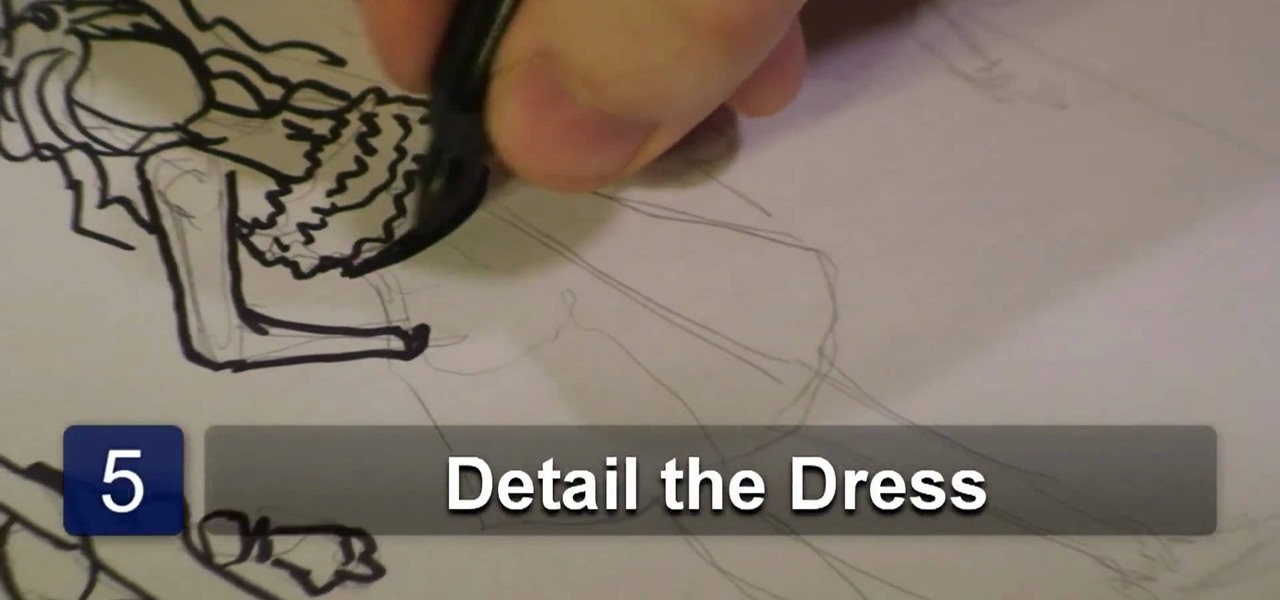
In this tutorial, we learn how to draw a variety of prom dresses. First, you will need to start out by drawing the dresses on different body shapes. Make dresses that are long, short, and knee-length. After this, use a marker to draw the outline of the body and the dress, then start to add in the pleats and the dress details. Add on scarves and other items to the different types of dresses, then continue doing this for the different types of dresses and body shapes. When you are done, draw in...
In this video, we learn how to make crayon resist watercolor background sheets. First, draw a pattern onto a piece of paper with crayons. You can make any kind of pattern that you want. After this, add some water color paint to the picture and use a credit card to push the paint around the picture. You will see that the crayon resists the paint and the paint sticks to the paper instead! Let this dry, then you will see that the crayon is still resisting the watercolor ink. After this, enjoy yo...
In this video, we learn how to make chocolate dessert cups for an event or party. First, tape a cupcake pan and paint pink colored hot chocolate into a shape at the bottom. Next, add in melted chocolate to the individual cups. After this, place in the refrigerator for 10 minutes, then push the cups out of the trays. Then, you can place icing or cream into the middle of them and serve to guests. These only take a short amount of time to make, and everyone will love them. It's a great way to ke...
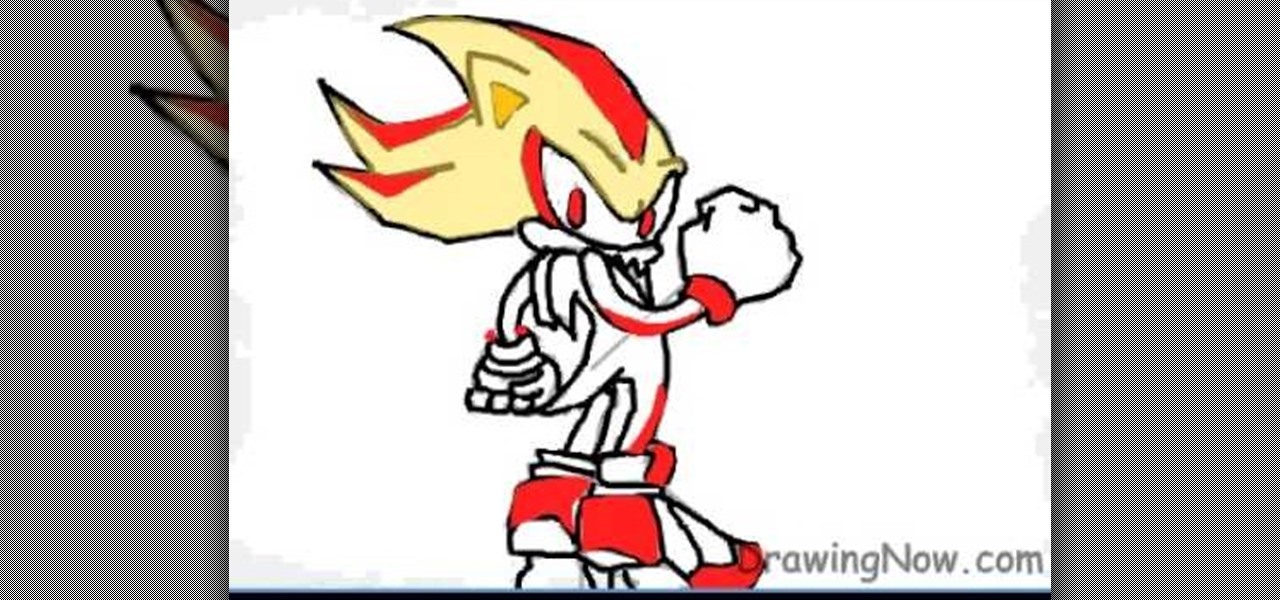
In this tutorial, we learn how to draw Super Shadow from Sonic the Hedgehog. Start off by drawing the spikes for the hair, then draw the ears and the eyes on the face. After this, draw the arms, upper body, lower body, and legs. When you are finished with this, use a dark pen to outline the cartoon character and draw in any additional details. Next, you will add in colors to the character, using reds on the outside of the hair and legs, then orange and tan on the inside. Finish this off with ...
In this tutorial, we learn how to do a side headband braid with ribbon intertwined. First, grab a ribbon that is around 32 inches and any color you want. Now, take a chunk of hair on the side of your head, and place the middle of the ribbon underneath it. Now, separate your hair into three sections, then start to braid by connecting the ribbon in with the strands. Once you finish this, tie off at the end. Now, make a messy bun in the back of your hair with the braid on the side still. After t...
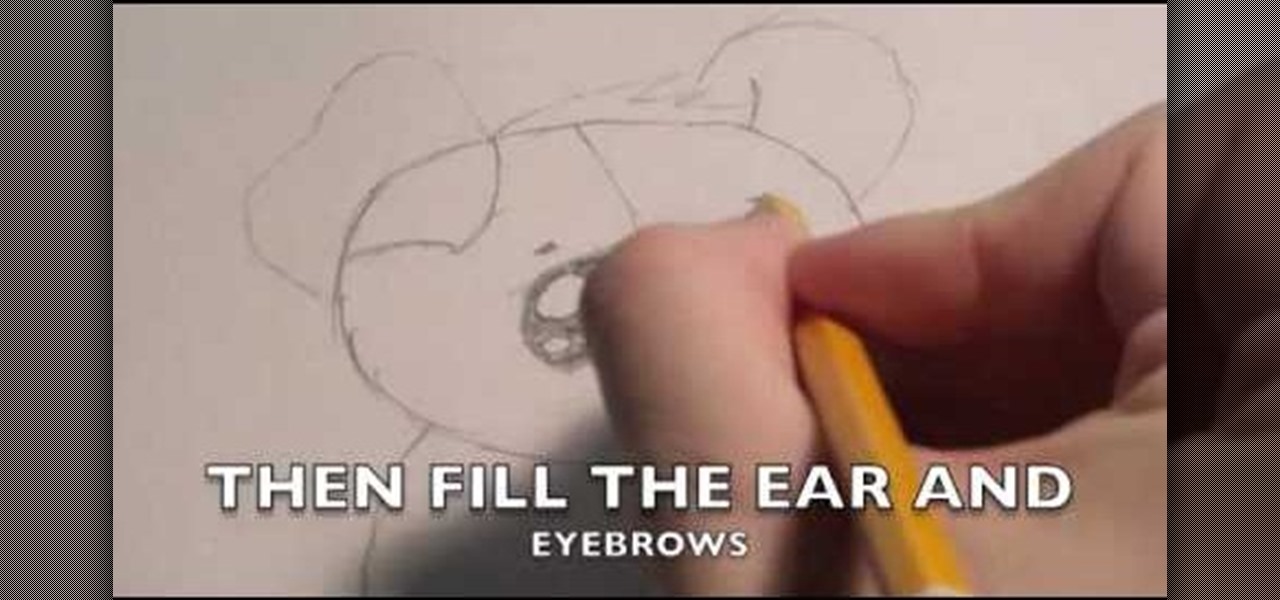
In this tutorial, we learn how to draw a cute puppy. First, you will use a pencil to draw the outline of the body of the puppy. After this, start to draw the details of the face and add in the ears and details for the hair. Next, draw in the pupils of the eyes and then draw in the nose and the mouth. After this, draw in the details on the body and add in lines and shadowing. After this, add details to the paws and then erase any lines that you don't need. When finished, color this in or leave...
In this tutorial, we learn how to customize a desktop with DragThing. First, go to the website DragThing and download it. This is an application that has a ton of different things that you can download to customize your desktop. You will be able to change different preferences, such as hot spots, your dock, and many other different things. You can customize everything from sounds and colors to font sizes and application icons. Go through all the settings to change what you want your desktop t...
In this tutorial, we learn how to make a cool neon text effect using Photoshop. First, type your text using a big and simple font. After this, right click on the text layer and click on "rasterize type". Now, press the control button while you click the thumbnail of the text layer. After this, grab the lasso tool and click "select inverse". Then, set it on 12 pixels in the toolbar. Now, use the magic wand too and select each of the letters by holding shift. Next, create a new layer and click ...
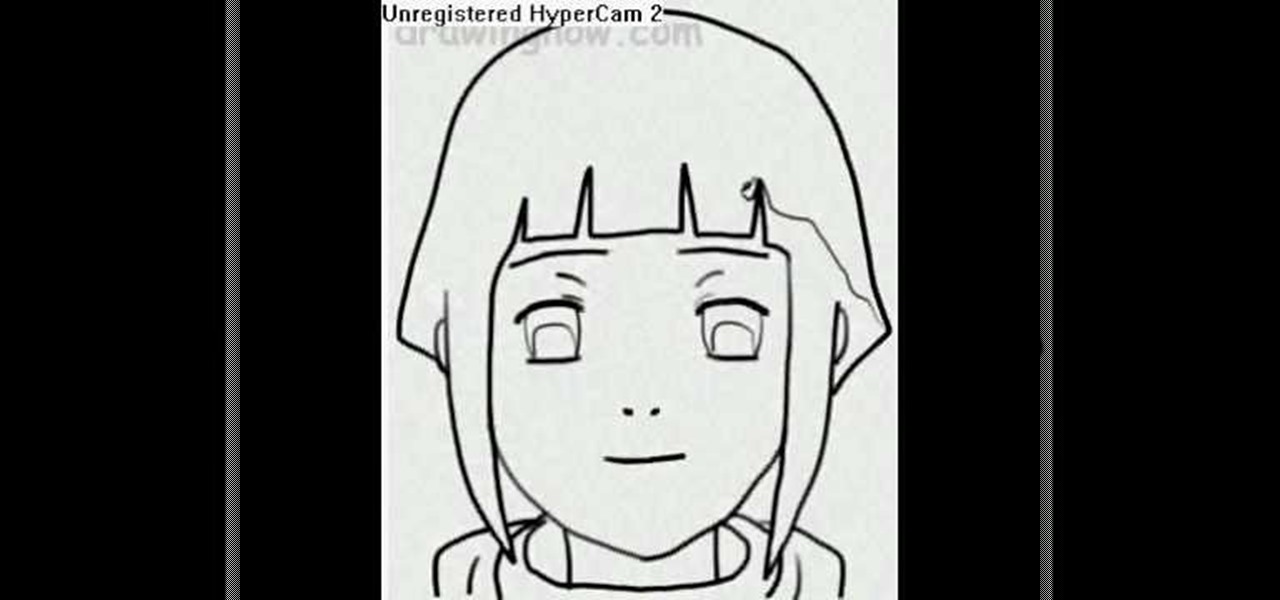
In this video, we learn how to draw Hinata. First draw a circle, then draw crossing lines through the circle. Draw in eyes where the lines intersect, then draw in the nose and mouth. Make the eyebrows after this, then remove the lines inside of the face. Next, draw in the hair and make the bangs lie flat on the face with long bangs on the front of the face. Draw on the top of the shirt and then start adding in further detail. Add lines to the face, then add in color if you prefer. To finish, ...
In this tutorial, we learn how to draw azure kite. Start off by drawing the face, then draw on the hat and the upper body. Next, you will want to outline the rough draft that you first made and start to add in details. Color in the hair and the hat, as well as the skin and the outfit. Add in wrinkles and buttons on the clothing as well. Add in the eyes to the face and include the nose, mouth and ears. Place the tattoo on the side of the face, then add in shading on the entire body. When done,...
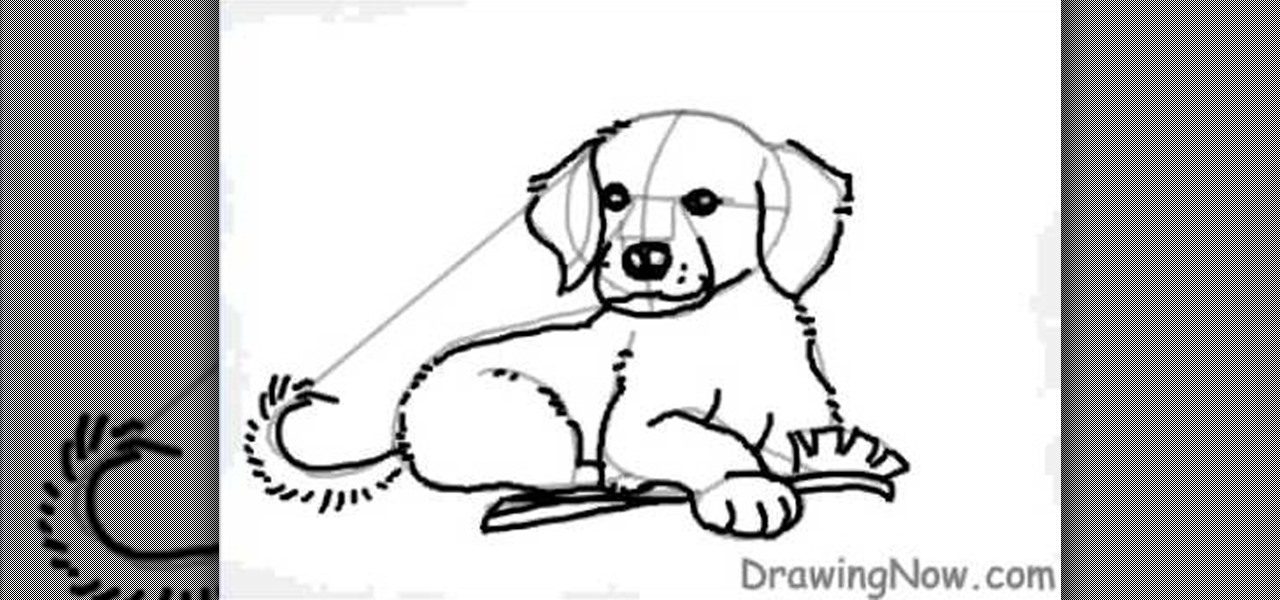
In this tutorial, we learn how to draw a cartoon golden retriever puppy dog. Start off by drawing the face with intersecting lines on it so you know where the nose, eyes and mouth go. Then, keep outlining the rest of the body including the legs and tail. Next, use a darker brush to go over the lines and make more of a detailed outline, including fur and eyes. Make sure to use lines on the side of the dog to make the hair look more realistic. After this, paint the inside of the dog using a lig...
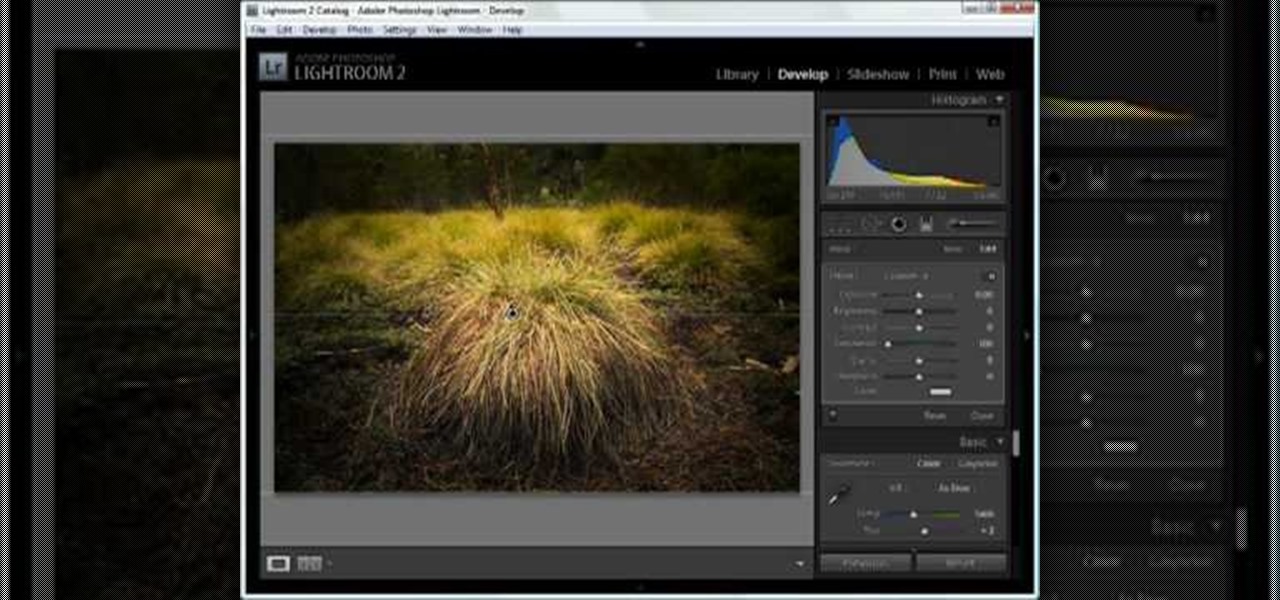
In this tutorial, we learn how to dodge and burn in Lightroom 2. First, open up your image in Lightroom 2 and use the brushes to change the saturation and the colors in the image. You can also use the graduated filter which you can use to apply effects across the image itself. Next, you can add a tint onto the picture and apply a second filter to make the top of the image darker, then make the middle of it brighter. Change the exposure and saturation to make the picture look more realistic. U...
In this video, we learn how to make friendship bracelets adjustable. First, tape both sides of your bracelet onto a flat surface. After this, bring both ends into a circle shape at the ends. Now, take any color of string and make a loop with it over the ends of the bracelet. Now, put one end over the other and then put it through the bracelets and into the loop. Then, pull the end of the thread and put the bottom over and under the top piece. Then, put it through the bracelet and tighten it. ...
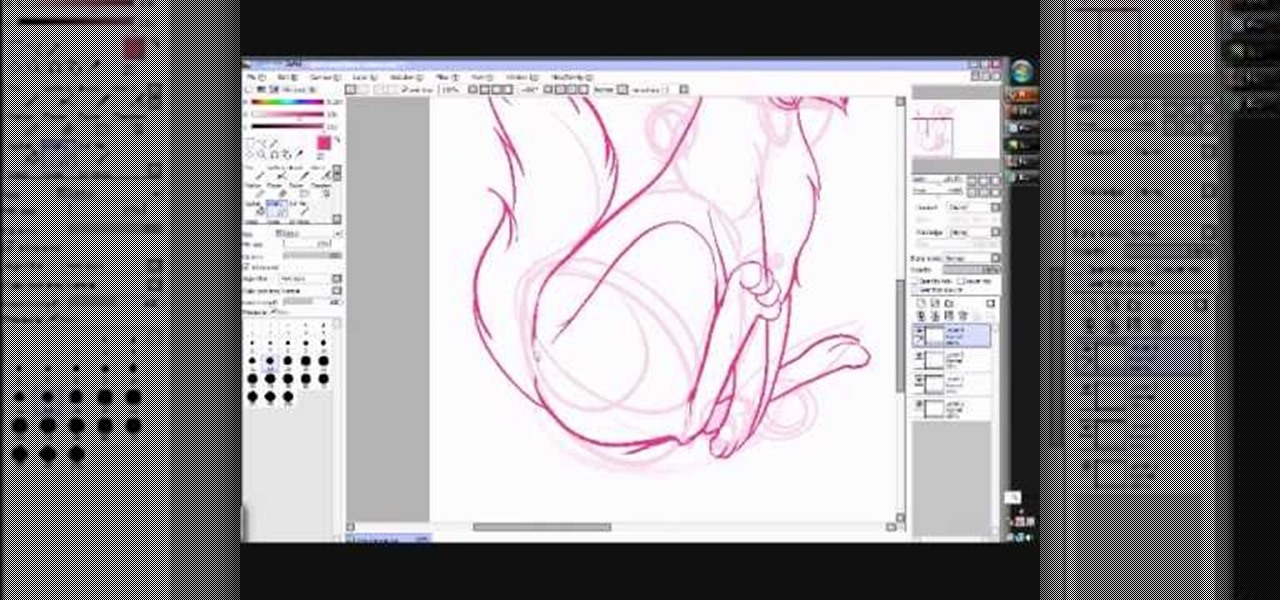
In this video, we learn how to draw a manga chibi eye. Start off by drawing an outline of the eye with the round middle and the lines on top and on the bottom. After this, start to add in the small details of the eye, like the pupil and shine marks on it. Next, start to shade in the eye and make the lines thicker. Continue to draw in black until the back of the eye is covered black and another portion of the eye is white. Switch back and forth between different pencils to help you color in di...
Need some help figuring out just how long to let your hair process when dying it at home? It's easy! And this clip will show you how it's done. So easy, in fact, that this home beauty video tutorial can presenta complete and thorough overview of the process in about a minute's time. For more information, including detailed, step-by-step instructions, watch this handy hairstyling how-to.
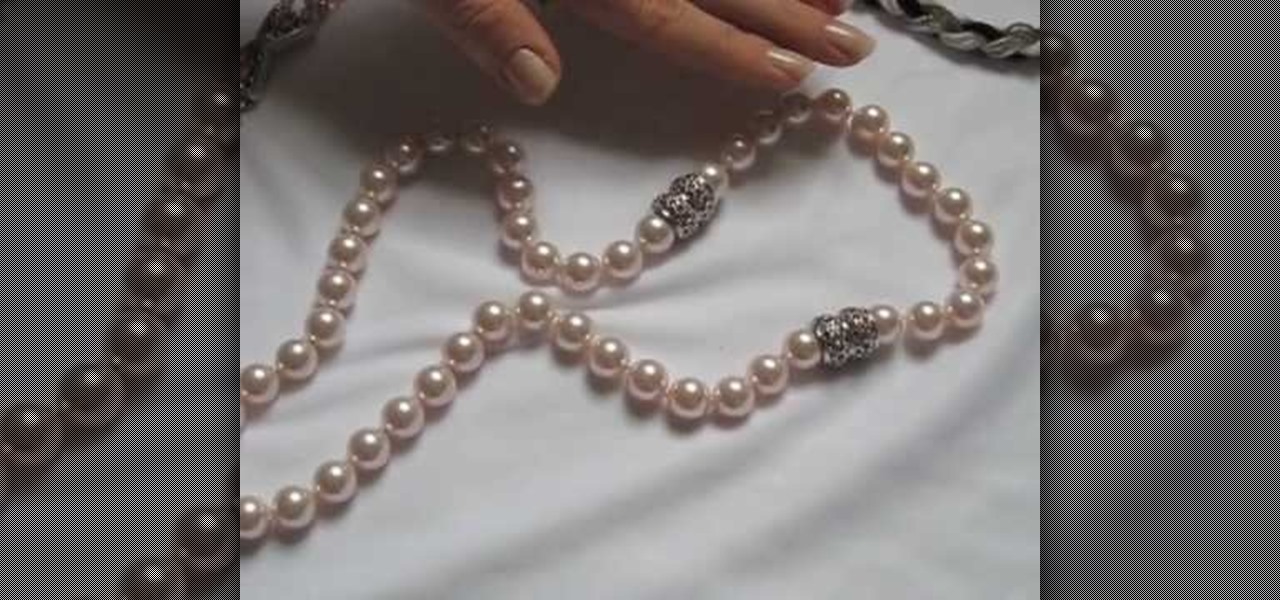
Jewelry clasps don't seem all that important, right? After all, when compared to the shape of your beads and the color scheme of your jewelry piece, a clasp is merely the finisher, something that helps close off your necklace.
Cherry blossoms aren't just special because they're Bath and Body Works' best-selling scent of all time. No, in addition to their delicate floral smell, cherry blossoms are special because they are the first flower buds to open in spring. Spring officially stars when you see the cherry blossom trees bursting into color, and what a wonderful way to celebrate the new season!
In this tutorial, we learn how to draw Timmy Turner. Start off by drawing the head, making the front round and the body will be a triangle shape. The back of his head should be a triangle as well. Draw two large circles on the face, followed by arms and legs coming off of the body. Next, draw ears onto his face followed by a shirt and pants on his legs. Draw Timmy's mouth with a large smile and two teeth at the top. His eyebrows should almost touch in the middle, then don't forget to add on h...
In this video, we learn how to draw Charmander. Start off by drawing the large eyes with lines inside of them. After that, you will connect the head around it, followed by the nose. Next, you will draw in the rest of the body including the feet. Draw in the tail with flames coming out the end of it. Add in lines around the body to make the figure look more realistic, then draw in pupils for the eyes. When you are finished, you can color the character or just leave it how it is and shade in on...
In this tutorial, we learn how to do UVmapping with 3D Studio Max. Open up your image in the software, then go to "unwrap UV". Scroll down to edit and you will be able to see the basic scale. Grab the mass and scale it down, then use your element turn on to select the different pieces. The UV mapping will now turn a different color and show you where you have edited it. Continue to do this throughout the entire program. Make sure you have all other programs closed while you are doing this, an...