Google's Chromecast streaming device is a marvel of functionality and form. Even with powerful features such as screen mirroring and collaborative party playlists, it's the device's idle screen that first catches the eyes of most folks.

Aside from its many high-end features, the camera on the LG G3 is up there with other heavy hitters like the Galaxy S5 and HTC One.
Google announced the ADT-1—their first foray into dedicted gaming using their Android TV platform—at this year's Google I/O, in hopes to once again take over your living room on the heels of the immensely popular Chromecast.

Replacing your wallpaper is one of the easiest and quickest things you can do to keep your device from going stale, but it goes way beyond just picking an image from your gallery. If you use the Google Camera, you can create some really awesome 3D lens blur backgrounds, but what if you want more wallpapers on your wallpaper?
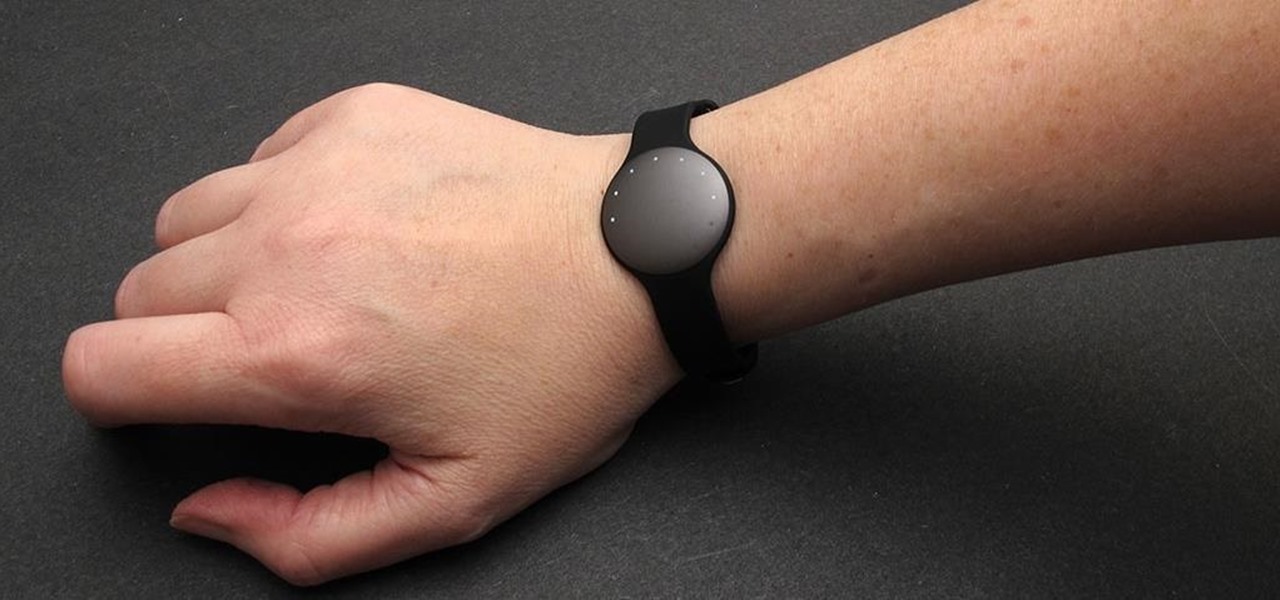
If you're like me, you are a non-stop, sweating, never-give-up workout fiend. Okay, not really, but like a significant amount of people, I would love to live a healthier lifestyle. The Misfit Shine makes fitness a lot easier.
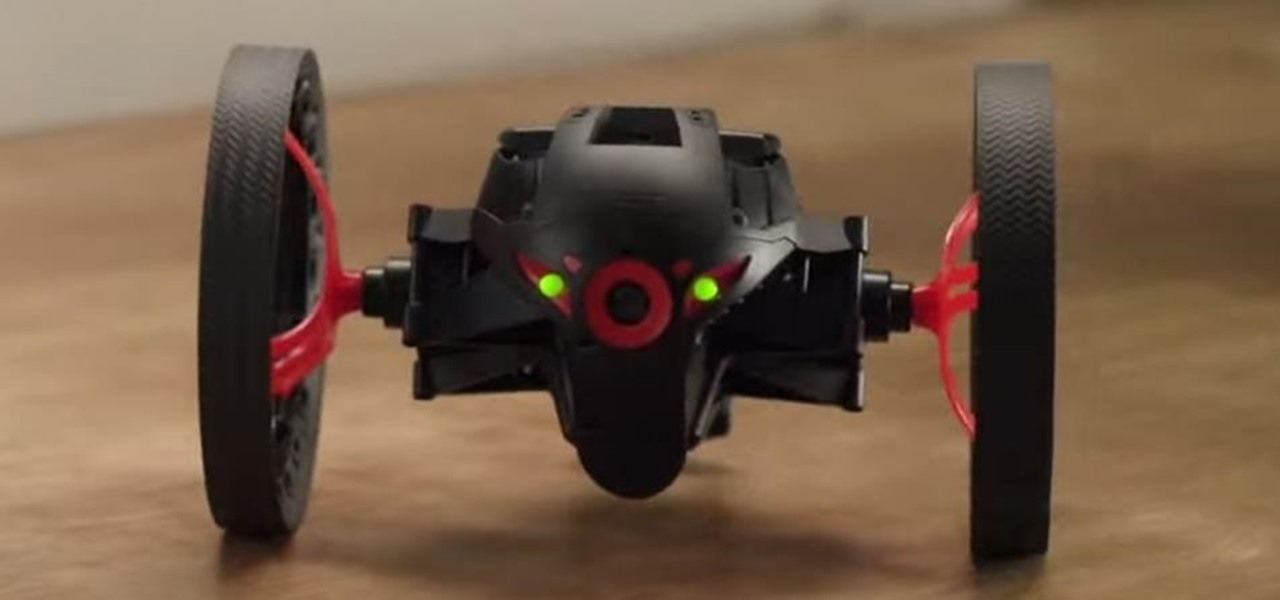
Parrot, a company that specializes in personal drones, has recently come out with new products that'll make those '90s robots look as dated as lava lamps and tie-dye.

Last week, we covered a new, open-source live wallpaper (LWP) called Muzei, and less than a week later we have no less than twenty beautiful add-on extensions to the app.
Snapchat has had more than its fair share of security failures and mishaps. The photo-sharing company is looking to better address some of these security gaps by adding new features, and today its most recent addition is live: the Captcha. New users will be asked to verify their "humanness" by selecting the infamous Snapchat ghost out of a selection of images. The feature is supposed to help block hacker-made bots from creating fake accounts or accessing existing ones. But rather than using t...
Every year, Black Friday gets a little more insane. People get up at ungodly hours, wait in lines forever, and get into some of the most ridiculous fights you've ever seen. All in the name of saving some cash. Everyone loves saving money, but without a game plan, you could end up missing all the good deals and going home with nothing. Luckily, the Internet is here to take some of the stress out of holiday shopping. With these sites and apps, you can find out about all the best deals before yo...
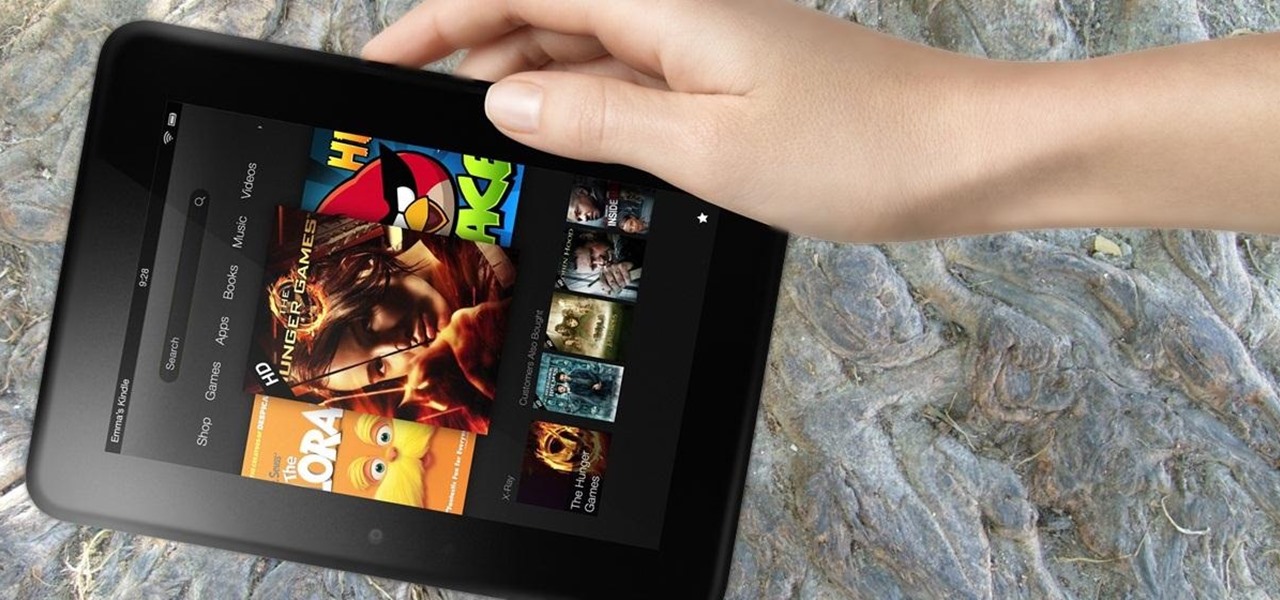
Yesterday, the entire Internet was talking about how the new Kindle Fire HD was supposed to be incredibly difficult to hack. Turns out, the folks over at XDA Developers are smarter than they thought—one day later, the mystery has already been solved. The exploit is the same one found by sparkym3 in Ice Cream Sandwich, but Amazon must have forgotten to patch it. As with any root, you can cause some serious damage, or brick your device completely if it's not done properly, so proceed at your ow...
Apple is notoriously cryptic when it comes to the reveals of its new products, and as usual, they've kept us guessing about the release of the iPhone 5 (or "New iPhone?"). It's expected to be officially revealed on September 12, and rumor has it that sales will begin on the 21st. Though the whole world seems to be anxiously awaiting the announcement, there has also been some controversy surrounding the iPhone 5's production. With the high number of suicides and poor working conditions at Foxc...
Creative Commons is awesome—really. If an image, video, or audio file is tagged with a CC license, that means you can use it as long as you give appropriate credit to the owner. For bloggers with no money for pricey stock media, it's a godsend. When you license your own media under CC, you can choose how you want it to be used by others and whether or not it can be used commercially.
Install & boot Mac OSX on an external hard drive
In this video tutorial, viewers learn how to change the color of lips in Adobe Photoshop. Begin by importing the image into the program. Select the quick mask tool and then select the brush tool. Now color the part that you want to retouch. This will allow the mask to create a selection. No click on the masking tool to create a selection. Then select the marquee tool. Right-click the selection and click on Select Inverse. Right-click the selection again and select Feather. Make it 1 pixel and...
In this how to video, you will learn how create glowing eyes in the darkness using Photoshop. First, open your image in Photoshop. Next, duplicate the background layer. Go to hue and saturation and make the image really dark by turning down the lightness and saturation. Next, select a paintbrush for the eraser and start erasing around the eyes. Once this is done, make a selection around the pupils. Create a new layer and paint the selection red. Next, lower the flow of the paint brush and cho...
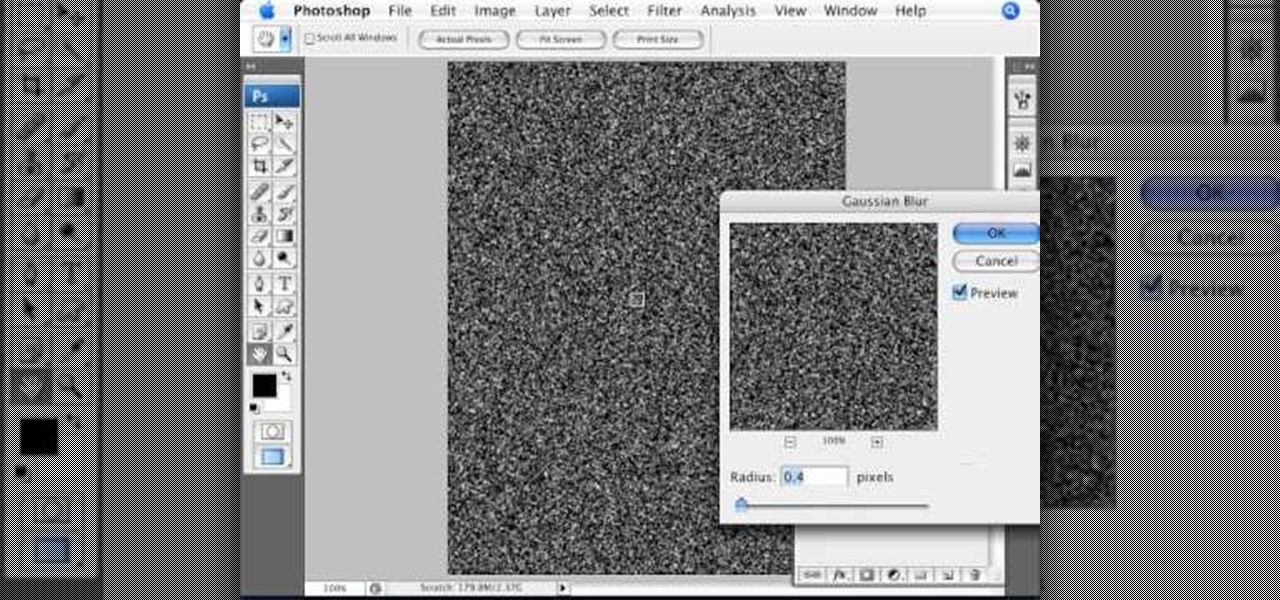
In this how-to video, you will learn how to make grain textures in Photoshop. First, click add layer mask to an open image. Add a filter to this mask and by going to the texturizer option. Adjust the settings to your liking. Click okay to continue. The mask will make the texture transparent. Go to image adjustments and levels to adjust the intensity of the grain. Click okay to save the settings. Select the layer and then choose the color you want the grain to be. Make sure to lock transparent...
In this how to video, you will learn how to create a rainbow effect in your photos with Photoshop. First, open the image you want to edit in Photoshop. Next, edit the hue and saturation. Make sure to desaturate the drawing. Next, create a new layer. Select a brush and choose a blue color. Make sure in the new layer that color is selected. Color the top part of the image. Next, select a purple or pink color and color the middle part. Choose a yellow color and color the bottom of the middle par...
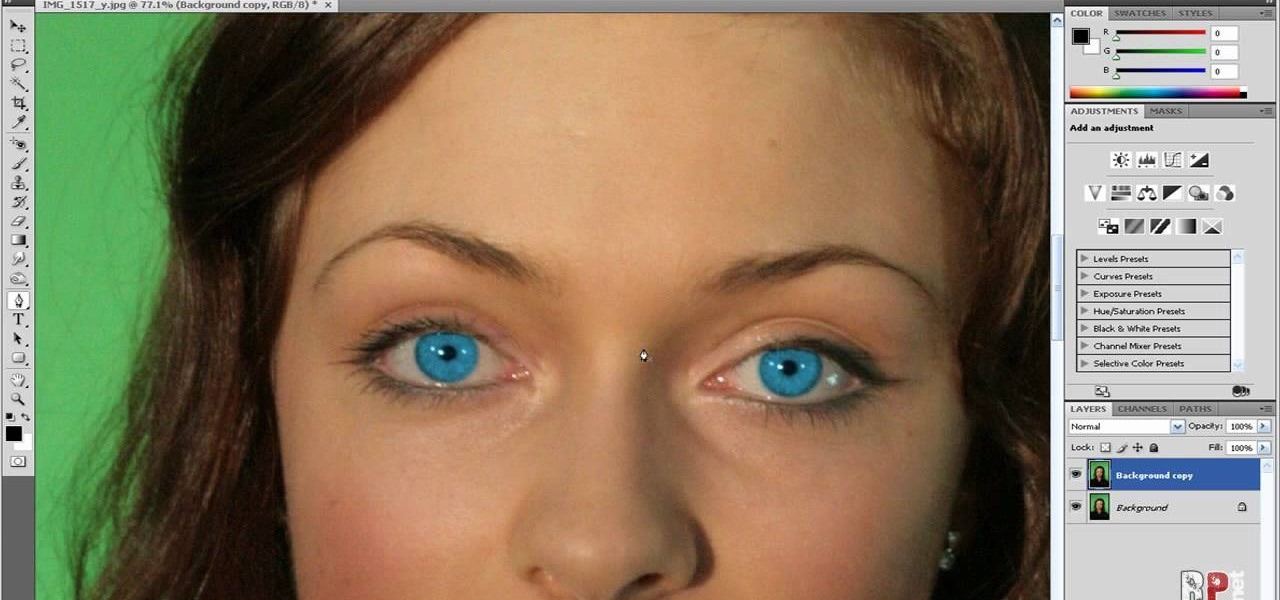
In this how-to video, you will learn how to change eye colors using Adobe Photoshop. First, open the image, Duplicate the background image. Zoom in to one of the eyes and select the pen tool. Set it to paths. Now, go around the iris of the eye. This does not have to be perfect. Click and drag to the other eye and select the other iris as well. Once these are both selected, right click into one of the selections and set the feather radius to about three pixels. Go to Image and Adjustments and ...
This step-by-step tutorial will teach you the correct way make a Light-Saber effect using Paint.net.In this video, you will learn how to gather the Light-Saber image, paste the image into Paint.net, choose the preferred color for the Light-Saber, and other special effects such as: sizing your Light-Saber, 'blurring' your Light-Saber, and learning the correct way to save your project.Your first step is to right click on the Light-Saber image and click 'Copy'. Next, you open Paint.net. Then you...
Video demonstrates how to make rounded corners in GIMP. First step is to open an image. The image needs to have transparency for this to work. An alpha channel is to be added to the image. This can be done by going to the layer option in that select transparency and add alpha channel. By doing this if the picture grays out it means the image already has transparency and there is no need to add an alpha channel. Now Select option is selected and in that rounded rectangle is selected. The radiu...
Cathie Filian and Steve Piacenza demonstrate the way of making medieval candles using tissue paper transfer technique. Steve asks you to first take a piece of tissue paper and a square-shaped chunky stamp. Then you should load the stamp with black pigment. Once the loading is completed, you should cut the tissue paper in square shape and place the shining side on the stamp and give a nice light press with your fingers. Then once you get the stamp image on the tissue, gently take it out and pl...
This tutorial explains how to create a multi colored eye effect. First open the image in Photoshop and unlock the layer. Make a selection of the eye with either the lasso, magnetic lasso or pen tool. If you are using the pen tool, like in the tutorial, right click and choose mark selection, feather radius of three pixels. Now copy and paste the eye. Go to File and select New. Create an image of 1000 by 1000 pixels. Unlock the layer and make sure tea background and foreground colors are black ...
This video by Wowzzydot shows us an easy way to silk screen/stencil a garment. Using either a t-shirt or baby onesie, you can decorate it in the style of our choice. She clearly tells you the supplies you will need, embroidery hoop,sheer fabric, such as a curtain panel, paint and stencil brushes, scissors, Mod Podge or any water solvable glue. Also textile paint or ink and of course, the garment to be decorated. The first step is to cut the sheer fabric about an inch larger around than the ho...
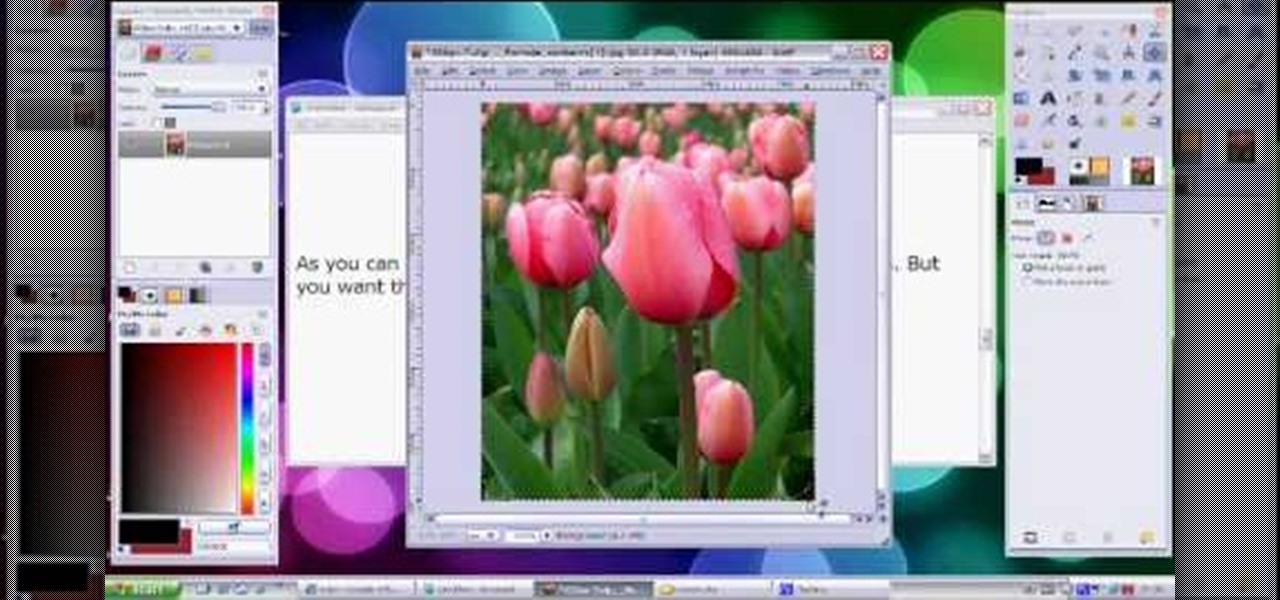
Open an image and on the layers panel add a new layer by clicking on the fifth icon below the layers panel. A new layer is created with the name 'layer 1' and your previous layer would have the name 'background'. These names can be changed by you. For now we'll leave them as they are.
Step 1 Launch the Adobe Flash program and select “Flash File (Actionscript 3.0)” under the “Create New” menu. Change the workspace layout to “Essentials” by clicking on the drop-down menu in the upper left of the top menu bar.
This artsy crafty video tutorial will show you how to make glittered window-style cards. The "glittered window" technique to card-making is basically just adding glitter to shipping tape.
In this clip, learn how to create lightbox galleries for images posted to your WordPress blog. Every version of WordPress brings with it new features, new functions and new ways of doing things. Fortunately, the very same technology that allows an open-source blog publishing application like WordPress to exist in the first place also makes it easy for its users to share information about the abovesaid things through videos like this one. Take a look.
Want to convert a color or black-and-white image to sepia? With Photoshop CS5, it's easy. And this clip will teach you what you need to know. Whether you're new to Adobe's popular raster graphics editing software or a seasoned professional just looking to better acquaint yourself with the program and its various features and filters, you're sure to be well served by this video tutorial. For more information, including detailed, step-by-step instructions, watch this free CS5 video guide.
If you want to have any kind of impact in the discussion of video games online (and that is one big and jaded discussion) it will behoove you to be able to capture images of the games you're playing, be they console or PC. It's easy for the PC, but many people have no idea how to capture screenshots or videos of their console gameplay that they can share later on their computer. This video is here to clear up that confusion, showing you how to install a PCI TV card in your PC that will allow ...
The safety-net trio of Undo, History, and Revert protect the intrepid image editor from unexpected disasters. But they also let you toggle operations, compare before-and-after images, and move back and forth through time. Whether you're new to Adobe's popular raster graphics editing software or a seasoned professional just looking to better acquaint yourself with the program and its various features and filters, you're sure to be well served by this video tutorial. For more information, inclu...
Want to let the world know who made your photo? Then choose File Info. Here you can assign a title, an author, a copyright, and a Web site. No image should go out without a visit to File Info. Whether you're new to Adobe's popular raster graphics editing software or a seasoned professional just looking to better acquaint yourself with the program and its various features and filters, you're sure to be well served by this video tutorial. For more information, including detailed, step-by-step i...
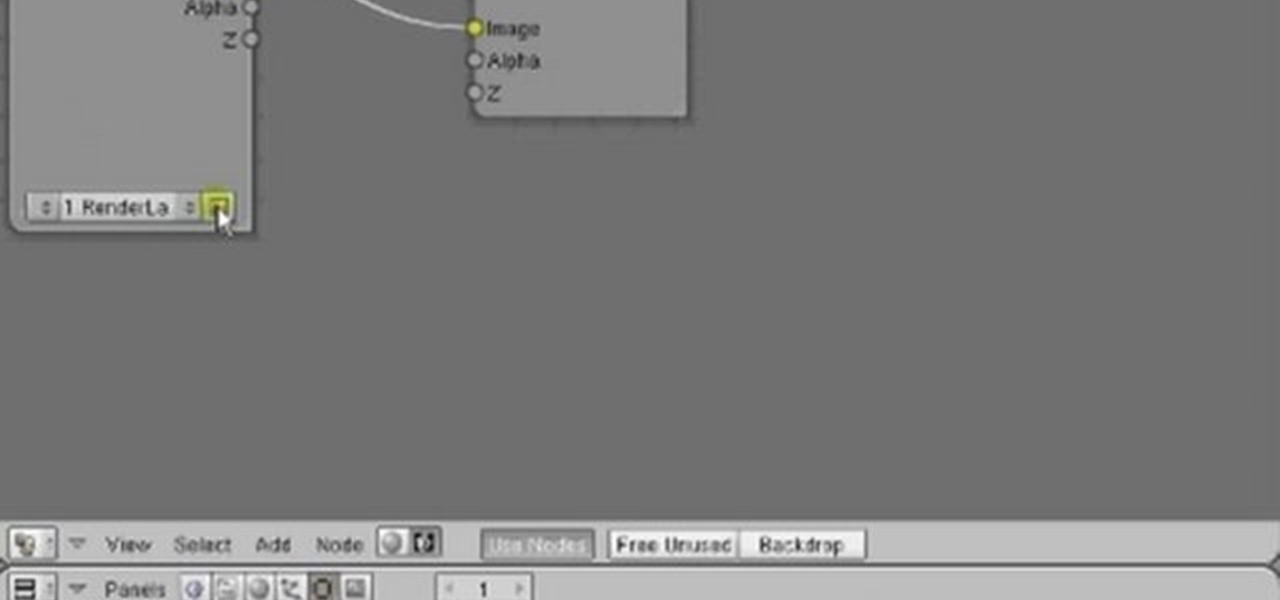
In this clip, you'll see how to create a new Screen Layout (workspace, desktop) to use when Compositing: 8-Nodes. and initialize this new default User setup used in all future tutorials. This clip will also teach how to move the window around, what the starting nodes are and do (RenderLayer, Composite, Viewer) Backdrop, , how threads work in the noodle, rendering the composite and discusses basic window management and splitting, and using the UV/Image Editor to view images/results. Whether yo...
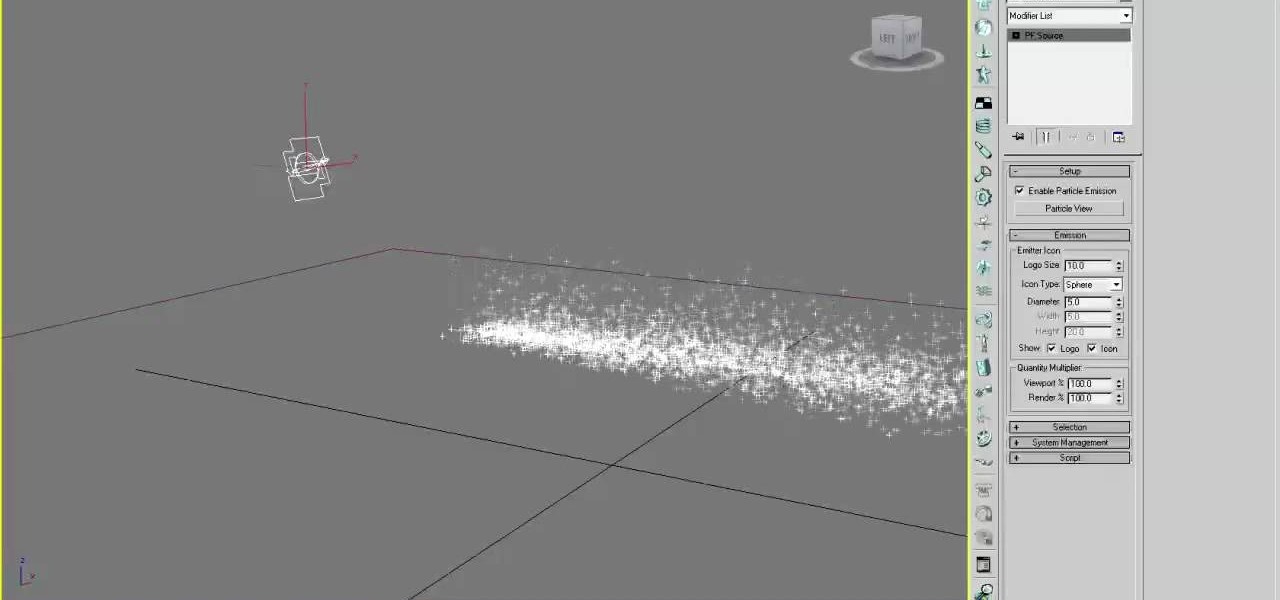
Particles are tiny images in 3D graphics that are essential to creating clouds, fire, and various other effects. This three-part video will teach you how to use particle flow in 3D Studio MAX to create particle images in your 3D graphics. Expand your repertoire of effects by watching this video.
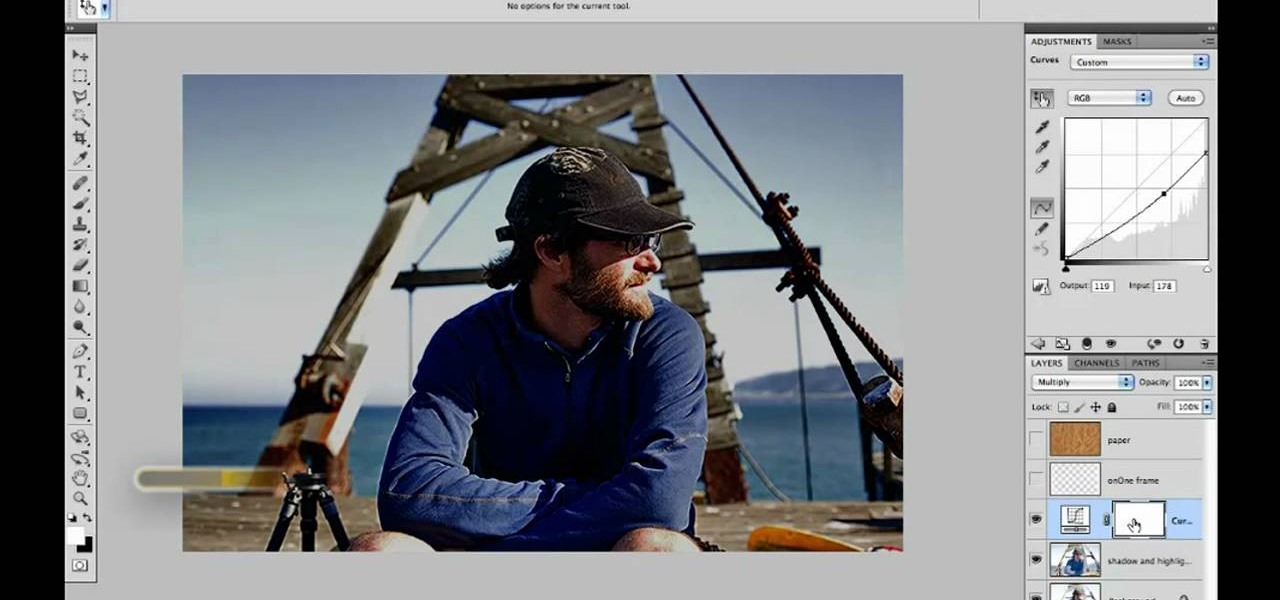
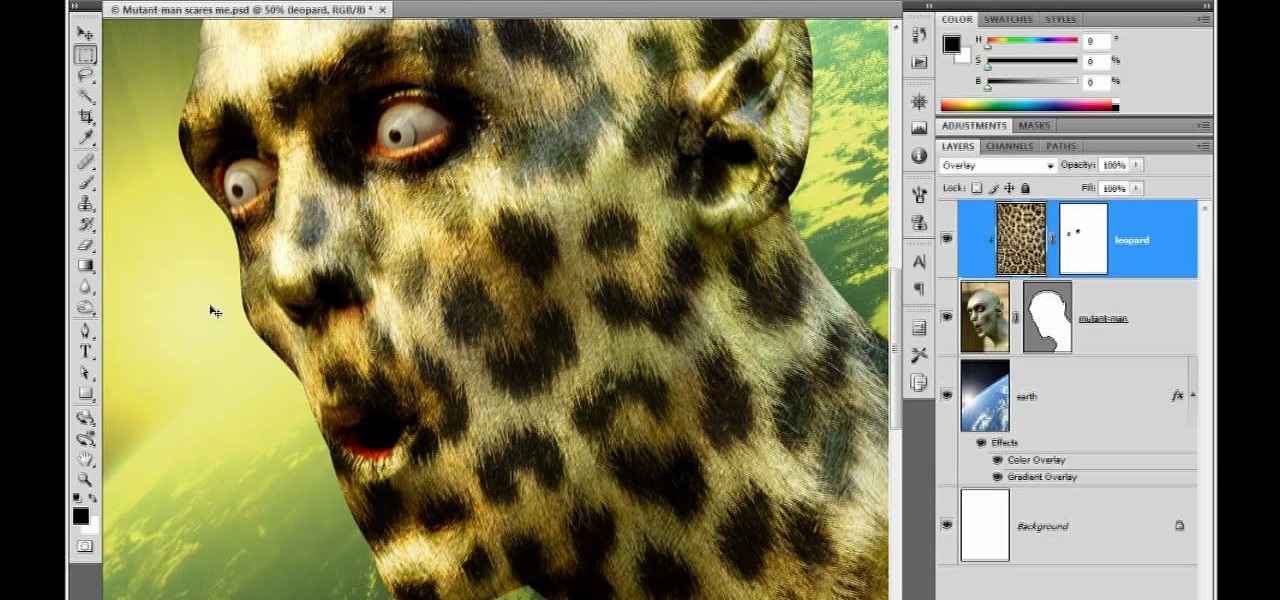
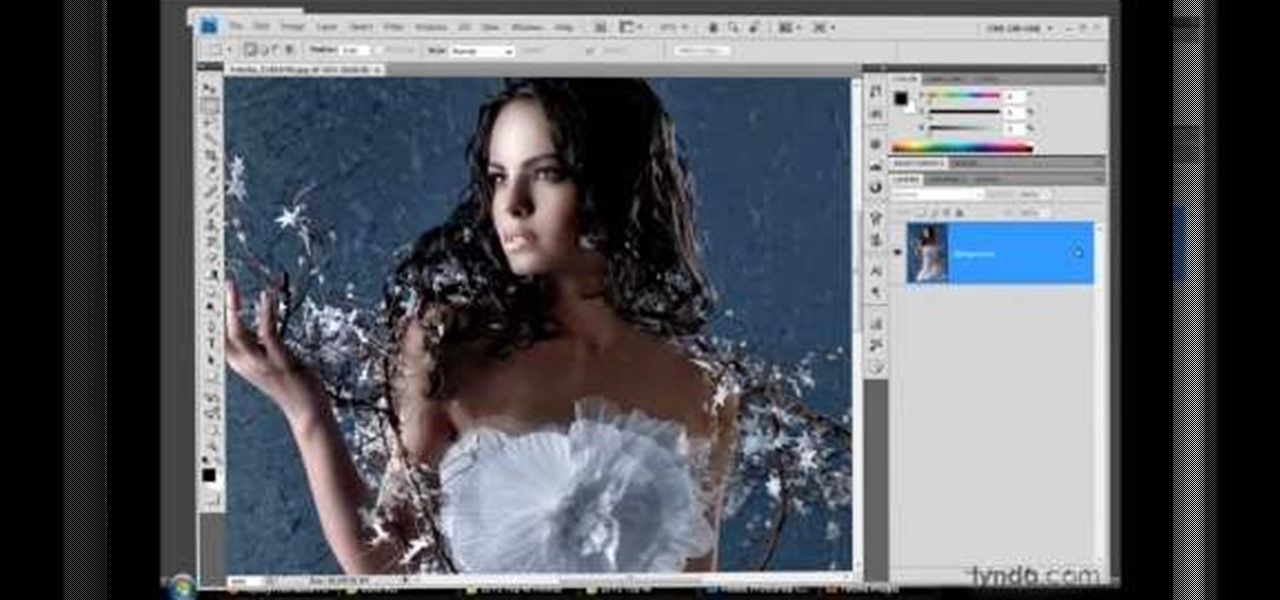
Refining selections and creating masks are unglamorous but utterly essential Photoshop techniques—you've got to master both in order to perform tricky compositing tasks, such as extracting a person from an image and then adding a different background.
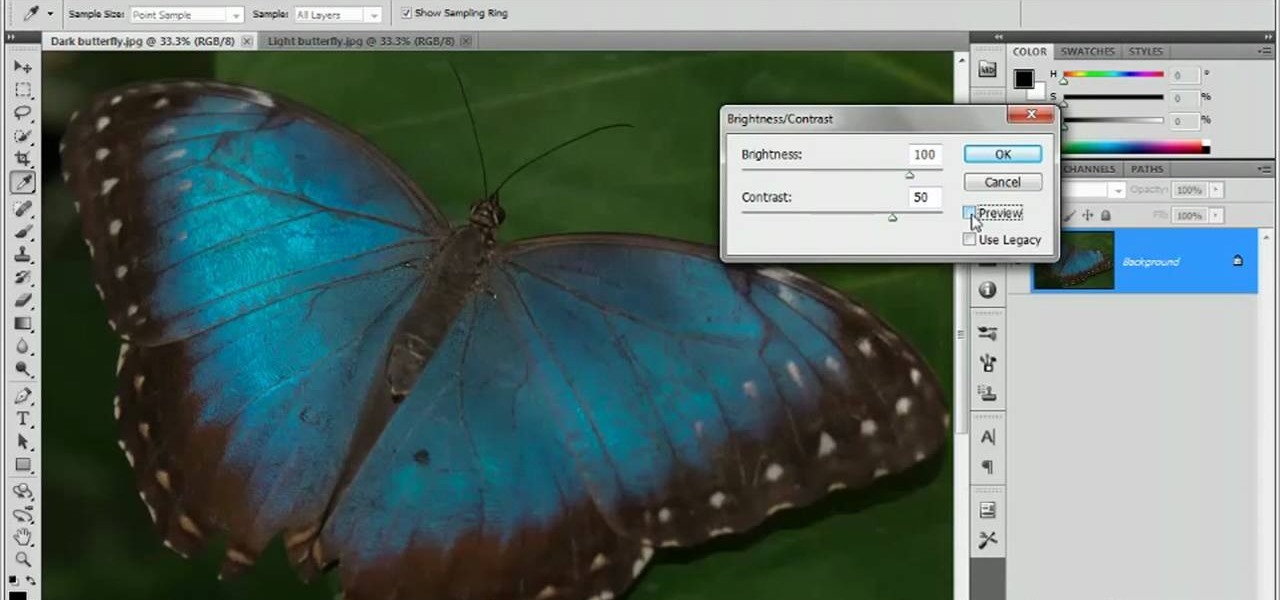
Have a digital image that's a little bit too dark or otherwise lacking in depth? Your fix is just a few mouse clicks away. This free software tutorial will teach you how to use the new Brightness & Contrast tools within Adobe Photoshop CS5. Whether you're new to Adobe's popular image editing software or a seasoned graphic design professional just looking to better acquaint yourself with the unique features of Photoshop CS5, you're sure to find something of value in this free video tutorial.
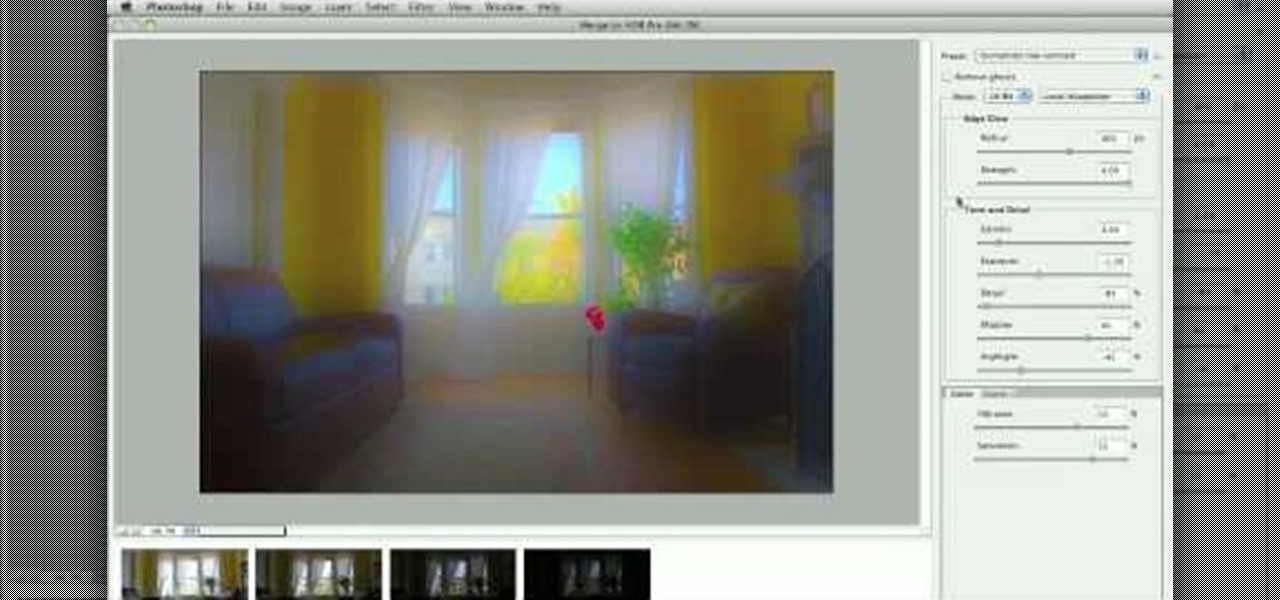
With Adobe Photoshop CS5, it's easier than ever to work with HDR or high dynamic-range images. This video tutorial presents an overview of some of the bigger enhancements. Whether you're new to Adobe's popular image editing software or a seasoned graphic design professional just looking to better acquaint yourself with the unique features of Photoshop CS5, you're sure to find something of value in this free video tutorial. For more information, and to get started taking advantage of Photoshop...
Don't know how to add some line frames in Photoshop? Well, this video teaches the viewers how to exactly add line frames, or borders for their images using Photoshop. First of all, change the background layer into a normal layer. Next, go to image size and add in some more pixels in order to allow room for the border. Next, add another layer and set it to transparent. Now select where you want your border to be, then go to strokes, and select a color. At this point, the viewer should have a b...
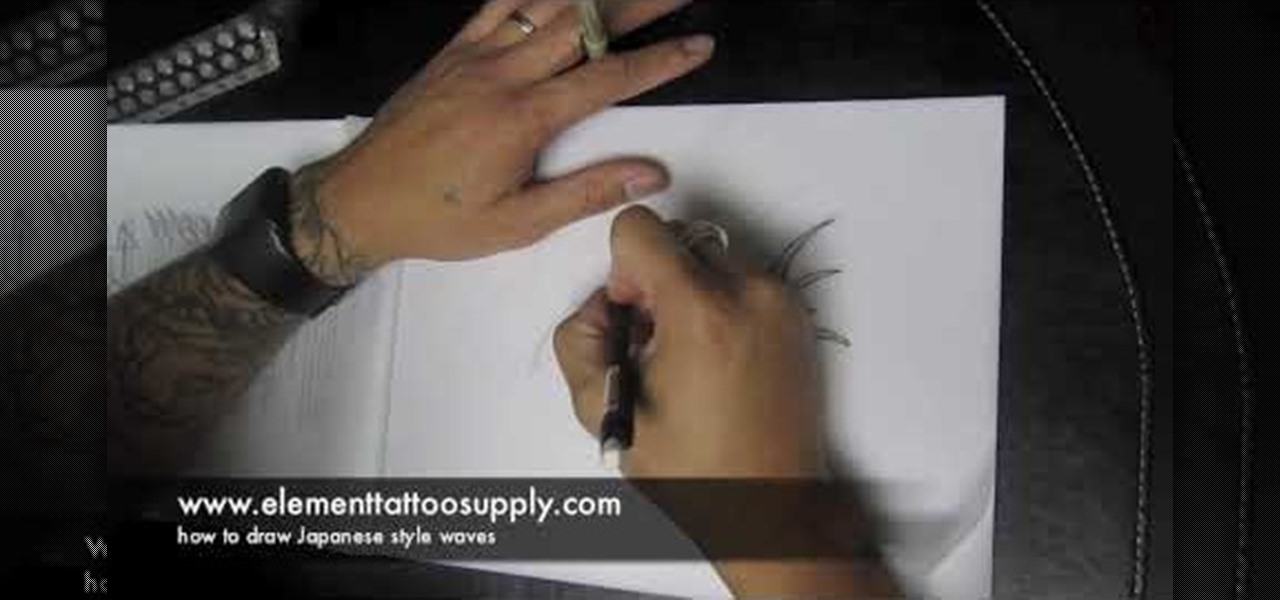
In this video tutorial, viewers learn how to draw Japanese waves for a tattoo. In this video, viewers observe different ideas and elements for wave designs. Viewers learn different techniques. To draw a design for a tattoo, viewers should sketch out their image and experiment different designs. The materials used in the video include: tracing paper, pencil and a Micron 08 pen. This video will benefit those viewers who enjoy sketching images, art and would like to learn how to design tattoos.
Dawn5377, teaches you how to use the clear mount stamps. These come in sizes from A to I. They are high cut so you don't get ink on your fingers when using them. The stamps come in a DVD case for easy storage, which also comes with instructions on usage. Remove the sticky part of the image, place it on the back of the rubber stamp. Place image face down on the clear block of equal size. Ink the rubber stamp and just stamp on a piece of paper. You clean the rubber stamp with spray mist and scr...
This video shows you how to simulate hand coloring in Photoshop. The first step in the process of simulating hand coloring is to turn the image you have chosen into black and white. Following turning the pictures coloring to black and white you must bring up the hue color control panel. The final task includes selecting the object to color within your image as well as picking the color in hue that you wish to use. The coloring must be done manually by the users control of the mouse.