There are a lot of videos out there about creating models and animating them using 3D Studio MAX. What isn't often discussed is the next step in creating a movie out of your models, adding sound and syncing your animations to the sound. This eight-part video series will show you how to do just that, animate objects and other properties with a sound file. This is very good stuff that you will need to know if you ever want to make a whole 3D movie yourself.

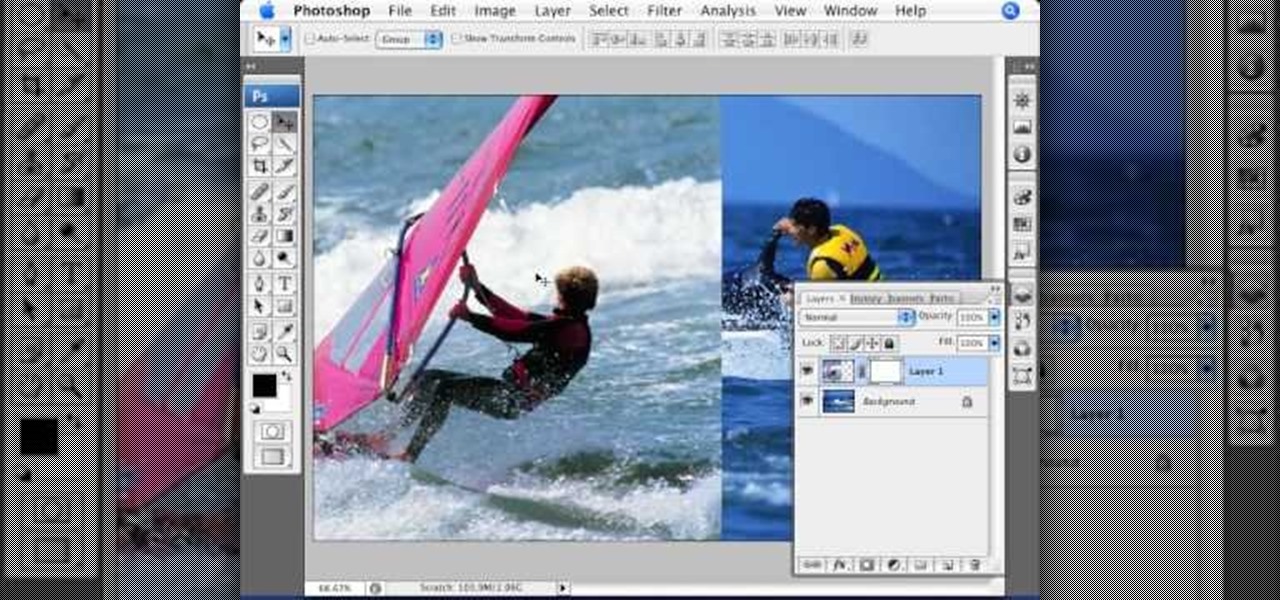
Ever wanted to combine two or more images? With Adobe Photoshop, it's a simple process. Whether you're new to Adobe's popular image editing software or simply looking to pick up a few new tips and tricks, you're sure to benefit from this free video tutorial from Tutvid. For more information, and to get started creating composites in Photoshop yourself, watch this graphic designer's guide.
Learn to use Photoshop's new timeline animation system to create a wipe-style image transition! Whether you're new to Adobe's popular image editing software or simply looking to pick up a few new tips and tricks, you're sure to benefit from this free video tutorial from Tutvid. For more information, and to get started creating wipe transitions yourself, watch this graphic designer's guide.
Touch up your digital photographs for studio-quality images. Whether you're new to Adobe's popular image editing software or simply looking to pick up a few new tips and tricks, you're sure to benefit from this free video tutorial from Tutvid. For more information, and to get started creating pixel-perfect images yourself, watch this graphic designer's guide.
Want to work with RAW image files in Adobe Photoshop? With the Adobe Camera Raw plug-in, it's easy. Whether you're new to Adobe's popular image editing software or simply looking to pick up a few new tips and tricks, you're sure to benefit from this free video tutorial from Tutvid. For more information, and to get started using and editing RAW image files in Photoshop yourself, watch this graphic designer's guide.
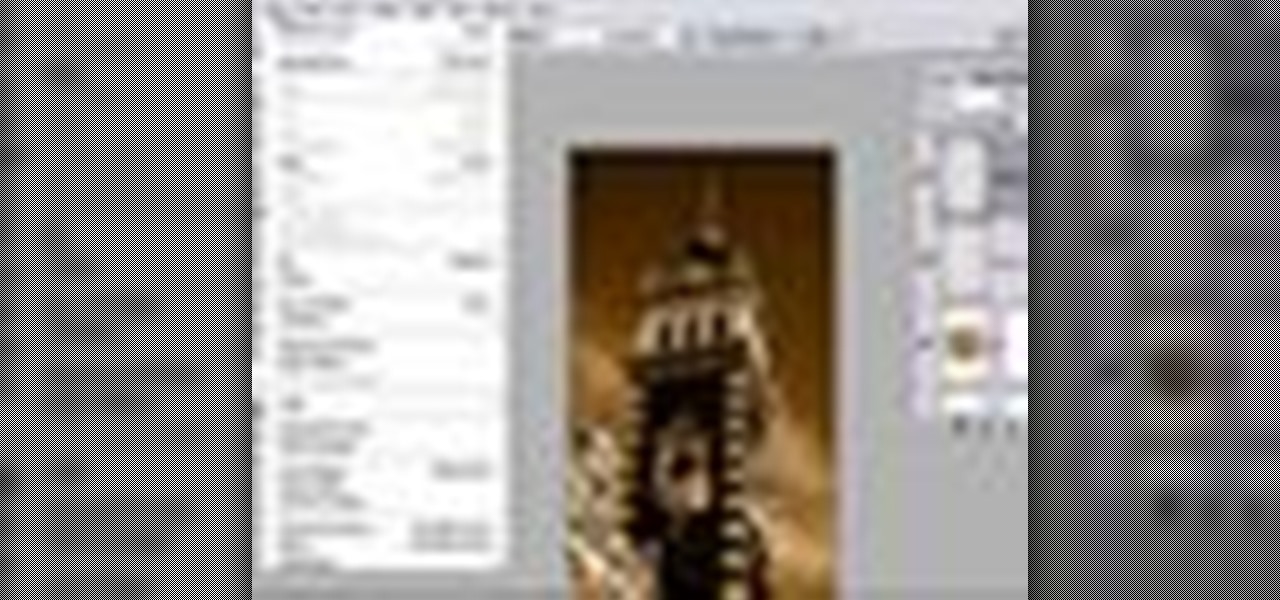
Learn how to create a sepia effect for your images in Photoshop using both adjustment layers and using a duotone image. You will also learn how to add some dirt specks and a dark vignetting around the edges.

PixelPerfect teaches you everything you need to know about being a digital artist. Learn tips and tricks to turn your regular vacation photos into works of art worthy of museums.
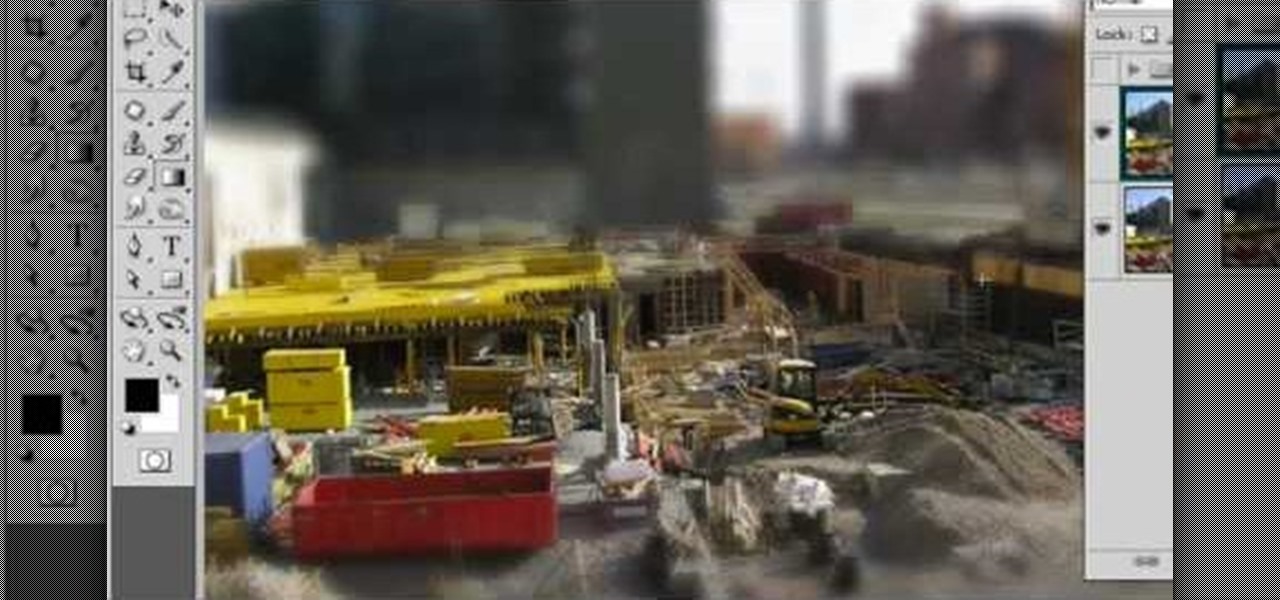
Easily turn your pics into table top style miniatures with this easy to create effect. This takes panarama photographs from afar and fades certain areas creating a toy scene effect. It's magical. Turn cities into model like images that resemble fantasy more than real life. To do this in Photoshop you're going to use the blur tool, layer masks, copies and gradient tools.
In this web development software tutorial Paul Wyatt shows you how to use repeat images for Dreamweaver backgrounds. You’ll learn how to use AP (absolutely positioned) Divs in Dreamweaver, and create tiled backgrounds with ease. If you don't know how to use repeat images for Dreamweaver backgrounds, this tutorial will explain it all.
Learn how to create a 3D anaglyph image (the kind of 3D image you see with 3D glasses) using Adobe Photoshop and a digital camera.
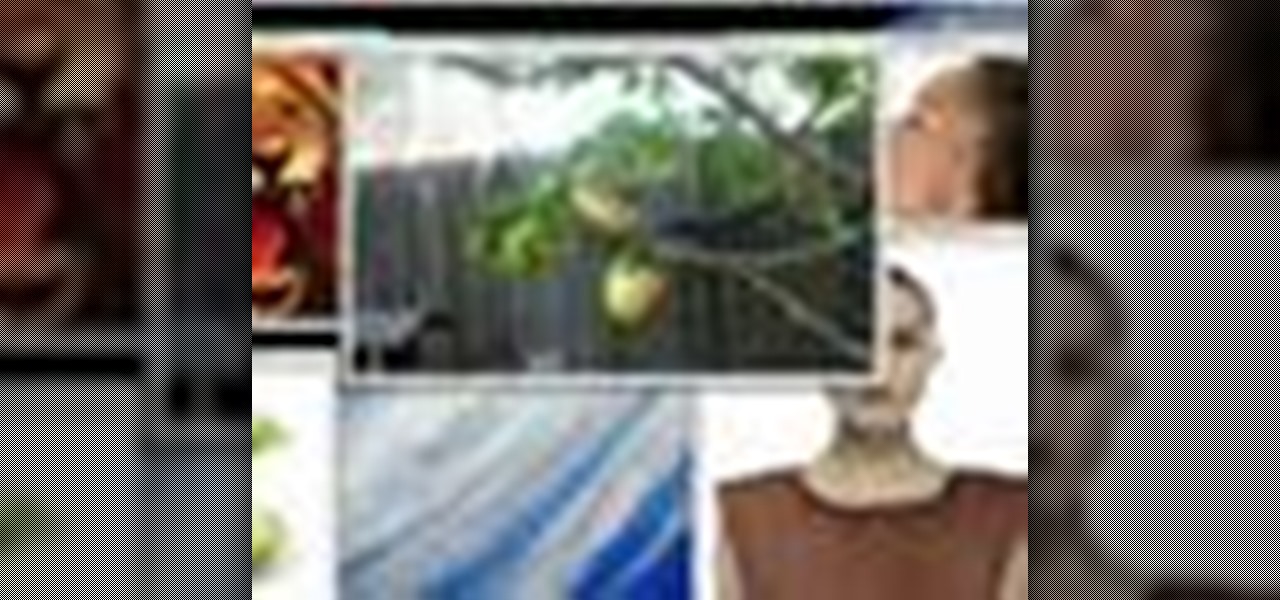
This tutorial takes four separate photographs and then uses several Adobe Photoshop techniques to blend them into a single background image. Using the layering and color overlay technique, this video demonstrates how you can get this unique and clever photo effect.
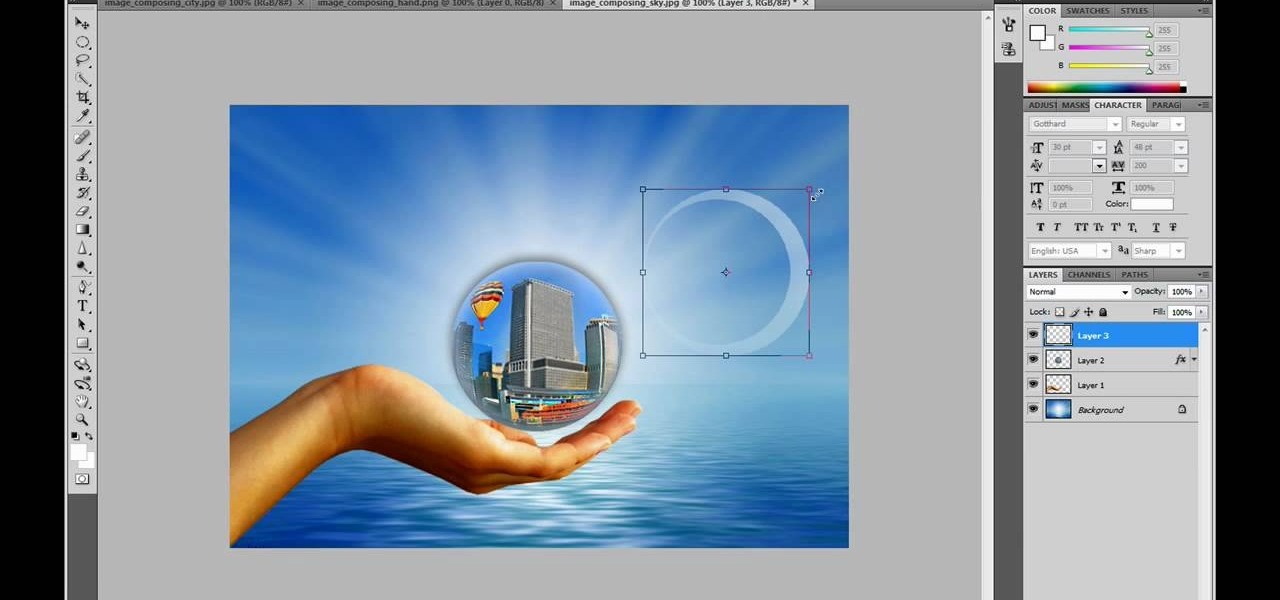
This video in the Software category will show you how to create a real cool manipulated globe in Photoshop. You will combine a few images and distort one of them to create a 3D image of a globe. There are 3 components; the background, a hand and an image globe. First open the background image. Then open the hand image, copy and paste it over the background, resize and position it correctly. Now open the third image, choose the elliptical marquee key, draw a circle and copy and paste it over t...
Open your first image and go to the rectangular marquee tool and select all of the image. Next click command or control C to copy image. Then go to your second image and click command or control V to paste the image. Select both the layers (hold down shift when clicking the layer), then go to edit, auto align layers and choose the top option then click ok. Last add a mask to your top layer, this is done by selecting the gradient tool (make sure its set black to white, the mode is normal and o...
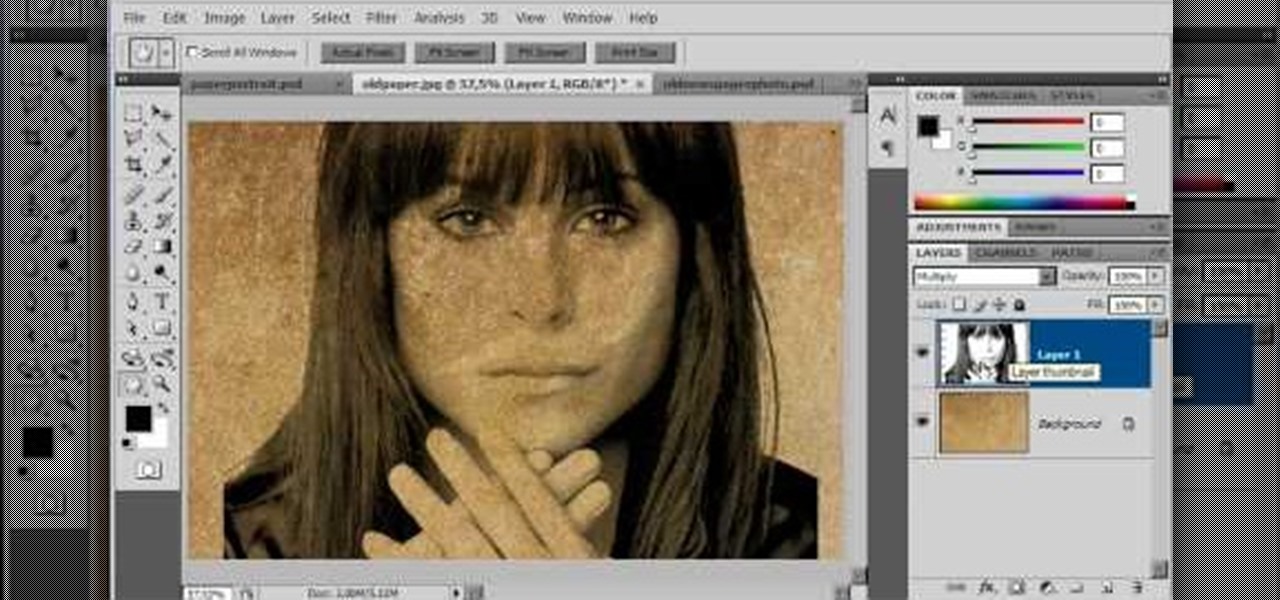
The video is about how an old stalled photographic image with faded backgrounds to a normal image. A nice clean digital image is taken and is mixed with a texture of a paper and produces a final composite image of all effects combined. The procedure is not that difficult but it needs to be followed in a proper order. First the paper texture is taken as a base and then the clean digital image is dragged onto this texture. The blending mode is adjusted from normal to multiplied blending mode, w...
In this video the tutor shows how to make an ISO image file on a Mac. He shows what the requirements are to get started. He points to the disk utility program from where he points to the option where we can open a disk image from a folder. Now he selects the folder to which he wants to save the image. Now he guides us through the rest of the settings on how to prepare the image. Now we end up with an image file which is in the .cdr format. Now he shows some commands on the terminal through wh...
Polar panorama has images radiating out from the center of the picture. Starting with a regular panoramic image, this tutorial shows you how to use the free GIMP image editing software to create this 'polar panorama' effect for your next project.
In this tip video, you'll see how to set the aspect ratio of a plane object to match that of the image mapped to it. This is important to prevent distortion in the mapped image. This knowledge will be helpful when using image planes for cutout trees and people, instanced image planes for particle effects, and any situation where you need non-distorted images on plane objects. Whether you're new to the Blender Foundation's popular open-source 3D computer graphics application or are a seasoned ...
Having large images on a website is a great way to slow down your site and make it much less appealing to your users. This video teaches you how to use Flash CS4 to load images dynamically, which dramatically decreases the size of your images and will make your site run much more smoothly, especially if you have a lot of images or videos.
This video tutorial by photoshopuniverse teaches you how to blend two images seamlessly using Photoshop. For this you need two or more images that need to be blended together. Using the move tool in Photoshop move one image over to the other image. Open the layers window and make a layer mask as shown and select the gradient tool making sure the colors are white on black and connect the two images as shown. Using the brush and the opacity at 50% reveal the parts of the image that need to be c...
This video teaches about adding any of your photos to a billboard. Now copy into the computer memory back into the original billboard image to create another layer this is the layer place in our image. We can do this correctly, respective into this filter which is called vanishing point. Clicking at the four edges make this little bit bigger in image area. Now we can paste in that image control and change the promotional image. It fits sign of the billboard area and resize after the slight li...
This Photoshop tutorial video teaches you how to make any photo look like it was hand drawn. The image selected should have a relatively simple background, because a too detailed image will not turn out properly. Use the high pass tool and the sketch paper tool and you pretty much have your hand drawn image. Follow this video for extra tips on how to get your image to look like hand drawn perfection.
Instead of using Photoshop, why not give Apple's Aperture a try? Aperture is designed more for post-production work for professional photographers, letting you cull through shoots, enhance images, manage massive libraries, and deliver stunning photos.
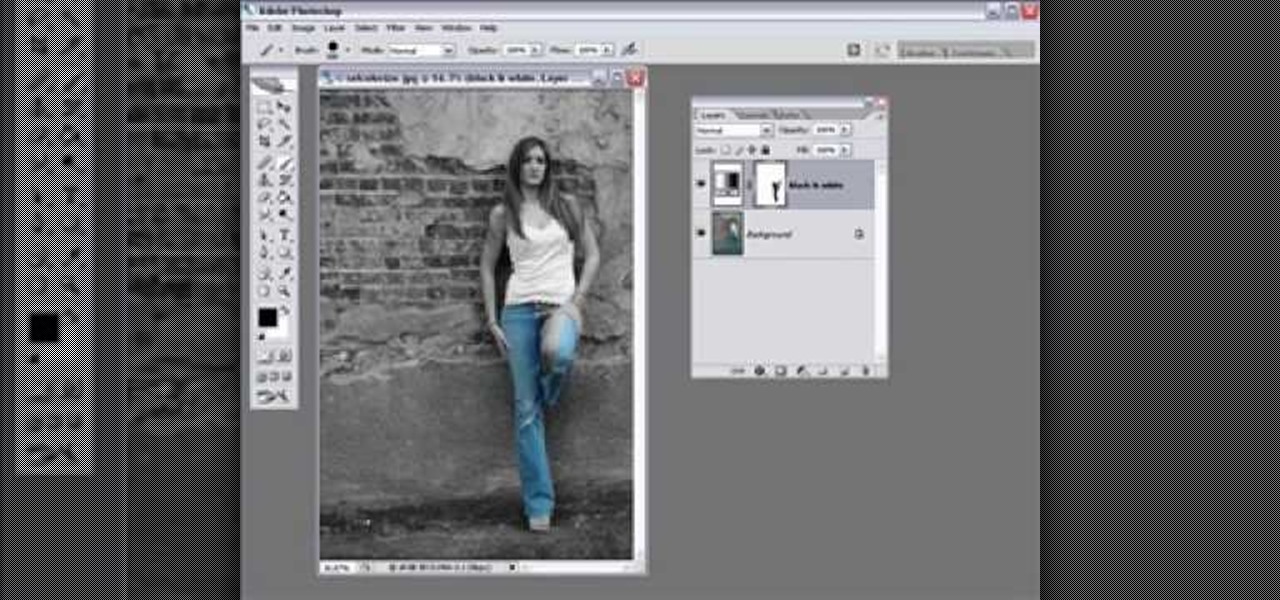
Learn one very simple way, using the mask of the Black & White Gradient Map Adjustment layer in Photoshop to conceal or reveal parts of the image in color and other parts as a black and white version.
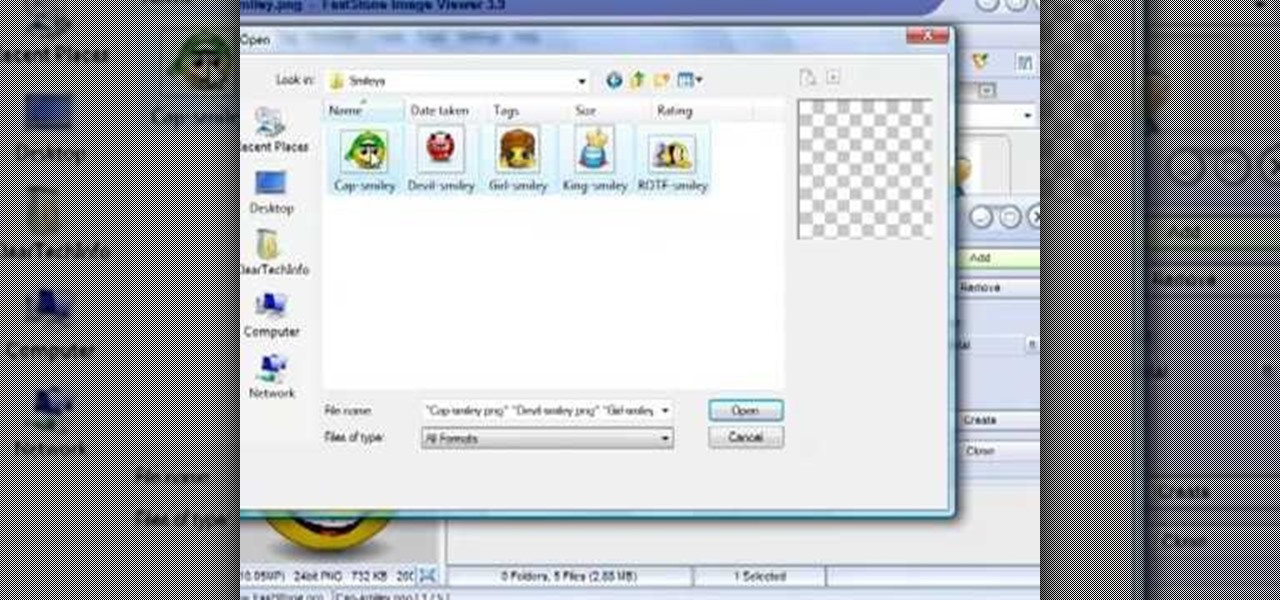
In this tutorial, we learn how to make an image strip using FastStone Image Viewer. First, open up the images that you want to have inside the strip. Then, open up Fastone Image viewer and find the location of the images. From here, go to "create", then "image strip builder". This will bring up the builder window where you can add in the images you want to see on the strip. When finished, click on the "create" button. Now, the strip will come up on your computer in a new image and you will be...
Here's a complete tutorial on all the controls, tools, functions and processes at your disposal when you edit photos or images in Adobe Photoshop. Starting with the basic toolbox, this tutorial series takes you on a tour of the program and demonstrates all the nifty things you can do to get started editing your own images!
This video tutorial is in the Software category which will show you how to "Photoshop' someone into an image. It is like cutting and pasting one image over another. First open both the images. Ctrl and click the person's image that you want to move over. Drag the cut out image over the other picture where you want to superimpose it. Then click "edit', resize, rotate and position the image where you desire. Then go to "Image Adjustments' and adjust the brightness and contrast to match with the...
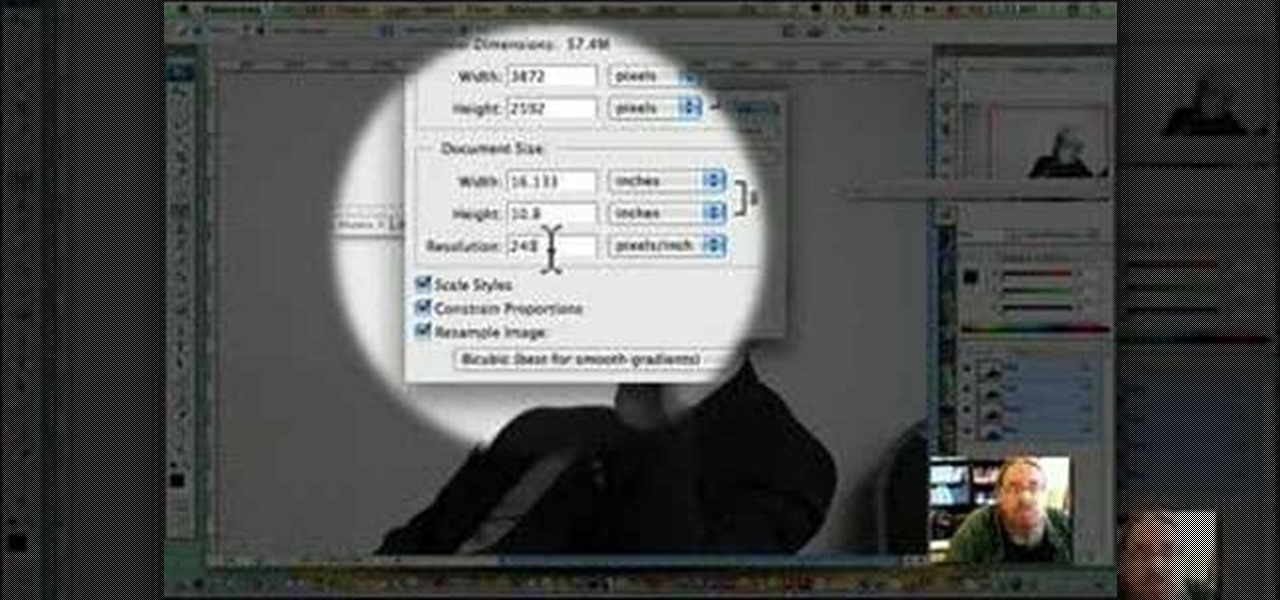
In this how to video, you will learn how to re-size an image for printing using Photoshop. First, open the image you want to re-size in the program. Next, go to image and select image size. From here, you will see the current size of the image. You can change the units of the sizing. The resolution is the number of dots printed per inch. De-select re-sample to change the resolution of the image only when printing. 300 is the standard resolution. When you re-size the image, make sure constrain...
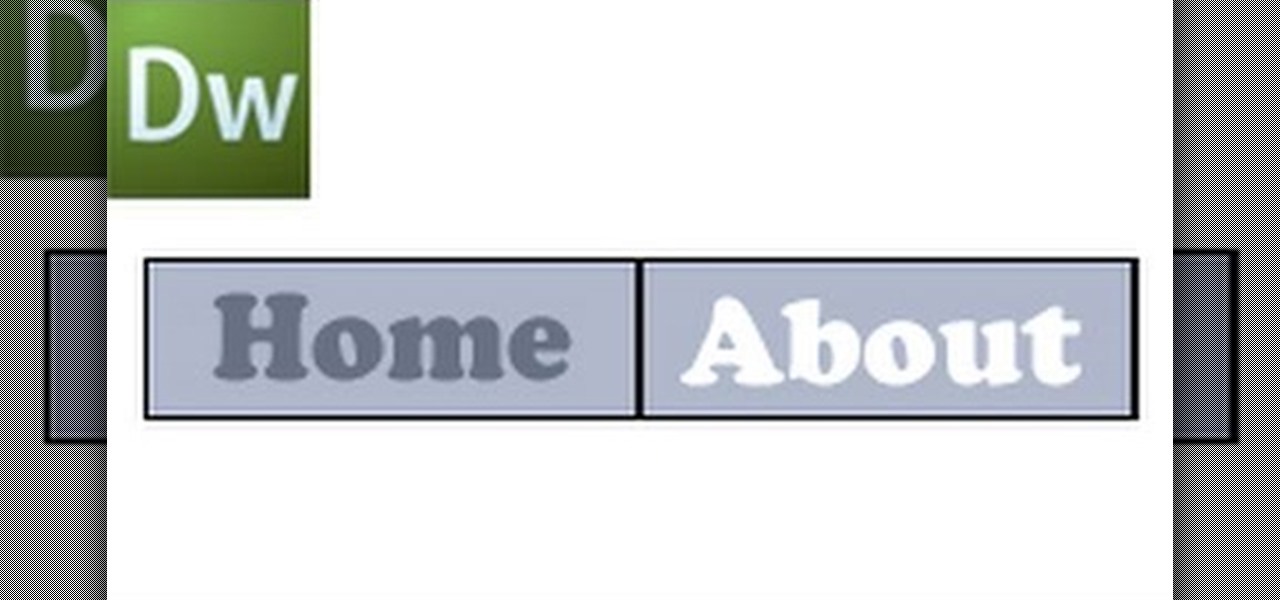
This video shows how to create a menu with rollover images in Dreamweaver. Open a new document and create a table with one row and one column. To add your rollover images, go to the "Image" tab and select “Rollover Image”. In the “Insert Rollover Image” box, give the image a name, then click “Browse” under “Original Image” to find your images. You can select your rollover images in the same window. Then enter your alternate text and click OK.
In this video tutorial, viewers learn how to apply a digital tattoo using Adobe Photoshop. Begin by adding the image and tattoo image into the program. Then drag the tattoo image over the image. Now in the layer menu, change Normal to Modify. Now re-size the tattoo image to a preferred size (PC: Control and T, Mac: Command and T). Now right-click the tattoo image and select warp. Form the image so that it is perpendicular to the skin and decrease the Opacity. This video will benefit those vie...
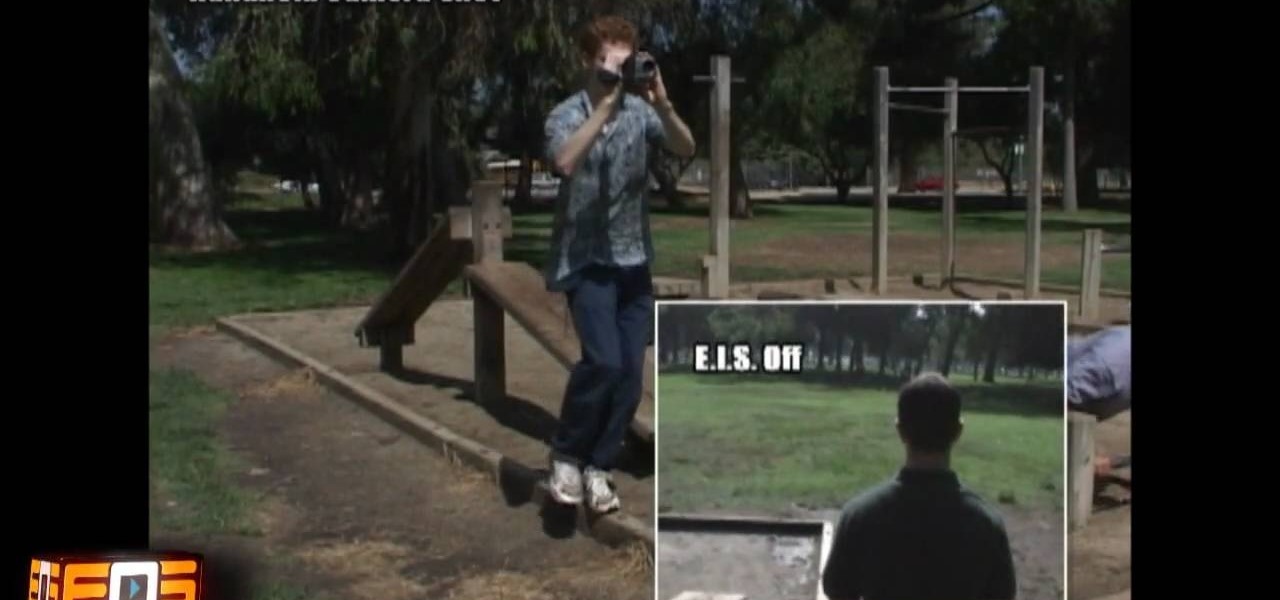
This is a video that is showing its audience how to use the electronic image stabilization or digital image stabilization on their digital cameras. Image stabilization is a good function to have on when movement is involved while taking a photo. The video goes over terms such as image stabilization, shutter speed, and contrast. It adequately defines image stabilization and digital stabilization and goes over the problems that consumers might have with the image stabilization mode on their cam...
This video in the Software category will show you how to create simple panoramic images in Photoshop. This video uses only five images for this effect. Select the five images and put them in a folder. Go to File -> Automate -> Photomerge. On the Photomerge page select ‘Folder’ and browse. Find and ‘choose’ the folder you created. Under the layout panel on left hand side of the page, select ‘cylindrical ‘option and click OK. Now the panoramic image will appear that will have some blank areas. ...
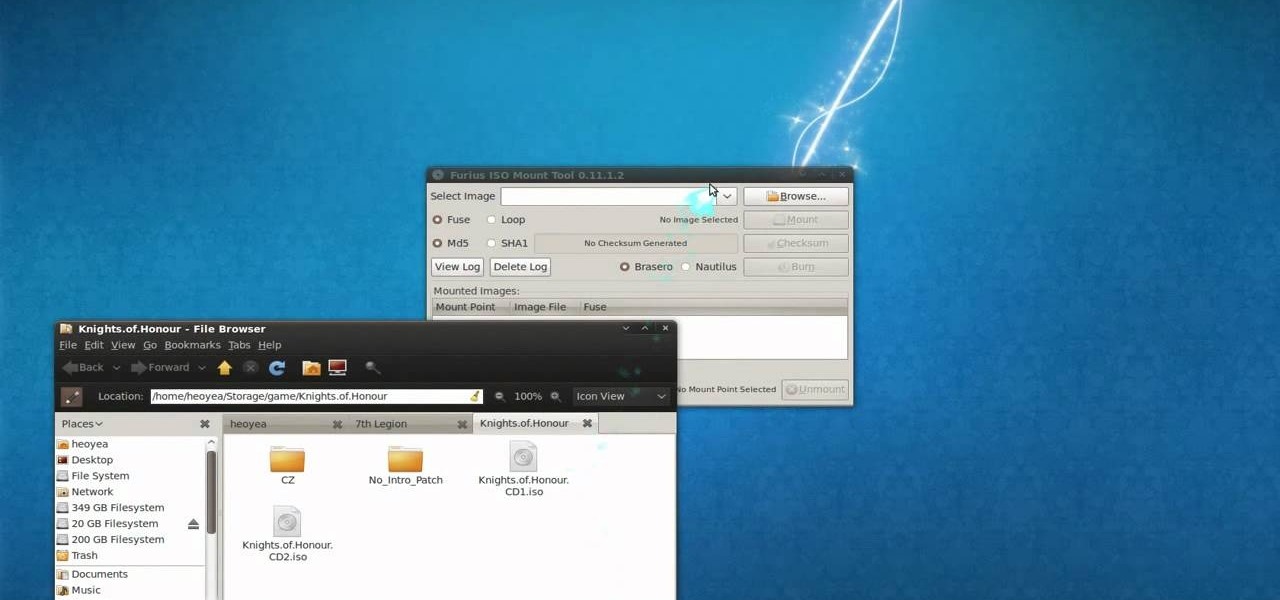
This is a tutorial video on how to use a virtual CD/DVD drive software tool called Furius ISO Mount. Furius ISO Mount is an .ISO, .IMG, .BIN, .MDF, and .NRG image management utility, that allows you to automatically mount and unmount disk image files. This utility application will allow you to mount multiple images at once, burn image files to optical disk, and create MD5 and SHA1 checksums to verify the that the image files are not corrupted. This program also automatically creates mount poi...
In this video the instructor shows you how to mount ISO images. You can use your ISO images of CD or DVD with out burning them on to real disks. Using this you can play a DVD with out a DVD player. Use DVD shrink to extract the copy of ISO image from your DVD. Go to internet and install Daemon tools lite program. After installing you will see an icon in the tray which says daemon tools. Right click on it and select the Virtual Devices option for the menu. Inside it select the virtual drive yo...
This video will show you how to resize an image using Photoshop. Select the image you would like to resize and follow these steps: See what size your image is by clicking on "image" and "image size". Play around with your resolution, and see what happens. Uncheck the "Resample" option and not how your pixel dimensions stay the same. Select the size you want your image to print, and check the "Resample" option. If you click on "print size" you will be able to see the actual print size on your ...
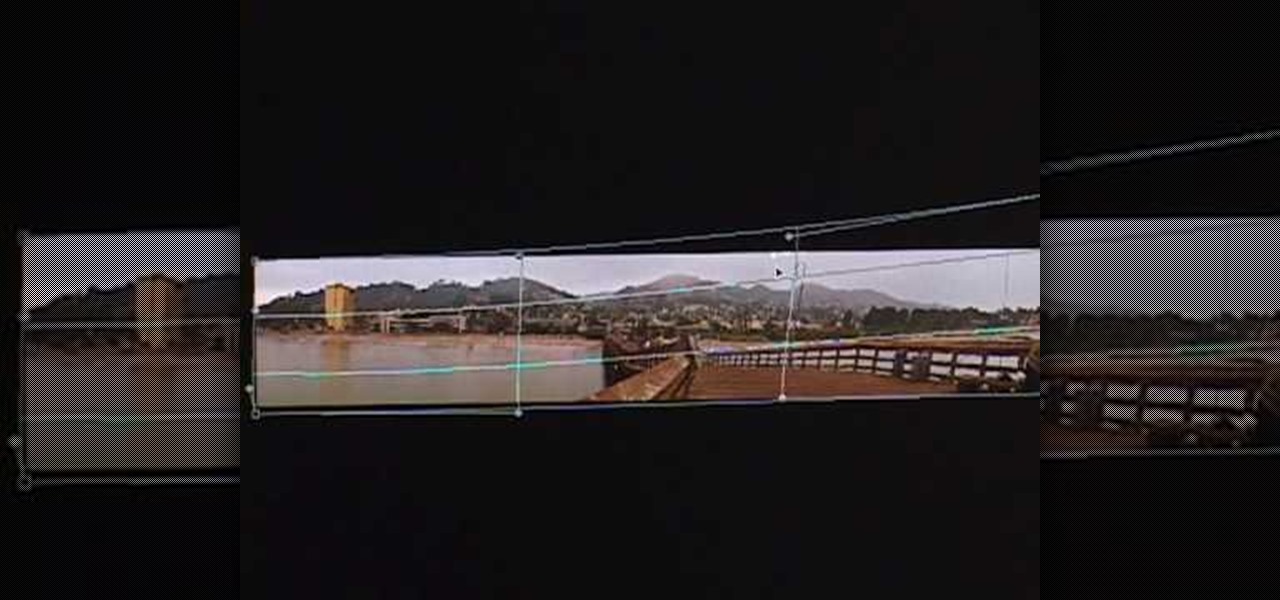
This video demonstrates using Xara Xtreme to align and stitch two images. This is useful for putting together panoramic images. The presenter instructs us to look for similar points in the two photos. Once the points are found see how the images line up. In this case one of the images needs to be rotated. To find the correct rotation the presenter will make one of the images 50% transparent. With the image somewhat transparent he can rotate and position until the images match up perfectly.
This tutorial shows you how to use FastStone Image viewer 3.5 for Windows to edit RAW photos. Learn how to use the free software FastStone Image Viewer 3.5 to view, handle and sort RAW images, and convert RAW images. FastStone Image Viewer 3.5 is a great free alternative to Adobe's Camera RAW.
Photoshop is a great computer software program designed to help people manipulate images and text. Learn a few easy steps about Photoshop image manipulation from a Photoshop expert in this free video series.
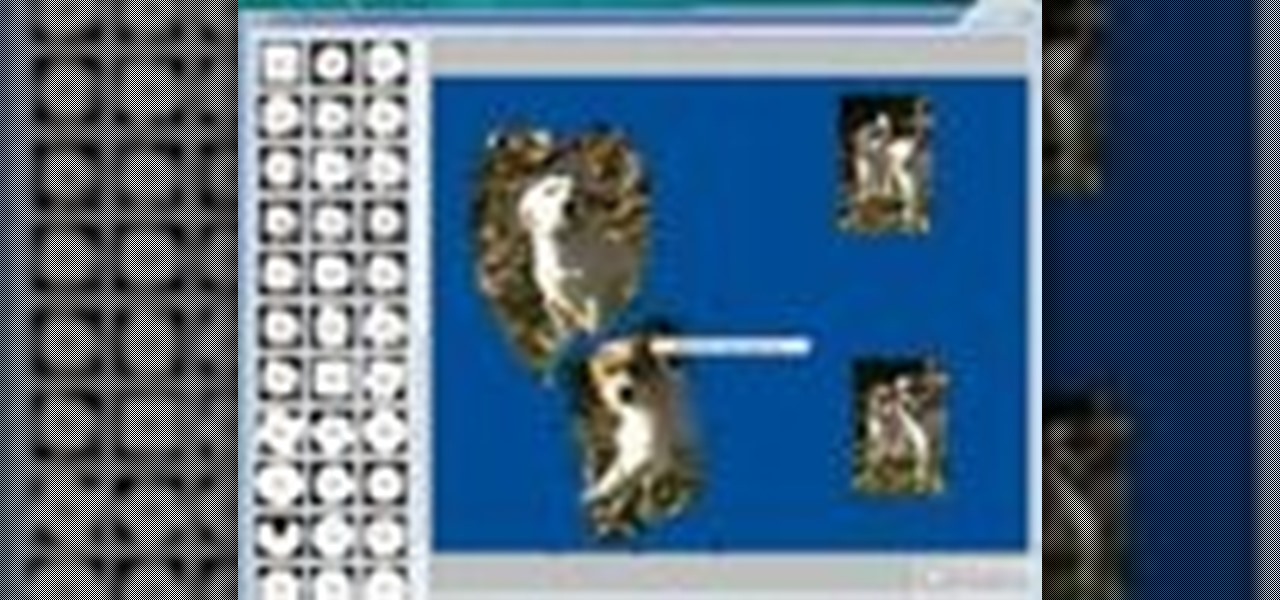
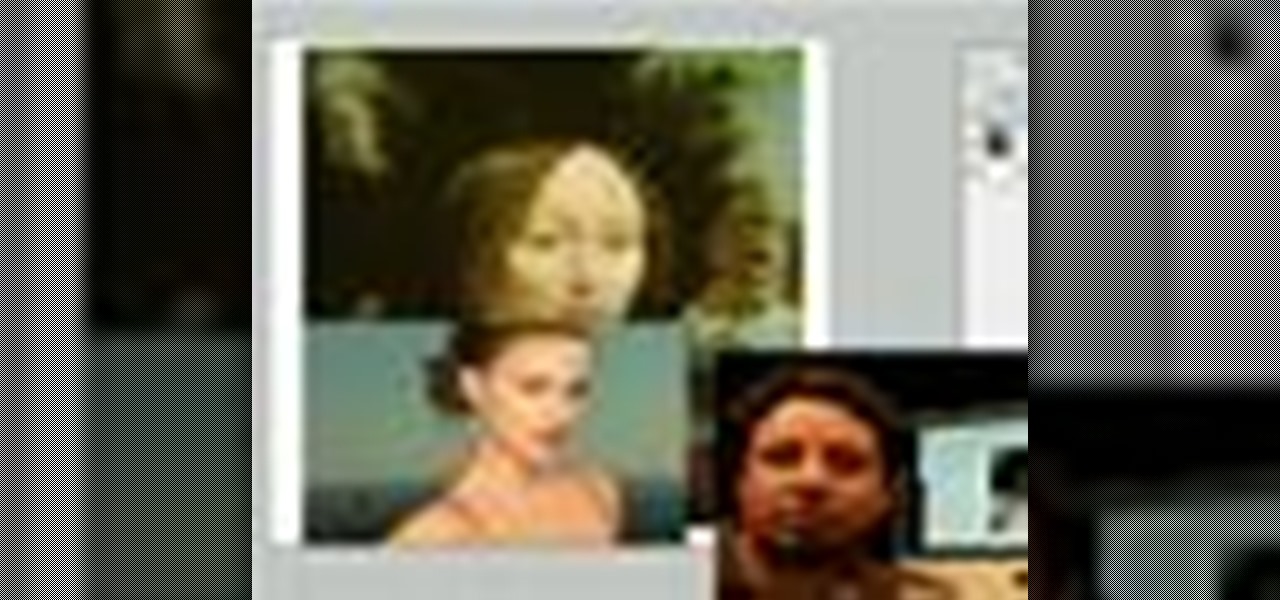
Blending together multiple images in Photoshop is a staple trick many new designers try, putting their faces in famous works of art or adding other faces onto model bodies. Learn to blend multiple images in Photoshop in this free Photoshop tutorial video series.
Your iPhone's Control Center is your main hub for quick access to controls like brightness, volume, Wi-Fi, and Do Not Disturb, but if you're using iOS 14, there may be a bunch of screen real estate taken up by blank squares. If that wasted space is bothering you every time you just want to use your flashlight, there's a quick way to get rid of those empty tiles for good.
If you were upset about "Friends" leaving Netflix, fret no more. The entire series, all eight Harry Potter movies, as well as HBO's massive catalog, are now available as part of HBO Max. If you're already an HBO Now subscriber, however, it can be a bit confusing to know how to switch over to this brand new service. Here's how.