If you would like to use Google AdSense on your website, in order to make money from your site, you will need to get a Google account. Click "sign in" on the Google home page: www.Google.com. Next, scroll down to the bottom of the page and click on "create an account now. Fill it out. It will send you an email to verify your account. You'll need to open your email to confirm.

In order to apply MLA format in MS Word 2007, you will need to change the lines and spacings. Press Control + A. This will highlight all of your typing. Then, click on No Spacing. Scroll to Times New Roman, in the font style drop down menu. Change the font size to 12. Change the line spacing to 2.0. You will need to re-center anything that was centered before. Your headers and footers will still be in the default font style. So, you will need to change them as well. Double click on the header...

Ash Davies teaches us how to Photoshop digital bokeh with this tutorial. First, open up Photoshop and create a new canvas with your width at 1920 and your height at 1200. Now, create a new layer and set your background layer as invisible. Now create a medium size circle and reduce the fill to 50%. Now enter blending options and add a stroke of 10 pixels to the inside with the color set to black. Now define the shape as a brush and then click "edit" and "define brush preset" name this, "bokeh"...
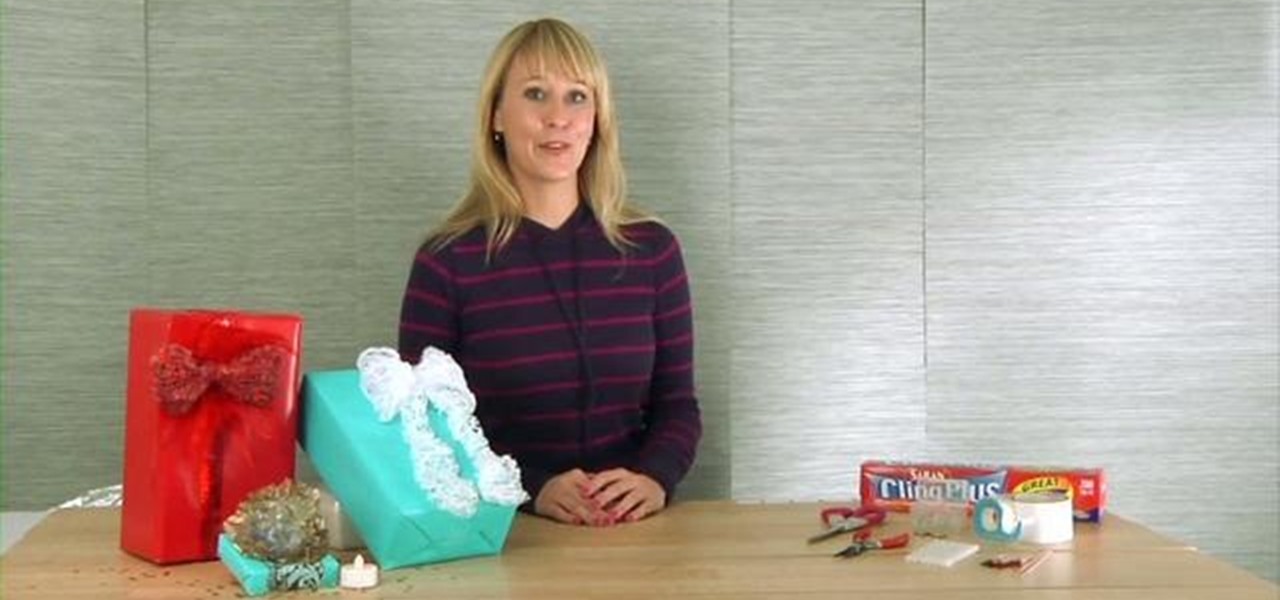
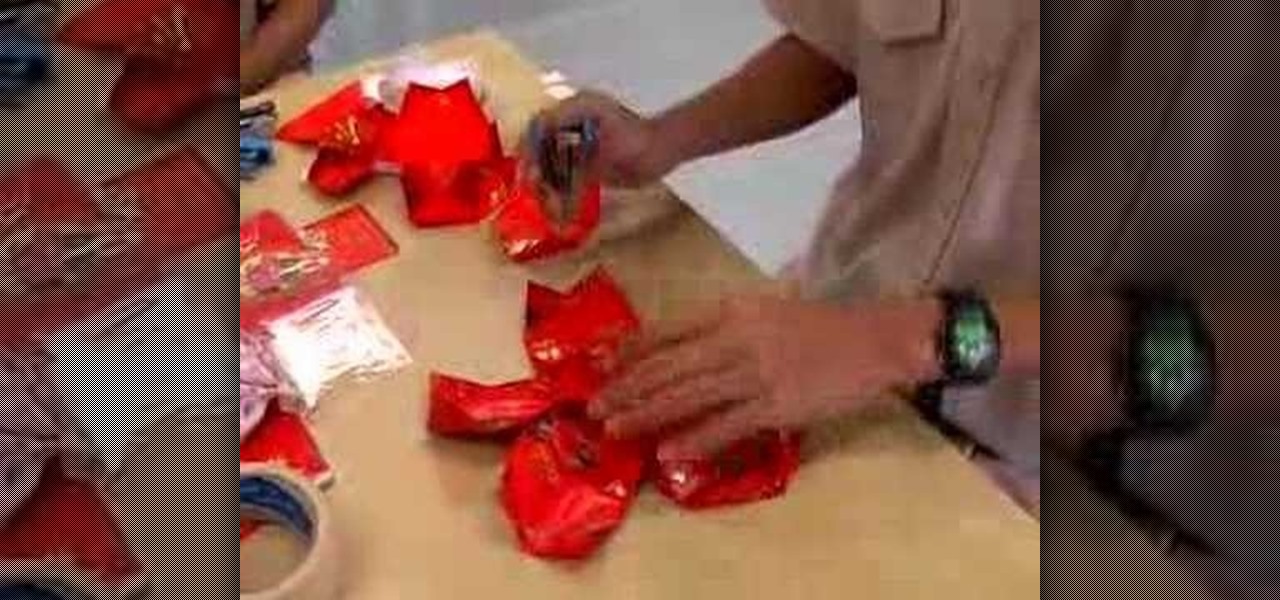
What a unique bow. Your gifts will be beautiful under the Christmas tree. Materials you will need are: plastic wrap, hot glue, LEDs, scissors, pliers duct tape, glue gun and glue, toothpicks and 3 volt batteries. First you take the plastic wrap and cut it about 5 times the size your bow is going to be. Take the end and push it together. Now make one side of the bow, push together, and make the other side of the bow. Keep going back and forth until the plastic wrap is at the end. The left over...
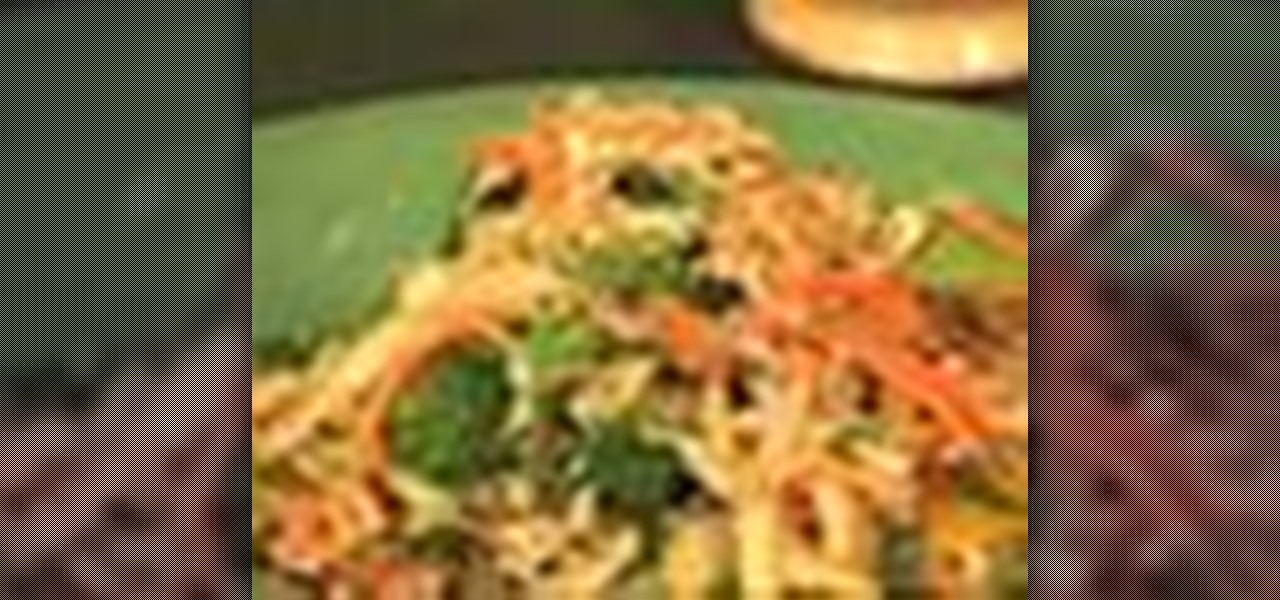
Sometimes an ordinary coleslaw just doesn't do it, so that's when you try out different ethnic recipes. And this Asian spin on slaw is sure to be added to your list of favorites, from the dressing to the actual salad mix. Check out the recipe for this delicious Asian coleslaw with peanut dressing.
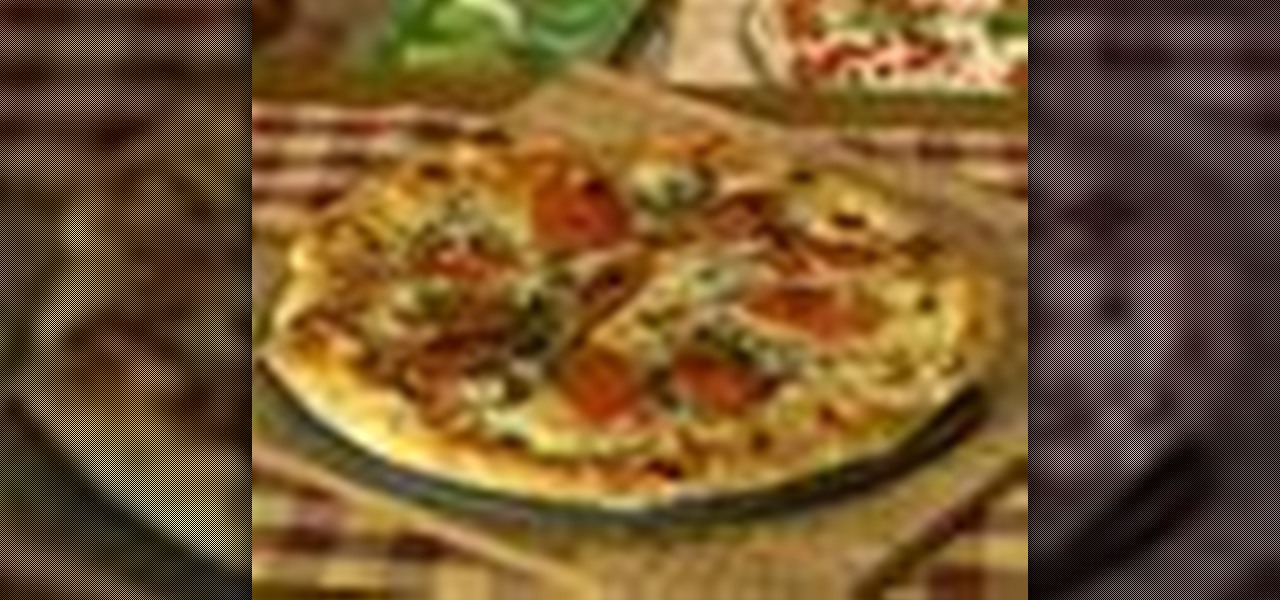
Chef Hubert Keller is known for his ingenuity in cooking, like when Frank Sinatra came into his restaurant and ordered something not on the menu — a pizza. Quickly, he had to come up with a great pizza recipe and this is what's come of it. Check out the recipe for this mouthwatering pizza from Chef Hubert Keller. You learn the whole process, from dough to sauce to baking.

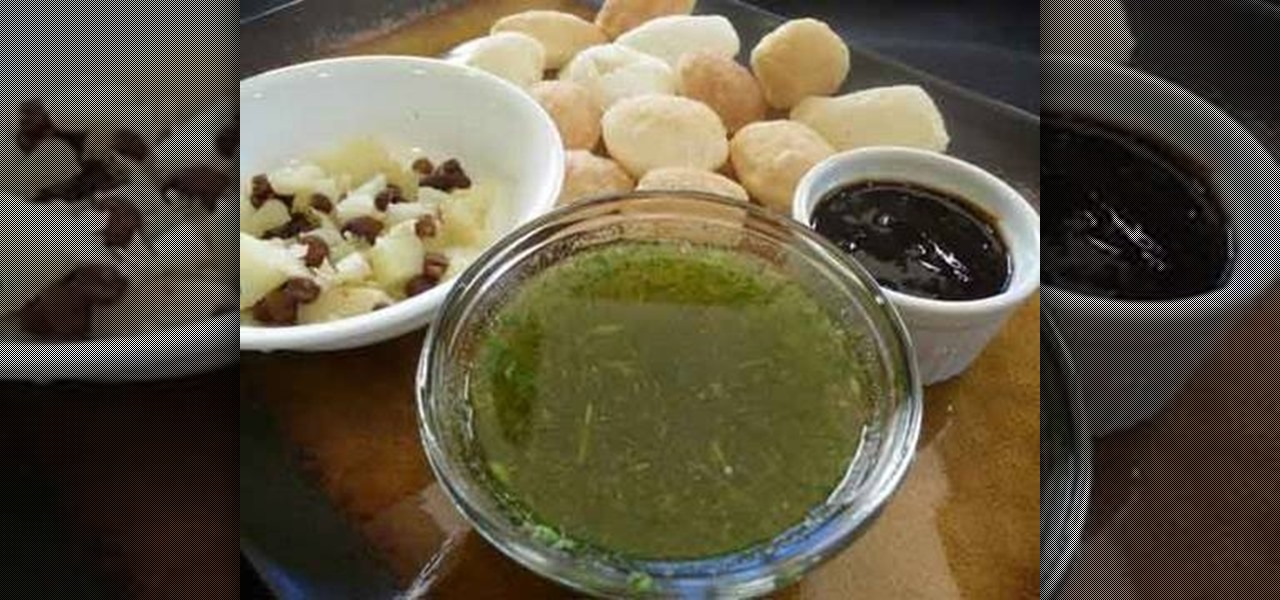
This dish is a popular one of the streets of India. It's a great dish that is easy to eat and can take one bite to devour. This tutorial will focus on one part of the dish, the pani in the panu puri dish. Enjoy!
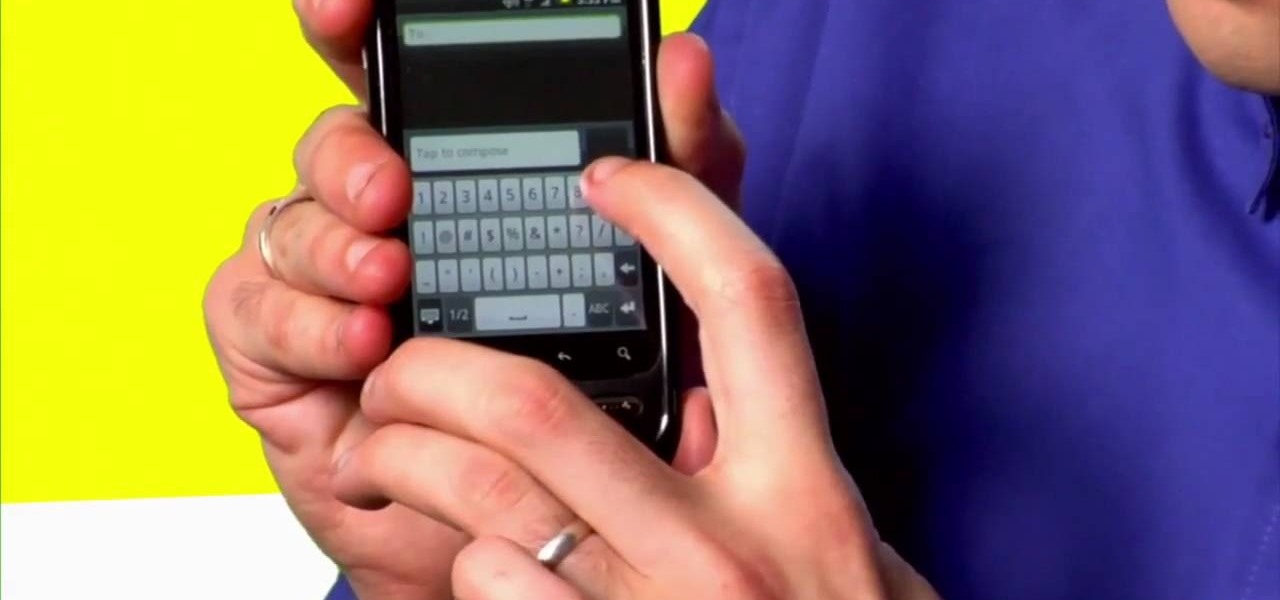
With the Android platform on a large amount of mobile phones today, chances are you have one. Sometimes messaging on the phones can be a little confusing, but there's a simple explanation for texting your friends and family. Best Buy has answers. The Best Buy Mobile team explains how simple it is to send a text message on your Android enabled cell phone.
This video shows us how to use a cuttlebug and make a congratulations card. Here are the following steps:
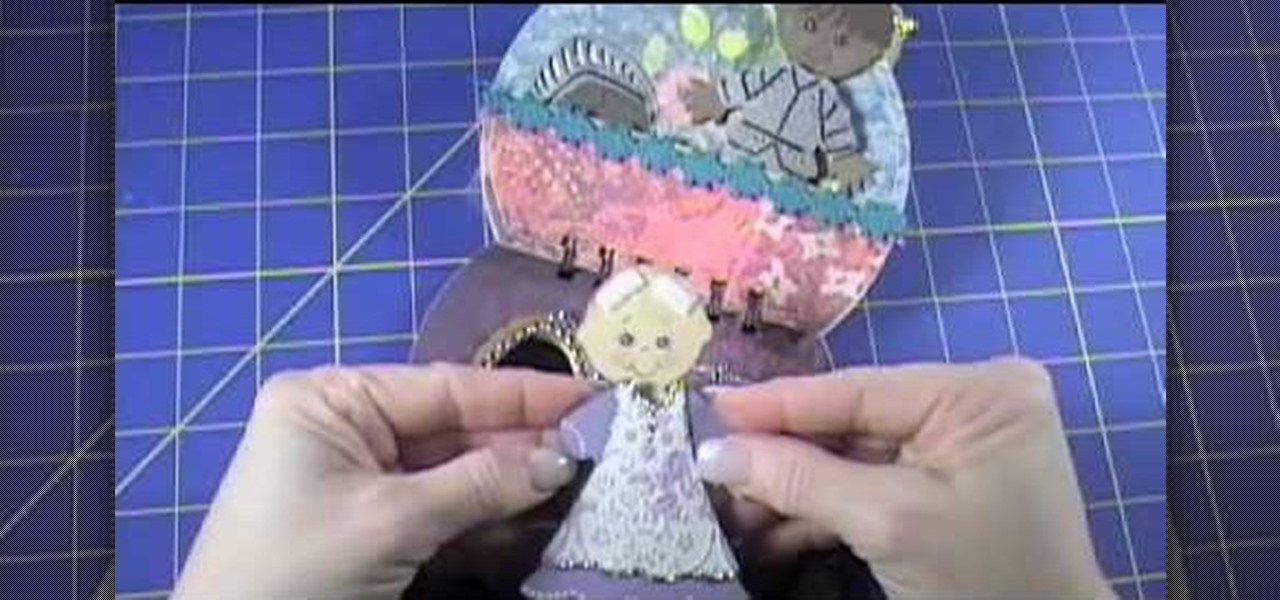
The video describes the making of Paper doll dress up and a Tin Purse to put the dolls inside. You can use the cartridge paper but regular paper should do. She was sticking to the princess themes in this tutorial. The tin comes from provocraft but creative imaginations also offers one. Instead of purchasing a tin you can find a old tin purse maybe once for a over sized set of playing cards. There is a tab feature you can use on the dolls but which children the might come off. She suggests usi...
Lactose Overdose demonstrates how to make a rainbow cake. Use either a store bought mix or use your own recipe. A white cake mix works the best. You will also need two canisters of white frosting and food coloring. Make the cake according to the directions or recipe instructions. Divide the batter equally into four mixing bowls. Add 10 drops of food coloring in your desired shades to each bowl and mix by hand. Place a large spoon into each bowl. Using half a spoonful, layer the colors on top ...
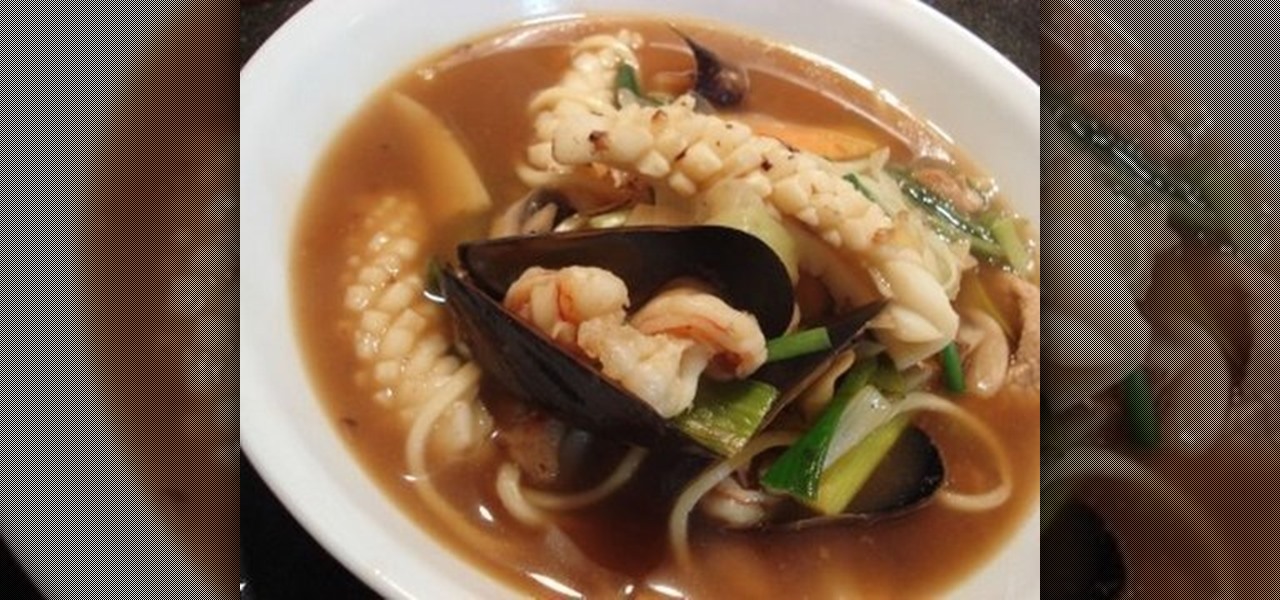
In this video, we learn how to make Jjamppong. You will need: Jjamppong noodles, 10 dried anchovies, 3 shiitake mushrooms, 1/3 c dried kelp, 1/2 of a medium onion, 1/4 c pork, 3 large shrimp, 4 mussels and a few pieces of squid. You will also need garlic, ginger, vegetable oil, oyster sauce, fish sauce, hot pepper flakes, ground black pepper, carrots, leeks, bamboo shoots and white mushrooms. First, you will make your stock which involves taking 7 cups of water and boiling it with your dried ...
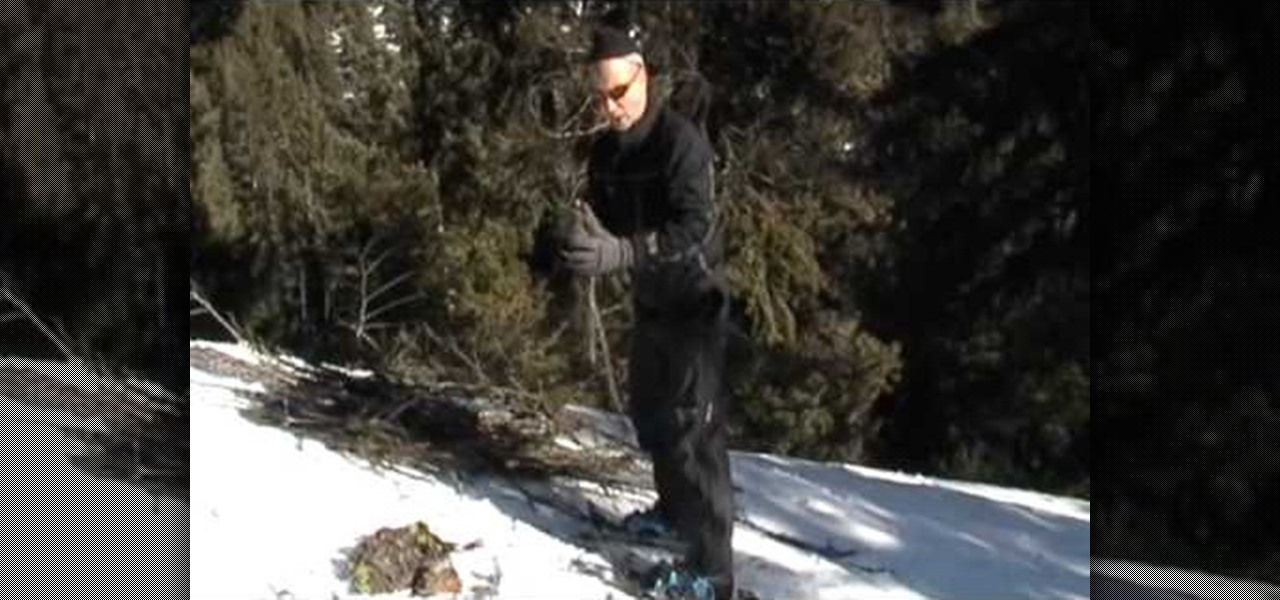
In this outdoors how-to video from fitclimb.com we're shown how to make a fire in the snow. The first step is to find a good flat spot, or make a flat spot yourself. Next, we look for trees with dead branches and break those dead branches off for the wood. The key here is to be organized because you'll have to carry this wood back to your camp. Next, you want to make a platform for your fire to keep it from sinking down as the snow melts. Here, we're using the bark from a dead stump for a pla...
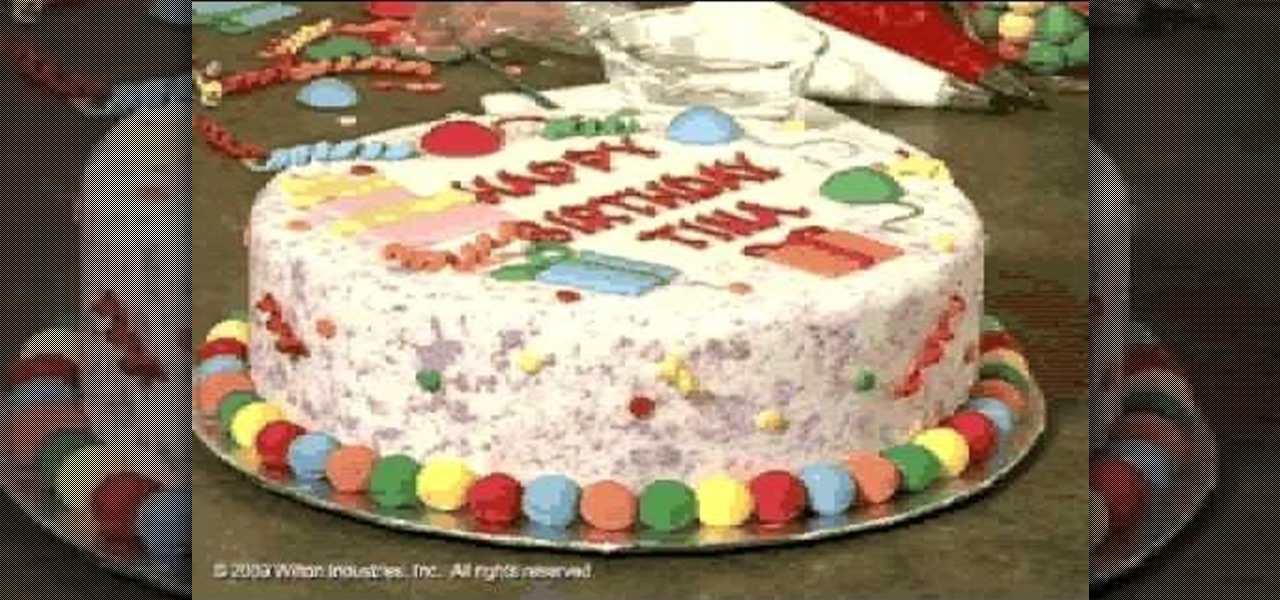
This video is a demonstration on how to make a festive and colorful birthday cake. The frosting on the cake is made of rolled fondant, which comes in bright colors already made. Roll the fondant about 1/8" thick. The cake should have a thin layer of buttercream frosting on it. Lay the fondant over the cake and mold the fondant over it with your hands, trimming the extra off the bottom. Fondant can also be used for decorations on the cake. They cut out squares of fondant to make birthday prese...
First of all you have to search for a reputed dealer. Then ask him all necessary questions like what sort of lenses shall fit in your camera, what shall be the size of the lens to fit in your camera. If you are going to purchase it online then you have to ask whether the surface of the lens is scratched and marked in any way. Make sure that three is no mould or scratches on the lenses. You can also hold the lens towards the sun or a light source. Do not hold it directly against the sun. Now y...
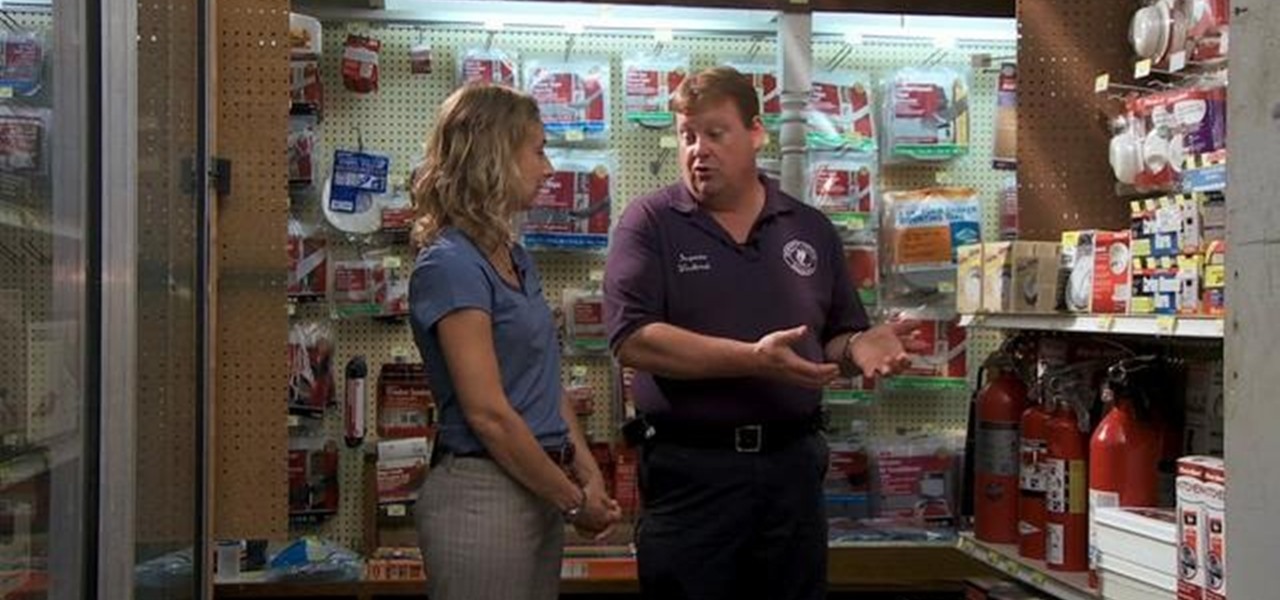
Bob and Leslie of the Washington Township Fire Department demonstrate how to choose the right fire extinguisher for your home. Fire extinguishers come in a large range of sizes so be sure to choose one that you can easily handle. If it’s too heavy you won’t be able to use it properly. Fire extinguishers are labeled according to the type of fire they are used on. A is for ordinary combustibles such as wood or paper; B is for flammable liquids such as gas, grease or oil; and C is for electrical...
Supplies1.20-35 square papers (all the same size)2.stapler
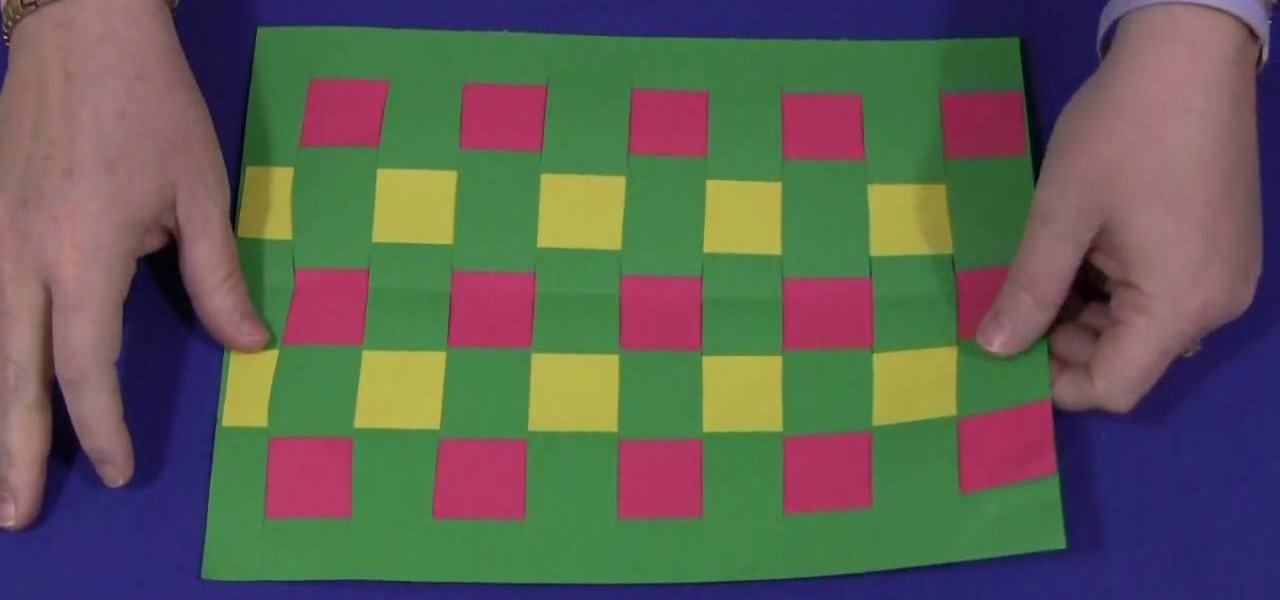
This is a project to keep your kids entertained. It is also a great way to practice hand eye coordination and motor skills. The materials that you are going to need are; construction paper and something to cut the paper with.Depending on the age of the child you can use 3 colors or more for older children and 2 colors for the younger children. Color choice is left up to what the child wants.To get started take a full size sheet of construction paper. Fold this paper in half length-wise. Take ...
Simple Card Monday teaches viewers how to make a berry-themed card using Preserves Cricut! You'll want to use the Garden Variety Cricket Preserves paper for this berry-theme project. First, you should start off with an A-2 sized 5.5 inches by 4 inches sheet paper. Ink this using chamomile ink on all of the edges of the card. Next, add green onto the top of the card. It should leave a tiny border around. Now stick this strawberry paper with ribbon onto the polka dot paper. Cut your strawberry ...
This video demonstrates how to make your own Greeting Cards at home. You will need the following: water color paint in bottles with sponge tip applicators and spray, ruler, adhesive, solid color paper stocks, patterned paper, a rubber stamp, stamp cleaning products, a bone folder, and a trimmer.
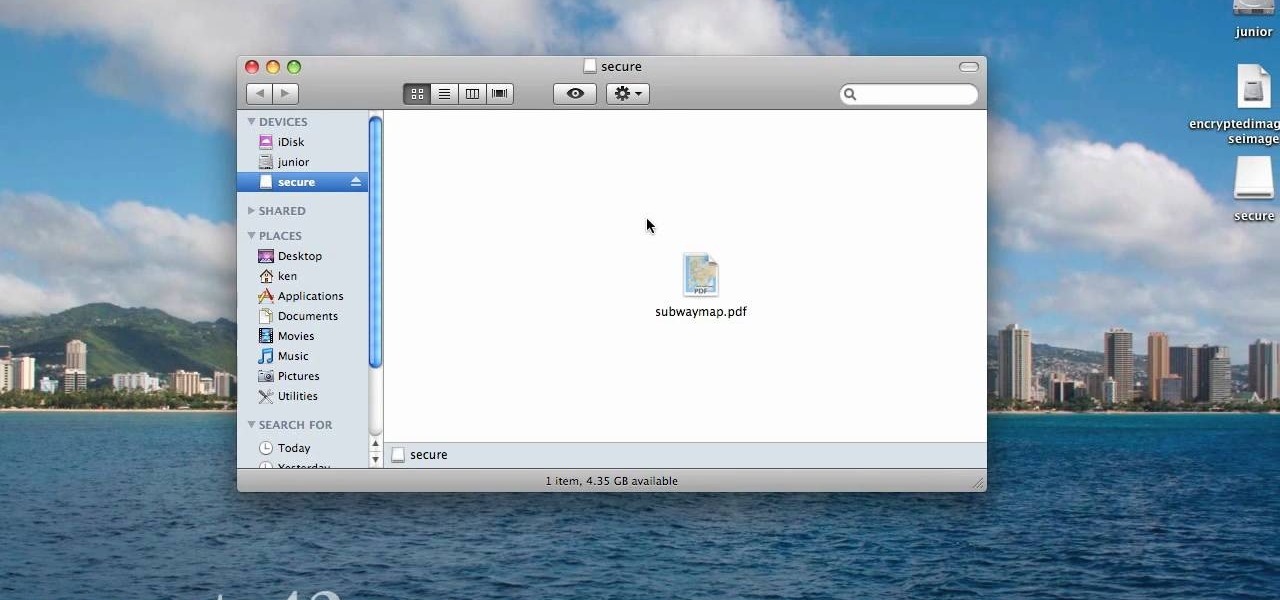
The Mac OS's Disc Utility allows for the encryption of files. To open Disc Utility click on the magnifying glass (spot light) up in the top right hand corner, and search for Disc Utility. Click on the first result in the list. Once Disc Utility is open, click on "create a new image" in the top tool bar. A new window will drop down, where you choose what you want to save the new image as. Give it a name, and choose the size you want it to be. Moving down, choose the encryption you want to use ...
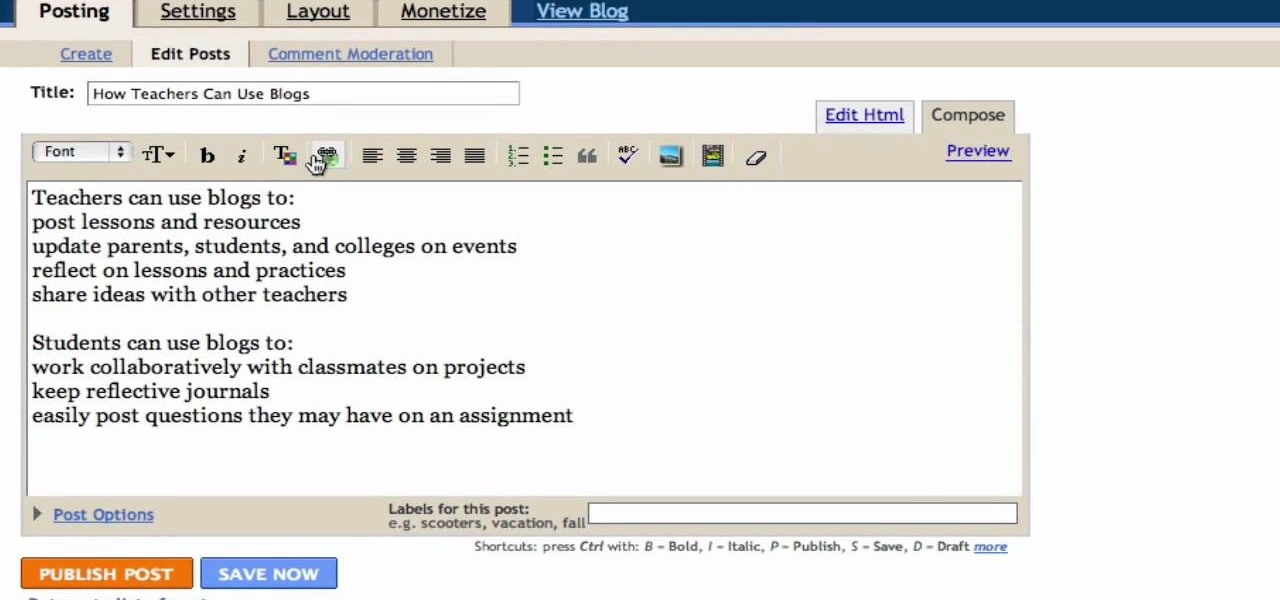
In this Computers & Programming video tutorial you will learn how to create a new account, add and edit in Blogger. First go to Blogger. On the home page click on ‘create a blog’. You will be taken to the account setting up page. Feed in all the details including our email. Then open your email and click on the confirmation link. You will then be taken to your dashboard or your home page. On this page you can click on ‘new post’ button and start writing your blog. When you do this a word proc...
When you are sending any files over a network it is advised to encrypt it so that no can read it even if they get hold of it. You can encrypt files in Mac OS for this purpose. So first take any file or program that you want to encrypt. Open your hard disk and go to the applications. In the applications, under utilities open the Disk Utility program. Using this disk utility program you can create an encrypted disk image. Now this image will act as a disk image or other flash drive, but we can ...
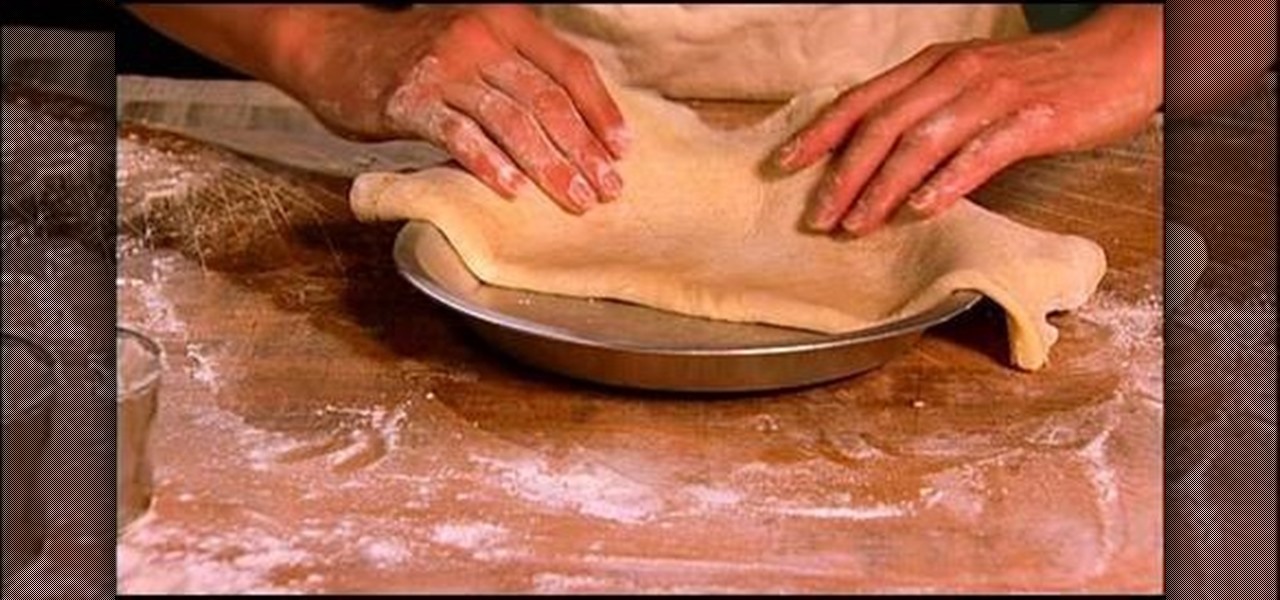
Pie crust can be tricky... If it's overcooked in the slightest, it will come out tough and break easily. In this video, learn how to make the perfect flaky homemade pie crust that will be the perfect compliment to any pie filling.
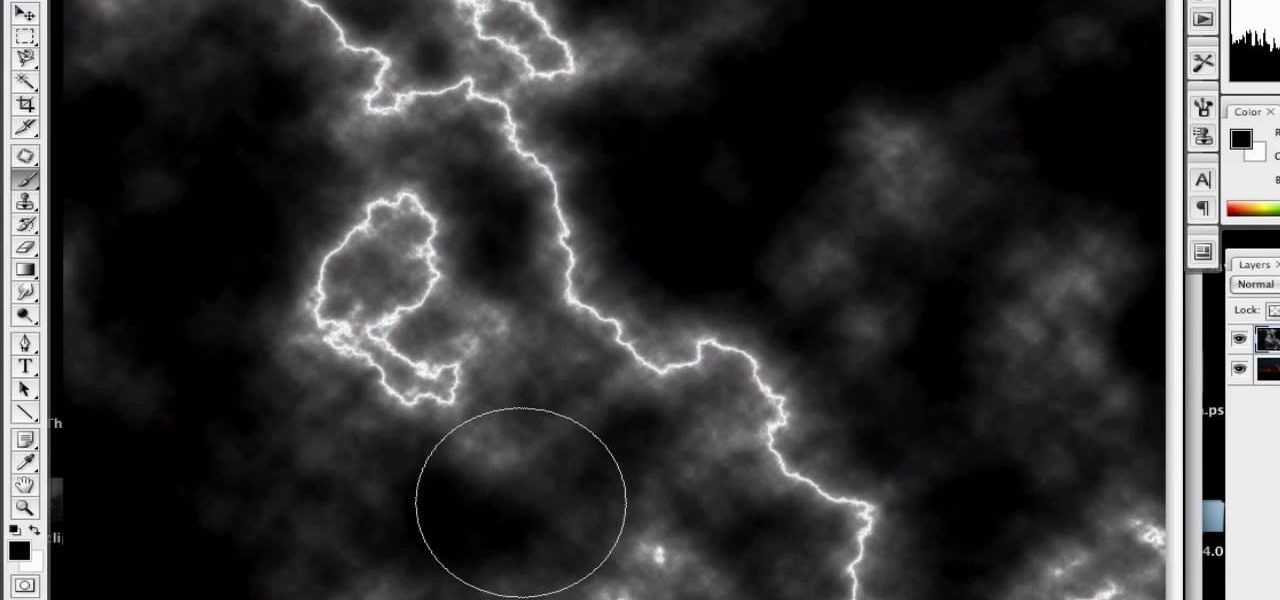
First of all open an image which shows many different lights in a night background. Now make a new layer now set the color of background to black by first and the foreground color set to white. Click the background for the bottom of the left bar and then pressing 'd'’. Next select the 'gradient' tool. Make sure to select the style from the foreground to background. Select the 'mode' to 'normal' and ‘opacity’ to '100%'. Now drag the top right hand corner to the bottom of the left hand corner. ...
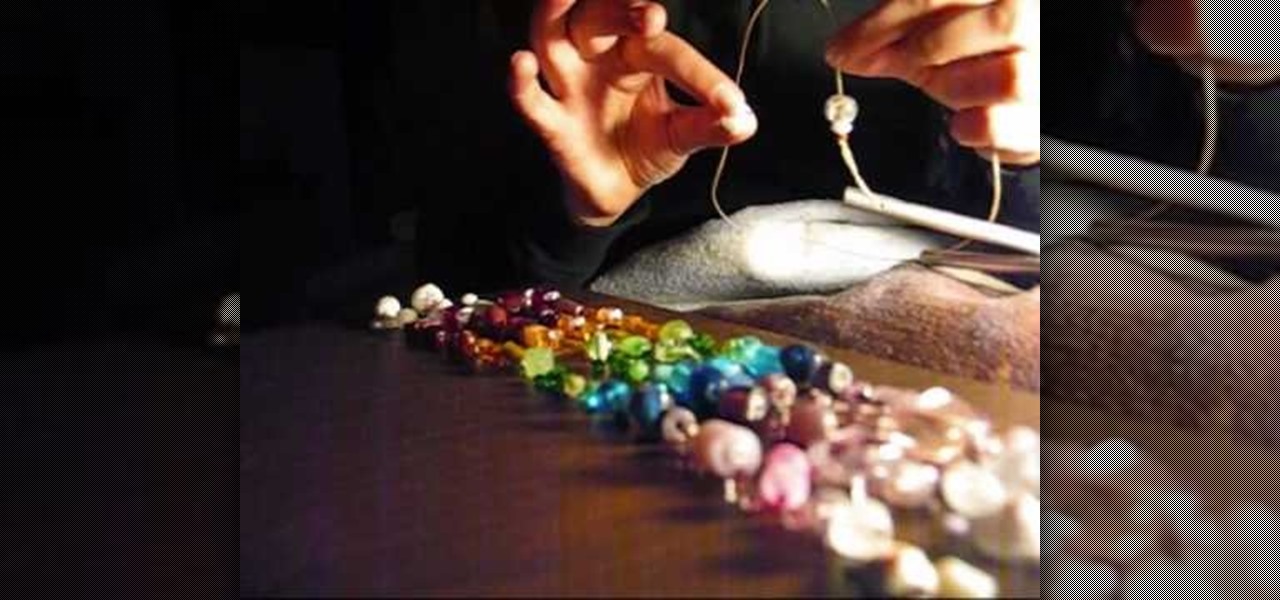
Do you have a bunch of flawed beads left over after you make your crafts? You know the ones, the chipped, cracked, sharp ones that don't make the cut and usually get tossed in the garbage? Why not make those into something lovely, where the cracks don't matter? In this two part tutorial, learn how to turn your discarded beads into a beautifully shiny wind chime for your backyard. This chime is unique and makes a lovely noise in the wind. Let's get crafting!
Ken Appleby shows viewers how to split and merge Adobe PDF files for free using a free software. First, open your browser and search for PDDsam.org. Click on download and install the file by saving the file and running the file. When it is installed, open up PDF Split and Merge. Go to split and you can decide how you would like to split. You can split by size, pages and bursts. Now click Add and find your PDF file. You can change the format if you'd like or leave it in the same format. Next, ...
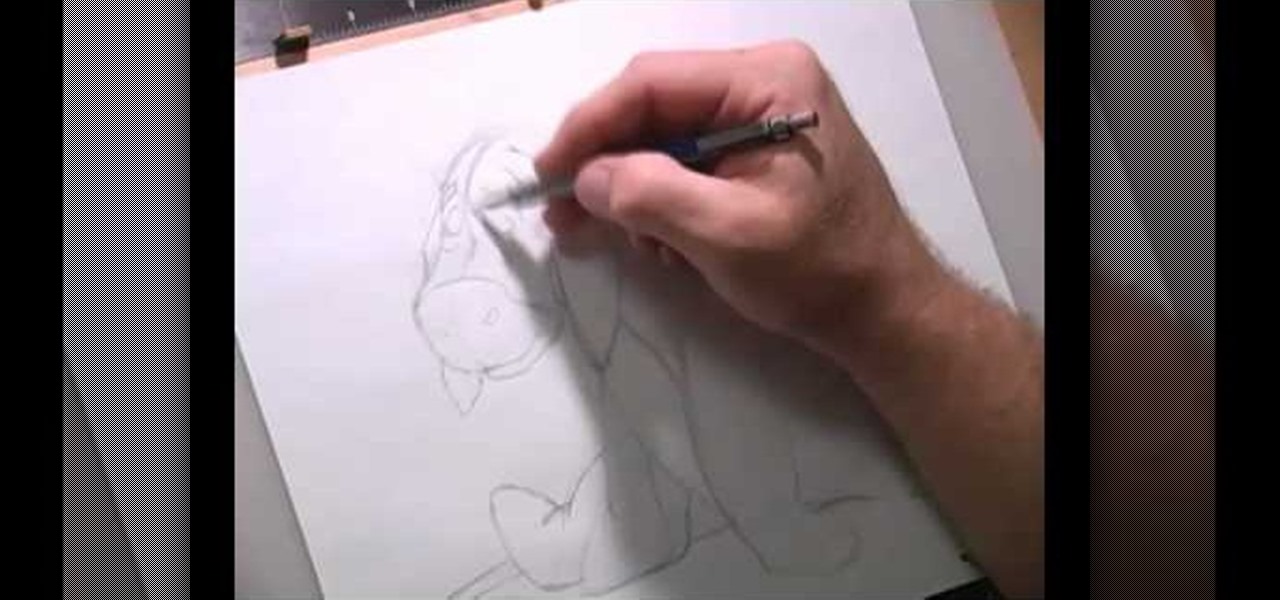
The user demonstrates how to draw Disney's Eeyore in this video. The first step is to draw a circle about the size of a 50 cent piece for his head and add construction lines to it, including one across the lower part of the circle to use as a reference. The user also suggests creating a mark below the "head" to mark where the end of Eeyore's jaw will be. Then, starting at the bottom cross line, he begins drawing the rounded area of his snout. Next, he draws a straight line from the other side...
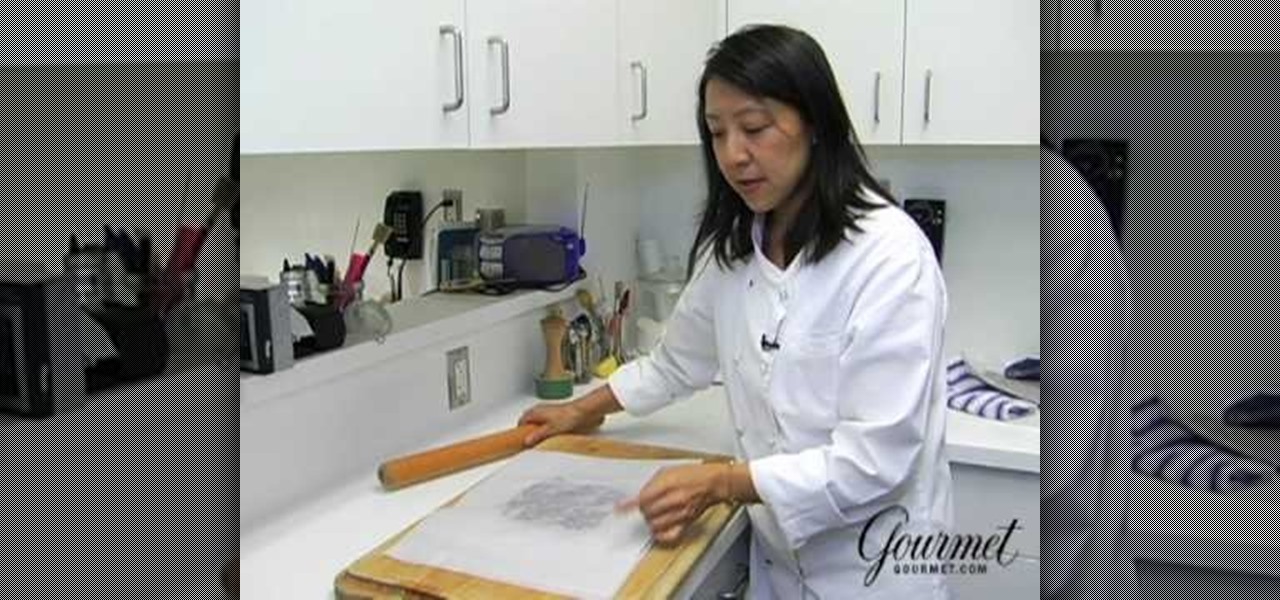
Food editor Lillian Chou shares a tip for rolling out extra-thin cookie dough with no mess and no extra flour. Follow along and learn how you can do this too.
First you need to make hydrogen gas which require a few material. Such as a glass bottle, a Full table spoon of aluminum (beer or soda can will work), a half a cup of cold water, a table spoon or two of caustic soda, a funnel, a medium size container of water, a way of cutting the aluminum, one or two balloon's, and some safety glasses just incase something goes wrong.
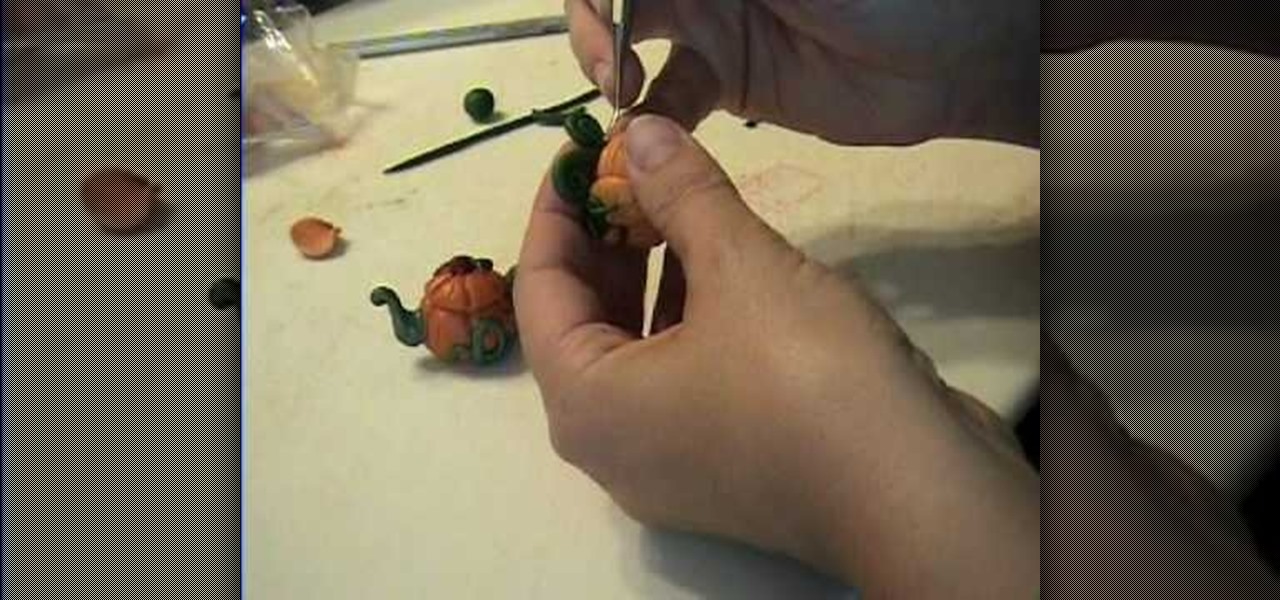
The person in this video is teaching us how to make toys with the help of polymer clay. As you can see the video you can say that the person there is a girl. This lady is teaching to make a teapot to her daughter. Her hand is focusing the camera. First she makes a little ball with the help of polymer clay. Then she made few lines on that ball and press that ball slightly on the top. Then she takes another piece of clay and presses it but that one is too small. Then she use another on quit big...
This video clip was designed to provide the viewer with the instructions to making a polymer clay Mashimaro character. First two small pieces of yellow clay are cut to go inside the ears. Next a large ball of white clay is rolled and pressed slightly flat for the body. A piece similar in size is rolled and flattened for the head. Shoving a toothpick into the body and clipping a small piece off allows for the head to be attached. Then a piece of white clay is laid out and the yellow clay is pr...
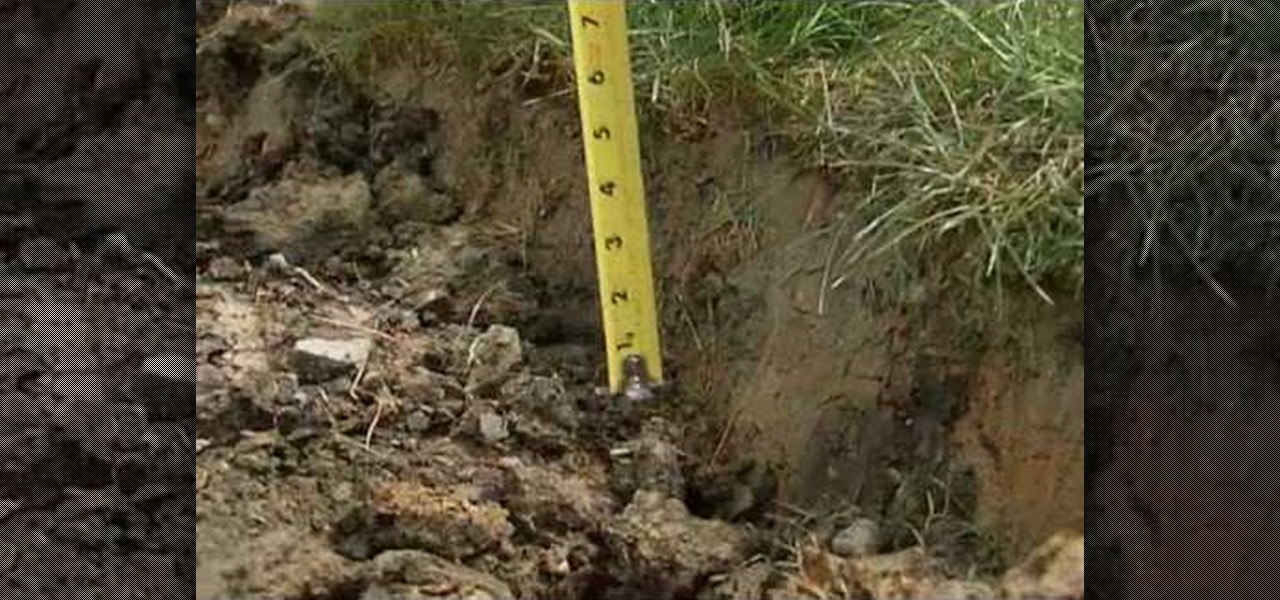
To create a retaining wall all you need to do is follow these simple steps. To begin you will need to get many interlocking wall blocks and either sand or concrete. The first step is to plot and measure the retaining wall's size and shape. Use your measurements to figure out the amount of retaining wall blocks that you will need. The second step is to mark off the spots in your yard that you would like the retaining wall to be. Then dig your trenches in these spots to level out the land and t...
This tutorial describes how to make a Hershey Kiss holder. This is a quick and easy project that you can make to use as little gifts in your kids' lunches, for co-workers, party favors, place-holders at holiday meals and more.
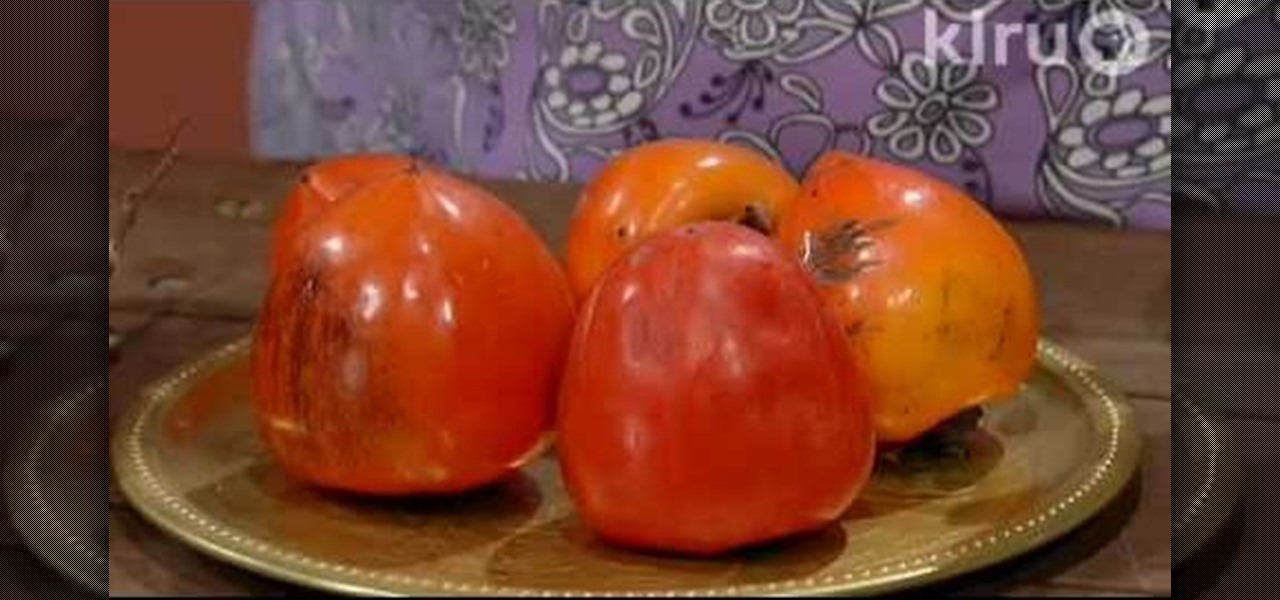
A persimmon is not ready to eat until it has a soft consistency like jelly or pudding, though the fruit can be harvested and brought inside while still hard, so long as the branch the fruit hangs from is picked along with it. One way to be sure that a persimmon is ready to eat, is to press a finger against the skin of the fruit. If a fingerprint is left, the persimmon is ripe and delicious. Once they start getting soft they go bad very quickly, so it's good to prepare them so you can eat them...
Betty's at it again with a super-simple pot roast recipe that you can make in your crock pot. When's dinner?
This tutorial video will show you what the purpose of compression is and how compression works through its parameters. Your instructor illustrates a drum beat and a plucked guitar line. Beginning with how to compress the drum beat, take (download) a drum sound pack without compression and to add compression using the software right click on the drum machine, choose create, and then choose combo on compressor. The virtual compressor has all the dials and adjusters found on any basic compressor...
Karen Knowler demonstrates how to make a quick and easy recipe called Fried Mushrooms in this video. This dish can be eaten as it is or topped with your salads. She takes in a generous quantity of mushrooms and slices them (obviously after they are washed!). Then olive oil is drizzled over the mushrooms and they are mixed well. Next, the juice of a whole fresh lemon is poured over the mushrooms with olive oil, to give an added taste. Next, she crushes two whole garlic pods and adds them in. T...
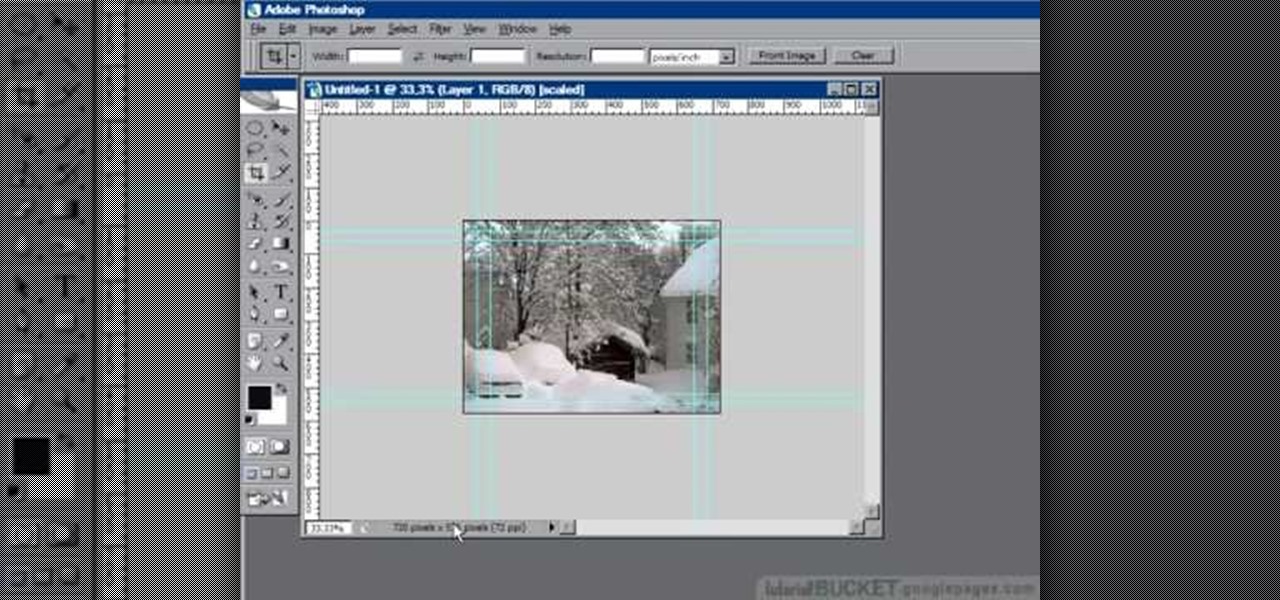
In this Adobe Photoshop tutorial the instructor shows how to prepare pan and scan images. To prepare an image by panning and scanning is quite different than preparing an image normally for using in your video. These images should be extra sized as you would perform special effects on the image in your video. This is also called as "Ken Burns" effect. Now go to the file, new menu and select the video format that you want to use according to your requirement. Enable the correct pixel aspect ra...
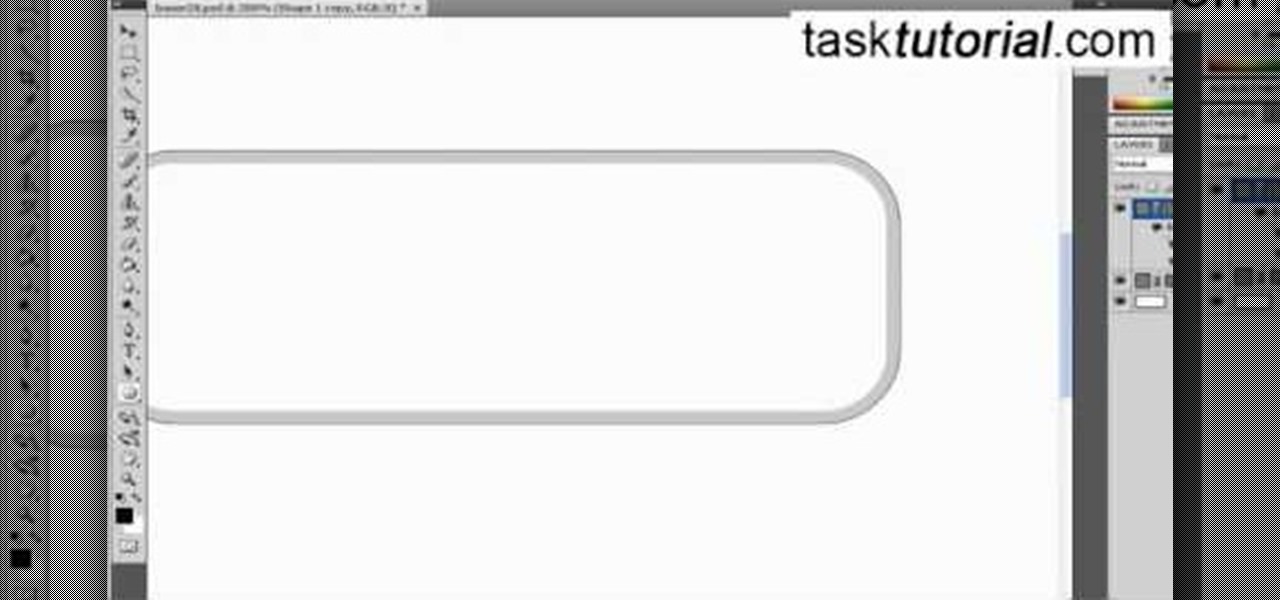
If you ever wondered how to create a buy now button for your website this video shows how to do it using Photoshop. To do this open Photoshop and start with a new file. First draw a rectangle which will be now modified into the buy now button. Set the radius of the rectangle to forty pixels. Fill it with gray color. Duplicate the layer. Open the layer options of the duplicated layer and set the stroke position option to inside. Set its weight to 6 pixels and set its colors to light gray. Now ...