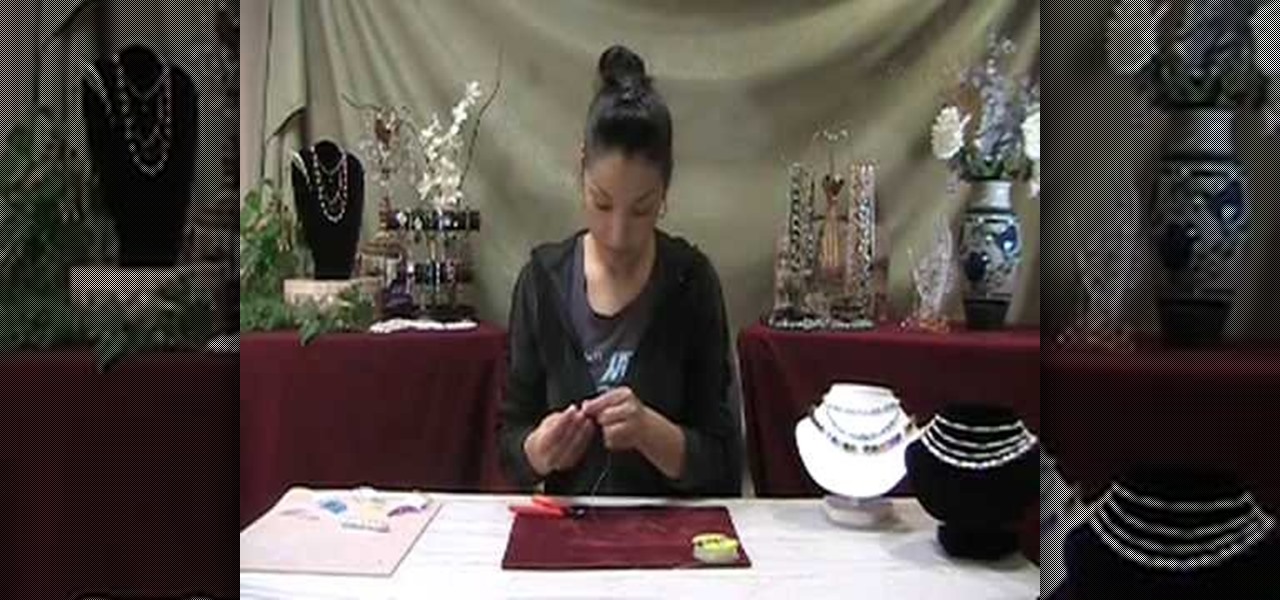
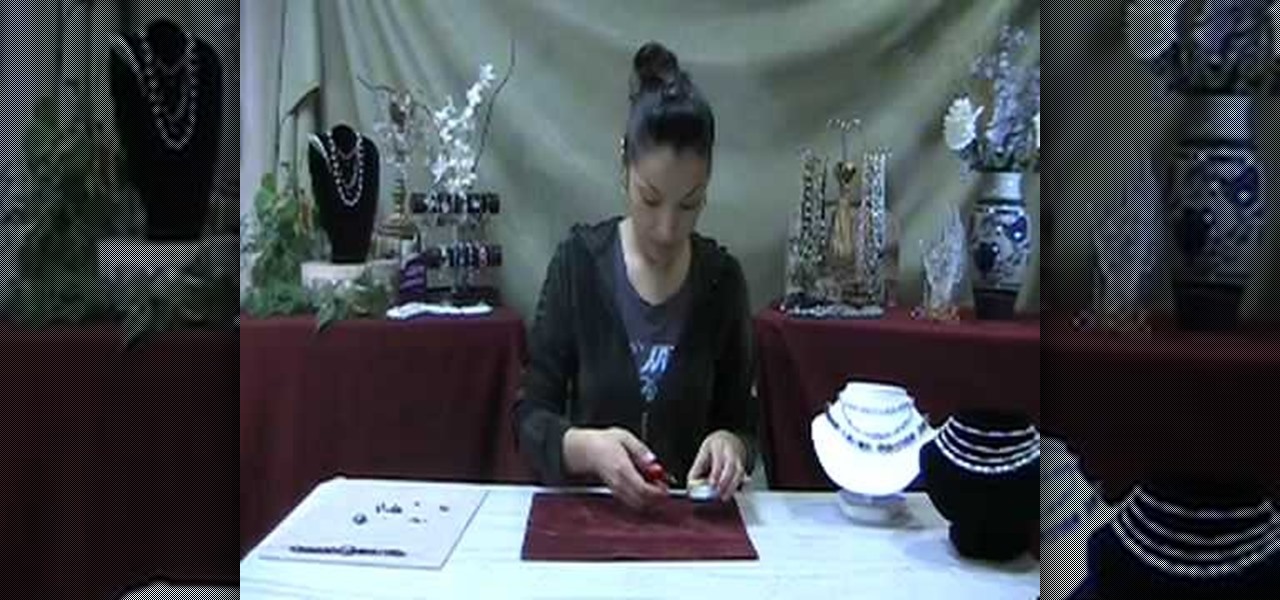
In this video, we learn how to use cones when jewelry making with Christina. First, take a half inch hard wire with a looped end and use a pair of pliers to open up the loop slightly. Next, take your strands of beads and place them onto the loop. After this, close the loop making sure it's secure and the beads won't fall off. Then, take the cone and insert the wire through the wide end and pull it through the narrow end. Using your fingers, bend the wire to a ninety degree angle, then trim of...
In order to make a thank you card for Christmas gifts, you will need the following: Winter Woodland cartridge, glimmer misty, pop dots, adhesive, gingham ribbon, and pattern paper.
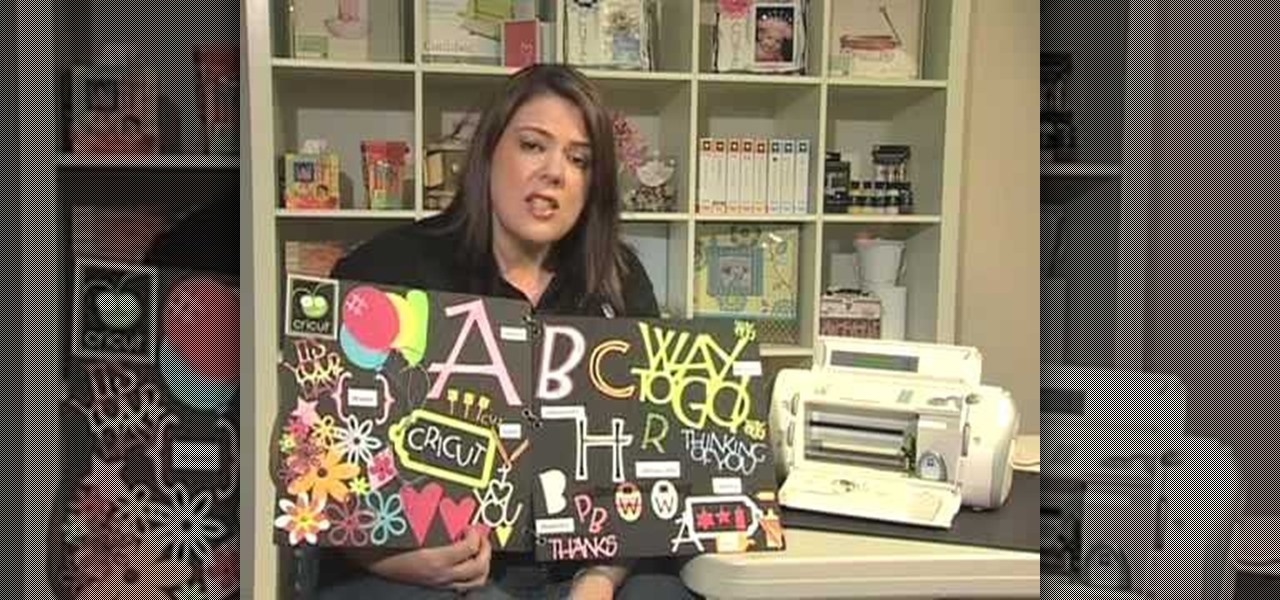
In this tutorial, we learn how to use the feature keys for your Cricut machine. There are six feature keys on every cartridge. The first is the shadow feature key that create a matte to highlight your letter. The shadow blackout key creates a solid matte that doesn't cut out the holes in between the letters. The charm feature key puts a charm top on the top of letters. The sign feature key puts letters inside of a small sign post, making it one inch from top to bottom. The slotted feature key...

In order to make a ribbon tree, you will need the following: 50 2" pieces of ribbon, scissors, a hot glue gun, hot glue sticks, and a floral tree.
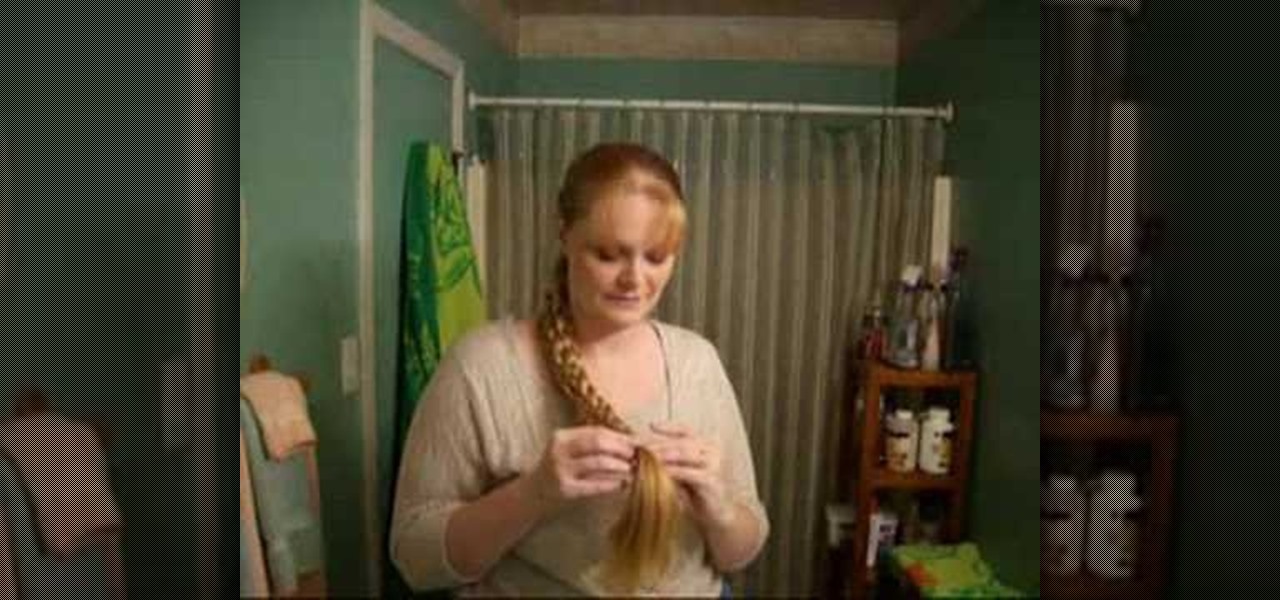
In this tutorial, we learn how to do a side headband braid with ribbon intertwined. First, grab a ribbon that is around 32 inches and any color you want. Now, take a chunk of hair on the side of your head, and place the middle of the ribbon underneath it. Now, separate your hair into three sections, then start to braid by connecting the ribbon in with the strands. Once you finish this, tie off at the end. Now, make a messy bun in the back of your hair with the braid on the side still. After t...

In this tutorial, we learn how to cook dry beans, step by step. First, rinse and soak the beans in water for 6 hours. When this finished, heat up oil and add in carrots, onion, garlic, and celery in a large pot. Next, add the beans to the pot and cover everything with water by an inch, then bring it to a boil and cover. After this has boiled, reduce the heat and let simmer for one to two more hours. When the beans are finished and tender, sprinkle salt over them then serve while hot in a bowl...

In this video, we learn how to work with Stretch Magic. This is a beading technique that is very easy to use. It's great for making bracelets, because no clasp is required. First, cut a piece of Stretch Magic 4-5 inches longer than you want it. Now, string your favorite beads onto the Stretch Magic. When you are finished with this, connect the ends with a square not and add a drop of super glue for added security. After this, cut off the excess strings from the end and you will be able to wea...
In this video, we learn how to punch down a 12 port patch panel. Start off by grabbing your cable and using scissors to cut off the outer covering of the cable. Next, use the wire scissors to cut off the end of the wires (about 1-2 inches). After this, place the stripped down wires into the appropriate spots that correspond to the colors that are on the 12 port patch panel. After you finished this, you will need to grab your punch down tool. Use this tool to push down on the wires, then it wi...
In this tutorial, we learn how to weave a (king) cobra stitch for paracord bracelets. First, take a 10 inch cord, fold it in half, then tie a knot at the end of it. Put this on a holder, then tie another chord on the bottom of it and hold it with your knees for tension. Next, start to weave the other color chord around it by going in and out of the two sides of the first chord. Continue to do this for the entire bracelet, then knot it off at the end to finish. You can add your favorite colors...
In this tutorial, we learn how to make a paper rose with a paper towel. First, roll one end to the other, then stick your finger inside one end and pinch the tip while twisting a few inches down. This will be your bud and your stem for the flower. Keep twisting down until you reach halfway to the end of the flower. Now, fold the loose piece on the bottom so it's parallel to the stem. Then, twist the leaf and wrap it around the bud. Then, shape the bud to the type of flower you want, then enjo...
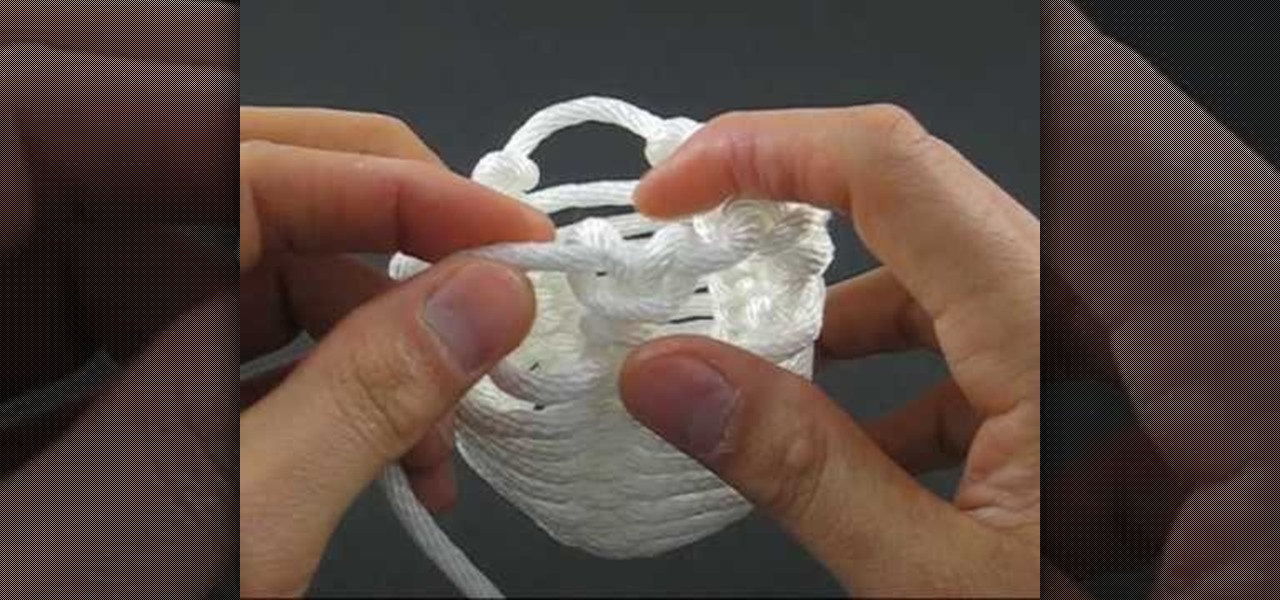
In this video, we learn how to tie a honey rope basket knot. To do this, you will need a 10ft of nylon rope. Start off by tying a counter-clockwise slipknot at one end of the rope. After this, pull the loop of the slipknot out four inches. Then, tie a second slip knot clockwise next to the first slipknot. Draw the loop length of the second so it's equal to the first. Next, continue to create slipknots next to each other until you've done five. No, hook your working end into the first loop and...
In this tutorial, we learn how to do every elevator on CoD4 and Modern Warfare2. Once you get used to the technique you use it will be very easy to do on each different level. First, go find a spot where you cannot stand and go to a staircase. Line yourself up so you're straight with the wall, then go into crouch and don't move forward or backwards at all. Look to the right slightly, then move to the left until you can't stand up anymore. Then, move your right stick to the left slightly and t...
In this tutorial, we learn how to make a window valance. If you have a drop down shade, a valance will help cover up the hardware that is located underneath it. Start out with your choice of fabric, then add in 1 inch to the top, bottom and sides. Next, line the fabric and place Velcro on the top. Now, use a wrap around and mark where you want to fold the fabric in at. After this, sew the valance and then use the Velcro to stick it onto the metal part of the drapes. When finished, enjoy your ...
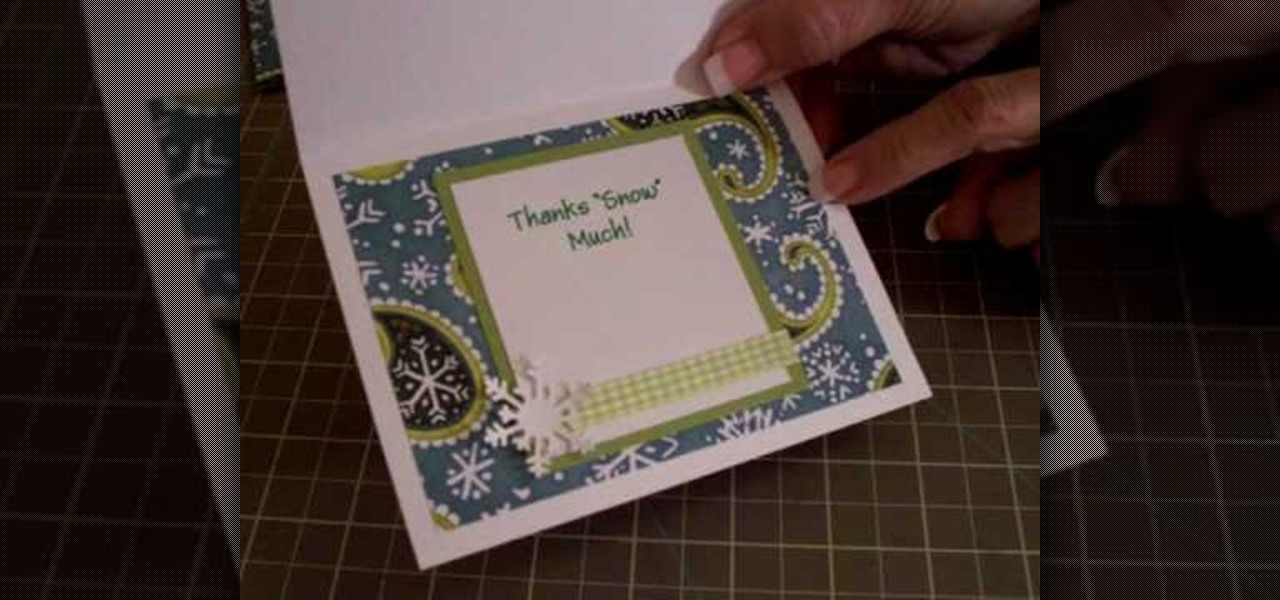
This video tutorial is in the Arts & Crafts category where you will learn how to make a multi-layered embossed floral gift card. Take a piece of 11 x 8 1/2 inch Stampin' Up card stock and fold it in half. Next you punch out layers of colored paper of rose red, very vanilla, regal rose and blush blossom colors of different sizes as stated in the video using the Boho Blossom Paper Punch. Now you take a Sizzix Big Shot Die and cut out a craft paper and set the cut outs aside. Now you got to stam...
In this video tutorial, viewers learn how to tie a four-in-hand knot with a skinny necktie. Begin with the wide end at least 12 inches longer than the thin end. Then put the wide end over the narrow end and wrap it around once more. Now bring the wide end under the loop and down through the front of the knot. Then pull the knot tight and adjust the tie. This video will benefit those viewers who have a skinny tie, and would like to learn how to tie it because hey are attending a formal dinner,...
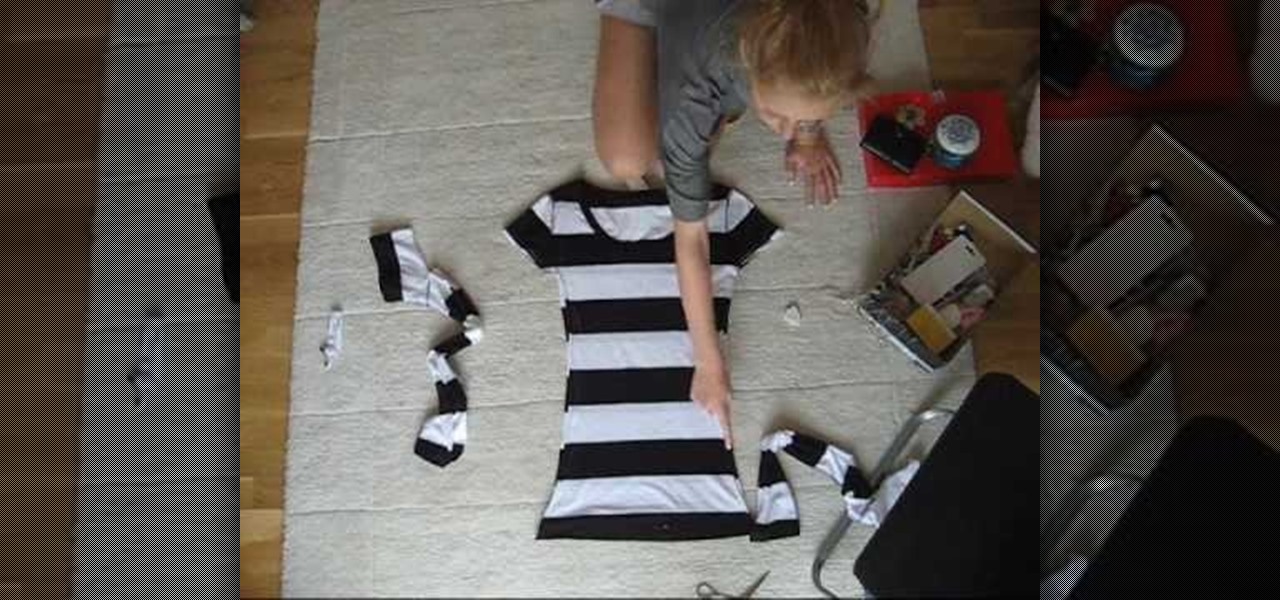
In this tutorial, we learn how to make a t-shirt. First, measure around your waist and your bust, as well as around the hips. Now, take your old boxy t-shirt and flip it inside out. Now, place your measuring tape on the shirt and pin it where your measurements are. Draw out your measurements so you know where to cut. Once you have the new shirt drawn out, Cut out an inch out of the lines and toss the rest of the cloth in the trash. After this, sew the shirt on all the open sides. To finish, t...
In this tutorial, we learn how to make your lawn tractor faster. First, add an exhaust to your lawn tractor with a one inch pipe out the back. Make sure it's secured so it doesn't fall down onto the ground while you're driving the tractor. Also, add on a 51" belt instead of a 52" belt to make the tractor run faster. The last thing you can do to make your tractor faster is to place a spring and wire around the throttle to start the machine faster. This could make your tractor go up to at least...
In this tutorial, we learn how to increase your Wi-Fi signal with a coffee can. Materials you will need are : a knife, a coffee can, tape, USB Wi-Fi adapter, and marker. First, measure 1 inch from the bottom of the coffee can then trace your USB around that mark. Now, cut a hole in that shape in the can. Next, cover the hole with your tape. Next, hook your USB up to your cable adapter, and then place it in the coffee can. Now, plug your USB into your computer and you should have more signals ...
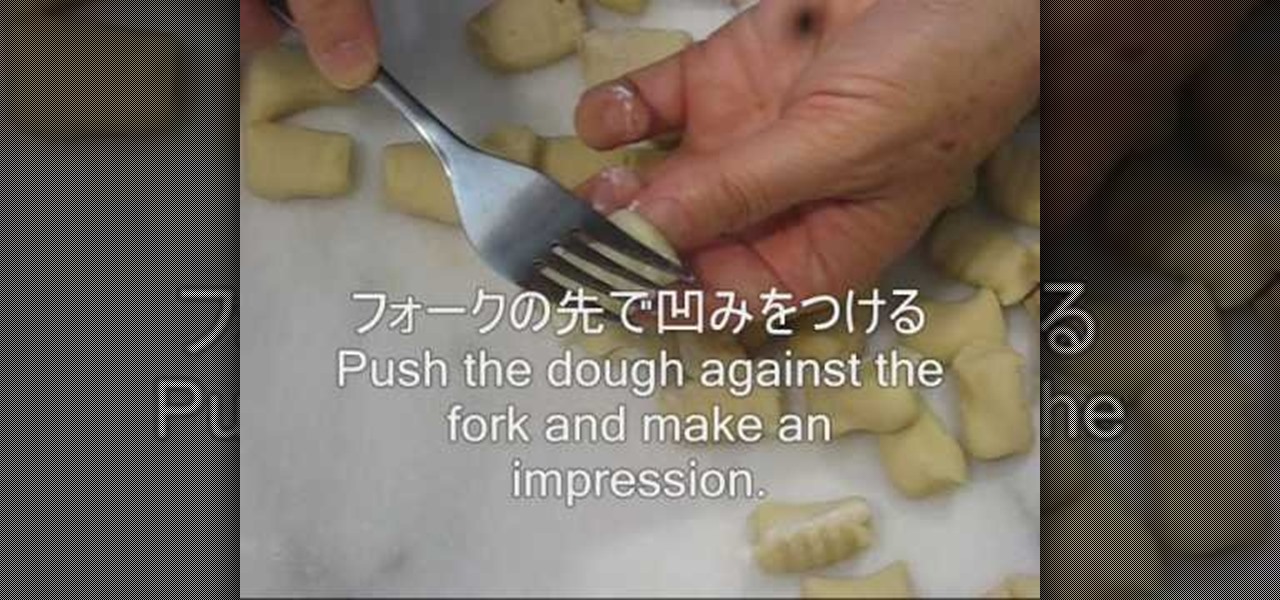
In this tutorial, we learn how to make potato gnocchi. First, microwave 1 lb of potatoes until they are soft. Next, let them cool, then peel them and cut them into cubes. Now, mash them with a masher or food processor. After this, add in 2/3 tsp salt, 2 tbsp grated Gorgonzola cheese, 1 1/4 c flour, and 1/2 egg. Blend until everything is well combined, then make the dough into a ball. Cut part of it off, then roll it into a thin roll 3/4" in diameter. Now, cut the roll into 1 inch piece and pu...
In this tutorial, we learn how to straight pipe your small tractor engine. First, insert a one inch screw pipe to your exhaust, then connect pipes into it so it connects to the back of the vehicle. You will need to install several elbow pipes as well as longer straight pipes. The pipes should reach the end of your tractor out of the tires. Make sure it's secured tightly to the floor boards and screwed in on the bottom of the tractor. You can experiment with different types and shapes of pipes...
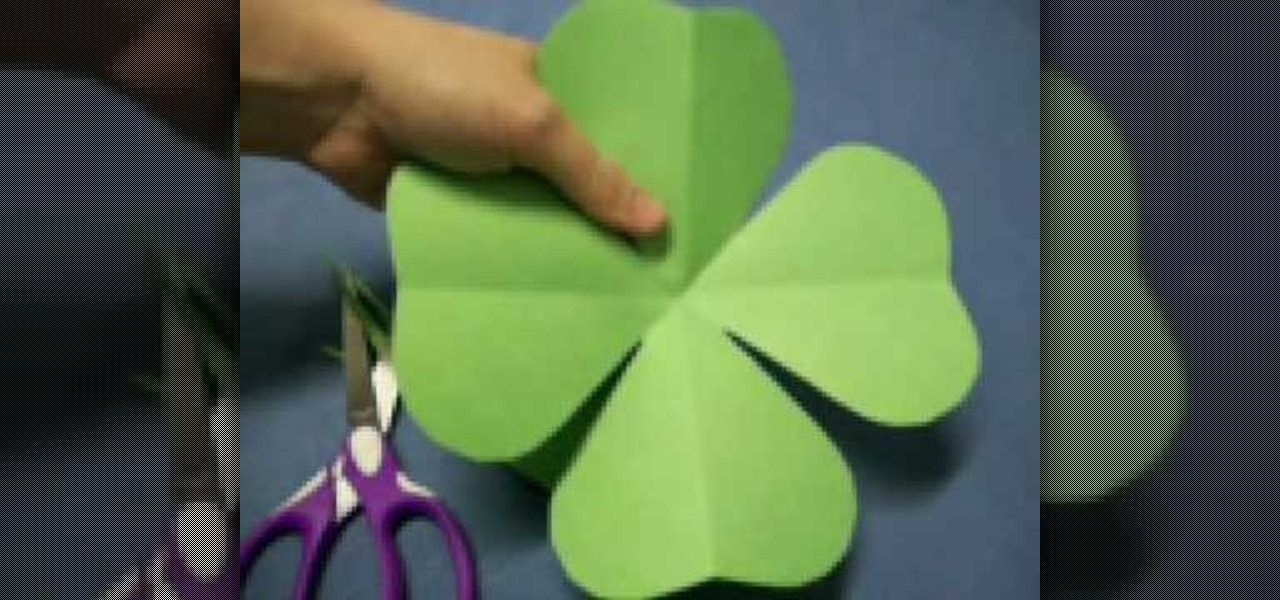
In this tutorial, we learn how to make a four leaf clover pattern. First, fold your paper in half, then fold it in half in the other direction. Next, fold the edges making a point and then cut a half an inch along the edge, making a cone shape. end the shape on the right side, making a heart shape. When you unfold, you will have a four leaf clover! You can use any size of paper to make this, just make sure you use green paper to keep the theme Irish. This is a great project for kids to learn ...
In this video tutorial, viewers learn how to make a carrot patch. Begin by cutting out a egg carton with 4 egg holders. Then cover it with a green felt and staple the bottom. Now poke a hole in the center of each egg cup. Then fold a green 3 inch pipe cleaner in half and add 2 orange beans into the pipe cleaner. Bend the ends down and make 3 more carrots. Finish by inserting the 4 carrots into the 4 holes in the egg carton. This video will benefit those viewers who enjoy making arts and craft...
In this tutorial, we learn how to get wavy hair in less than five minutes. First, apply silk hair serum to your entire hair, avoiding the roots. Next, take a curling iron and curl your hair from the bottom up. Only curl around 1 inch curls, or smaller if you want tight curls. If you want your hair to be shiny, flatten it with a straightening iron before you do this. Curl your entire head of hair, sectioning off sides as you go. When you are finished, your hair will be curly and sexy! Use flex...
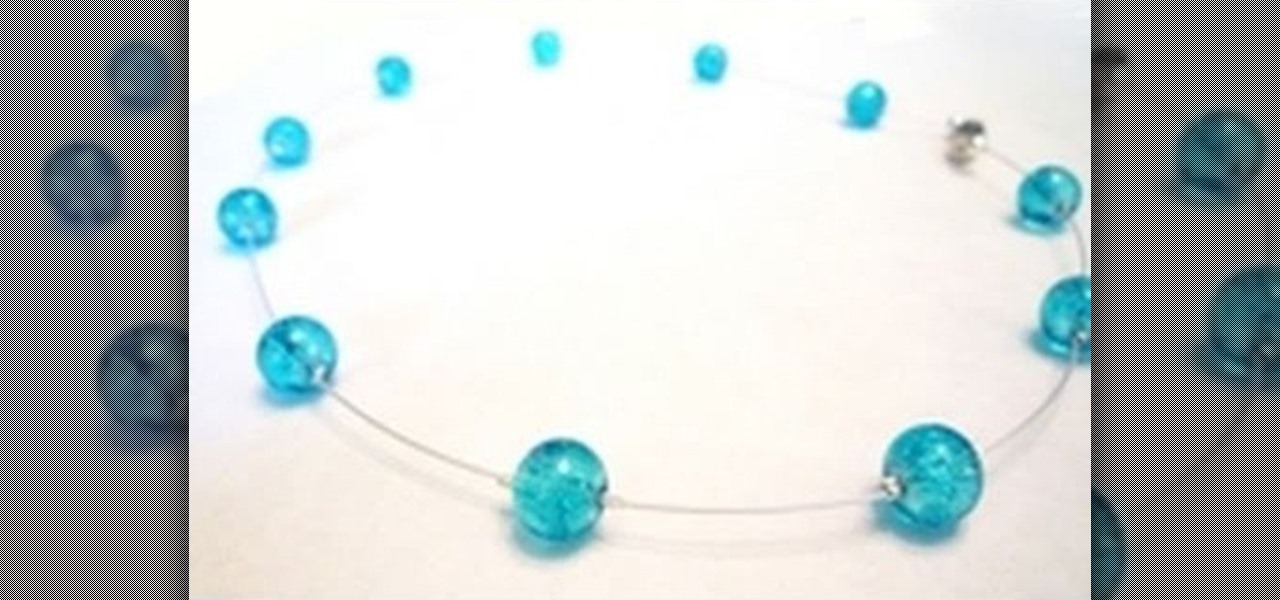
In this tutorial, we learn how to make a floating illusion style necklace. You will need: beading wire, crimping pliers, wire cutters, beads (your choice), crimp beads, crimp covers (3mm), and a clasp (barrel clasp). First, cut your beading wire to the length you want your necklace, add 3-4 extra inches. Next, space your beads out on a beading board evenly, 1 1/2" apart. Now string a crimp bead onto your wire and take the end of the wire and string it through the crimp bead on the opposite si...
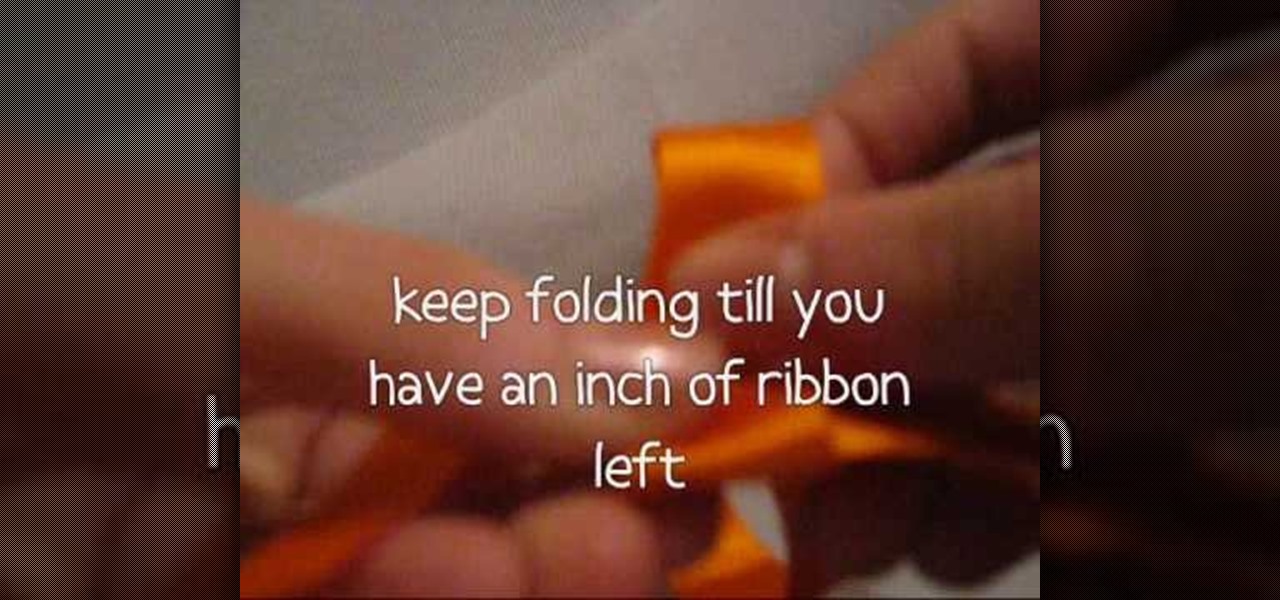
In this video tutorial, viewers learn how to make a ribbon rose. Users will need approximately 60 cm of 16 mm of satin ribbon. Begin by folding your ribbon in half and then pinch fold the end. Now fold the front half sideways and pinch it in place. Then turn it over and fold the ribbon to the opposite side. Keep folding until there is only about 1 inch of ribbon left. Users should end up with a pile of little folds. Pinch the two ends together and let go of the pile. As you pinch the ends tog...
In this tutorial, we learn how to get curls from using a hair straightener. First, prep your hair with a heat protector, which will also help smooth the hair. Next, apply a curl activator mist evenly throughout the hair. Next, section your hair from ear to ear using your fingers, then secure one side so it's out of the way. Now, take about an inch of hair in your straightener then turn it 180 degrees, then pull straight down. Keep doing this for your entire head of hair, and you should get be...
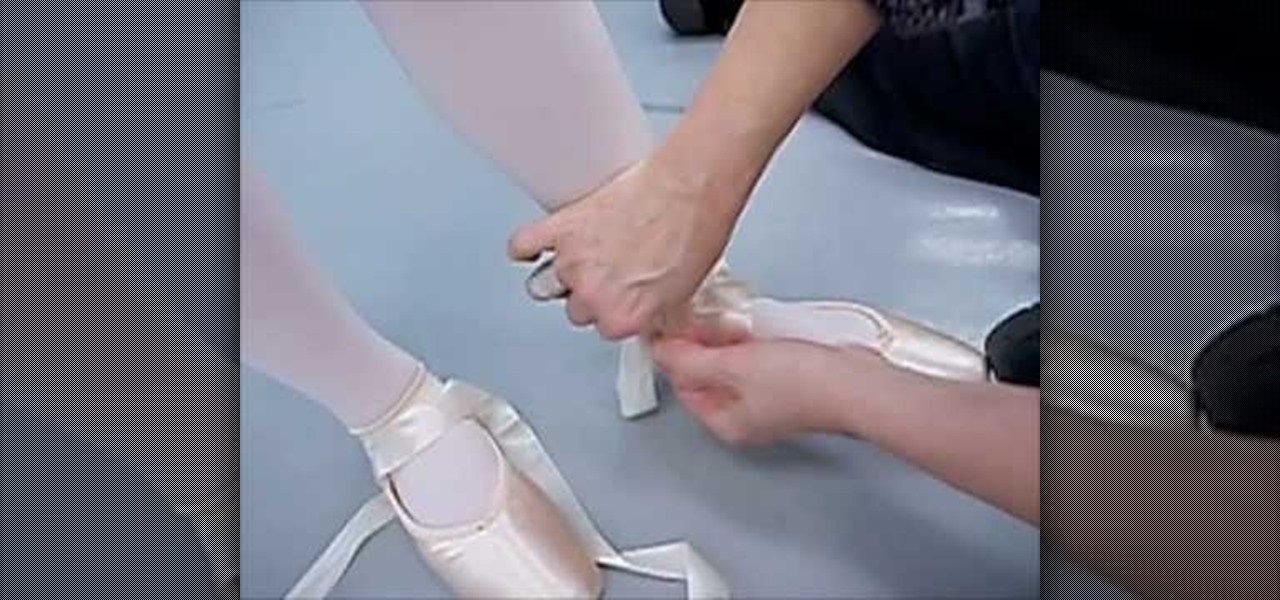
In this video tutorial, viewers learn how to tie pointe shoes in ballet. Begin by putting on the shoe and tie the small lace. Then cut off most of the excess of the small lace (about 1 1/2 inches) and tuck it inside the shoe. Now wrap the inside ribbon of the shoe one time around the ankle and tuck it back. Do the same with the other ribbon, except do it the opposite way and then tie the ribbon together. Now cut off the excess ribbon and tuck it in. This video will benefit those viewers who a...
In this video, we learn how to make butterscotch brownies. First, melt 3 tbsp butter and combine with 1/3 cup brown sugar until it's dissolved. Next, beat in 1 egg and 1 tsp of vanilla. Now, stir in 1/3 cup sifted flour, 3/4 tsp baking powder, and 1/3 tsp salt. After this, fold in 1 cup chopped nuts and 1 cup dried fruit. Now spread the dough into an 8x8 inch pan and bake for 20 minutes at 350 degrees. When finished, let the brownies cool and cut them into squares for eating. Serve with ice c...
In this tutorial, we learn how to make a paper snowflake. First, take a copy paper and fold a quarter of it over to the other edge. Next, cut off the excess paper so you have a triangle shape. Now, fold a corner to the next corner, and repeat so you have another triangle. You can now cut corners off so they are even and you have a rounded snowflake. Then, cut a triangle starting from your edge points that you just created. Now cut slits a quarter inch apart into the middle of the paper all th...
Spinner bait are good for attracting and catching bass when fishing. In order to have the lure and the bait working correctly when using this type of bait, you will have to attach the bait directly to the lure. This can be done using the improved fisherman knot. After threading the line through the bait, you should leave about 6-8 inches of line to tie the knot. Begin by making about 5 twists around the line and then thread the line through the hole created below the twists. After threading t...
In this video, Caroline gives you a few tips on how to lose your love handles easily, Caroline herself lost her love handles during a 9 day cleanse in which she lost 2 inches off her waist. In order to do this exercise, you need to first stand with your legs about shoulder length apart. Then, placing one of your arms at your hip, extend the other one far above your head, touching your ear on the same side. Begin to stretch to the opposite side, stretching your side until you are at about a 45...
In this video tutorial, viewers learn how to make a beaded watch band with a non-loop watch face. Begin by cutting 2 pieces of the stringing materials to approximately 10 inches. Then put one end of the string through the hole of the watch face and pull it to about halfway. Now users will have 2 strands to work with. Users may choose to making a double strand watch band by putting beads on both strings, or a single strand watch band by running both strands of string through a single bead. Fin...
Secure a square-shaped piece of paper preferably six inches long on both sides. Cut the square paper into two equal halves. Fold one piece longitudinally right at the middle. Open the fold and refold it horizontally, on the shorter side. Refold the longitudinal crease you made earlier. Then, fold both sides diagonally but facing opposite each other.
If you own a BMW E46, you may have run into a problem with the control arm bushing. This is a frequent problem when dealing with this car, but it can easily be identified. What happens when a control arm bushing fails, is that the actual wheel moves two inches back. This can be dangerous and can easily damage the car. So check out the tutorial above to identify control arm bushing failure in a BMW E46. Enjoy!
The only thing women have requested more than Carrie Bradshaw/Sarah Jessica Parker's wardrobe (and AH-mazing closet) is her lush, plump curls. The barrel-curled hairstyle is a look she's worn since day of of "Sex and the City," and it's lived on as an iconic style almost as popular as her character (and with as great a following).
You can't be a successful and certified cross dresser/drag queen without a nice rack. A realistic looking pair of titular fun bags finishes off an outfit as much as a six-inch pair of stilettos, so it's very important to know how to put them on.
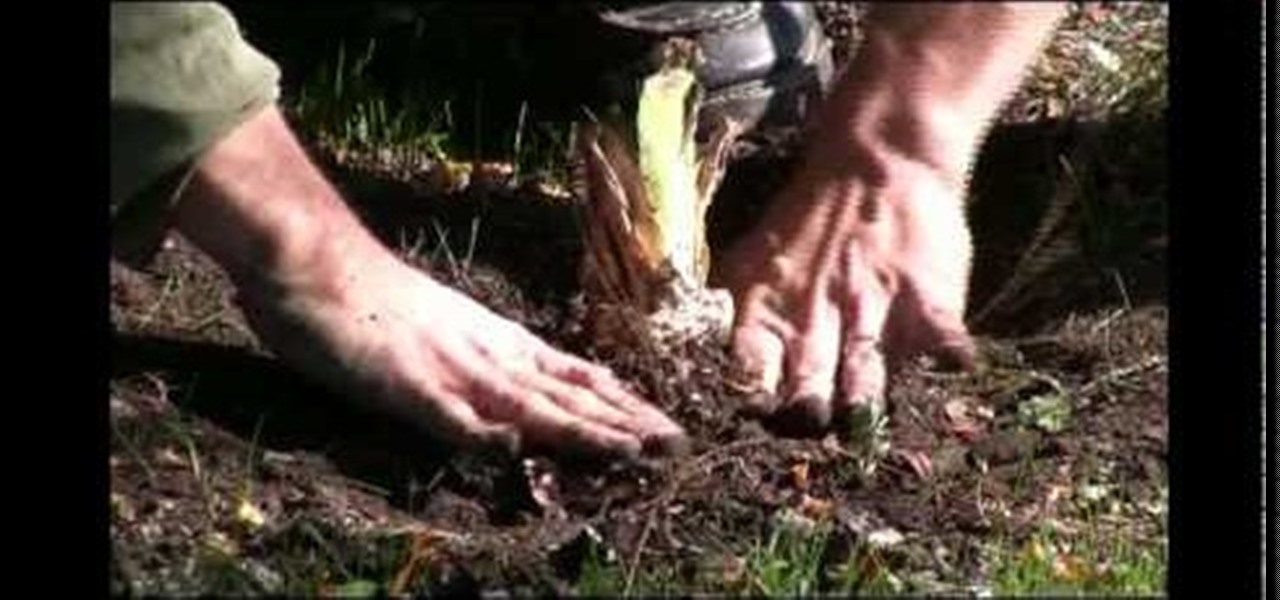
This video shows how to plant an iris. Be sure to select a spot that gets about six inches of sun a day to plant an iris. When planting more than one iris, be sure to space them about a foot apart. This will encourage them to grow tall. When you dig the hole, don't dig it too deep. Also, make a little mound in the center of the hole. Spread the roots of the iris over the little mound so that the hole drains and the plant doesn't rot. You want about a third of your rysem sticking up out of the...
To start a kinky or Senegalese twist, create a one inch square section of hair and split it into two pieces. Drape a piece of weave over the strands. Twist the right piece of weave over the right strand with a clockwise motion. Twist the left piece of weave over the left strand also using a clockwise motion. Then twist the right strand over the left. Continue twisting each strand to the right before twisting the strands together as you go down the section. The twists can continue down to the ...
Torrin creates a Victorian up-do with long hair. The style can be done with hair that is at least just past the shoulders in length. Make a ponytail at the base of the neck. Slide the band down a bit and poke fingers through the middle of the ponytail to split the hair. Then pull the ponytail through the split from top to bottom. Separate the ponytail into three sections and make three English braids. Attach the three braids together with one rubber band, leaving several inches of hair left o...
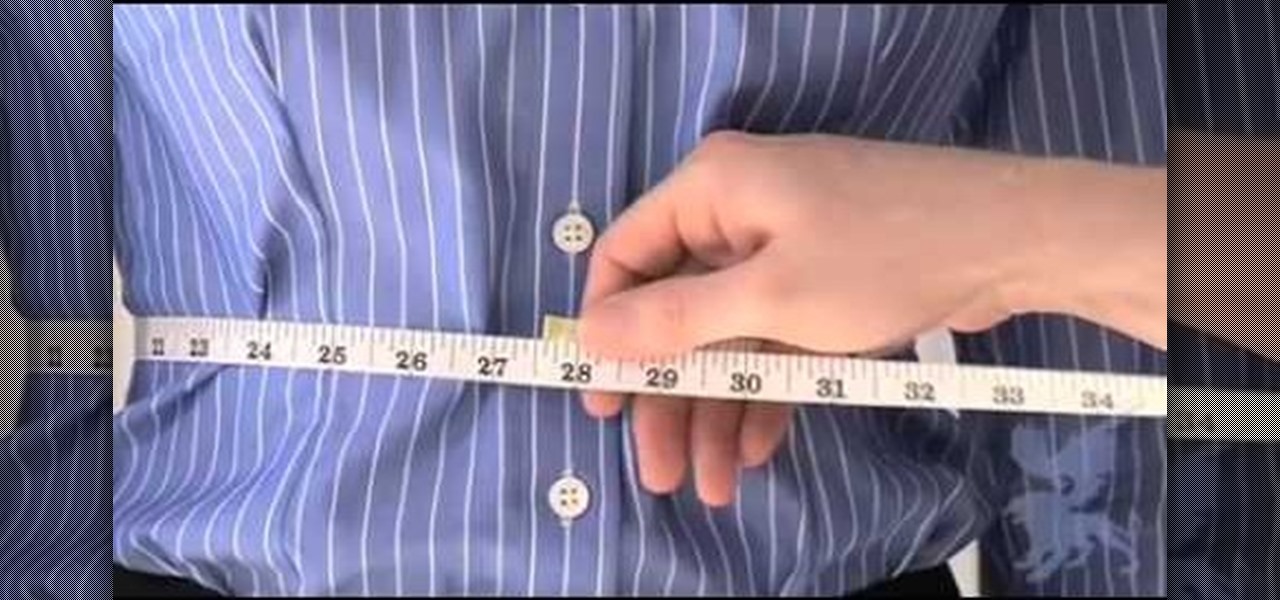
When being fitted for clothing, it is important to get a true measurement of your waist. On a woman, this can be confusing, as our waists are actually inches higher than where we typically wear our trousers.