Catheterization is used to drain a patient's urine freely from the bladder or to inject liquids for treatment and diagnosis of certain bladder conditions. Cathing is usually done at a clinic by a nurse, although self-catheterization is also possible.
Using Embird embroidery software, Rosanne shows us how to use the Basting Stitches control properly, for a perfect design. Rosanne will also show you the bast in a hoop technique for more security. Insert basting stitches in Embird.
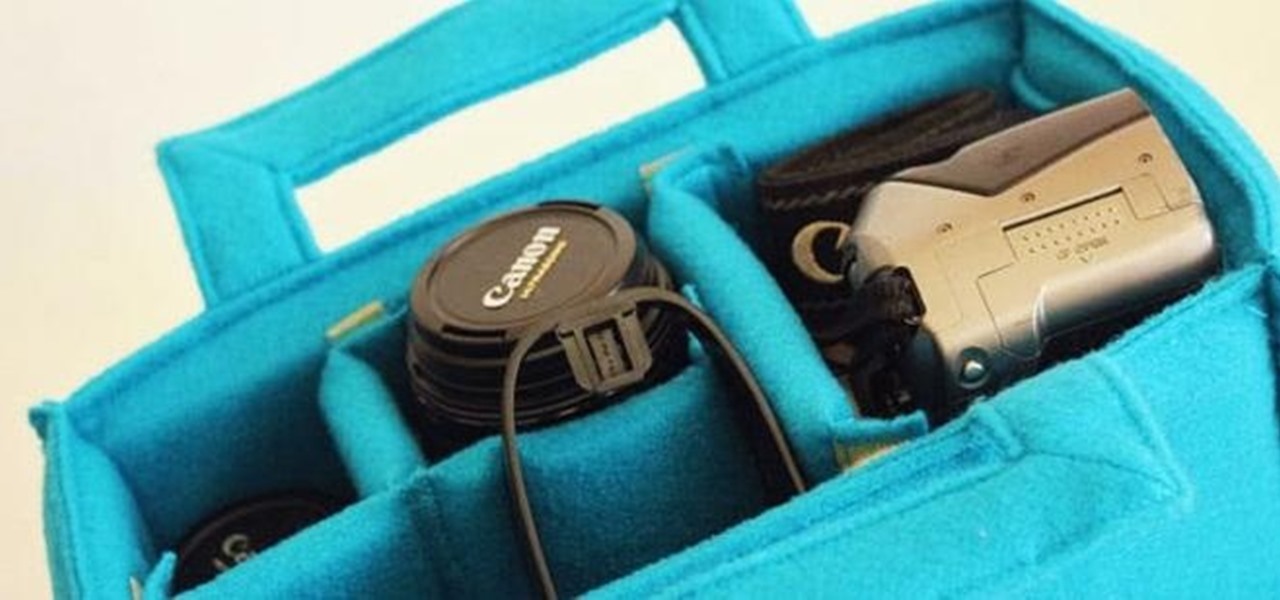
When you have expensive camera equipment, the last thing you want to do is just throw it all in a bag without any kind of protection. If you don't want to buy a separate bag, you can always use an insert, but they can get pretty pricey, too.
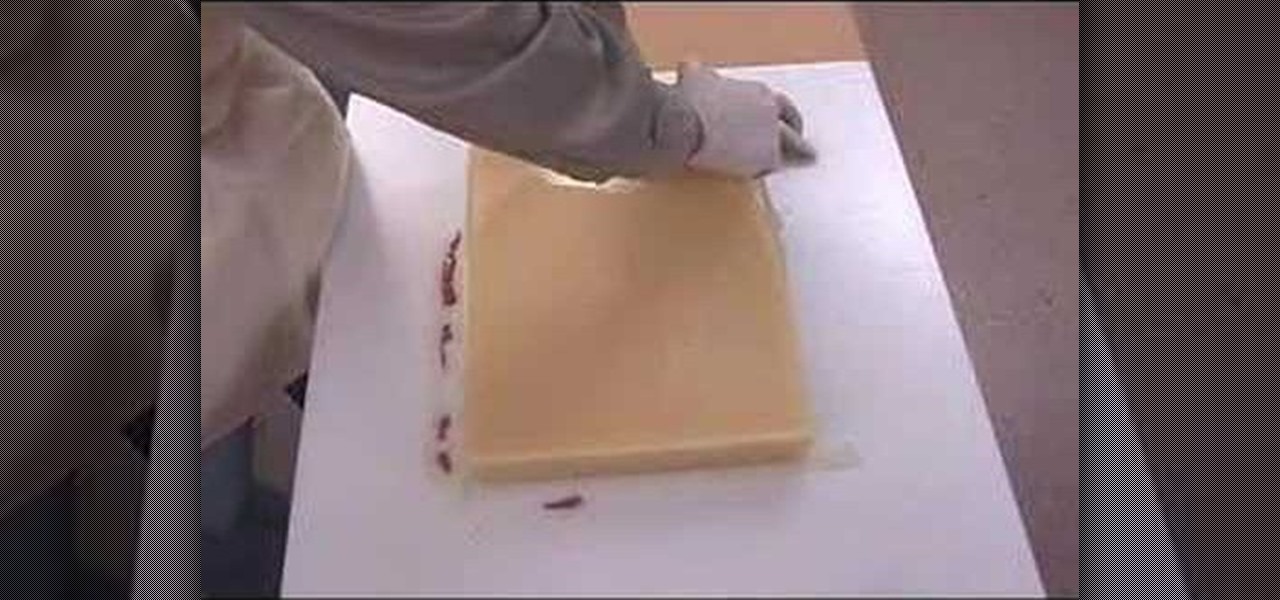
This video tutorial shows how to use Smooth-On's ReoFlex urethane mold rubber to cast a simple 1-piece block mold. Learn how to mix, pour, form, and create a one piece mold to create duplicates of an original object.
Create a table with sales data with this video.

Do you want to include more pages after your file is published into PDF? Or you have accidentally included pages that are not meant to be in the PDF? In this Adobe Acrobat video tutorial you will learn how to insert and delete pages in a PDF document. Make sure to hit "play tutorial" in the top left corner of the video to start the video. There is no sound, so you'll need to watch the pop-up directions. Insert and delete pages in Acrobat 5.

PDF files could be boring to the readers if filled only with text. You can easily make a difference by adding graphics to your PDF. In this Adobe Acrobat video tutorial you will learn how to insert image files into PDF pages. Make sure to hit "play tutorial" in the top left corner of the video to start the video. There is no sound, so you'll need to watch the pop-up directions. Insert image files into PDF pages in Acrobat 5.
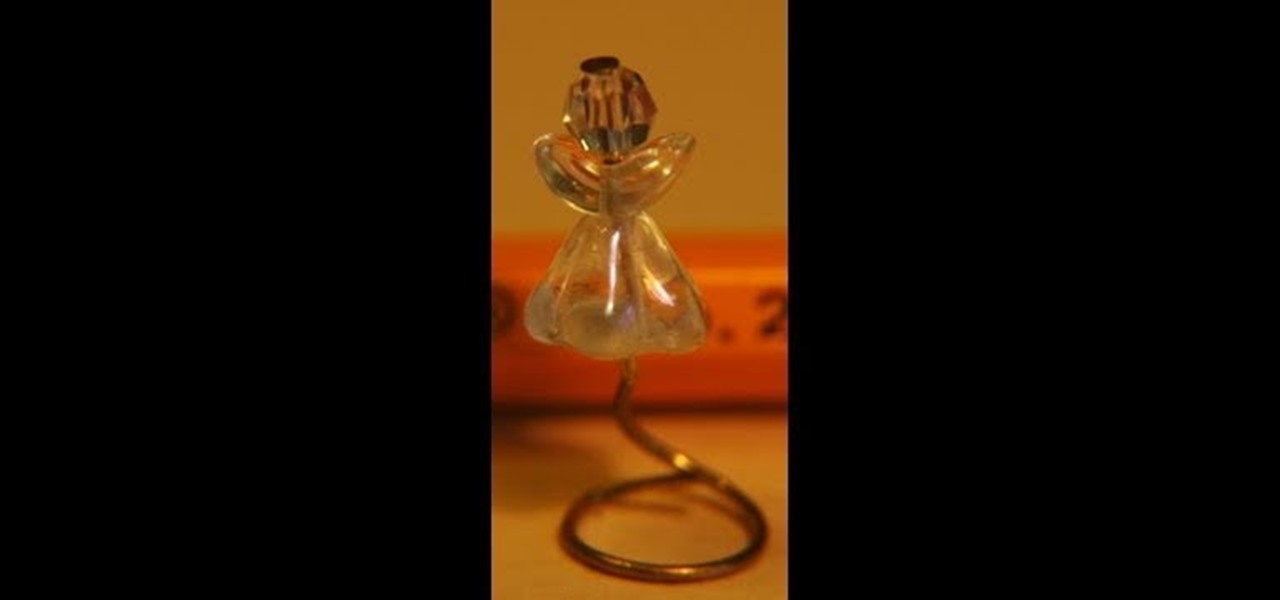
In this demonstration garden of imagination shows how to make a doll house Christmas tree angel topper ,which is less expensive and easy to be made at home .First she inserts a round bead in an eye pin which is for the crown of the angel and followed by crystal ball .after that small glass wings are inserted and then followed by a flower crystal which will be inserted upside down so it will look like an angel skirt and then inserts a bottom of an earring for the base and fixes tightly as it s...
This video tutorial will show you how to add citations and bibliographies in MS Word 2007. 1. Select desired text.
Great news! — Excel isn't just for Windows anymore. Okay, so it's been available on the Mac for awhile now, but if you haven't used it yet, why not start now? Getting started with Excel 2008 for Mac is easy, and this video overview will show beginners or even the most seasoned professional spreadsheet worker a thing or two. The Microsoft Office for Mac team shows you just how to get started in this how-to video.
In this clip, learn how to take your Nook e-reader apart and insert a new Micro SD card into the back. By inserting a new SD card you can change the reader's storage capacity, add new files and do a bunch of other things. If you are daring enough to remove the back of your e-reader, follow along and swap out your card.
Activate/Use iPhone 3G and 3GS with Go Phone Prepaid SIM Card:1. Eject the SIM tray using a pointy (thin) object.2. Firmly, insert the Gophone SIM card to the SIM tray (which got ejected from the iPhone).3. Insert the SIM tray along with SIM card into the iPhone.4. You will be able to notice that a new symbol pops up in the iPhone (which symbolizes SIM Card inserted).5. Create and send a new message to your Secondary mobile.6. You will be able to observe that, your other (Secondary) mobile ge...
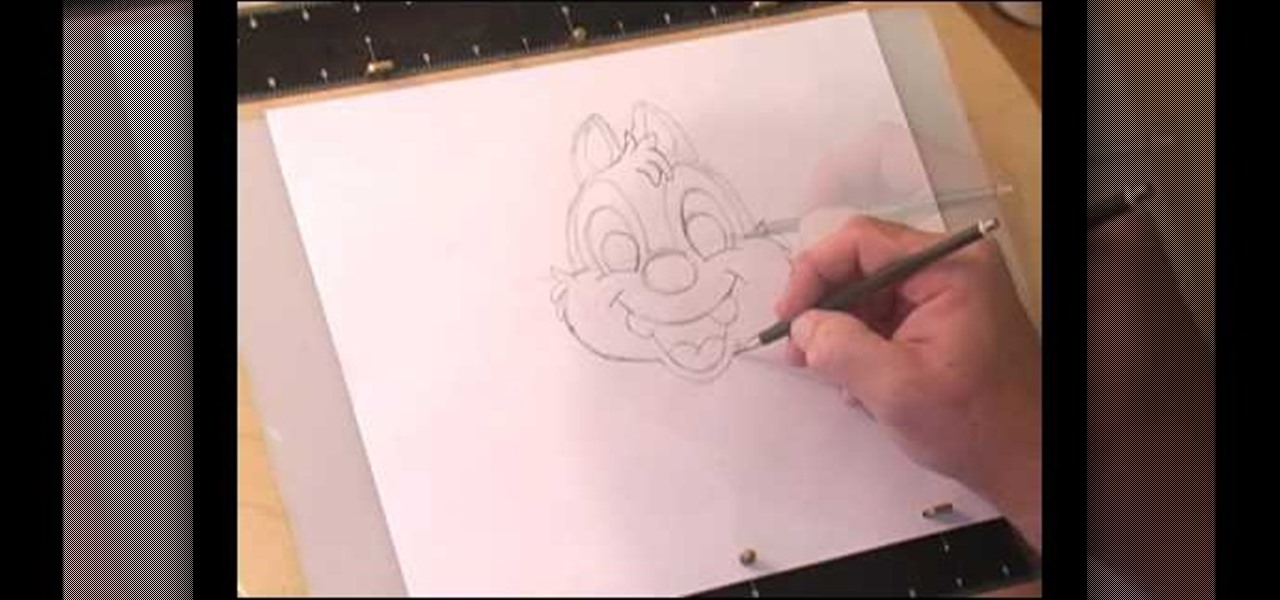
This video shows us how to draw a Dale character. First you draw a ball about the size of an orange. Insert construction lines in the shape of a cross. Starting with the small middle area, draw the mask outline and add the ears at the top. Draw in the nose under the middle line. Draw the cheeks outside the construction line on both sides. Add smile lines on each side and draw a curve between them for the mouth. Extend the lower part of the mouth outside the construction line. Insert teeth and...
In this video the instructor shows how to create charts and graphs in Microsoft Word. First, open the Word document and select an area to insert the charts. Now go to the Insert tab in the ribbon and select the Chart icon. The Insert Chart window opens up with various chart templates. There are various categories of charts like Line, Pie, Bar in the left hand side. In the right hand side you can see the sample charts available and you can select any of them that you want. Now it transfers you...
To tie the spinal sinnet, take the thread folded from left to right and hold it at the cross. Now insert the right thread in to the hole and pull the left thread to make it tight. Take the end of the thread and insert it and pull the thread which is close to the knot, you will get another hole. Now cross the hole and then insert the right side of the thread and pull down the thread close to the knot. Repeat the same till the end of the thread. Now the spinal sinnet is ready to use.
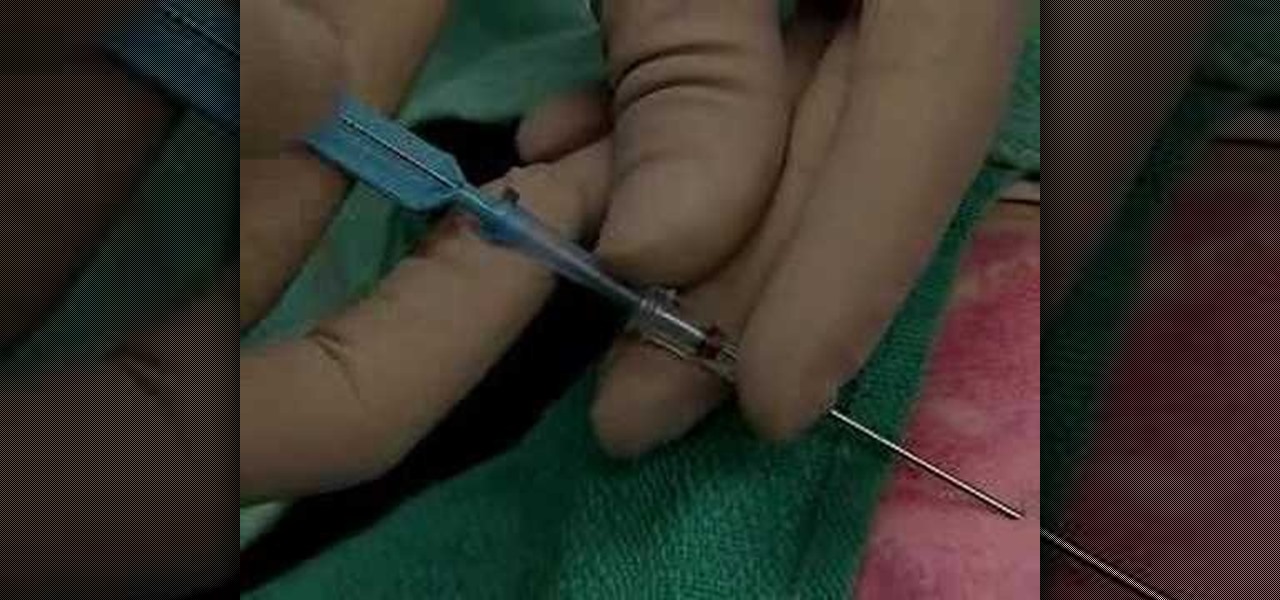
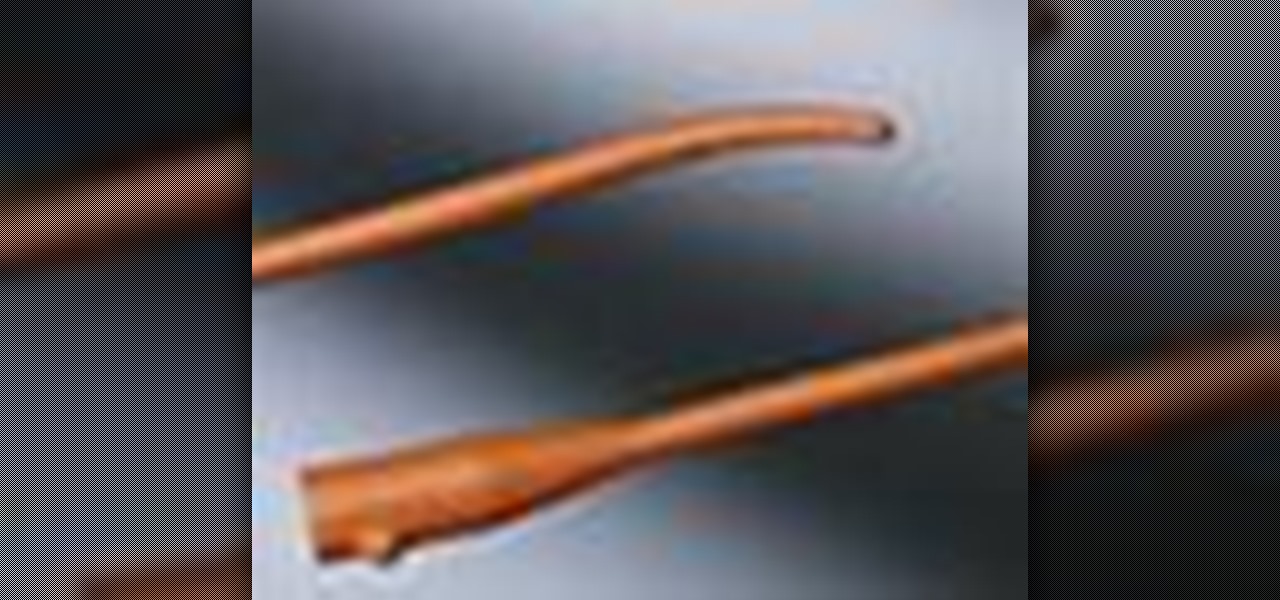
This medical how-to video demonstrates how to insert a central venous catheter line. The method used to insert the venous line is the landmark base technique. Always prepare the skin by wiping it with antiseptic. The patients head should be tilted slightly to the left. Follow along and learn how it's done.
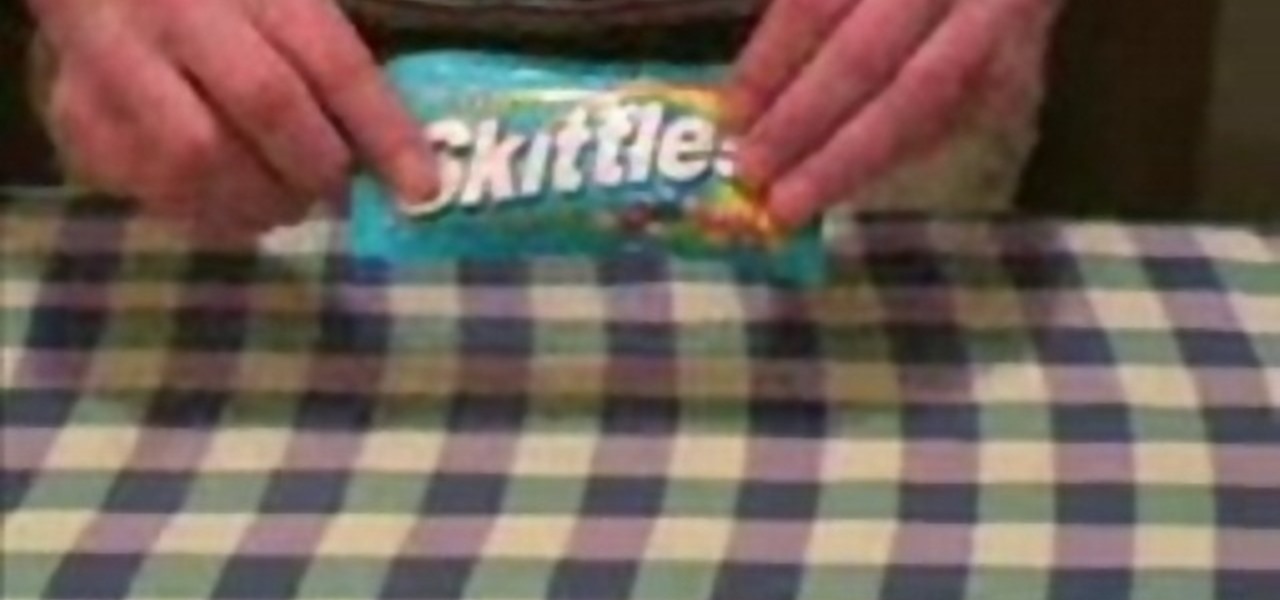
Here is a neat little way to manipulate a bag of Skittles to insert a secret message. Shock your friends and bedazzle your family with a neat little trick that will sure to leave them scratching their heads. Insert a message into the Skittles and have fun fooling everyone.
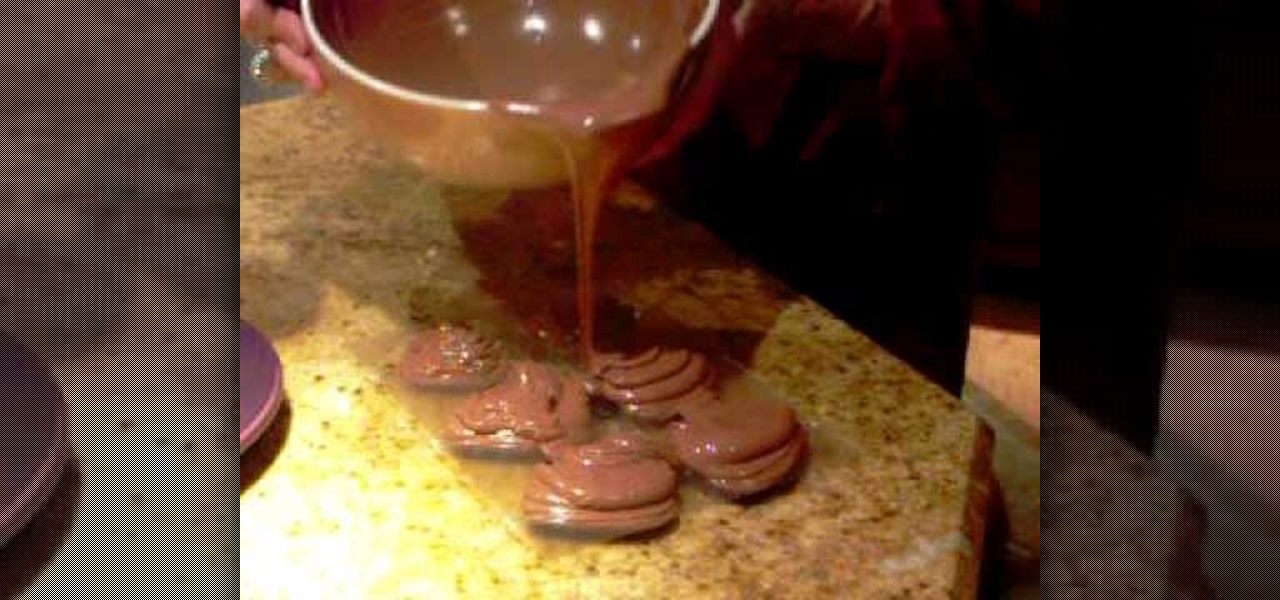
In this tutorial, we learn how to make chocolate hearts for Valentine's Day. You will need 1.5-2 lbs of chocolate and a mold with heart shapes in it and sucker inserts. You will also need sticks to insert into the chocolate. First, melt your chocolate in a large bowl with a spout. After this, pour the melted chocolate into the molds and then scrape excess chocolate back into the bowl. Next, insert the sticks into the molds and then place them in the fridge to let them sit overnight to get har...
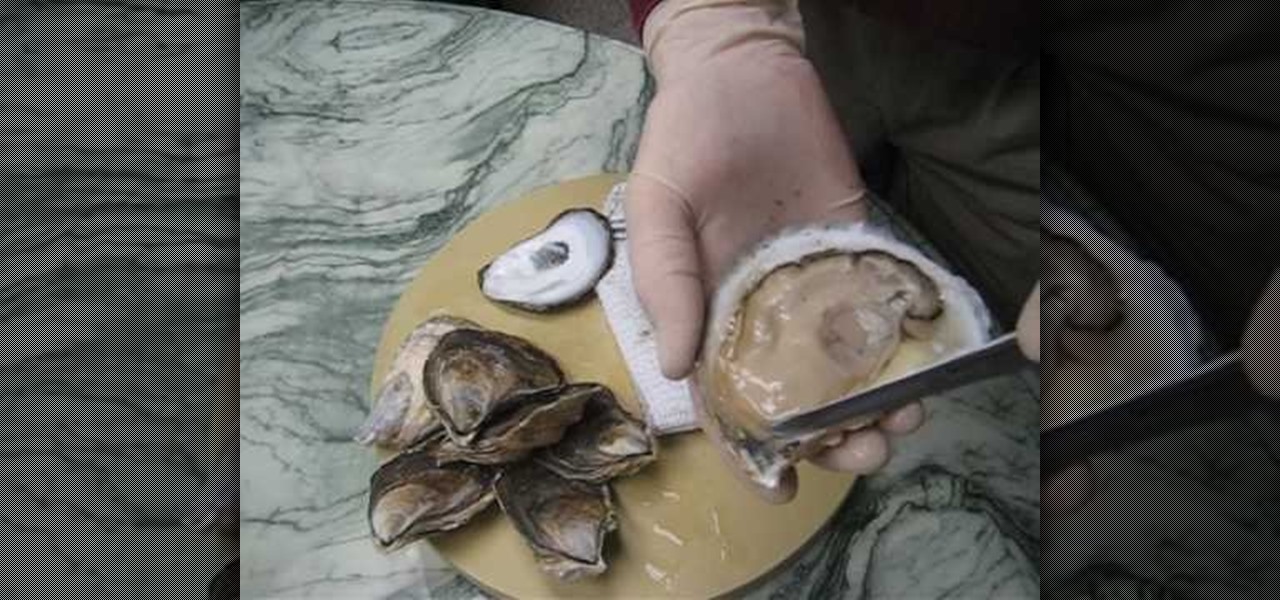
In this how-to video, you will learn how to shuck an oyster using the hinge method. First, you must have cleaned oysters, oyster knife, a small towel, and a glove. The oyster has a flat top shell and a bottom shell. The hinge is where you will be inserting the knife. Place the oyster top side down on a flat surface. Insert the tip of the knife into the small hinge opening. Use force to push it in. Clean the knife and then pry it open. Slide the knife across the top shell towards the abductor ...
How to make cool paper cube
This video teaches you how to solve a linear system by mathematically graphing it out. The video starts off with a problem, asking to solve the system, with two given equations. To solve the system, one would insert 0 for x and solve for y in the first equation to obtain a point. Then one would insert 0 for y and solve for x at the second point. Afterwards, insert 1 for x and solve for y to obtain the third point. For the second equation, do the same thing, inserting 0 for x, 0 for y and 1 fo...
This is an easy guide on how to load a CD in a 2010 Toyota Prius. On units with standard audio system, insert CD into the slot to load. Press eject button on the left to eject. On units with JBL audio systems, press the load button in the right hand side and wait for the light. Next to the CD port to turn amber until solid green. Now you can insert a CD (if you'd like to load all 6 CDs), press and hold the load button and wait until light turns solid green. Now you can insert the next CD and ...
In this video, we learn how to use Logic Pro: Changing presets in Logic instruments. First, insert the ES2 and add in a preset that you like. You can also use key strokes to step through presets instead of using the mouse to click through all of them. By doing this, you will save time while you are going through presets to audition a bunch of presets to find the one you want. Use the drop down menu within the instrument to find the different presets and then choose one you would like to inser...
Great hair doesn't come easy, at least according to this video. Although some are blessed with a naturally thick mane, those who are not as fortunate can volumnize their locks with extensions.
Clip Art from Microsoft Office allows you to insert stock photos into you PowerPoint, Word, Excel and Entourage documents easily. You can gain access to the Office Clip Art site easily in any of the mentioned applications. The Microsoft Office for Mac team shows you just how to download and use clipart from Office Online in this how-to video. You can get free stock images of low-priced professional quality photos.
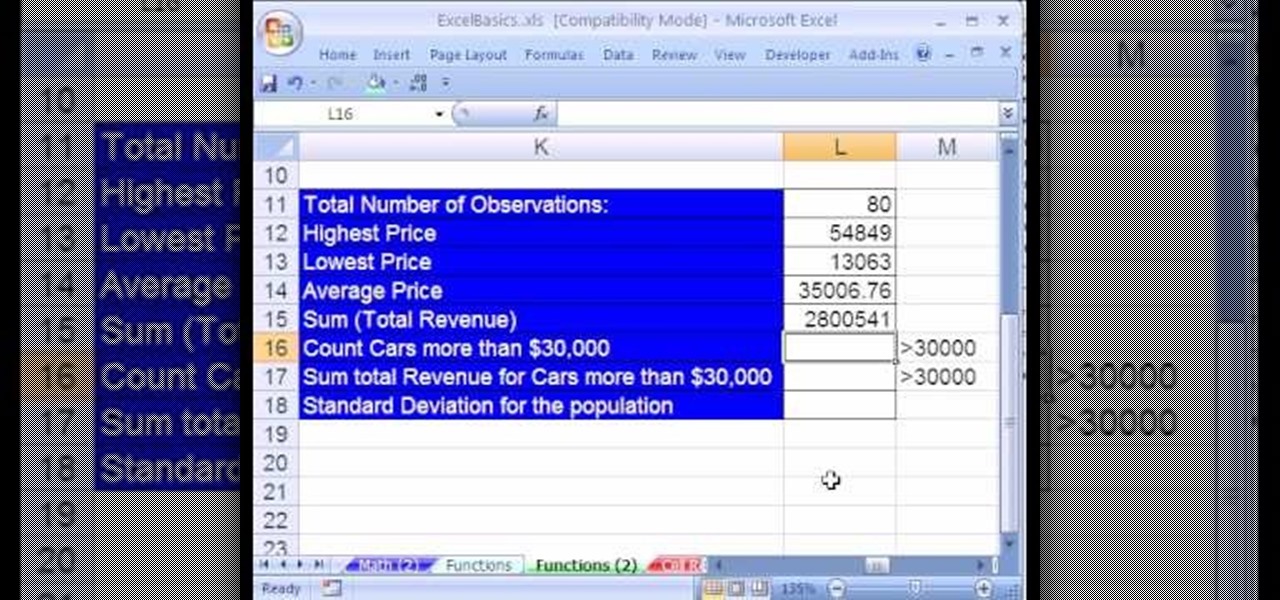
Not every client or coworker likes to mine through a spreadsheet to find all the important data. So, with Excel 2008 for Mac, you can easily share that data without sending the entire Excel spreadsheet. To do this, all you need to do is to use the "copy as picture" option. The Microsoft Office for Mac team shows you just how to insert a spreadsheet snippet in this how-to video.
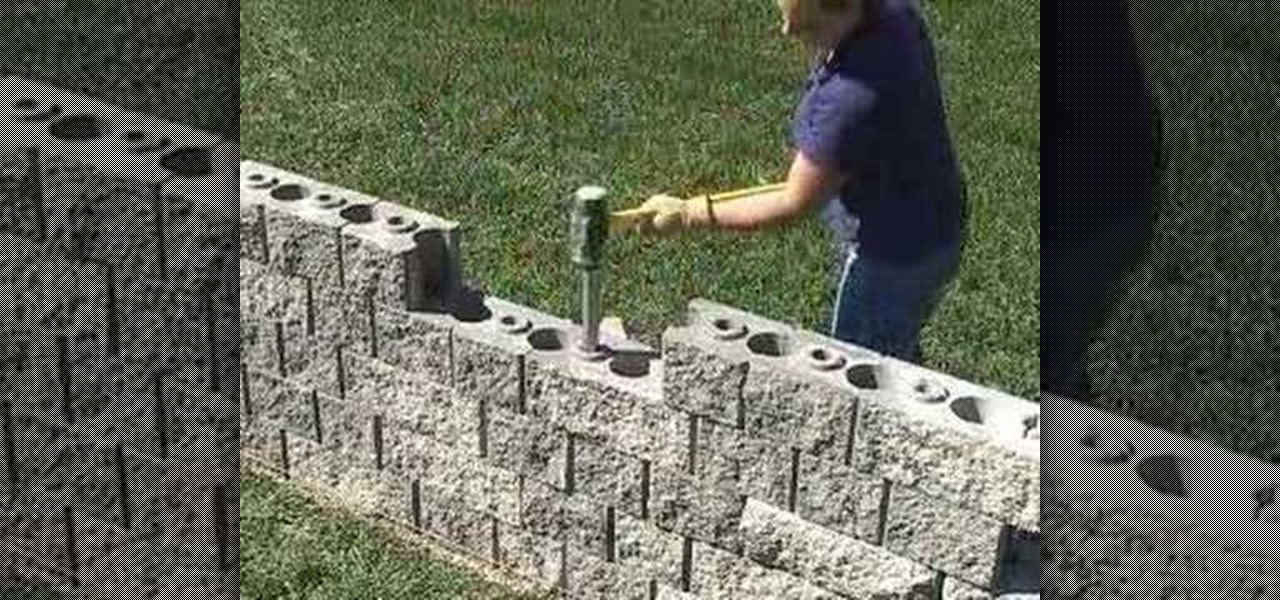
In this video tutorial, viewers learn how to add strength to a landscape patio wall. For reinforcement, users should insert metal pipes down through the wall. To do this, users will need a sledgehammer, 1/3" pipe and a large diameter pipe cutter. Determine the length of the pipe by adding 2 feet to the actual length of the wall. Cut the pipe to the length and insert the pipe down through a large diameter hole on the wall. Remove the surrounding blocks and use the sledgehammer to drive the pip...
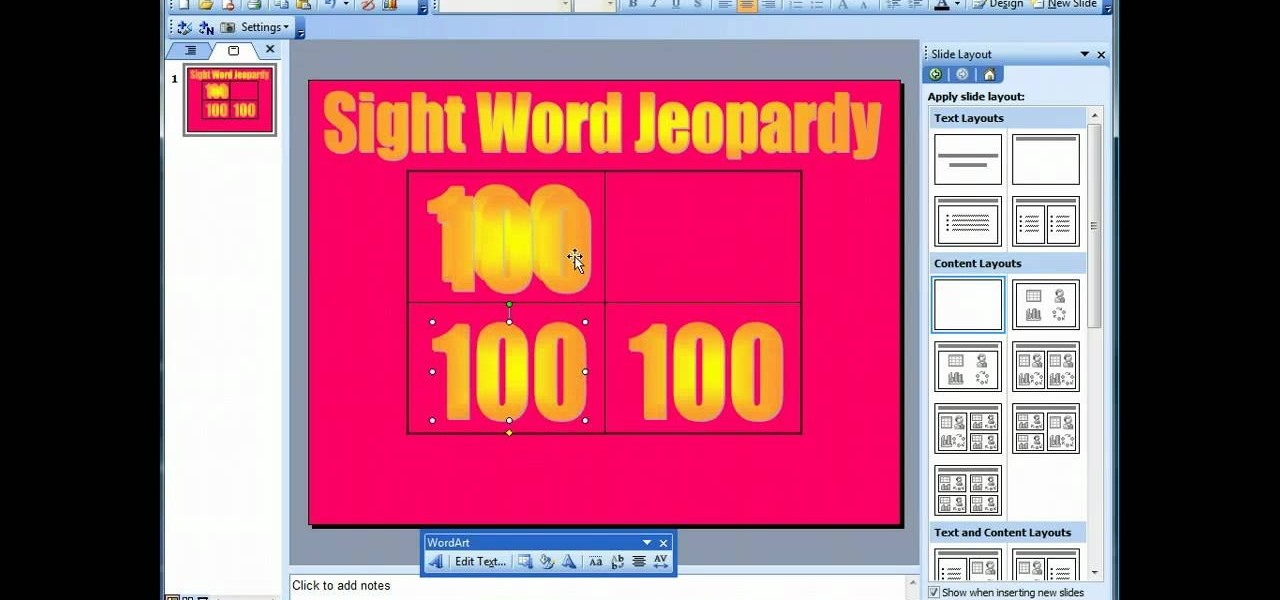
This video demonstrates how to make a basic Jeopardy game in Microsoft PowerPoint. First, choose a background color by clicking Format on the top bar menu. Select Background and choose the color you wish to have. Click Apply To All to apply it to your entire PowerPoint presentation. Then, click Insert on the top bar menu and select Table. Fill in the number of columns or rows you wish to have for your table and then click OK. In this example, create a 2x2 table. Make a title for your game by ...
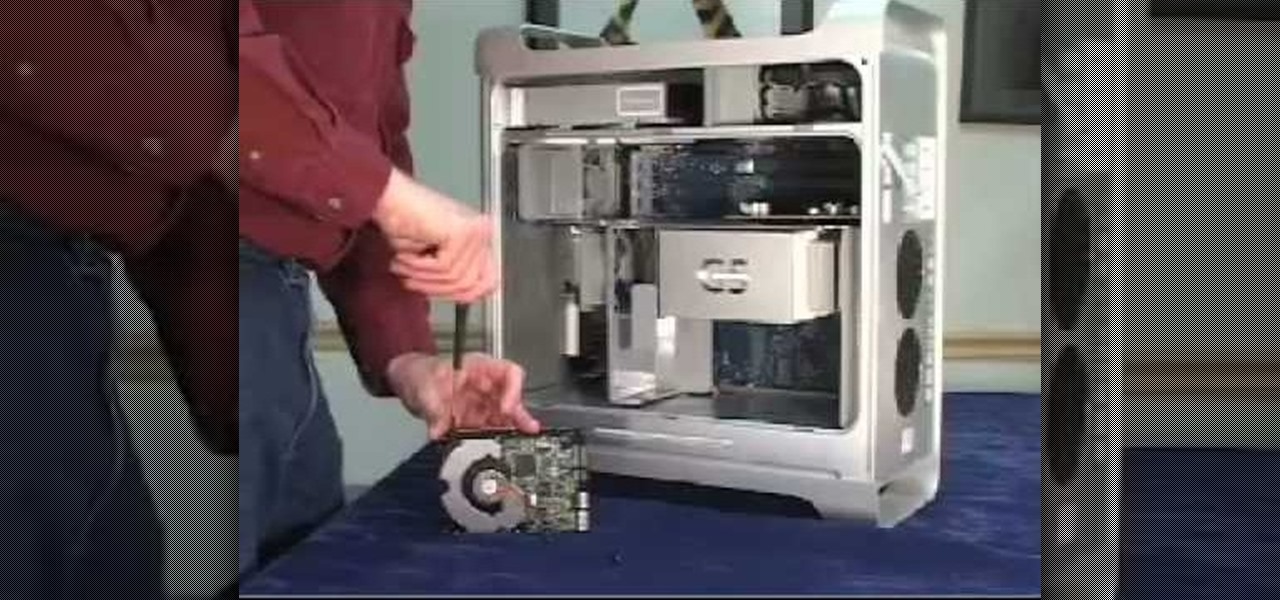
This video is about installing second serial ATA drive into a Power Mac G5 system. The video is a step by step demo starting with the removing of the door to the machine and the air pack. The first hard drive is at the top rack and you have to remove the four screws at the bottom and insert them into the top and bottom screw alls on each side of the drive. The hard drive is inserted below the first hard drive and the data and power cables are plugged into their respective slots. The video is ...
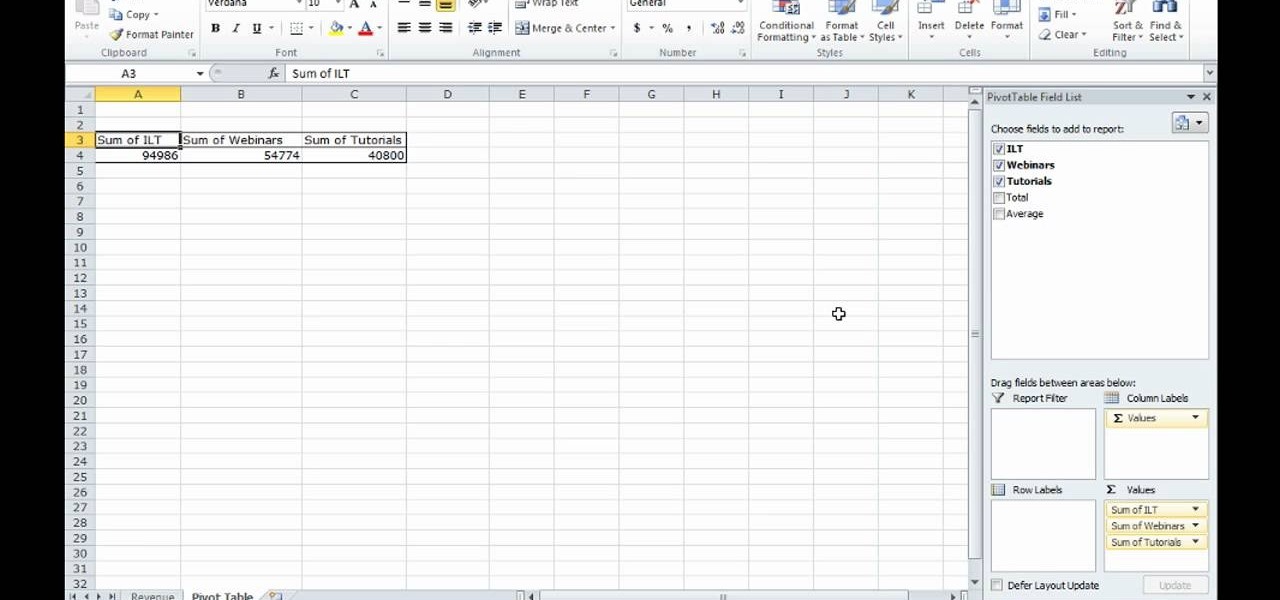
This video shows how to make a quick pivot table data filtering by using Excel 2010's ‘Slicer’ functionality. ‘Slicer’ delivers enhanced visual filtering method to allow you to get the data you need more quickly. When selecting a cell in the pivot table you will find ‘Slicer’ in the filter group of the ‘Insert’ tab. Click on ‘Slicer’ and an 'Insert Slicer' dialogue shows up where you can pick particular data fields from the slider list. Once you click on ‘OK’, the ‘Slicer’ objects with filter...
The Video On Demand highlights how amazing backgrounds are inserted behind characters and will show you how to composite video so your characters can seamlessly move in front of these images. Computer generated video objects may be superimposed over a background video image so as to create the illusion of a single composite scene. The leading edge of an object is detected and for a period of time the object and background video signals are mixed. After that period, only the object video is tr...
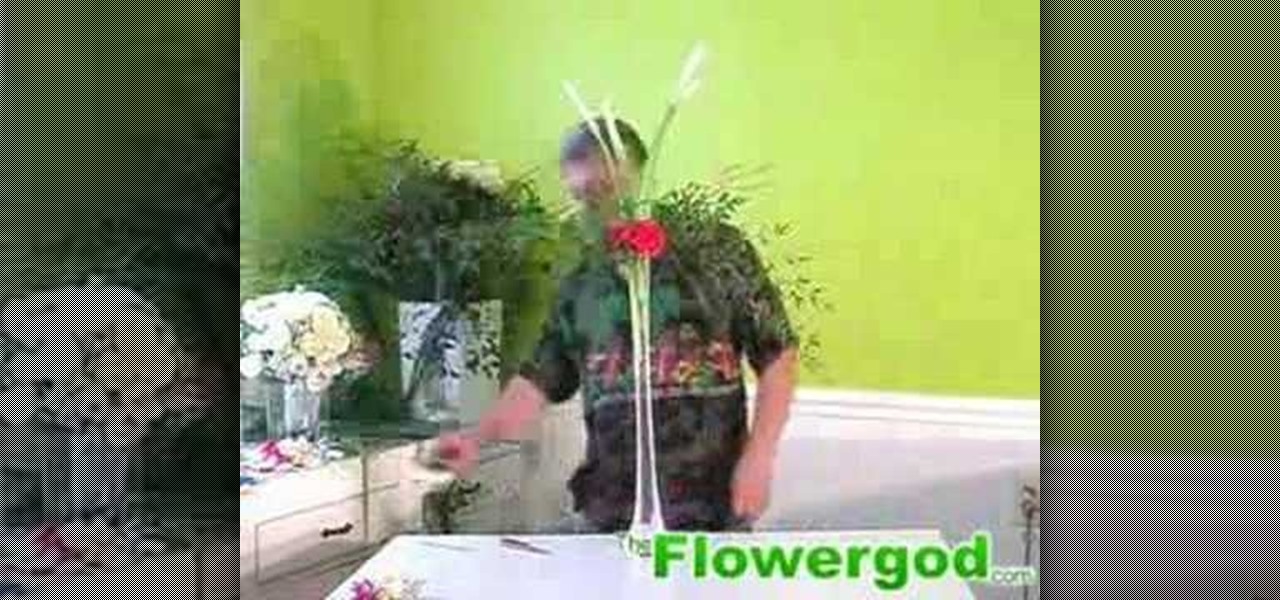
Following are the steps to describe how-to make floor flower arrangements: 1. The materials required for this flower arrangement are a long flower vase, few red roses, some pine leaves, few lilies and some long grass.
Customize your vehicle, watch this video tutorial on how to install a billet grille set on a 2008 Toyota Tundra. This shows the process of installing the complete Carriage Works brand billet grille on your Tundra.
Scared of using a tampon? This how to video takes the mystery out of inserting a tampon. Watch and learn how to insert and remove a tampon properly with this feminine hygiene tutorial.
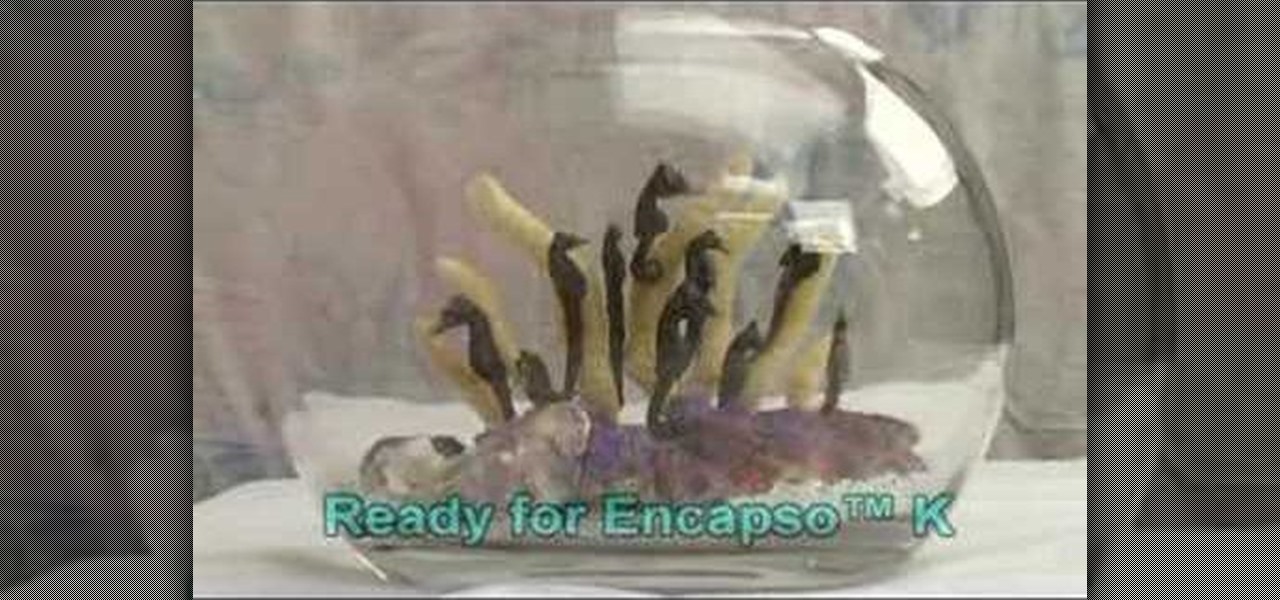
This video tutorial demonstrates how to use Smooth-On's Encapso K rubber to create a realistic seascape display. Learn how to freeze and protect an underwater landscape sculpture.
This video tutorial shows how to use Smooth-On's EZ Spray Jr. system to spray mold rubber, liquid plastics and casting resins. Learn how to make molds out of any object out of rubber, plastic or resin.
If you're into knitting and crocheting, you probably know it all. But what about a broomstick lace crochet? If you haven't attempted this fine crochet pattern, you must… now! Broomstick lace crochet forms a visually interesting and beautiful stitch.
Assemble tools and materials. You'll need a rim, a hub, and the proper length spokes and spoke nipples. You'll need a wheel truing stand, a spoke wrench, a flat screwdriver, and medium weight oil. A spoke tensiometer, a dishing tool and a nipple driver are optional. Place the rim in your lap with the valve stem hole directly across from you. Hold the hub in the middle of the rim with it axle vertical. These instructions assume you are building a front wheel 3x. Drop one spoke though every oth...
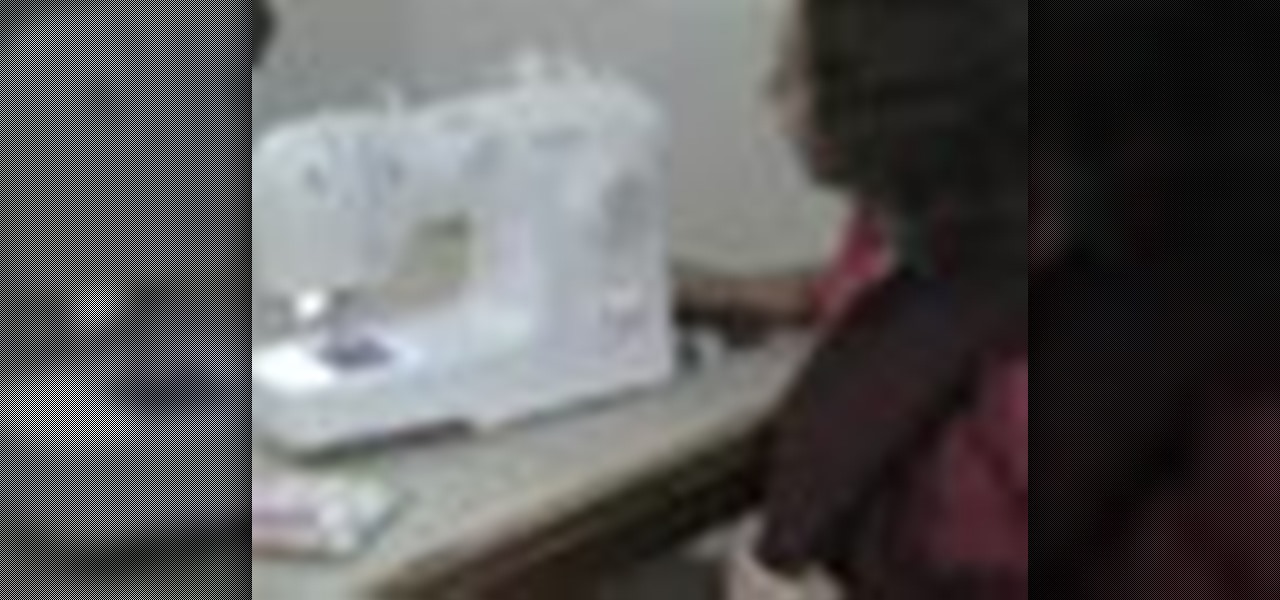
Crafts are easily completed once you learn how to quickly thread a sewing machine. You Will Need
In this video, we learn how to make a photo/ATC carousel for cheap. First, take clay in a cylinder circular box and let it set. Then, insert in a long object to create the spine of it. Push the clay around this after spraying with water. Then, fold trading card stock as well as card stock for photographs. Cut these out so you create little pockets where you can insert your photos into. Then, once you have all of these cut out and your photos inside, you will adhere the sides of them to the ce...