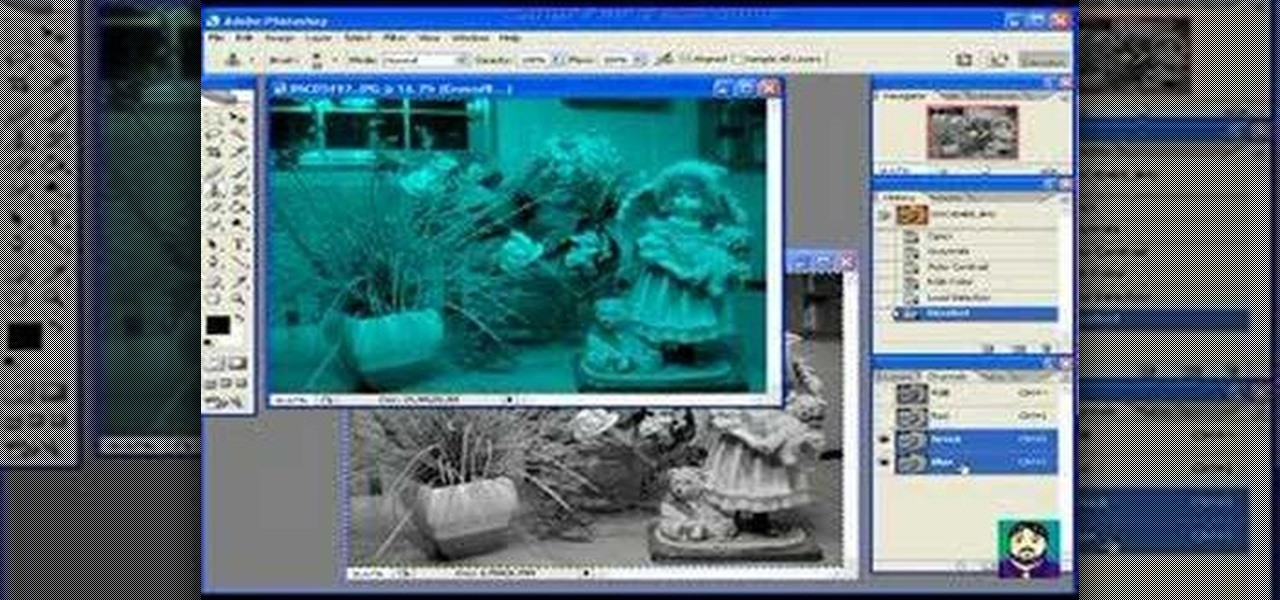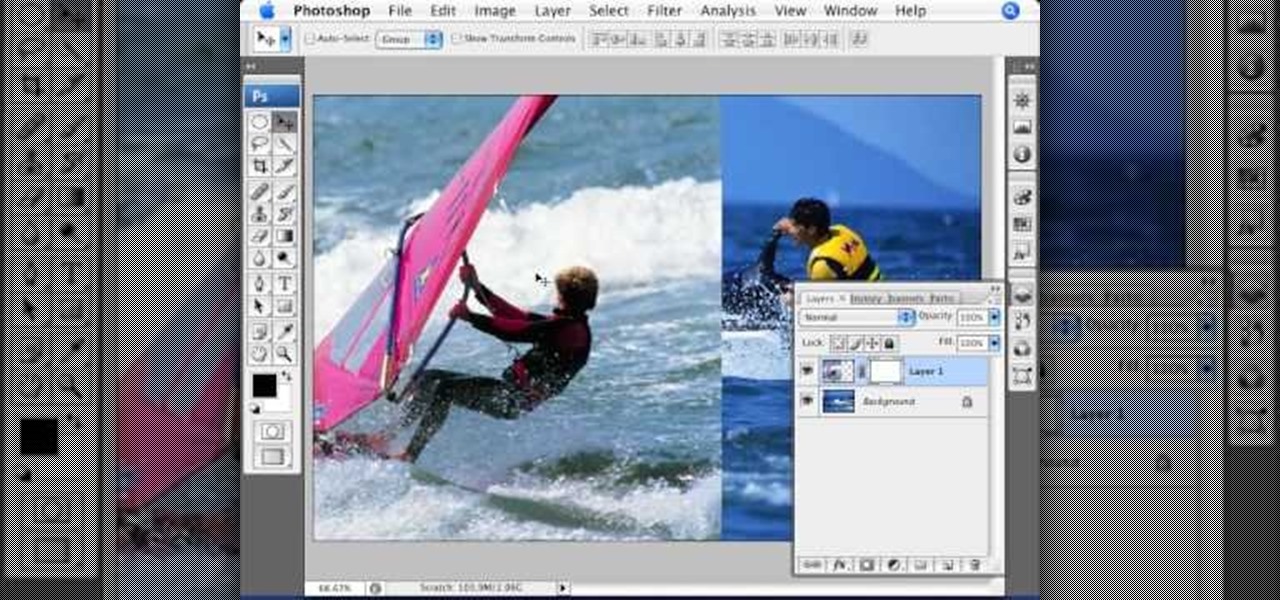
This video tutorial by photoshopuniverse teaches you how to blend two images seamlessly using Photoshop. For this you need two or more images that need to be blended together. Using the move tool in Photoshop move one image over to the other image. Open the layers window and make a layer mask as shown and select the gradient tool making sure the colors are white on black and connect the two images as shown. Using the brush and the opacity at 50% reveal the parts of the image that need to be c...
This video teaches about adding any of your photos to a billboard. Now copy into the computer memory back into the original billboard image to create another layer this is the layer place in our image. We can do this correctly, respective into this filter which is called vanishing point. Clicking at the four edges make this little bit bigger in image area. Now we can paste in that image control and change the promotional image. It fits sign of the billboard area and resize after the slight li...
The video is basically about how to modify the focal point of the image. When the image has some stuff on the background and when you want the viewers to focus more on one particular area and making the rest of the image darker, you need to modify the light values of the image, which will be taught in this video. This can be done by just selecting the area, which you need to highlight on the image by giving some border and then add curves. In the curves the area is made darker than the rest b...
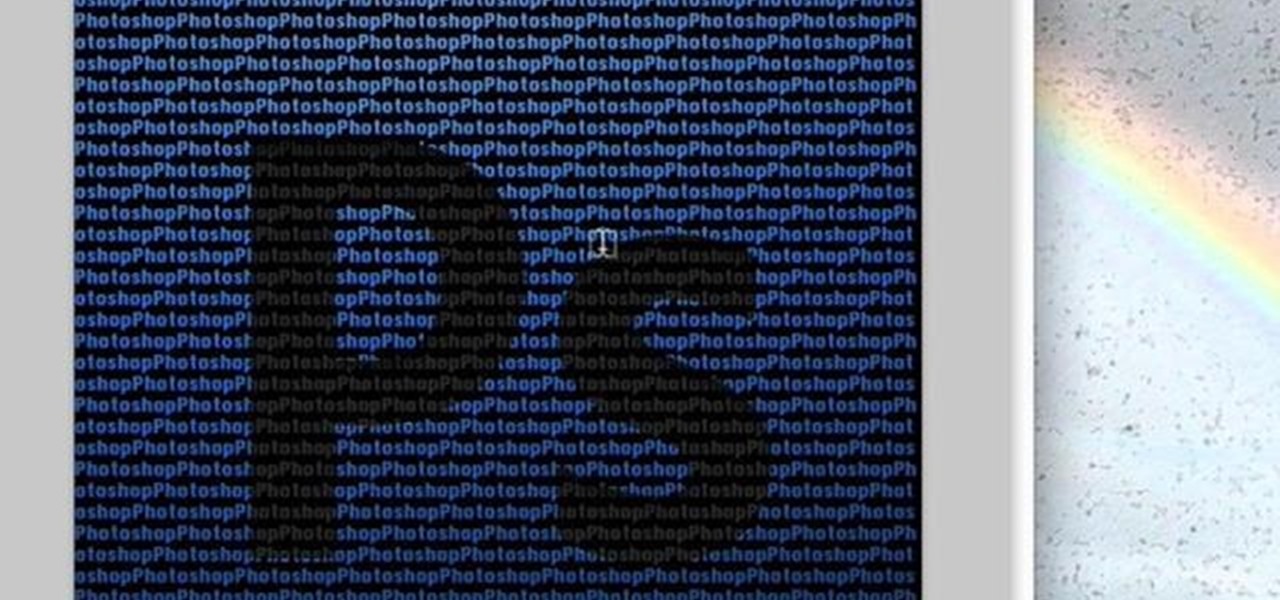
Need a little help with your new Adobe Photoshop graphics editing program? Working with Photoshop can be a bit tough if you don't know what you're doing, so instead of getting out the books, check out this 'no nonsense' video tutorial to learn how to make an image into a text image in Adobe Photoshop. Photo manipulating and editing is always tricky, so just watch to see how to make an image into a text image, for beginners.
Instead of using Photoshop, why not give Apple's Aperture a try? Aperture is designed more for post-production work for professional photographers, letting you cull through shoots, enhance images, manage massive libraries, and deliver stunning photos.
While many image sites allow you to hide image and video catalogs behind passwords, you can often gain access to these images by "guessing" the URL of the image. This process is called fuskering. Photobucket is one of the popular websites that can be fuskered and this tutorial will teach you how to use Nav.Net 4.2 to fusker private images

Pixelation is a dreaded effect which can corrupt your image when you try to resize or rotate an image and end up with jagged edges. This tutorial shows you how you can use Flash to smooth out your images and prevent pixelated images.
This tutorial shows you how to import an external image into your Adobe Flash CS4 animation project using Action Script. Choose any image you like and incorporate it into your current project using the steps outlined in this tutorial.
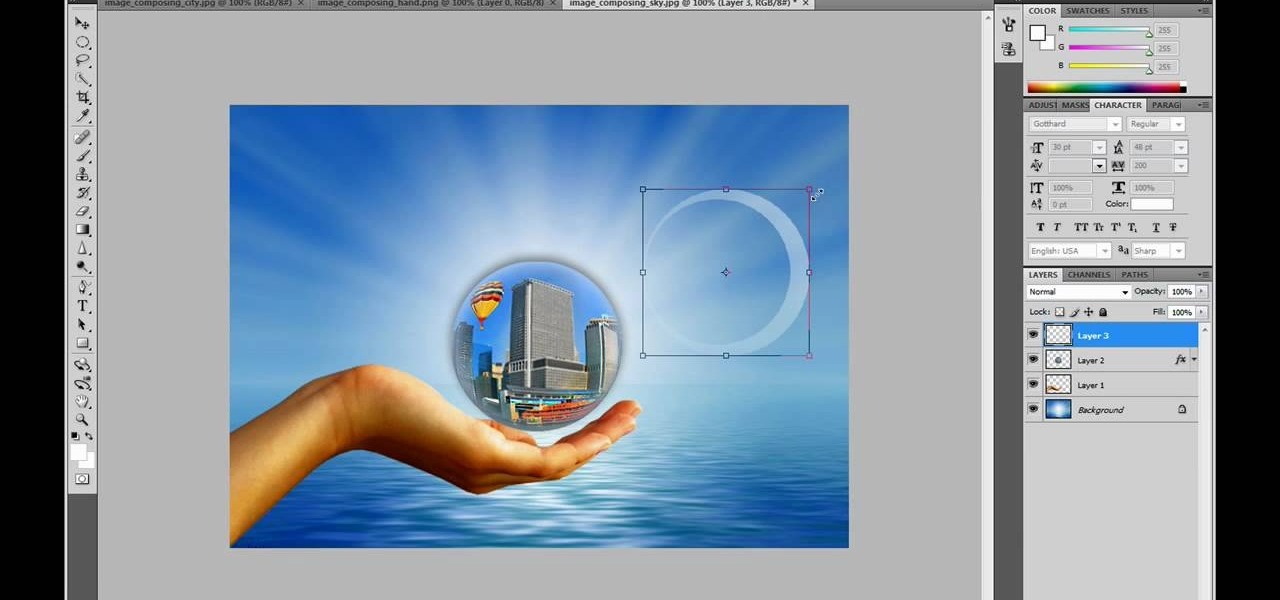
This video in the Software category will show you how to create a real cool manipulated globe in Photoshop. You will combine a few images and distort one of them to create a 3D image of a globe. There are 3 components; the background, a hand and an image globe. First open the background image. Then open the hand image, copy and paste it over the background, resize and position it correctly. Now open the third image, choose the elliptical marquee key, draw a circle and copy and paste it over t...
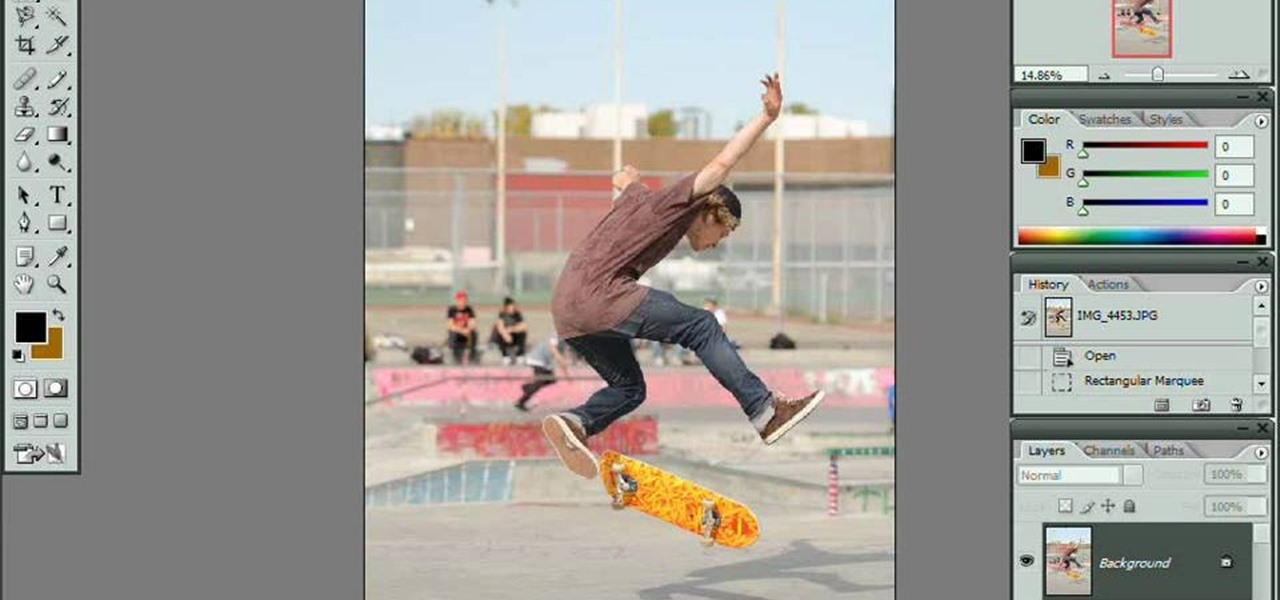
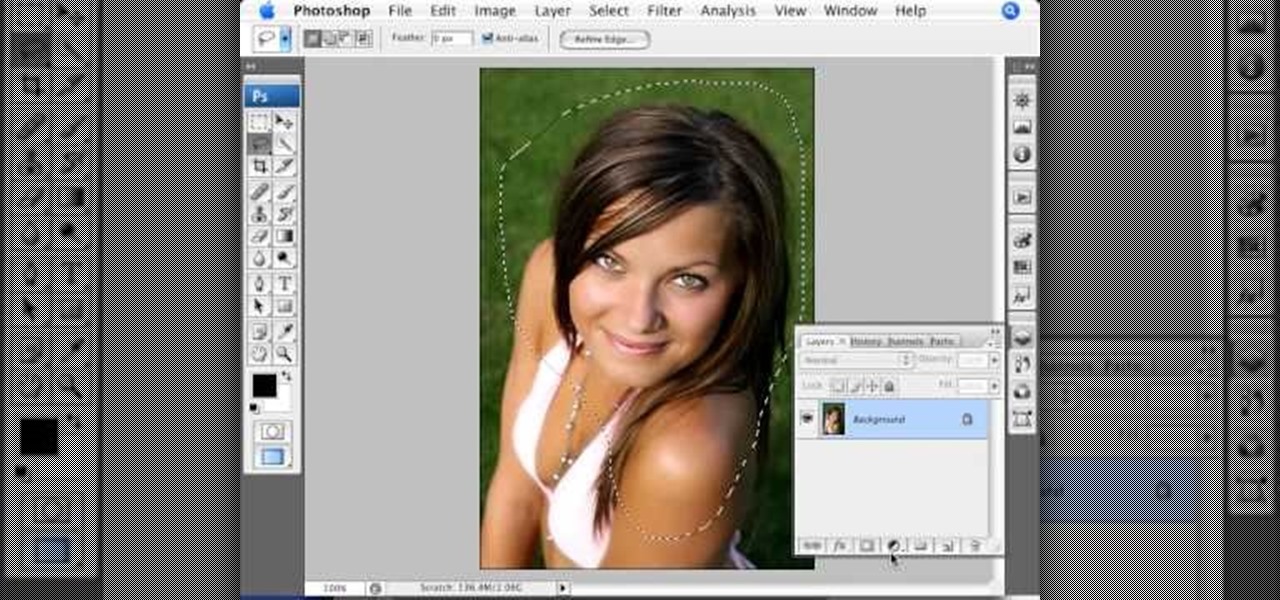
Open your first image and go to the rectangular marquee tool and select all of the image. Next click command or control C to copy image. Then go to your second image and click command or control V to paste the image. Select both the layers (hold down shift when clicking the layer), then go to edit, auto align layers and choose the top option then click ok. Last add a mask to your top layer, this is done by selecting the gradient tool (make sure its set black to white, the mode is normal and o...
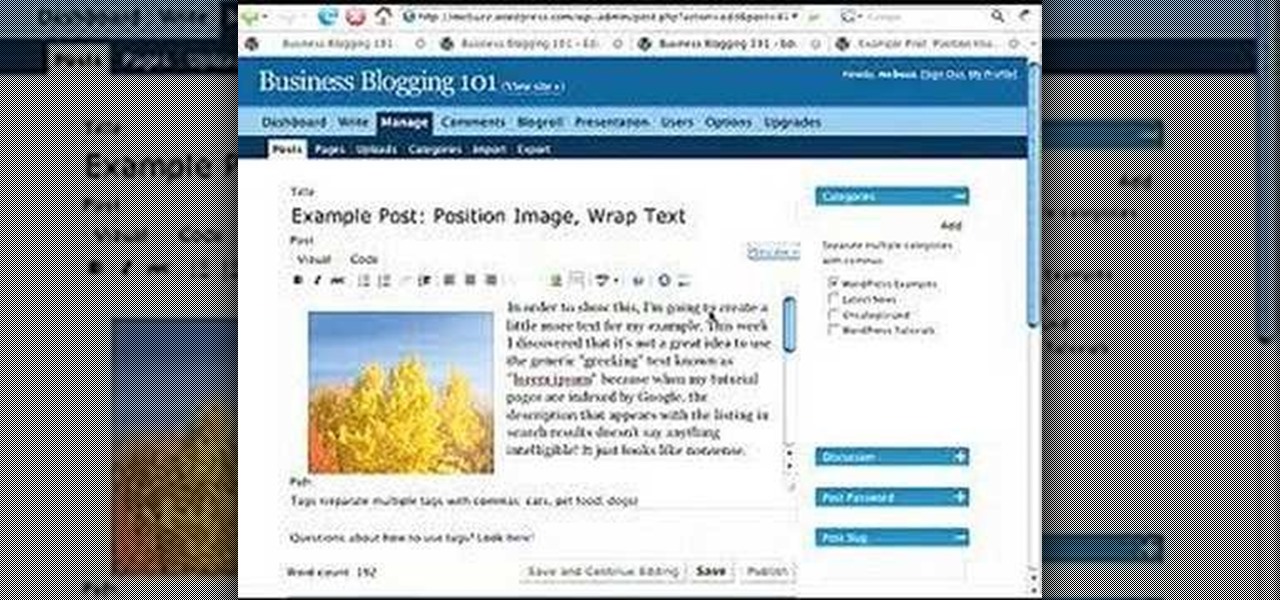
This video describes how to wrap text around an image in Wordpress. The video starts with an example describing the technique, showing a video left justified with text flowing around the right side of the image and then vice-versa. He then goes into the Wordpress editor and inserts an image into a new post. After the image has been inserted into the post, the video shows how to set the image alignment to the left. Once this setting is complete the text will then wrap around your image.
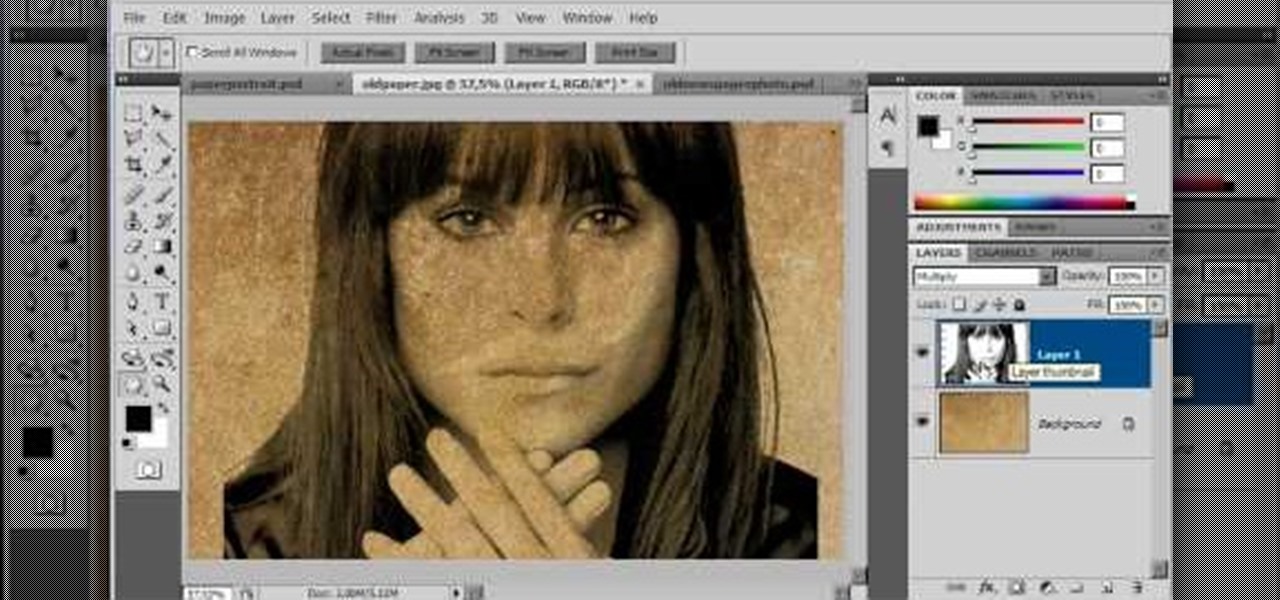
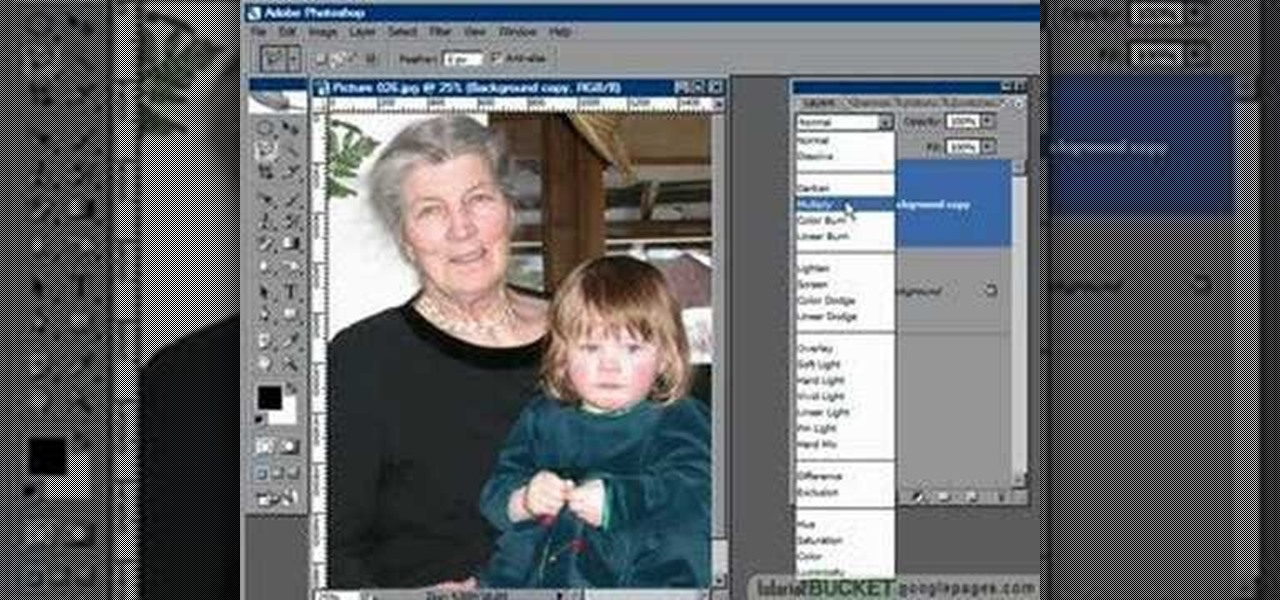
The video is about how an old stalled photographic image with faded backgrounds to a normal image. A nice clean digital image is taken and is mixed with a texture of a paper and produces a final composite image of all effects combined. The procedure is not that difficult but it needs to be followed in a proper order. First the paper texture is taken as a base and then the clean digital image is dragged onto this texture. The blending mode is adjusted from normal to multiplied blending mode, w...
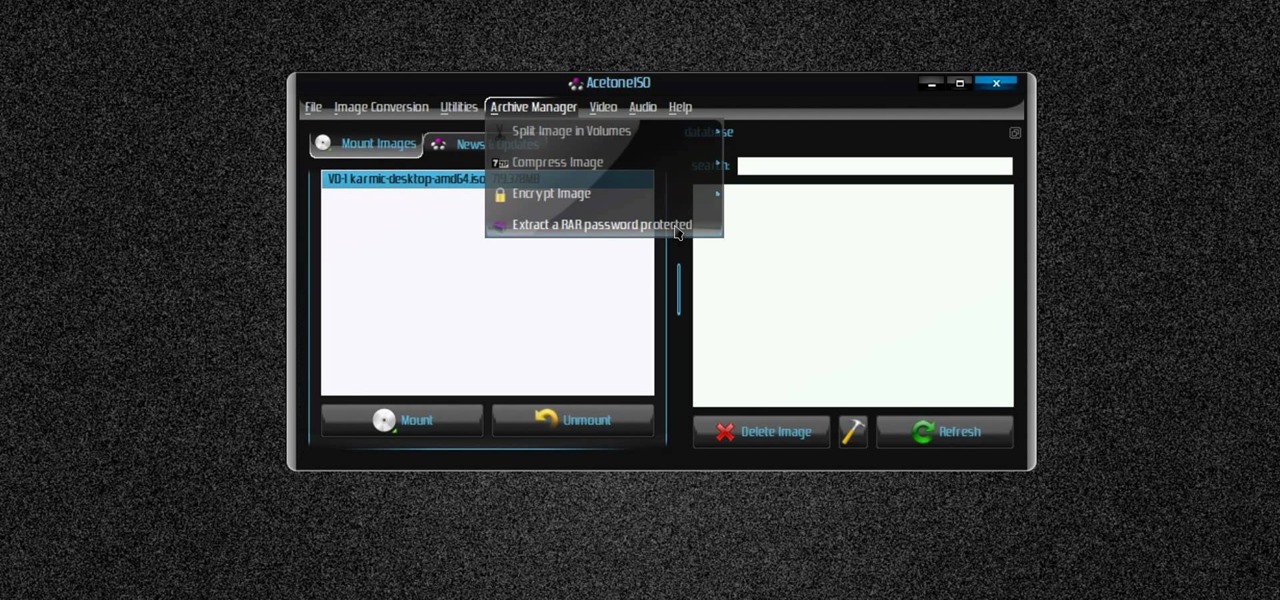
In this video the tutor shows how to make an ISO image file on a Mac. He shows what the requirements are to get started. He points to the disk utility program from where he points to the option where we can open a disk image from a folder. Now he selects the folder to which he wants to save the image. Now he guides us through the rest of the settings on how to prepare the image. Now we end up with an image file which is in the .cdr format. Now he shows some commands on the terminal through wh...
This how-to video is about how to darken an over exposed image in Photoshop.
Giclee art reproduction gives artists more options for selling their artwork. Learn how to prepare your images from a professional artist in this giclee art reproduction video series.
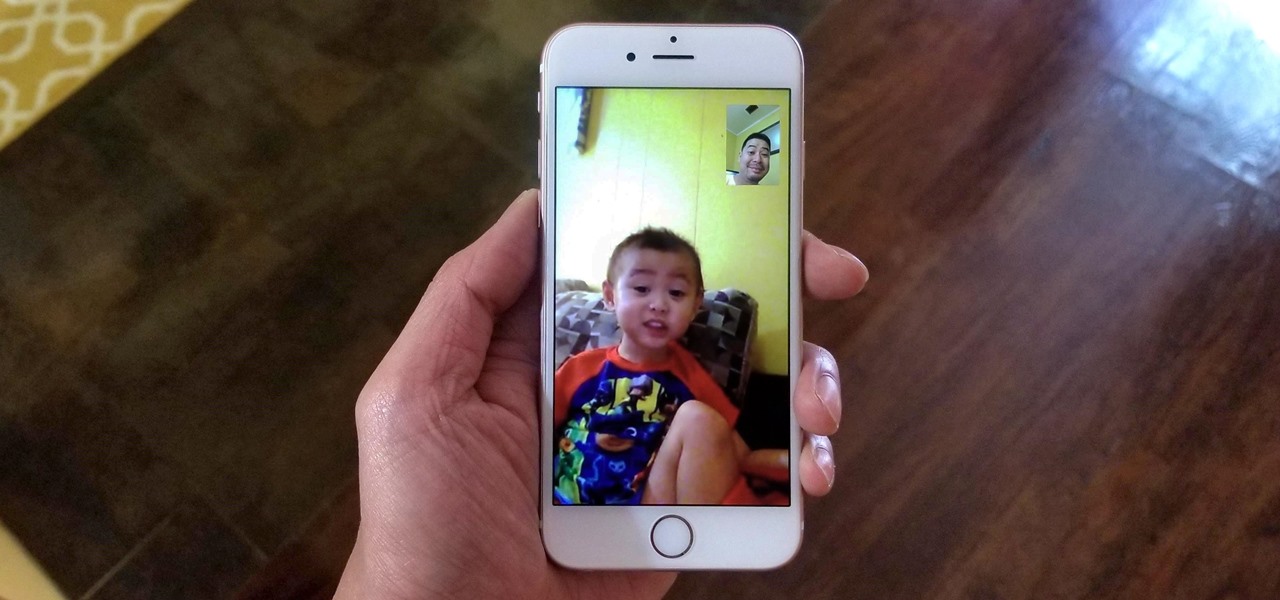
Using either iMessages or FaceTime on the iPhone is a great alternative for coworkers to stay in touch in the event that messaging services like Slack go down. They're also a handy means of communicating between buyers and sellers, as it provides a more intimate way of either checking out or showcasing a product. But you're not always going to want to give out your real number to everyone.
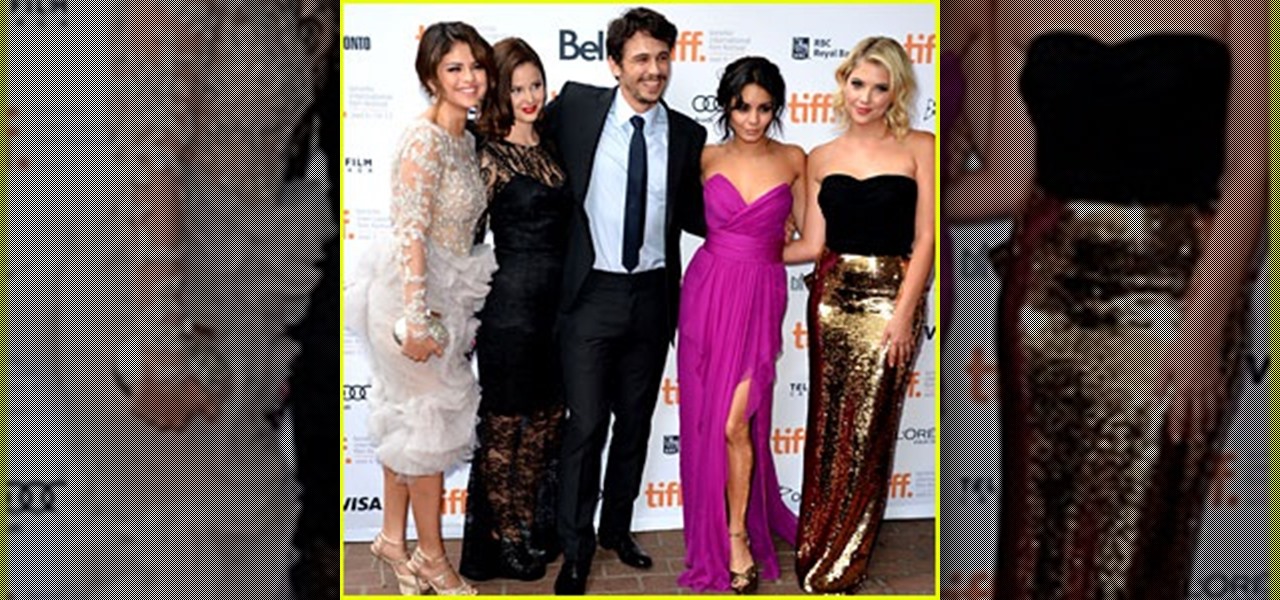
Every year the fine folks at Row Three do a post-TIFF mega-wrap up, collecting the micro-blurbs of a bunch of attendees into a giant meta-analysis of what everyone liked, loved, hated, etc. etc.. We'll link to that post when it goes up on the weekend, but in the mean time, here's my contribution:
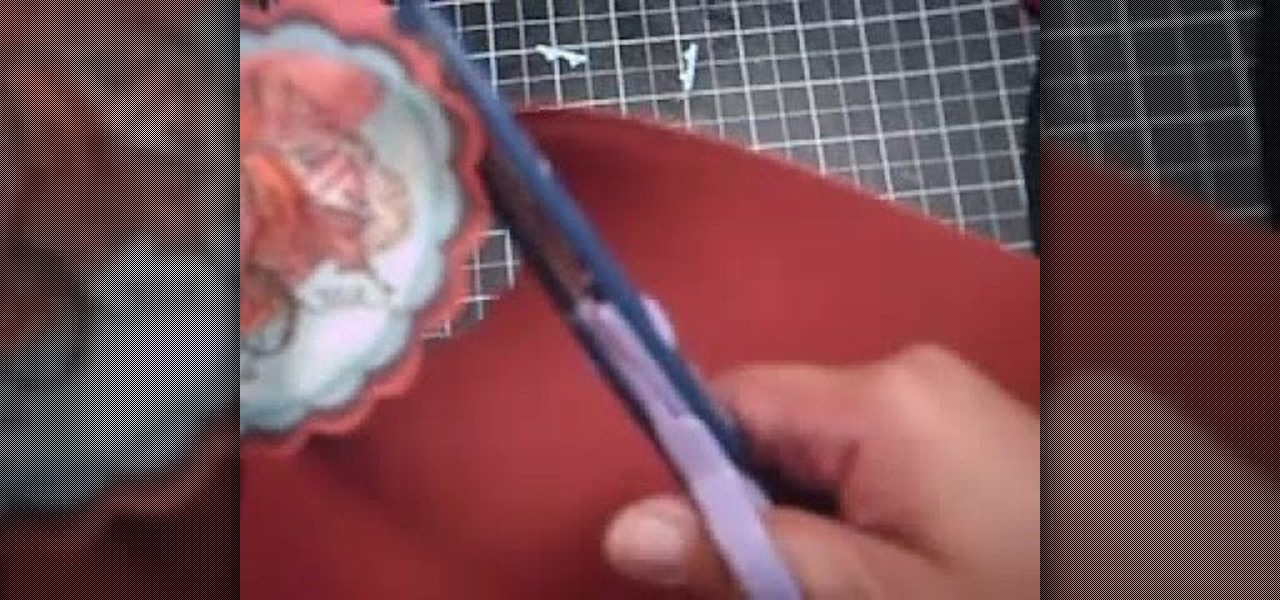
In this tutorial, we learn how to make a cute Thanksgiving card using stamps. First, cut an oval shape with an oval template. After this, you will stamp the image from the harvest home stamp set on watercolor paper. After this, outline the image with SU markers and color the image in with an aqua painter brush. From here, scallop the edges of the design to make it look more unique. Then, glue the stamp to the card stock and use it as the front of a card for the holidays! Experiment with diffe...
Want to make sure a message doesn't fall into the wrong hands? Try embedding it in a web image. With the Mozaic Encrypt web app, it's both quick and simple. For all of the relevant details, and to get started adding secret messages to image files yourself, watch this home-computing how-to from Tekzilla.
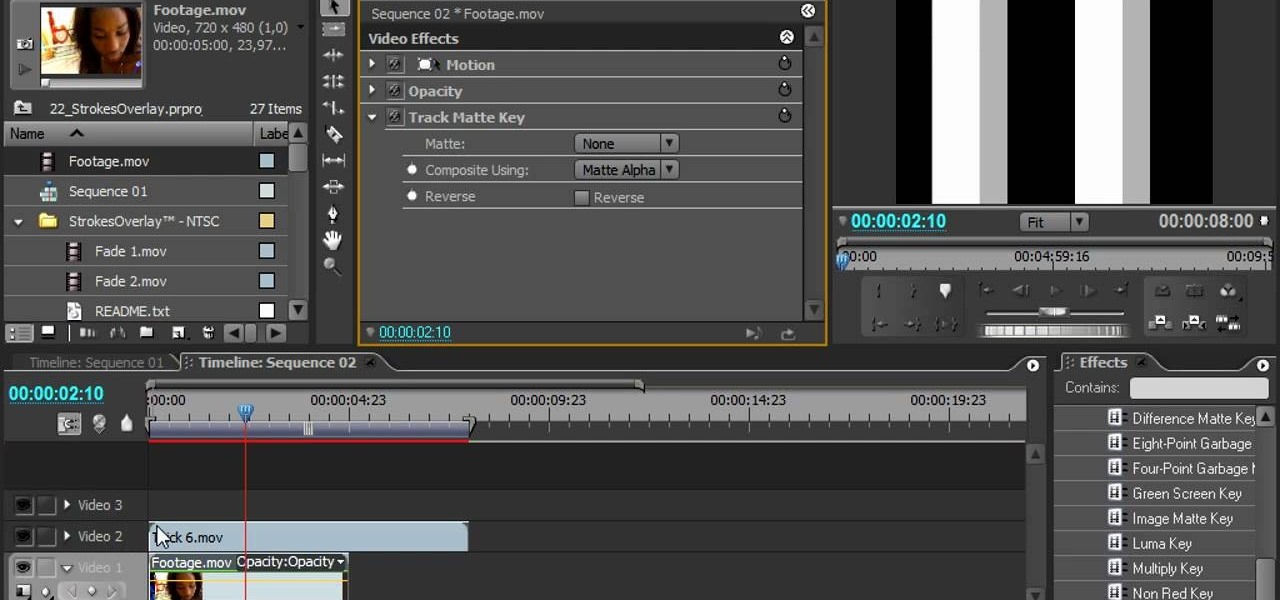
Stroke overlays allow you to put semi-transparent lines over you video while it is playing, creating a cool artistic look. This two-part video tutorial will teach you how to use apply stroke overlays to an image using the Adobe Premiere Pro video editing software. This is a very popular technique for fashion videos, so if you are involved in making those then this video should be very useful to you.
Ever wanted to combine two or more images? With Adobe Photoshop, it's a simple process. Whether you're new to Adobe's popular image editing software or simply looking to pick up a few new tips and tricks, you're sure to benefit from this free video tutorial from Tutvid. For more information, and to get started creating composites in Photoshop yourself, watch this graphic designer's guide.
Learn to use Photoshop's new timeline animation system to create a wipe-style image transition! Whether you're new to Adobe's popular image editing software or simply looking to pick up a few new tips and tricks, you're sure to benefit from this free video tutorial from Tutvid. For more information, and to get started creating wipe transitions yourself, watch this graphic designer's guide.
Touch up your digital photographs for studio-quality images. Whether you're new to Adobe's popular image editing software or simply looking to pick up a few new tips and tricks, you're sure to benefit from this free video tutorial from Tutvid. For more information, and to get started creating pixel-perfect images yourself, watch this graphic designer's guide.
Want to work with RAW image files in Adobe Photoshop? With the Adobe Camera Raw plug-in, it's easy. Whether you're new to Adobe's popular image editing software or simply looking to pick up a few new tips and tricks, you're sure to benefit from this free video tutorial from Tutvid. For more information, and to get started using and editing RAW image files in Photoshop yourself, watch this graphic designer's guide.
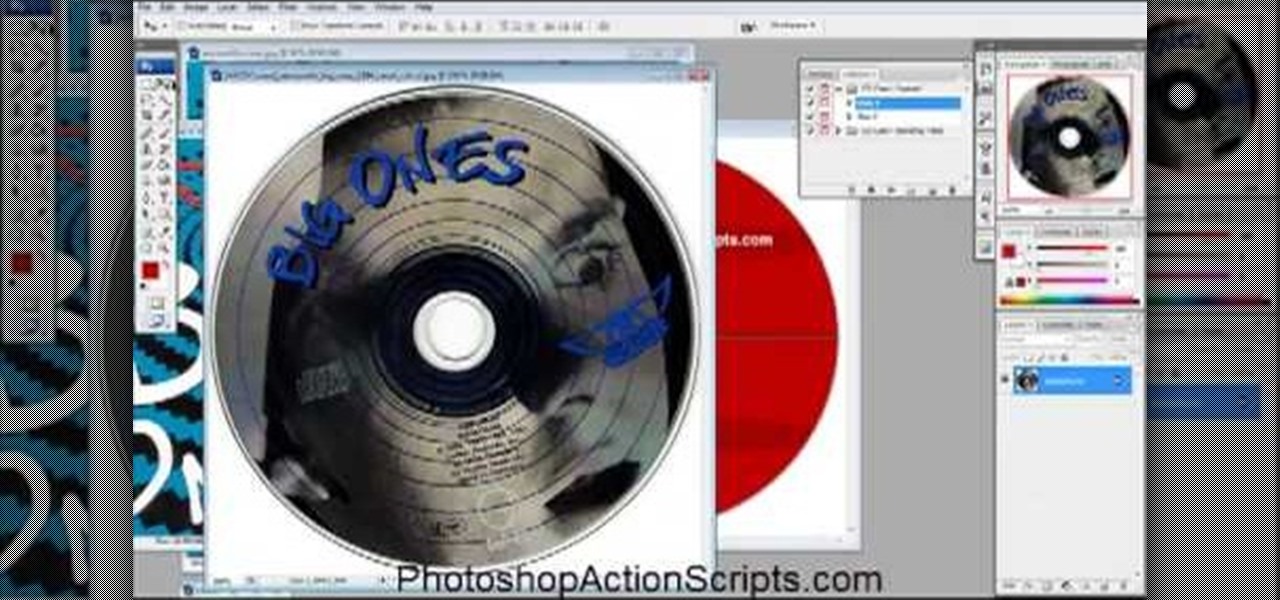
This video is about how to make a CD cover. First, open up the image that you have. Then, you need an action script. Click on the action's palette and pick which CD cover you want to do. Then you click step one which will run a template for you to set everything up and place your graphic in. The next thing to do is to slide the graphic image on to the template through the select tool. Then, click free transform found on the edit toolbar and just double click the image. The next step is to edi...
Learn how to create a sepia effect for your images in Photoshop using both adjustment layers and using a duotone image. You will also learn how to add some dirt specks and a dark vignetting around the edges.
PixelPerfect teaches you everything you need to know about being a digital artist. Learn tips and tricks to turn your regular vacation photos into works of art worthy of museums.
New to Ubuntu Linux? This computer operating system could be a bit tricky for beginners, but fret not, help is here. Check out this video tutorial on how to manage CD/DVD images with ease on Ubuntu Linux.
In this web development software tutorial Paul Wyatt shows you how to use repeat images for Dreamweaver backgrounds. You’ll learn how to use AP (absolutely positioned) Divs in Dreamweaver, and create tiled backgrounds with ease. If you don't know how to use repeat images for Dreamweaver backgrounds, this tutorial will explain it all.
Learn how to create a 3D anaglyph image (the kind of 3D image you see with 3D glasses) using Adobe Photoshop and a digital camera.
In this tutorial, After Effects is used in actual realtime to create a video comp that simulates a forward three-dimensional movement. Several images are arranged into a layered, three-dimensional composition, and a single image is tiled into a surface pattern that is offset tilted and scrolled forward indefinitely. Several additional elements are also mentioned to add realism and depth to the forward scrolling movement, including foreground elements, background images, camera shake, camera p...
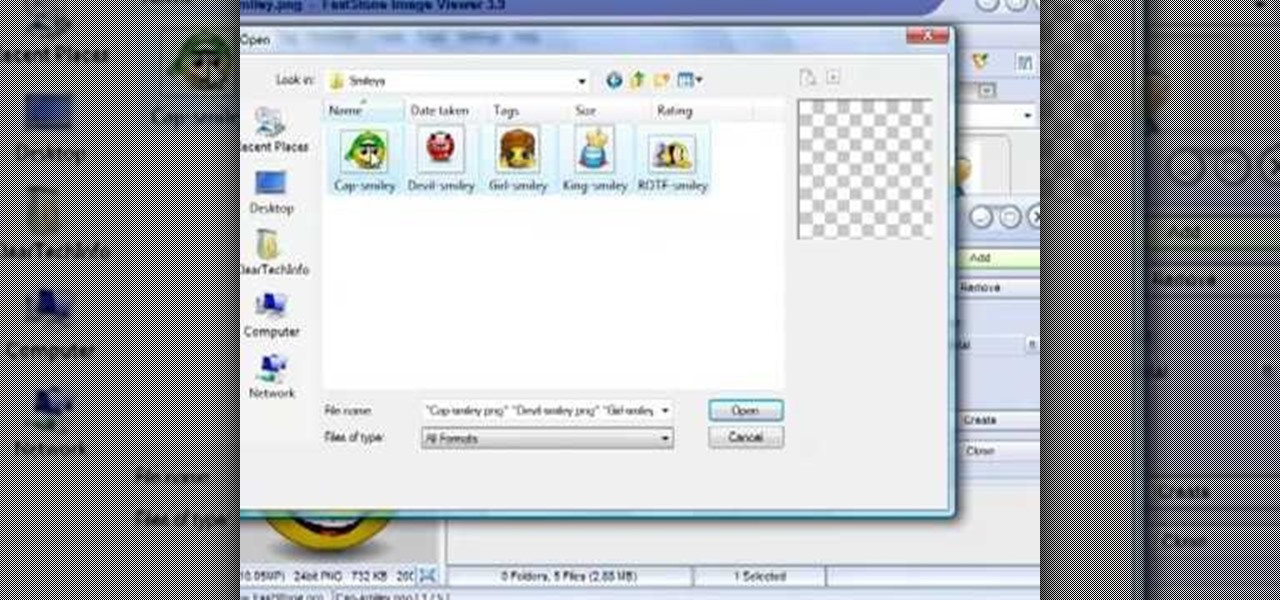
In this tutorial, we learn how to make an image strip using FastStone Image Viewer. First, open up the images that you want to have inside the strip. Then, open up Fastone Image viewer and find the location of the images. From here, go to "create", then "image strip builder". This will bring up the builder window where you can add in the images you want to see on the strip. When finished, click on the "create" button. Now, the strip will come up on your computer in a new image and you will be...
Here's a complete tutorial on all the controls, tools, functions and processes at your disposal when you edit photos or images in Adobe Photoshop. Starting with the basic toolbox, this tutorial series takes you on a tour of the program and demonstrates all the nifty things you can do to get started editing your own images!
This video tutorial is in the Software category which will show you how to "Photoshop' someone into an image. It is like cutting and pasting one image over another. First open both the images. Ctrl and click the person's image that you want to move over. Drag the cut out image over the other picture where you want to superimpose it. Then click "edit', resize, rotate and position the image where you desire. Then go to "Image Adjustments' and adjust the brightness and contrast to match with the...
In this video tutorial, viewers learn how to make an animated image on a Mac OS X computer. Users will need to download the GIFfun program. Once downloaded and installed, open the program and drag the images into the program. Then set the time delay for each image, amount of loops and configure the options. Once your finished configuring the image, click on Make Gif. The image will be produced in the small square window below. Then simply drag the image onto your desktop. This video will bene...
In this tutorial on GIMP, the render-flame tool is looked over in detail. GIMP (the GNU Image Manipulation Program) is a free software raster graphics editor. It is primarily employed as an image re-touch and edit tool. It not only offers freeform drawing, but can also accomplish essential image workflow steps such as resizing, editing, & cropping photos, combining multiple images, & converting between different image formats.
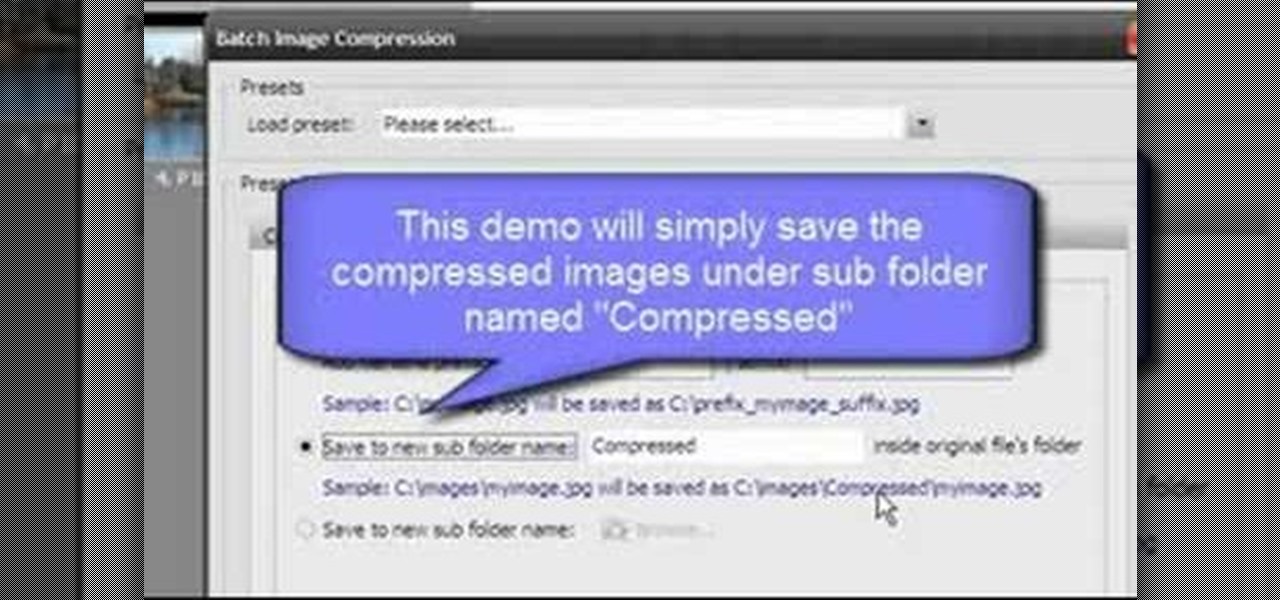
Open Image Compressor 2008 and go to the Image Tray. Pick the images you want with the image selector and click on them to add them to the Image Tray. If you want to add every photo in a certain folder, you just click on the Add All button. Once you have the photos you want, you can batch compress them. You can go to File>Batch Compress to start the process, or just click on the Batch Compress button in the toolbar. Then, pick the compression options you want, or edit the images. You can also...
In this how to video, you will learn how to re-size an image for printing using Photoshop. First, open the image you want to re-size in the program. Next, go to image and select image size. From here, you will see the current size of the image. You can change the units of the sizing. The resolution is the number of dots printed per inch. De-select re-sample to change the resolution of the image only when printing. 300 is the standard resolution. When you re-size the image, make sure constrain...
In this video tutorial, viewers learn how to apply a digital tattoo using Adobe Photoshop. Begin by adding the image and tattoo image into the program. Then drag the tattoo image over the image. Now in the layer menu, change Normal to Modify. Now re-size the tattoo image to a preferred size (PC: Control and T, Mac: Command and T). Now right-click the tattoo image and select warp. Form the image so that it is perpendicular to the skin and decrease the Opacity. This video will benefit those vie...
In this how to video, you will learn how to re-size any image in Photoshop to submit to Alamy. You will need the file to be 48 megabytes and uncompressed. First, open the image in Photoshop. At the bottom, you will see the current image's file size. Now go to image and image size. Increase the size by two or by five percent. Make sure re-sample image and constrain proportions are selected. Make sure bicubic smother is selected at the bottom of the window. At the top of this window, you will s...