This clip demonstrates how to get video and images into the node-based compositor in Blender using the RenderLayer and the Image input nodes. Whether you're new to the Blender Foundation's popular 3D modeling program or a seasoned graphic artist just interested in better acquainting yourself with the application, you're sure to be well served by this free video tutorial. For more information, including detailed instructions, take a look!

In this video tutorial, viewers learn how to create a carbon fiber desktop wallpaper using Adobe Photo-shop. Begin by creating a 20x20 pattern with the rectangle marquee and gradient tool. Then go to Edit, select Define Pattern and name the image. Now create a document with the dimensions of your monitor screen. Then go to Edit, select Fill and select the pattern that you have created. Then go to Filter, select Render, click on lighting effects and configure the image's lighting. This video w...
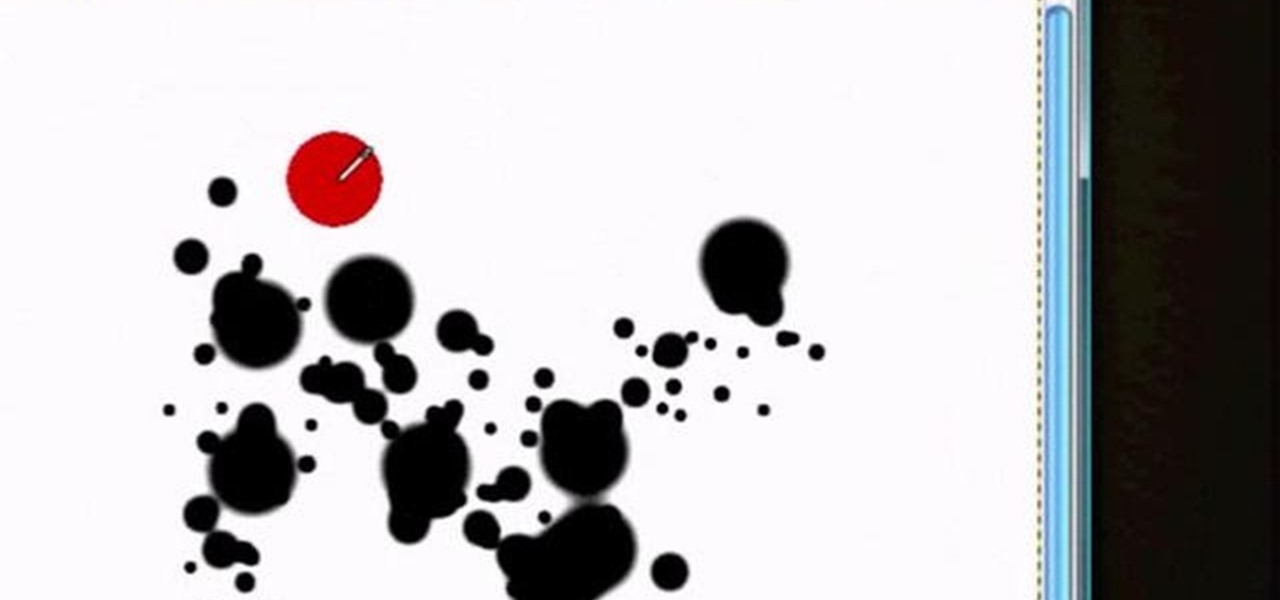
See how to create a splatter brush within the GIMP image editor. Whether you're new to the GNU Image Manipulation Program, GNU's popular free graphics editor, or a seasoned designer just looking to pick up a few new tips and tricks, you're certain to enjoy this free video software tutorial. For more information, including detailed, step-by-step instructions, and to get started making your own custom splatter brushes, take a look.
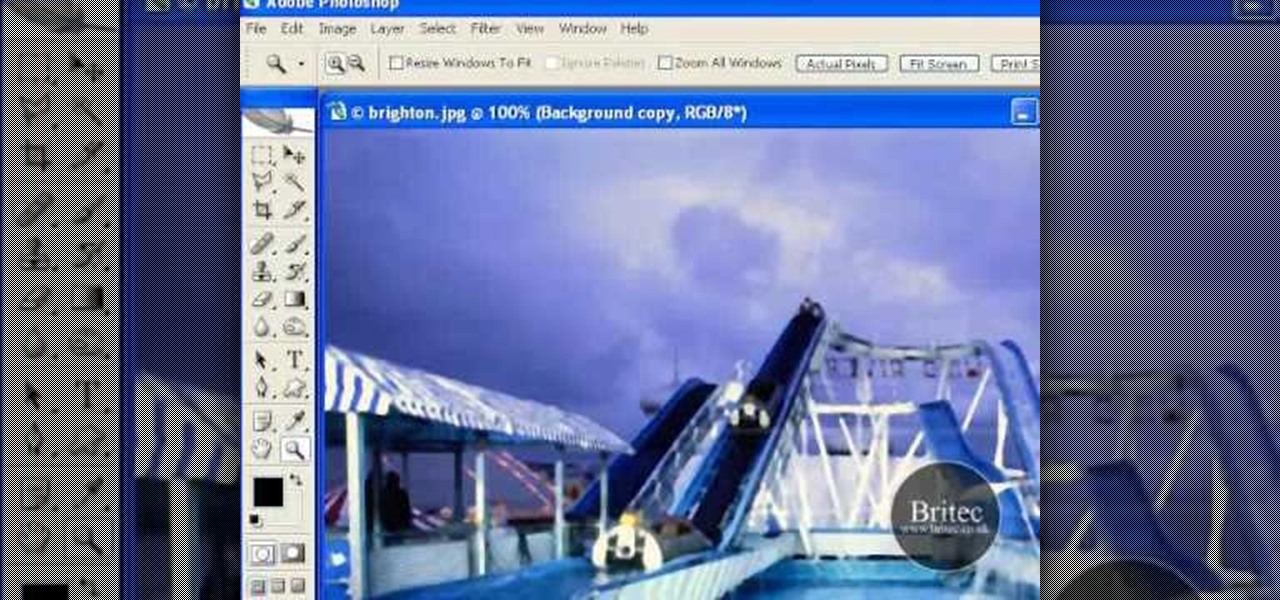
Want to remove dirt, dust and scratches from an old photo? With Adobe Photoshop, it's easy to restore antique or damaged photographs. Whether you're new to Adobe's popular image editing software or simply looking to pick up a few new tips and tricks, you're sure to benefit from this free video tutorial from the folks at Britec Computer Systems. This video offers a step-by-step guide on how to remove dirt and noise from an old image.

So, you're browsing the web on your iPhone using Safari, and you come across a picture you really want to keep forever and ever… what do you do? You can save it directly to your phone! But how do you download that web image? Best Buy has answers. The Best Buy Mobile team explains how simple it is to save web images from Safari on your Apple iPhone.
Photoshop is one of the most powerful and widely used program out there on the market. Not only can people use it to make their own photos look better, but they are able to take other pictures and images and enhance them to whichever way they want. That can be seen as both bad and good. Somtimes, to do so it involved using the layers and moving a picture to a new image. In this tutorial, you'll find out how to move a layer to a new image using Photoshop. Enjoy! It's quick, easy, and will be a...

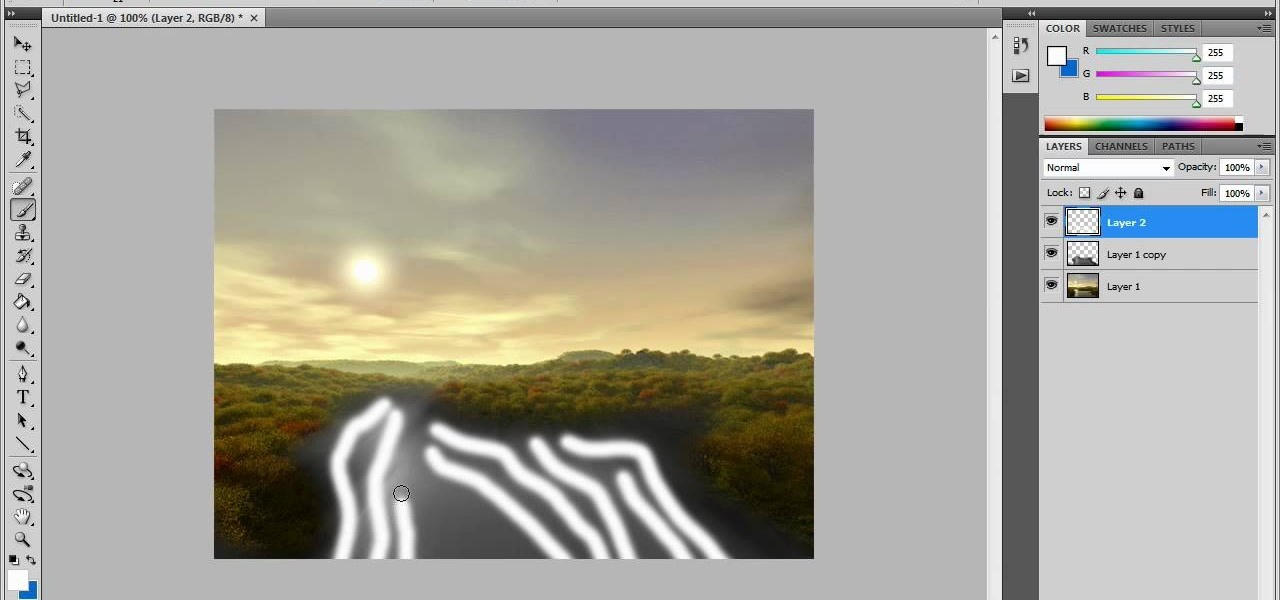
In this video tutorial, viewers learn how to create fog using Adobe Photoshop. Begin by importing the image into the program and duplicate the image. Now go to Filter, select Blur and select Radial Blur. Set the amount to 100, Blur Method to Zoom and Quality to Best. Now select the rectangular marking tool and select the sky. Then open the Hue/Saturation menu and set the Saturation to -100. Use the eraser tool to remove the gray from the edges. Now use the paint tool and paint white streaks o...
In this Software video tutorial you will learn how to sharpen blurry images using Photoshop. Open the image and duplicate the original layer. Then go to filter > other > high pass. In the window that pops up, enter a value of 4 – 6 pixels. Now simply change the blending mode of that layer to overlay by clicking on ‘layers’ and selecting ‘overlay’ from the dropdown menu. You will notice that you have a much clearer picture. Then go to filters > sharpen > ‘unsharp mask’ to add som...
This video tutorial from adamstechvids shows how to resize photos in Windows using Picasa application.
In this how-to video, you will learn how to hide a file inside an image file. You will need a program like WinZIP or WinRAR to do this. First, create a new zip folder. Drag the file you want to hide into the zip folder. Open the command prompt. From here, type in the location of your file. Now, type in COPY /B followed by the name of the image, a plus, and the name of the zip folder. Press enter to do this. Now, you can delete the zip folder. The image will now actually be a zip folder. This ...
This shows how to use live trace on Adobe Illustrator to make a vector image. First, you need to open up Adobe Illustrator. Then go to file and select New and adjust your size to letter. For orientation you can choose to have it landscape if you want. Once you have your blank work space you will want to get a saved image. Go to File and click on Place and locate your image. Adjust the size of the image if you need to. Click on the image and then go up to the tool bar to click on the live trac...
In this how to video, you will learn how to liquify an image using Photoshop. First, open the image in Photoshop. Next, go to filter and select liquify. Use the forward warp tool to press pieces of the photo. Use the reconstruct tool to bring the image back to the original state. The twirl clockwise tool can be used to twirl pieces in the photo. You can adjust the pressure to twirl more. The pucker tool can be used to push sections into the image. The bloat tool can be used to pinch sections ...
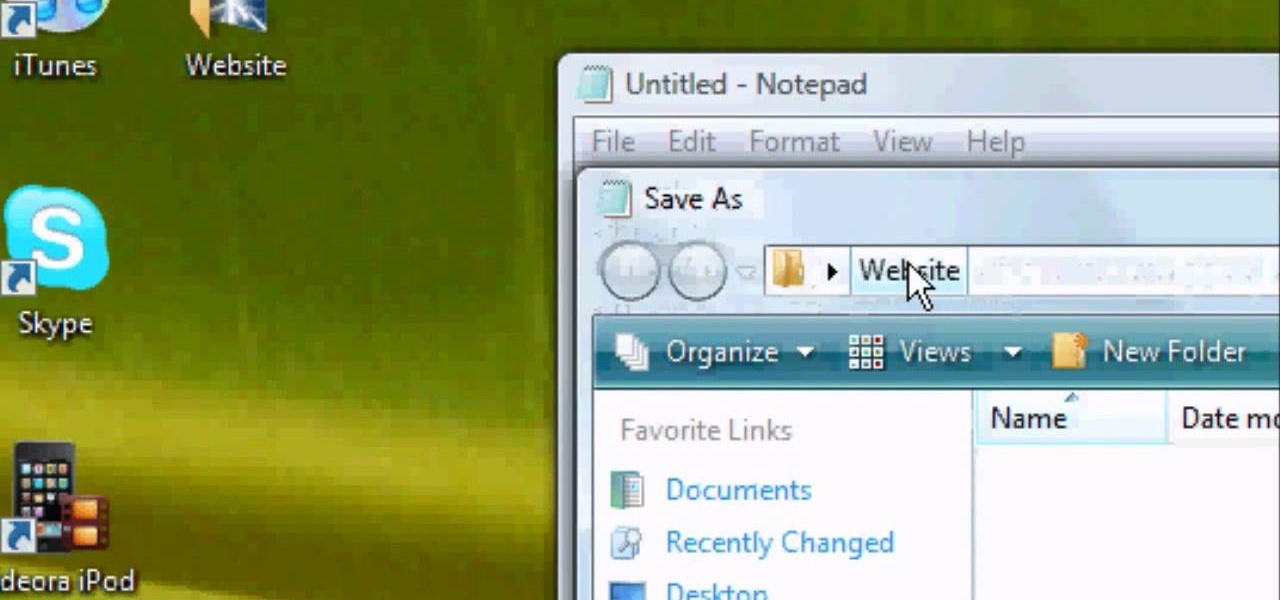
First of all you have to open the 'notepad'. Now you have to type in "<html>" in first line. Write "<head> in second line. Write "<title>this website contains text wrapped around images</title>". In the fourth line you have to type '<body bgcolor="#999999">'. This shall add a light orange color. Now find out the name of the image. Here the name of the file is 'image.png'. Then in the next line you have to type in "<img src="image.png">this text should hopefully wrap around the outside of the ...
Ready to bring your digital photographs into the world of tangible objects? Before you do, you'll need to understand a thing or two about aspect ratios and image cropping within Adobe Photoshop. Fortunately, this guide will tell you everything you need to know. For a complete overview, and to get started cropping your own images for printing, watch this free video guide.
In this how-to video, you will learn how to quickly set up the background image on your Apple Macbook Pro. First, right click the desktop and select Change Desktop Background. A new window will pop up where you can change it. Also, you can go to system preferences and selecting desktop and screen saver. To change the image, select any of the options available. This includes solid colors to large images. You can also go to your iPhoto albums and choose any picture in there. You can also go onl...
In this video tutorial, viewers learn how to make an animated GIF file using Adobe Photoshop. Begin by opening the program. Then click on File and select New. Choose the size of your image and click OK. Now create your picture or text image. Once finished creating your image, click on Window and select Animation. Now click on the button on the right side of lower window and select Make Frames from Layers. change the time of each frame to 0.5 sec. Now edit it and save it. This video will benef...
The video opens up with an introduction from the video sponsor, "Godly Tutorials. It then goes to a screen displaying the basic Photoshop screen. Once there, he opens up an image that is completely black. After that he opens up an image editing window that displays the color scale and also displays various effects. He then picks one of the crystal like effects displayed in the window as well as a color described as baby blue. Once the he changes the layer and adds another crystal effect to th...
In this video, the poster is teaching YouTube users how to use Daemon Tools mount games image files. That’s very useful to many people that cannot burn ISOS or any other image files into a blank media (CD, DVD). With the tips provided by this video, anyone can use Daemon Tools to mount the image in a virtual CD/DVD drive. Daemon Tools is a Freeware program and you can download it at many websites on the internet.
In this video the instructor shows you how to mount ISO images. You can use your ISO images of CD or DVD with out burning them on to real disks. Using this you can play a DVD with out a DVD player. Use DVD shrink to extract the copy of ISO image from your DVD. Go to internet and install Daemon tools lite program. After installing you will see an icon in the tray icon which says daemon tools. Right click on it and select the Virtual Devices option for the menu. Inside it select the virtual dri...
This video is about how to make a business card design in GIMP. First of all, download some GIMP labels plug-in. Create a business card of required size by entering dimensions going to on “Toolbox”, then Xtns, then Misc, then Labels, then Rect Label. Now create image and text on business cards. The image should compliment it without overwhelming the text. Now add borders and accents. Select “Image”, then “Filters”, then “Combine”, then “Make Label Page” and insert the image. Check your contac...
Xara Xtreme works with 2D image rendering and comes with a number of features to support your tasks. Removing a background in a bitmap can be done with ease. You can either fill the background with a solid color or just delete the space around it. You can also overlap the image and delete the remaining background then finish editing your image. There are a number of ways to remove space in your image and this video will demonstrate how to remove the background from a bitmap in Xara Xtreme.
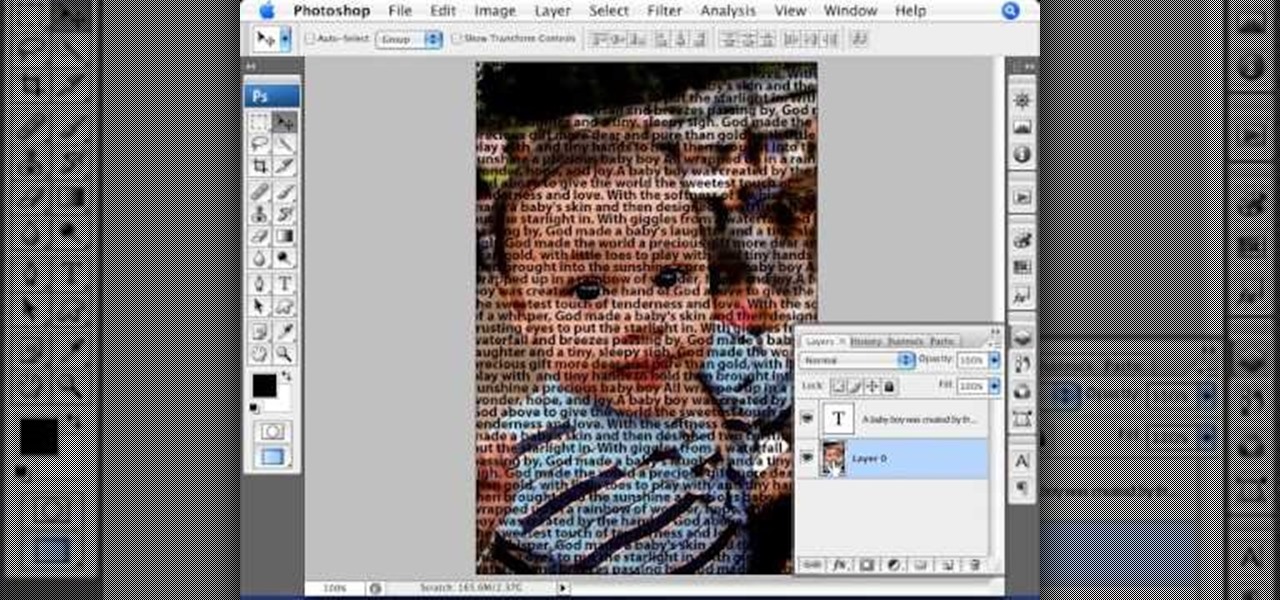
Photoshop Universe presents a step-by-step tutorial on how to mask images over text. First and foremost you'll need to have a poem or some other block of text in mind to use. Once you've selected your text you'll use methods such as copying and pasting, using clipping masks, and mild typeface editing. By the end of this tutorial you will have the abilities you need in Photoshop to make your very own text based image!
This video shows the process of making animations in the image program Photoshop. It shows users how to open up and navigate the animation dialogue box in Photoshop by adding frames with variations on the image to be animated, with attention to using as many frames as needed to ensure a "clean" looking animation (one that is not jumpy but rather has smooth transitions). In closing, the instructor shows its viewers which options to select on the animation settings (particularly noteworthy is t...
In this Photoshop tutorial the instructor shows how to fix colors. It looks bad to have dull colors in your images. Now open the image in the Photoshop and go to image adjustments. Go to curves and start playing around with the curves in the RGB mode. When you change the curve you can see the change in the original images. Now adjusting the colors in the curves tool play around with the colors and this will get the colors brightened up. There are no stead fast rules but you need to play aroun...
In this video tutorial the author Chris Orwig shows how to perform image enhancements using Adobe Photoshop. Chris Orwig is a photographer and a Adobe Photoshop power user who explains how to use Photoshop to bring the best in photographs. He takes a real photo and shows how to add little color to a photograph and make it more lively and attractive. He also shows how to apply some vintage effects. He shows some images and points out to the wide angle distortion present in the images and how t...
Photoshop is the perfect program to use when you want to make adjustments to photos you have taken. You can really make a sky pop in any of your pictures by using Photoshop to manipulate the color by following this tutorial.
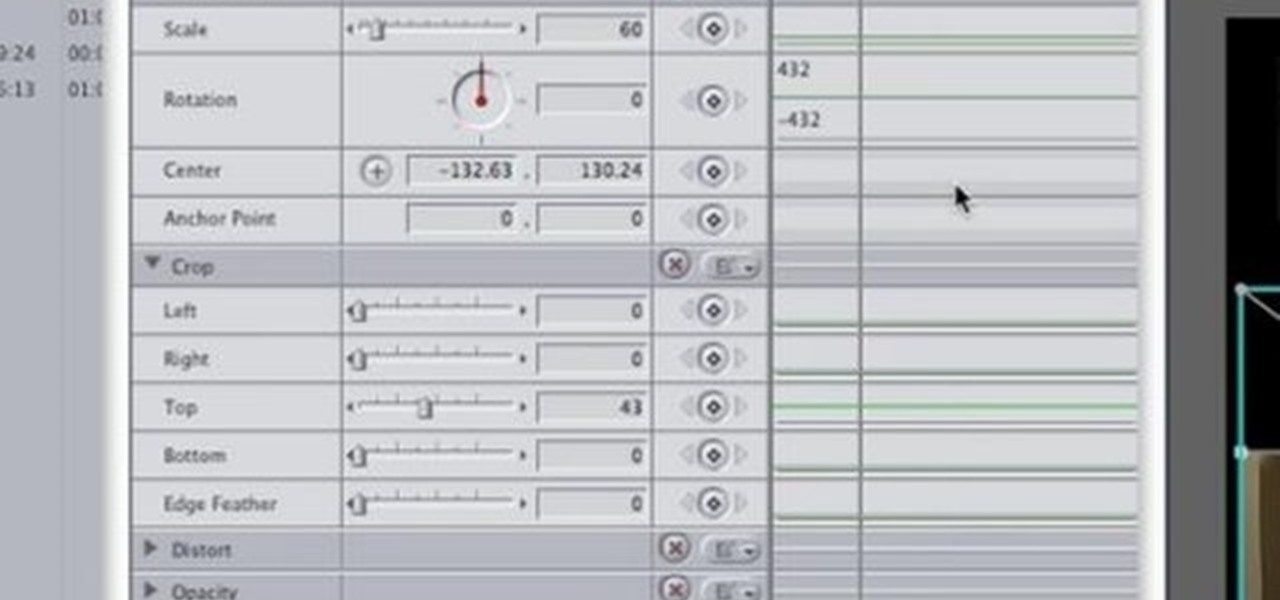
This video editing software tutorial looks at working with large images, and setting keyframes in Final Cut Pro. The FCP tutorial also goes into working with multiple layers a little bit. Working with large images can get slow and frustrating, so it's worth learning these tricks to make it easier in Final Cut Pro. Crank the volume, the audio on this tutorial is a bit low.
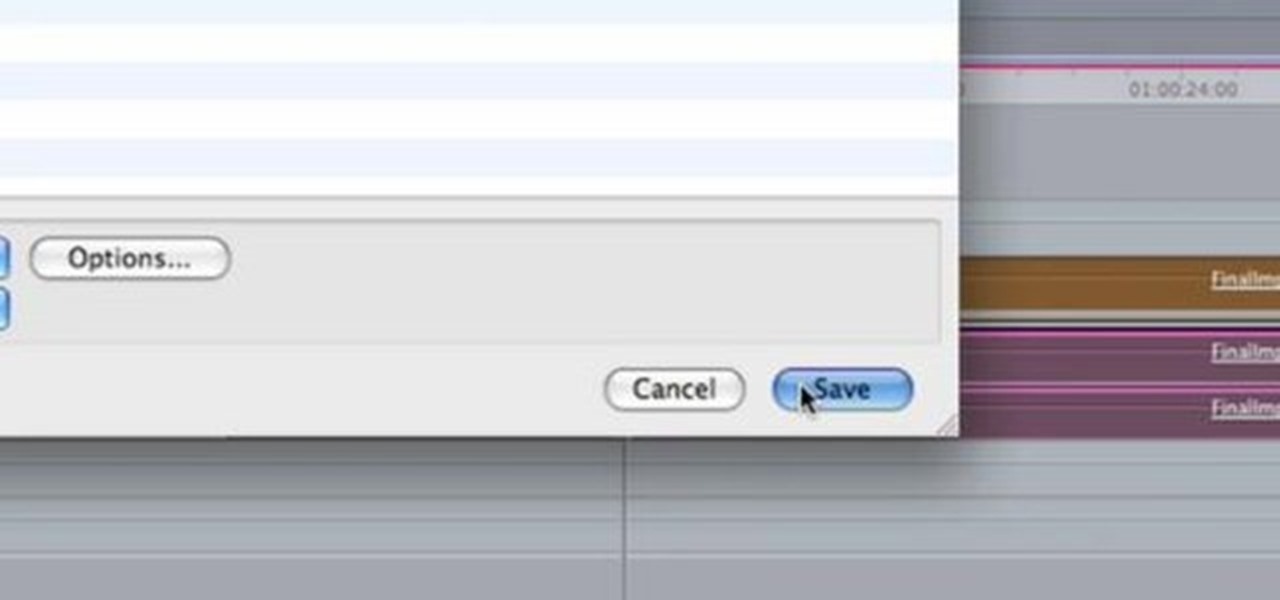
This short Final Cut Pro tutorial shows how to export a still image from Final Cut Pro and then deinterlace it, and alter its aspect ratio in Photoshop. This is a great tutorial for learning how to work with still images from Final Cut Pro.
Learn how to use black and white to separate elements of your designs in Photoshop CS3 in this image editing software tutorial. Using black and white to separate background images from more important foreground images is a great technique for creating dramatic designs. Learn how in this Photoshop tutorial. The tutorial assumes you know how to use Photoshop.
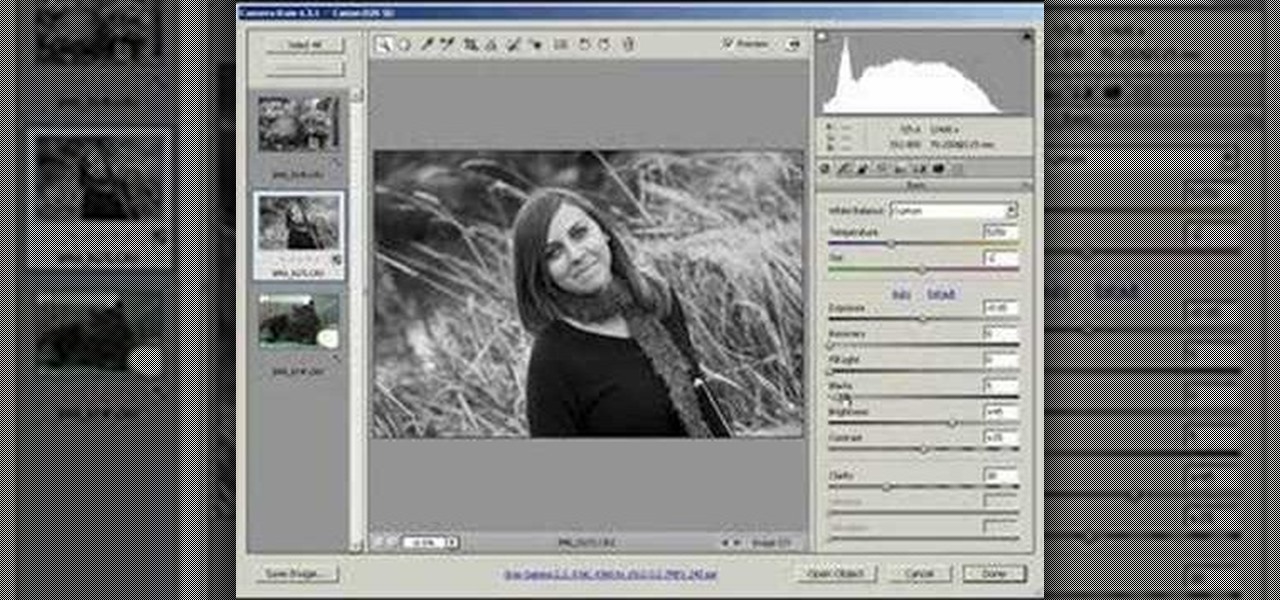
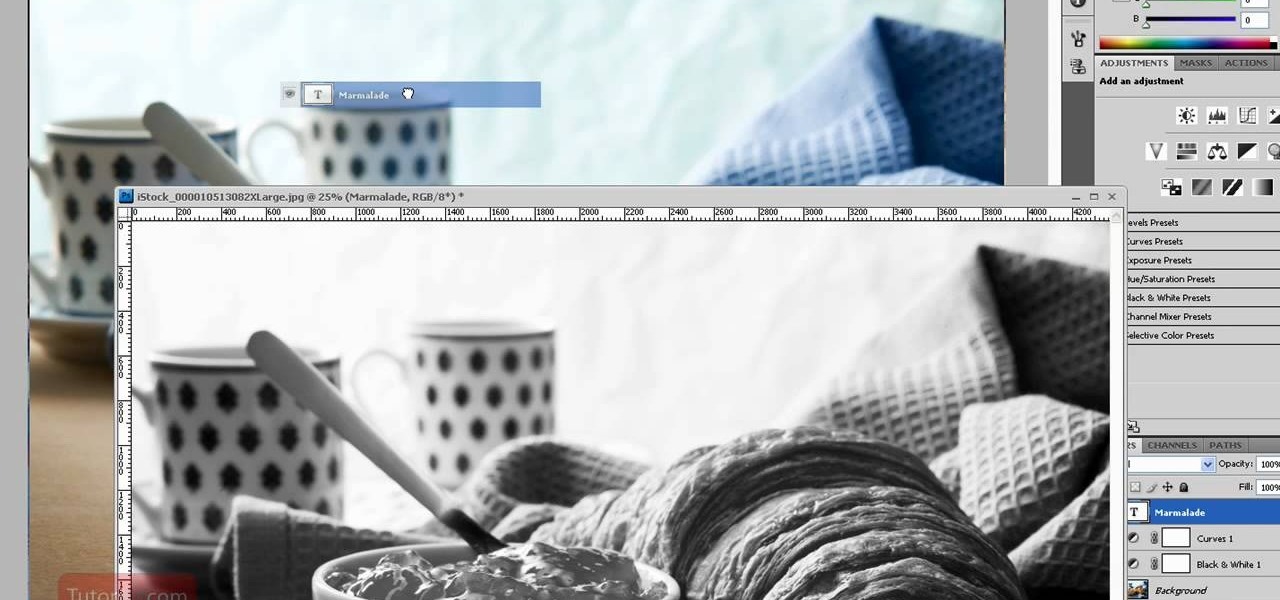
This image editing software tutorial shows you how to use the hsl grayscale tab to remove the color from a photo and turn it into a black and white image in Adobe Camera RAW. Using the Grayscale Mix slider controls inside Adobe Camera RAW, you will see how to achieve some great looking black and white images.
This image editing software tutorial covers resampling an image down to an optimal print size in Photoshop CS3 so you can bring it to a lab for printing. It's nice to take pictures as large as possible, but it's not always so easy to get that data out of your computer and into print. If you don't have a nice photo printer at home and need to transfer your images, you may want to watch this video and learn how to resample them down to a good print size in Photoshop CS3.
Snagit is a great image capture software package made by TechSmith. It does much more than capture images and has an intuitive image editor. Mike Lively shows you how to use SnagIt in this tutorial.
Discover how to generate an excellent piece of art from an image with the use of layers and tones in Photoshop CS3. If you make certain features or subjects in the image stand out, you will get a more dramatic and interesting look. See how to make features in your images stand out in Photoshop CS3 by adjusting tones and colors.
Check out this instructional printmaking video that demonstrates how to output your positive film using Adobe Photoshop. This video goes over how to do a one color image and then a two color image. Create a black image on a clear, white background. Learn a few tips when using a toner enhancer on your film. Output your positive film using Photoshop with this printmaking tutorial video.
Jordan explains how to make a nice abstract image using only filters and no brushing in Photoshop. Let your artistic side come out (even if you aren't the best painter) just by playing with Photoshop filters and making cool abstract images.
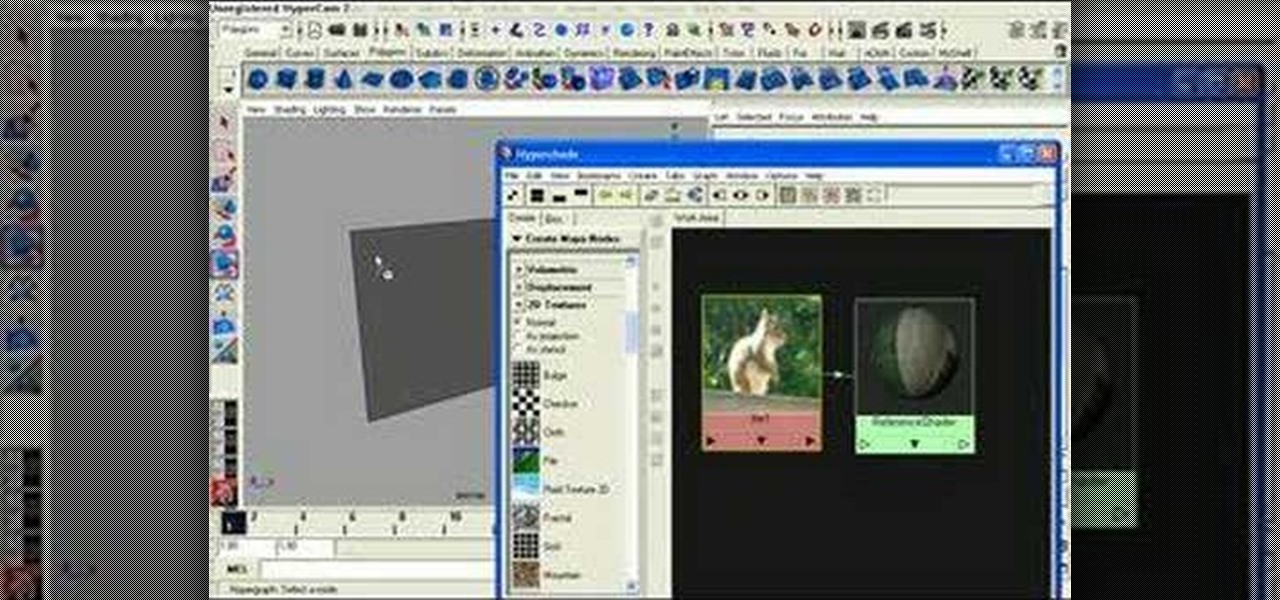
Learn how to setup a Reference Plane
Learn how to use Maxon CINEMA 4D R10 - along with Adobe Photoshop and Illustrator for vector image editing - to create 3D objects from vector images.
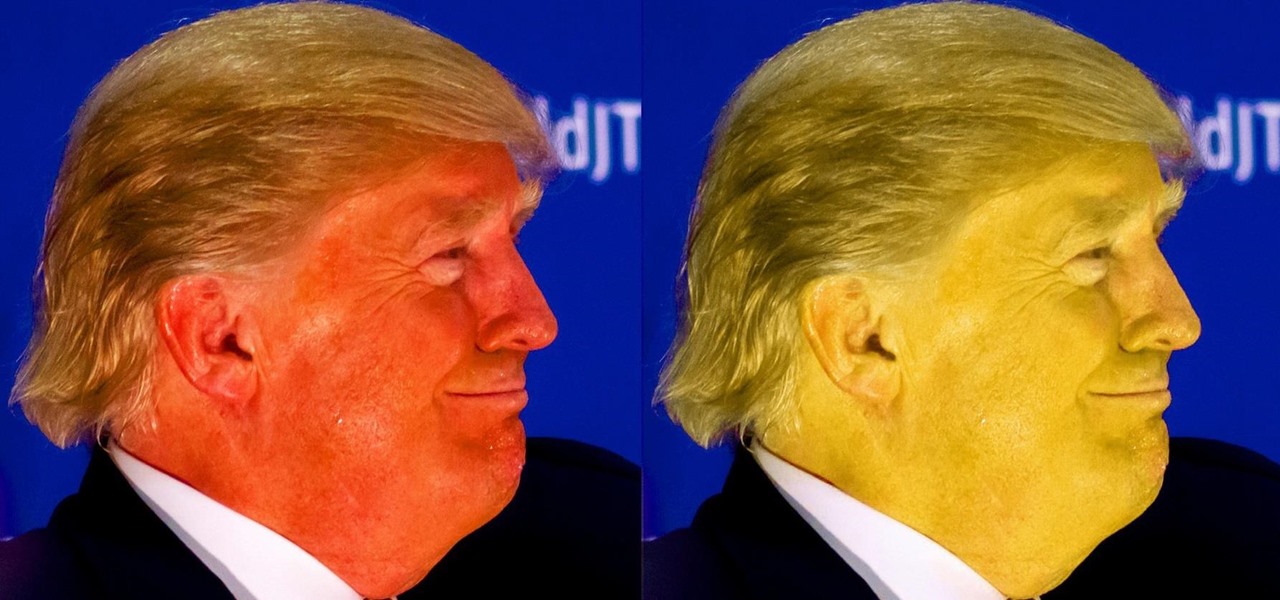
With Adobe Photoshop on your computer, it's super easy to change or adjust the skin tone of somebody in a digital photo. The process uses some basic selection and color adjustment tools, and it's a fun way to make a friend's face nauseously green or lessen the effects of overly strong, sometimes even orange, makeup.
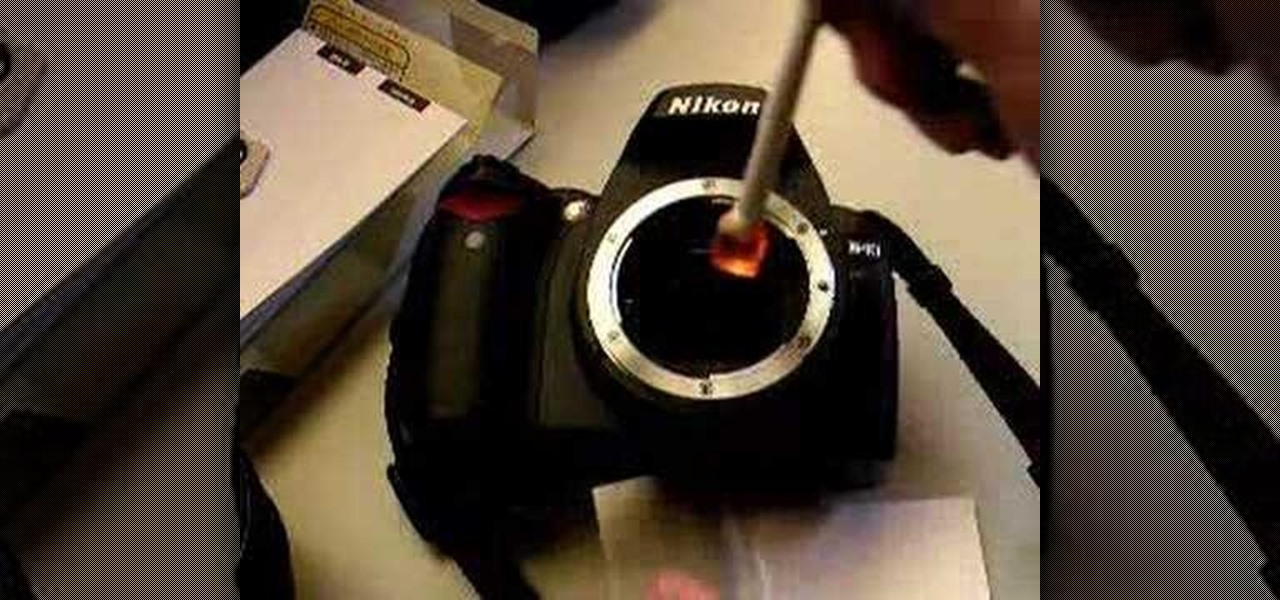
See how to clean the Nikon D40 SLR image sensor in this video. This is a method of the briefest laundry which used the Pentax O-ICK1 Image Sensor Cleaning Kit.
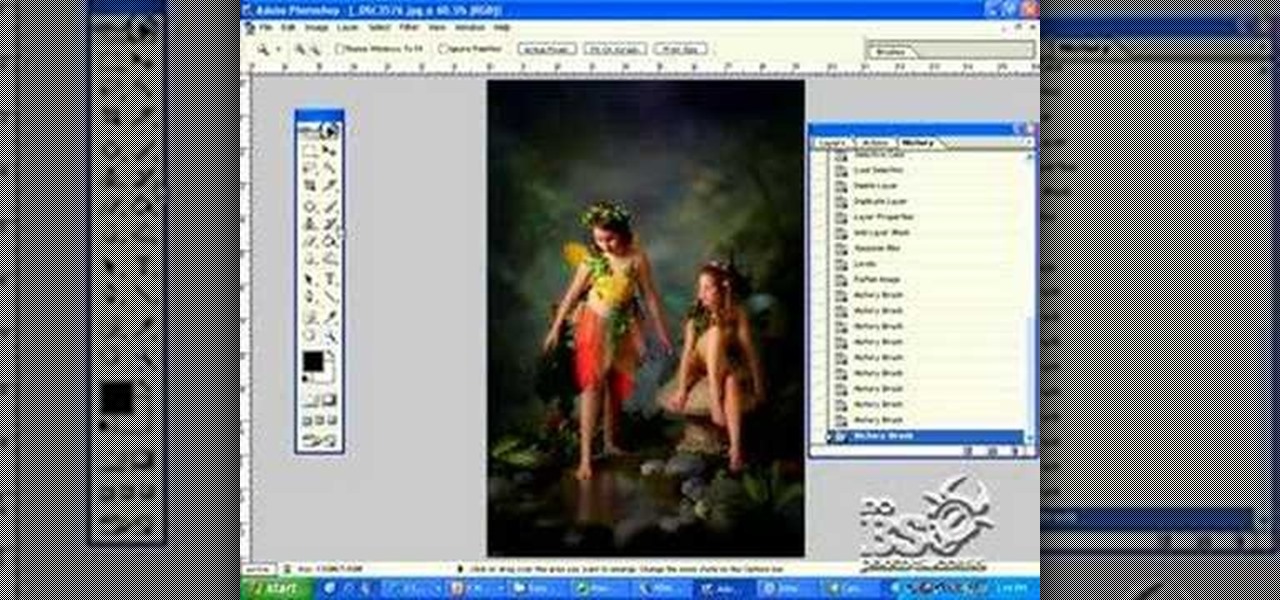
Some techniques for creating dynamic images in photoshop for that artistic and `mystical`look in fairy images and enchanted forests.