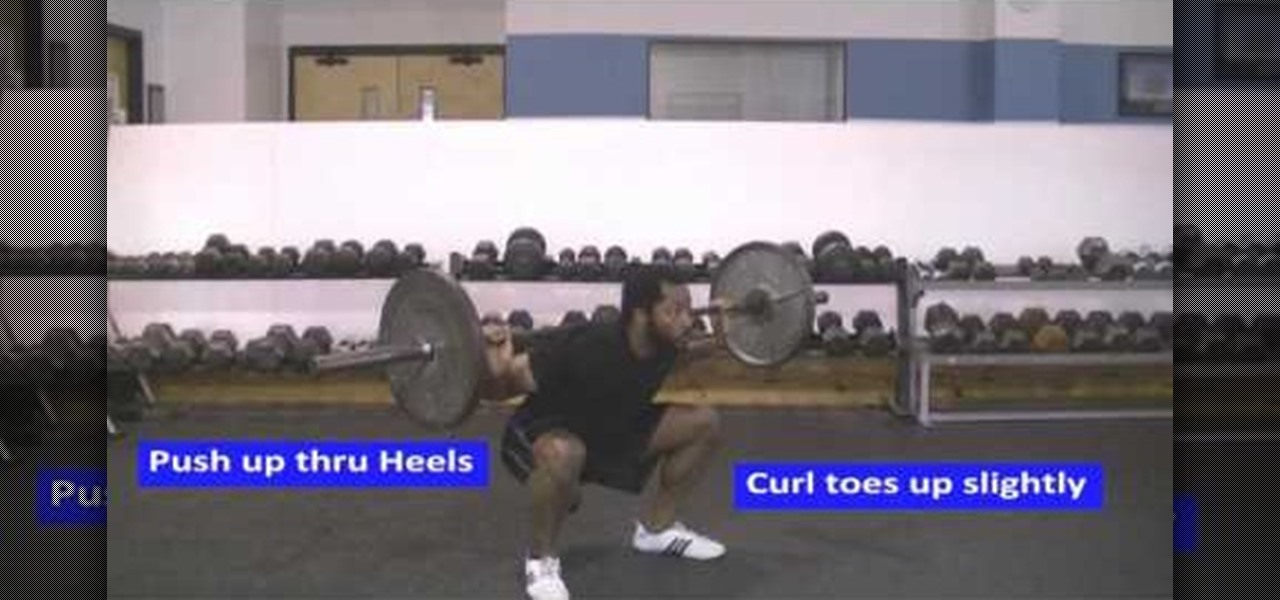
In this video, we learn how to get a bigger butt with squats. First, place your feet wider than shoulder width apart. Then, point your toes out at a 45 degree angle and look straight ahead. Squat down as deep as you can while carrying a bar. Repeat this again, making sure you are keeping your head up and looking straight ahead. The deeper your squats, the larger your butt will be from the muscle you are building. Continue to do this for several reps, then add in more weights as your body gets...

In this video we learn how to make Christmas bows. First, take the ribbon and then tie it into two separate one sided bows. Connect these together at the bottom and then continue to make these shapes and connecting them to the same brad. Once you are finished, put double sided tape on the bottom of it and then you will be finished with the bow! You can do this several times to make a whole bunch of bows or you can make it larger to create a huge bow. Have fun making these and use your own sty...
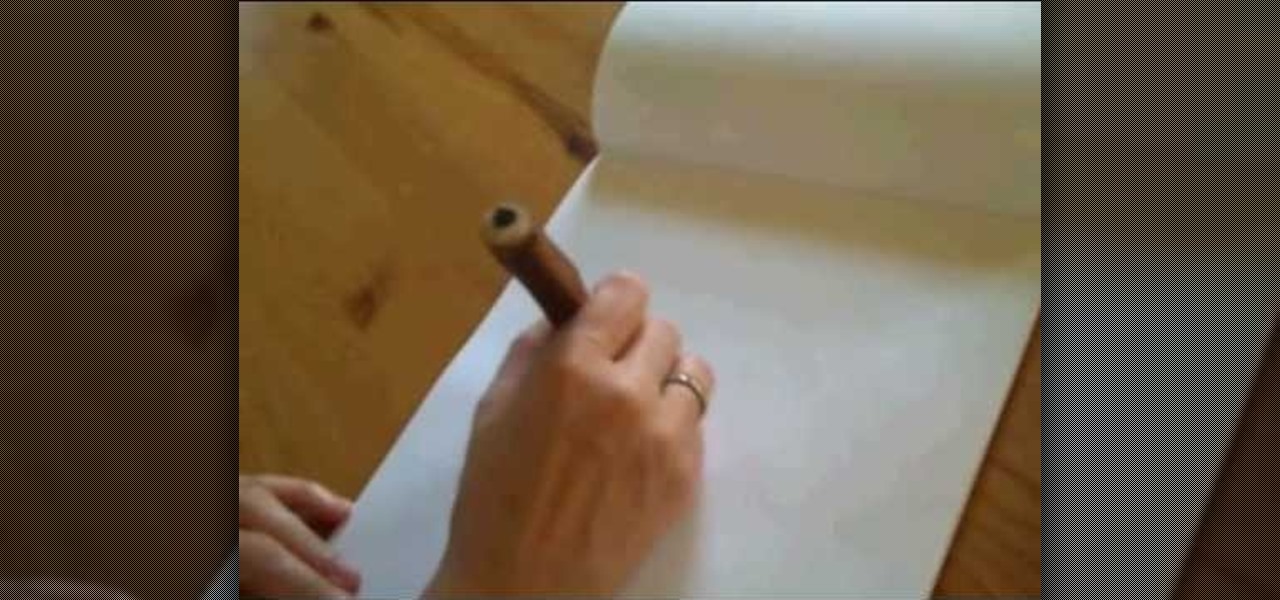
In this tutorial, we learn how to draw super-simple trees. Start out with a pencil and piece of white paper. Draw a straight line for the trunk of the tree. After this, draw the branches coming off of the tree in diagonal lines. From here, draw smaller lines coming off of those to make more branches. Draw in a smaller tree next to the larger one and you will have created a very simple tree! You can add more detail to this by drawing on leaves and grass at the base, but this is the most simple...
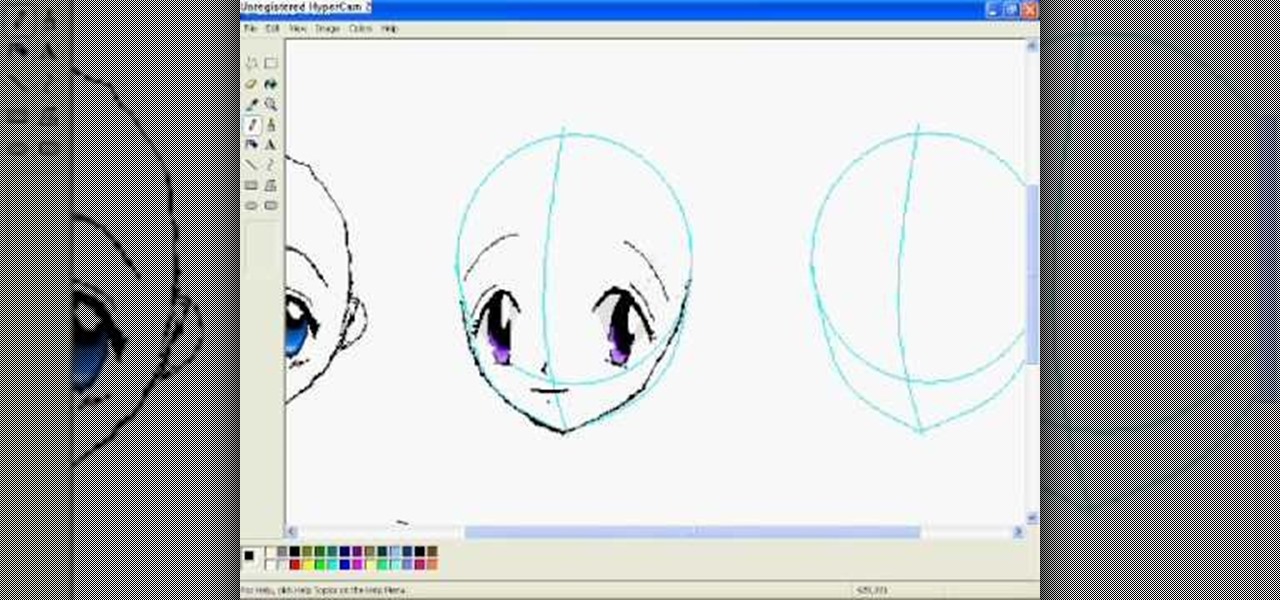
In this video, we learn how to draw anime eyes in MS Paint. First, draw the round circle for the head and draw a line in the middle for reference of where the eyes will go. To draw large eyes, draw two round circles and then a small pupil at the top. Color the pupils in black and color the rest any color you'd like. For female eyes, make the pupils much larger and add in eyelashes on the eyelids. Shade in underneath the lids and add white to show they are glossy. These are both great looks fo...

In this video, we learn how to make a prosthetic Glasgow smile like the joker. First, smooth the material onto the face and around the lips. Follow the shape of the lips for the sides of the mouth to make it look larger. Use a Q-tip to push on the prosthetic onto the face. Once this is attached, you can add in the color to the lips to make it look more realistic. Makeup will need to be added to the entire face. White should be on the face, black should be around the eyes. Go for a cracked and...
In this video, we learn how to destroy jeans to look like Hollister's. First, you will need to take your jeans, a nail file, and scissors. After you have these, use your files to rub onto the jeans where you want your hole to be at. Go from side to side to create a lighter look than is on the rest of the jeans. After you start grating through the jeans, there should be a small hole forming. Pull at the strings as you see them, then stick your finger inside the hole to make it the size you wan...

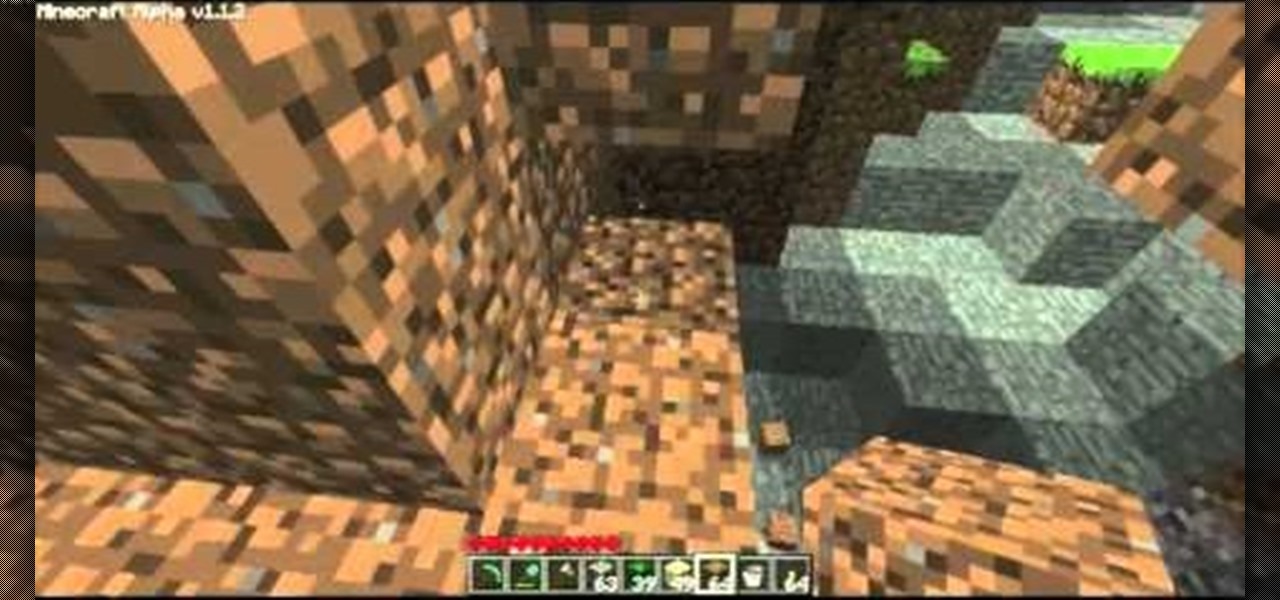
Having an epic base in Minecraft is one thing, having an epic moat, much more awesome. But let's up the stakes, a moat that also doubles as a way of killing those nasty zombis, spiders, creepers and more and then transports all their loot right into a little holding area that you can claim them from. In this two part video series you'll learn how to construct the moat itself, although he does it for a 6x6x6 building you can do it for larger, it will just require more materials.
In this tutorial, we learn how to know the pros & cons of laminate flooring. The difference between laminate floor and wood floor is mainly the cost and quality. Laminate flooring will withstand damage better than regular oak flooring can take. But, laminate flooring does not do well if you spill water on top of it. Once the water gets on the edges and stays there for a while it will end up swelling the floor up so it becomes larger than the rest of the flooring. Other than that, laminate is ...
In this tutorial, we learn how to distress and cut up jeans to destroy them. First, you will grab an old pair of pants that you want to have a distressed look on. First, you will need to take some sand paper and rub it on the front of the jeans in the thigh area. After you do this to your liking, you will take your scissors and cut a small hole going down the legs. Use your hands to make the holes larger, then leave the frays at the end for a more distressed look. When finished, wash them off...
In this tutorial, we learn how to make an easy hair bow. First, grab some thick ribbon in any color or material that you want to have. Use more ribbon if you want a larger one and less if you want a smaller one. Measure it out or use your eye to measure. After this, heat seal the ends so they don't fray by passing them through a lighter quickly. Now, fold the ribbon in half length wise, then place a crease there. After this, use a hot glue gun to fold down the two sides of the ribbon with a k...
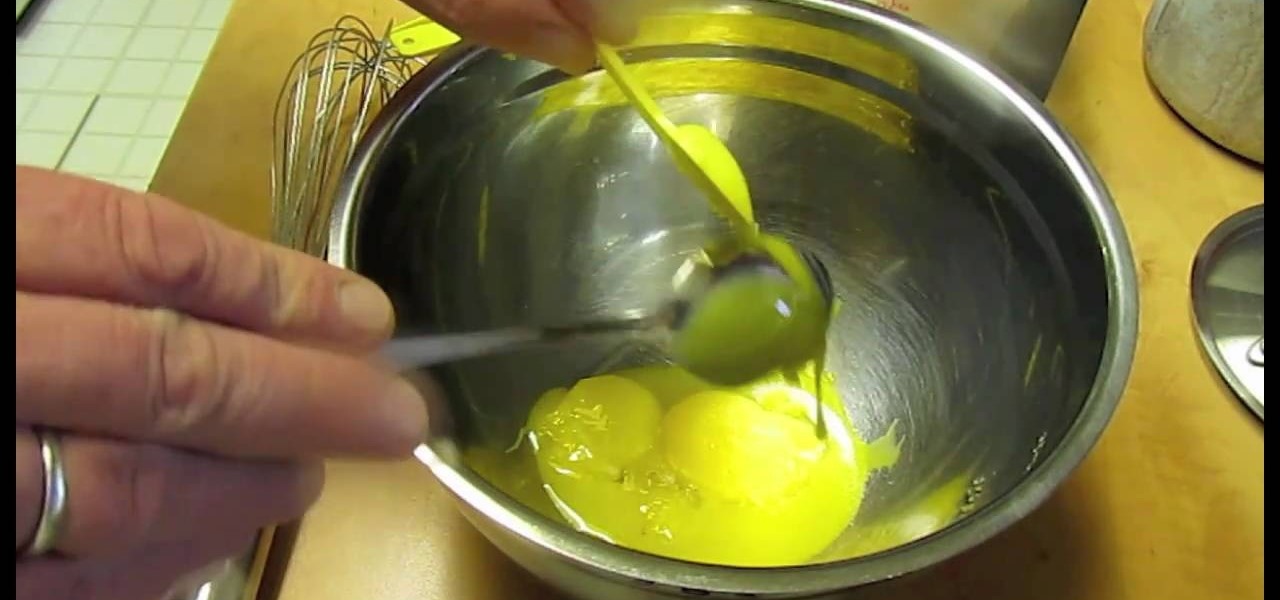
Seriously, what's not to love about a banana cream pie? Naturallly creamy, sweet bananas, crispy pie crust, and mountains of whipped cream make this comfort food dessert one of our all-time favorites.
Tutting is one of the members of the larger Popping family of hip-hop dance styles, so named because the moves are inspired by the right angle heavy art of early Egyptians. It looks very cool and doesn't requires as much full-body coordination as many other dances, so learn it! This video will give you some tips for making your King Tut Style look more clean. It doesn't feature many new moves, but should make all your other moves look better.
In this video, we learn how to quickly make an origami kusudama. This only requires six pieces of paper to make. First, fold one piece of paper into a triangle, then open it up and fold it in a triangle on the opposite side. Open this back up then flip over. Bend in the edges to make a new triangle, then press down the creases on the side. Bend the middle of the triangle up to the point on both sides. Bend these back down, then fold over the side and make a crease. Open up the bottoms where y...
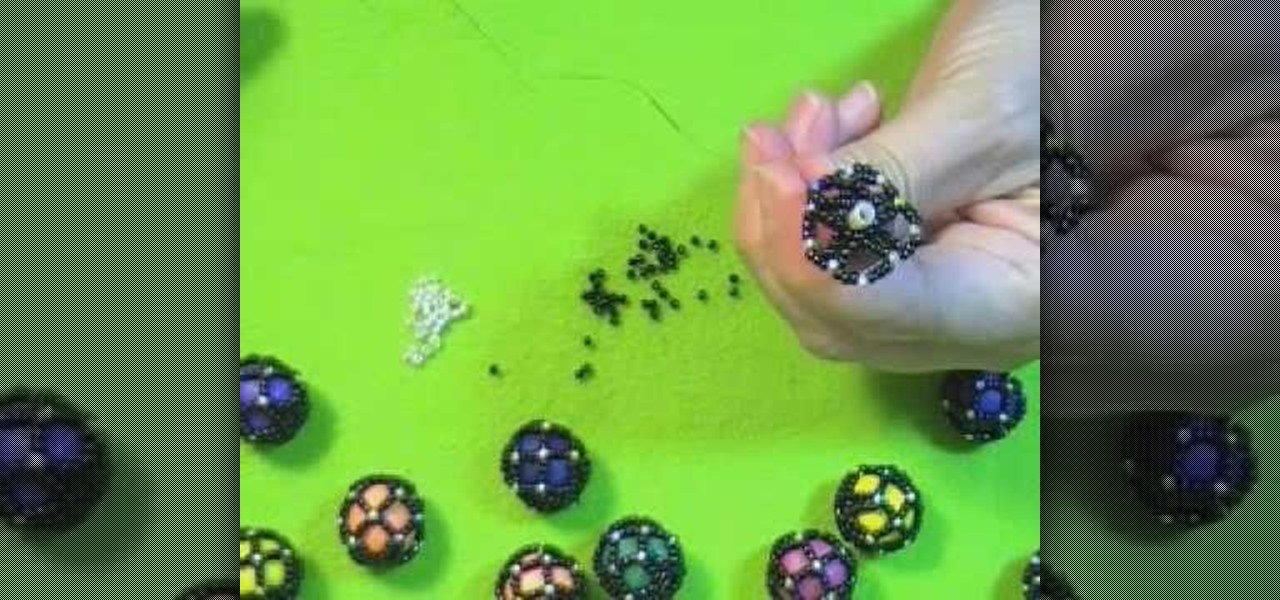
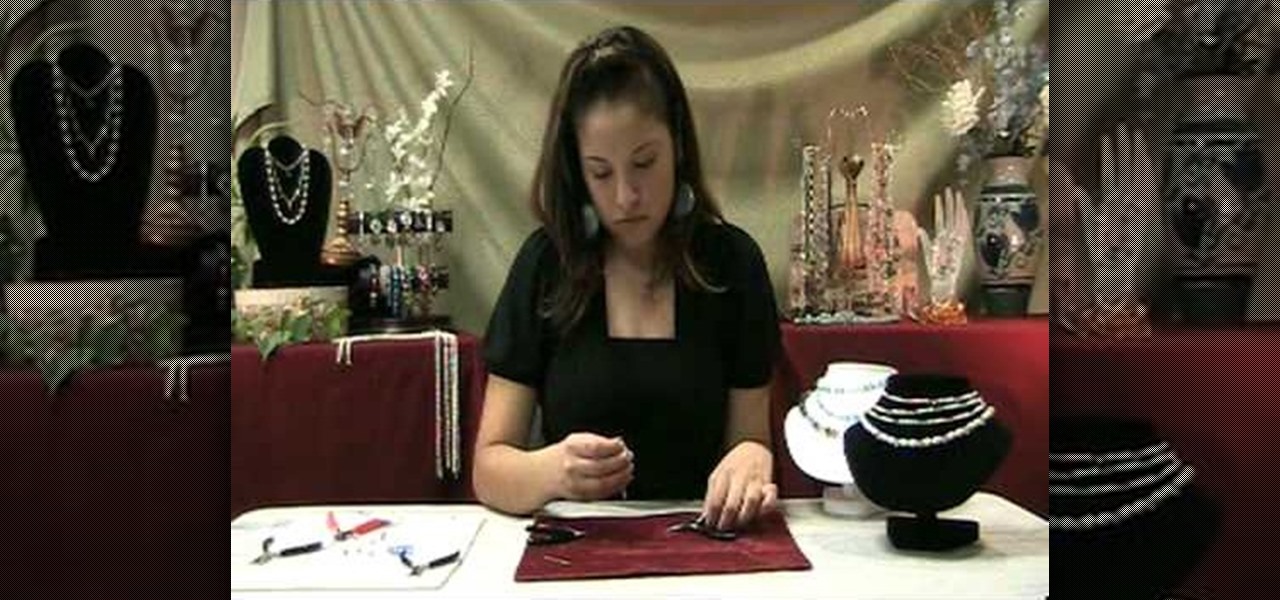
Want to create netted necklaces, earrings, purse decorations or any other netted designs. This video demonstrates and explains how to create a netted bead. However, the basic procedures which are
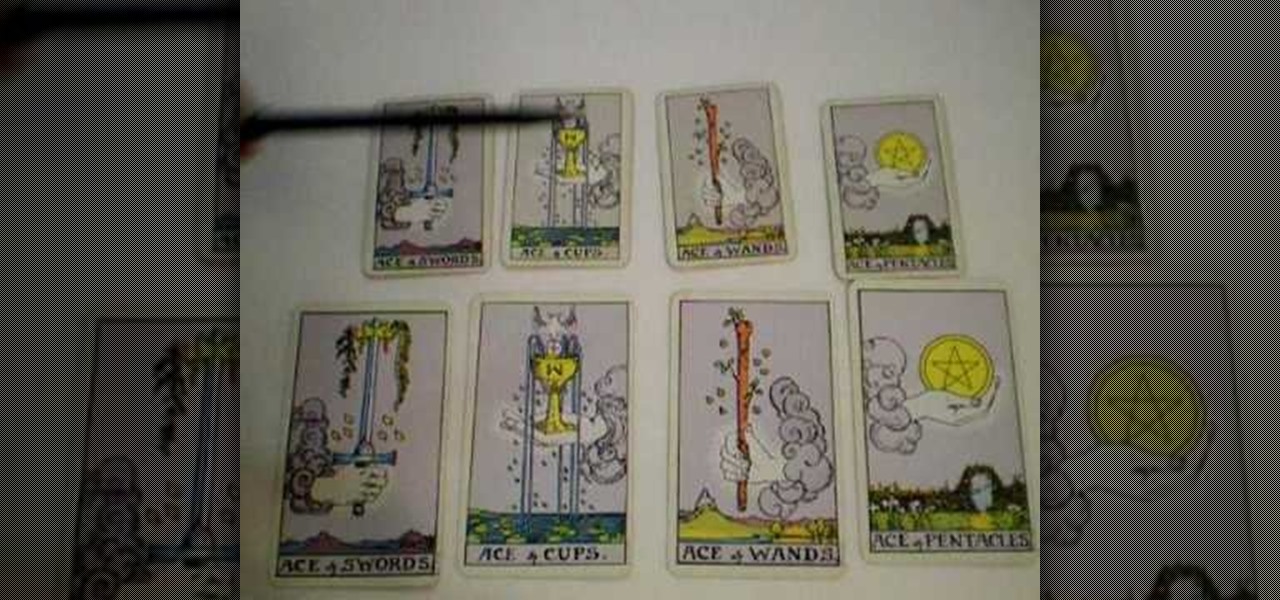
Peter John teaches us how to explain Tarot cards & reading with Peter John. Tarot cards come from the playing cards era and there are many different types of tarot cards on the market. These work by the person that picks the specific cards. When someone picks a certain type of card, this will tell something about themselves or what is going to happen in their future. The larger cards are harder to use and the smaller are more frequently used. Some tarot cards will explain what they mean on th...
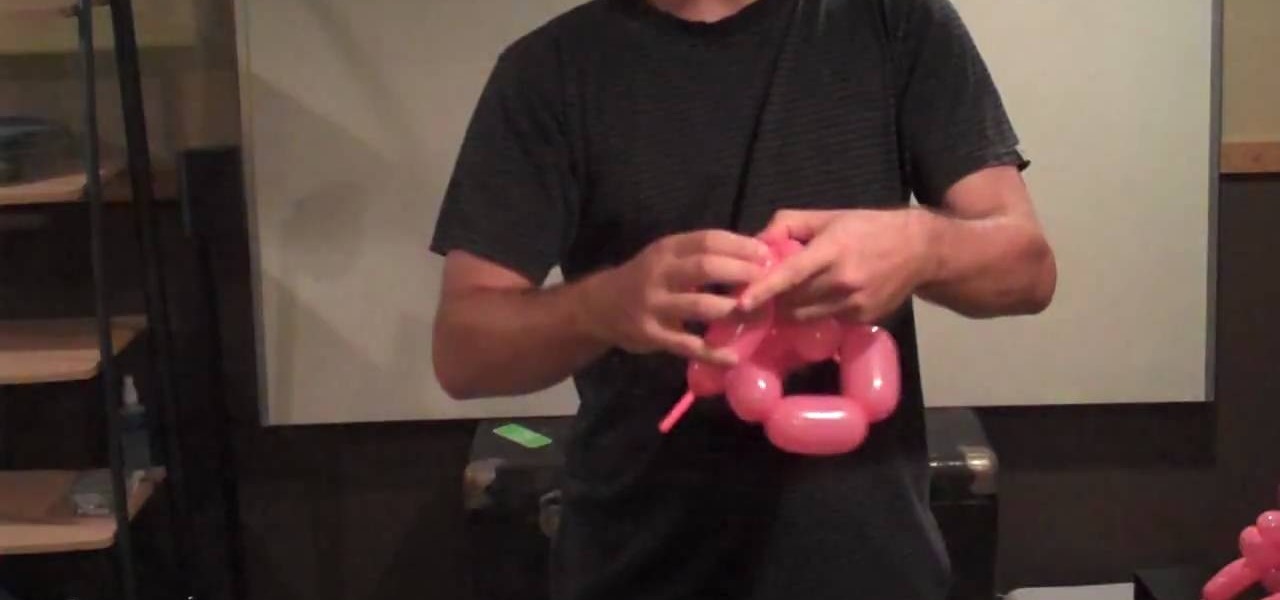
This video shows viewers how to create a maple leaf using two long balloons which are used for making animal balloons. You will begin by inflating the first balloon, leaving a few inches of empty space at the end of the balloon. Begin by making two small bubbles by twisting the balloon and creating consecutive bubbles in the balloon. Follow these with two larger bubbles and 3 more smaller ones, to create a hexagon shape. Continue to create small bubbles, folding them into each other to create...
In this tutorial, we learn how to use a yarn bowl when knitting. The side of the bowl will have a slit in it where you can place your yarn while you are working on a project. Use hand wound balls or any other type. First place the yarn in the bowl and then string it through the slit, feeding it through as you do your project. If you have a larger ball, set it on the side and use it the same way. The bowl is glossy and smooth so the ball will roll around and won't get stuck inside. There's als...
In this video, we learn how to remove blackheads with Lisa Rhodes. Blackheads are a common problem that occur when dirt and bacteria get trapped underneath the skin. The best way to remove these blackheads from your skin comedone extractors, which is a metal stick with a hole at the end. It applies even skin around the blackhead when you are extracting. This is safer than using your fingers, because your fingers tend to damage the hair follicle, which leads to acne bumps or a larger pore. thi...
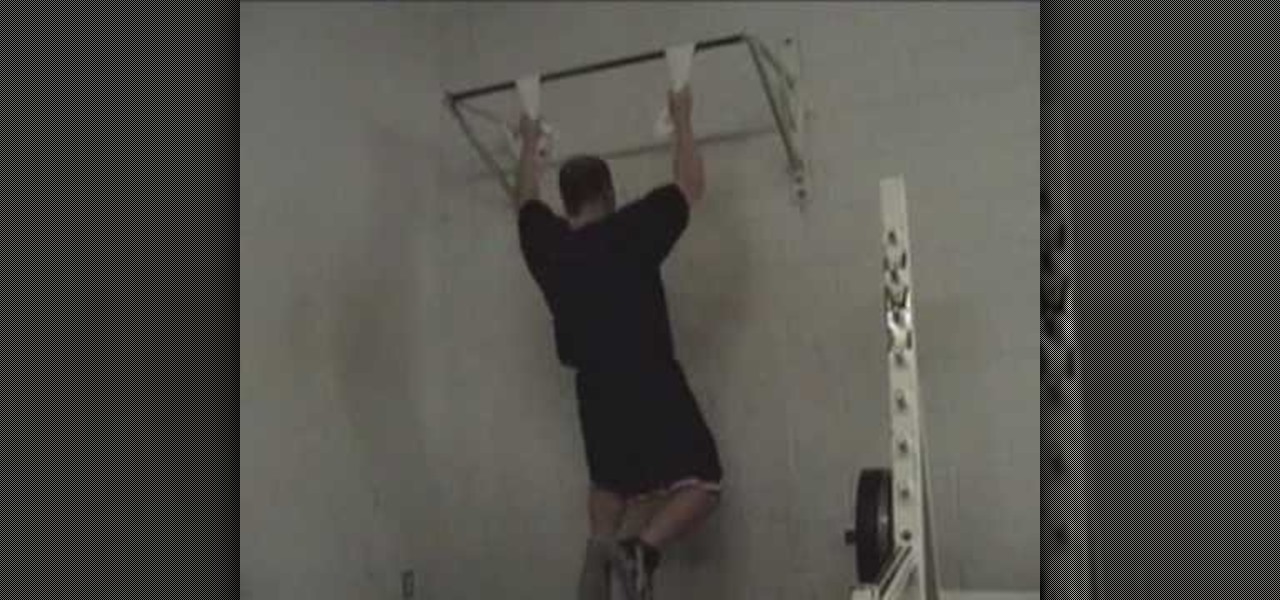
In order to do a big back giant weight sets, you will need free weights, a bench, and a hanging bar. You can use towels or and powder, if it helps you.
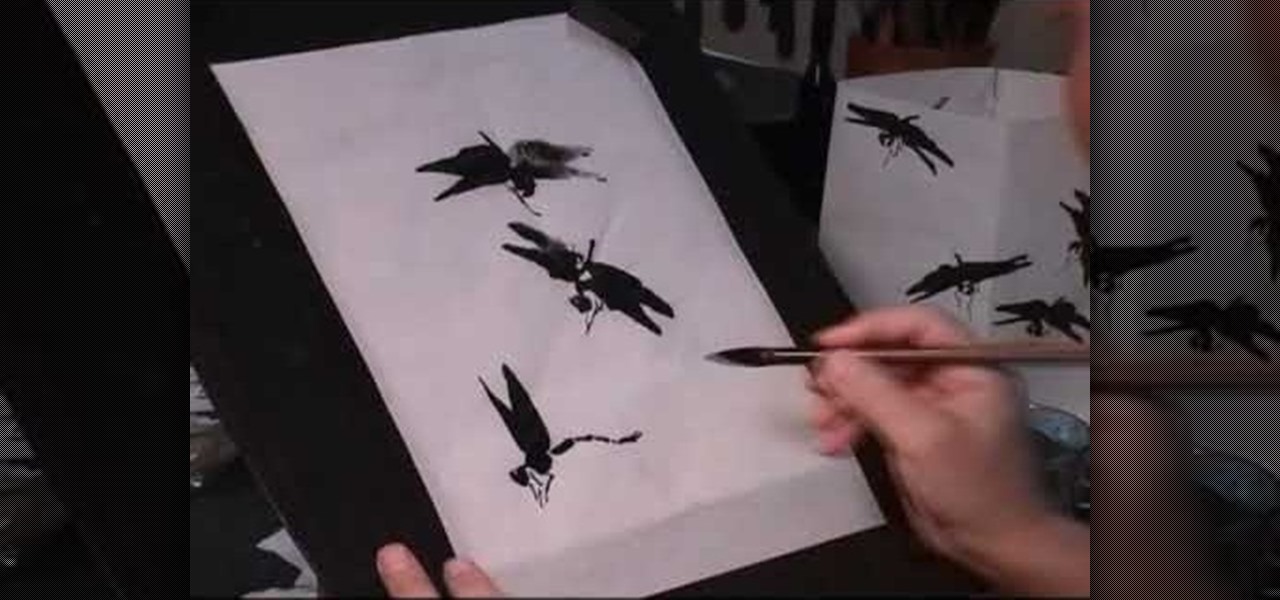
In this video, we learn how to draw dragonflies in Chinese painting. Start out with rice paper, then soak your medium sized combination hair brush in water. Next, squeeze the moisture and then push the ink out. Now, position the brush so it's comfortable and touches the paper lightly. Draw the wings on the insect first, then draw the tail on the bottom. After this, paint a small circle shape for the head and continue to draw the other dragonflies. You can vary how these look by making the win...
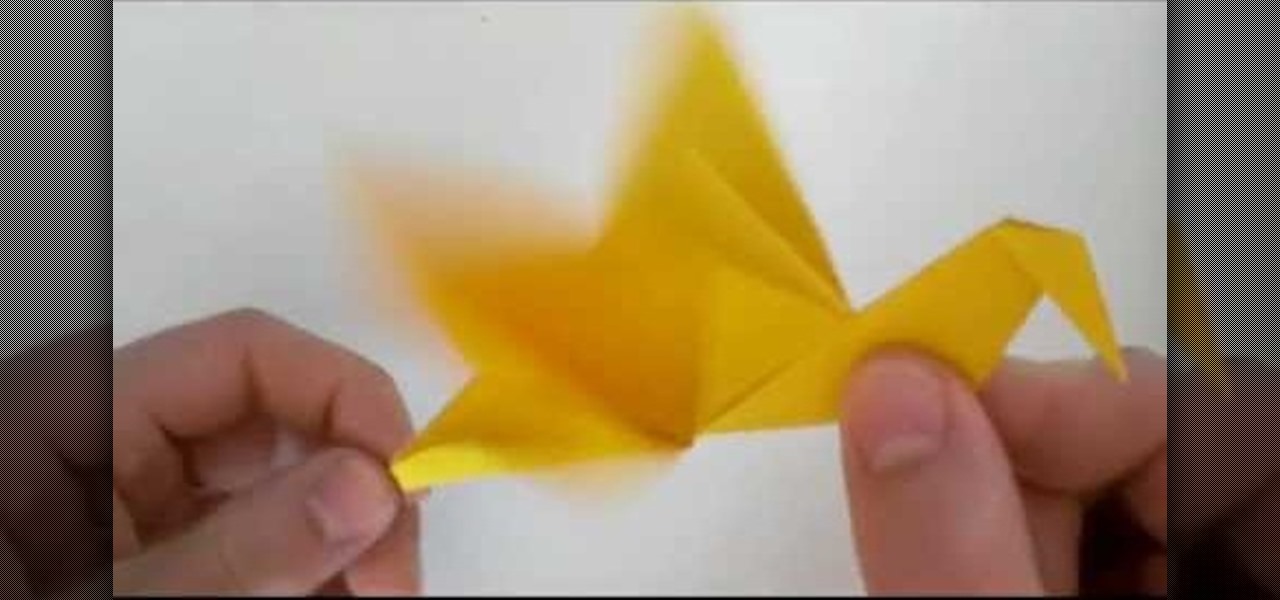
Do you know how to fold an origami flapping crane? If you do, then great, because that's the only origami project you need to know how to fold in order to complete this origami bird. A variation of the crane, this bird has larger wings and you can make them flap by pulling on the tail.
In this video, we learn how to use and understand depth of field in photography. If you look at a photo, the depth is how deep the picture looks. You can change the depth by changing the aperture to make the depth of field look shorter or longer. The lighting can also change the depth of field and what you can see in the background. A big aperture will give you a large depth of field, with a small amount of light. If you want a big depth of field in a landscape, then you will use a maximum ap...
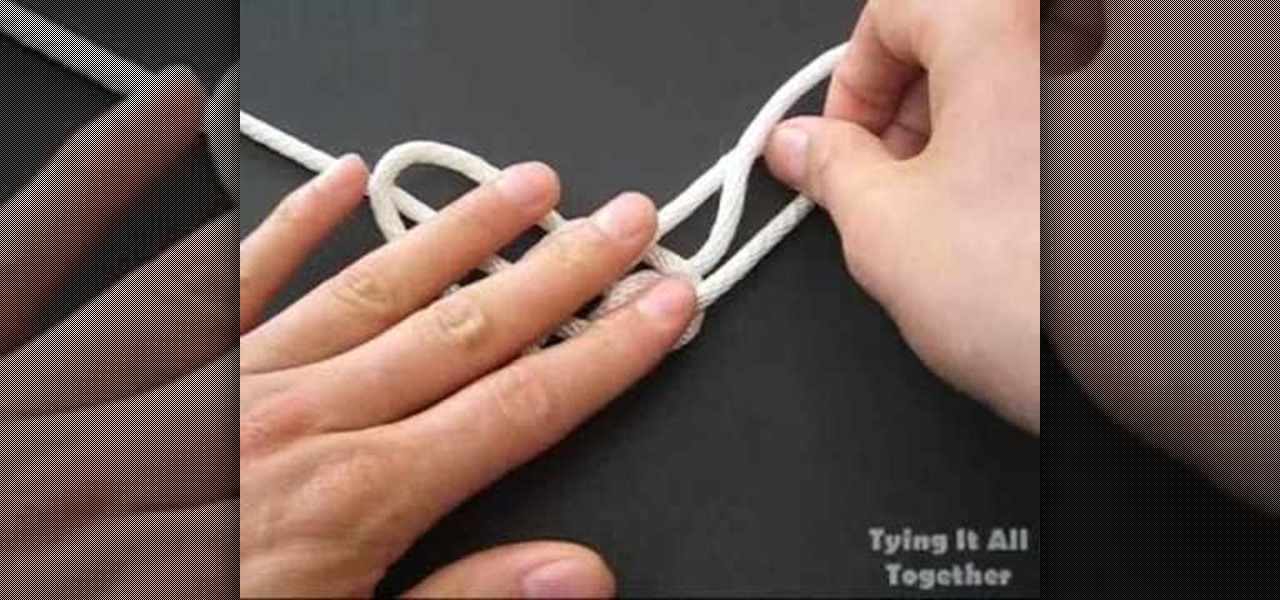
In this video, we learn how to tie the longhorn knot. First, make a spike with your rope, then push the rope around it and through it, making a circle. Then, push the loops on the bottom down and make a pretzel shape with it. Bring the left hand side string down and pull it through the loop, then do the same with the other side. Next, pull the strings on the top up to make larger loops, then pull the string through the left loop. Now, do this to the other side of the rope as well. To finish t...
In this tutorial, we learn how to transform into a broken statue for Halloween. Start off by putting your hair back in a beanie, then painting your face white with a sponge. Next, stop halfway through your face so one side is still normal and the other side is completely white. Make sure you make a diagonal line, making the smaller area your regular face and the larger area your white face. Now, create contours on your face using a light touch with a brush that has gray on it. Now, take your ...
In this video tutorial, viewers learn how to increase a computer's low virtual memory. Begin by clicking on the Start menu. Then right-click on My Computer and select Properties. Then click on the Advanced tab and click on Settings under Performance. In the Performance Options window, click on and Advanced tab and click on Change under Virtual Memory. Now select your hard disk and check Custom Size. For both Minimal Size and Maximum Size, set it at 2500 MB. Finish by clicking on Set and OK. U...
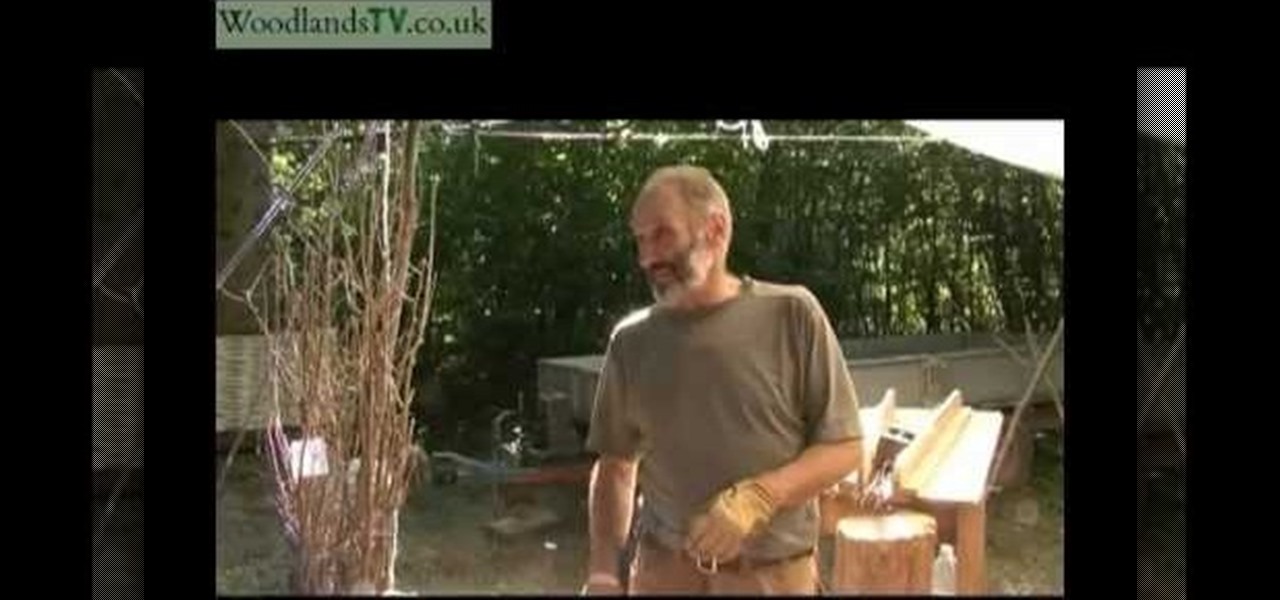
In this tutorial, we learn how to bundle kindling. First, gather up 25 pieces of kindling together and tie it together with a rope on two ends and in the middle. Before you do this, you will cut the tops off of the kindling so you are just left with the branches. The water will go through these and it will build the bank up, that is what these kindling bundles were created for. You can bundle kindling in larger groups or smaller groups, depending on what you need it for. These were once used ...
In this tutorial, we learn how to prepare for a navel piercing. First, know how much the piercing will cost, so you are prepared to pay for it. Next, do your research on how to clean and care for your piercing. Cleaning it with salt water and a cotton ball will help keep the piercing clean and infection free. You should also know what kinds of piercings to avoid. You can get a larger gauge for your belly button, which will cause more pain depending on how large you go. Also know that the pier...
In this tutorial, we learn how to perform a butt weld. First, read the settings for your welding machine and make sure you have everything set up in order. Now, place protective gear onto your body and start to perform your weld. Use caution and make several holes into the metal. You can do this on a small piece or try a larger one once you are comfortable enough. Make sure you are using the push and pull method while welding, pushing into the metal and then pulling back out. When you are fin...
In this tutorial, we learn how to set a spring loaded snare trap. First, find a sapling with a larger tree next to it, then bend the sapling down and wire on a stick to this. This stick will have a small nub on it that will hook onto a stick that you will prop up on the back of the tree. When the rabbit comes along, it will follow the trail and walk through the wire. The feet will go into the wire and it will tighten up, releasing the spring to ensure the rabbit stays trapped. This is a simpl...
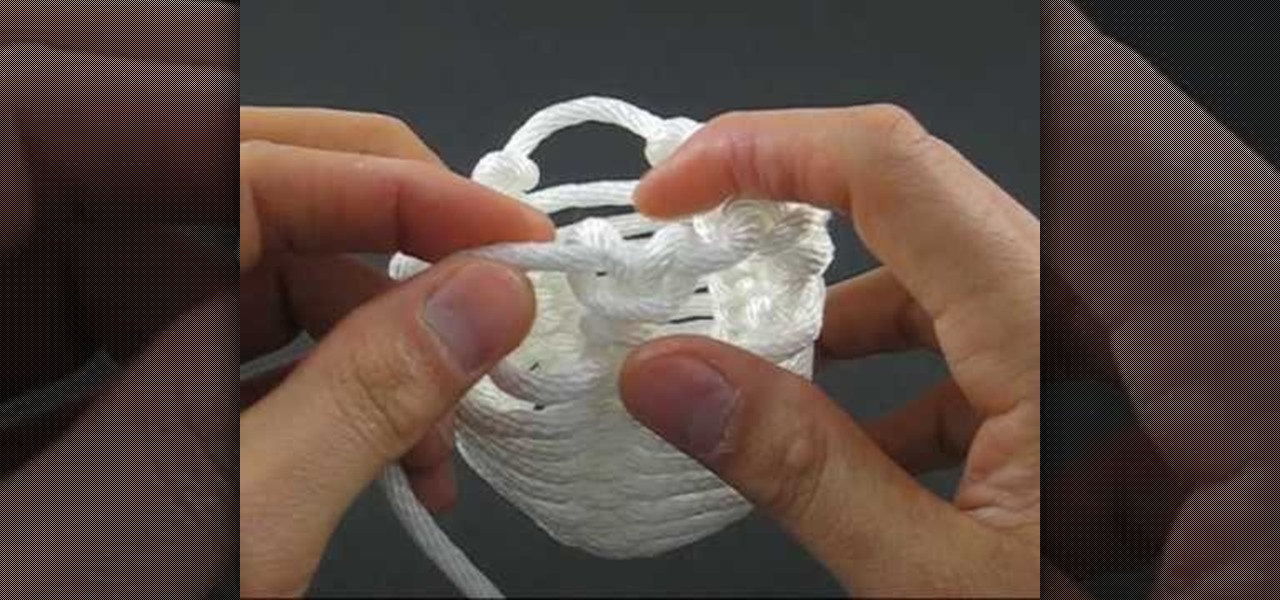
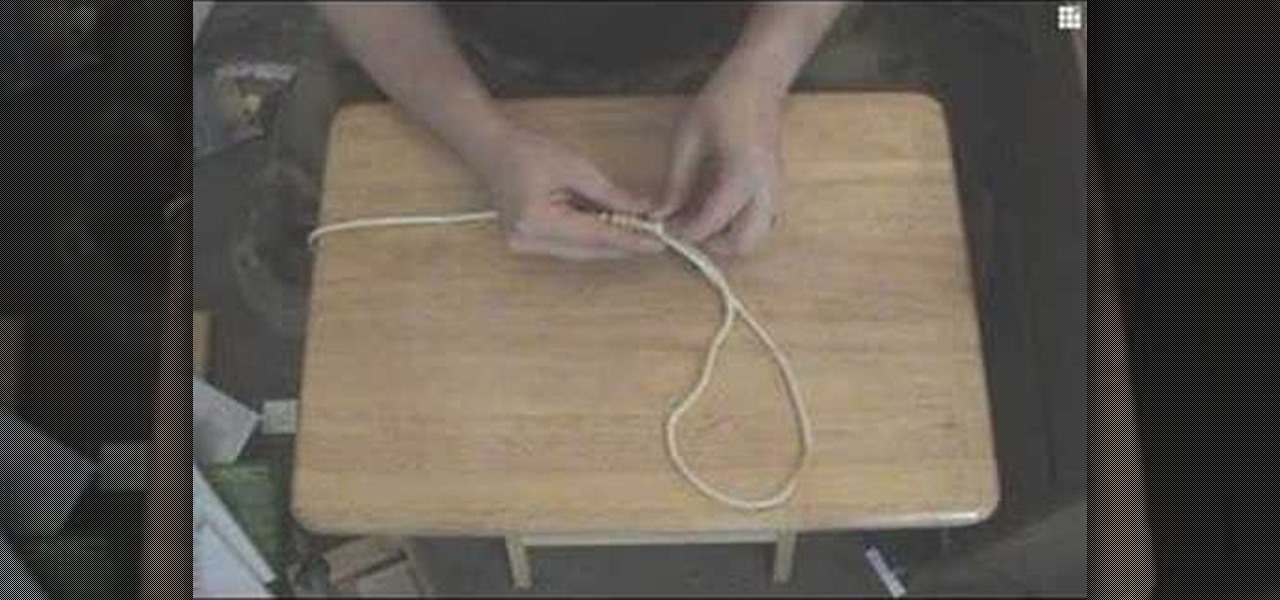
In this video, we learn how to tie a honey rope basket knot. To do this, you will need a 10ft of nylon rope. Start off by tying a counter-clockwise slipknot at one end of the rope. After this, pull the loop of the slipknot out four inches. Then, tie a second slip knot clockwise next to the first slipknot. Draw the loop length of the second so it's equal to the first. Next, continue to create slipknots next to each other until you've done five. No, hook your working end into the first loop and...
In this video, we learn how to divide bigger numbers. As an example, let's say you were dividing 843 by 13. To make this easier, write down the times tables for 13 down and keep adding up. After you do this, see how many times 13 goes into 84. Your table will tell you how many times it goes into the larger number. Thirteen will go into 84 six times, so write six on the top line above the four, then subtract 78 from 84 and write a 6 next to the 4. Now, work out the remainder and when finished,...
In this tutorial, we learn how to tie a decorative noose. First, form a loop and then and wrap the end around the loop thirteen times. Next, take the loose end and stick it into the coils you just made. Use a pencil and long scissors to help you do this. After you are done with this, tie a knot at the end and pull so the loop is tight. You can also clip off the loose end and pull the loop to make it larger if you prefer. When finished, use this as you wish but do not use it for violent activi...
In this tutorial, we learn how to attach a charm on a chain with Anna. To begin, grab a pair of pliers in each of your hands. Now, pick up the chain with them and gently lift up one side of the flap. After this, pick up your charm and attach it onto the chain. When finished, attach the chain onto the larger chain (bracelet or necklace), then gently close the chain link back up. You will want to gently press the opening back down leaving no gaps in it, or the chain will come loose and you will...
In this tutorial, we learn how to make beeswax candles. To make this, you will need thread for a wick and a small bucket of beeswax that is melted on a hot surface. To start, cut the wick thread into even strings, you will only need two of them. Next, place the strings into the wax and dip them in until they are coated. When finished, let the strings dry and continue this will several other strings to make even more candles. Continue dipping the strings and letting them dry so you collect mor...
In this tutorial, we learn how to build the perfect campfire. It's important to consider the materials, it's impossible to take a lighter and light a large piece of wood. You want to start the fire small and build it large. Think about the wood you will be using, which will decide if you are going to cook on it or need it for warmth/light. Birch bark is great for a base layer. Cinder is perfect to place on top of the birch, then add in larger pieces of wood as you create a bigger fire. When y...
In this video tutorial, viewers learn how to make paper footballs. Begin by cutting a straight strip of paper. The wider the width, the larger the football will be. Then fold the edge into a right triangle shape and continue folding the strip in the right triangle pattern. Once you have reached the end of the strip, tear off the end at an angle and tuck it in the side of the football. This video also shows viewers how to play a game with the paper football. This video will benefit those viewe...
In this video, we learn how to groom men's eyebrows with Aaron Marino. You will need: high quality tweezers, small scissors, fine tooth comb, and a pencil. First, use the pencil and place along the inside and outside of your eye to know where your eyebrow should start and stop. Now, take your tweezers and pluck the middle of your eyebrows, as well as the outside and underneath of the eyebrow. Next, take the comb and brush against the grain. Trim the hairs that come up at the top, making sure ...
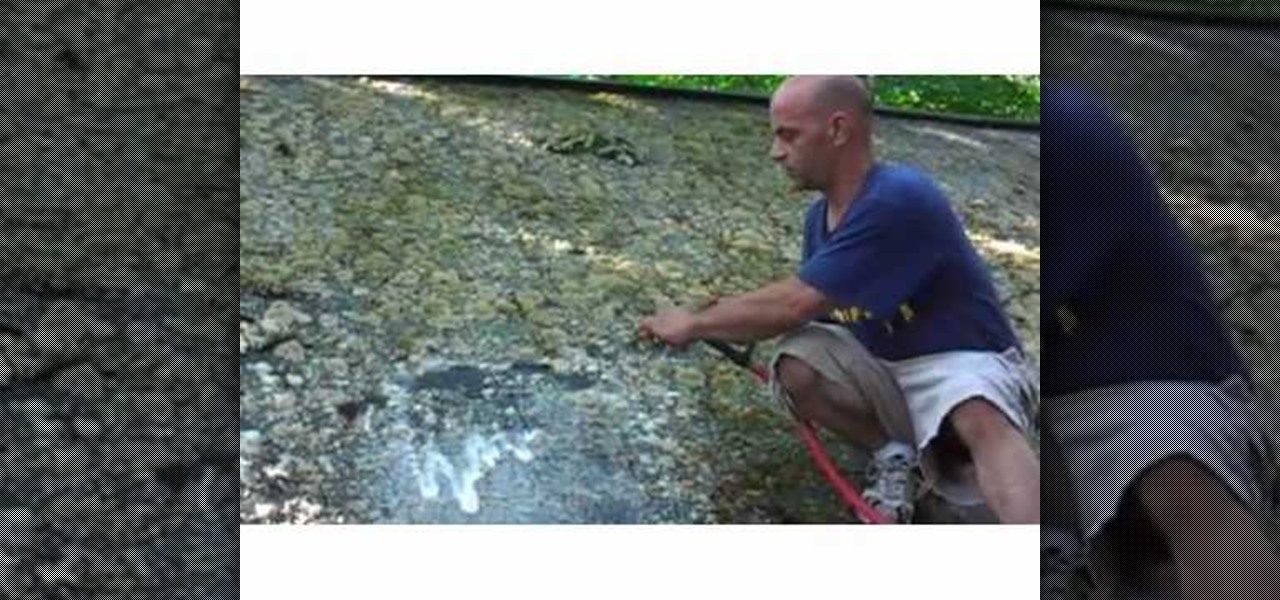
If you live in an area where moss or algae is a common theme on most people's roofs, it's important that you get this removed soon. Over time, the moss can grow larger and potentially damage certain parts of your home.
In this video tutorial, viewers learn how to pack lampshades. Most lampshades are packed into 4 cu ft cartons. Begin by placing crushed paper into the bottom of the box. Then place clean sheets of packing paper over each side of the box, making sure that the flaps and inside wall of the box is covered. Now carefully place the lampshade top-down into the box. Then spread clean packing paper over the shade. Now gently place the smaller shade into the larger shade and pack in the remaining packi...
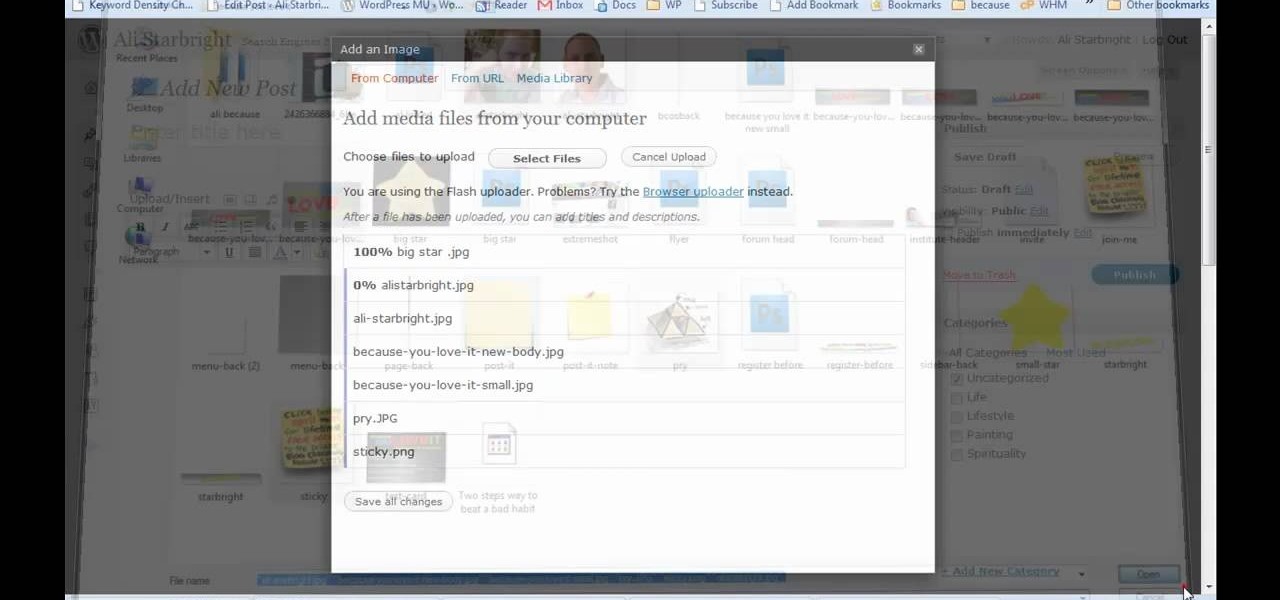
If you need to display thumbnails on a WordPress page and link the smaller thumbs to the original larger pictures, this post shows the process involved, using the Lightbox plugi,n which creates a special overlay effect when an image link is clicked on. Every version of WordPress brings with it new features, new functions and new ways of doing things. Fortunately, the very same technology that allows an open-source blog publishing application like WordPress to exist in the first place also mak...