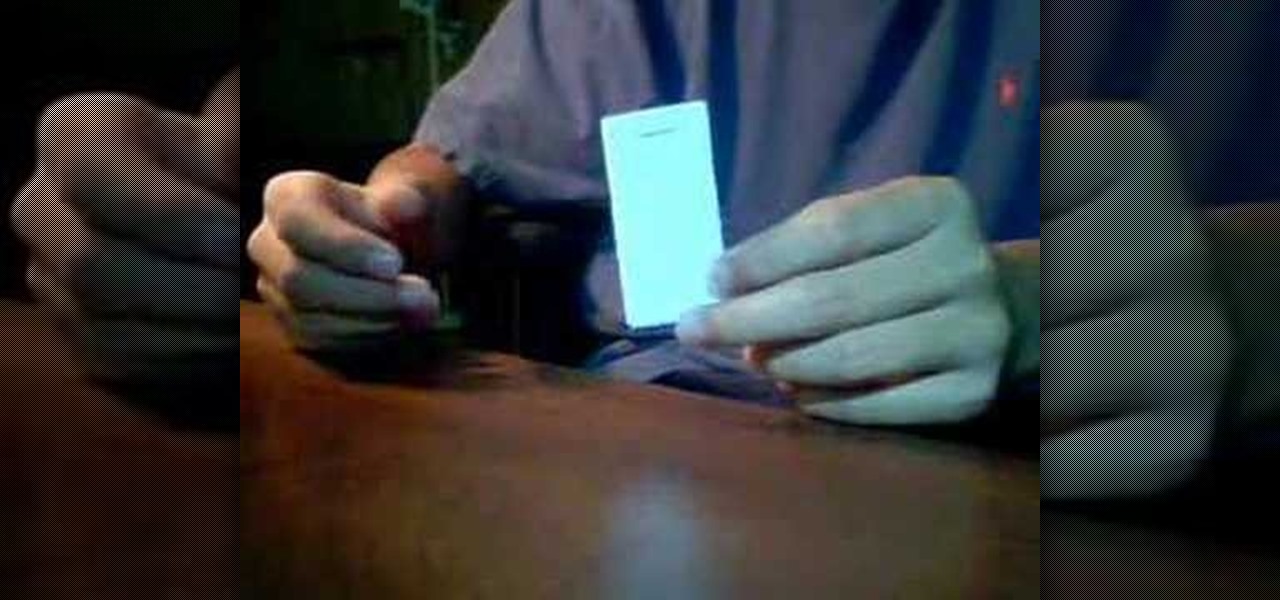
The ancient art of Japanese paper folding is broken down and explained clearly in this video. The video teaches how to create a beautiful bookmark of your own design from a simple single sheet of paper. The instructions use the square base as a jumping off point for showing you how to easily make a custom book mark. There are a few simple beginning steps, and after you complete those you will be able to fold and crease your way to a gorgeous custom origami book mark.
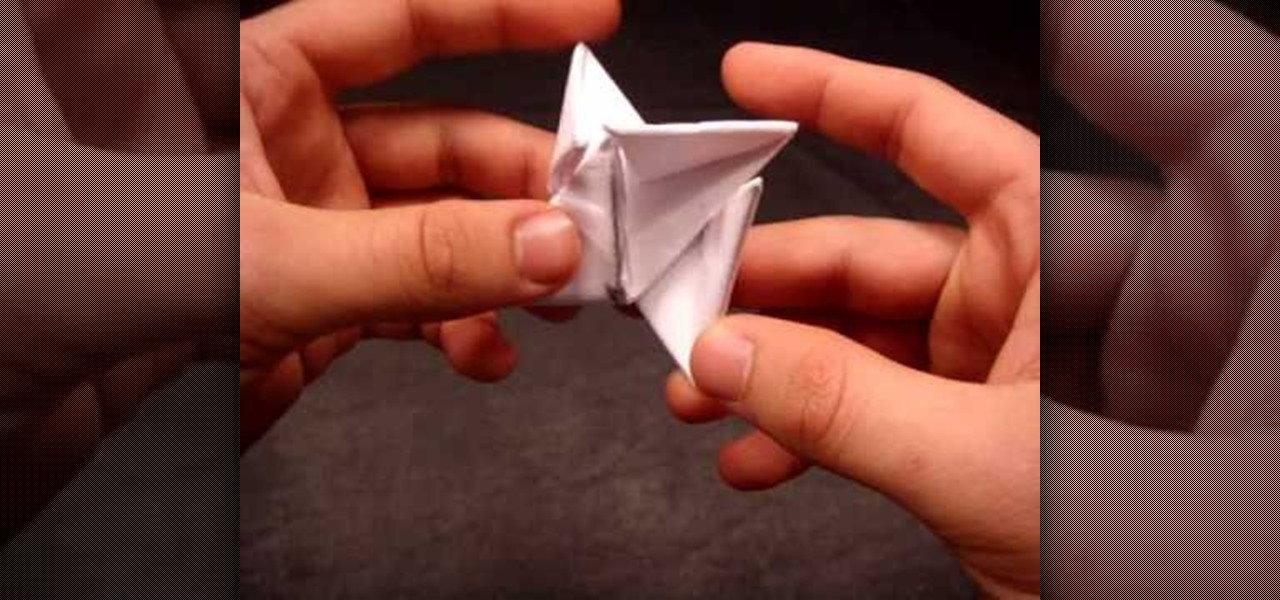
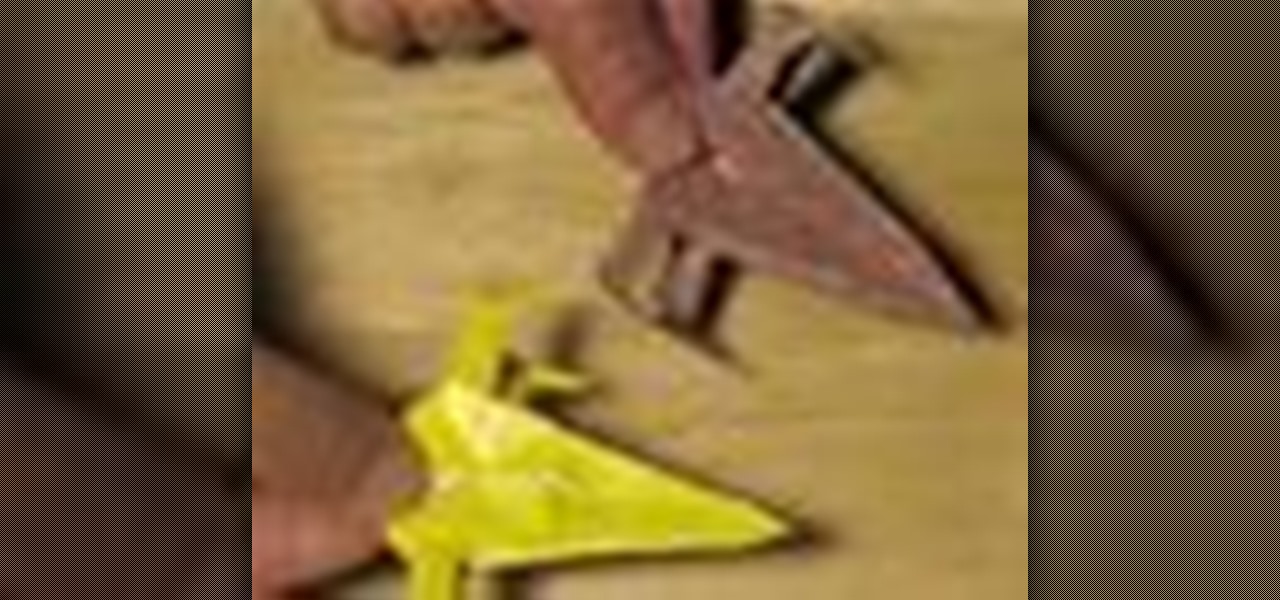
Shuriken are the ancient Japanese weapons you've seen ninja warriors use in the movies. Their name literally translates as "sword hidden in the hand". In this tutorial you'll learn how to make a shuriken out of paper in a few fairly simple steps. But while this throwing star isn't as deadly as a metal version, it has sharp edges and it is potentially dangerous. Be very careful about where you throw it, and never throw it at people or animals!
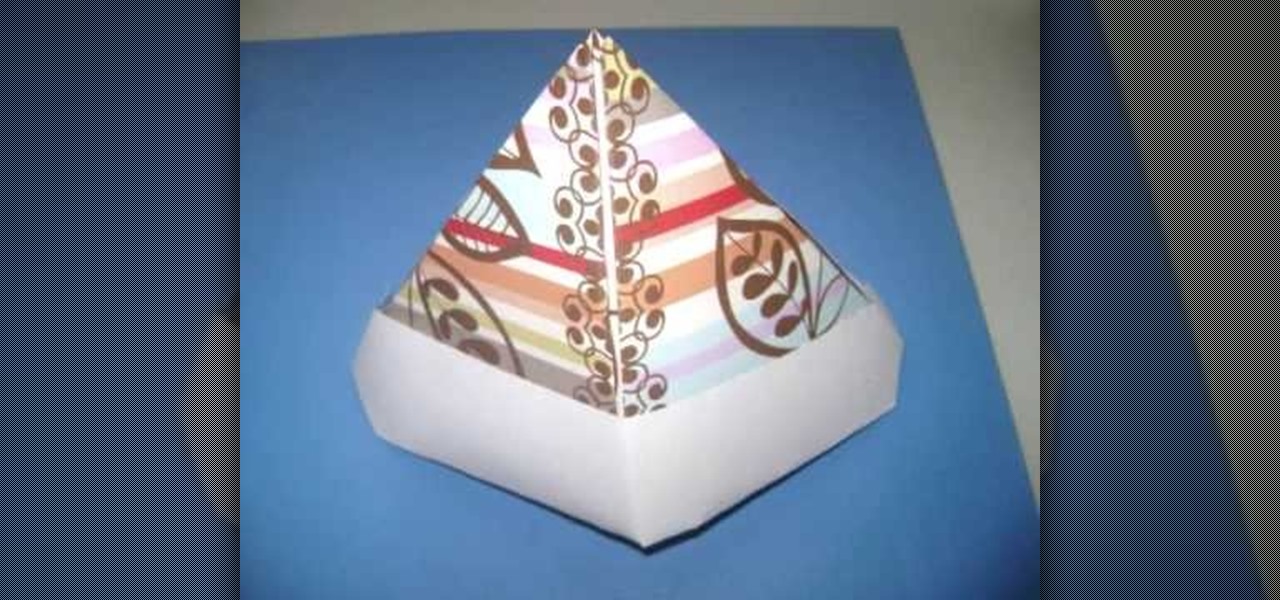
This origami video tutorial shows how to make a box with a lid out of two sheets of paper. This fold makes a great gift box for small presents. This is relevant with the upcoming holidays like Christmas, Hanukkah and Valentine's Day all around us. It's also a good idea for adding a personal touch to a birthday present or to hold a first year anniversary gift... (the first year is paper guys).
This holiday season, become a wrap artist! Learn how to make every Christmas present look festive, no matter what shape or size. Wrapping Christmas gifts can be quite the bore, but when you add a little artfulness, it could be more fun than ripping it off and finding your present.
Because who wants to mess with all those wires, programming and power sources? You can make your own origami robot out of paper or cardboard! Though it probably won't do as much as a real robot would, it's nevertheless a fun project to do! All you need are a few sheets of paper (you can also used cardstock or a thin cardboard, depending on how sturdy you want your robot to be). Then just follow the steps in this tutorial!
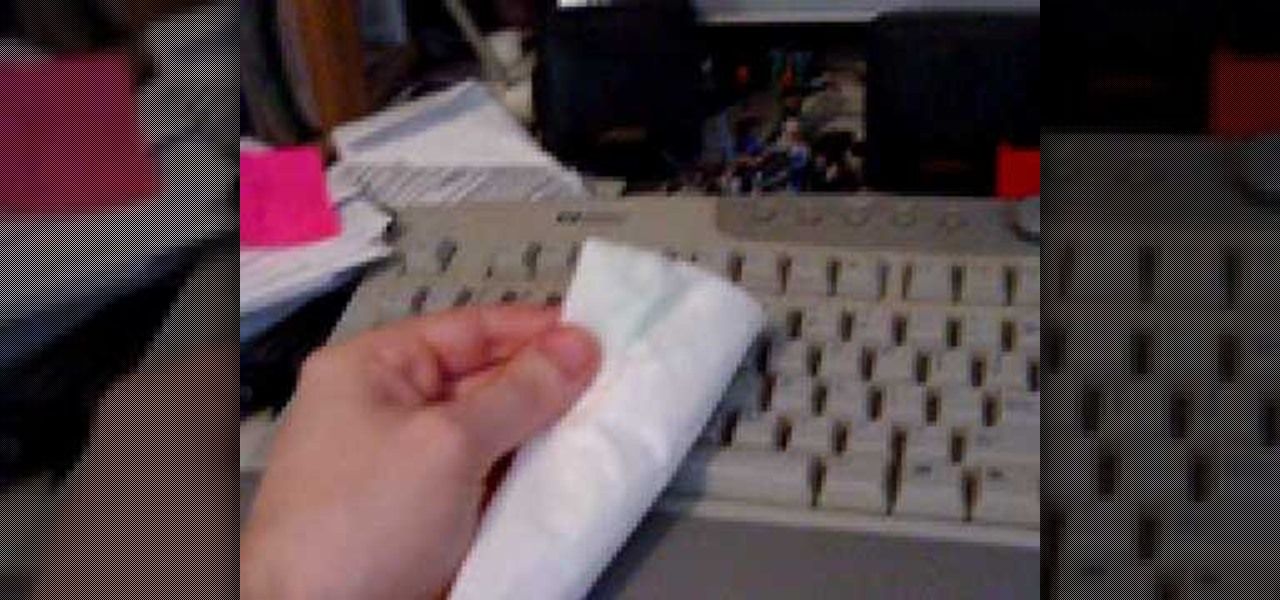
In this video from Defcon Computers we learn how to clean your computer keyboard. You can use cans of air, or take off your keys. But in this video we learn how to actually clean the keys themselves. With the computer off, put Windex on a paper towel, and rub the key. Put more Windex on your paper towel and continue to rub the keys. Rub them individually and also clean the spaces in between the keys with the paper towel. Again, make sure your computer is off or else you'll get all sorts of er...

In this video, we learn how to make note cards for your research paper. Note cards will help keep your data organized and easy to organize. Take a pen and write out the title of the card on the top, then write out the pages you got the information from next to that. From here, start to write down information on the card, covering one topic per card. Use any notes that will help you out and have the most amount of information on them. After this, use a highlighter to highlight the different wo...
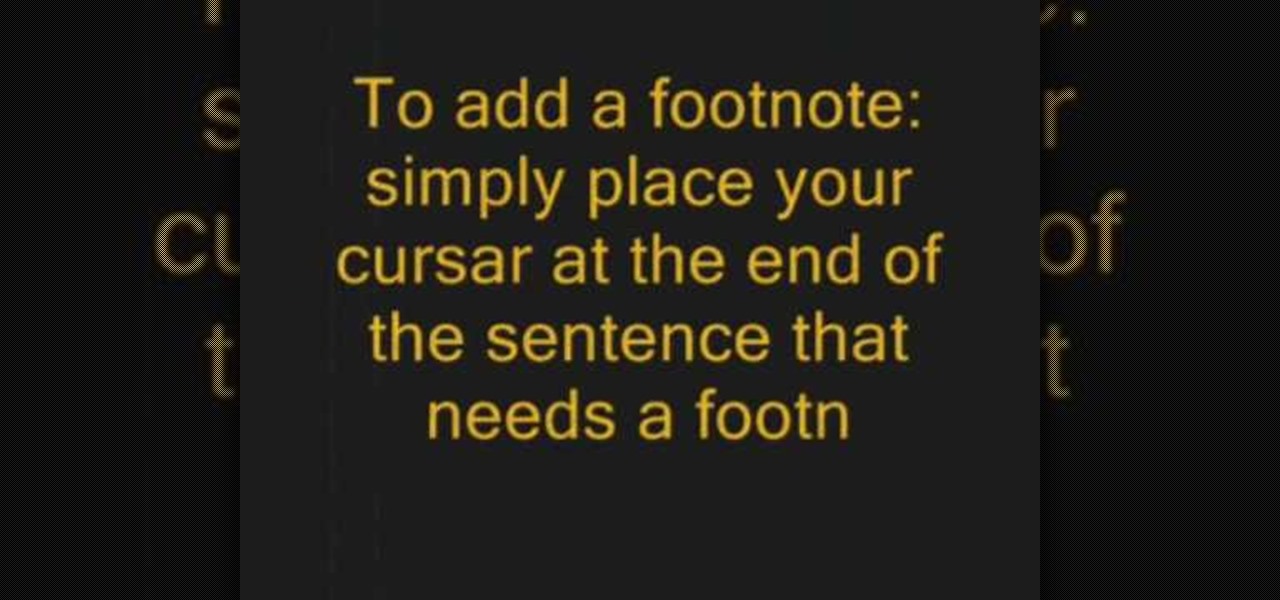
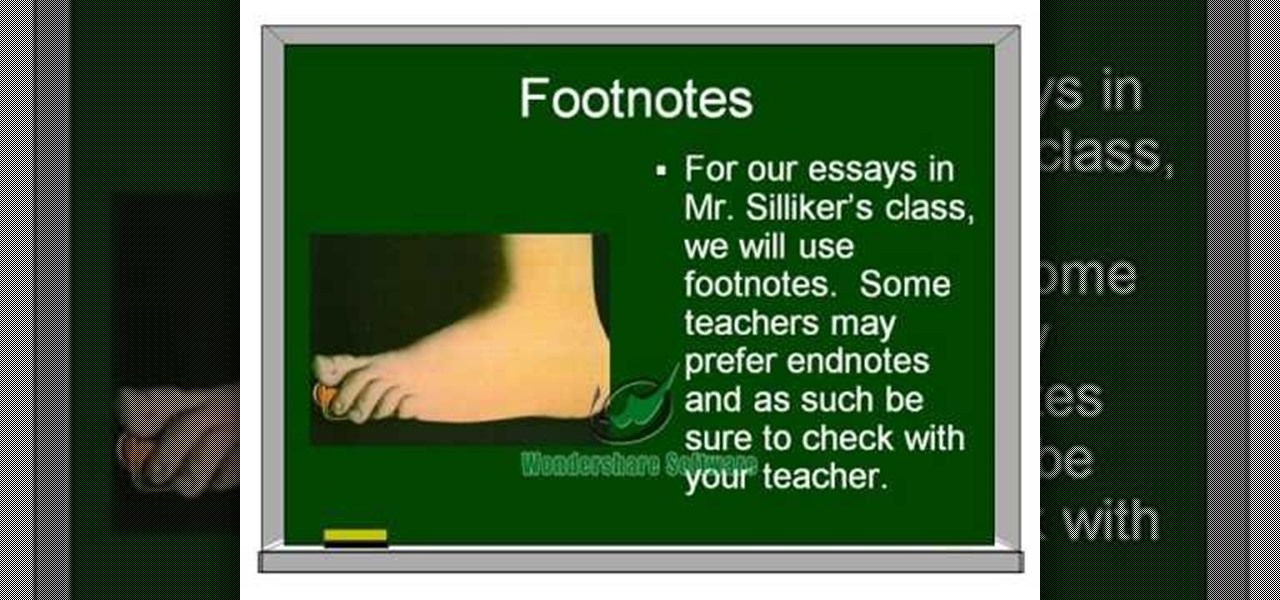
In this tutorial, we learn how to add a footnote to a research paper. To do this, you will need to have all the sources written down where you got the information for the topics that you're writing about. Make sure you give credit to all the places that you go the information, or else you stole it and it's plagiarized. You will need to write down the author's name, title of the source, publication company, city of publication, copy date, and page number. To add the footnote, you will simply w...
In this tutorial, we learn how to use the cold pressed watercolor paper technique. Start out with one leaf, then use your brush to apply more color above it. Continue to apply the paint and try to blend it. It will be difficult to blend and get a smooth effect, but it will look great. You can also add your paint to the dry paper by brushing on more paint and creating different layers with your brush. Once you apply enough, you will get the smooth look with the paint and it will look great. Ei...
In this tutorial, we learn how to cheat on a test in a short sleeve shirt. First, take a piece of paper and cut out a circle from it. Make sure it's small so it can fit in the palm of your hand. After this, write down all the answers or information that you need onto this piece of paper. Once you're finished, take the paper and stick it into the palm of your hand. Make sure the writing is facing out towards you. Then, when you need the information you can simply open up your hand, then close ...
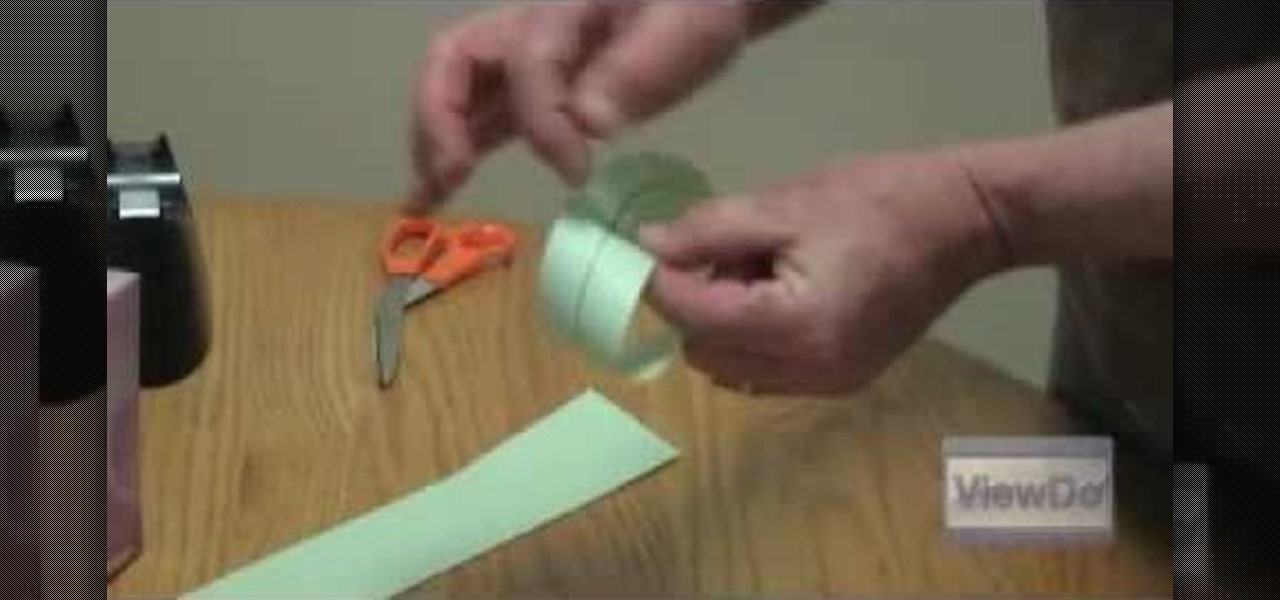
In this tutorial, we learn how to fold a paper rose. First, you will grab a napkin and unfold it. From here, roll the napkin around two fingers. Then, take it off and go two inches down from the top. Roll around this quickly, stopping half way. Grab the corner of the napkin and bring it up. Then, pull the rest down and continue to twist. Take your flower and make a leaf, then twist around the stem tightly. Put your fingers in the middle of the rose and use your finger to swirl it around. This...
In this video we learn how to make a paper bag mini. Start out with your paper consistent throughout the entire bag and then distress the pieces that you place on it. When you open it up it will have several pages inside of it. Use different types of stamps, distressing, and tags to make this unique. Use a lot of tags to put notes and sentiments on and then add in designs that are all your own! Add in as many pages as you would like to and create something interesting. Leave it plain or add i...
In this video, we learn how to write an essay for school. This is important because it will help you get into college! The main parts of an essay are: the title page, outline, body, introduction, conclusion, and footnotes. Make sure your title page has the title of the paper, the student's name, teacher of the class, and due date for the paper. For the rest of the pages, make sure you follow the guidelines that have been set by your teacher to properly write. Add in a lot of details and make ...
This video will show you how to make a 2 dimensional object in a 3D world. A well-known example of this is a mobius strip, which can be made with a strip of paper, scissors, and some tape. After cutting out a long strip of paper, you should take the strip of paper, give it a half twist and tape it together, making a loop. This loop, or mobius strip, exists in a three dimensional world, where by following the loop, you seem to always arrive at the same point. Furthermore, the loop can by cut d...
In this video, we learn how to quickly make an origami kusudama. This only requires six pieces of paper to make. First, fold one piece of paper into a triangle, then open it up and fold it in a triangle on the opposite side. Open this back up then flip over. Bend in the edges to make a new triangle, then press down the creases on the side. Bend the middle of the triangle up to the point on both sides. Bend these back down, then fold over the side and make a crease. Open up the bottoms where y...
In this video, we learn how to move from notes to a rough draft of a research paper. First, you need to place all your notes in order and create an outline for your paper. Find out what important information you need, and filter out all the information you don't. After this, you can begin to fill in your outline and add any additional information into your outline. After you have this completed, you can start to write your rough draft using the outline you just created. Keep your notes around...
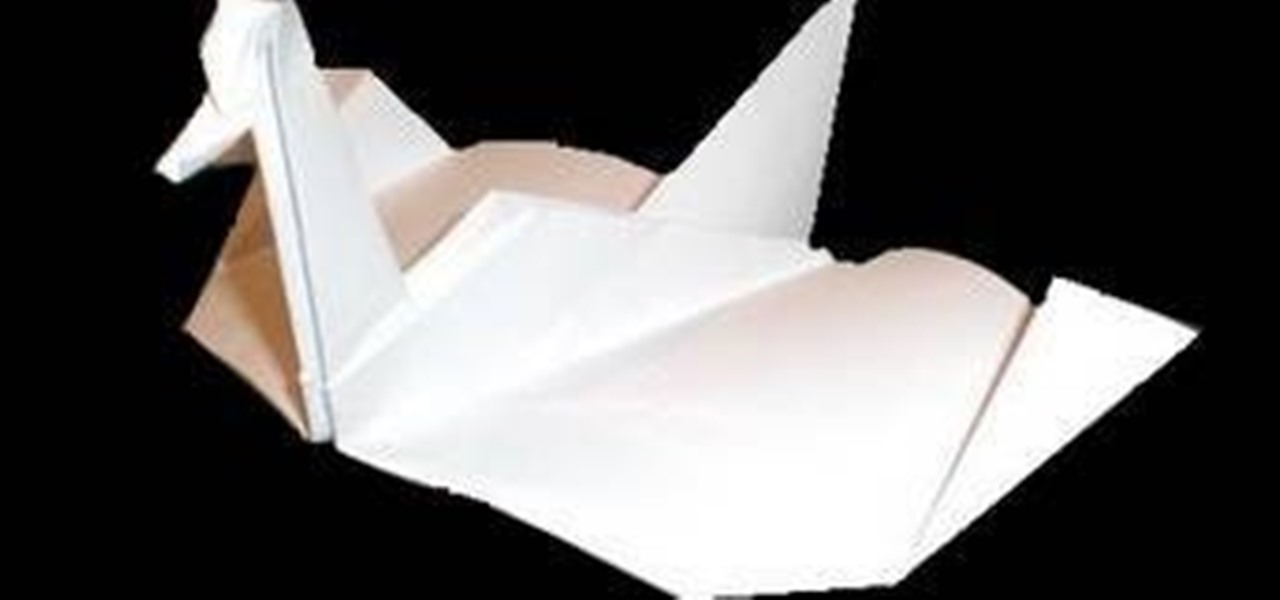
Watch this origami tutorial and in no time at all you'll transform an ordinary piece of paper into a fabulous, beautiful swan, unsuspectingly reenacting the classic gratifying story of "The Ugly Duckling." All you need are two hands with more or less dexterous fingers and a piece of white origami tissue paper or printer paper.
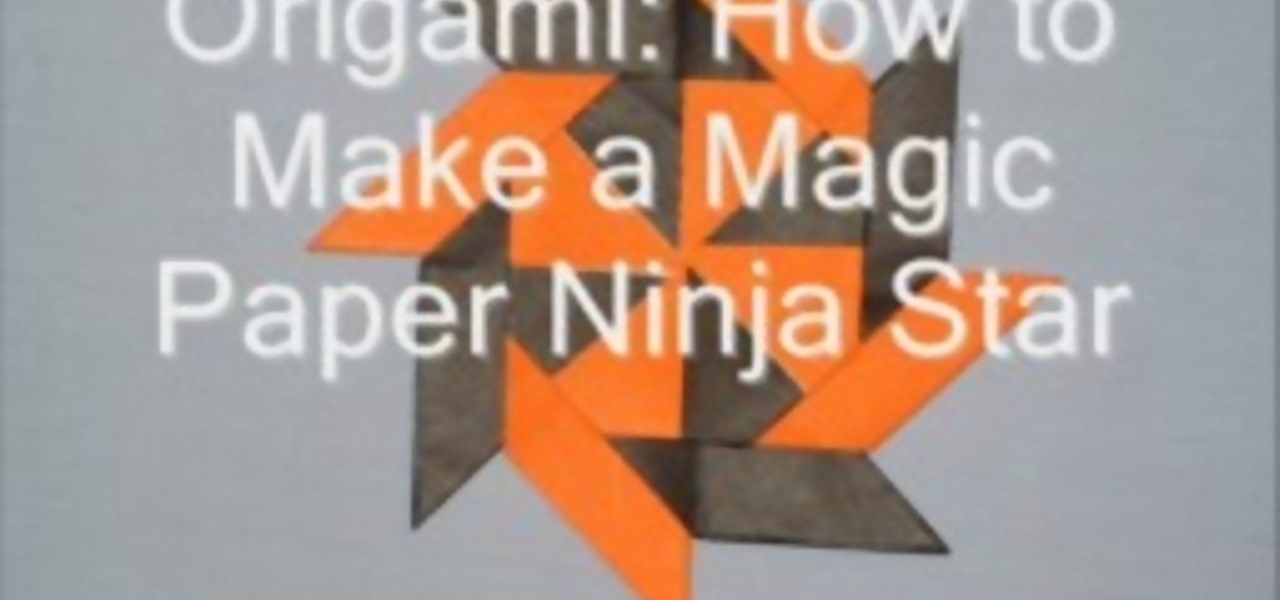
This video tutorial is in the Arts & Crafts category where you will learn how to make a magic paper ninja star. For this you will need 8 sheets of square paper, all of the same size. Fold one sheet in half, open it up and fold both corners of one edge inwards along the centerline. Now fold the whole sheet in half inwards. Then fold the lower part in a triangular pattern, make a crease and open up the sheet. Fold the lower part inwards from the center and collapse the sheet over the fold. Do t...
In this tutorial, we learn how to cheat on a test with a hollowed pen. First, grab your pen and take the top off the ink of it. Now, cut a small slip of paper out of a piece of copy paper. After this, write down the answers that you need for a test. Next, use the scissors to cut the side of the pen and make a slit in it. Now, attach the answer strip to the ink of the pen and place it back into your pen and put the top back on. Now, the sheet of paper that has the answers on it will hide in th...
In this video, we learn how to make a compact cheat sheet for a test. First, grab a sheet of copy paper and fold a rectangle into the bottom and make a crease. Next, do this once more, and on the other side as well. Then, tear the paper where the crease was made and fold the strip into a small booklet. Next, use a stapler to staple the side of all the papers together. Next, you can write in all the answers and questions that will help you cheat on your test. Hold this in the palm of your hand...
For this next video tutorial, you're going to find out how to make a really simple and easy origami crane. Origami is the traditional Japanese folk art of paper folding which took place during the 17 century.
In this video tutorial, viewers learn how to fold a paper airplane. Begin by folding the paper vertically in half. Then open the fold and fold the 2 top corners to the center crease to form a triangle. Now fold the top point down so the it tucks underneath the fold to form a envelope shape. Then fold the 2 top corners to the center crease to form a triangle once again. Now fold it vertically in half and fold the wings down so that they are aligned with the bottom of the plane. This video will...
In this tutorial, we learn how to make a paper cigarette from a cigarette foil. First, fold a piece of foil length wise, then flatten out the creases. After this, unfold the paper and tear it in half. Now, fold half of it in half again to make the stem of the flower and twist the top. Use the other half of the foil to make blossoms and flower petals. When you are finished shaping these, attach to the stem of the flower and shape more to make the flower look more realistic. Attach more leaves ...
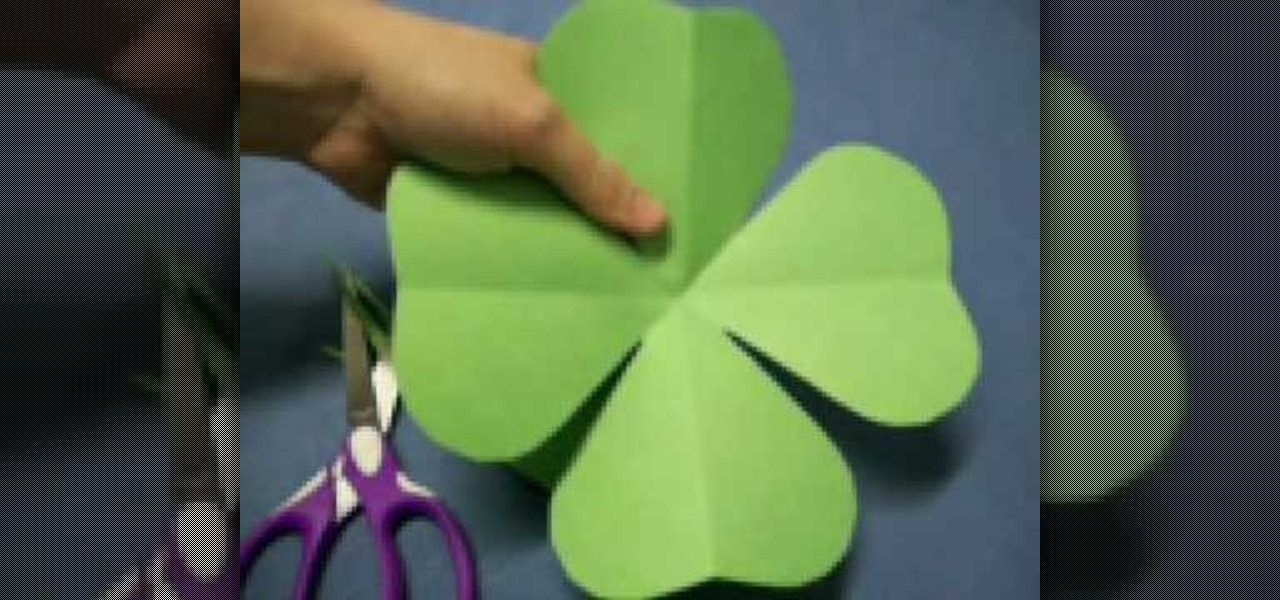
In this tutorial, we learn how to make a four leaf clover pattern. First, fold your paper in half, then fold it in half in the other direction. Next, fold the edges making a point and then cut a half an inch along the edge, making a cone shape. end the shape on the right side, making a heart shape. When you unfold, you will have a four leaf clover! You can use any size of paper to make this, just make sure you use green paper to keep the theme Irish. This is a great project for kids to learn ...
This video tutorial is in the Arts & Crafts category which will show you how to make a paper football that flies well. For this you will need a piece of paper. Fold it half way along the longer side. Open it up, flip it over and fold it again. Now tear it along the fold. Now fold it again in half along the longer side. Then take a corner that is away from the seam and fold it back along the other edge of the fold to make a triangle. Now fold the triangle back over the sheet. Keep repeating th...
In this video tutorial, viewers learn how to make a paper rose with a napkin, Begin by orienting the napkin lengthwise. Then pinch the napkin corner with your right index and middle fingers. Now wrap it around the fingers. With your left hand, squeeze to create the size of the rose flower. Then hold the flower with your left hand and twist the stem. Now hold the end of the stem twist and pull the corner upward to create a rose leaf. Pinch the leaf into place and pull the excess napkin downwar...
Paper houses don't make very sturdy shelters for those living inside, but paper jewelry boxes make excellent storage boxes for keepsake jewelry. Using the right method (ie. the one presented in this video) you can create a very sturdy jewelry box out of paper.
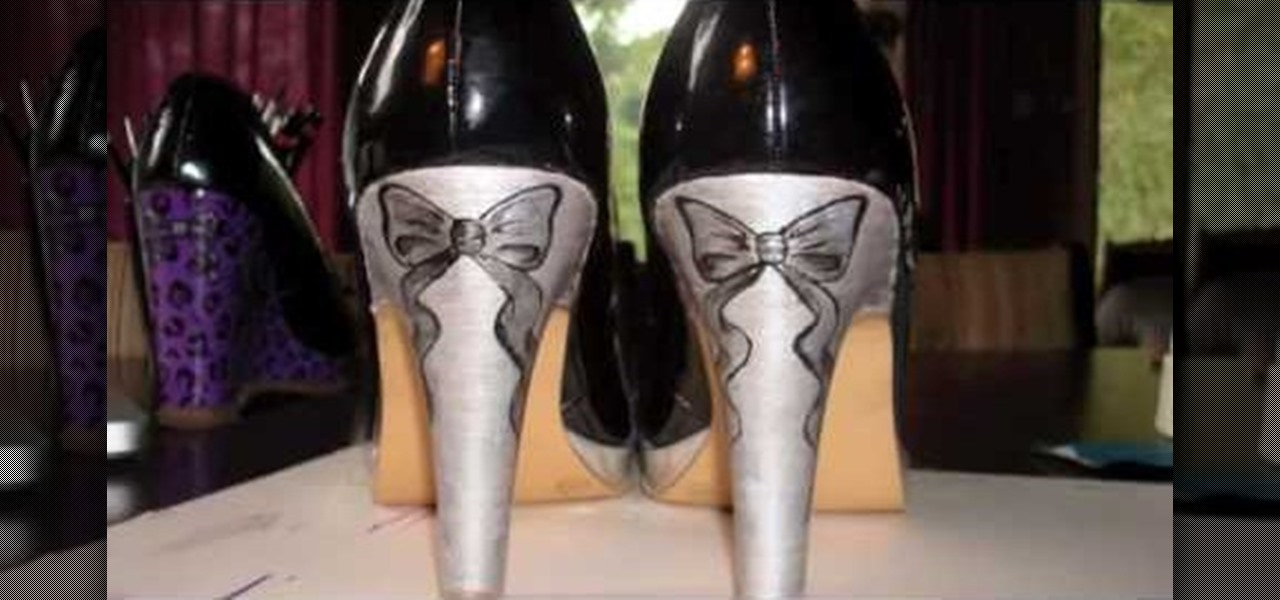
In this tutorial, we learn how to paint a pair of high heels with Anne. You will need: paints, varnishes, paintbrushes, pencils, pen, designs, scissors, sticky tape, and carbon paper. First you will need to paint both of your heels with a solid color, doing two base coats. Next, pick out a design you like and cut it out with carbon paper and tape it to the heels with sticky tape. Make sure to place the carbon paper facing down. Next, use your pen to trace the pattern along the heel. Now use a...
Looking for a geeky craft project? With this guide, you'll learn how to make a paper X-wing fighter with origami, the traditional art of Japanese paper folding. These instructions are based on diagrams by Philip Schulz. You'll start from the origami frog base which you can find in another video. See how to origami a Star Wars X-wing Fighter. For more information, including a step-by-step overview of the folding process, as well as to get started making your own paper Star Wars X-wings, watch ...
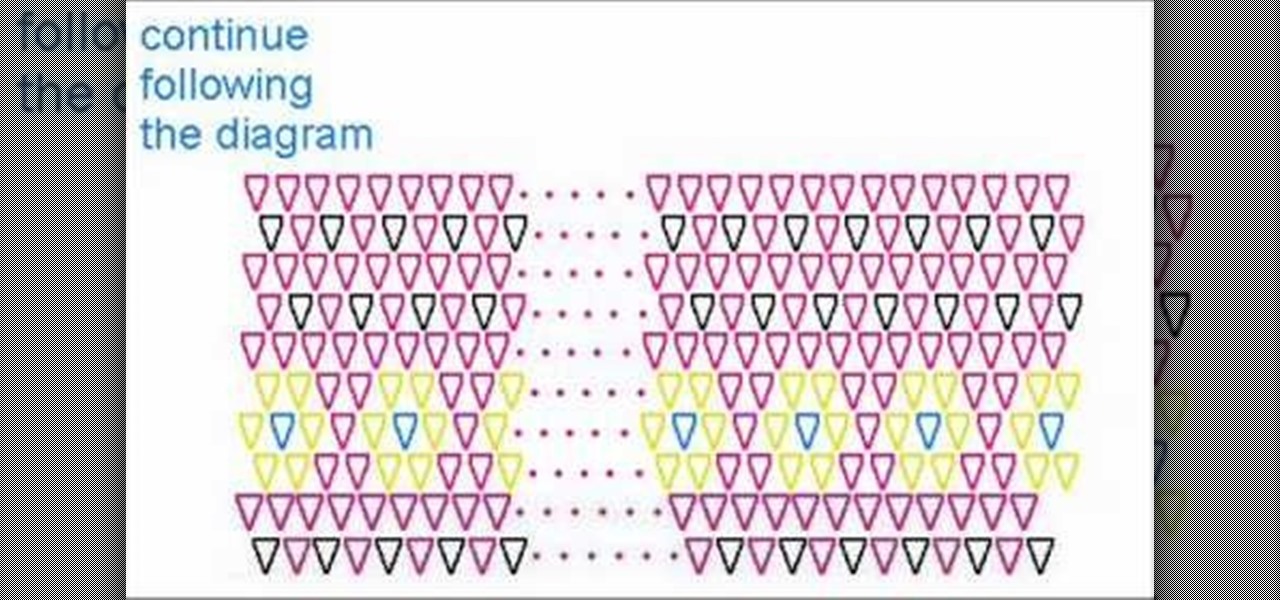
This tutorial guides you through the process of making a mennorade star with origami. It begins with a square of paper that is folded in half and then folded from the corners to make guides on the paper. The paper is then cut in half to make two rectangles. Each rectangle is then folded and trimmed to form a 'Z' shape. It is necessary to complete these steps for ten more pieces of paper. The next step is to take to of the 'Z' shapes, perhaps of complimentary colours, and link them together so...
To make an 8 sided ninja star first you need to take a sheet of the paper you are using and fold this in half, the short way. Unfold this so you have a crease. Now, fold the corners into the center crease. Do this to the top corners. Now, flip this over and fold over the bottom of the paper to the back and crease this. Now, you will want to tear this bottom half creased part off. Fold this into a square and fold the square into halves on both sides and tear this off to create smaller squares....
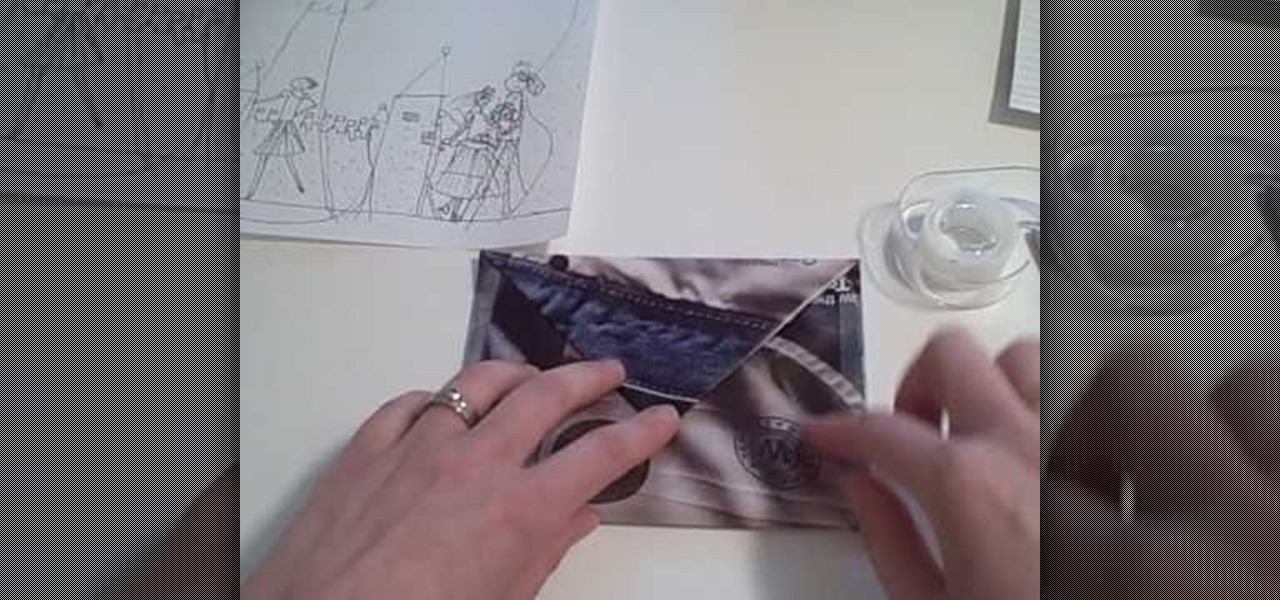
Everyone loves the personal touch of a homemade greeting card, so why send such a beautiful gift in a plain white envelope? To maintain the crafty beauty of your card, why not make a custom envelope to go with it?
This video describes the steps on how to make Origami claws. These paper claws are very sturdy and don't break easily.
In this Family video tutorial you will learn how to make a spiral sun catcher. Take a contact paper and draw a spiral on it starting at the center and drawing out wards. Now remove the backing of the contact paper and lay it down sticky side up. With markers, color in the spiral. Then take the contact paper and lay it on top of the backing and smooth it out. Now cut along the line of the spiral with scissors. Tie a piece of ribbon to the inside end of the spiral and now you have a spiral sun ...
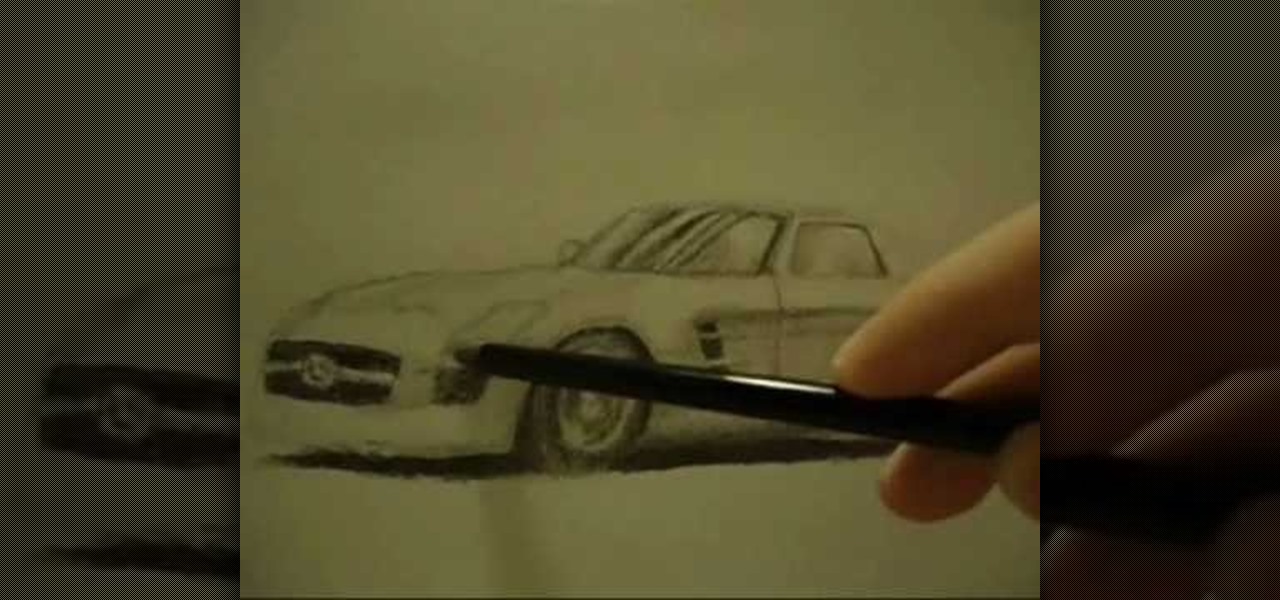
This video illustrate us how to draw a realistic car on paper. Here are the following steps: Step 1: First of all take a sheet of paper and pencil.
Try to use the same brand of spray paint throughout the project, read the instructions, follow them. Different brands may have different instructions, this is why we advise against mixing brands. Begin by lightly sanding your project with 600 grit sand paper, anything lower can potentially scratch your project. Use a sturdy tape to cover the parts you want to leave unpainted. Use a very light coating of primer, sand it with 600 grit sand paper (lightly). To add 'special effects' to the job, u...
In this how-to video, you will learn how use set up a studio table for watercolor. First, make a water blotter out of toilet paper and tissue folded in half. Fold the towel into the paper. The gator board and paper should be in front of you, with the sketch at the left side. If you are right handed, everything should be on the right side. This allows for ease of painting. The kleenex and trash can should be on the right as well. If you are left handed, everything should be on the left. This p...
Looking for a fun activity for your kids birthday party? In this tutorial, learn how to origami a paper hat with your kids. The benefit of using these hats is two fold! Not only do they make great party favors, they also provide an arts and crafts project to keep the kids entertained for a while.
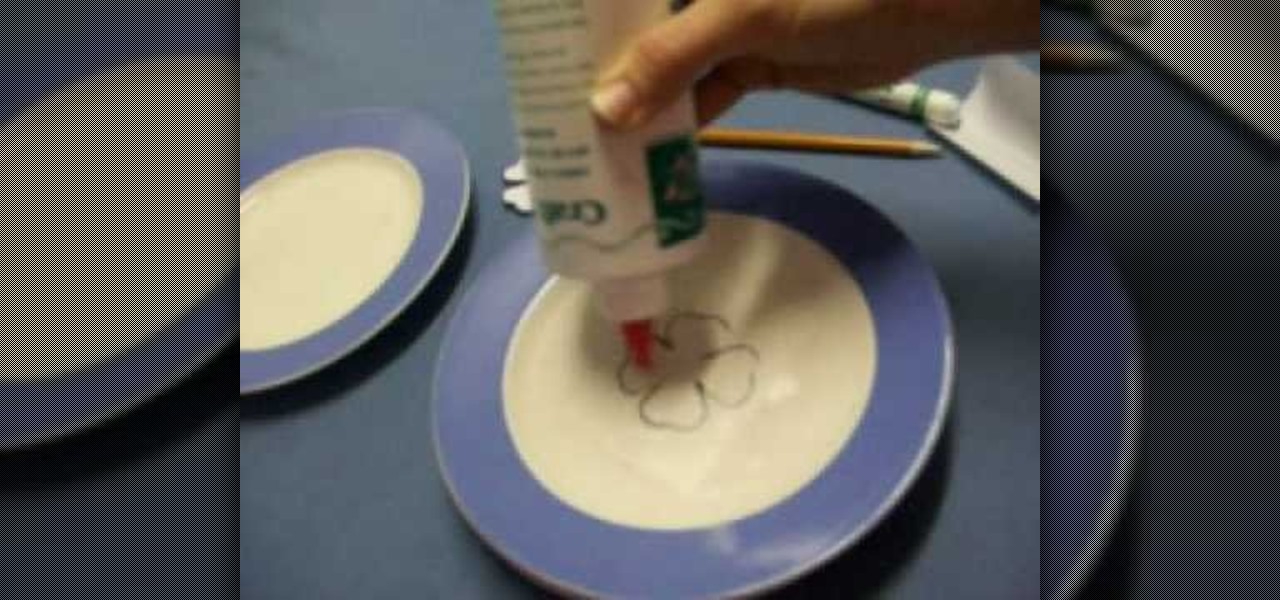
In this how-to video, you will learn how to make a four leaf clover pendant. Start off with contact paper and place it on a smooth flat surface, such as a large plate. Trace a four leaf clover shape onto the paper using a pencil or pen. Fill the entire shape in with glue. Once it dries, you can color the pendant with a green marker. Finally, you can peel off the contact paper. The four leaf clover shape will come right off with it. Viewing this video will show you the fastest and easiest way ...
This video demonstrates how to make a notebook with ribbon binding. Take a stalk of plain white paper and it would be 5 1/2" long and 8" wide. Fold it in half. Trim off the excess with a ruler. Then align the edges of the white paper. Put this in a cardstock which is 8 1/2" wide and 5 1/2" long. Cover rapid around the white paper stalk to make sure that it the spine is bounded. Take the grid ruler and center it and mark the center and also 1" from the center at each side to the left and right...