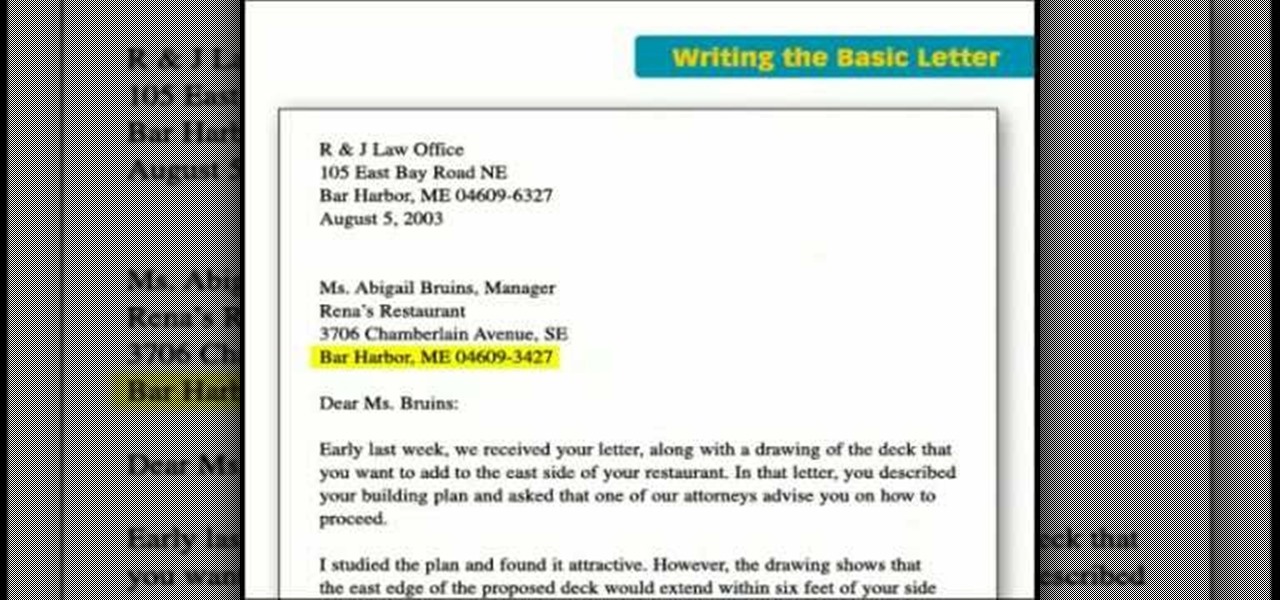
From this video, learn a proper way to fold a letter professionally and place it an envelope. Basically take the letter and lay it in a flat surface, then find a spot in the paper which is almost a certain way up and then fold from bottom to that spot and crease it. Then fold from the top above the previous fold and then crease it so that it is a three fold letter. Make sure that the letter head is up when you place it inside the envelope. So that when a person opens the letter the letter hea...

This video is about professional/business letter folding and mailing. Before starting this process your hands should be clean and dry so as not to ruin the look of the letter. To fold the letter correctly, you must take the bottom 1/3 of the letter and fold it upwards towards the letterhead - it should be folded about halfway to the top. Then crease the fold. Next you fold the top down and crease that fold also. To mail, you must place the lettehead, head down, face forward into the envelope....
Step1. Make sure you get your facts straight. Note down the dates, names, and numbers, what was said etc while talking over the phone. It is also essential that when you present your letter of complaint that it is chalked full of facts so that when it reaches a decision maker you may get justice properly. Do not write a novel that is 30 pages. Keep it short and write in bullets. Remember that they are interested in facts only.

In this tutorial the viewer is taught how to make a 3D letter "A". You will need a piece of paper and two different colors so the 3D letter is more dramatic. The directions from the video state to draw the letter "A" just as you would normally. Continue by coloring the "A" to make it a solid letter. Next you need to make lines from the "A" to make it appear as if its popping off the page. These lines should be parallel from the "A" this way it comes across as a 3D letter. As you connect the l...

This is a clear video showing how to easily draw a 3D letter 'B'. First of all you start by just writing the letter 'B' normally; and then you double outline all of the lines you have drawn, both inside and outside of the letter. Color it in with a block color for a 2-dimensional letter. Then its time to make it 3D! In the middle you just add lines parallel to the 2D letter, and also around the top and left sides of the shape; color this in with a darker color, and voila! You should now have ...
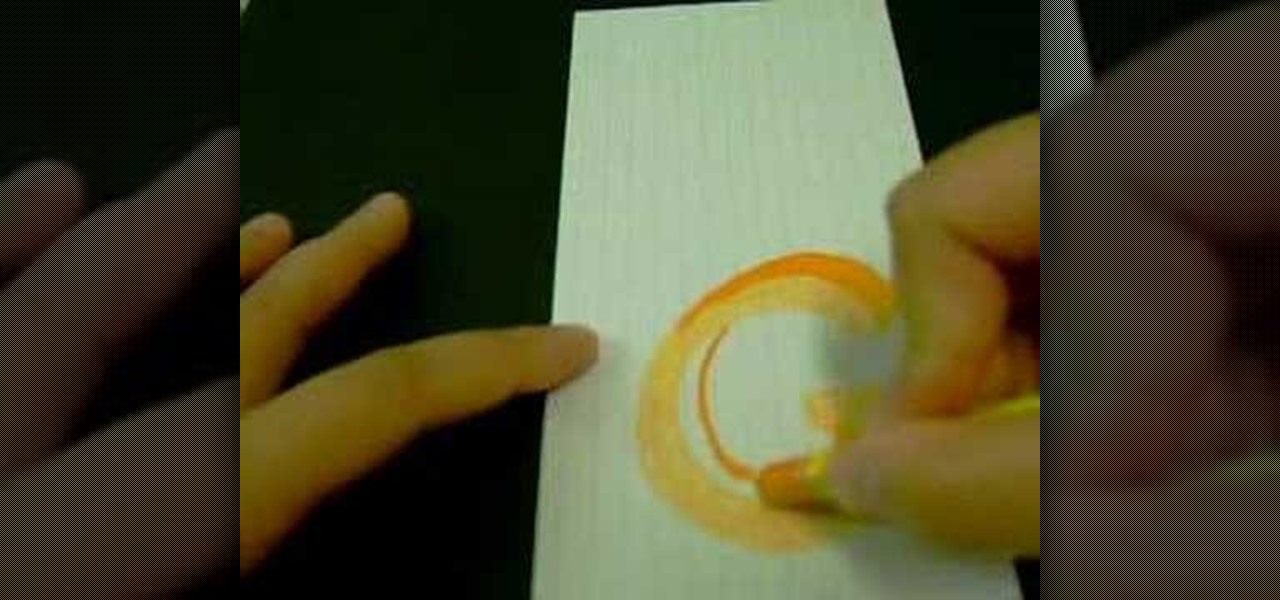
The instructor in this video is showing viewers how to make a Block G in 3D. The process involves drawing the initial capital G. Then a line is made as an outline around the top of the letter and another line is made the same way at the bottom of the letter, so it appears to have a G made with 3 lines. Then the whole G is colored in to make a solid block letter. At the top of the G, a parallel line is drawn and filled in to appear the top is 3D. Another parallel line is drawn at the bottom in...

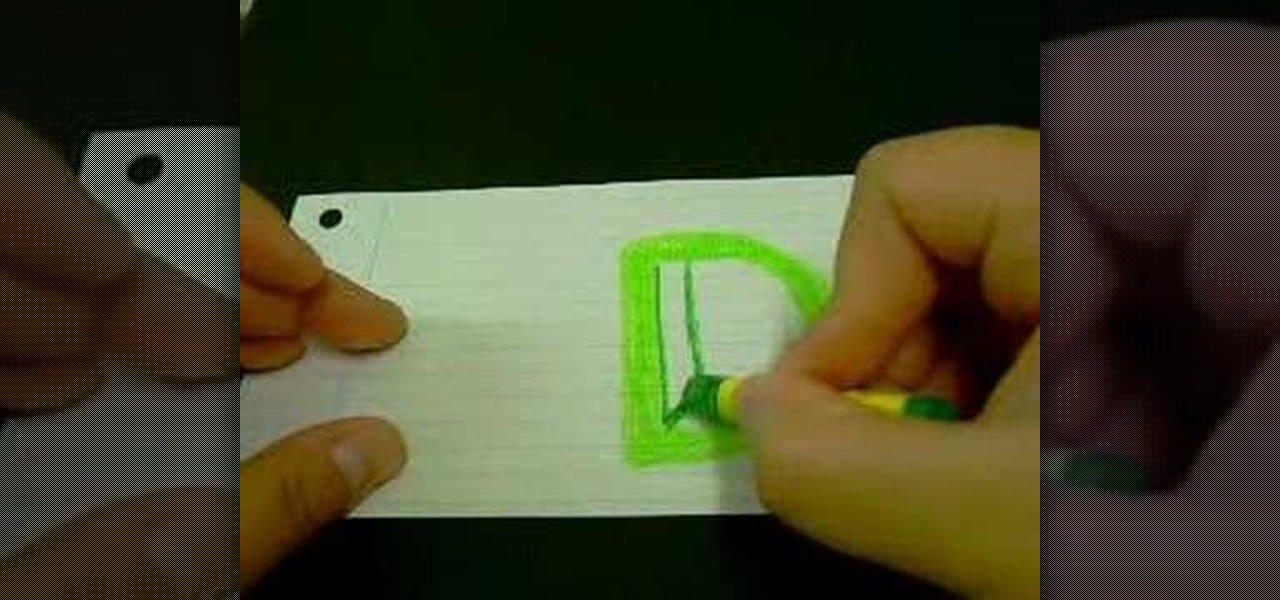
Drawing the letter D as a 3D block letter is easy and fun. To start simply draw the D like you normally would. Next, you need to draw another smaller D inside the first D. From there, draw another D on the outside of the first D. Color in the 3 stacked Ds with your first color. To continue, choose a darker version of your original color. In the bottom left hand internal corner of the D draw a short line that extends at about a 30 degree angle in reference to the bottom of the D. From the end ...
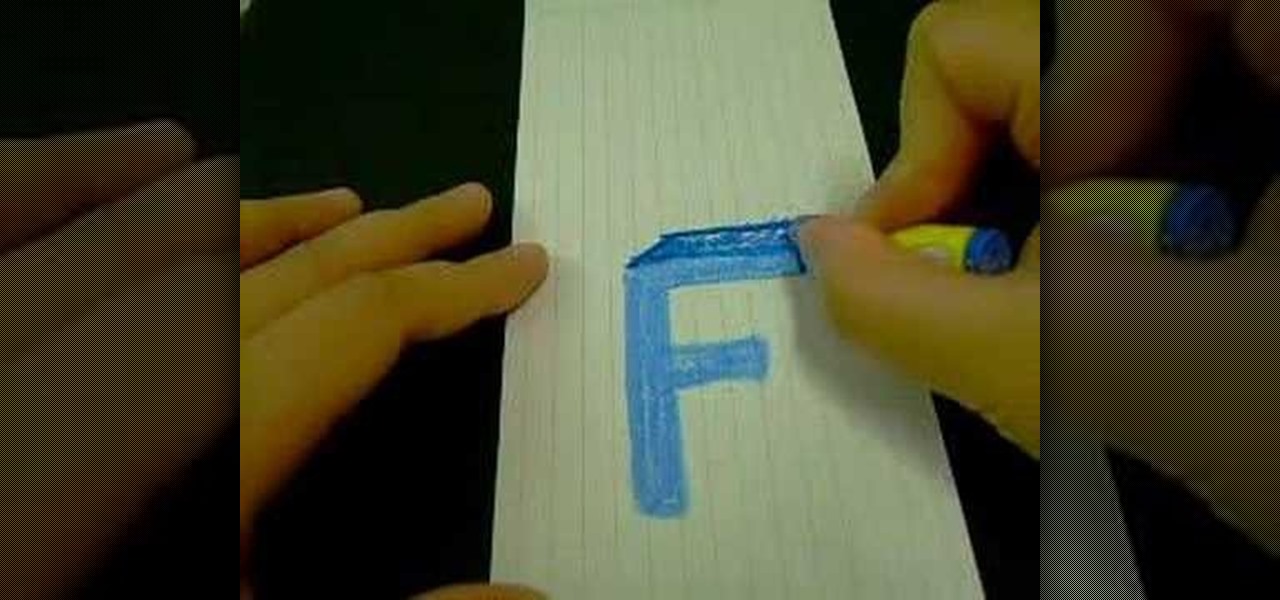
This video teaches us the method to draw the letter F in 3D. First draw F normally. Now double the outlines of the F on both sides of the outlines. Draw a line that is parallel and of the same length of the longer top arm of F. Join the ends of the line to the ends of the top arm by parallel lines. Color the parallelogram with a darker shade. Make a parallelogram by joining the ends of a line drawn parallel and equal to the smaller side of the rectangle of the top arm. Draw a vertical line an...
If you're running a business and have employees, chances are you may have to write up a Employment Verification Letter. The tricky part is knowing what to put down on the letter itself. In this video you will learn what layout you will need and the information to put into the letter including: Company Letter Head, contact information, description of the employee's duties, ect.
This incredible video breaks down the basic business letter into easy steps, going over some of the most key points in creating an effective business letter: make it straight, and too the point, non-confusing, and easy to read.
Already a bona fide friendship bracelet weaver? Then get ready to knock your friends' socks off with this personalized bracelet emblazoned with the letter "A." This step-by-step video will turn your mind to a whole new world of friendship bracelet possibilities, and you may find yourself stringing together batches of these for friends, family, and coworkers.
Getting your dream job is reliant on impressing the hiring manager with a resume and cover letter. Make sure you tailor your resume for the specific job you're looking for, and format for maximum presentability. From title to reference, this video will help you get the job you've always wanted.
In this video, we learn how to write a winning resume and cover letter. First, you want to remember that your resume online needs to be keyword rich, so you will have greater chances of getting an interview. To find keywords for your resume, look up different job descriptions to change your resume to fit that specific job. List your specific qualities that make you the best candidate for that job. For your cover letter, make sure you always send it along with your resume. You want to capture ...
The JET Programme is a teaching exchange program between the USA and Japan. If you are accepted into this program, you will get the exciting opportunity to travel, teach and live in Japan. This is a dream come true for a lot of people, and applying to this program is similar to applying for college or a job.
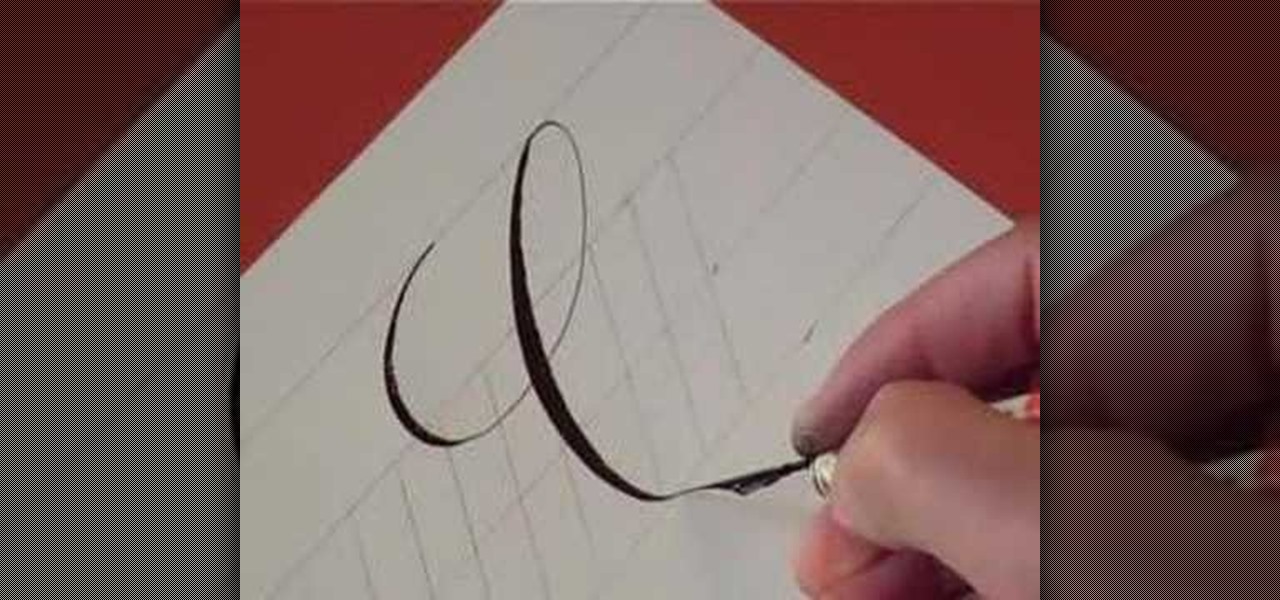
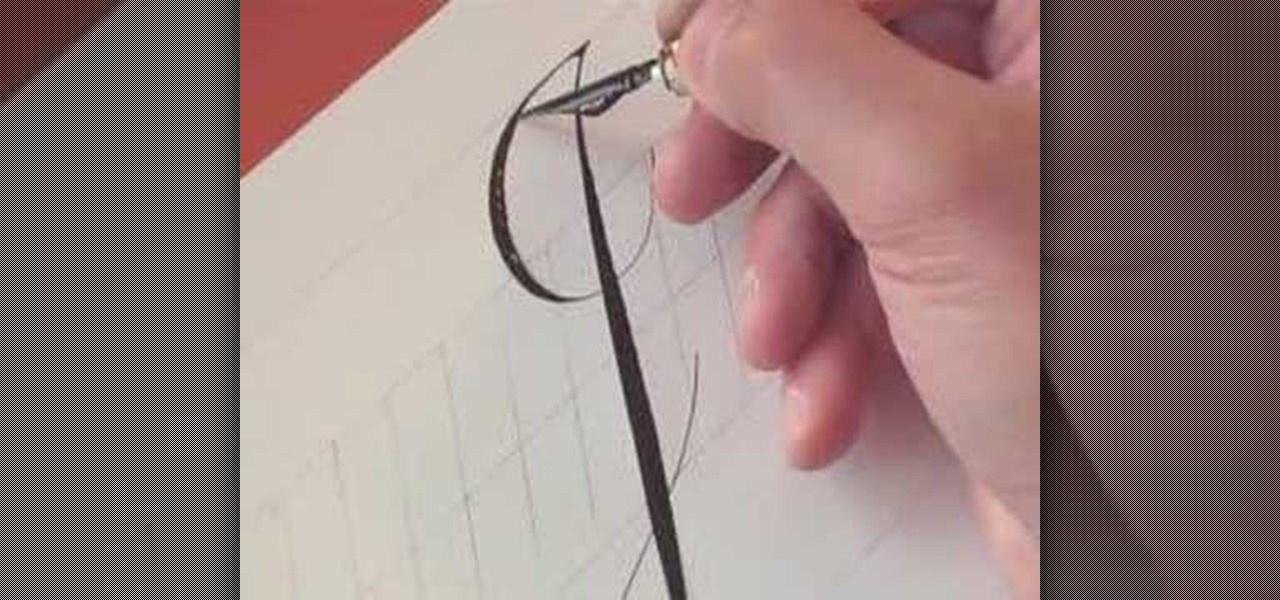
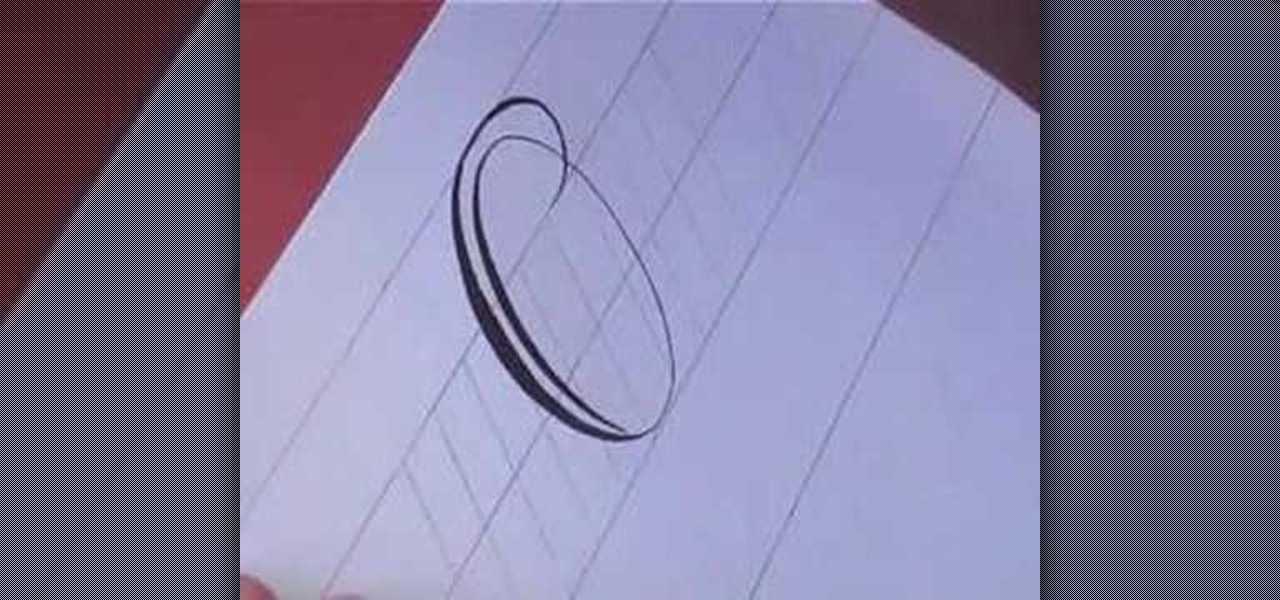
In this video, we learn how to write the letter "c" in calligraphy copperplate. First, dip your calligraphy pen into ink and start out making a large half circle on the paper. Dip the pen into ink again and make a loop with the top of the letter, then drag the pen down, making the "c" shape. End the letter with a loop on the bottom that isn't touching the inside of the letter. Make the lower case "c" by drawing the basic shape of the letter and adding a ball filled in with ink to the top of t...
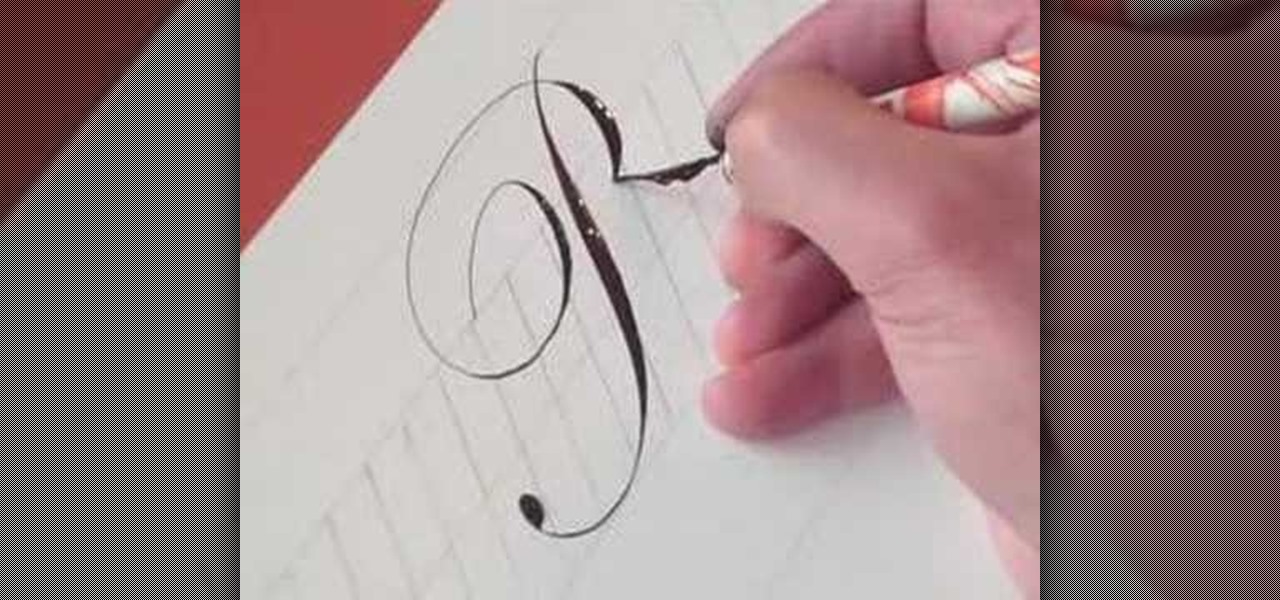
This video demonstrates how to write the letter P in calligraphy copperplate. The technique that is illustrated in this video show you the proper way draw the letter P effectively and beautifully. The video first shows you how to draw the capitalized letter P. The first step is to create a slightly S-curved stroke downward from the top margin to the bottom-middle margin--thickness in the middle. You end the line with a curled tail. To complete the letter you then have to draw a looping, curle...
Even if you've received hundreds of requests for letters of recommendation (college professor? We thought so), every letter of recommendation should be personal and well thought-out.
In this video, we learn how to write the letter H in calligraphy copperplate. To make the upper-case letter, start off drawing into a thick line, with a curve at the end of the letter. Make the curve end touching the line, then draw it out to the right side of the letter, bringing it back down to a line to make the "h" shape. Next, draw a line across the two lines with a curve at both ends. To make the lower-case letter, start by drawing a thin line to make a loop at the top, then bring it do...
In this video, we learn how to write the letter K in calligraphy copperplate. Start by running your calligraphy pen on the paper going from a thin line to a thick, making a line curved to the left ending with a dot at the end of a small loop. Next, make a loop to drag out across the top on the right hand side and curve it down to make the K letter. Do the same to make the lower case letter, except making a loop for the top of the letter instead. When finished, let the ink dry and you've got y...
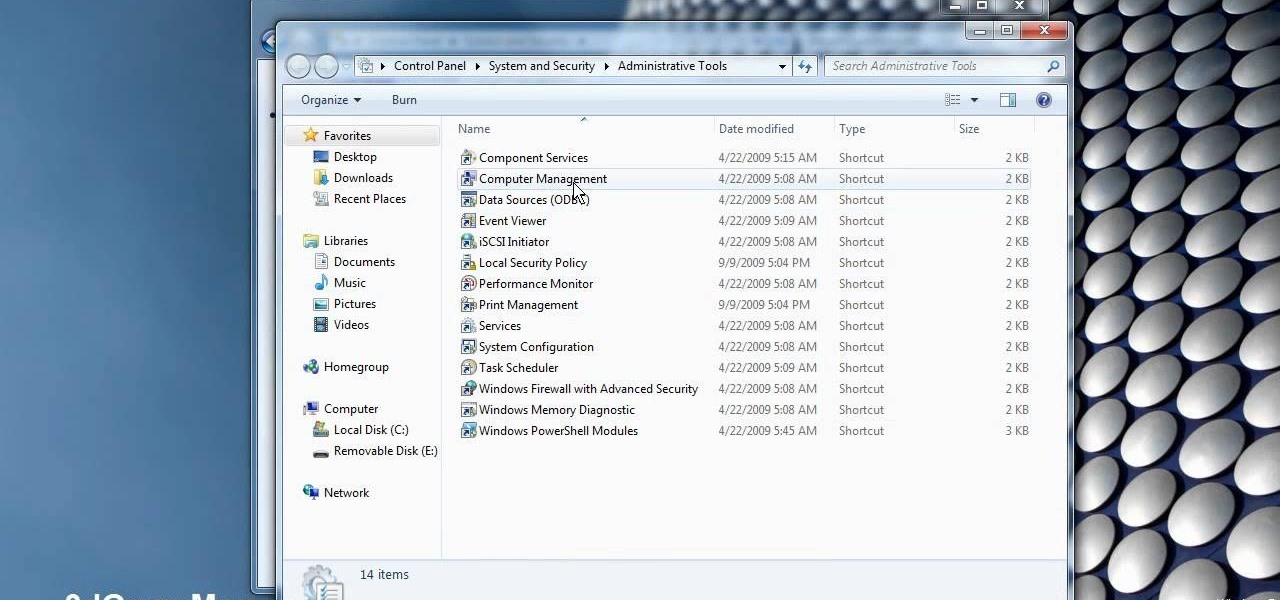
This video demonstrates how to change a drive letter to a certain drive in your Windows 7 computer. On you Windows 7 computer, go to Start > Control Panel. In the Control Panel, select System and Security then open the Administrative Tools. Look for and open the Computer Management tool. On the left side pane of the Computer Management window, select Disk Management. Look for and right click on the drive you want the drive letter changed. Select 'Drive Letter and Paths...'. Click change and s...
In this video the author explains when to write a recommendation letter to some one. He says that one may often face this situation to write a recommendation letter to some one we know. He advises that you should write a recommendation letter about some one only if we think that they are good at what they do and if we really believe in them. He says not to write recommendation letter if there is any problem because there is a chance that we may loose our credibility by such an action. This vi...
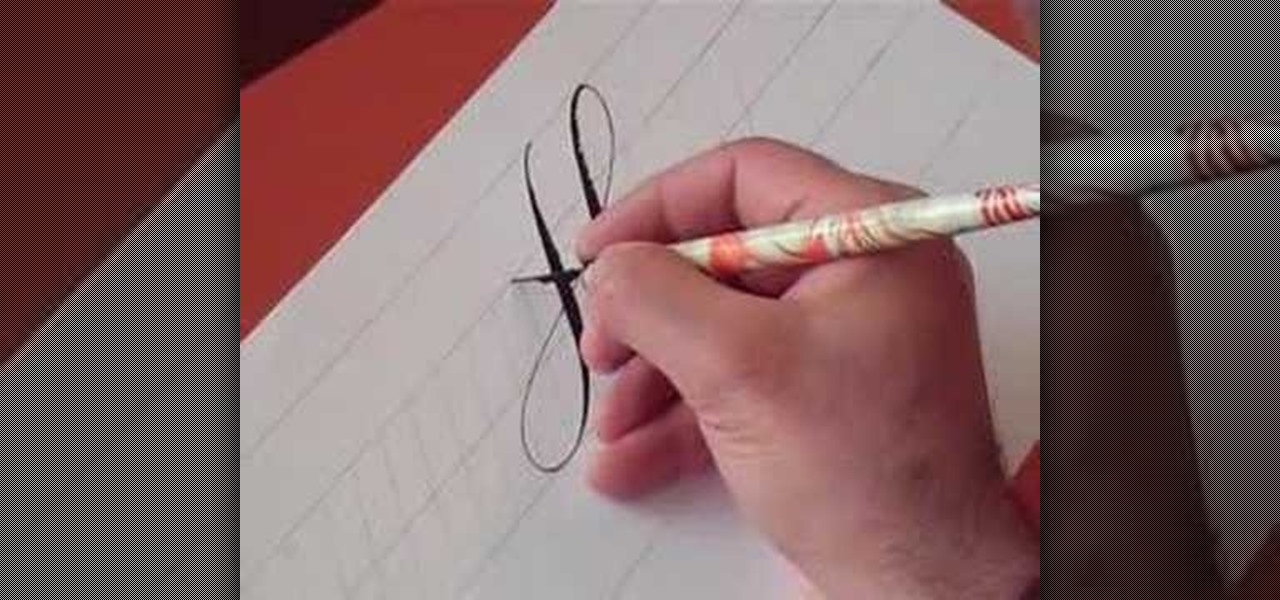
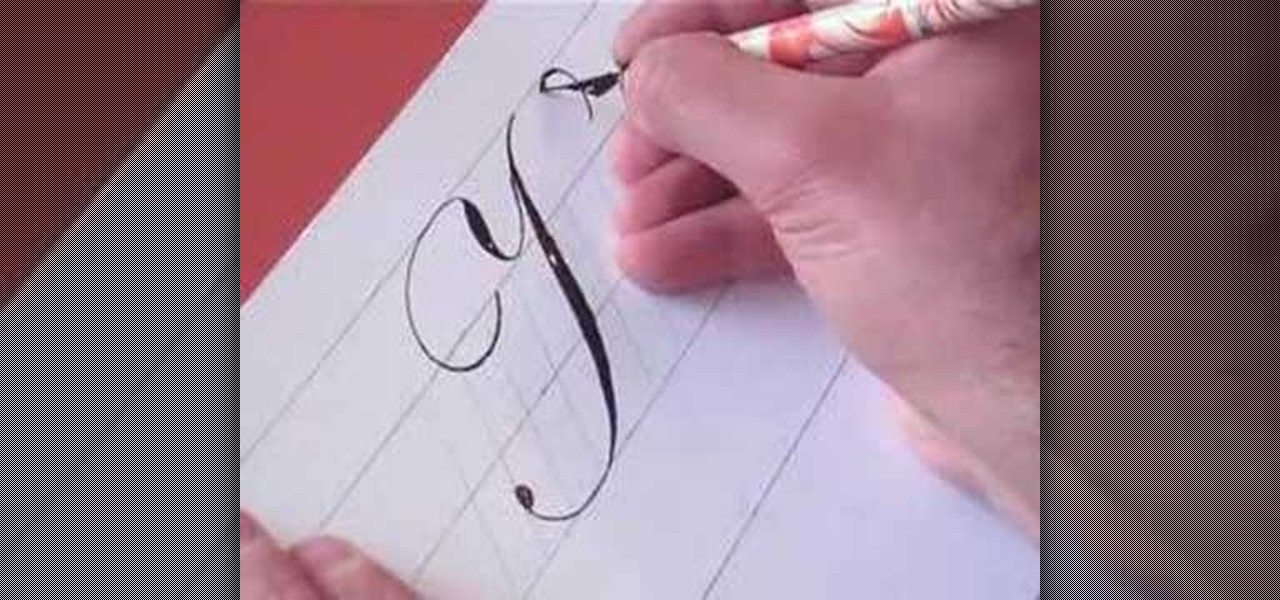
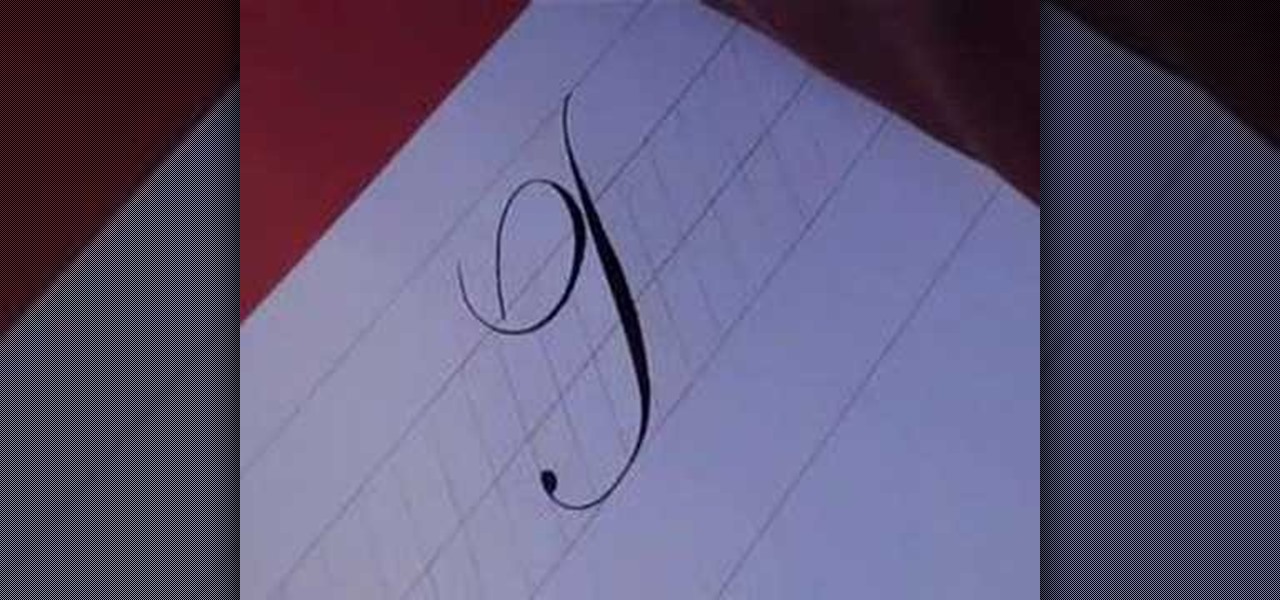
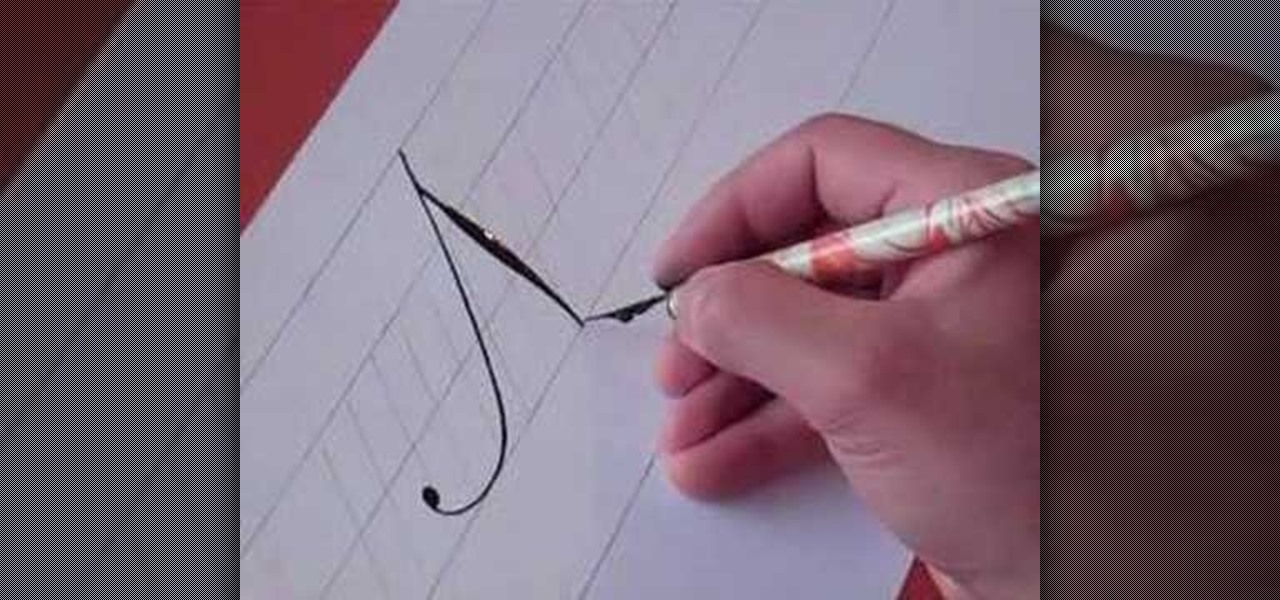
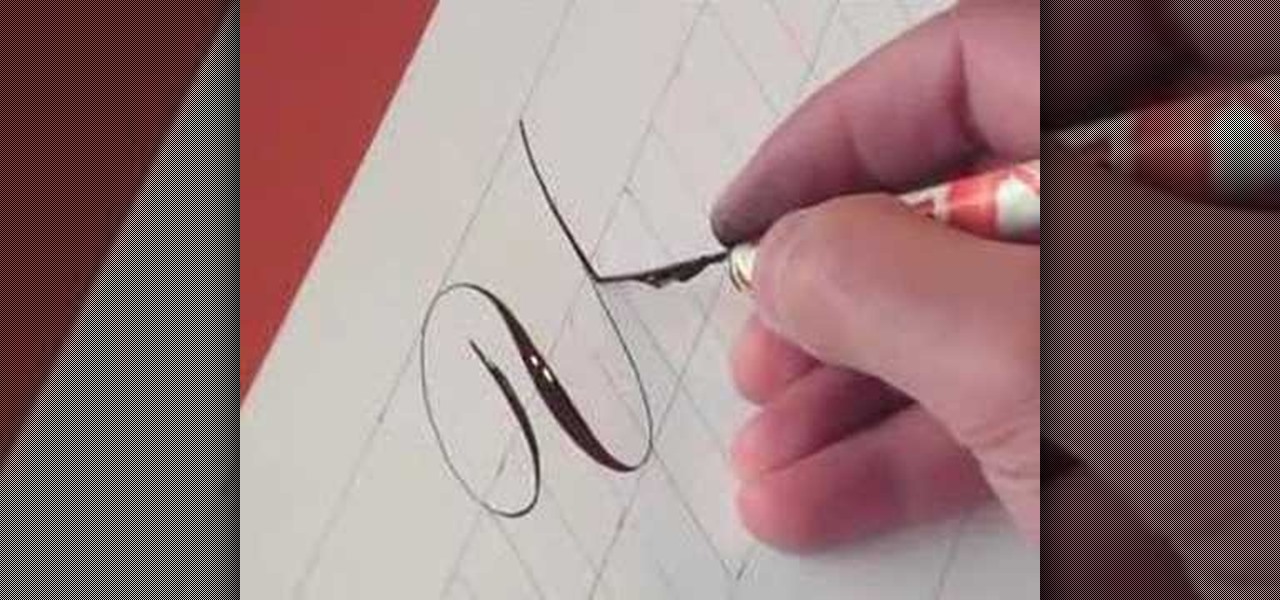
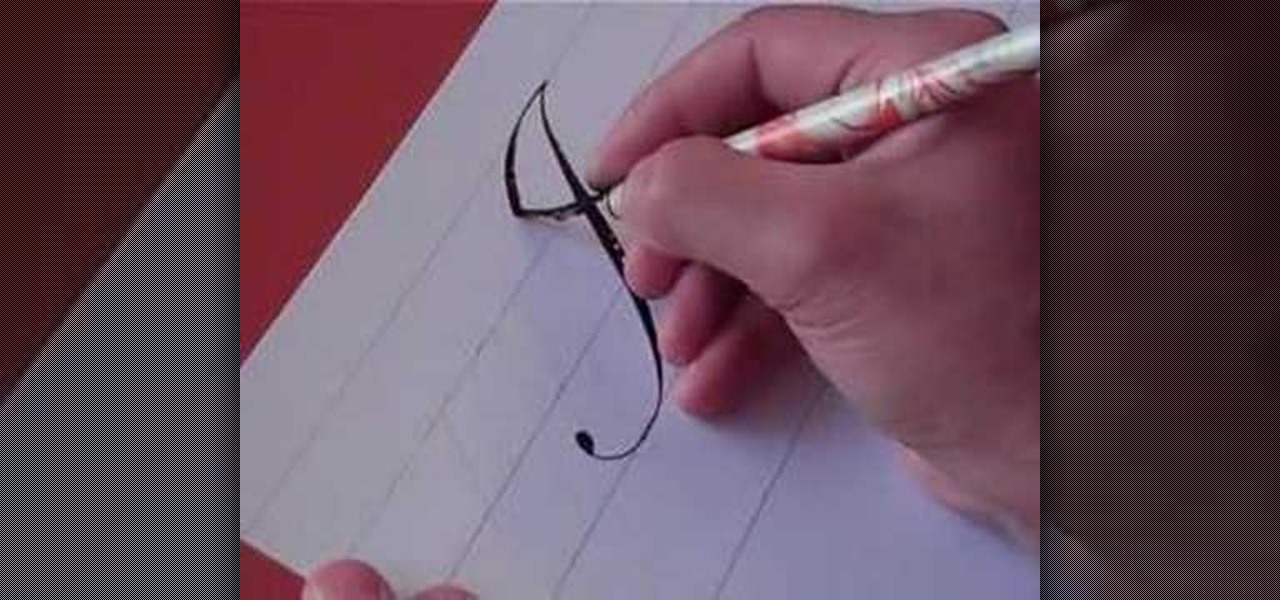
In this video, we learn how to write the letter J in calligraphy copperplate. For the uppercase letter, start by grabbing your calligraphy pen and drag it down so you have a thick black line with a thin line at the top. End the letter with a loop around it, then bring the top line to the left and loop it around, making a semi-thick line with it. To make the lower case letter, make a thin line going diagonally to the right, then dip the pen in ink and bring the pen down in a thick line down. C...
In this video, we learn how to write the letter T in calligraphy copperplate. Start by drawing a thick line that follows out a loop that curves to the left hand side. After this, create a loop at the top of the line, on the left hand side. Draw this out and cross the line over the top to make the T shape, ending with a slight curve at the end. To make the lower cased letter, draw a thin line, then draw a thick line over it, then cross a thin line across the top middle of the letter. Now you w...
This video tutorial with Hamid Reza Ebrahimi, shows you how to write the letter N in calligraphy copperplate. The video illustrates step-by-step how to write this letter in the most accurate way possible. To begin, you draw a thin slanted downward stroke with a moderately curled tail. Then you create a stoke tangent to the first stroke with a tapered thickness in the middle. To complete the capital N you draw a tangent line upward that is thin and has a large looping tail. For the small case ...
A resume without a cover letter is like a burger without a bun. Learn how to write a proper cover letter for your resume.
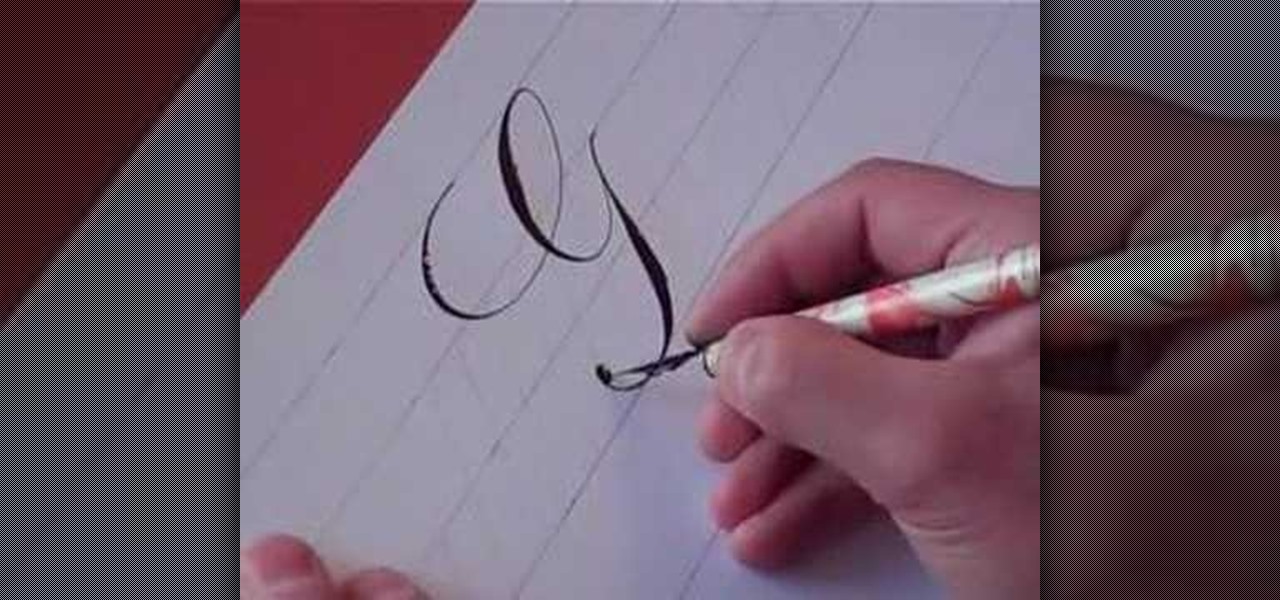
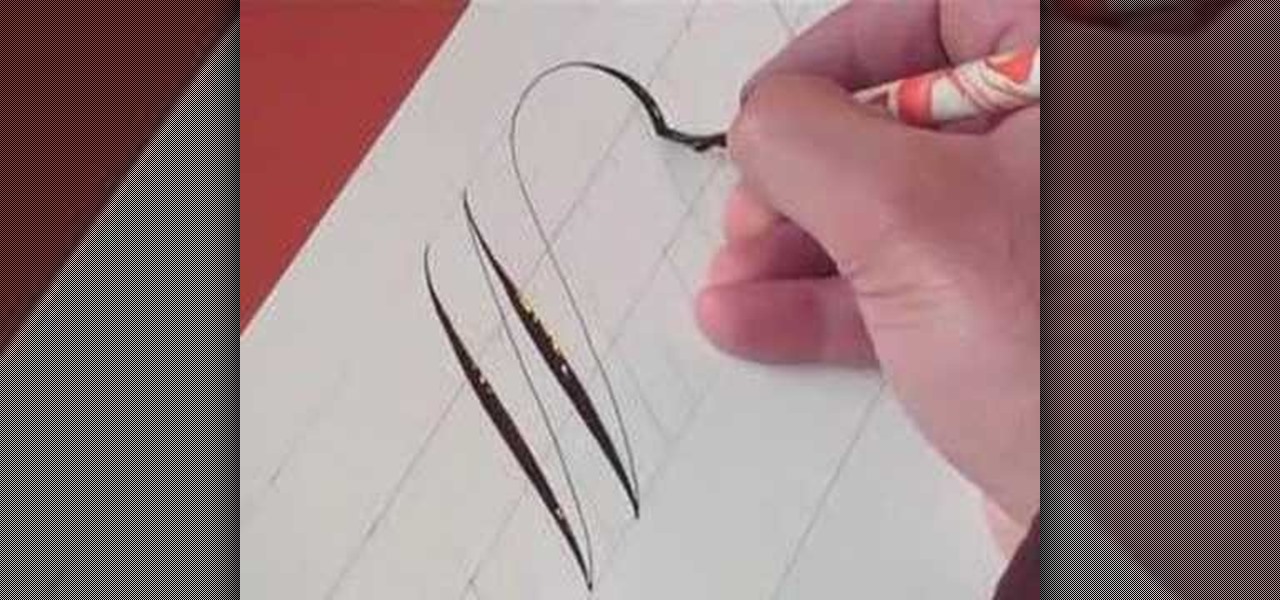
In this tutorial, we learn how to write the letter Y in calligraphy copperplate. First, make a thin line with the pen, going thicker as you go down, make a loop and then come back down. Make a "u" shape, then connect a curved line to the other side finished with a dot on the bottom to complete the letter. To make the lower case letter, make a small thin hump, then drag the pen down to a thicker line. Make a new line on the other side, making a thicker line and connect it with the other shape ...
In this video, we learn how to write the letter "S" in calligraphy copperplate. First, dab your calligraphy into ink, then start to writ on a your paper. Make a large half bowl shaped curved line, then make a loop and go down, creating a curved line with a dot at the end. To make the lowercase letter, make a thin line, followed by a thick outer line that curves into the large line making a lower case s. When you are finished with both of these, you will have beautiful letters that look great ...
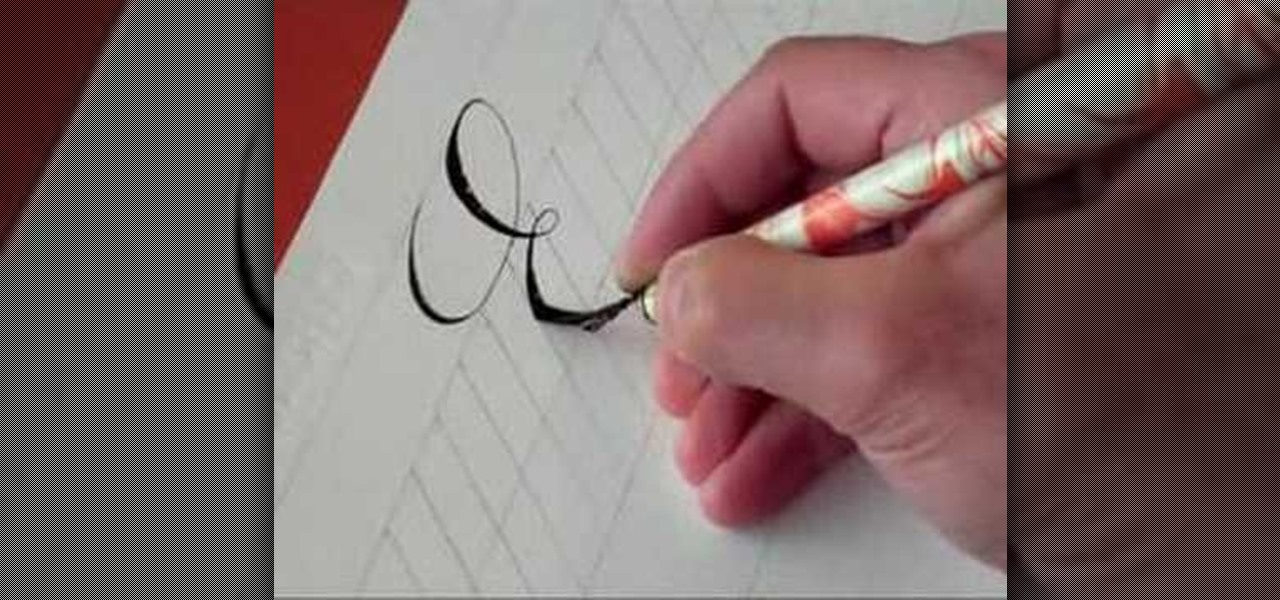
In this video, we learn how to write the letter O in calligraphy copperplate. Take your calligraphy pen and make a medium thick half loop at the top, dragging it down into a thicker line on the left side of the word. Then, continue onto the other side of the O with a lighter touch of the pen making a very thin line, finishing with a loop in the middle. Make the smaller O just like normal, making the thick line on the side and finishing with a small loop bending out to the right at the end. Wh...
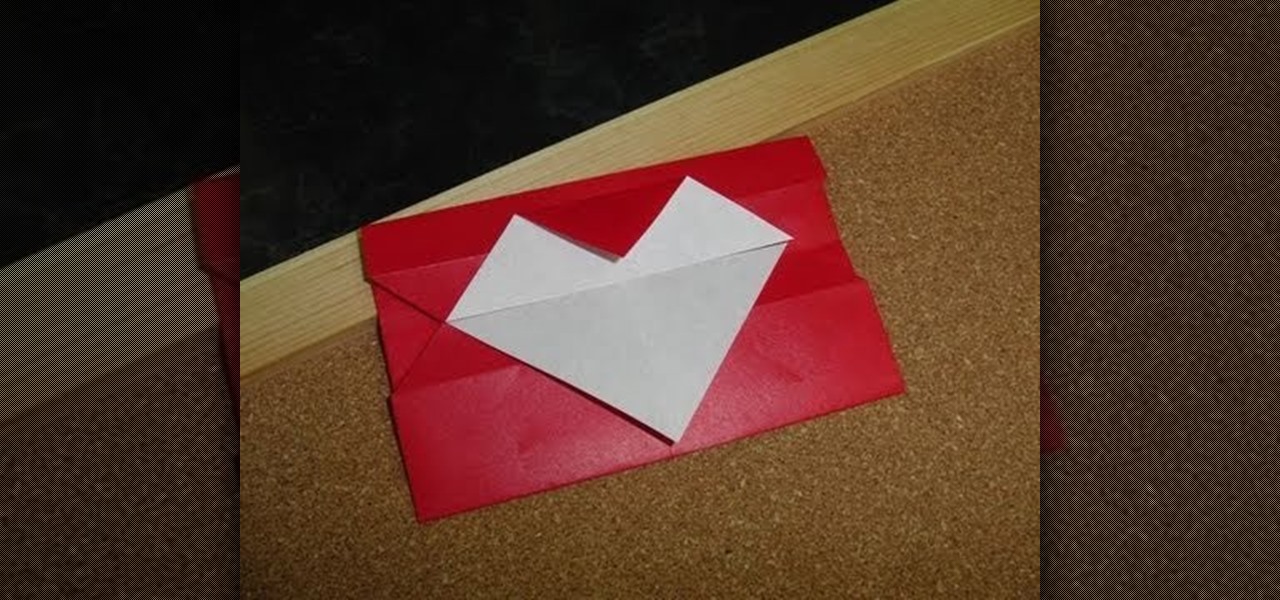
Whisper sweet nothings to your amor by crafting this simple and quick origami message card, which features a heart seal. It's a delightful way to package a loving, amorous sentiment and can also hold tiny trinkets of your affection.
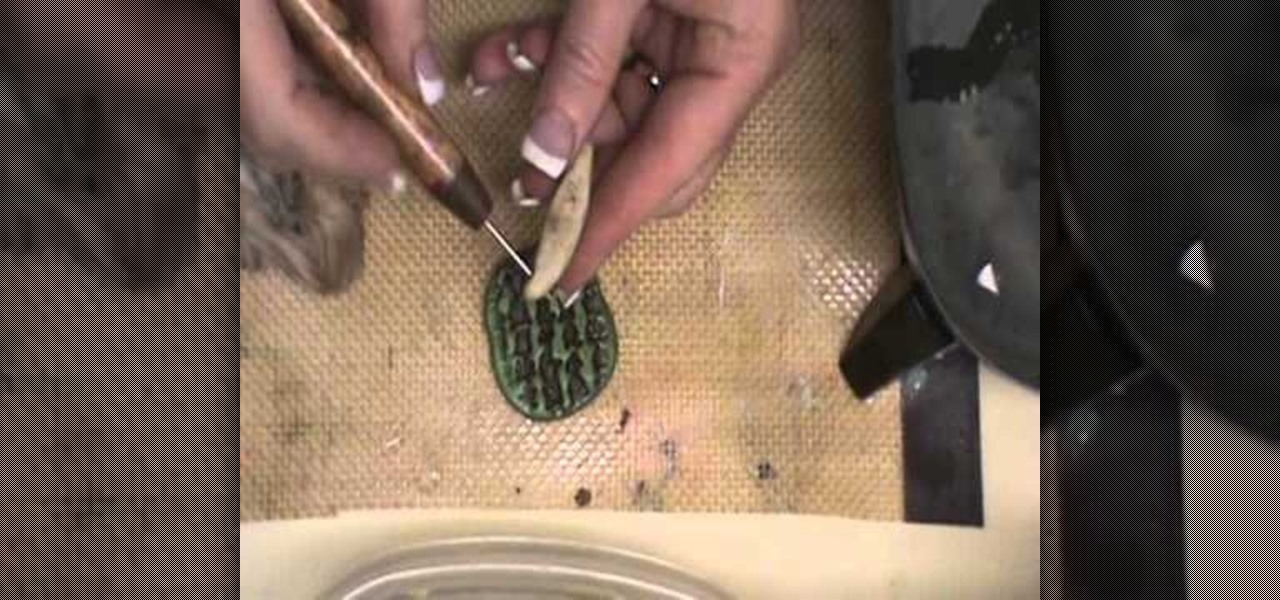
Tribal jewelry, as seen on the runways at Peter Som and Stella McCartney, is very much on-trend right now. But don't waste your hard earned cash paying for a piece of your own.
In this video, we learn how to write the letter "r" in calligraphy copperplate. Start out by dipping your calligraphy pen into ink, then creating a curved line with a dot at the end of it. Next, fill in the line so it is smooth and there are not ragged edges. Next, draw a large swirl on the left side next to the curved line, then draw it over to make the initial loop on the "r". After this, create a loop in the middle, then draw it back down to make the end hump of the "r". After this, draw i...
In this Fine Art video tutorial you will learn how to write the letter Q in calligraphy copperplate. Hamid Reza Ebrahimi shows you how to this using a Brause & Co No 86 nib, Persian traditional black calligraphy ink, Brause marbled penholder and Persian leather pasteboard and Steinbach pasteboard. To write the capital "Q", dip the nib in to the ink, then starting at the 2nd horizontal line, write upwards touching the top line. Then continue writing downwards till you touch the 4th line and no...
Learn to write the letter “I” in calligraphy copperplate with this video. First, we need a book and a pen suitable to write in calligraphy. The pen's tip has to be bendable. First write the capital "I". It looks like a long "g". When half way from the top, the nib of the pen bends to give a thick feel and again it fades out to a thin one. The small "i" looks the like the actual "i" itself with minor changes. This will help you in your writing (font) style.
How should you write in copperplate? Hamid will show us how write E and e in copperplate. First we need a book and a pen specially to write in copperplate. This type of font has letters with narrow edges and it gets broader in the middle. For capital 'E', it will be in curved form with the font's unique style of thickness. The small 'e' more looks like a 'c' with a closed loop. It will help in improving your handwriting style and add some grace.
Hamid Reza Ebrahimi demonstrates how the Z and z are written in copperplate. For this video, Hamid used a Brause & Co. No. 86 Nib Persian black calligraphy ink. Also, he used a Brause marbled penholder along with a Persian leather pasteboard and Steinbeck pasteboard. Hamid writes the letter Z at 6 centimeters tall and the small z at 2 centimeters. The video shows how the Z is written, starting off with a loop from the top line on a ruled paper and moves on a slant to the left down to the bott...
This video demonstrates the procedure involved in writing an uppercase "G" and lowercase "g" in Copperplate. You will need a writing utensil and something to write on. In the video, a nib and black ink were used on lined paper. The letters should be written slowly and carefully to avoid errors. The video may be useful for people who want to learn how to write a "G" or "g" in Copperplate style. After watching this video, a viewer would know how to correctly write a "G" or "g" in Copperplate.
In this video, Hamid Reza Ebrahimi indulges the viewers in the world of copperplate writing through a short tutorial on how to accurately form the shapes of capital and lower case V. The video requires that the viewer has some previous experience with copperplate writing since it is not accompanied by instructions. Mr. Ebrahimi does a great job and the final result is honestly a true work of art. This video is an inspiration to anyone interested in learning how to write copperplate or just im...
Mr. Hamid Reza Ebrahimi has shown a demo on how to write the character W & w in a calligraphy copperplate. The single pen like brush was used by him to complete that fine art. He started drawing with a thick impression and then used the same brush with the thinner impression. We need to learn how to handle the brush before starting with the art work. His art work has accentuated our eyes. Viewer should learn to be calm while doing such art works. It will give you peace and calmness.
It might seem easy to a few, but some of us out there grew up with email and consider "the letter" an artifact. However, writing a letter is the ultimate in class and shows someone you took the extra time to get in touch with them. Whether you are writing a business letter or a friendly letter, these tips will guide you in properly writing that letter to a special someone, friend, or client.
The query letter is often your first point of contact with a literary agent, and the first step to becoming a full published author. So you'll want your query letter to be as effective as possible. Here's what to do (and what not to do!) to write an effecitve query letter.