In this video, we learn how to get a classy rich makeup look with Shar Connolly. You will first do your foundation, using a brush to make a matte look on your face. Use a concealer under the eyes to cover and dark circles. Next, grab a coffee eye pencil and eye line your upper and lower lids. When finished, color your entire lid with the same pencil, making the line darker on the top of the lid. Now, use a brush to mix in the color all over and give it a smudged look. Next, pat a light eyesha...
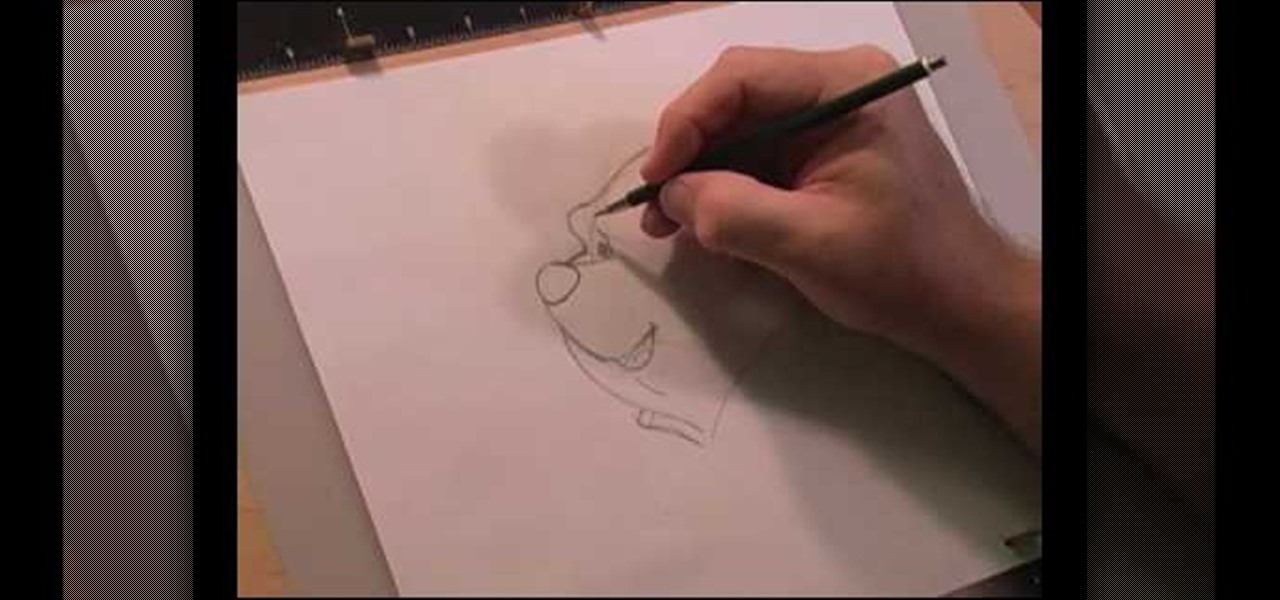
This is a video tutorial that is showing its audience how to draw Winnie the Pooh from Disney. The first step in drawing Winnie the Pooh is to draw a light circle that will end up being Winnie's head. Then draw construction lines through the circle for the mouth, eyes, and nose. Next you should draw the eye line off of the construction line that you made earlier. Next lightly sketch his other facial details such as his mouth and nose. Then you should draw his ears on and detail his facial str...

New to Microsoft Excel? Looking for a tip? How about a tip so mind-blowingly useful as to qualify as a magic trick? You're in luck. In this MS Excel tutorial from ExcelIsFun, the 230th installment in their series of digital spreadsheet magic tricks, you'll learn how to use the Excel List Table feature to make a dynamic stock price line chart.

We learn how to throw a cast net. There are many different ways to do this since everyone develops their own personal technique. The way we're shown is this way: First choose your bait. Then get all the rope up in your hand. Lay your hand on the top. Come down about halfway. Lay it back on top again, Hold net up. Grab the lead line. Although many people dislike doing it this way we see him put it in his mouth. Then he grabs the led line and throws it, releasing the lead line at the right moment.
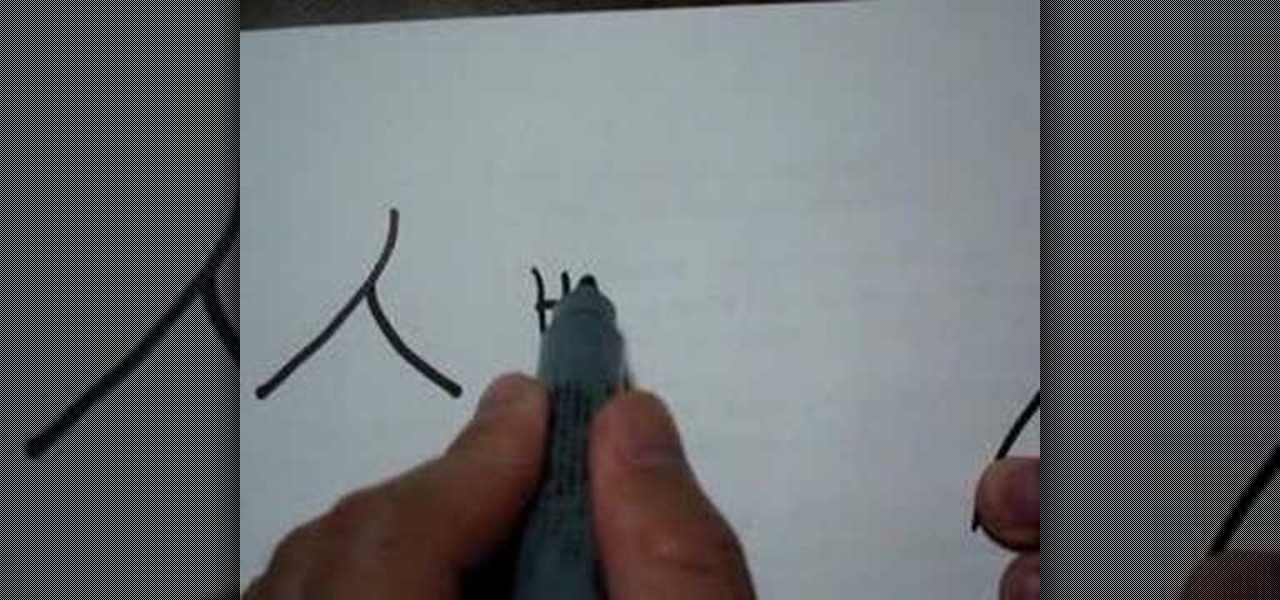
Writing the word “human” using Japanese characters or writing (also known as kanji) is deceptively easy. It can be completed in as little as two downward, curving strokes. Beginning from the top, draw a line downward, curving the direction of the pen or pencil slightly to the left as you go. Next, find the halfway point of the line you have just drawn. Once you have found the halfway point, draw a line from the halfway point downwards and curving slightly to the right. The end result will loo...
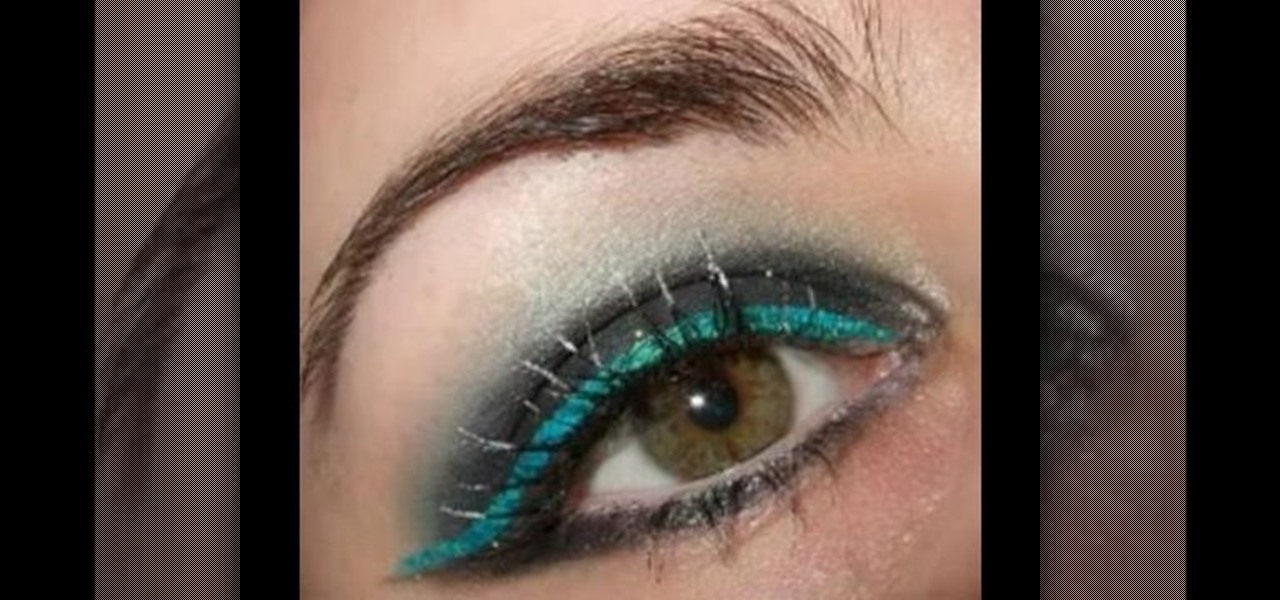
Create a Dancing On Ice sparkling smokey eye makeup look with the makeup tutorial from Lauren Luke, aka Panacae81.

This square dance video teaches the following plus level square dance calls: Chase Right, Spin Chain & Exchange the Gears, 3/4 Tag the Line.
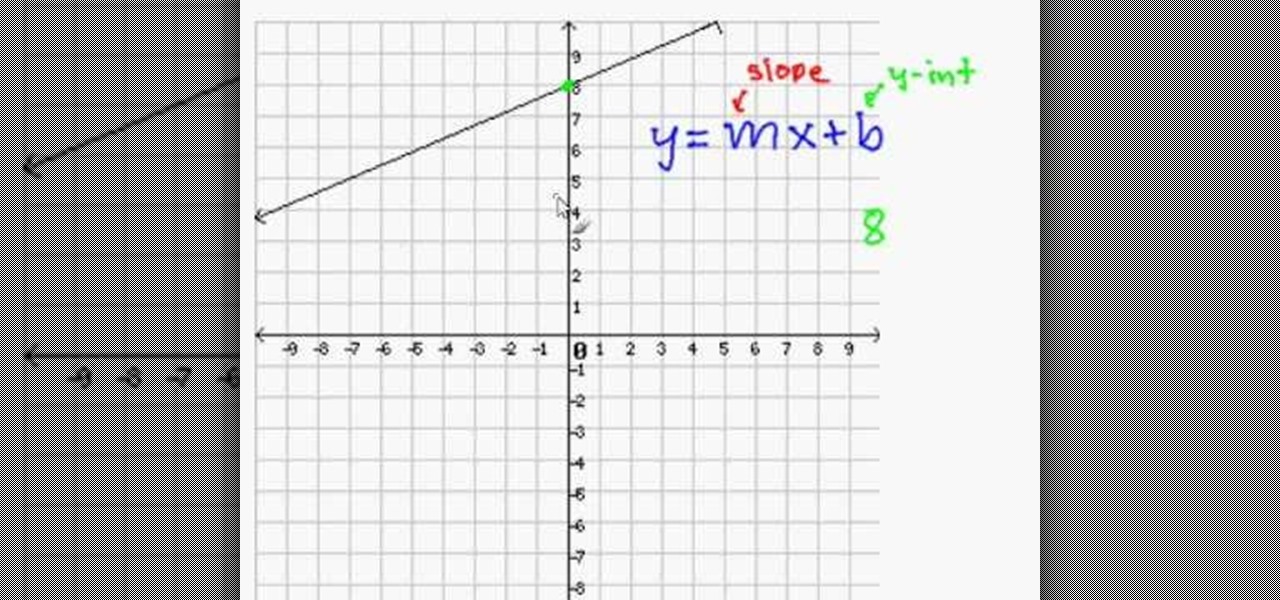
Lawrence Perez, from Saddleback College, and his assistant Charlie, give this beginning-algebra lesson on writing lines in slope intercept form. M is the slope, and b is the y intercept.
Much of the excitement around the HoloLens 2 has moved on to many wondering when we'll finally be able to get our hands on what is now the best augmented reality device on the market.
If you weren't aware, all music purchased online through iTunes, Amazon, and other digital audio providers have information embedded that can be used to identify the buyer and transaction of the digital music file. This may seem like something you should be disclosed about in their terms of use, but it's not.
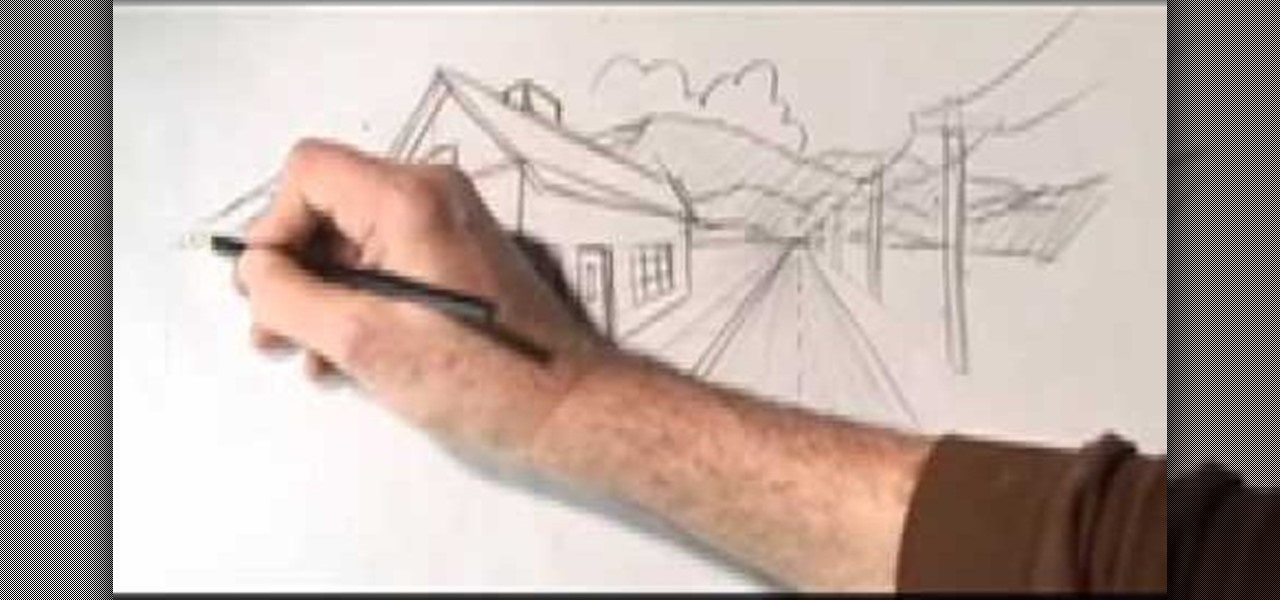
In this video, we learn how to draw two point perspective. Start off with a horizontal line on your paper. After this, draw a small point on the line where your drawing will focus to. From here, you will start to draw lines coming out of this. Next, you will design the rest of the picture around the main focal point you started out with. Add in lines to create lots of detail and make sure to use shading to show depth. Erase any background lines you don't need. Then when you are finished, you ...
A topic which is taught during school days: The slope - intercept equation of a line in a 2 dimensional space.
This video shows aspiring artists how to draw the head in a 3/4 or a side view. Three lines should first be drawn in a pie-wedge like shape. First, a line is drawn from the chin to the hair line and another one is connected to that, arching across the forehead to the back of the cranium. Then a final line is drawn from the endpoint here to the base of the chin. A face can then be drawn along line 1, to show the profile or side-view of your character. A triangular shape is drawn about half-way...
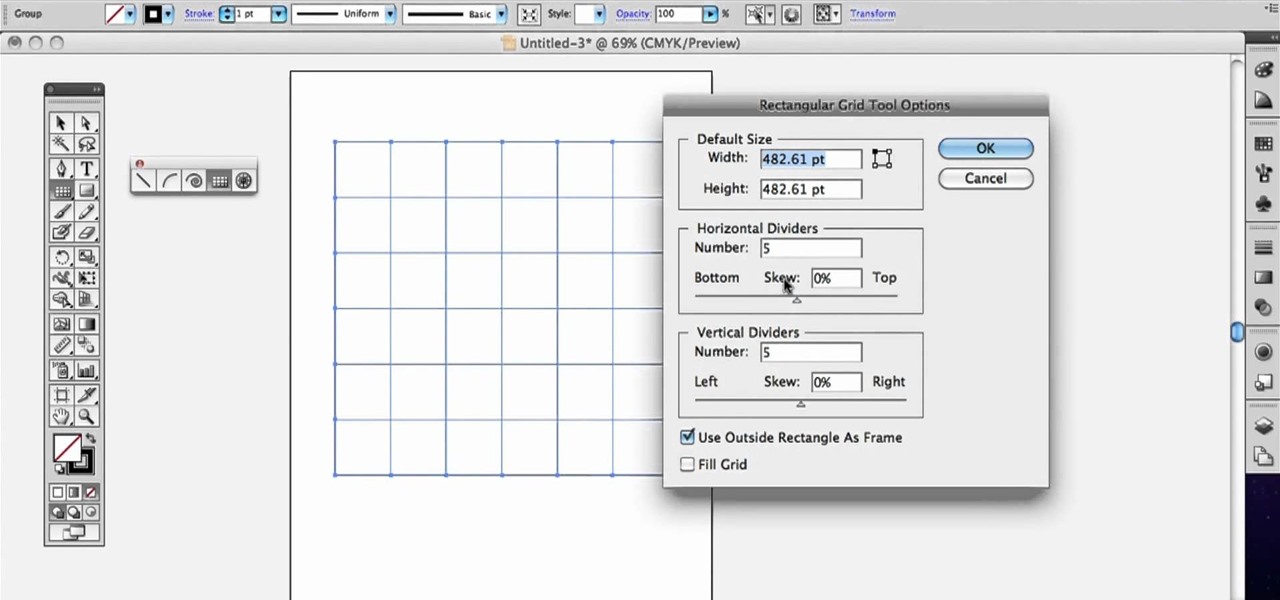
In this clip, you'll learn how to create line segments with the Line Segment tool when doing design work in Adobe Illustrator CS4 or CS5. Whether you're new to Adobe's popular vector graphics editing software or a seasoned professional just looking to better acquaint yourself with the program and its various features and filters, you're sure to be well served by this video tutorial. For more information, including detailed, step-by-step instructions, watch this free video guide.
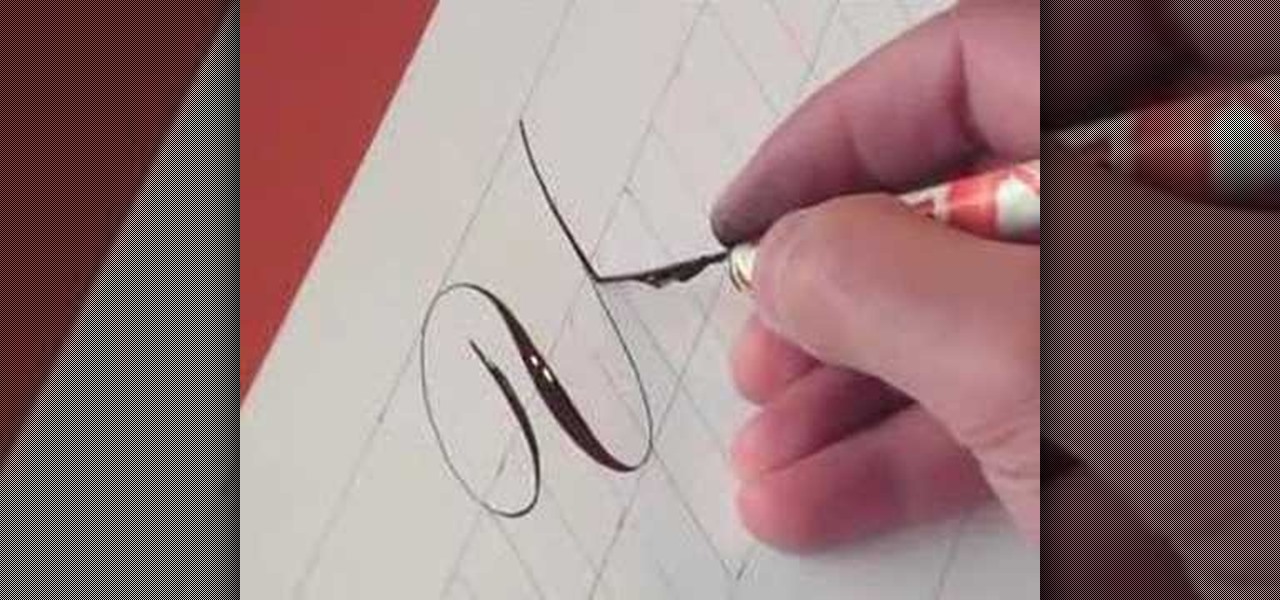
In this tutorial, we learn how to write the letter Y in calligraphy copperplate. First, make a thin line with the pen, going thicker as you go down, make a loop and then come back down. Make a "u" shape, then connect a curved line to the other side finished with a dot on the bottom to complete the letter. To make the lower case letter, make a small thin hump, then drag the pen down to a thicker line. Make a new line on the other side, making a thicker line and connect it with the other shape ...
In this video, we learn how to write the letter "S" in calligraphy copperplate. First, dab your calligraphy into ink, then start to writ on a your paper. Make a large half bowl shaped curved line, then make a loop and go down, creating a curved line with a dot at the end. To make the lowercase letter, make a thin line, followed by a thick outer line that curves into the large line making a lower case s. When you are finished with both of these, you will have beautiful letters that look great ...
In this tutorial we learn how to rig a fly line. Start by preparing the floating line or sinking line to accept the fly. Carefully unwind your leader, then fasten it over the perfection loop and thread it through the fly line perfection loop. This should make a nice tight knot so you have a nice tight fly. When finished, you can remove the leader then coil it back up and make three loops and save for use later on. It's also smart to carry a pack of weighters in your vest so you can throw them...
See how to tell whether a set of lines are perpendicular to one another given their equations with this free video math lesson. From Ramanujan to calculus co-creator Gottfried Leibniz, many of the world's best and brightest mathematical minds have belonged to autodidacts. And, thanks to the Internet, it's easier than ever to follow in their footsteps (or just finish your homework or study for that next big test). With this installment from Internet pedagogical superstar Salman Khan's series o...
This video teaches us the method to write an equation in slope intercept form and to graph it. The equation of line is y = mx + c. m is the slope and c is the y intercept or the point where it crosses the y axis. Let us find the equation of line if it crosses (8,6) and m=1/2. Substituting the values of x,y and m we get 6=(8)(1/2)+b. Simplifying we get b=2. Substituting the values in the equation of line, we get y = m/2 + 2. Suppose we want to find the x coordinate of a point on the line given...
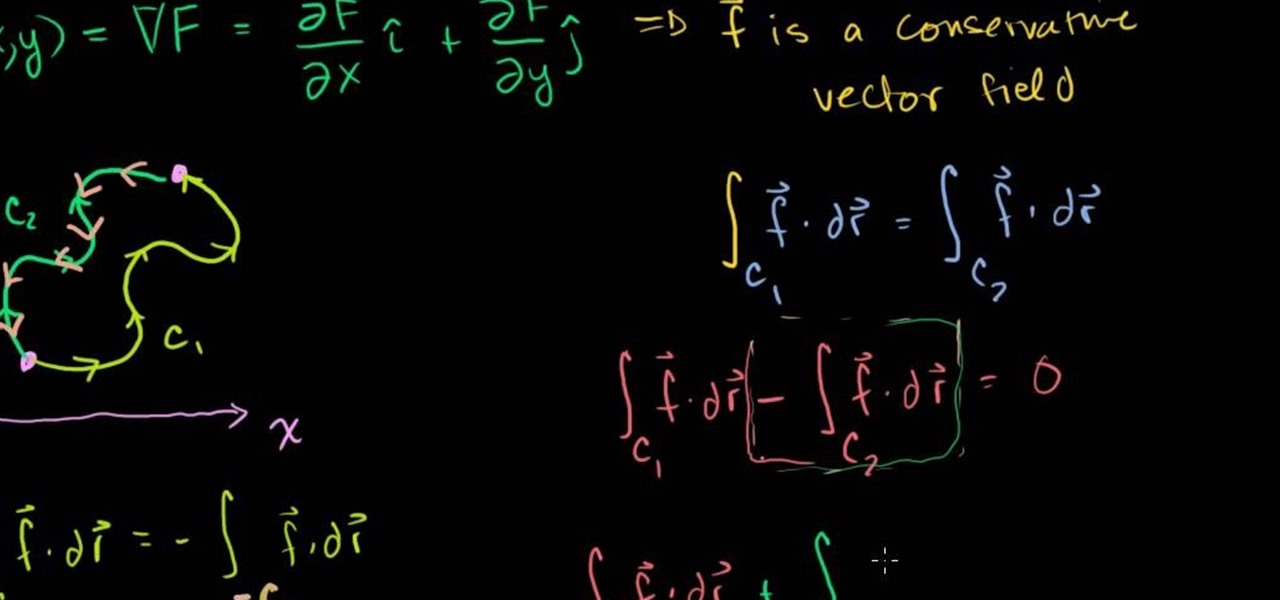
This three part video walks you through the steps of solving closed line integrals on conservative fields. This excellent video shows you a clean blackboard, with the instructors voice showing exactly what to do. Don't fret, any question you may have, will be answered. Watching this video will make you feel like your back in the classroom but rather comfortably from your home.
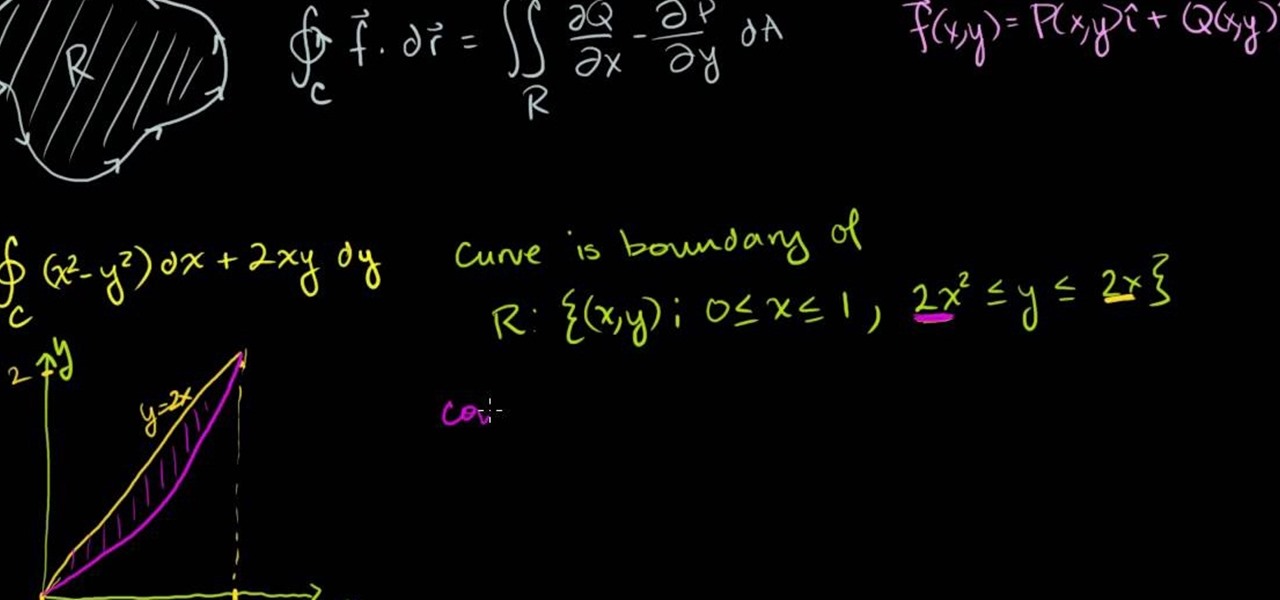
This three part video walks you through using Green's theorem to solve a line integral. This excellent video shows you a clean blackboard, with the instructors voice showing exactly what to do. Don't fret, any question you may have, will be answered. Watching this video will make you feel like your back in the classroom but rather comfortably from your home.
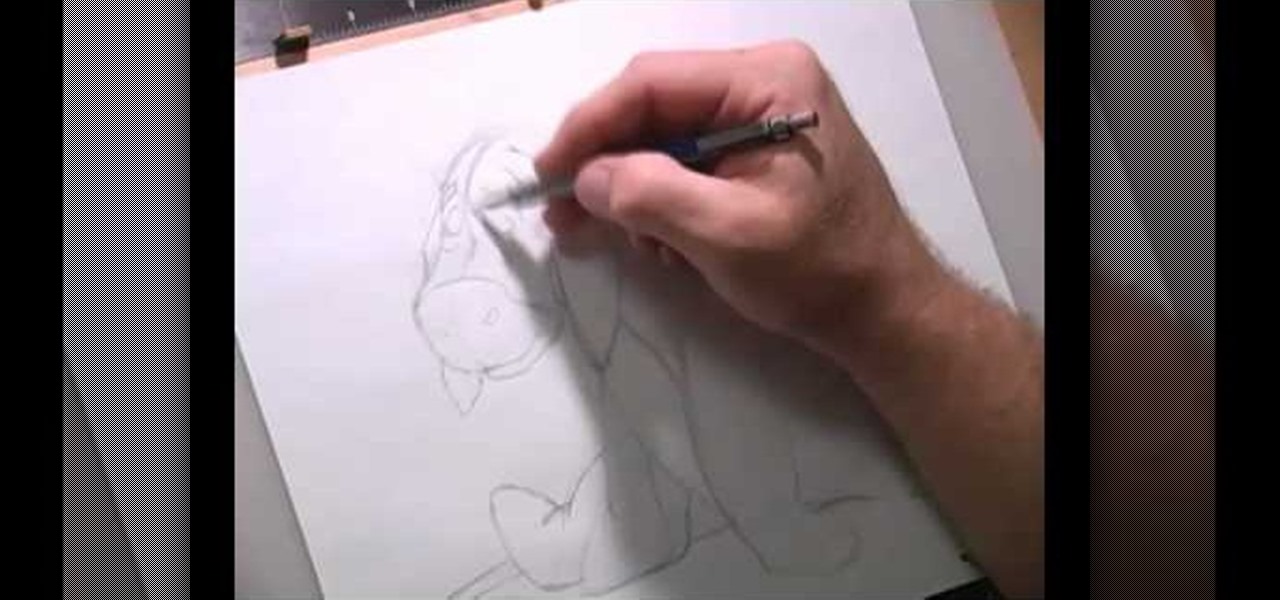
The user demonstrates how to draw Disney's Eeyore in this video. The first step is to draw a circle about the size of a 50 cent piece for his head and add construction lines to it, including one across the lower part of the circle to use as a reference. The user also suggests creating a mark below the "head" to mark where the end of Eeyore's jaw will be. Then, starting at the bottom cross line, he begins drawing the rounded area of his snout. Next, he draws a straight line from the other side...
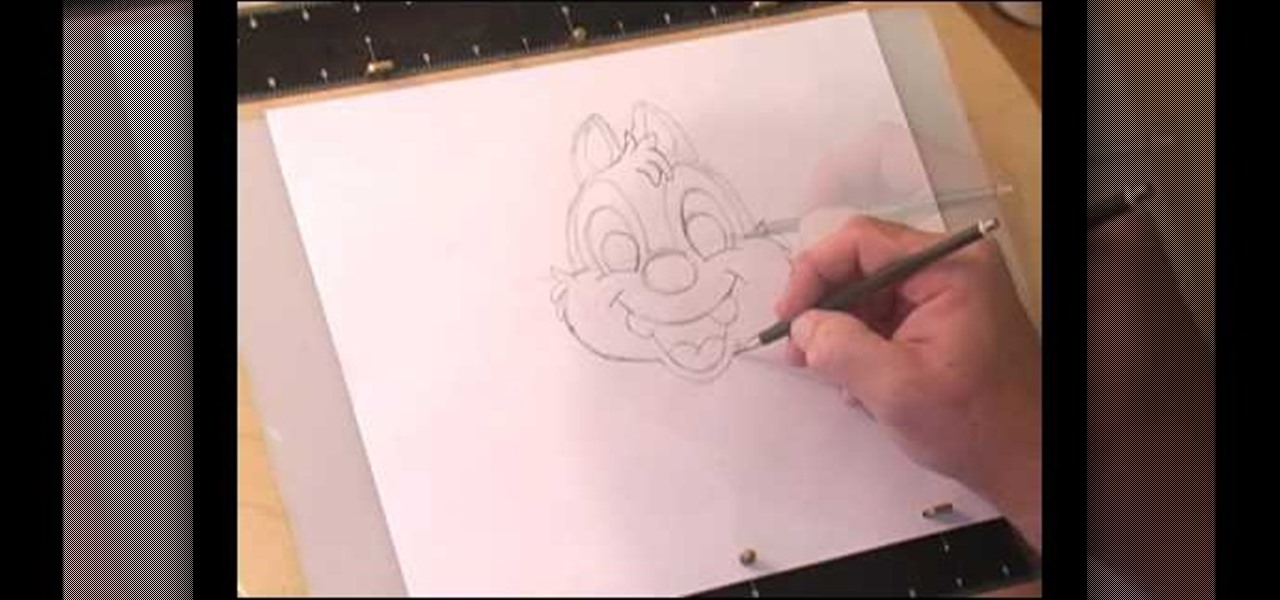
This video shows us how to draw a Dale character. First you draw a ball about the size of an orange. Insert construction lines in the shape of a cross. Starting with the small middle area, draw the mask outline and add the ears at the top. Draw in the nose under the middle line. Draw the cheeks outside the construction line on both sides. Add smile lines on each side and draw a curve between them for the mouth. Extend the lower part of the mouth outside the construction line. Insert teeth and...
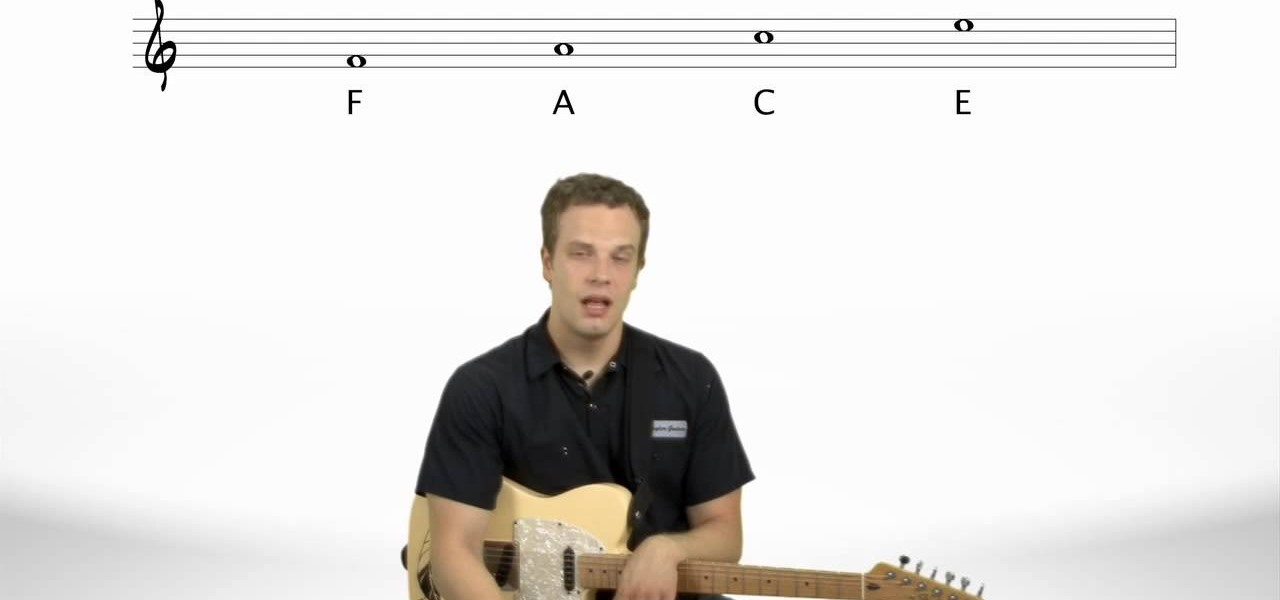
Follow along as Nate Savage teaches us to read sheet music for the guitar. -The first thing you are going to need to know are the names of lines and spaces on a staff.
In this video the author shows how to find out if a Point lies on a Line in Slope Intercept Form. He shows it by an example where he takes a point, which is an ordered pair in the form (x, y) and a line, which is an first degree equation. Now he substitutes the values of x and y in the equation and checks if both the sides of the equation match. If it matches we can conclude that the point lies on the line. By following the method given in this tutorial you can find out if a given point lies ...
Jessica Harlow presents a great look for Halloween. She mostly uses eye shadows by "Beauty from Earth" and "Obsessive Compulsive" brands, but thinks it is OK to use colors from any 88 shade shimmery shadow palettes available in the market.
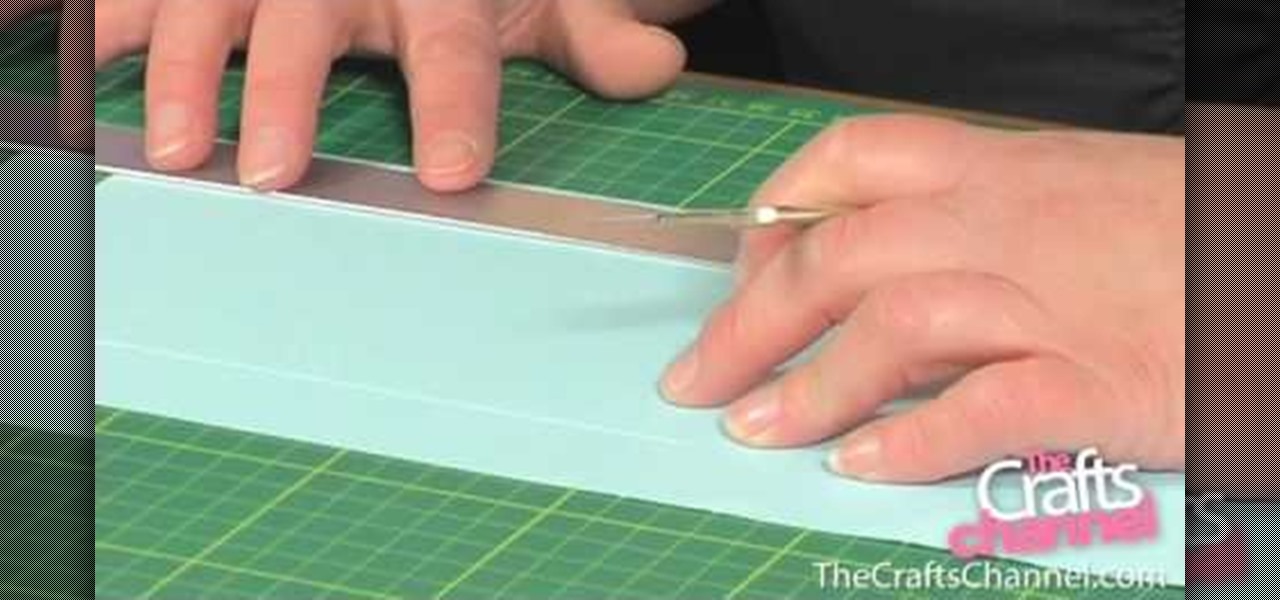
Design your own clothes by making sewing patterns, but pay attention to the details. You Will Need
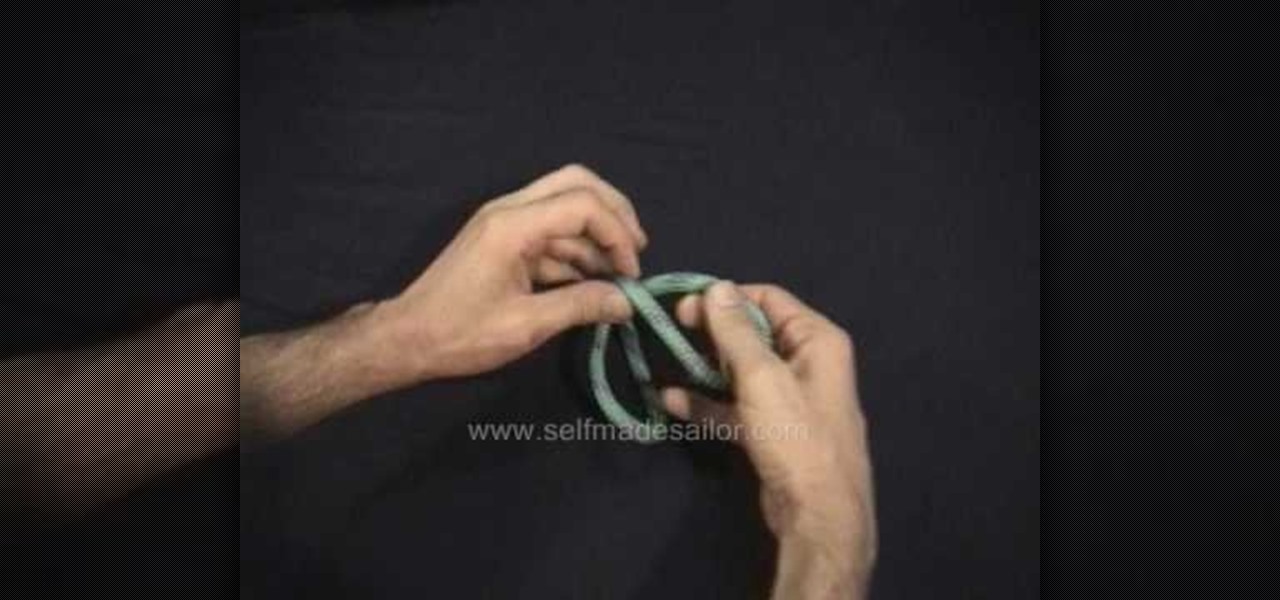
Learn how to tie a Heaving Line or Franciscan Monk's Knot - a practical and decorative knot used to add weight to the end of a heaving line, or to finish a Monk's belt rope ends. This is a fine knot for camping, climbing, sailing or Boy Scout training.
This image editing software tutorial shows you how to create a solid curved line in Photoshop CS3. You will learn how to stroke that path and create nice curved line effects in Photoshop CS3.
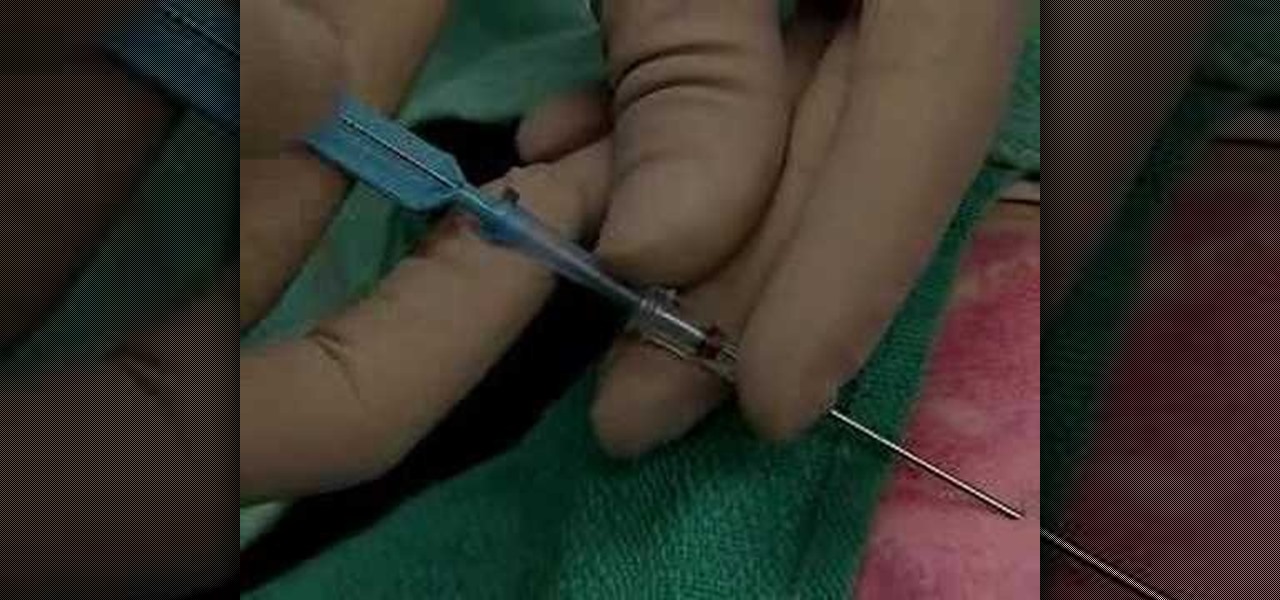
This medical how-to video demonstrates how to insert a central venous catheter line. The method used to insert the venous line is the landmark base technique. Always prepare the skin by wiping it with antiseptic. The patients head should be tilted slightly to the left. Follow along and learn how it's done.
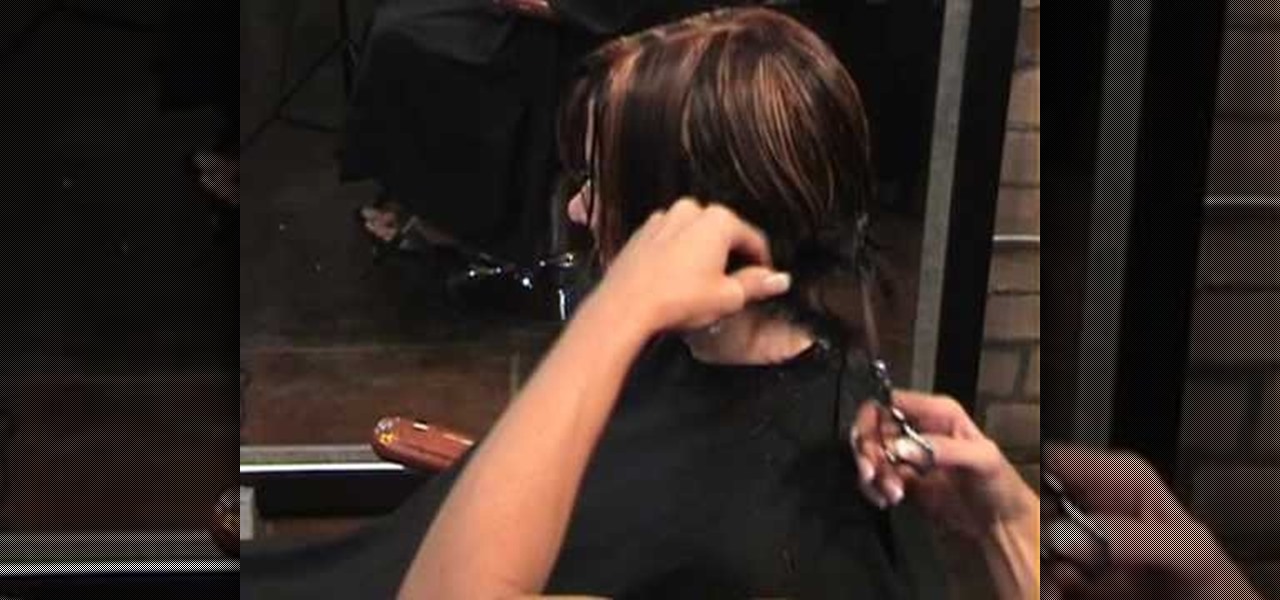
If you're still obsessed with Olivia Wilde's blunt-cut bob in "Tron," then why not get the cut for yourself? We know it's a really big change, especially if you have long hair, but if you're ready to take the plunge, then check out this video to learn how to cut an assymetrical angled A-line bob.
Connie Brad teaches us how to make a pop-up box card in this tutorial. First, you need to take a scoring board and draw 1 cm increments down the center of it. Now, take a sheet of card stock and score the sheet 2 cm from one end, then continue down until you reach the bottom 3/4's of the paper. Now, fold your card along all of the score lines up until the last line. Next, line this up on a cutting mat and cut 3 cm on each side until the end of each score line. Now when you set this up, it wil...
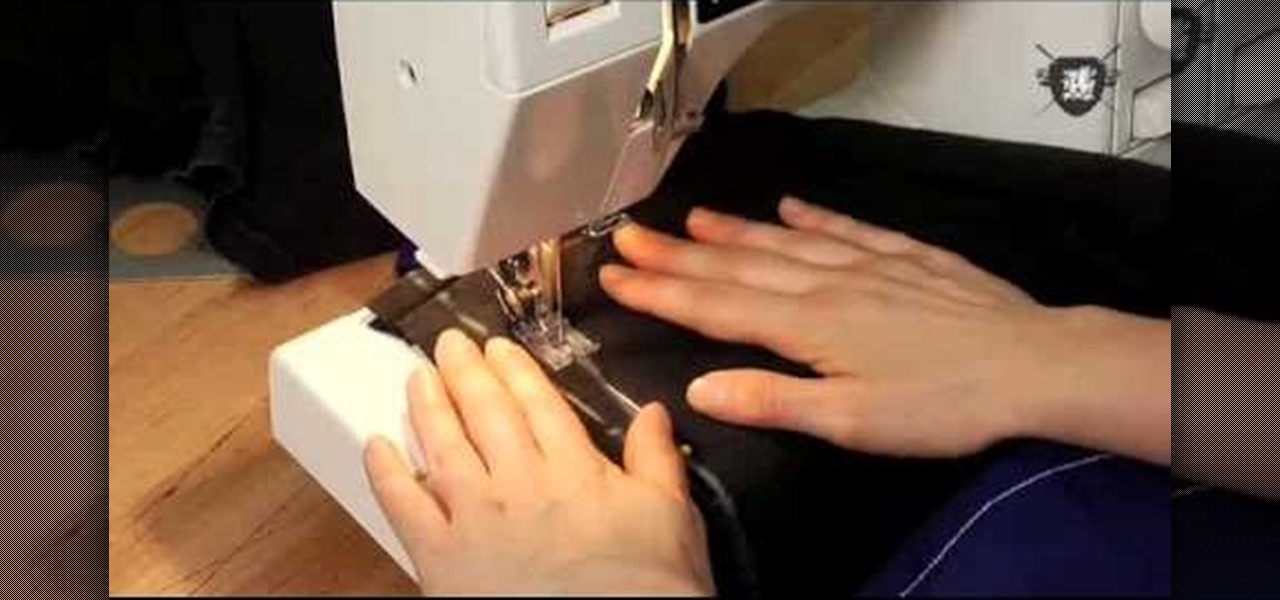
Of two old t shirts, one is taken and marked from the collar to under the armpit on all four sides of the t shirt. The marked lines are cut along. The shirt is tried on and pinched and pinned under armpit until the right fit and marked with chalk. Both sides of the shirt is cut off and along the chalk line is pinned. A straight edge and chalk is used to make a line from the pin to the bottom edge of the shirt on both sides.Both side of chalk lines are pinned down. The bottom is made even with...
The first step in drawing a Christmas tree in Microsoft Paint is to open up the program and click on the line button on the left hand side of the toolbar. Start with where you want the top of your tree to be. Click and pull down the cursor about an inch and a half on a 45 degree angle. Click again. Now take the cursor and go to the right about an inch. Click again. Repeat three more times making each 45 degree angle line a little bit longer than the last. It should zigzag angling towards the ...
He explains how to tie a "blood knot" and what the blood knot is used for, which is joining two separated rope/string ends. He demonstrates the knot, which starts by taking the two lines and lining them up one on top of the other, so they are parallel to each other. Then, start winding one end around the other, at least 3 or 4 times. Do the same with the other loose end as well. Then, place the first end through the wound part of the two ropes where you started. You pass the other end through...
Line integrals will no longer be the feared terrorist of the math world thanks to this helpful guide from the Khan Academy. Marvel at the ease in which the integral is taken over a closed path and solved definitively. Then take out a sheet of paper and see if you can do the same.
Find out how to use the creep swab in Houdini 9. It's a three-part video tutorial that shows the strength and diversity of the Creep Tool in Houdini. In this specific case, see the creep tool with line rotation and improve your animation skills.
It's time to boogie! Get your shoes on, put on your dancing shirt, turn off your phone, and tell your friends you've gone on a permanent vacation! The boogie line dance is a simple line dance - easy enough for a toddler to learn, but hard to forget! This instructional video will get you up and boogieing in no time. So don't be shy, watch this dance video and get your boogie on.
Connecting your sprinklers to the water line is actually fairly easy when you're installing your own sprinkler system. Basically, you just go to your outside tap, screw it off and screw in your house connection.
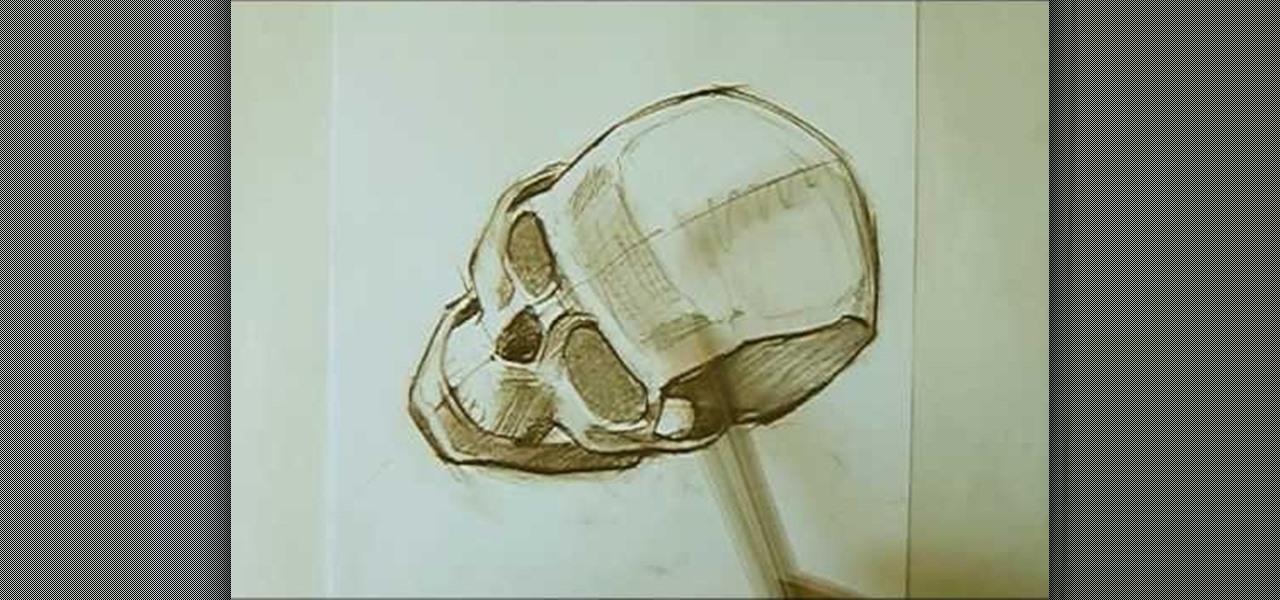
In this tutorial, we learn how to draw a skull with proper proportions. First, draw the outline of the skull with the light touch of a pencil. After this, use the pencil to draw two crossing lines that are the same length. Next, draw in the features of the face and head using the lines on the drawing. From here, you will start to add in the details to the features of the face and erase any background lines. Use the side of your pencil and the top of it to shade in the sockets and lines. To fi...