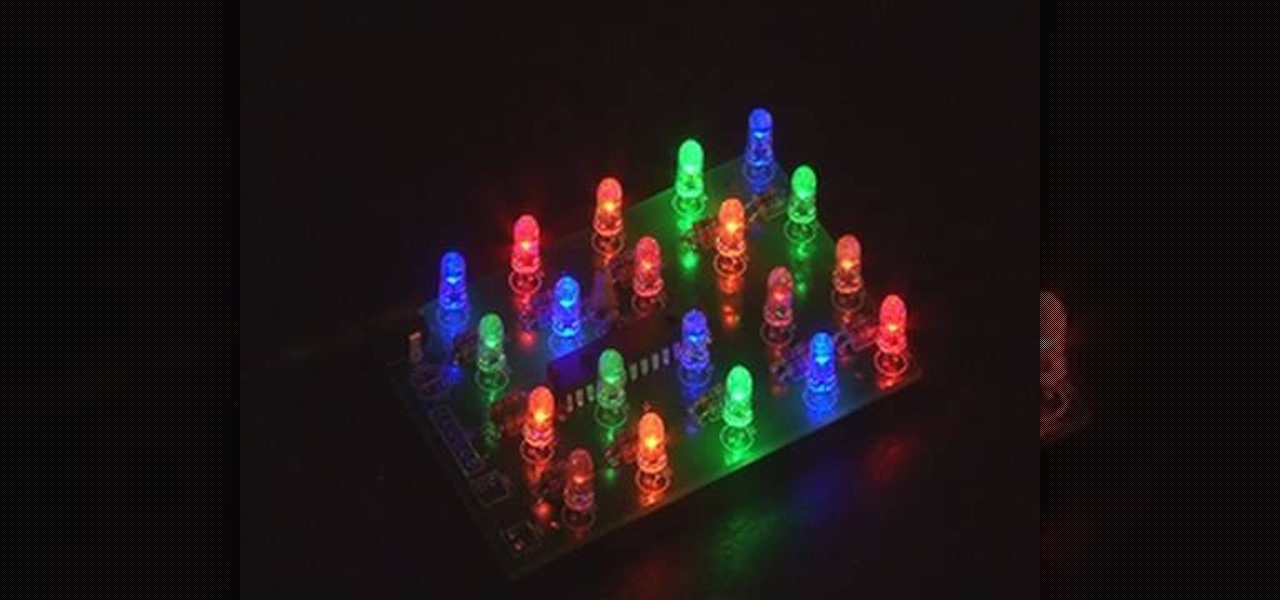
This video by makemagazine demonstrates a weekend project on how to make a LED light brick. The materials required for this project are listed on the link to the make magazine page in the info box or it can be orders as a kit from the make magazine store. Take the PCB (printed circuit board) and first solder the Resisters and Capacitors as shown. Next test the LEDs and separate them using a button cell batteries. Solder the LED, PIC micro-controller, DC power connector and tilt switch followi...

Let a Lowe's expert show you how to install bi-fold doors. Learn how to install bi-fold doors that you can add to you closets. Get your drill, doors, tape measure and other tools together so you can be ready to complete your project. Measure your closets so you know what kind of door you need to fit your projects. If you need to paint, paint before you add to the door. Mark all your spots and measure before you add your pieces.
Drywall screws were originally created specifically for drywall projects. But they have become increasing popular for woodworking projects because you can often screw them into a soft piece of wood without having to drill a pilot hole. But because they have threads all the way up to the head of the screw they will not pull two pieces of wood tightly together. So to get the drywall screw to hold two pieces of wood tightly together you have to drill a shank hole through the first piece of wood ...

In this two-part tutorial, learn how to make a simple baby doll tube top dress! For this project you will need a meter of fabric (thin & loose), scissors, elastic, and of course... a sewing machine! This dress is perfect for going to throw on before headed to the beach or for those warm, sunny summer days!
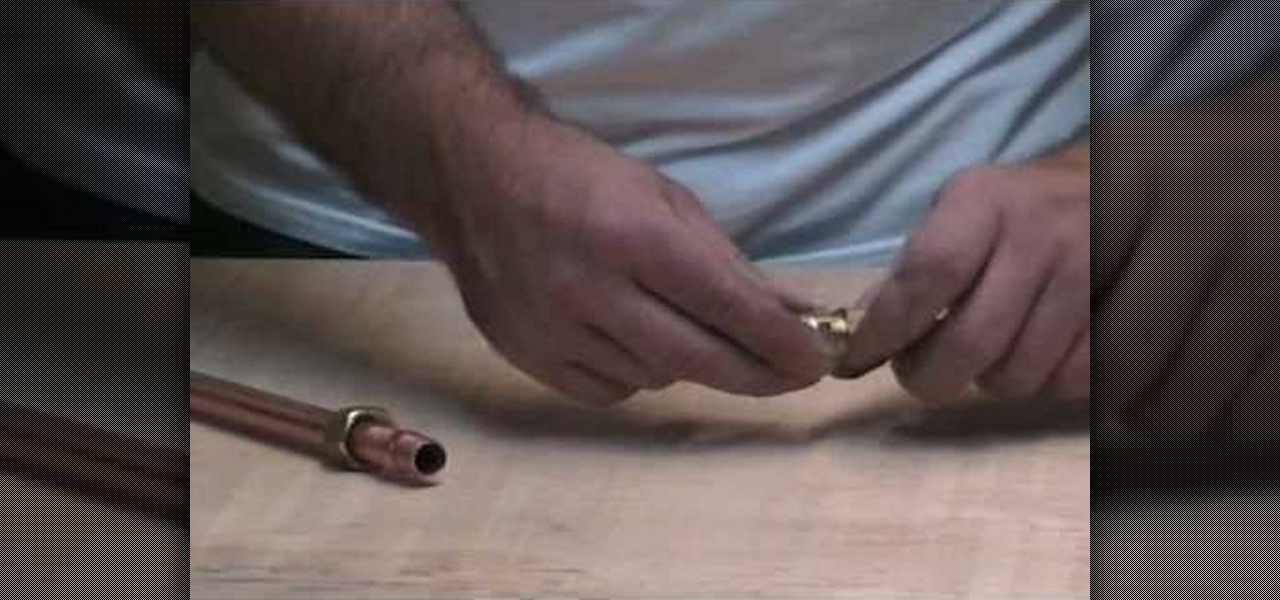
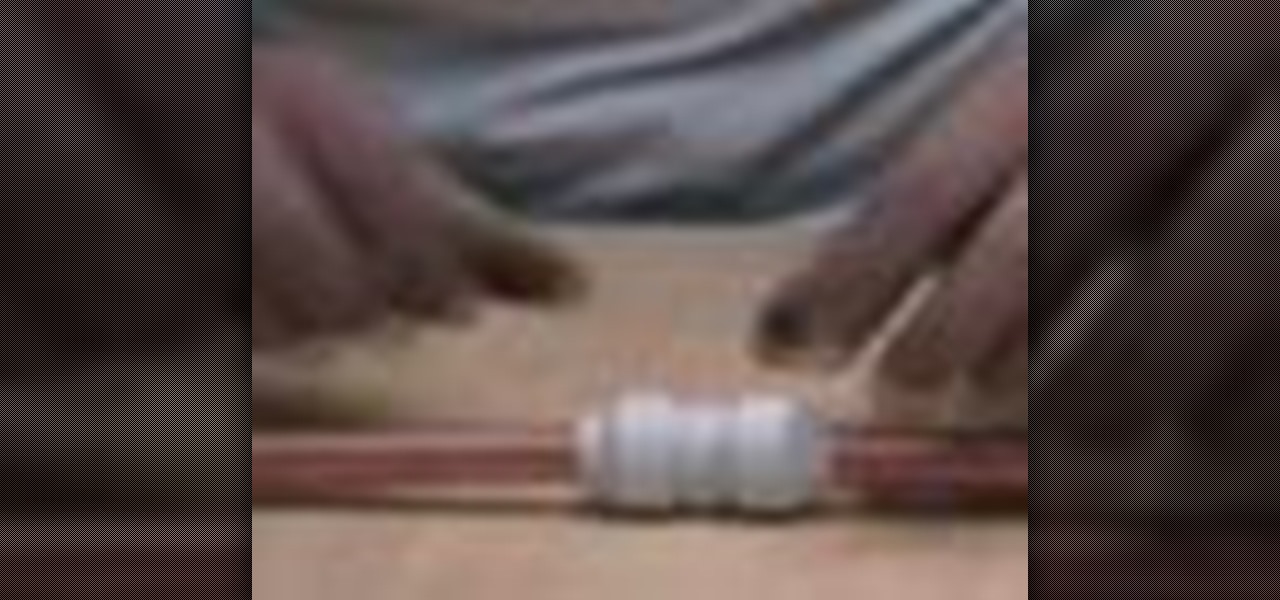
Copper pipe is perhaps the most versatile of all piping types in that you can use virtually any fitting with it. Copper pipe, however, is not particularly flexible, which can make it a little unwieldy to work with. Simplify your copper piping projects by using compression fittings. This home plumbing video tutorial shows you how. For detailed, step-by-step instructions on using compression joints in your copper plumbing projects, take a look.

Ever hear of fantasy film? No, not the weird fantasy movies, but the decorative colored paper. It's great for making any arts and crafts project. In this video, see how to make a glittery dragonfly out of Fantasy Film and opals. Barbara Trombley shows you how to make this simple project in minutes. You will be amazed when you see the film change colors right before your eyes. This dragonfly is perfect for any card or hat or lapel.

Are you a scrap booking nut? Why not add some flare to your page with a three-dimensional looking photo collage? 3D photos are the best way to jazz up a page and take it from boring to popping! In this step-by-step tutorial, learn how to make your photographs from Fourth of July a three dimensional fireworks experience using a Fiskars' Fingertip Craft Knife, as well as a self healing matt, a 5x7" background photo, a 4x6" focal point photo, and some Ranger's Pop It! Shapes. Before beginning yo...
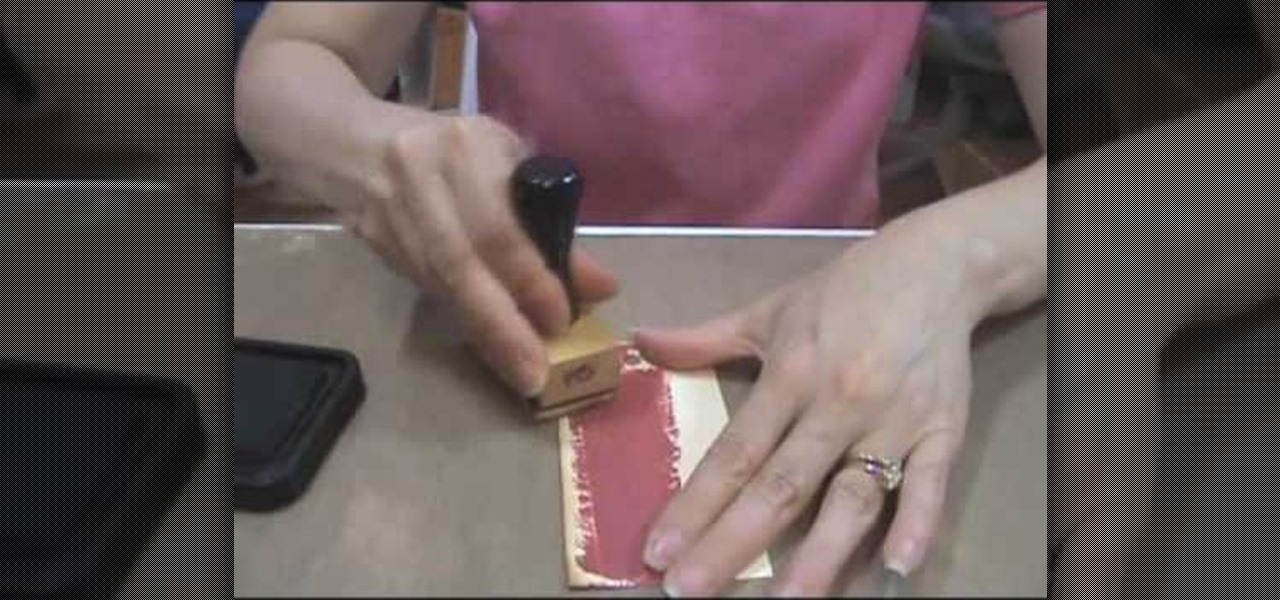
Learn how to use the Tim Holtz' Distress Crackle Resist technique with this tutorial that gives step by step instructions on applying this method to a Manila tag. Materials you will need include distress crackle paint, distress ink (for this project, in "Vintage Photo", "Fire Brick" and "Black Soot"), Inkssentials' ink blending tool, foam, nonstick craft sheet, Inkssentials' Mini Mister filled with water, heated craft tool, paper towel, stamp, and a Manila tag. After done, use this tag in a s...
This is a tutorial on creating graffiti letters from duct tape to decorate and stick anywhere you like. Not your everyday graffiti, but if you have a lot of duct tape lying around the house, this project's an interesting way to spend an afternoon and stay out of trouble. Starting with graffiti letters from GraffitiGen and GraffitiCreator, this tutorial takes you through the steps to make your own graffiti duct tape letters to decorate just about anything.
Systm is the Do It Yourself show designed for the common geek who wants to quickly and easily learn how to dive into the latest and hottest tech projects. We will help you avoid pitfalls and get your project up and running fast. Search Systm on WonderHowTo for more DIY episodes from this Revision3 show.
Systm is the Do-It-Yourself show designed for the common geek who wants to quickly and easily learn how to dive into the latest and hottest tech projects. They will help you avoid pitfalls and get your project up and running fast. In this DIY episode, see how to make a motion activated silly string shooter.
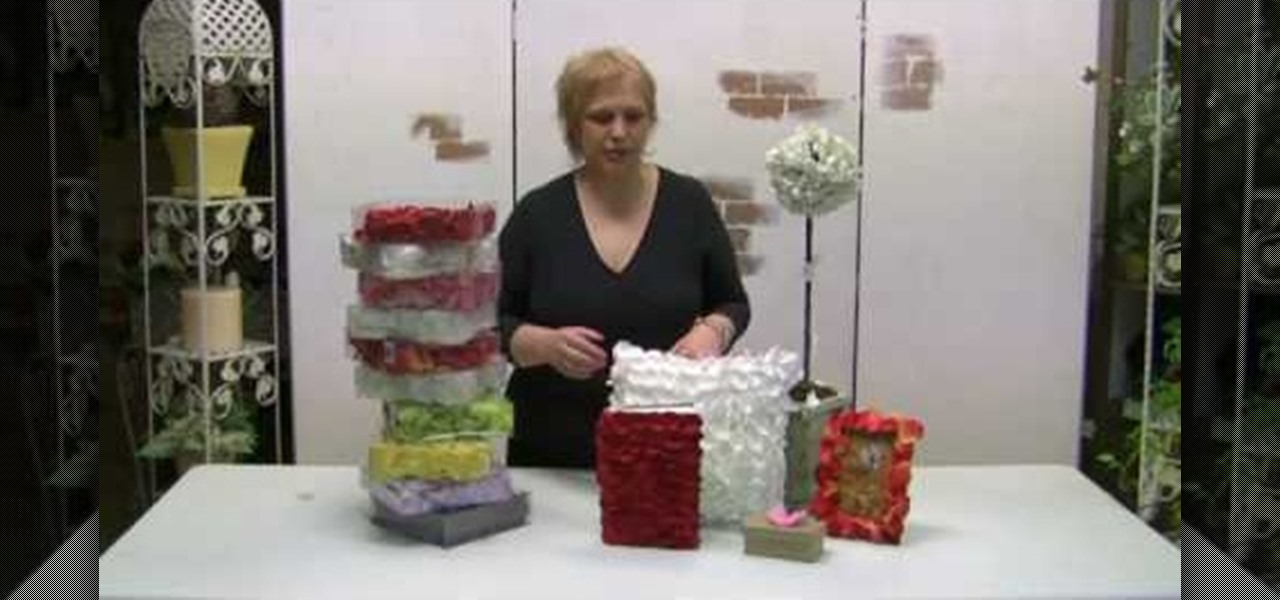
The art of floral arrangement is a fun & valuable skill. Dana Plazyk lends useful tips and tricks on making simple flower arrangements.
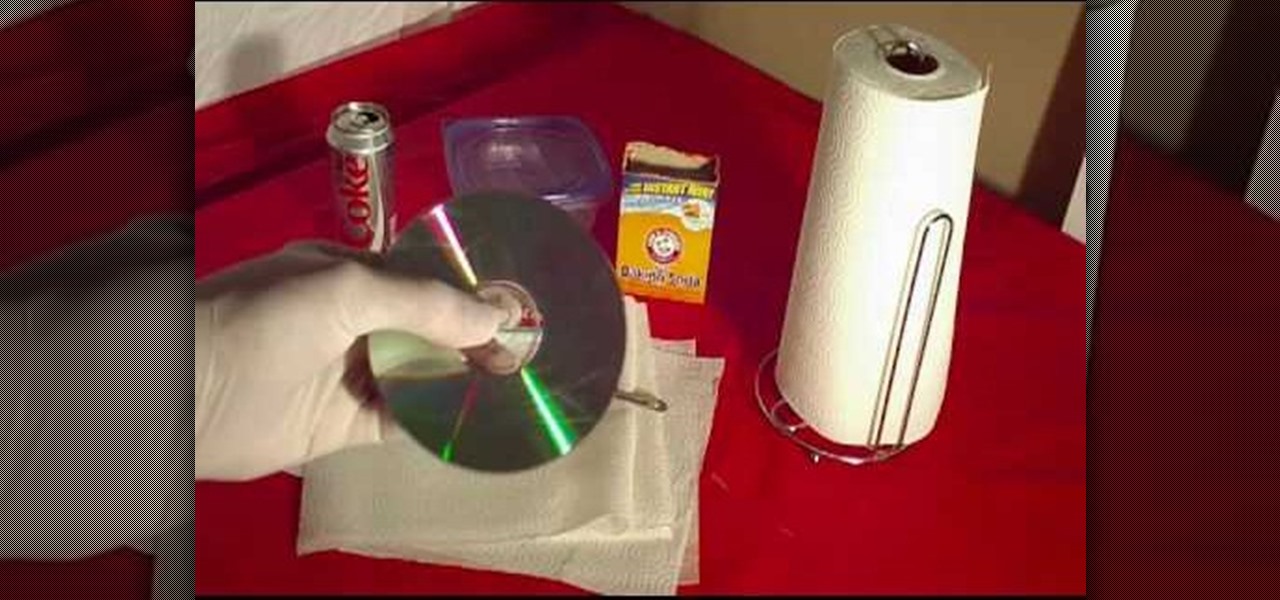
In this Household Hacker experiment, we'll demonstrate how to completely remove scratches from your CD or DVD media.
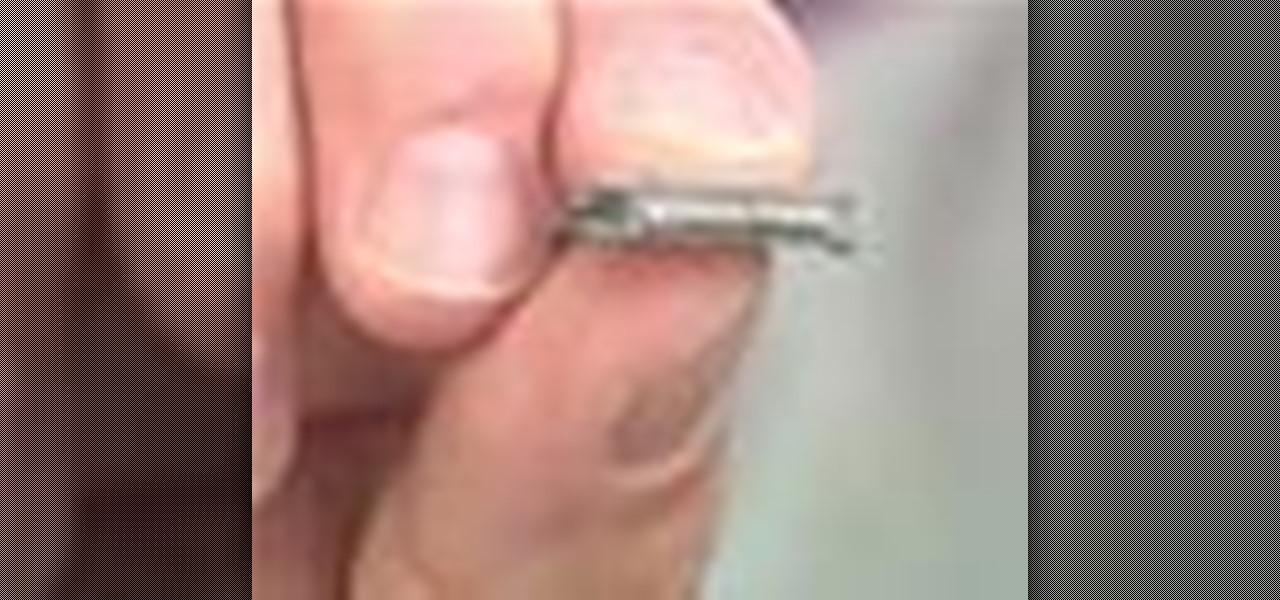
The Five Minute Project crew is back, and bringing you six fresh projects sponsored by Craftsman. Break out the tools and protective eyewear and brace yourself for the best how-to videos a DIY-er could ask for. Learn to make Geek-Chic Cuff Links, a Cereal Box Spectrometer and more, all in Five Minutes Time!
Copper pipe is perhaps the most versatile of all piping types in that you can use virtually any fitting with it. Copper pipe, however, is not particularly flexible, which can make it a little unwieldy to work with. Simplify your copper piping projects by using push-fit fittings. This home plumbing video tutorial shows you how. For detailed, step-by-step instructions on using push-fit joints in your copper plumbing projects, take a look.
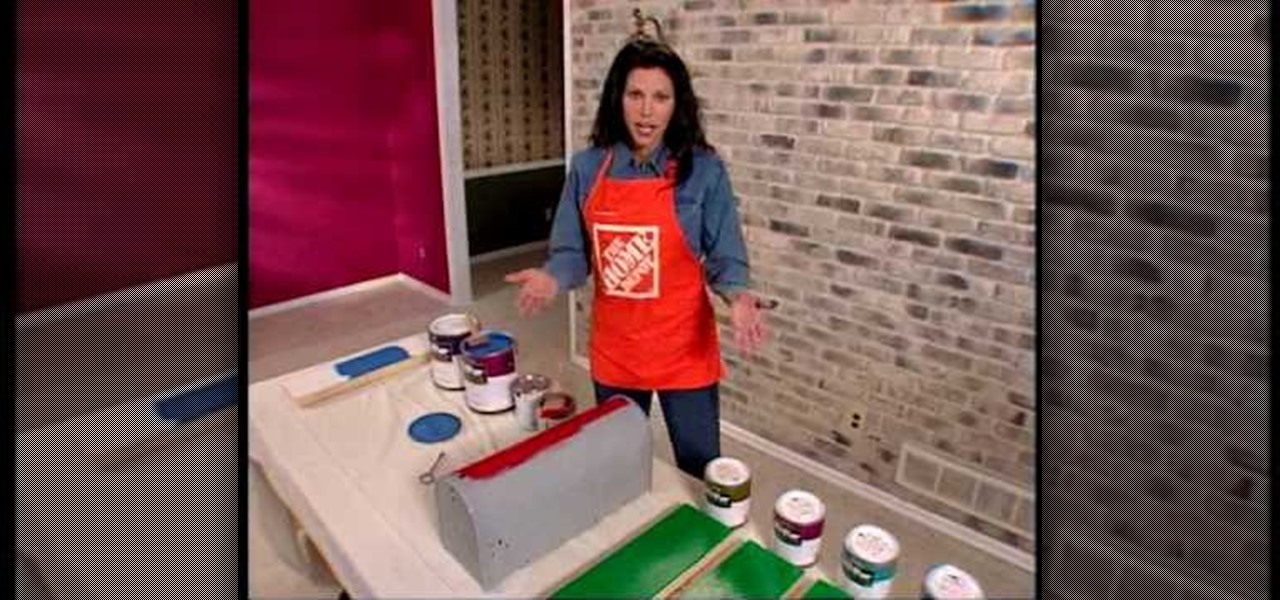
Learn how to choose the right paint for your next project. In particular, this DIY guide looks at the following topics:
A place to sit and relax can add greatly to the enjoyment of your backyard, garden or flower beds. A garden bench is one answer and also a fun workshop project. Garden benches, as seen by the examples here, can range from classic designs requiring a fair amount of materials and woodworking expertise to simple slab benches that require little effort, can be built from scrounged materials and add a “rustic” appeal to yards. In this DIY video tutorial, you'll find step-by-step instructions for b...
Installing a new garage door and opener may seem daunting at first, but if you take your time and do the job step-by-step, it's a good weekend project. It will take from nine to 12 hours for most doors, then another two to four hours for the opener. You will need help for some portions, such as lifting out the old door and lifting the new door up until the tension springs can be installed (some doors may weigh up to 400 pounds). You may need to remove an old door, or you may be installing in ...
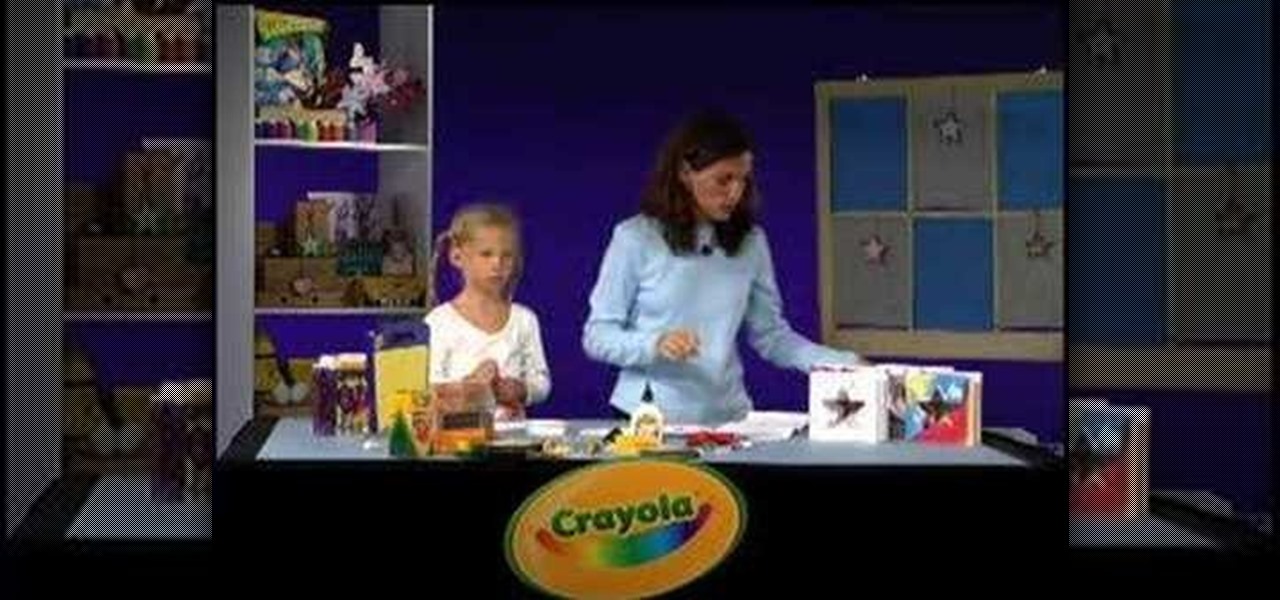
Learn how to make a window holiday card with this tutorial. This is a fun arts and crafts project to do with your children. You will need to use the Crayola Cutter to create peek-through windows in your card. The materials needed for this project are 2 large pieces of white paper, cookie cutters, Crayola erasable colored pencils, glue, glitter glue, markers, crayons, colored pencils, and the Crayola Cutter. With this how to video you and your kids can make these fun window cards for any holiday.
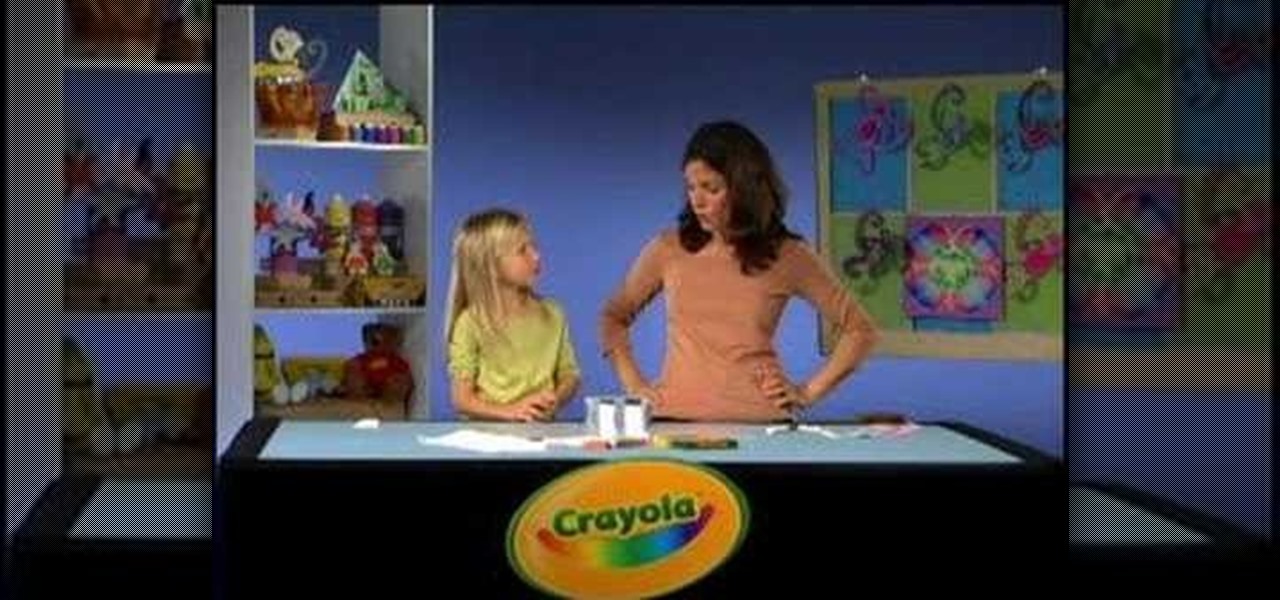
Check out this great science project craft from Crayola. Learn how to separate the colors in a black marker with this tutorial. You will need Markers, scissors, a paper towel, wax paper, and a container of water. This is a great project to teach your kids about the science of colors. With this easy to follow how to video you will be able to separate the colors from a black Crayola marker with your child.
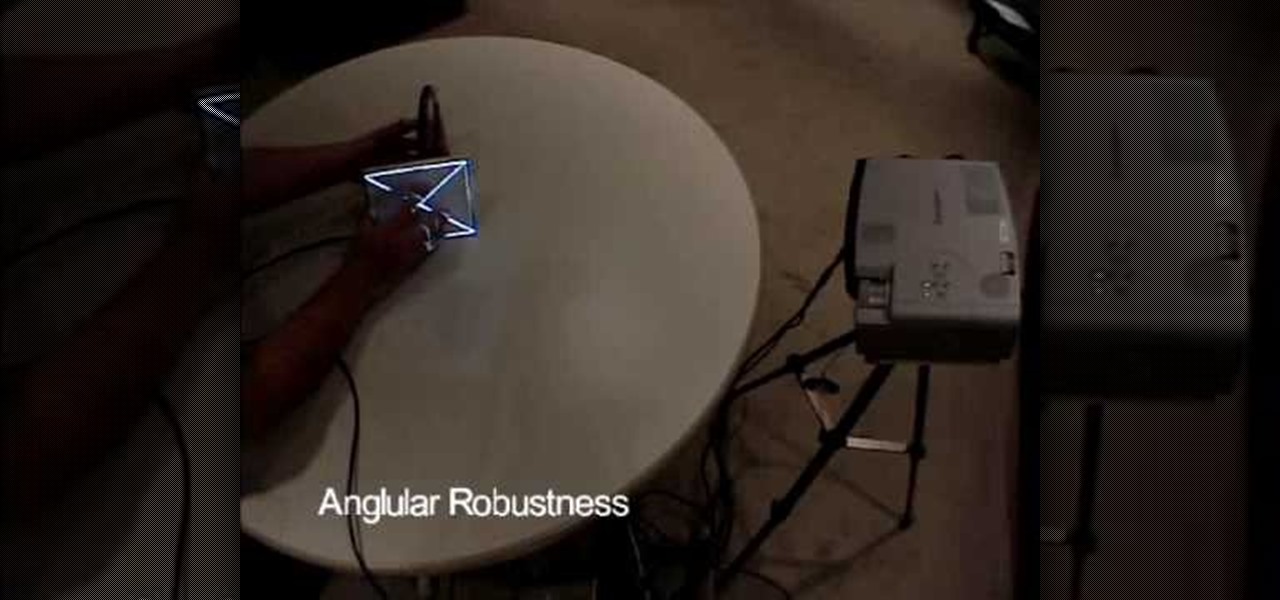
Take a look at this instructional video and learn how to fit a projected image onto a target surface with Johnny Chung from Carnegie Mellon University. Typically, you'd need to use a screen to be directly in front of the projector and at a very specific orientation to get an undistorted image. What this tutorial is trying to accomplish is to place a screen at any location that is convenient and then calibrate the projector onto the target surface. This technique is used to automatically disco...
This video demonstrates how to fold the origami model "Kaleidoscopic Twister" that Charles "Doc" Santee designed. You can use 30cm by 15 cm (12 in by 6in) size paper for this project. This is a complex origami project, but these instructions are both clear and thorough. With a little practice, you should be able to complete your origami "Kaleidoscopic Twister" without trouble.
This is a simple "take home" solar energy lamp project, based around a dirt cheap solar garden lamp, which suits enthusiastic ten-year-olds (with modest adult help).
Check out this low cost project. This video will show you how to transfer sound over light! Yes, this is possible. You'll transfer a sound with a distance of 5 meters, but you may experiment on greater distances if you'd like. You'll need a laser (or an LED) for this audio project, one Opto transistor (or resistor), one 3-volt battery, two mono audio jacks, and some alligator clips. Just watch this cool electronic audio experiment and try it out yourself.
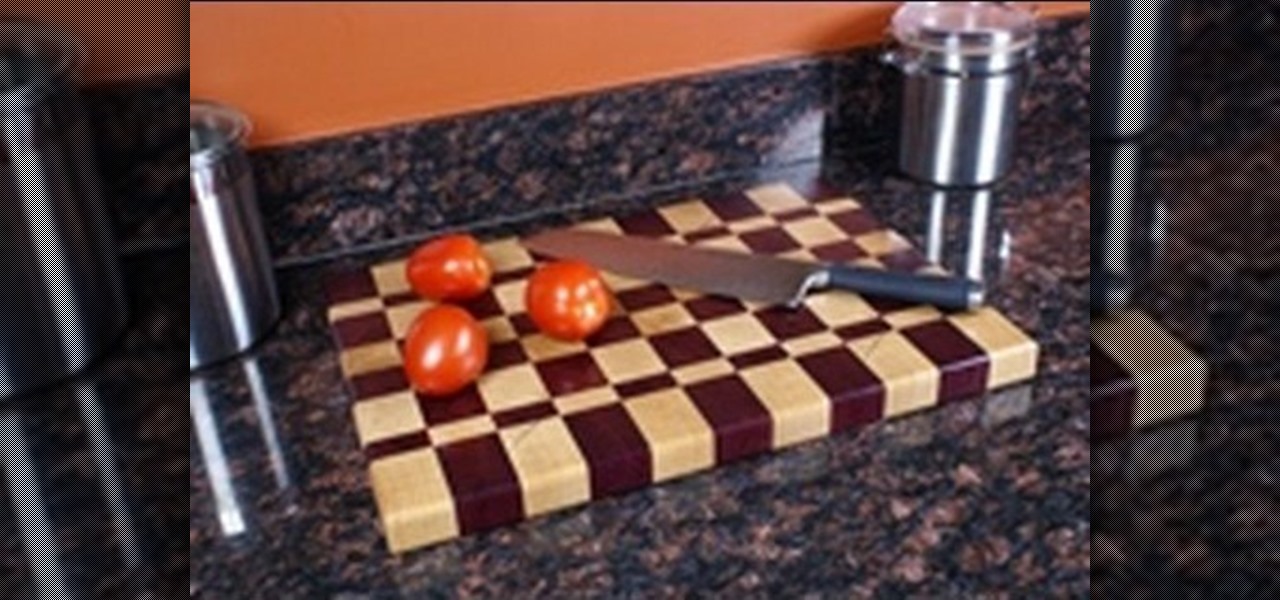
Make your own butcher block end-grain cutting board with this two part video series. Enjoy the "back to basics" simplicity of this useful project. A custom cutting board makes a great gift and many woodworkers make them in batches every holiday season. And if you are relatively new to woodworking, this is a great project to hone your milling, glue-up and tablesaw skills.
Downing drinks while perched on the bed, the floor, and the arms of the couch is totally awesome!!! (If you're a college freshman.) Otherwise it sucks. Don't get us wrong; living small doesn't mean you can't party like a rock star, it just requires a little creativity. This project offers dual functionality: wall art on quiet evenings, and extra seating and side tables on nights when friends roll in to bring down the house.
Learn how to make a papier mache skull by first learning how to mix papier mache and then how to make a jaw bone. Part 2 of this informative craft how to for making a cool papier mache skull starts with building from the jaw bone in part 1 the project continues with the making of the skull. Part three shows the details, sculpting, painting and completion of this cool papier mache craft project.
Knowing just one or two programming languages is no longer sufficient if you want to make serious money in the lucrative world of web design and development. But the good news is that you don't need to spend an excessive amount of time or money on a traditional coding education to get the skills you need to thrive.
With its 3D engine being responsible for approximately 60% of augmented and virtual reality experiences, Unity is continuing to place a premium on tools that not only keep developers working in its development environment but also make their workflows easier.
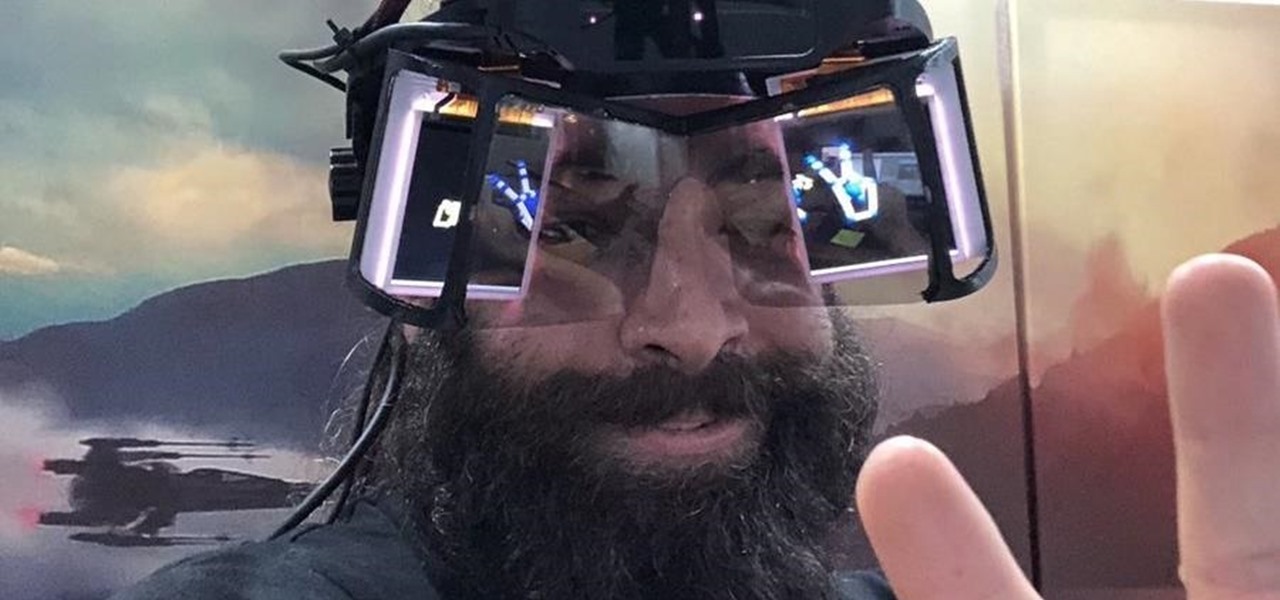
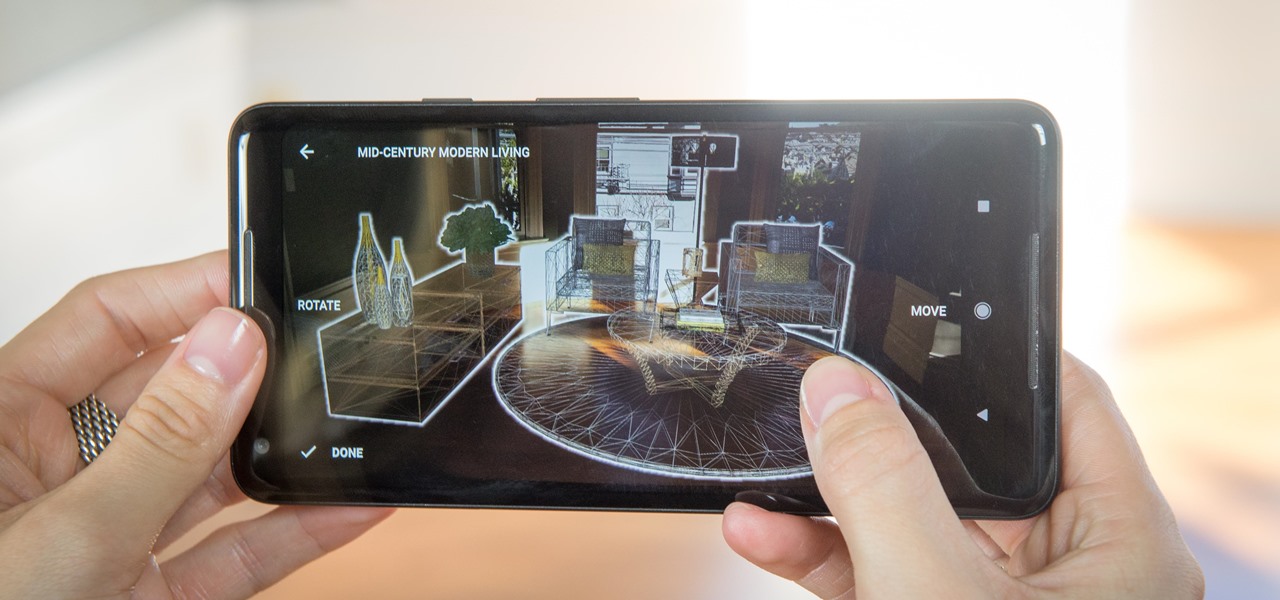
While Leap Motion has given makers a DIY solution for building their own augmented reality headset with Project North Star, a self-described "AR wonk" has taken the blueprints one step further by creating an untethered version.
At its annual MAX event kicking off on Monday in Los Angeles, Adobe gave the audience a new preview of its forthcoming Project Aero augmented reality authoring tool during the keynote presentation.
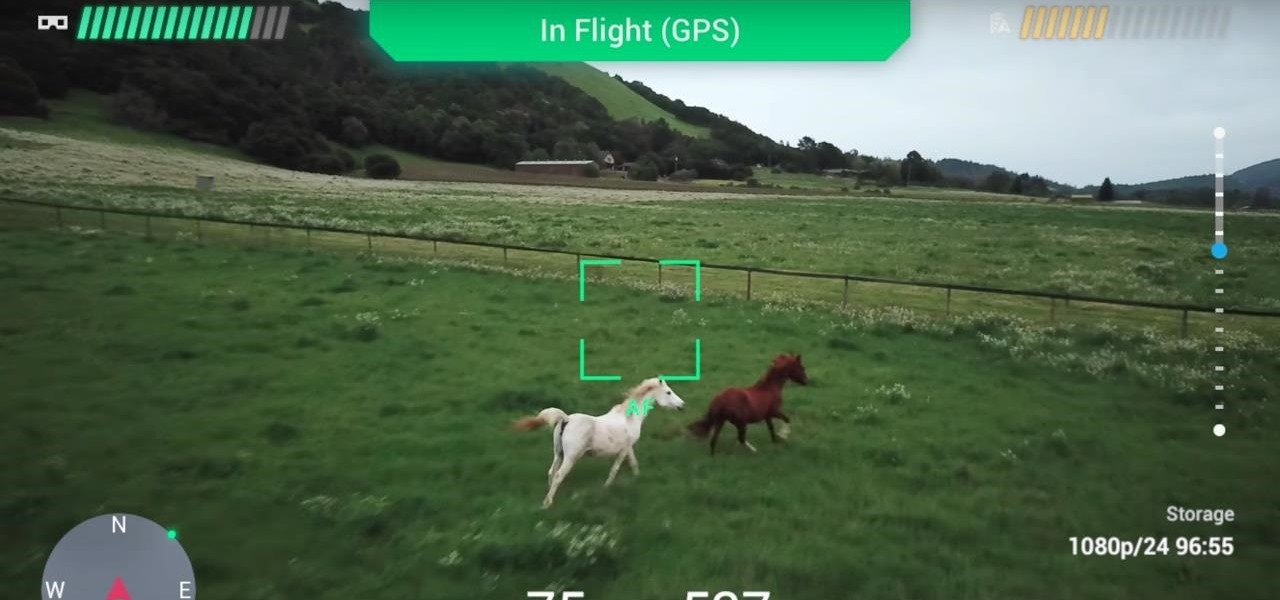
Smartglasses maker Epson remains the top gun in the drone market with its Moverio line of wearables, and the company is further elevating its offerings with its new Drone SoAR app for DJI drones.
Project Fi, Google's MVNO, is running a new promotion on the latest and greatest from LG. From July 16 until the 29th, whenever you order and activate the LG G7 ThinQ or LG V35 ThinQ, you will receive a $300 service credit. When you do the numbers, that equals a minimum of three free months of service.
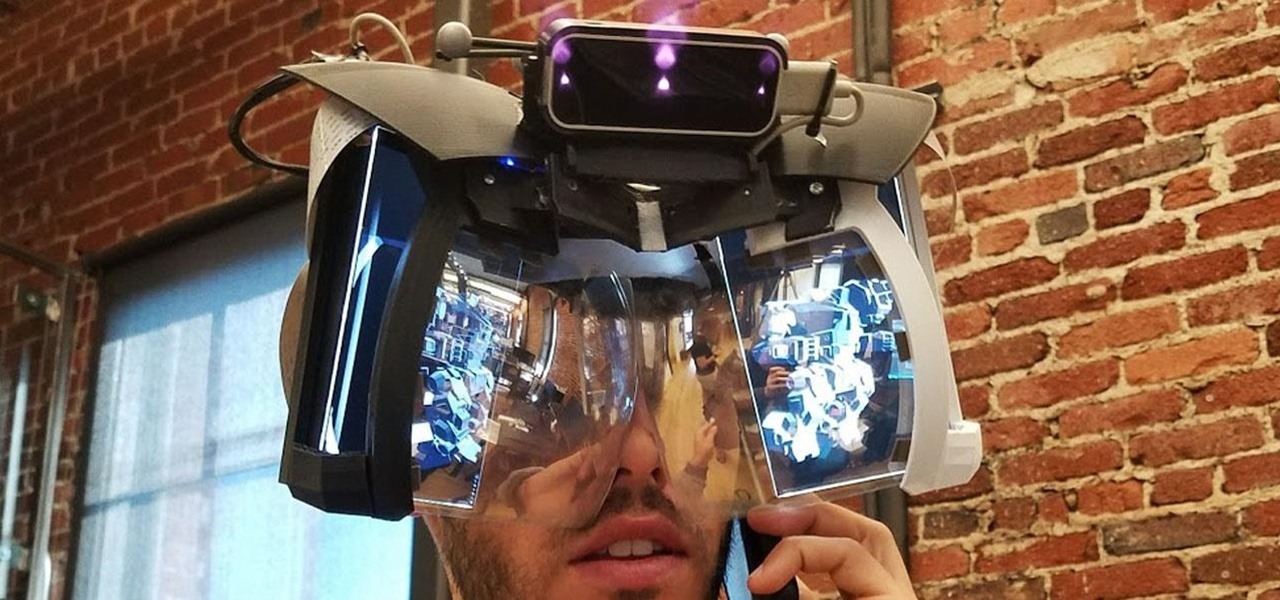
If it had come out just a week earlier, around April 1, no one would have believed it. But it's true, Leap Motion has developed its own prototype augmented reality headset, and it looks pretty wild.
Just weeks after officially launching its mobile augmented reality toolkit, Google can now claim one of its first Android and ARCore app exclusives with the Curate app from Sotheby's International Realty.
Following up on a preview of the deal we reported during last week's CES, Dell has officially announced the details around its role as the first company to resell the Meta 2 augmented reality headset.
While the iMovie application for Mac has a few more bells and whistles, Apple's mobile version of its video-editing program is jam-packed full of features and more intuitive than its big brother. Still, before you dive right in to become a movie editor on your iPhone, it's good to know the basics first.
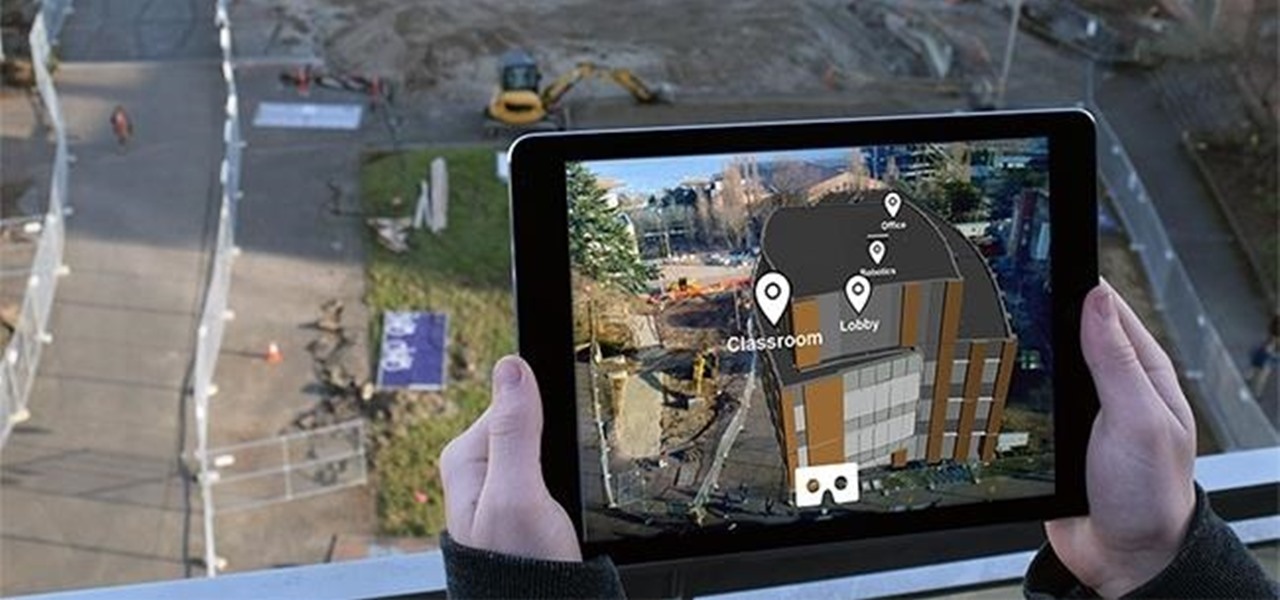
It's fitting that students at the University of Washington can catch a glimpse of the new, 135,000 square-foot computer science building in augmented reality before construction is completed.
With significant advancements in the treatment and prevention of HIV, you'd think the stigma surrounding the deadly virus and AIDS, the syndrome the infection causes in the body, would have lessened. Unfortunately, a new project looking at conversations on Grindr — a social networking app for gay, bi, curious, and queer men — has shown that this stigma is very much present.
Intel launched their Advanced Vehicle Lab in Silicon Valley this week, and the tech giant is now on the hunt for potential partners.