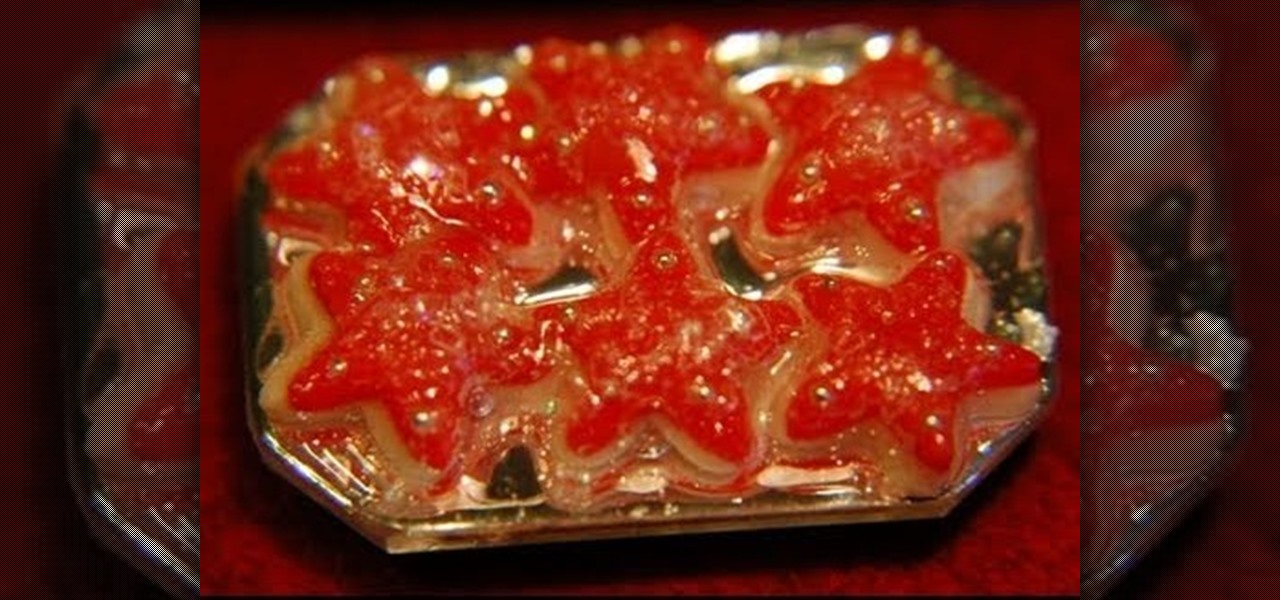
This video shows how to create mini decorated Christmas cookies using polymer clay. They are about the right size for a dollhouse. She shows the process of cutting the clay out in both colors, using a star stencil for the cookie shape and also the frosting. Make sure to have the frosting piece be a little bit smaller than the cookie so that it appears to be sitting on top. She also shows how to place the decorative silver pieces onto the clay. She explains how long to bake these pieces, and a...

In this video tutorial, viewers learn how to make a reflective text in Adobe Fireworks CS3/CS4. Adobe Fireworks a bitmap and vector graphics editor. Begin by opening Fireworks and create a new project. Create your text and then duplicate it. Align the duplicated text under the original and flip it vertically. Click on the color and select Fill Options. Select Gradient and keep the second option at Linear. Drag the opacity on the left to zero and the right to 100. This video will benefit those...
She teaches us how to make a beautiful jewelry pendant for a necklace out of polymer clay. She starts with kneading a black base. She then sends it through a pasta machine. After she has a black flat sheet she rolls it into a ball again. Then, she takes the other five colors and starts rolling tiny little ball. She attaches them to the base black ball. Next, she creates a snake with the colors swirling around. She sends it back through the pasta machine to create a perfectly flat surface. To ...
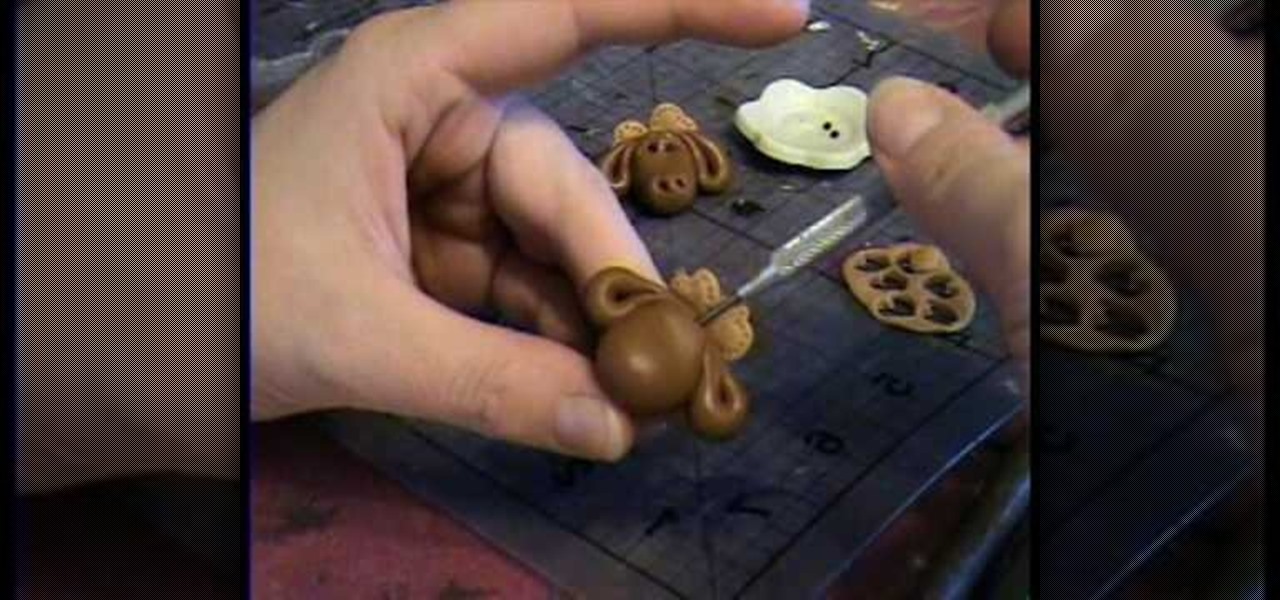
This video tutorial is going to show you how to make a Moose Bead from Polymer Clay by Garden of Imagination. You begin with clay and make a shape it like the head of the moose as shown in the video. Then take more clay and make the ears and attach them to the head. Now take lighter color clay, cut it out into heart shapes, poke around the edge with a pin, and attach them behind the head. Take a pin and make a hole at the top end of the head to make it a bead. Watch the video to finish the pr...
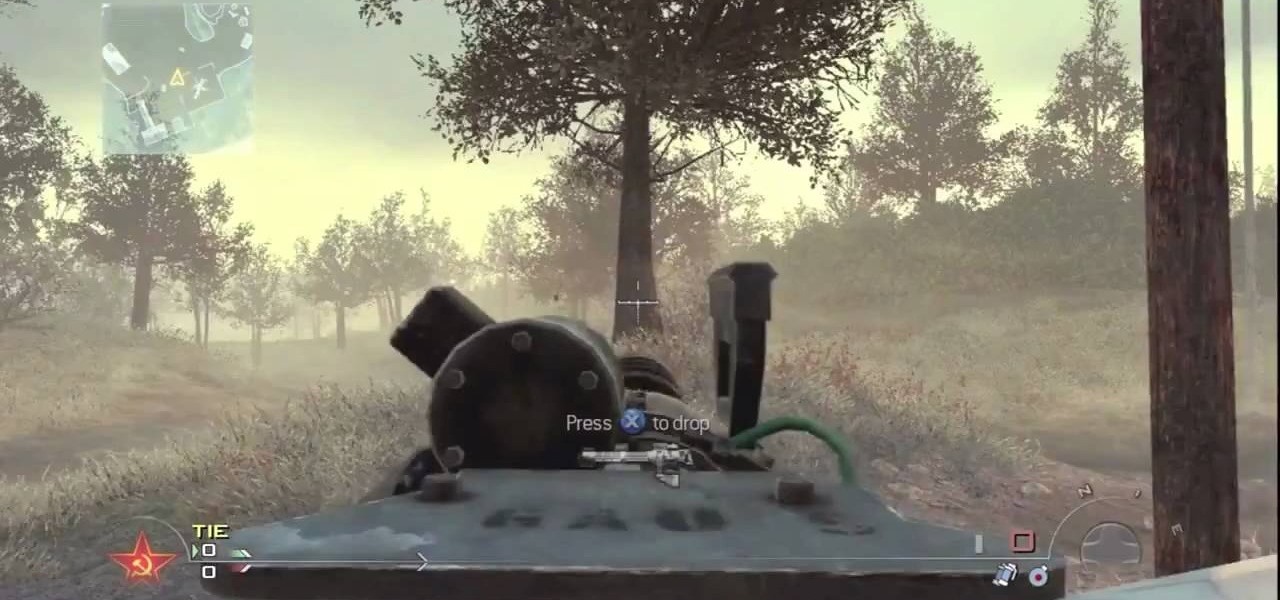
WhatEverHD shows how to shoot your javelin using a turret in modern warfare 2. This is made possible by using a glitch in the system that allows you to use the turret as a mechanism of projecting your javelin. You can walk up to the turret, zoom in and do what is instructed in the video to throw the javelin. The video states that the only advantage of this method over the normal javelin shooting is that you have a turret to use it on and thus the javelin travels a longer distance. You need to...

Make mini truffles out of polymer clay for a dollhouse. Watch this video to learn how to do this. You will need amazing mold putty for this project. It comes in two parts; yellow and white. Take equal amounts of each and mix them up; they are like clay. You will make a mold out of this for the mini truffles. Then you take whole black peppercorns and press them into the mold putty and keep it out for drying. After it is dry, remove the black pepper and you got the mold ready. Now you take clay...

Garden of Imagination demonstrates how to make a miniature corn on the cob out of polymer clay. First, roll and flatten two small balls of green clay to make the corn husks. Make the husks pointed on both ends. Take a piece of yellow clay and roll it into a conical corn cob shape. Insert the corn on the cob into the texture piece and roll it to achieve the textured corn kernels. Wrap the corn on the cob between the two green husks. Make sure the husk leaves overlap in the front. Squeeze the c...
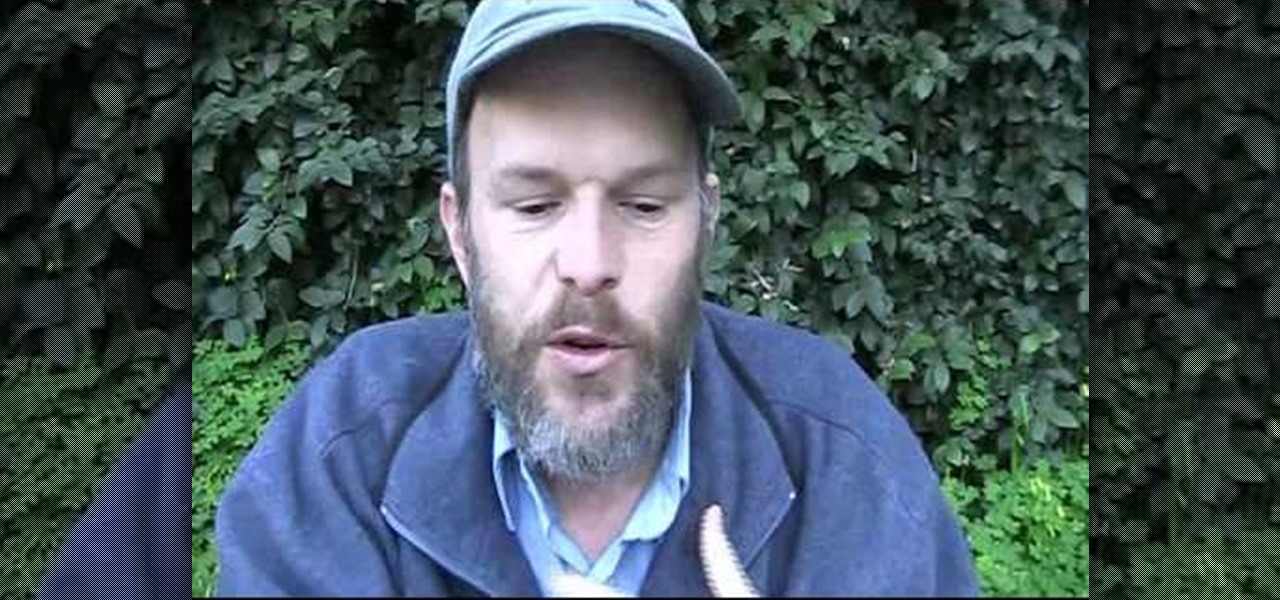
This video loosely explains the method of how to make a blue colored slime from corn flour, blue food coloring, and a quantity of water which is undetermined. Quantities of ingredients to be added for this project vary and can be made up as the person goes along in combining the ingredients to produce the desired results. Ideally, the product should be of a slime like consistency, or can be described as 'gooey' in appearance. The resulting slime product should be easily stirred when it is sti...
Dragontrap uses 1/2 a yard of three different colors of fleece for this scarf project. She cuts the fleece into strips of twelve to sixteen inches in length and two to three inches wide. Then she sews the strips together lengthwise, rotating the colors of fleece. Once the strips are sewn together, she has a large rectangle of pieced together fleece This is folded in half with outsides together. She sews one edge of the scarf closed and sews all the way down the long edge of the scarf. Finally...
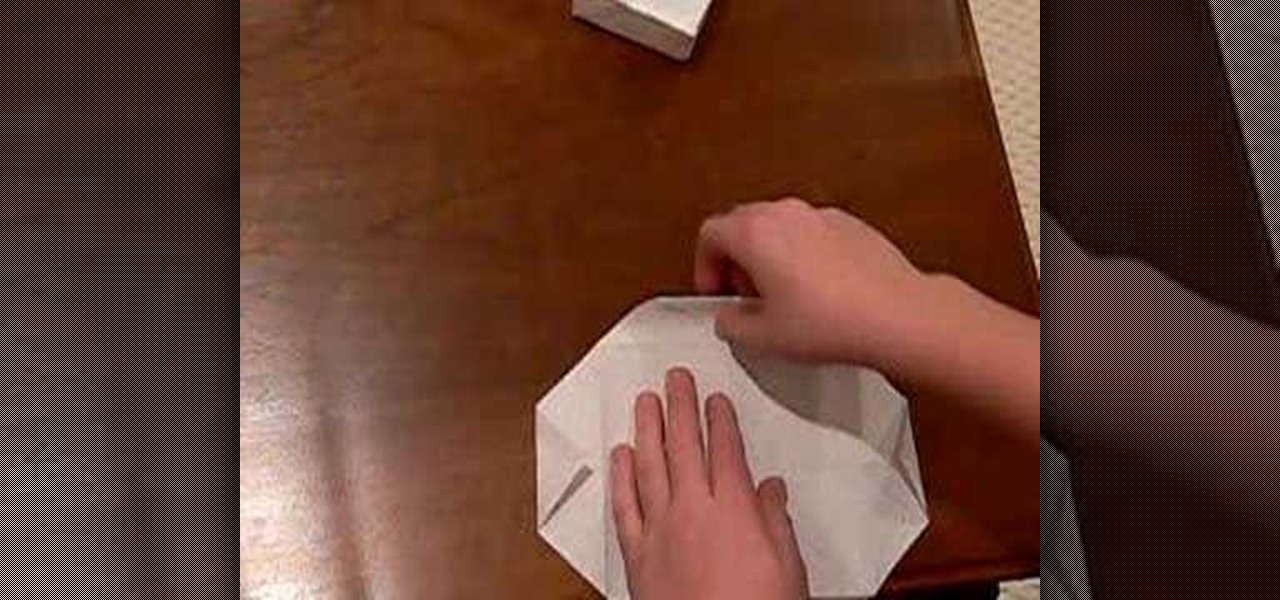
This video, for simplekidscrafts.com, tells us how to make an origami necktie. This is a very easy crafts project, suitable for kids and adults alike. It doesn't require a long list of materials, only a sheet of origami paper is needed. The sheet of paper is then folded ten times to transform it from just a square of paper into a decorative origami necktie. The video has no audio instruction, but encourages you to follow the folding technique exhibited by the child in the video. The camera is...
Anne, The Making Things Girl, demonstrates how to make play dough. Play dough is almost like clay in that you can bake it so it hardens. Then you can decorate it with things like paint, glitter and rhinestones. To make play dough you will need 2 parts flour, 1 part household salt and 1 part water with 2 tablespoons of olive oil. Mix the ingredients in a mixing machine for one minute. Next, work and knead the dough in a bowl and then on the counter. Knead the dough for a while because it makes...
This is a guide that will show you how to make a bow out of everyday items. First, you want to find a curved branch outside that's nice and thick so it won't snap. Also, if it's connected to other branches just saw them off, and then remove any smaller twigs or leaves from the branch. Then take a small knife and whittle down any nubs or small leftover pieces, then if the branch isn't bent to your requirements just bend it or use a vice to bend it to our liking and your bow staff has been crea...
Simple Kids Crafts demonstrates how to make a flower out of a toilet paper tube. For this project you will need one toilet paper tube, paint, a paintbrush, glue and scissors. First, paint the toilet paper tube and let it dry. Then cut the toilet paper tubes into rings. Scrunch up a ball of tissue and glue it closed. Bend the painted rings into flower shapes. Attach the flower shapes to the tissue ball. Paint the tissue ball. Next, paint the inside of the flower shapes. Let it dry. Add decorat...
For this project you will need 2 Wooden palettes (long as you can get), angle iron (coping made from steel), Sheet of ply (or any other wood will do fine) and the usual tools like nails, hammer and saw. Stick the two wooden palettes together using glue and make sure they're dry before using them. Cover them on all sides using the ply wood. Next, place the angle iron on the side of the top palettes, for grinding. Leave it all to dry and make sure it doesn't bend or break before using it.
Ilysa and Kira with Polymer Clay TV demonstrate how to make an incense burner out of clay. An incense burner is a great way to use up a lot of your scrap clay. You can also use molds, embellishments and pigments to create your incense burner. You can roll up your clay in a swirl to create the incense burner or use any other desired shape. You can also do pinch pot type shapes. To make an incense burner, you'll need a ball of scrap clay, a blade, and a rod. Use the rod to flatten pieces of a c...
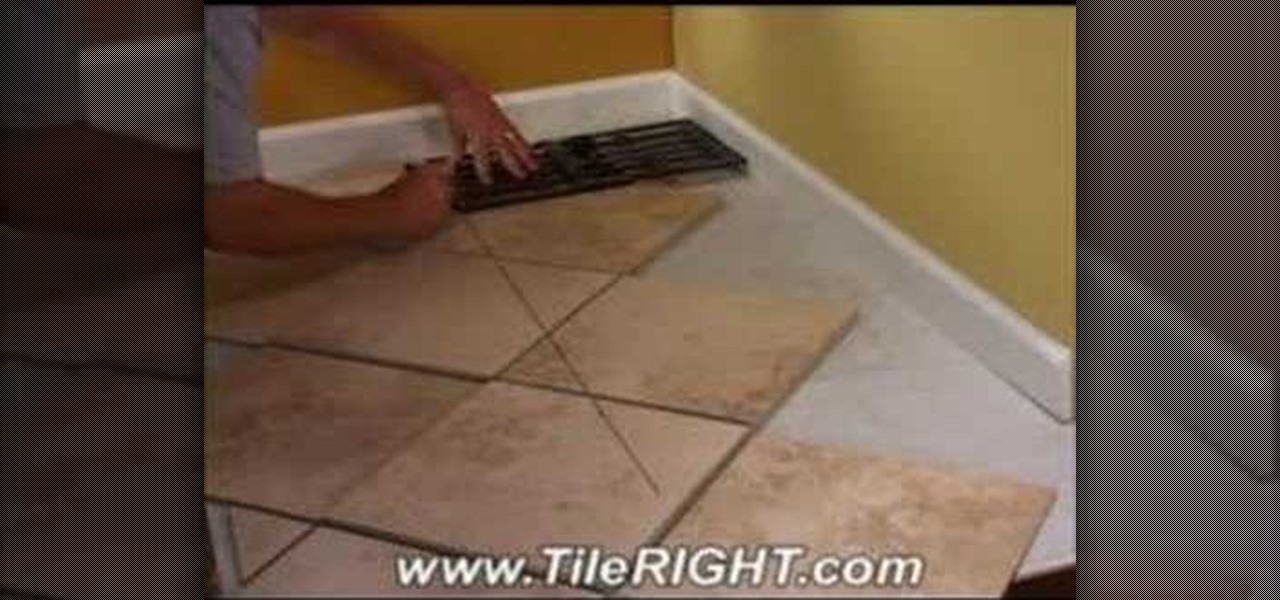
Tile RIGHT demonstrates how to tile a diagonally cut tile. First set the Measure Right Pro to the appropriate setting, extending it from corner to corner along your tile. Account for your grout line and the space up against the wall. Then, lock the tool. Next, place the tiles you're going to use on top of your set tiles. Slide the Measure Right Pro along the wall and mark the tiles. Place the sections in the appropriate place. Then, cut your tiles. Lay the tiles where you've previously marked...
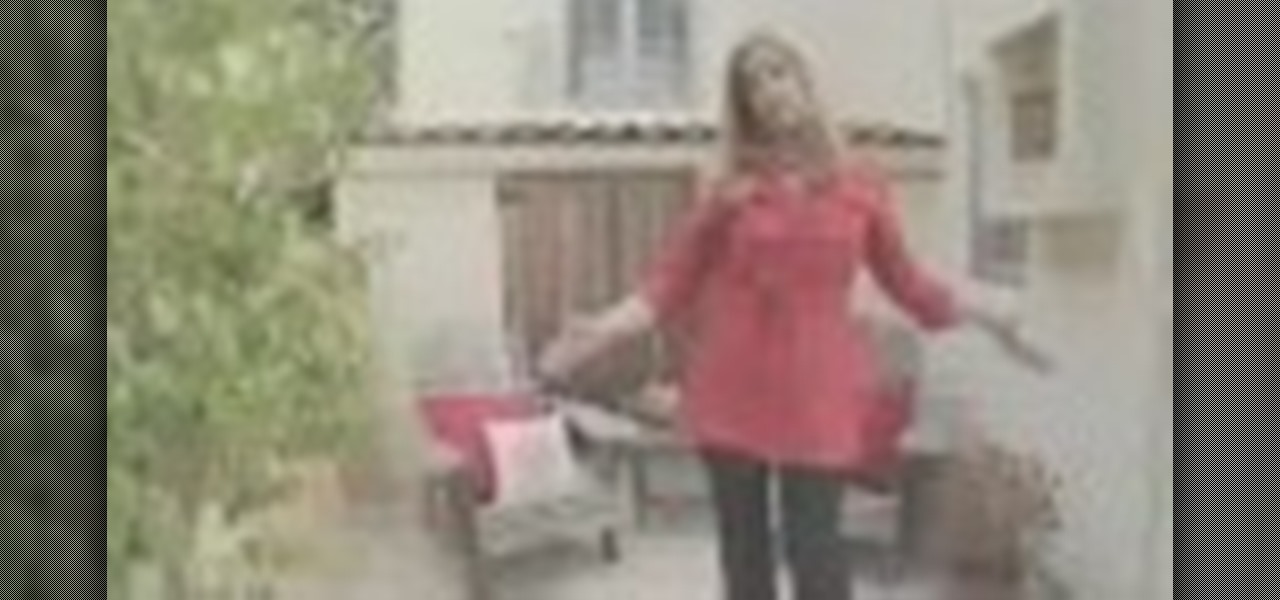
Elizabeth Chamberlain, with Space Lift, demonstrates how to make room for love with feng shui at home. First, find your focus room with your energy map by laying the energy map on top of your floor plan. The love area is the far right corner from the front door, facing in. If the love area turns to be an outside area like a patio, clean it up. Remove the cacti and pointy plants to reduce arguments in the relationship. Clear out any unfinished materials and projects. Next, complete the area by...
In this video, you will learn how to make a mosaic stained glass window as well as techniques for using mosaic to decorate other items in your house. Host Laura says she's decorated her house so much that her neighbors say if you stay too long, they will become mosaic by Laura. The materials you will need for this project are a window, stained glass of which Laura says you can buy cut up, silicon, and grout. Laura takes you with her to her local hobby store and shows some different stained gl...
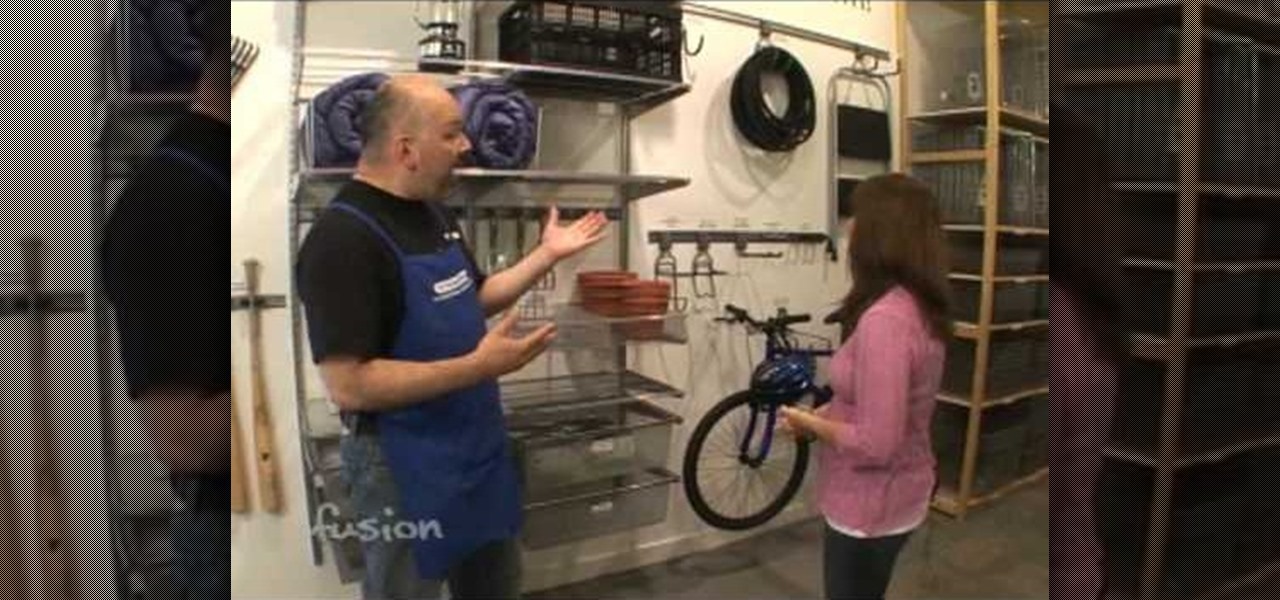
This video demonstrates the process for organizing your garage. The video interviews an employee from The Container Store which offers organizational products for every room in the house. They stress that organizing a garage is not a one day project. The Container Store recommends taking three full weekends to organize a garage, start out by focusing on one wall at a time. Labeling is a big part of The Container Store's organizational plan, everything has its own place with a label. The label...
If your replacement faucet is not the right size, pick up a connector and fitting from the hardware store. You will also need wrenches. First turn off the water supply. Then, brace the pipe with a pipe wrench. Use another wrench as a lever and remove the faucet. Take a piece of plumber's tape and wrap the brass connector. Make sure you thread the tape in the same direction that you screw on the connector. Screw the connector on by hand and tighten it with a wrench. Use the other wrench to kee...
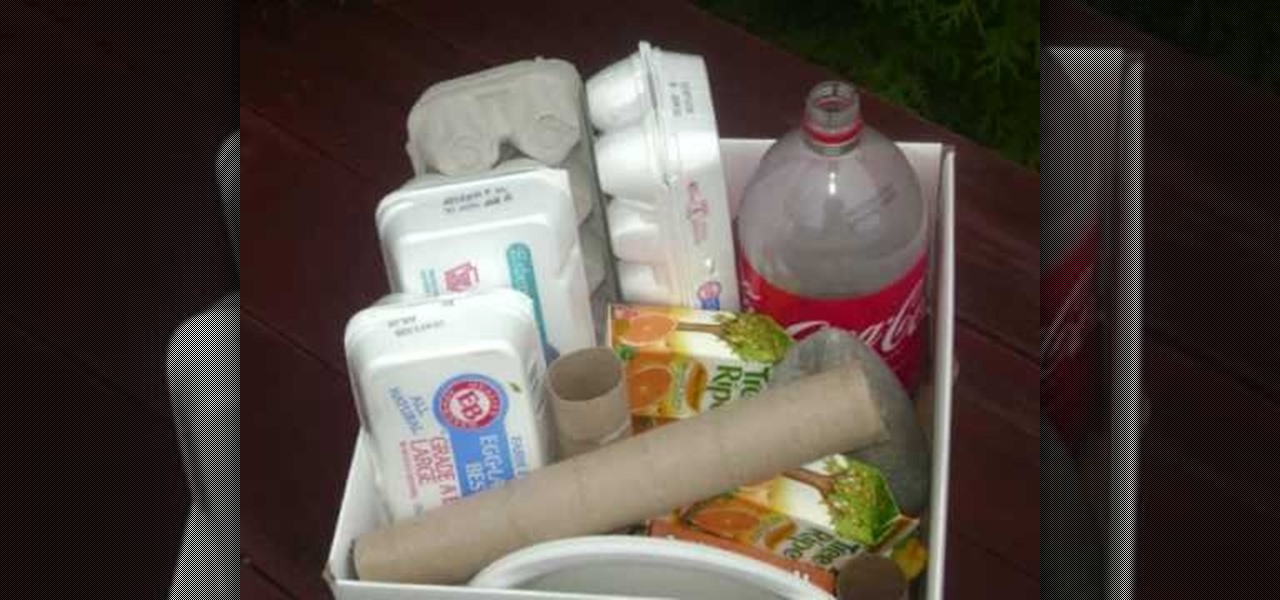
Making crafts with a group of children can get a little hectic and also maybe a bit costly. Recycling materials to use for creative activites with your kids can be a fun and and economicly fiscal alternative to your normal purchases. This video will give you some example on how to recycle materials for your kids arts and crafts. Using these everyday materials, accompanied with some great insight from this video, you can have a lot of fun creating all sorts of interesting projects with your ch...
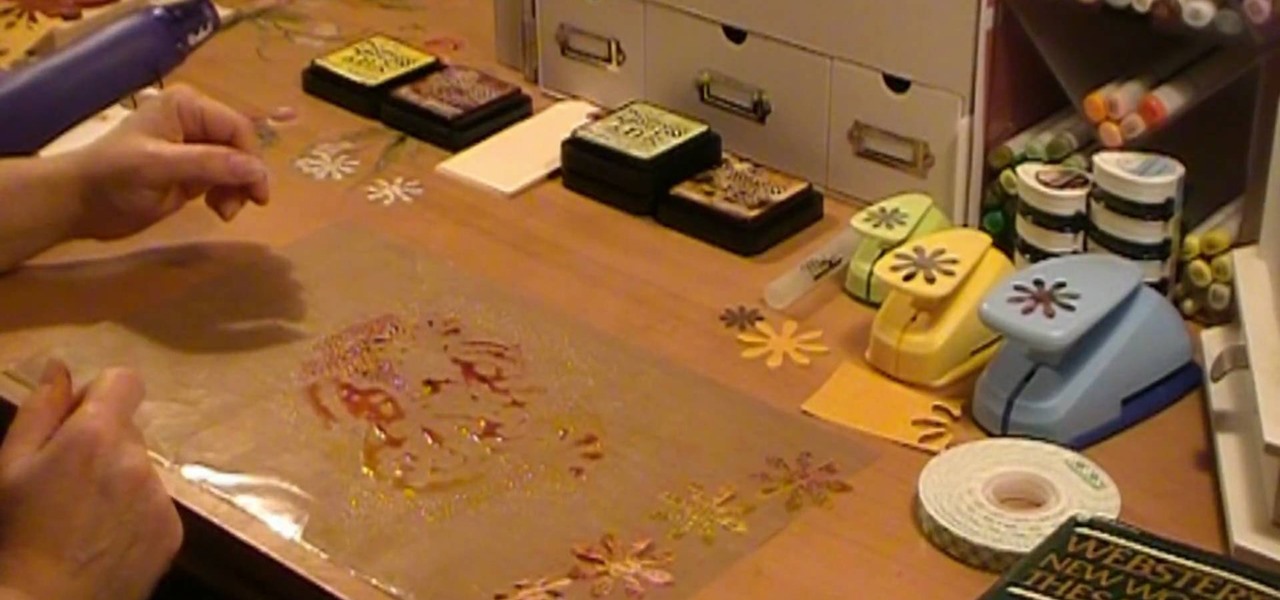
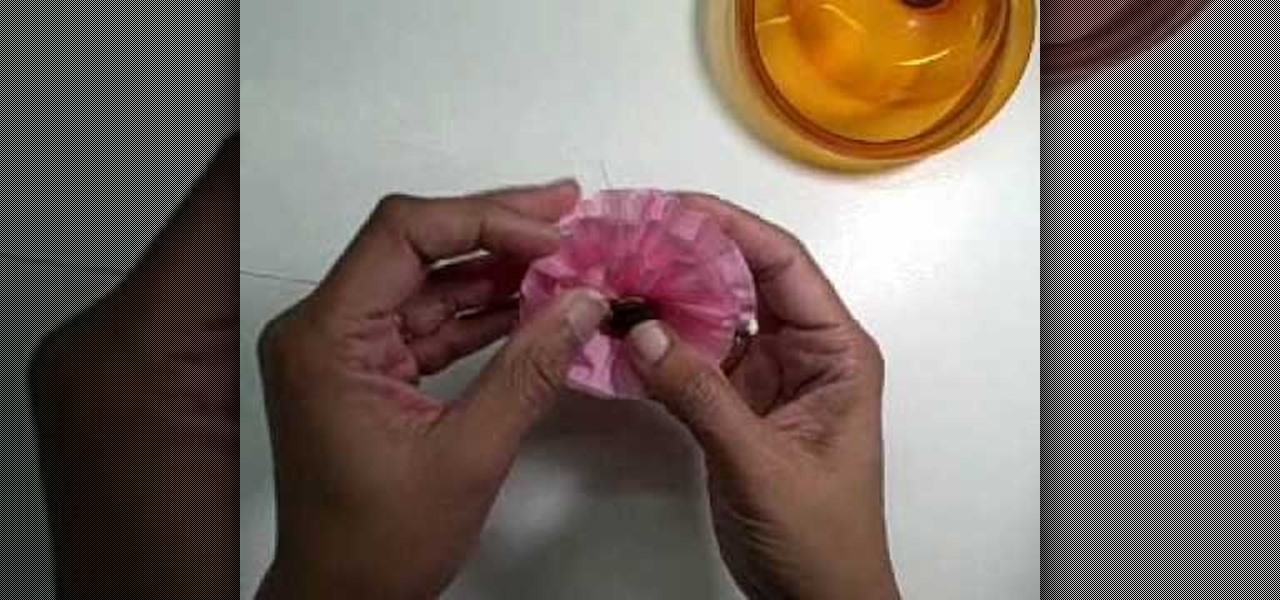
This video demonstrates how to make paper flowers. She lays a silicone mat on the table. She shows how to use distress inks by stamping some red and yellow ink onto the mat, sprays water onto the mat with a mister, and lays punched-out paper flowers into the wet ink. She turns them over and uses a heat gun to dry the ink. After the flowers are dry, she layers them on top of each other, putting a piece of foam tape in between the layers. She shows how she used the layered flowers to decorate a...
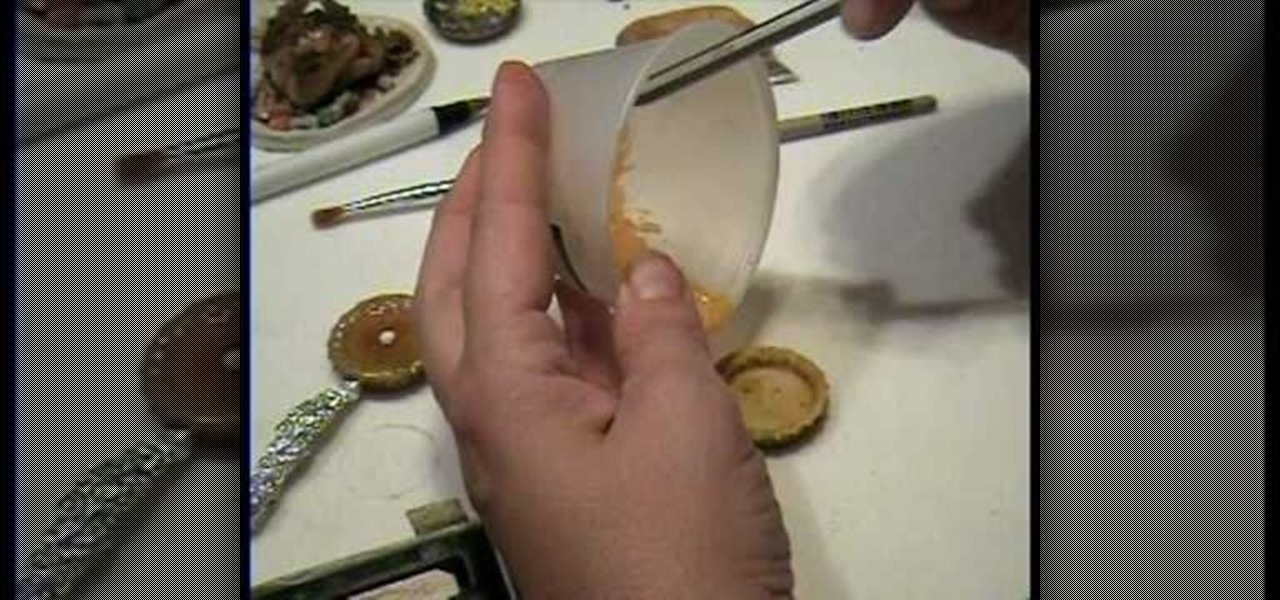
Have you ever wanted to create a miniature pumpkin pie model out of polymer clay without the hassle of complicated crafts books or manuals? Have you tried making miniature clay models in the past and have had them disintegrate when drying the clay? This video will tell you step by step, how to create a miniature pumpkin pie out of polymer clay using a bottle cap, a fork, a small flashlight and a pen. This is a fun project for the family, and won't disappoint.
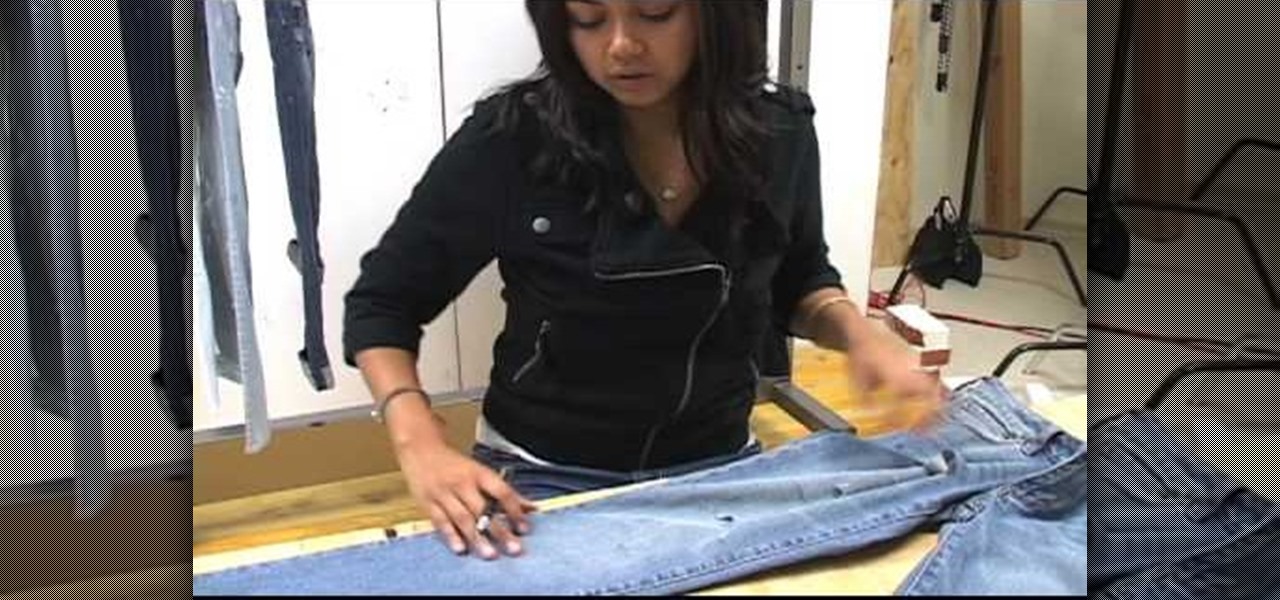
This is a how-to video tutorial from the Pac Sun community where Akiko and here intern, Ashley, will show you how to actually destroy a pair of jeans so they will get a old and worn in look.
Crafter Brenda from Brightlings shows viewers how to make a mermaid wave necklace at home. This project will include certain tools and supplies which are further explained in the video. Any variation of colors can be used but the ones shown in the video give the necklace more of a mermaid ocean type look. This necklace is great for pairing up with your favorite bathing suit for a stroll along the beach or just to wear around the house while you daydream about swimming with the fish.
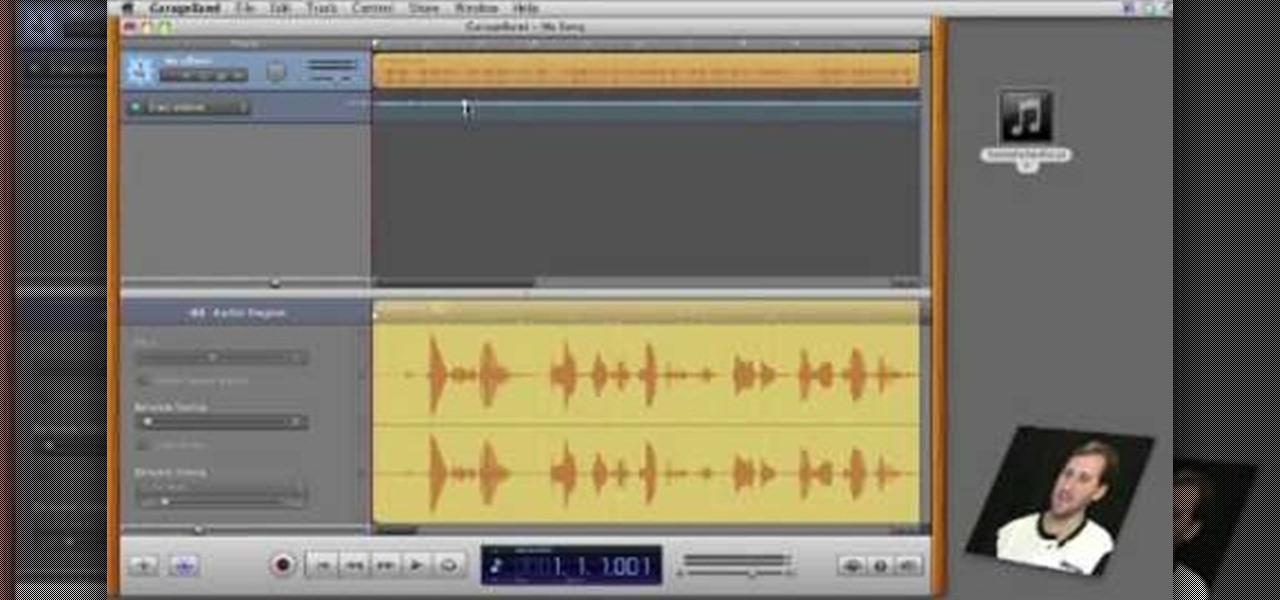
In this video, Gary from MacMost demonstrates how to use GarageBand to edit audio. He creates an empty GarageBand project,and then imports an audio file by dragging it in. He demonstrates how to move to any point within the audio file and view the waveform. To edit out a part, he moves the marker to the place he wants to split it,and then chooses "Split" from the Edit menu. He can also delete the section from the audio region editor. He shows how to select an area by dragging over it, and the...
Eyepatchentertainmen teaches you how to choose the best prime lens for Canon cameras, for video shooting. The faster the lens, the lower the light we need. The dark sequence was shot using a Nikon 15 mm 1.8 lens. Canon 50 mm 1.8 or the Nikon 50 mm 1.8 are good starting prime lenses. These run about 100 dollars. Sigma 30 mm 1.4 is a way up from that. After that there is the Canon L series primes, those are very good as well. Adaptation is also needed when you start using lenses. The most expen...
Mind you now, that using a normal rectangular piece will not give you the desired results. You must use a square piece of any size. Start by making two diagonal folds for each corner to corner cross section. Now do two hot dog folds, like wise, then take each corner and fold it into the middle so it resembles triangular tabs. Now take these tabs and once again fold them in half but up to the outside of the paper, resembling another triangle. Fold Over, and do as shown in the video for the bes...
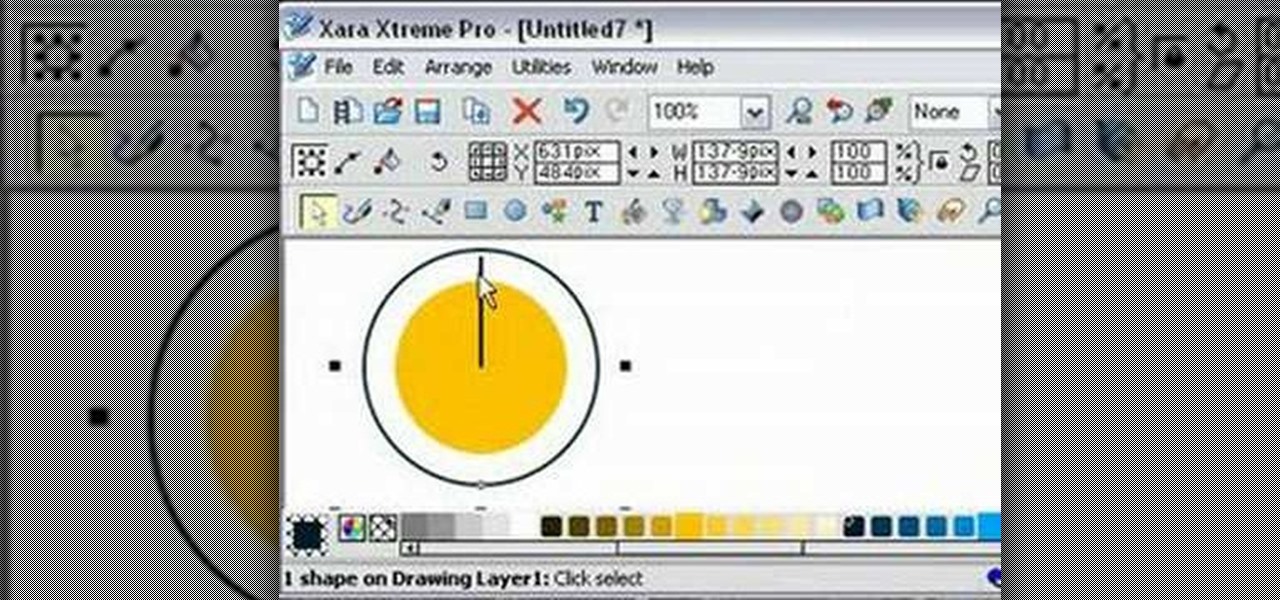
Ever wanted to make a pie chart in Xara Xtreme? This video will help guide you through the process of using Zara Xtreme to cut a circle into a pie chart segments using percentages as angles. After finding the center of the circle using a line and the central alignment tool, you'll begin arranging lines over the circle according to the speakers instructions. By the end of this tutorial you should have your very own pie graph, as well as the knowledge it takes to make bigger and better projects...
This video discusses the lenses available for the Cannon 7D camera. The video starts by describing the difference between still and video lenses. The presenter then goes on to recommend his three favorite lenses. First, the Tokina 11-16 is the wide angle lens recommended in the video. The Tamron SP AF17-50mm is a stabilized lens that works great for video and stills. Finally, the presenter recommends the Sigma APO 50-150mm to round out the lens collection. These lenses will cover all distance...
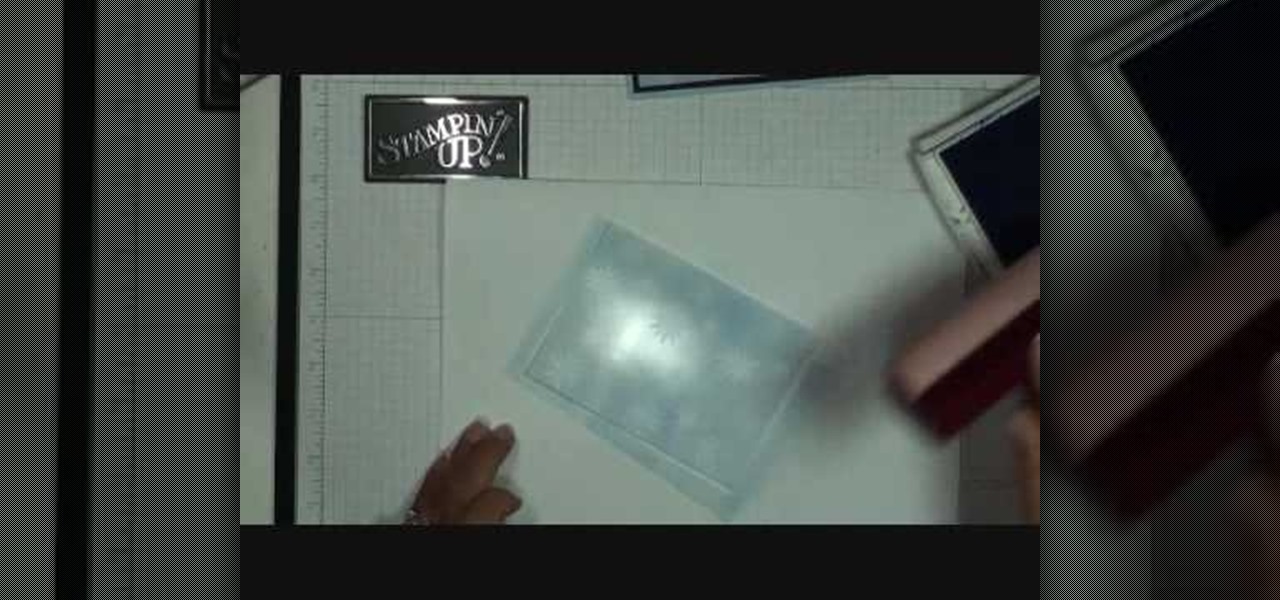
Our host Dawn teaches how to use the Versa Mark resist technique when stamping a card. Dawn teaches the technique on a Christmas card to create a snowflake background. The basic idea behind this technique is that the Versa Ink is clear and will resist any other ink you put down, so you can stamp a pattern and then go over with a flat coat of regular ink, and you will be left with a white pattern where you made the Versa Ink stamps. To complete this specific craft, you will need a Versa Mark i...
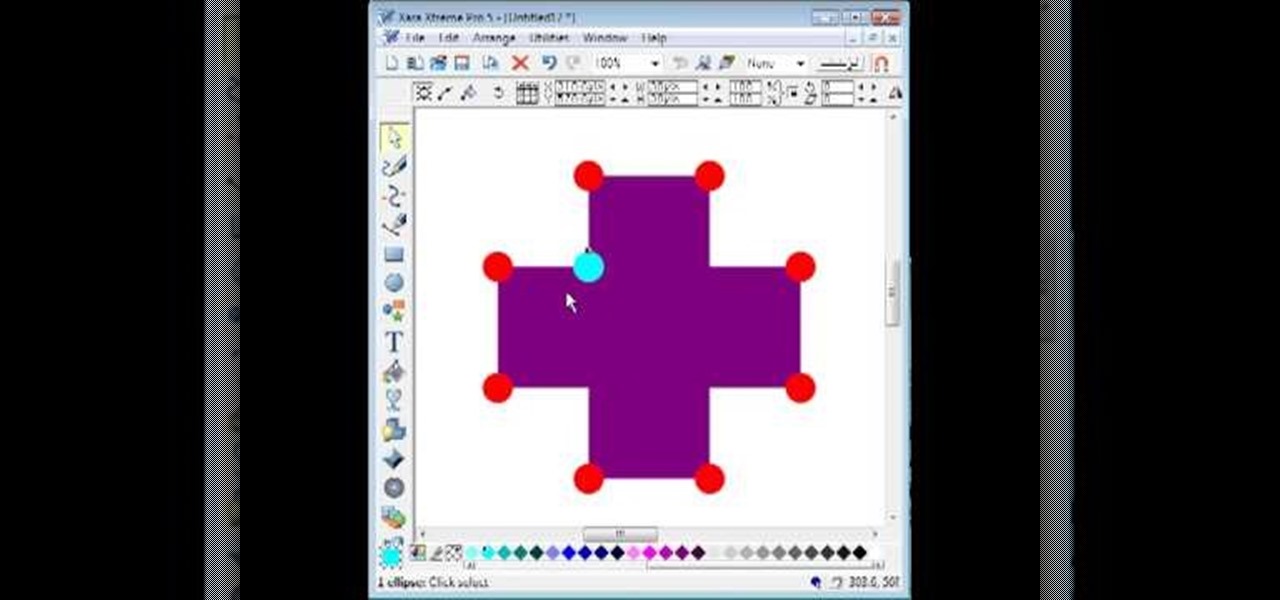
By utilizing the click and drag features of Xara Xtreme, users can take shapes and duplicate them for quick work (ctrl K). Further by identifying them by colors and other subsets, users can add or delete with just a button push, or (use the add shapes, subtract shapes options.) All this is done in the event for the sake of convenience; eliminating the tediousness of creating shapes one by one, and using them as plot points on a map to create projects within record times.
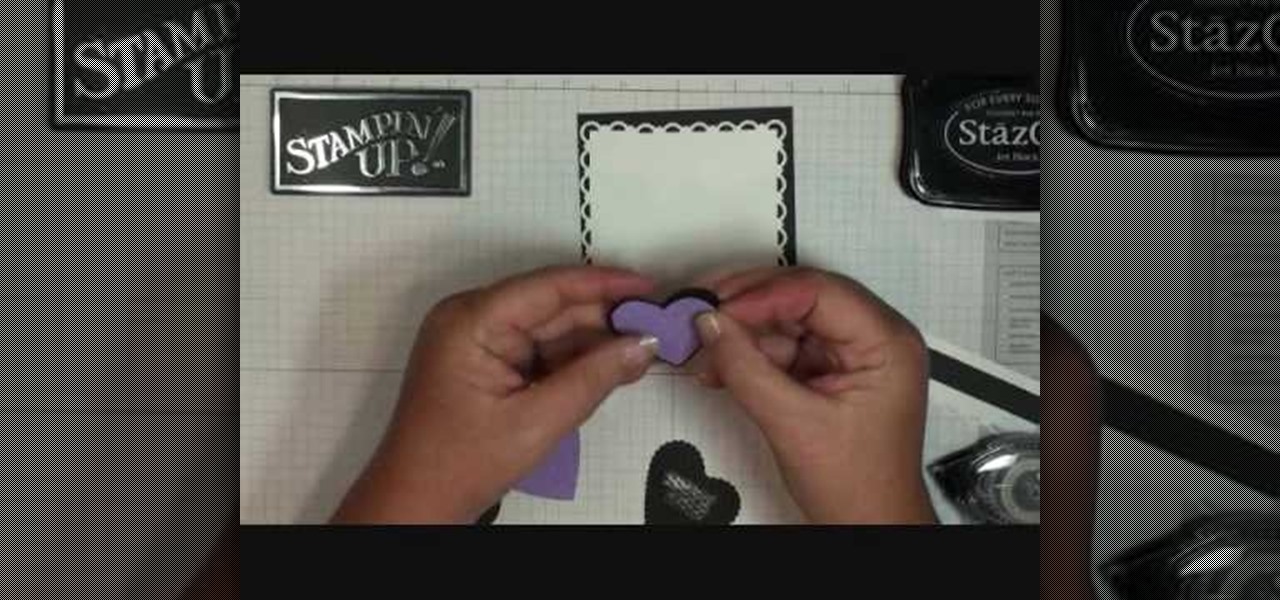
Using products from Stampin' Up you are able to create this great looking easel card. This quick and easy project uses card stock, stock lace created with a border punch, stock cutter, embossing plates, a few dimensionals, and a few other items that can be bought in the Stampin' Up kits. Each item adds it's own unique look to the creation of this easel card. The process to create these cards are sped and simplified with the kits and a variety of items can be created to add a personal touch to...
Becca from Amazing Paper Grace demonstrates how to make crepe paper flowers. The supplies needed are a roll of crepe paper, scissors, a ruler, and a sewing machine or needle and thread. Measure a yard of crepe paper and trim it narrower if you want a smaller flower. Use the sewing machine to sew a straight stitch along one edge with the longest stitches. Pull the thread to gather the paper so it curves around to form a flower shape. Layer the curves around in a spiral to form the flower. Feed...
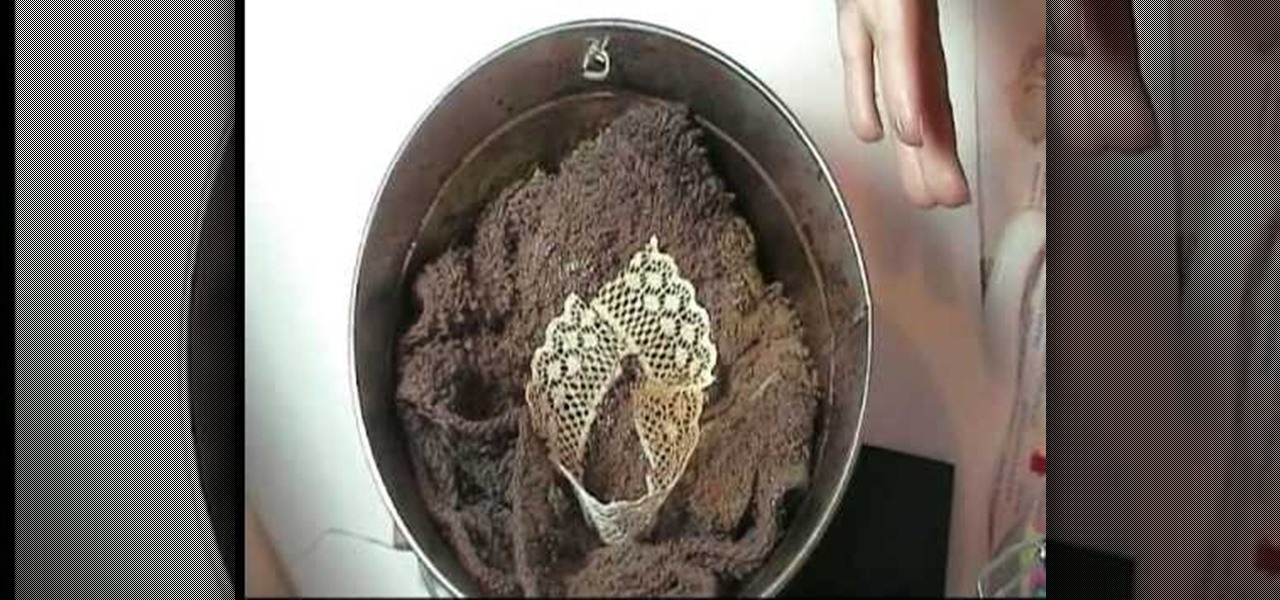
Marion teaches us how to use a technique involving lace and glitter mist to make the lace look vintage. The lace can be placed in a bucket to spray the glitter mist from Tattered Angels onto the lace. Doing this in the spray bucket allows you to avoid spraying anything else in your work area. Marion uses the Old Lace Glimmer Mist, Suede, Cream de Coco, and Sherbert spray colors for this technique. This combination of the sprays allows you to create an old and vintage look on lace that can be ...
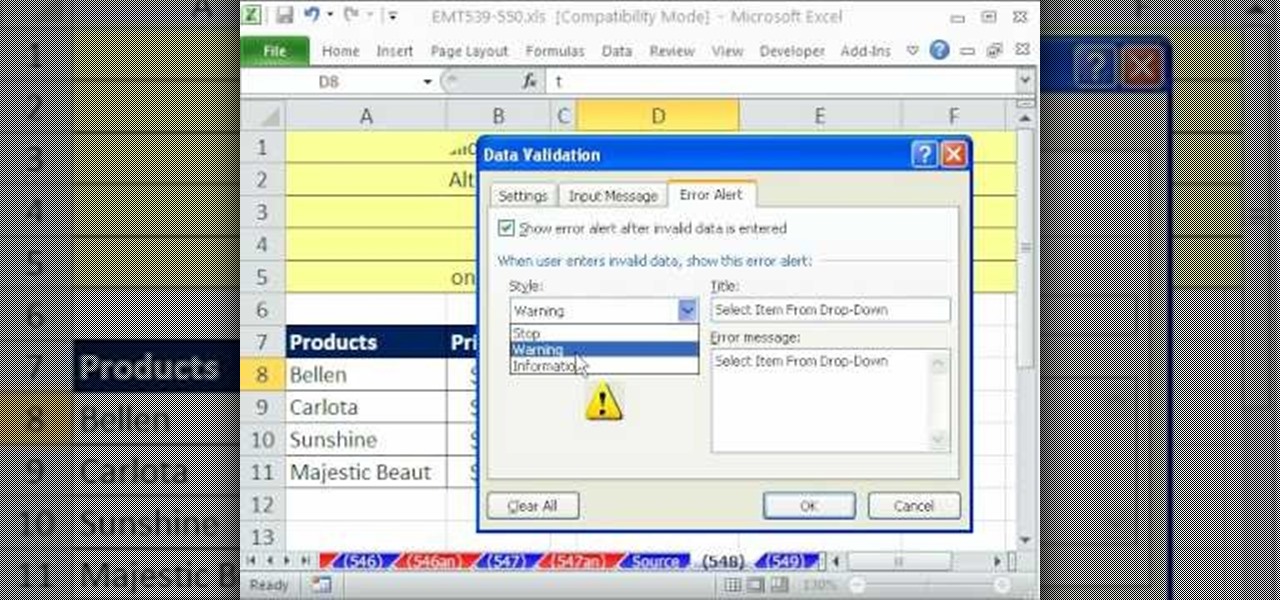
If you want to manage what sort of data is entered into your Excel spreadsheet, data validation will help you to accomplish just that. In this Excel tutorial from ExcelIsFun, the 549th installment in their series of Excel magic tricks, you'll learn how to use data validation to full effect in your Microsoft Office projects.
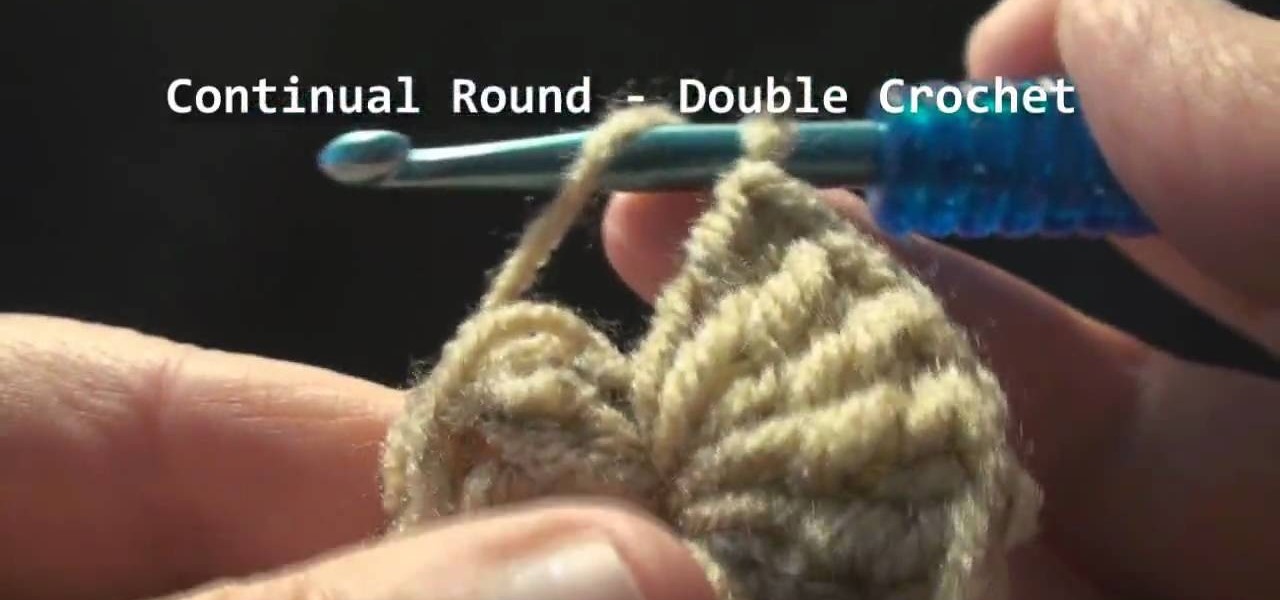
This video shows how to start a continual round in single crochet, half-double crochet and double crochet. The photography on this video allows you to see the motion of the crochet hook and the thread and really see observe the techniques as they are explained. Techniques are explained for starting and ending the continual round. This continual round technique including transitions between single, half-double, and double crochet allows you to crochet projects like skullcaps and hats using one...
A PDF Portfolio is a bundled collection of content compressed into one PDF file. Watch this 5 minute overview and learn how you can bundle documents, e-mail, drawings, flash presentations and even video into one sleek package that can be used for presentations or project management for your organization. Your portfolio can include introductory text and sets of data that can be sorted geographically by being linked to clickable maps. Not only can the entire portfolio be branded with your logo ...
The famous poet, Percy Bysshe Shelley, wrote a poem about how to write poetry. This video covers the poem from beginning to end. In the poem, Shelley writes about being able to get ideas to paper, about finding the right words, about the ability to match syllables and rhyme and about the different types of writers. If you have ever had a problem writing a poem for a class project or a loved one, you will smile over the issues that this famous poet had with writing poetry. This poem is read be...
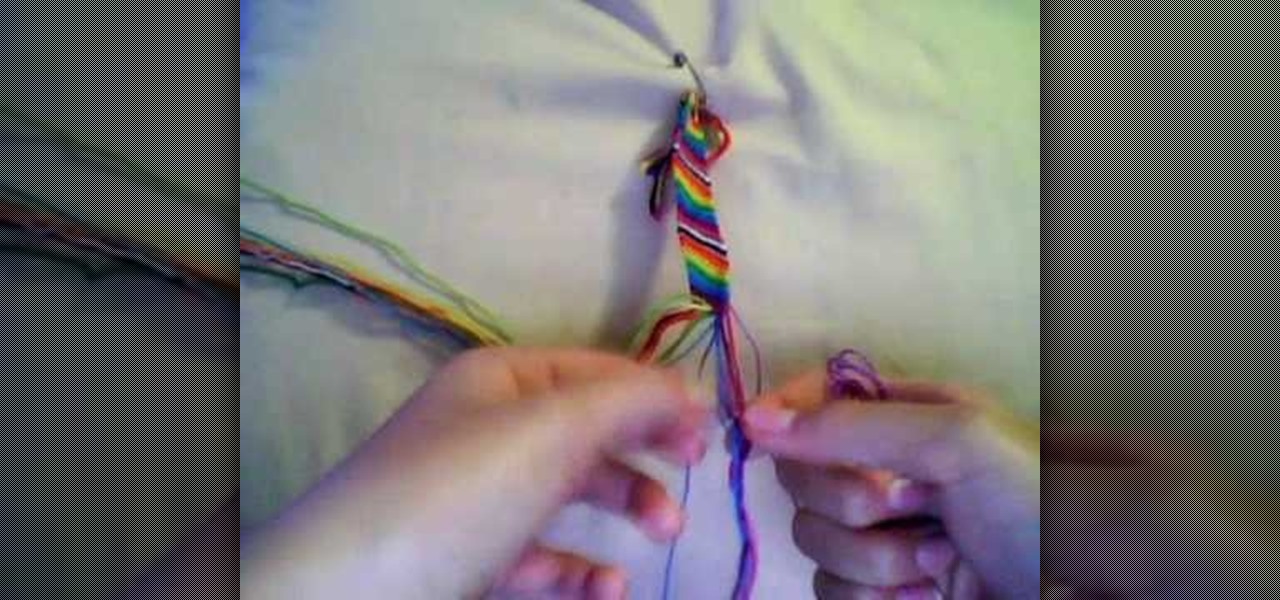
Learning how to make a piece of jewelry can be a daunting task, but this straight forward tutorial gives you all the skills needed to perfect the craft of making friendship bracelet. Starting with just a few simple pieces of string, one can make this very simple DIY project. Although the materials are cheap to procure, the end result is anything but cheap looking. The candy stripe design adds to the charm of this whimsical bracelet. Make one for all your friends today!