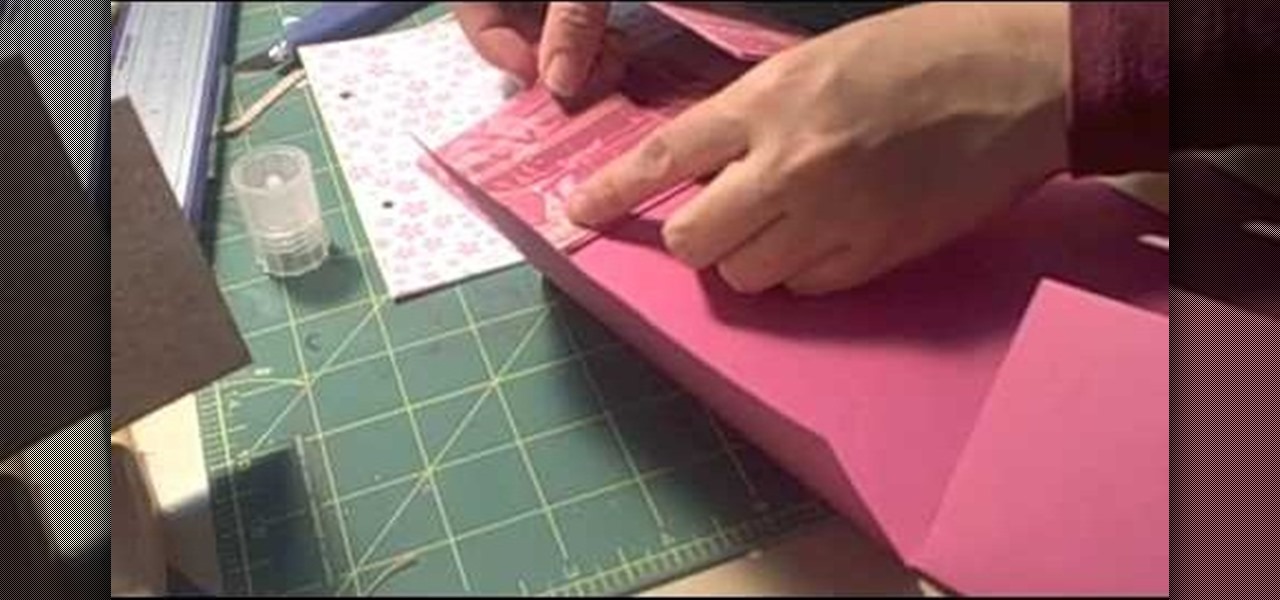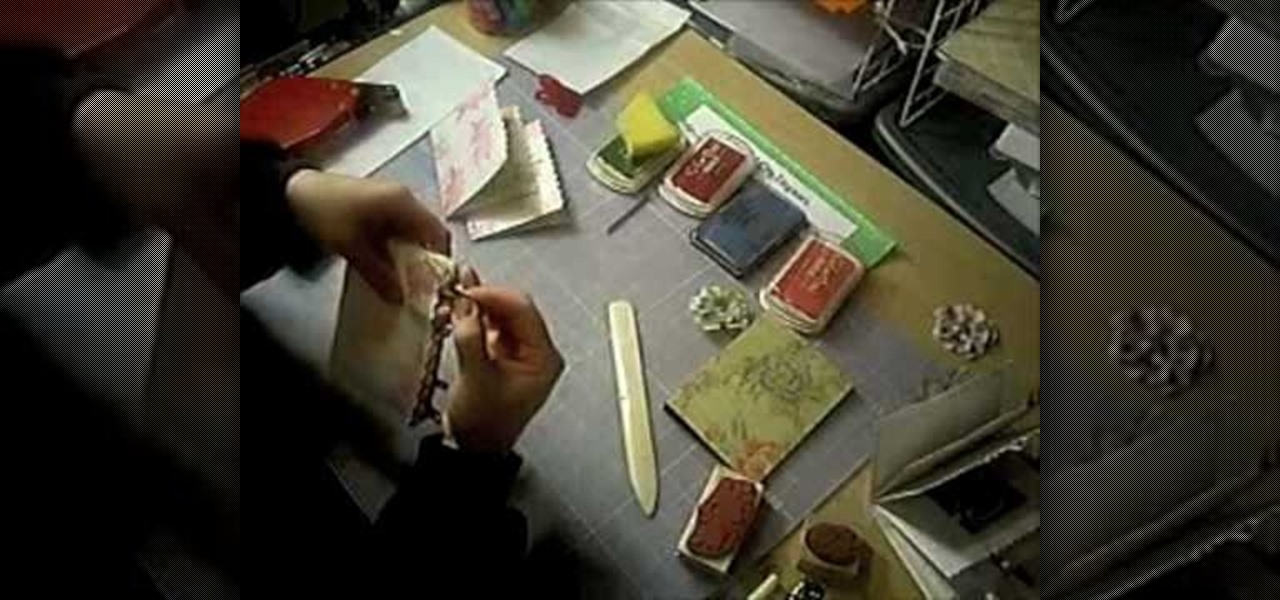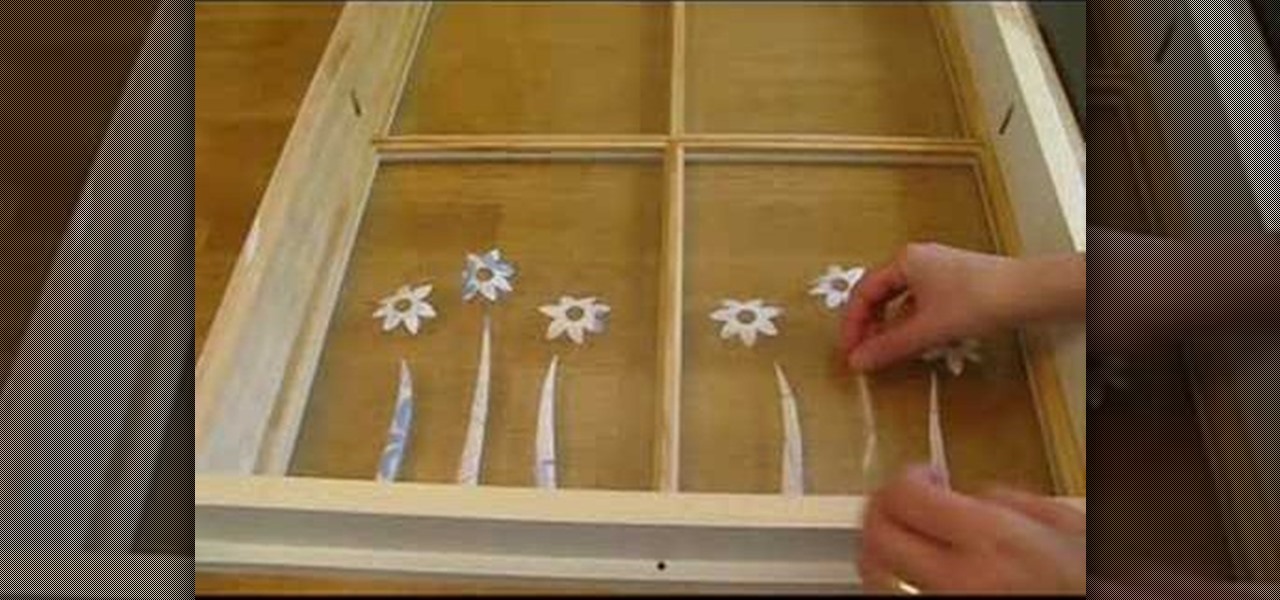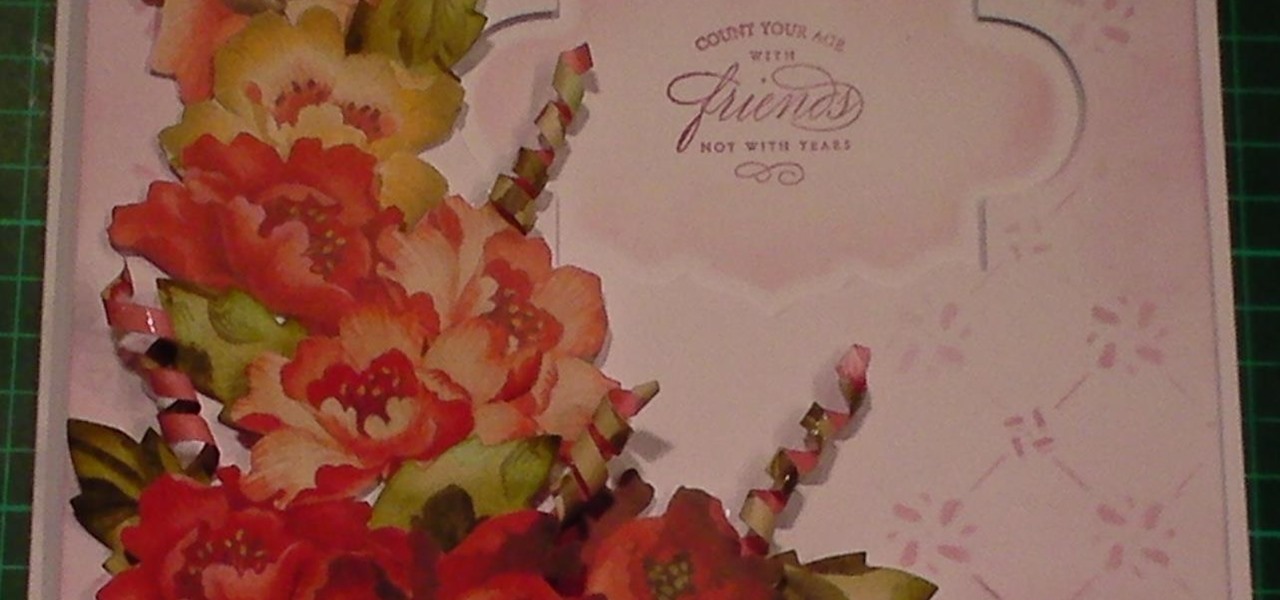
In this cardmaking tutorial I make a gorgeous card using cut out decoupage from a sheet of 12x12inch paper from Anna Griffins range of fabulous papers. I finish off the card with the matching leaves and paper curls. This looks like a time consuming card but apart from the cutting out of the flowers, it is quite quick & easy and all from 1 sheet of paper. Step 1: Items Used
Video: . Learn how to make a paper origami gift bag with own logo design (branded paper gift bag). The final size of the paper bag is with width: 18cm and hight:15cm.

Video: . Learn how to make a paper origami gift bag with/without handles tutorial.

How to make an origami basket with handle from sheet of printing paper (A4 or Letter). Video tutorial. You can use this paper basket as Easter decoration, picnic with kids, or just for fun.
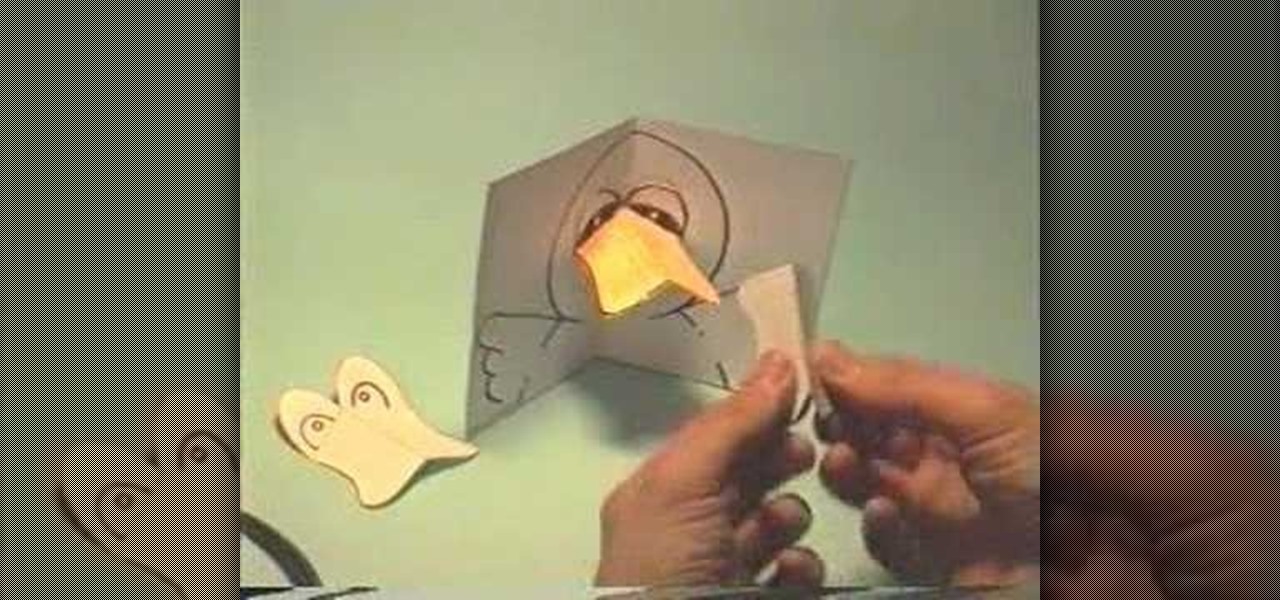
In this tutorial, we learn how to make a little duck pop-up card. First, draw a duck on a 4x6 piece of paper. Simply draw the big head with the wings coming out at both sides. From here, fold it in half so it closes together. Then, make another small piece of paper that has the eyes drawn onto it and the beak colored in. Place this on the duck to get it in the right spot. Then, adhere it with glue on the top part and fold it in again. Now, when it opens up in the card, the beak will pop up, e...

In this video, we learn how to make an Easter pop-up card. First, draw a duck with a little baby duck on a 4x6 piece of paper. From here, fold it in half so you can see the image on the outside. After this, use scissors to cut the middle, where the little baby chick is at. Cut the top and bottom around it, but avoid cutting the sides. From here, bend that piece left and right. Then, open up the card and bend it into the middle. From here, take a piece of paper with eggs cut out of it and bend...

This video tutorial is in the Arts & Crafts category which will show you how to make a flip square album. Take a 12 x 12 inches square cardstock and make a score line at 3 inches on all 4 sides of the paper. Now cut along the score line at the top and bottom of the paper up to the 3 inch line. Next you fold along all the score lines inwards and you have all the flaps ready. Then mark along the edge of the center part of the sheet and punch two holes for tying the album as shown in the video. ...
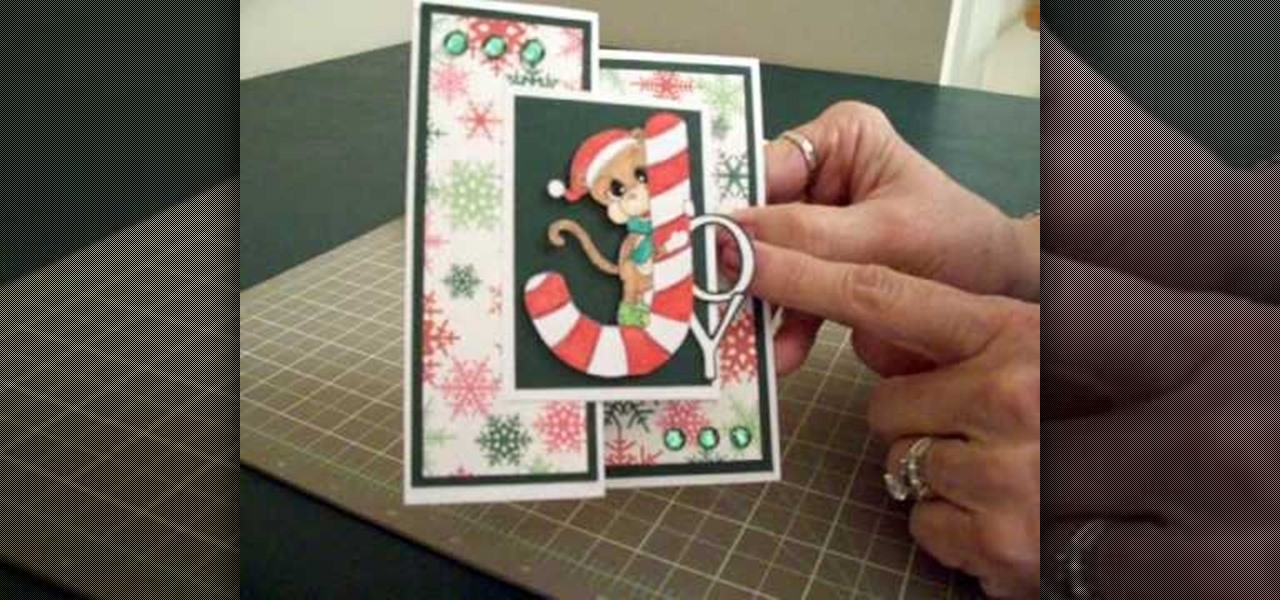
In this video, we learn how to make a Joy S-fold Christmas card using Cricut George. First, fold the card and mark it so it's in the S shape, then stamp the background of the card with colored snowflakes in different sizes and shapes. After this, use a black outline along the sides of the papers, then add in a black piece of paper to the middle of the top fold. Apply a monkey with a Santa hat to the front and wrap him around a J shaped candy cane. Add in the letters "o" and "y", then add in a...
To make a mini milk carton, you will need the following a big shot, Mini Milk Carton Die # 117310 (Occasions Mini) card stock, a clip, and sticky strip.
In this Arts & Crafts video tutorial you will learn how to make a growing flower pot card. First you make a flower out of a tea bag. Then cut out a piece of paper in the shape of a flower pot. Now take a couple of sheets of 8x4 card of the same color. Score one card in half and fold it. From the other card cut out a piece equal to the size of an A5 card, which is 14.85 x 10 cms. Now glue the flower pot shaped paper on to this card. Now cut a long strip of the card, 30 x 3 cms and fold it in h...
In order to make a Shaker card, you will need the following: a 2" square punch, scissors, card stock, clear plastic, paper, glitter, beads, decorative cutouts, and 2 sided tape.
Bored in class and need something to toss around? Check out this video!
In this tutorial, learn how to make a basic Christmas card in under 5 minutes using paper and glitter glue.
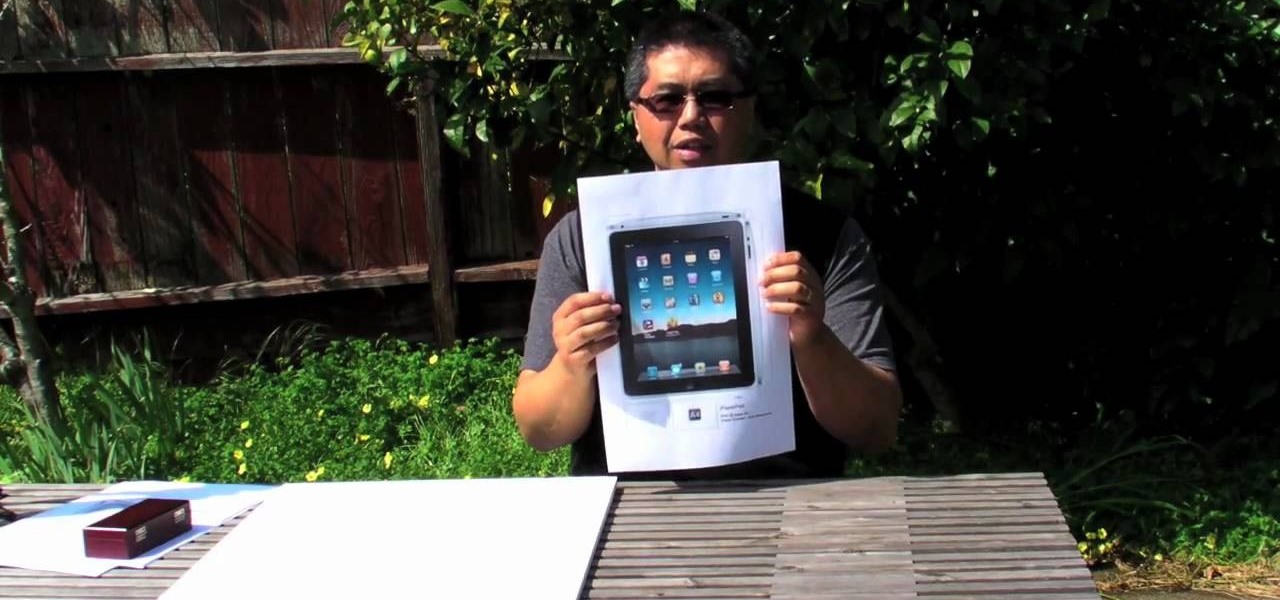
Do you know someone that wants an iPad but can't seem to afford one? Well, here's a great way to do an April Fools Day trick on that friend or family member by giving them a fake home-made iPad. Roman Loyola shows you how to make a fake iPad out of foam and paper. The tools you will need is a half inch thick foam board, a pair of scissors, a glue stick, a ruler, a blade, and most importantly a print-out of the iPad template. Start by cutting out a square of foam board that is the size of the ...
In this Arts & Crafts video tutorial you will learn how to use clear stamps & make a card. You will need acrylic stamps for this project. The products used in the video are from papertrayink.com. The stamps are clear and have a sticky back with which you can attach them to an acrylic base to make the stamp block. Then ink the stamp and stamp it on the paper. Since, it is clear, you can ass and align it properly on the paper. The other cool thing about acrylic stamps is that you can take more ...
This illustrate us how to make paper mache mirror. Here are the following steps.Step 1:Take a piece of cardboard and make two circle on it with two different circumference.Step 2: Now cut through the outer circle as well as the inner circle to obtain the rim.Step 3 : Now take a sheet of cardboard and cut it in shape of a flower.Step 4: In the center of the sheet place the rim.Step 5: Now along the petals of the flower stick a pile of rounded newspaper.Step 6 : On this newspaper and cardboard ...
Learn how to make simple tri-fold cards with these instructions. What you will need: -5 1/2" by 11" cardstock paper -Scorer -Scissors and paper cutter -Pencil and Ruler What to do: -Score the cardstock to 3" by 7 1/4" -Using the 3 3/4" flap, from the corner measure 2 1/2" and mark with a pencil. -Repeat on the horizontal side of the cardstock. -Cut the corners using the marks as your guide. -Round the pointed end with your scissors. -Fold the card at the score line. -Embellish your card as de...
Joann from Emerald City Elegance teaches is how to make a creative business card holder in this short paper craft video.
JoAnn, an amazing scrapbooker from Emerald City Elegance, teaches you how to make an amazing mini scrapbook album of your own out of note cards. Describes the necessary materials and tools and gives an easy to follow explanation of how to put together this excellent gift. Includes great scrap booking tips and ideas about cutting and punching holes into card stock, presentation advice, and working with different types of paper. Video includes beautiful pictures of paper crafts to get your crea...
Joann of "Paper Crafting" shows you how to create a CD mini album. What it is, is actually a pop up photo album that you create using a CD case. The materials needed are 1) a CD case. 2) various decorations to put on the outside/inside depending on your taste. 3) cardstock type paper that can be folded around 8 times: on each "fold" you will put a photo- preferably the album will have a theme. Then you fold it up and put it in the Cd Case and embellish the front however you like.
If you have ever thought about making a paper-bag album for artist trading cards, this is the video for you. Ozsomenurse captures this in a simple video saving you money. The required materials are easy to acquire. They are all available at your local craft store. This video provides very descriptive and easy to follow instructions. The finished product is a cute, hand-crafted album for your artist trading cards.
For this trick you need a glass, a coin and a large piece of paper. 1. Sit at the table.
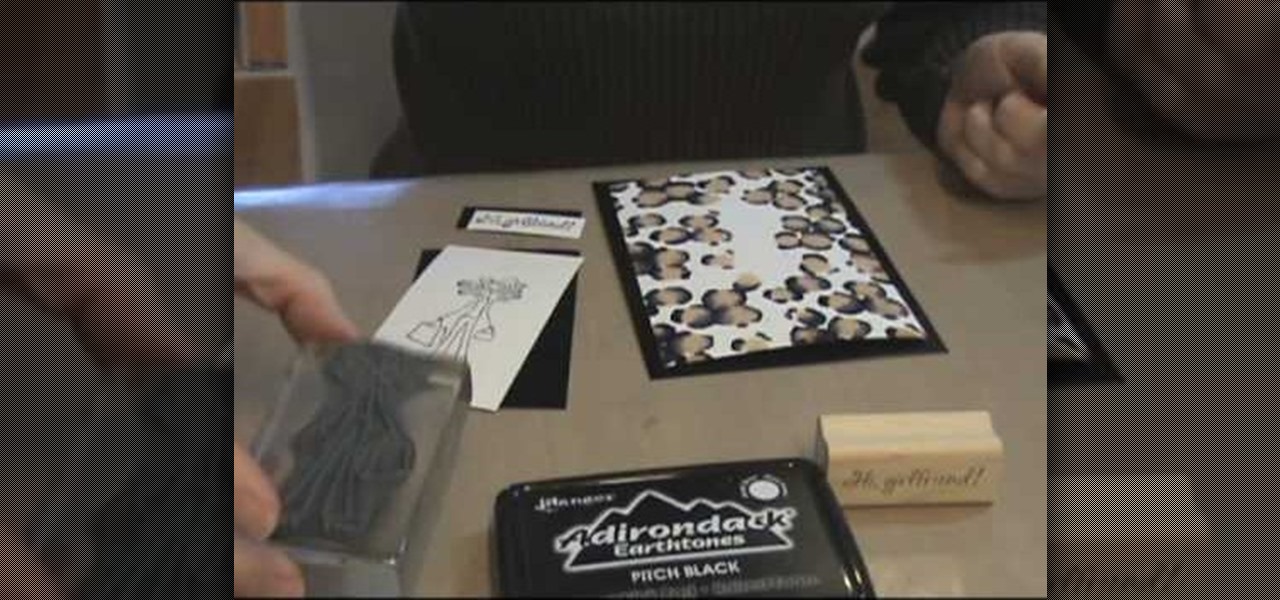
Create some great leopard prints with Ranger's Alcohol inks. The needed items are: 1. 5" Gloss sheets in white and in black color
Framing and matting your favorite posters or art can get expensive! In this Curbly video tutorial, you'll learn how to make a quick and inexpensive frame. All you need are some basic supplies available at almost any arts and crafts supply store including: A sheet of plywood, a plexiglass cut to the size of the plywood, archival paper cut to the size of the plywood, frameless corner clips, and a bracket.
Check out this DIY video tutorial from Curbly, the best place to share pictures of your home, find design ideas, and get expert home-improvement advice.
Check out this DIY video tutorial from Curbly, the best place to share pictures of your home, find design ideas, and get expert home-improvement advice.
In this how-to video, tag along with Karen from Yasutomo as she creates a scrapbook wallet that's perfect to keep in your purse. She uses origami paper folding techniques and one sheet of 12" x 12" patterned scrapbook paper. Plain manila tags from the office supply store are the background for photos that are just right for the pockets of the wallet. You end up with a brag book that's worth bragging about. Watch this video crafting tutorial and learn how to make a tag along scrapbook wallet.
Freezer paper to make stencils? We're aware that you're probably not used to using the food staple for crafting, but it's actually a super inexpensive way to create beautiful stencils - in this case, monograms - on fabric.
This is a fun demonstration that ends with teaching you how to fold a paper heart using the techniques of 3-D origami. This is a fun and creative gift for Valentine's Day, and anyone who can fold paper can make it!
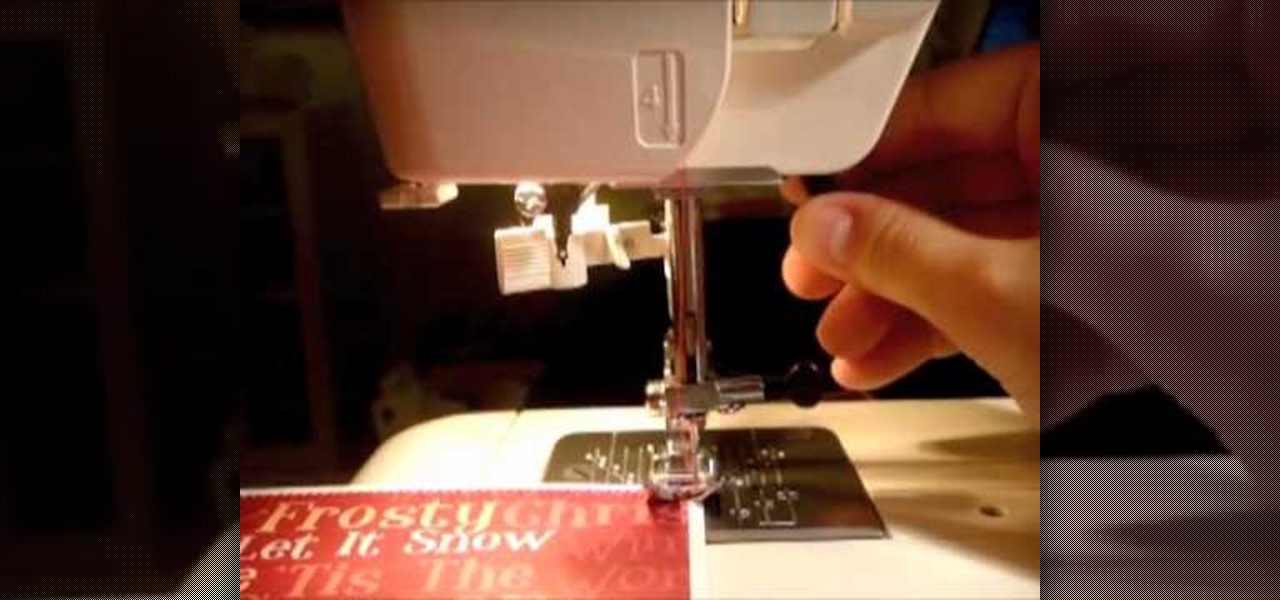
This video represents a union between two spheres of crafting - sewing and cardmaking. You can create some decorative stitching on your handmade greeting cards by using your sewing machine. Here's how you can sew on paper without ruining the paper or cardstock.
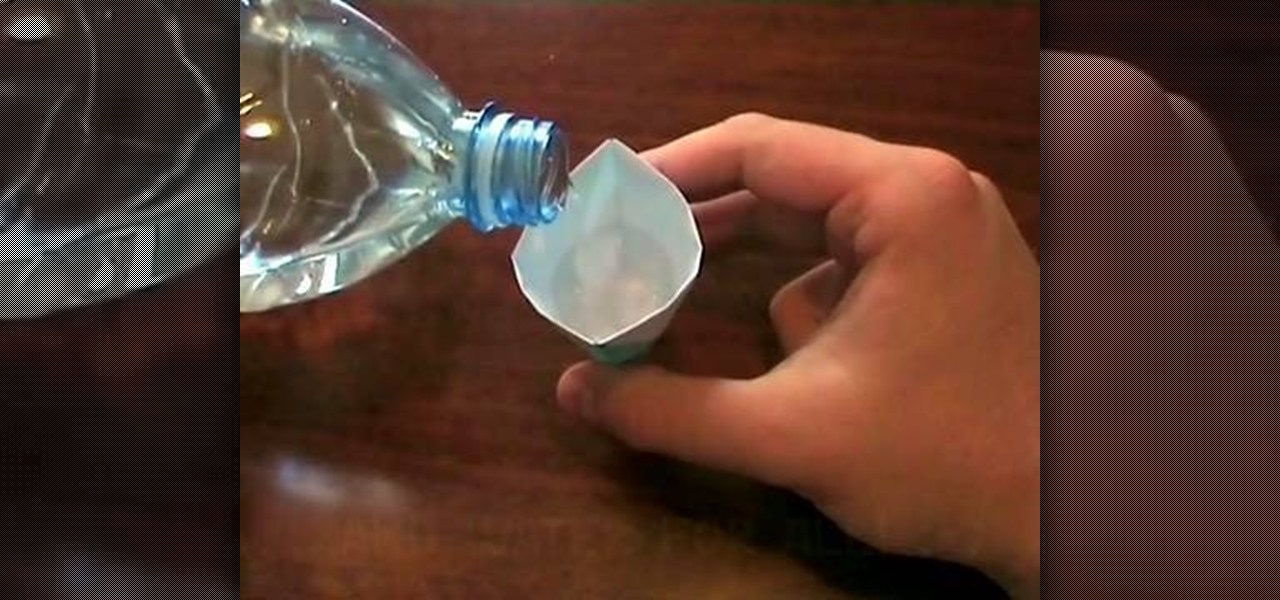
Let's get one thing out of the way first: Yes, you can in fact drink from this wee paper origami cup. As long as you use wax-coated paper you'll be fine. Just know that this origami paper cup isn't intended to be used multiple times!
Now that Valentine's Day is on the horizon, it's time to start thinking about what treats you'll be baking, how you'll be packaging them, and what paper crafts you'll be glueing together for the big day.
This cute project makes a great holiday gift - a tiny hand sewn book bound with buttons. You will need some pattern or designer paper (2 3/4 inches by 5 3/4 inches), about twenty pieces of smaller white paper (2 1/2 inches by 4 3/4 inches), and basic paper crafting tools.
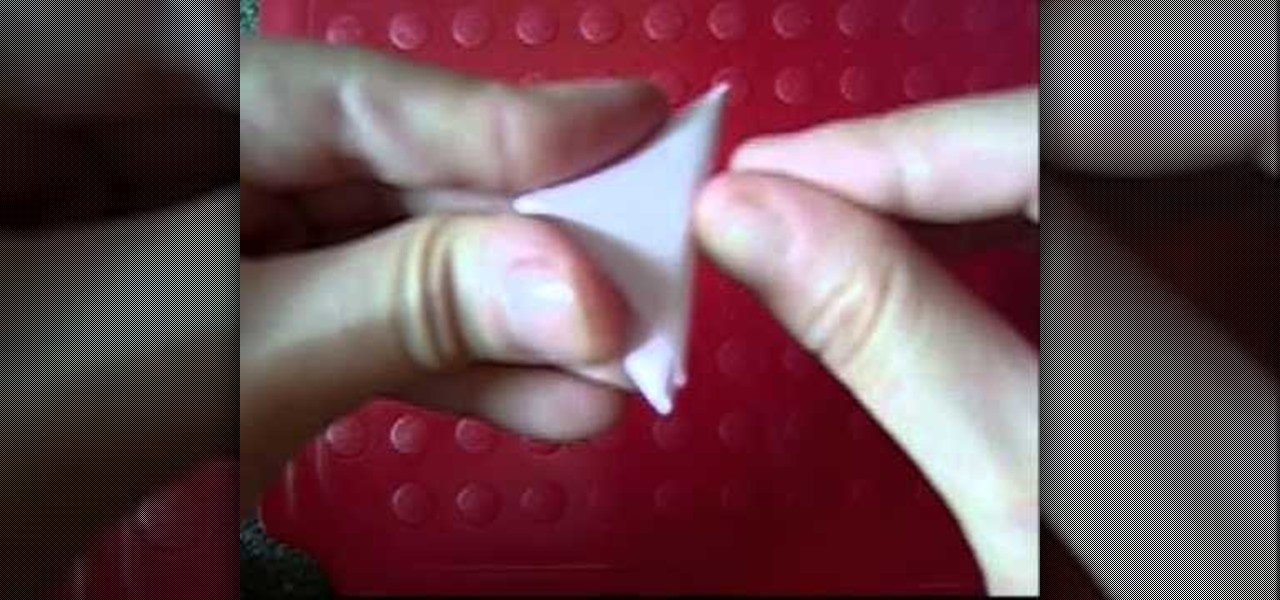
Cut a perfectly balanced pentagon from a square piece of paper! You can do this without measuring or drawing. Fold your square of paper as outlined in this tutorial, and then cut along several of the fold lines to end up with a pentagon!
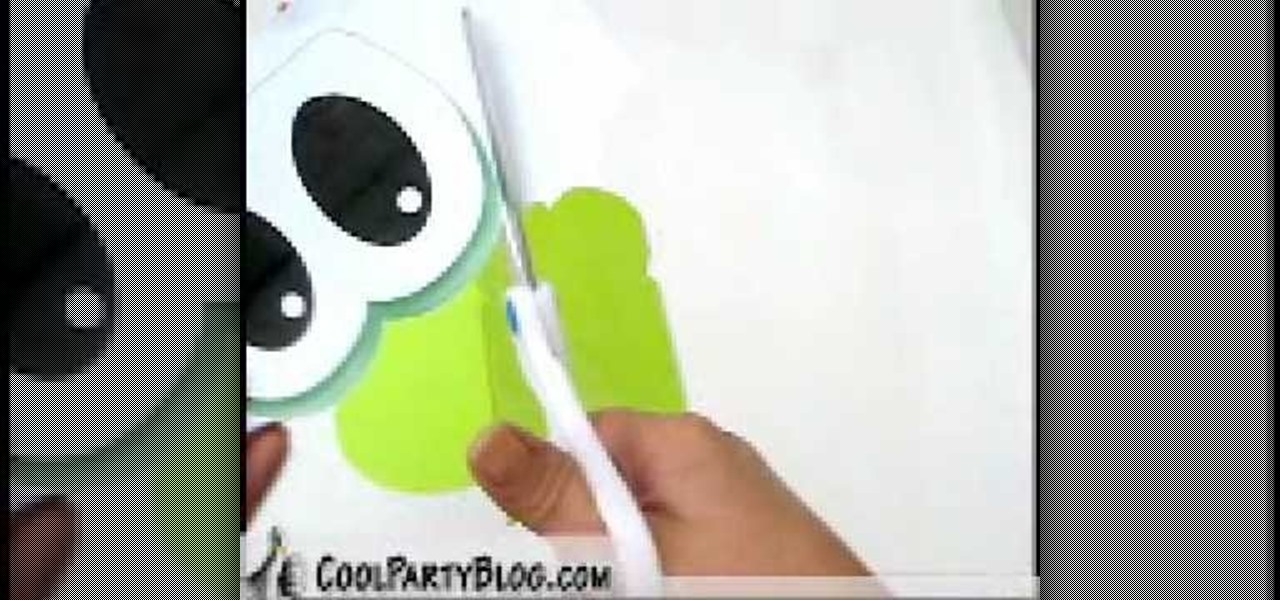
In this video, we learn how to create custom Yoshi loot bags. First, take some lime green paper bags and cut the top of them so they resemble the shape of Yoshi's eyes. After this, print out lots of Yoshi's eyes on a white piece of paper. Cut out the eyes from the paper and then put glue on the back of them. After this, glue the eyes onto the paper where they belong. When finished, let this dry and you will have a cute Yoshi bag to put little treats in! You can follow the template as well if ...
In this tutorial, we learn how to make an iron on transfer for a t-shirt. The materials you will need are: a printer, an iron, hard surface, transfer paper, and t-shirt! To start, find the art that you want to put on your picture and then you will need to transfer it onto the paper for your shirt. Once this is fully transferred with the scanner, load it to your computer. Then, print it out on transfer paper. After this, you will place the paper down on the shirt and iron it for a few minutes....
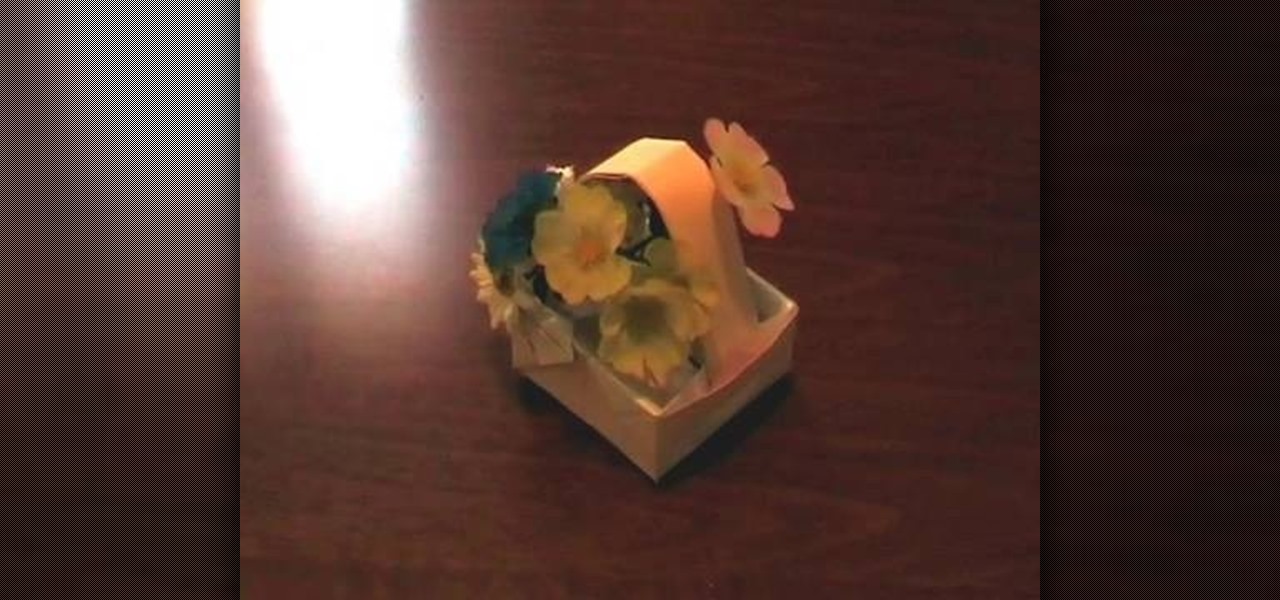
In this tutorial, we learn how to make an array of paper roses. Use any colors of paper you want with this to add a special touch to them! Now, you will take the pattern or color of your choice and fold it up into a square. after this, fold it into a triangle and then cut the edges of this off. After this, cut the bottom off and open it up, it should be a flower shape with a hole in the center. After this, repeat with several other papers and then cut the flowers up into halves. From here, yo...
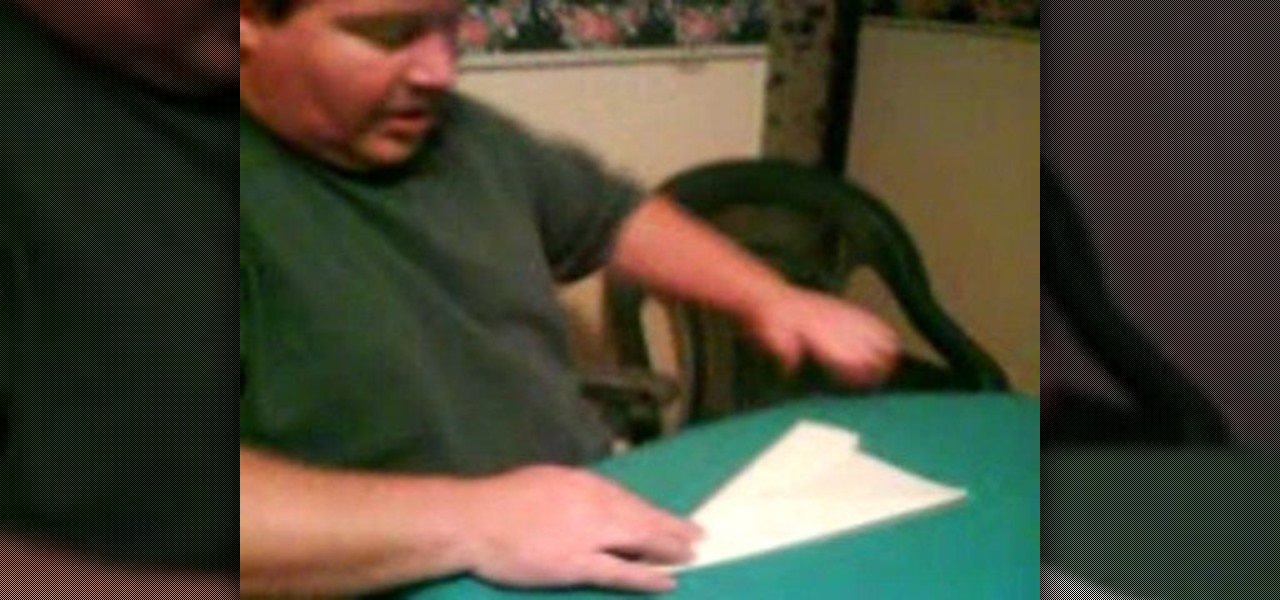
In this video, we learn how to make a simple paper airplane that flies far. First, fold the paper in half and make sure it's perfectly even. From here, unfold the paper and fold the edges into where the crease is. After this, do the same on the other side and make it perfectly even. Then, fold the side over to the middle again and do the same on the other side. Next, make sure the creases are solid and then fold it in half. Now, to make the wings you will fold one side down, putting the tip d...
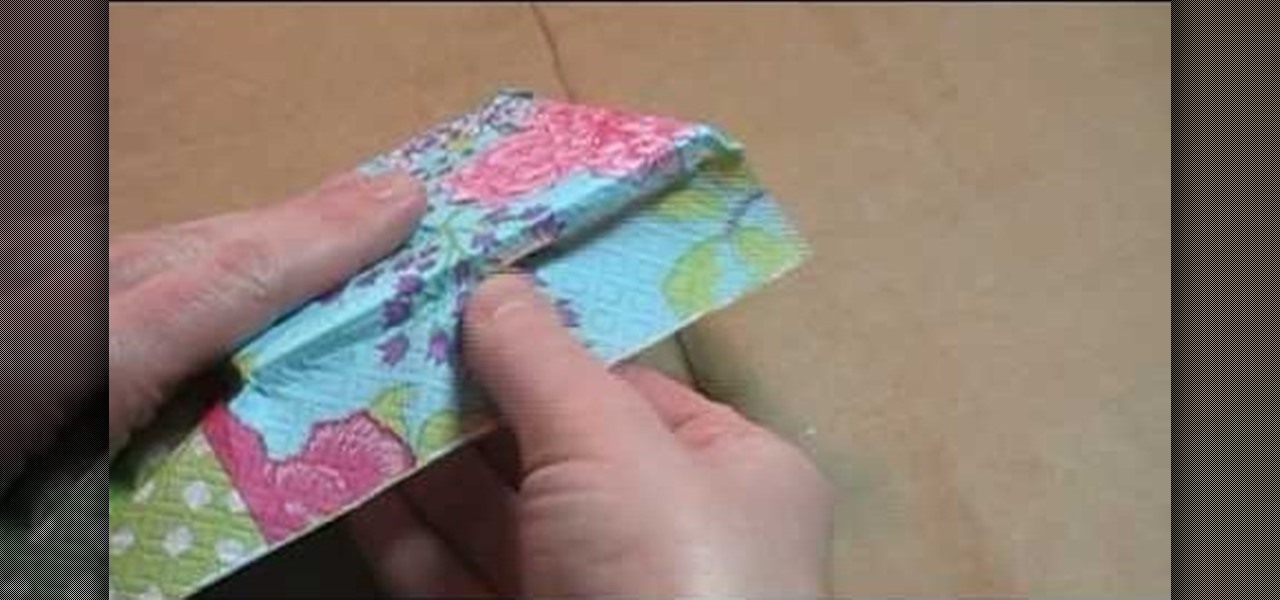
In this tutorial, we learn how to make a paper flower using napkins. First, roll the paper over to one side and then start to roll it up with the other side as well. As you do this, the napkin will start to roll into the shape of a rose. When finished, you will pull out the edges to create different lengths with the petals. After this, use a green napkin to create the stem of the flower, making a small leaf in the stem by ripping it. When finished, continue to make these to create a beautiful...
In this video, we learn how to make the farthest flying paper airplane. First, you will lay the paper flat and fold in two sides on the top. Then, fold it in half and keep folding the plane in. After this, you will see the wings become smaller and smaller. Once you fold this up until you cannot fold it in anymore, you will be able to throw this and make it fly! This will be really thin so it will go further and further. This will fly across the room easily and make everyone jealous they don't...