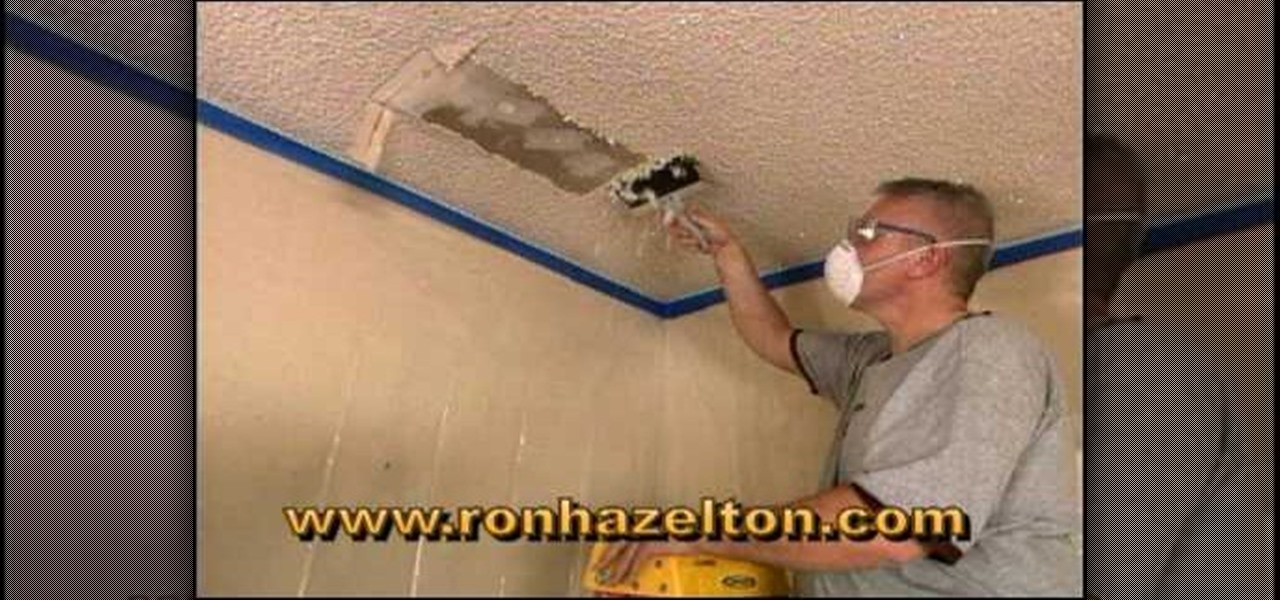
Many acoustical or popcorn ceilings that were put in, in the 1970's, contained asbestos. If you are unsure about the contents of the ceiling take a piece and put it in a plastic bag and send it to a lab for testing. Once you know that the ceiling is asbestos free and you are ready to take it down, start by turning off the power to the room. Next put down a plastic drop cloth to cover the floor and furniture in the room and protect it from the water that you will be using in this process. Tape...
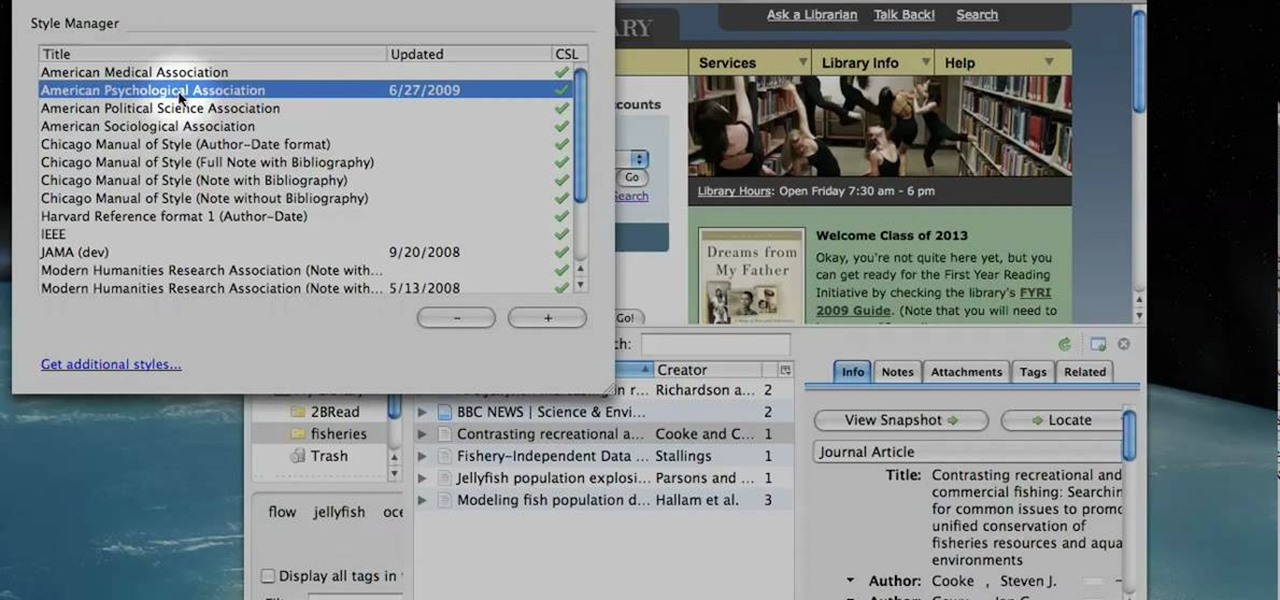
Learn to use Zotero to create bibliographies and citations with this tutorial. In addition, collect and organize information from all sources. So help correct the sources research paper. Before using the excitation features, make sure to select and prepare the style of your paper. If you are not sure ask your instructor. She has a preference style. You will select by clicking on the action button +preference then choose the style. It will include the number of most common style. You can downl...

Create a hand bag using a plastic bag with this video tutorial. We really have to do something with these plastic bags, it spoils nature so dramatically.
You will be shown how to use rice water to nourish and fortify your skin. You will be using just the rice water.
Why make a flip book? Because all animation – even stick-figure Flash animation and multilayered, highly technical 3-D effects – is built on, and can benefit from, the basics of the craft first developed by artists working at the beginning of the last century. And while fancy computer programs are nice, you can teach yourself these basics using nothing more than a pad of paper and a pen, and replay them over and over without any extra technology needed.
This tutorial video will demonstrate the process of how to make a wallet out of a piece of paper. This paper wallet is extremely useful because it's recyclable and easy to make if you've lost your other wallet.

How to make a paper airplane.
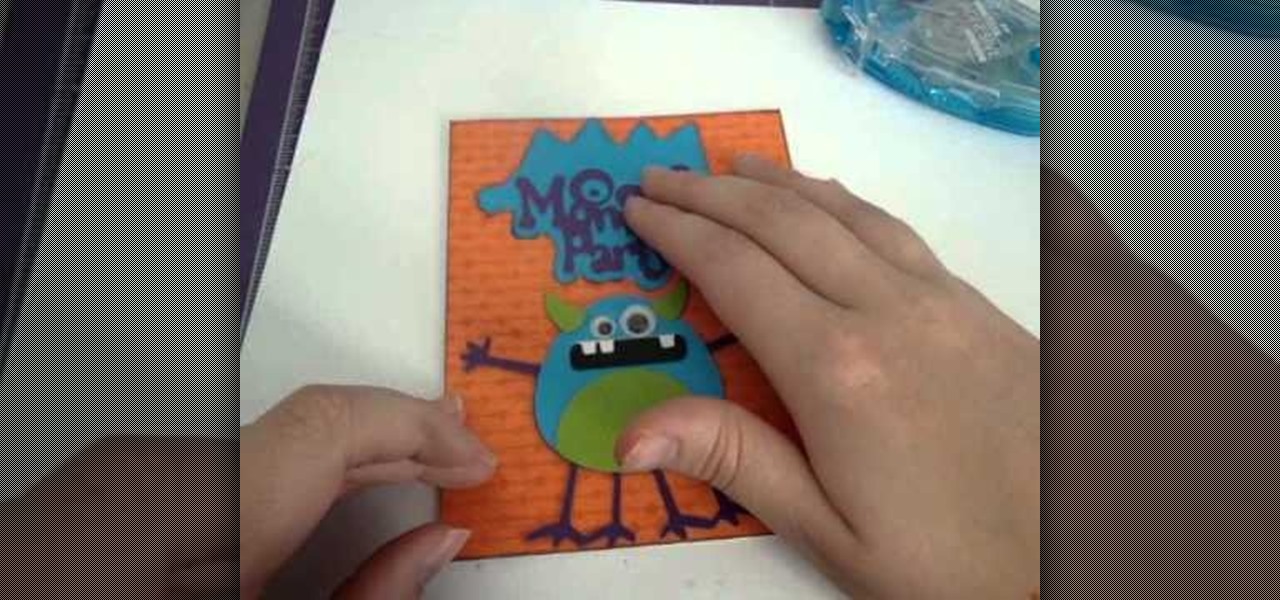
Treat your little monster and his friends to a monster-themed birthday party this year for fun thrills. Make sure to have plenty of monster-shaped cupcakes, pin-the-eyes-on-the-monster blindfold games, and icky looking - though delicious - candy on hand. And, of course you can't forget the perfect party invitation.
These festive Christmas crackers serve as both party favors to hand out to guests and name plates on your dinner table. In vibrant colors of green and red, they simply scream out Christmas.
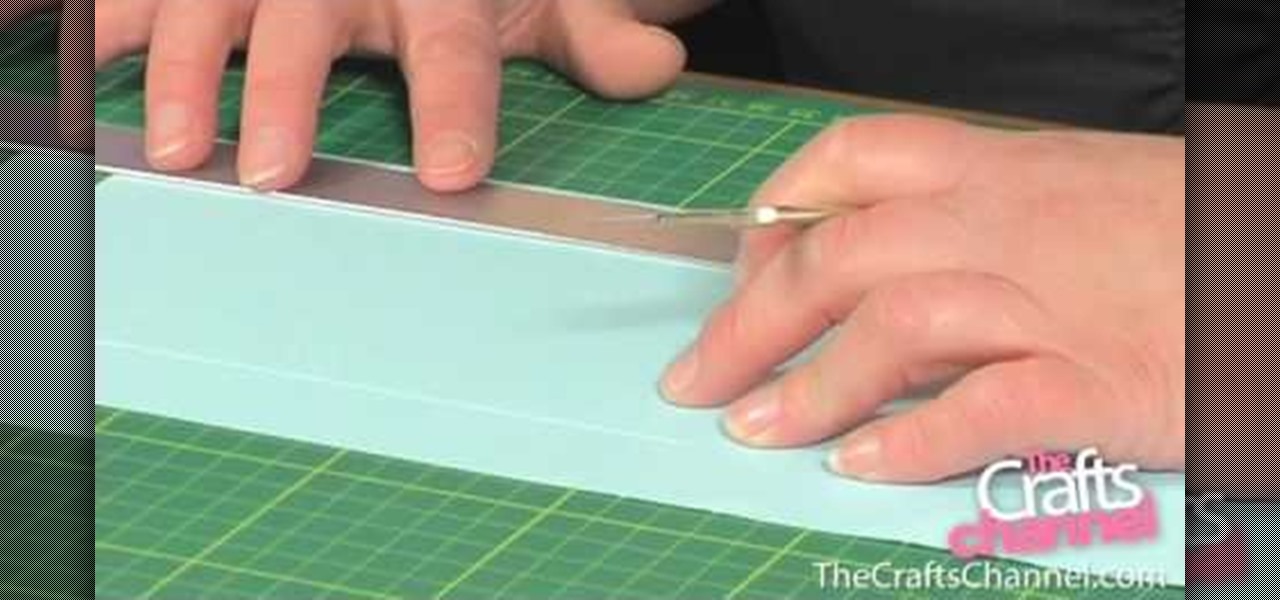
Connie Brad teaches us how to make a pop-up box card in this tutorial. First, you need to take a scoring board and draw 1 cm increments down the center of it. Now, take a sheet of card stock and score the sheet 2 cm from one end, then continue down until you reach the bottom 3/4's of the paper. Now, fold your card along all of the score lines up until the last line. Next, line this up on a cutting mat and cut 3 cm on each side until the end of each score line. Now when you set this up, it wil...
In order to make a Cricut Sunflower card, you will need the following: card stock, Walk in My Garden Cartridge, ribbon, decorative paper, chalk, scissors, 2-sided tape, an ink stamp pad, adhesive, and pop dots.
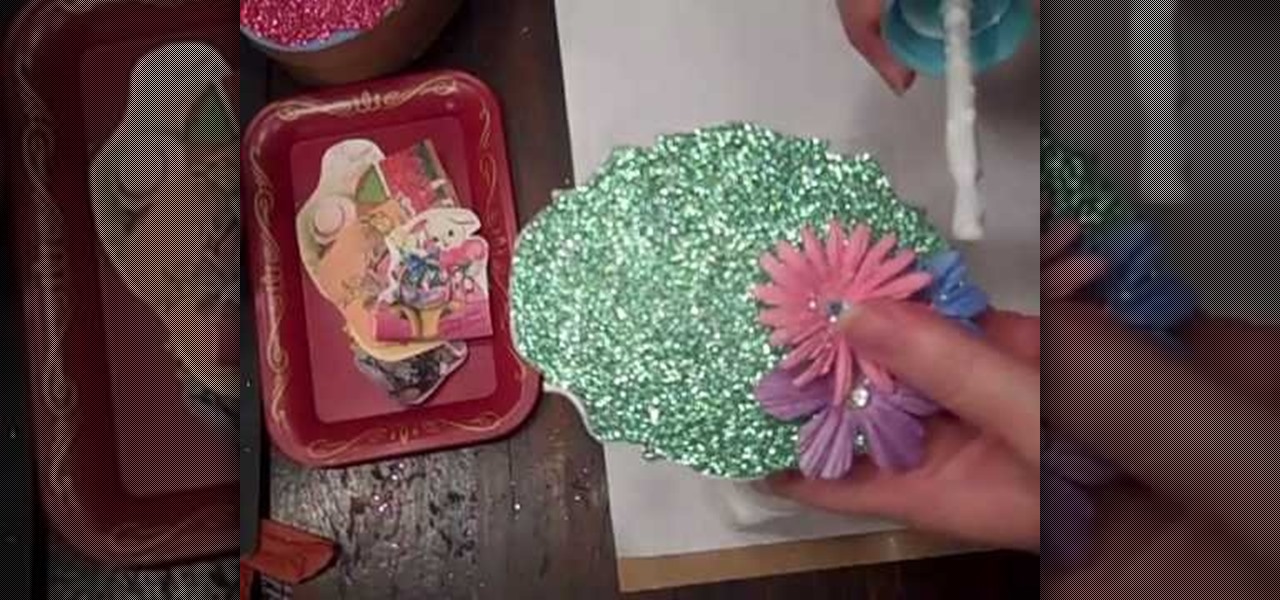
Easter is one of the best times for crafters to indulge in and even overdo pastel spring hues, vibrant flecks of glitter, and flower decals galore. Which is why this craft, a combination of all of the above, is such a perfect project for celebrating Easter.
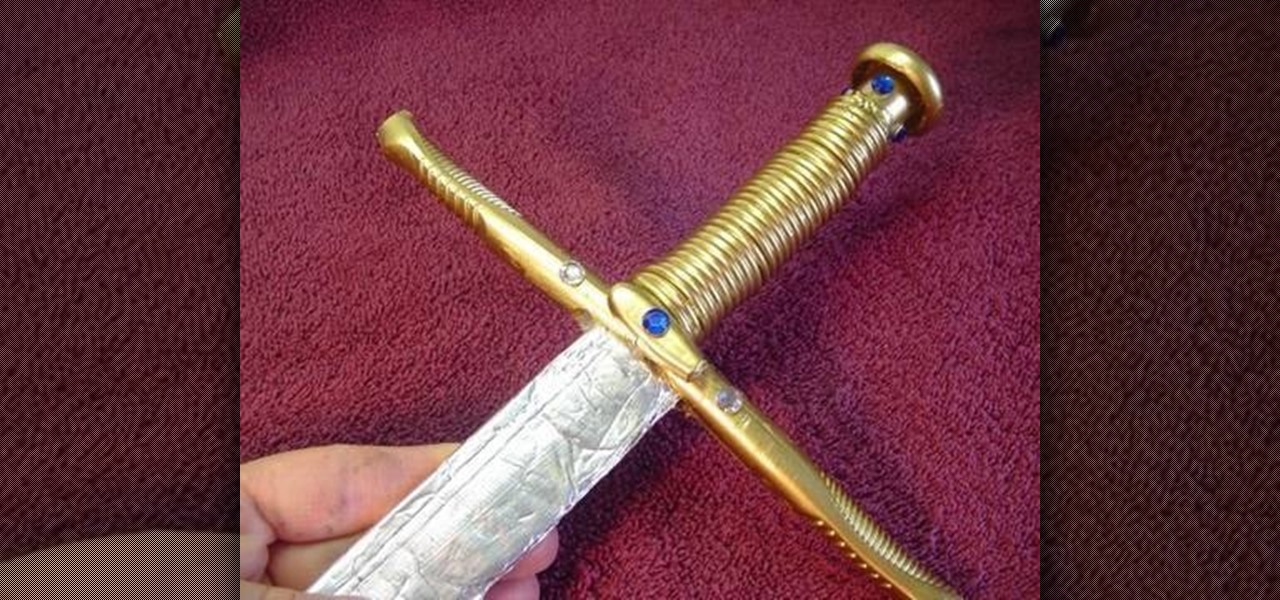
Complete your knight costume - or damsel in distress who's really a kick ass swordsman in disguise costume - with this cardboard Medieval sword. Sturdier than paper and much safer than the metal of a real sword, this version can be used by kids without risk.
We believe that cupcakes are as cute and pretty as they come, but when they're given out as party favors (pending they don't get entirely eaten beforehand) they have to be packaged and carried home.
Back at the dawn of time, a man's worth was determined by how many dead animals he had mounted to his wall. These days, men still want to be manly but find taxidermy a wee bit creepy.
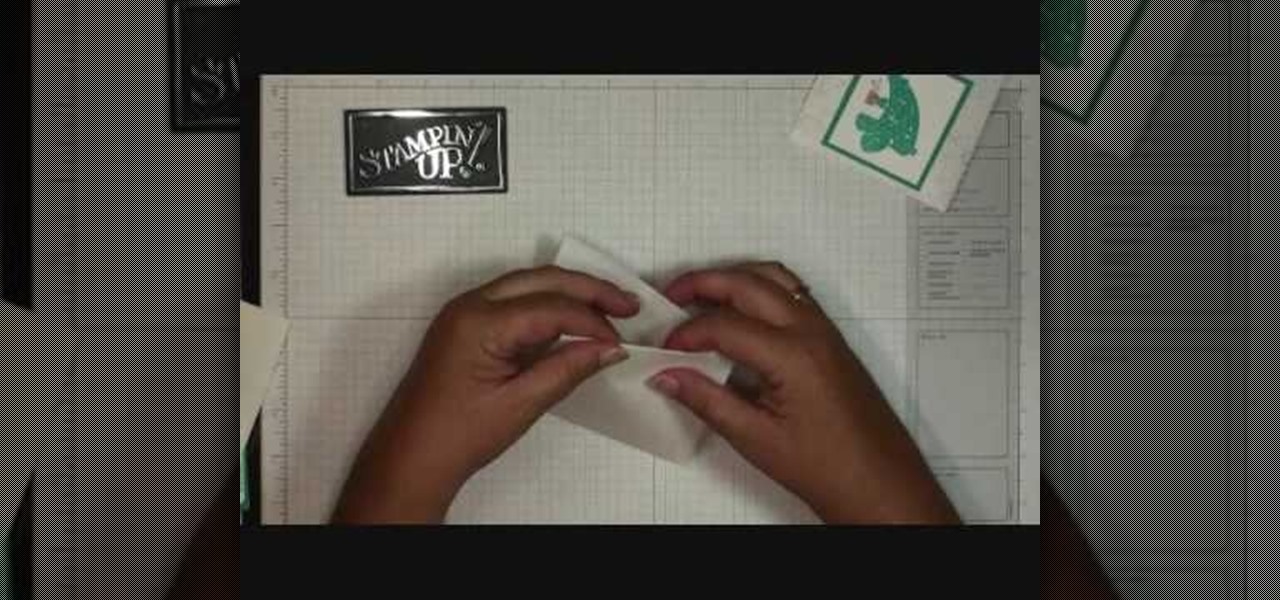
Corinne from crafts beautiful magazine teaches how to make a photo wallet. Get an A4 colored paper. Fold about an inch on both short edge and one of the remaining 2 longer edges. Bring the top part to the bottom of the longer edge and tuck it inside the fold. Divide into three. Put a ribbon around it and decorate the way You want it. Follow these steps and You'll be able to make Your own photo wallet.
Etsy is the place to get all your handmade needs and wants met. Etsy encourages personal connections between sellers and consumers. On Etsy you can connect with the handmade and crafty communities, and learn more about the process of making handmade goods like soaps, candles, invitations and more.
Check out this DIY video tutorial from Curbly, the best place to share pictures of your home, find design ideas, and get expert home-improvement advice.
The Professor of Silliness returns with some paper. Watch this instructional video to make a tall tree out of newspaper. You need an old newspaper, masking tape, and scissors. Simply lay out the newspaper pages from end to end and tape them together. Then roll it up at a diagonal, starting from one corner, and pack i it into a compact tube. Use tape to keep the tub intact Use the scissors to cut vertical lines half way down the newspaper tube. Pull out the inner most layer and turn your recyc...
Discover Kirigami, the art of paper cutting. This beautiful Kirigami captures the moment of the Mantis in prayer. Just download, print, cut and assemble, it's easy. It's better than giving a card, it's giving a piece of art. Best of all, you can make them again and again. Download this pattern for free at http://www.easycutpopup.com.
In this video, we learn how to make a miniature medieval flail. You will need: glue, string, scissors, drill, paper, cardboard, paints, masking tape, electrical tape, plastic chain (optional), a brush, and a wooden handle. First, crumple up a couple sheets of paper to make it into a ball. Wrap masking tape around it so it keeps its shape. Next, wrap your string or twine around the ball several times at various angles, tying it each time at the bottom. After this, tape it again with masking ta...
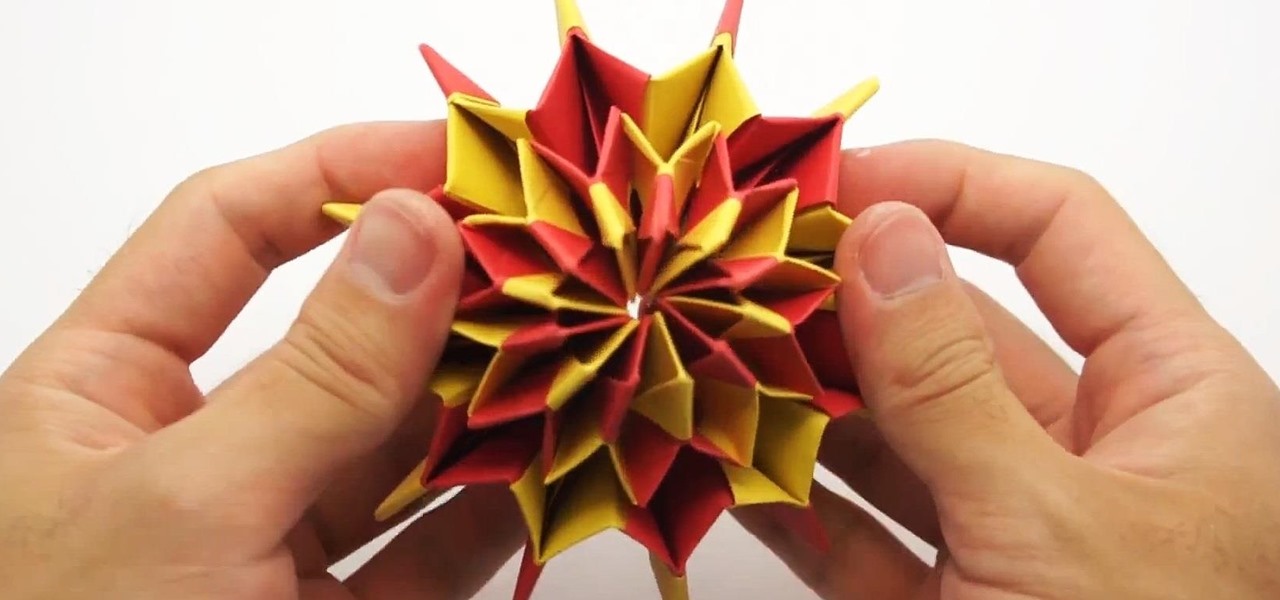
If you won't be near any real fireworks for the 4th of July holiday, do the next best thing and origami yourself some! For this origami fireworks project, you'll need square sheets of paper of different colors.
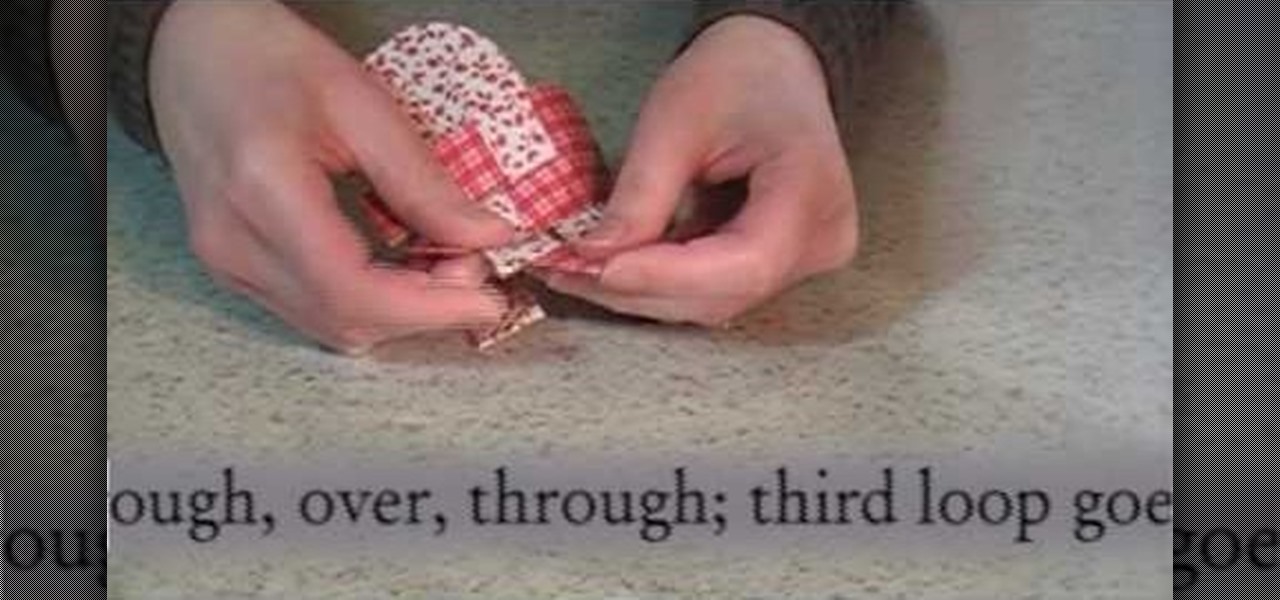
Supplies1.20-35 square papers (all the same size)2.stapler
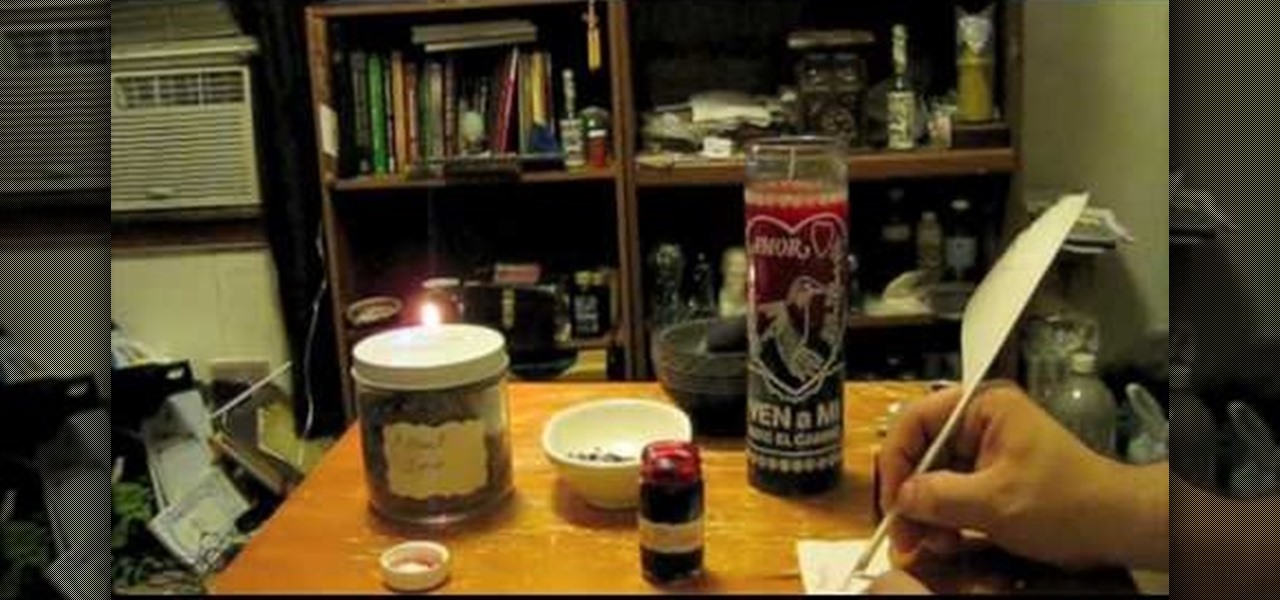
Krazyboytx shows viewers how to dress and fix a love candle or come to me candle. First, you need to have a love mix, that is either prepared by you or that you have bought. You also need to use a sedative or a hallucinogen - such as salvia. You will also need dove's blood and some love oil. You will also need something to pierce the candle with. You need to inscribe on a piece of paper your name three times on the parchment paper. Now, write love over your name three times. It maybe messy so...
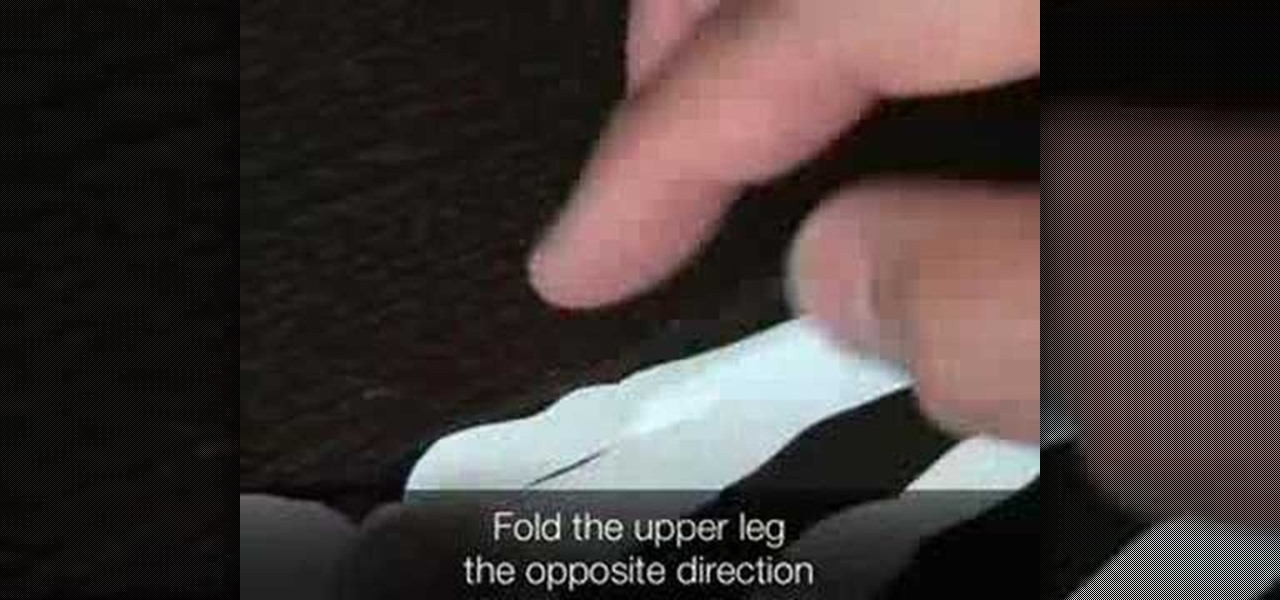
To create an origami buckyball, you must start with a piece of paper cut into a triangle with each side about two inches long. Fold the corner of each side into the middle of the opposite side and then unfold to create creases that will be your guide. Next, fold a side up to the midpoint of the creases and repeat on all sides. This will create a star-like shape. Now, fold two sides in and pinch out the extreme, outer corner and repeat on all sides. This will create a small star inside your pa...
Mark demonstrates how to draw flapping flags or scrolls. He starts with a paper in a binder but any paper will work. In this demonstration he uses a pencil to create his drawing but any pen or pencil will do. He draws the flagpole first starting on the left side of the page. He draws multiple circles creating cylinders that you may have learned how to draw in a previous lesion by Mark Kistler. He uses shading to create the effect of a curve and depth of the flag. He shows how to create the ef...
First of all whenever there is low rainfall and higher heat then there are problems.You shall notice that there are brown colored needles which dry up and then drop of. Sometimes they start at the tip and then move towards the branch. This shows drought and you need to soak in lots of water to overcome. However if you notice the brown needles going from the middle to the tip then these are due to natural process. Another problem is the presence of spider mite. Take a white sheet of paper and ...
Make a Christmas Gift Card Holder Materials
Did you know that you can make a rocket out of stuff you might already have around the house? In this tutorial, you'll see how to make a candy rocket using PVC pipes, sorbitol (a sugar substitute) and other fairly common household objects. With just a little work, your sugar rocket will be ready to blast off into space. Sweet!
Watch this visual demonstration on how to fold the paper airplane Nakamura. The Nakamura is a awesome plane. Do not squeeze the nakamura's keel together like you are throwing a paper dart or airplane. This nakamura does not have a trajectory. It follows a distinct and flowing flight path. With the nakamura at rest, and the keel in its natural 'V' shape, is the shape it must be flown in. Do not throw the nakamura. Gently push it on its way and if it is trimmed properly, it will find its glide ...
Typically taught during the elementary school years, cursive writing builds on the letter formation of block letters or printing. The pencil doesn’t leave the paper in cursive writing and letters flow together. If you don't know how to do this, check out this video tutorial. Learn to write cursive, step by step.
Origami is an activity which brings life to paper and can be enjoyed by both adults and children alike. In this video, Ngai Chun Cheung demonstrates how to make a mobile phone stand using origami. He begins by folding a rectangular piece of paper at the center lengthwise. Next, he folds the outer open sides to touch the folded edge on one side, which forms a triangle. Then he flips the long rectangular side to form another triangle next to the first one. The paper is opened out and folded alo...
Want to hand out lollipops to your kid's class for Valentine's Day? Then don't just phone it in by scouring the shelves at Target the night before for some Dora the Explorer paper valentines that you'll tape to the lollipops.
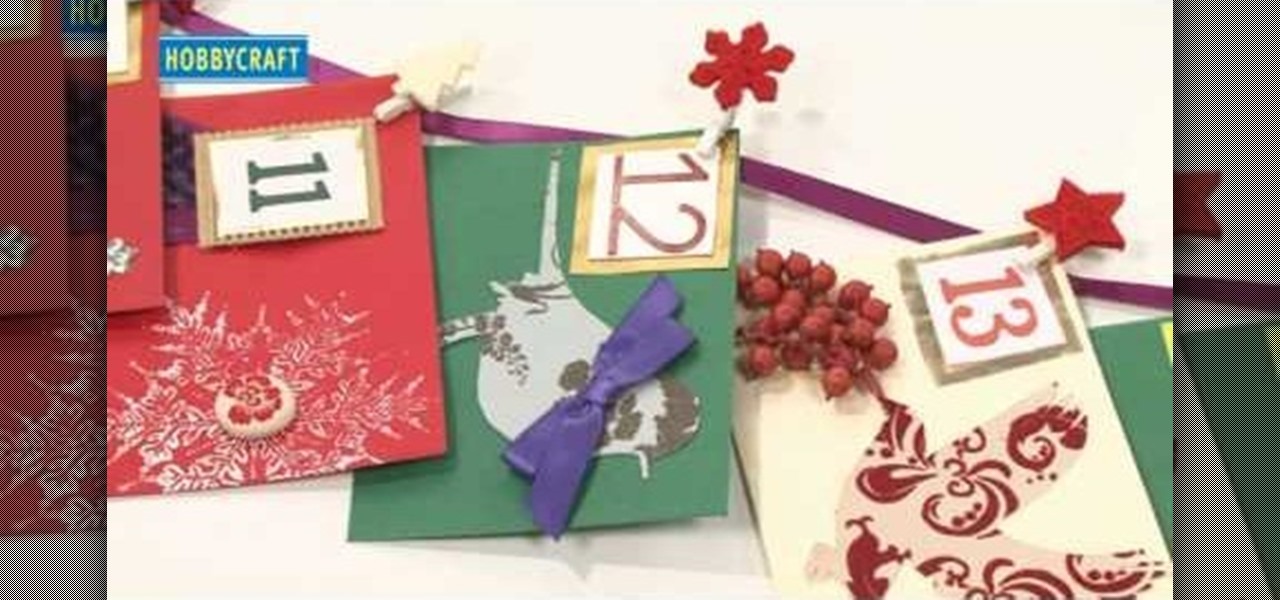
The holiday season rushes by so fast that it helps to keep track of touching holiday memories with an advent calendar. Advent calendars also allow you and your family to congregate together each day and spend some quality time together counting down the days to Christmas and sometimes getting a new small gift each day.
In order to make hot cocoa holders with Stampin' Up, you'll need the following: a whisper white Stampin' Up envelope, scissors, a paper cutter, cocoa, a jumbo wheel, ink pad, adhesive, stamps, ribbon, pen, stapler, glitter, and card stock.
In order to make the side step Christmas card, using Cricut, you will need the following: card stock, cutter/trimmer, adhesive, rhinestone, ribbon, and a bone folder.
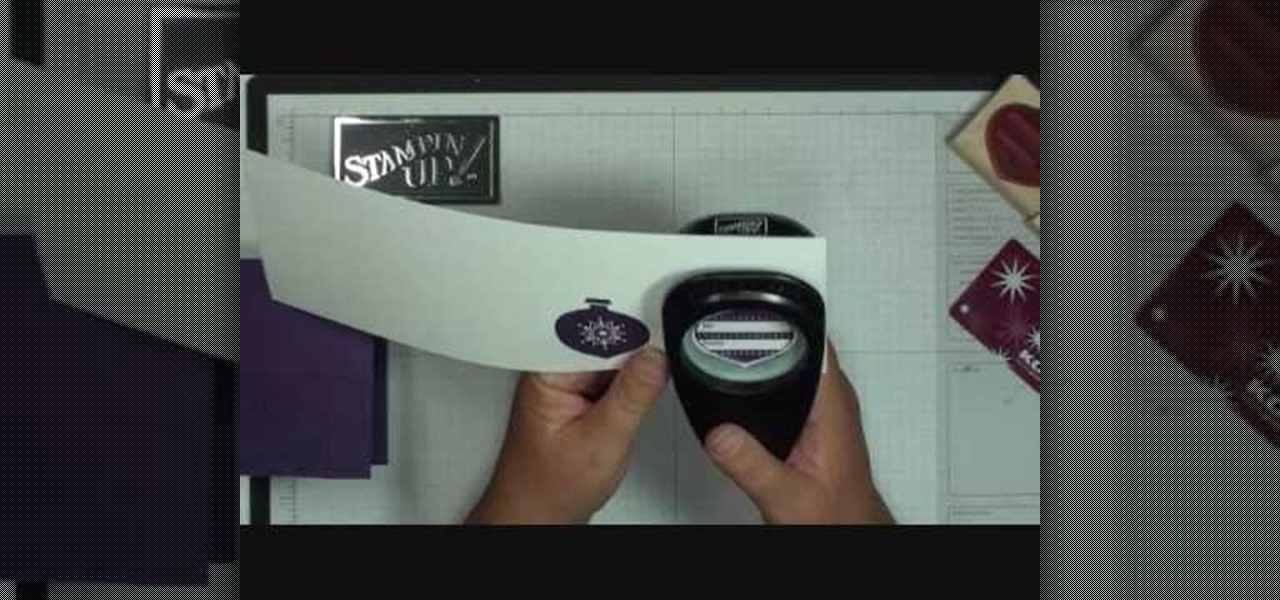
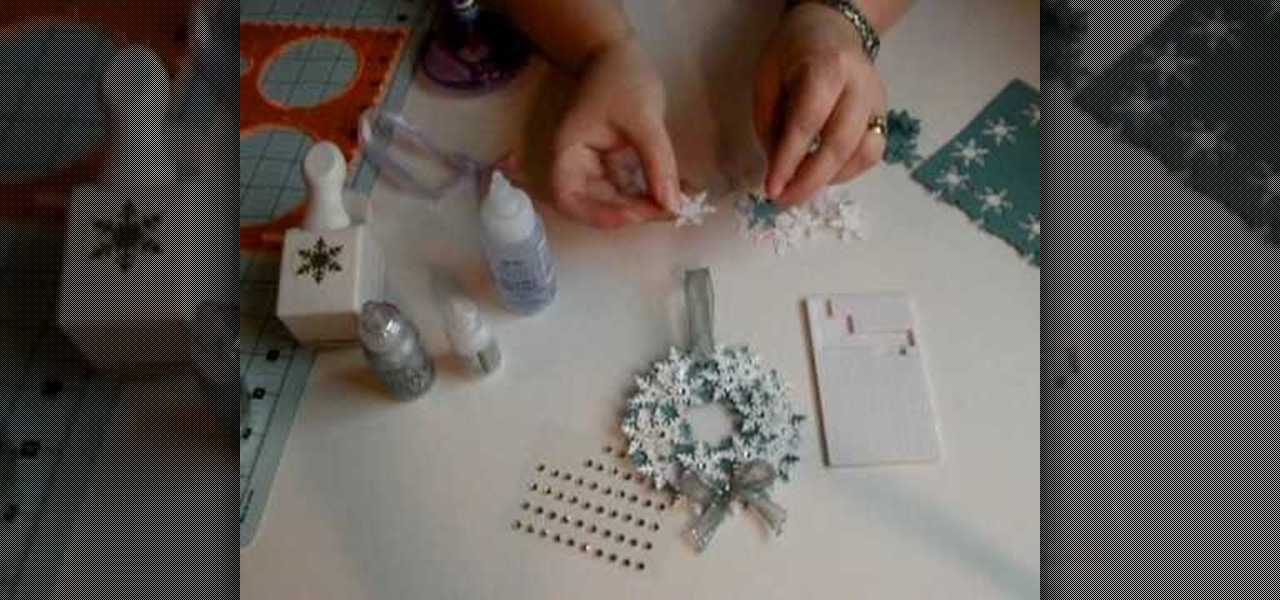
In order to make a snowflake wreath ornament, you will need the following: a snowflake punch, adhesive, foam, rhinestones, card stock, a hole punch, a circle cutter, scraps of paper, and ribbon.
In this tutorial, we learn how to make a small folding box for Easter. First, cut a shimmery white piece of card stock to 6" x 8 1/4". After this, score the paper at 2 and 3/8". Then score again at 2 and 7/8", flip it over and do again on the other side. After this, cut the four corners with score lines off, then fold the score lines that are left. Now, grab an Easter stamp and stamp the inside of the box underneath the top flap. Place a candy inside of the box, then fold it up and place an E...
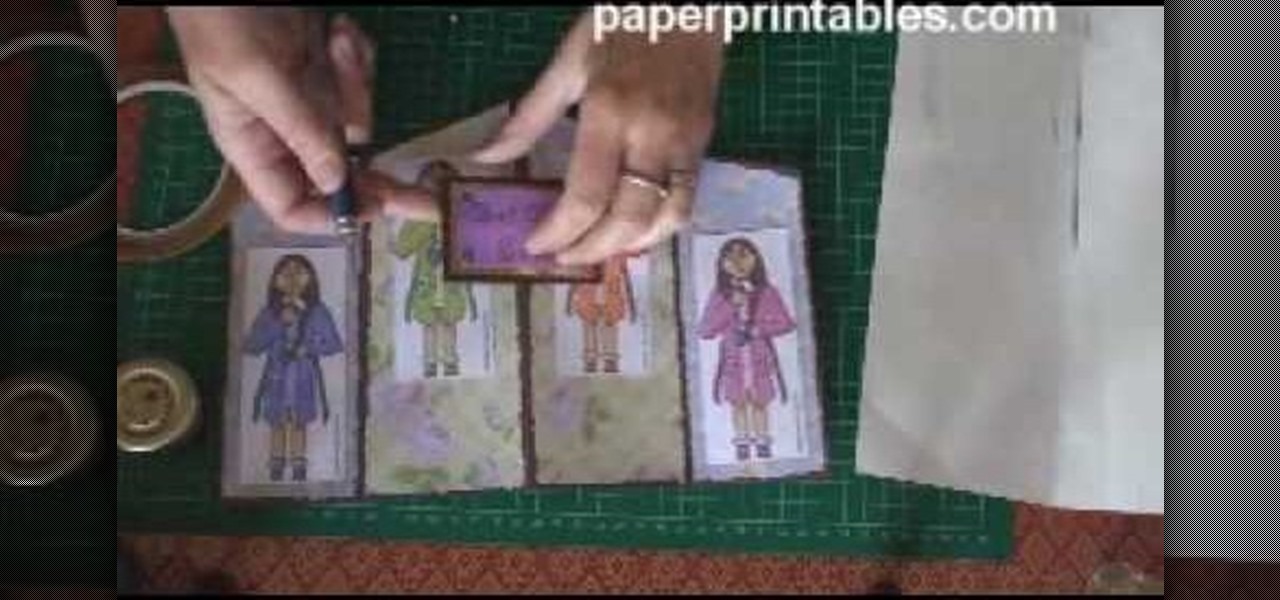
What exactly does a concertina card imply? We all know the concertina is a musical instrumental, much like the accordion and bandoneon, which is basically played by stretching and squeezing. Well, this concertina greeting card applies the same principle, though without as many folds.
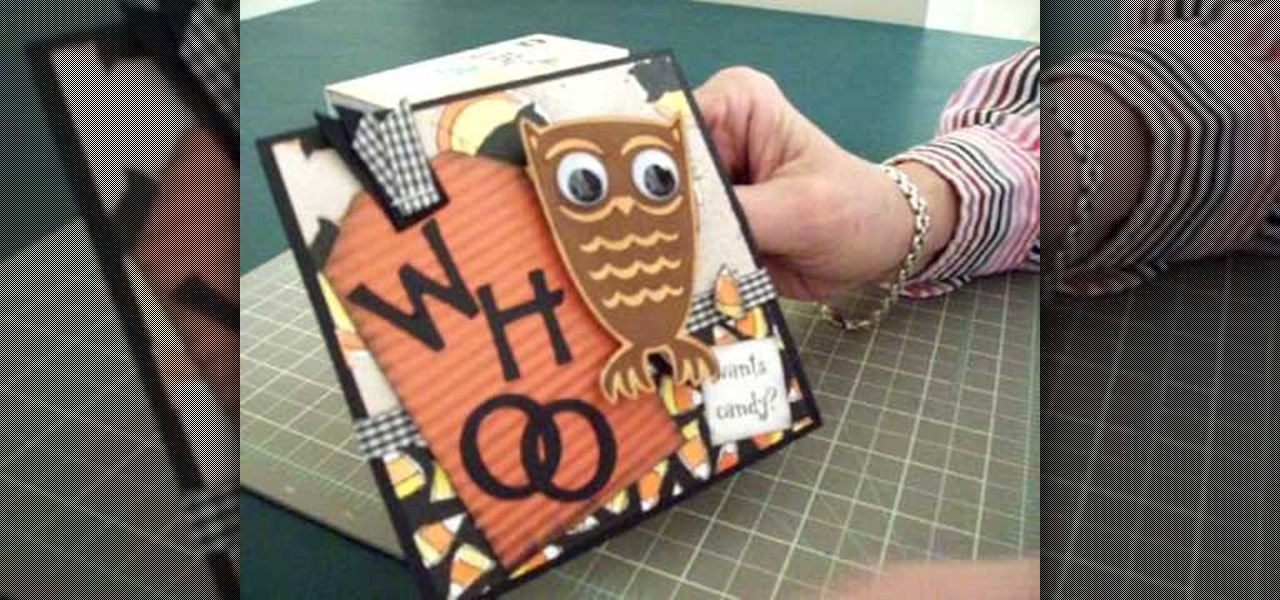
Learn how to make an owl Halloween card using the Cricut Storybook cartridge: Mary explains how to make a 5 x 5 inch square Halloween card in a few simple steps. On page 34 of the Cricut Storybook manual you'll find the owl. Cut the owl at 3 inches out of the darker brown by hitting shift and the owl. Then cut the owl out in the shadow and layer it. Give the owl big google eyes. Cut a tag out of Tags, Bags, Boxes and More at 4 inches. Then run it through the crimper. Then cut the letters W-H-...