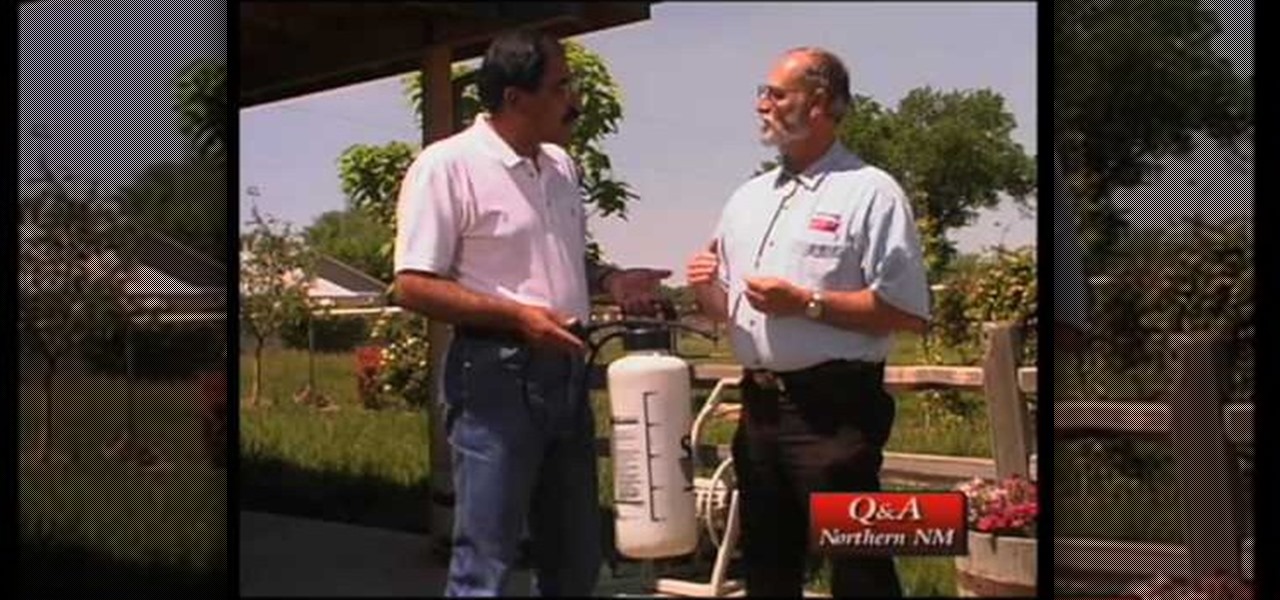
In this video from nmsuaces we get a lesson in how to dispose of leftover lawn chemicals. Many gardeners want to know what to do with leftover materials and how to get rid of it safely. You should not store it. Once mixed up, use it all. Make your mix so you don't have to have a surplus that day. If you have a surplus, you need to spray it in an area that is labeled to be used. After you are finished rinse the container at least 3 rinses. The rinse water must then be sprayed out in the area w...
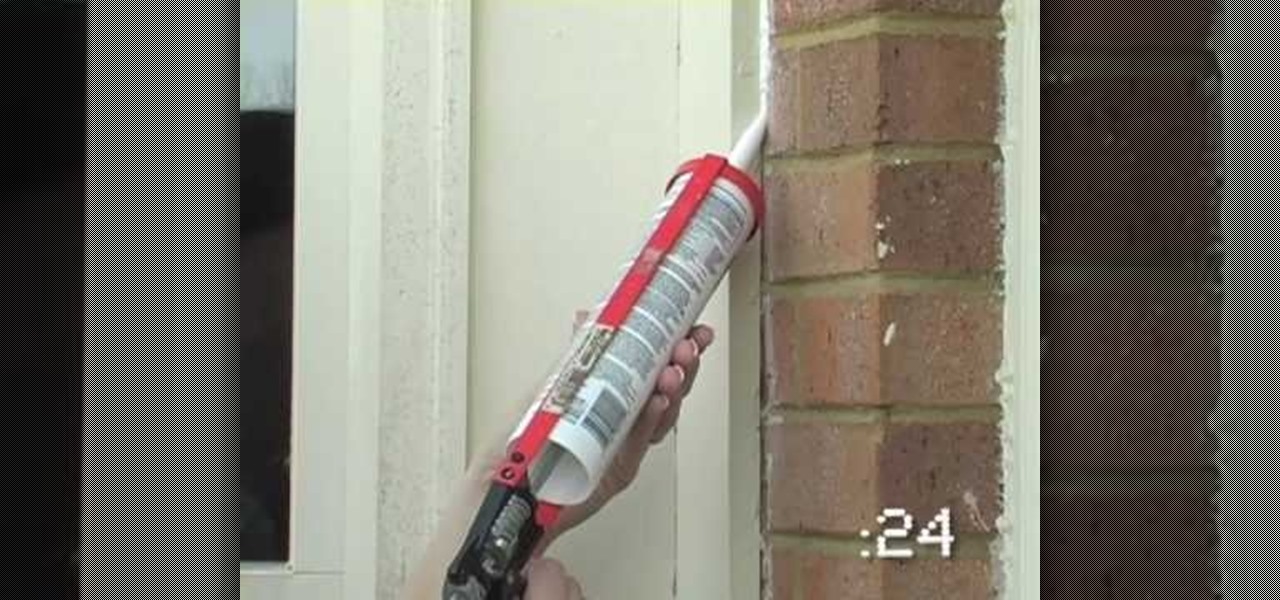
All around your house there small cracks and spaces that are letting air out of the house. You can stop the air leaks through an inexpensive way saving money from being wasted, it's called caulk. You have to select the right one for what you need, there are many different types for different applications so be sure to pick the right one. Clean the area you want to apply the caulk in and then put the caulk in the device with which you're going to use it. Push the plunger until it stops and cut...
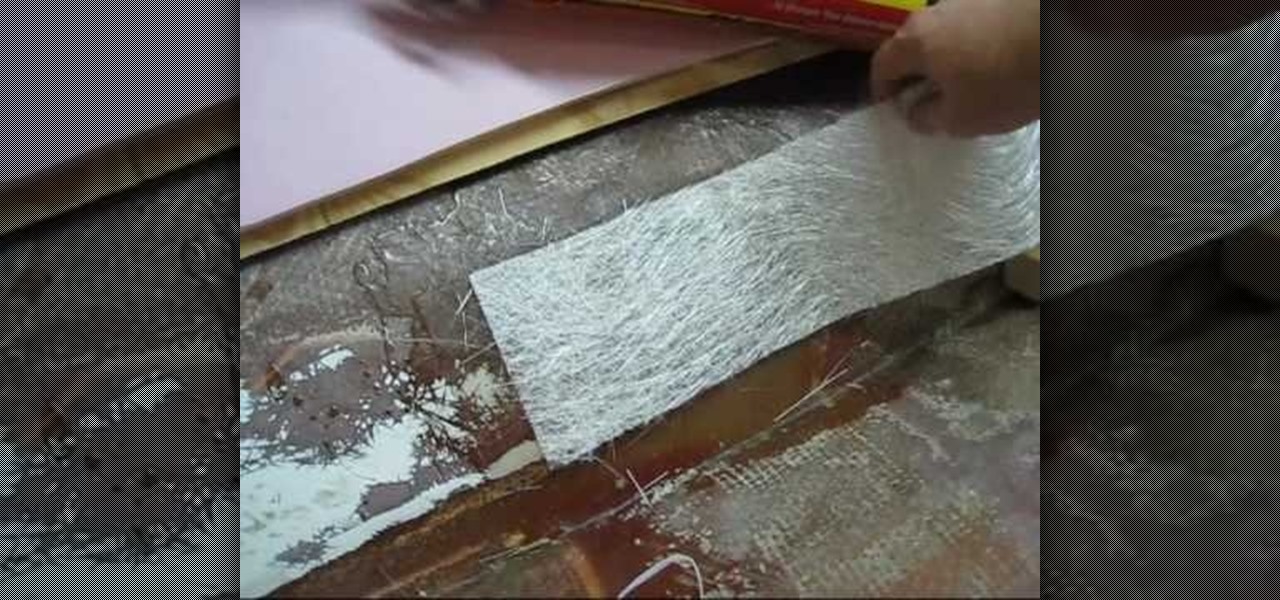
LowkeeLT demonstrates how to patch a hole in a fiberglass boat hull. First, grind around the edge of the hole to make it smooth. Make an angle that goes towards the hull so that the resin won't get caught and create air pockets. Attach kitchen wax paper to the boat as a non-stick material for the poly resin to set against. Then, put down a flexible cutting board by duct taping the two layers on the outside of the hull and pulling it taut. Attach three layers of fiberglass strips with resin to...

This video is about Wet Felting Wool Over Soap .The materials required small sized soap bars, a towel, hot water and wool batting which is sheep's wool that has been washed and dyed. Now take a thin piece of the wool and lay it over the soap. Thin layers help the felting process and these layers are wrapped around the soap in vertical as well as horizontal direction. Now apply hot water to the bar and rub it over the wool. Keep doing this for a couple of minutes and then leave the bar to dry....

In this video tutorial, viewers learn how to make a natural and inexpensive Christmas wreath. The materials required for this wreath are: some greenery, garden wire, pair of pliers, ball of string, scissors and ribbon. Begin by cutting the wire into 120 cm and bend it in half. Now weave the strands together and bring the ends to each other. Hook them and twist it together. Now weave the greenery along the wire. Tie down the greenery with some string to secure it. Finish by trying the ribbon o...
This video shows the viewer how to start a fire using a steel wool and a 9 volt battery. This is done by first selecting a charge battery and clean steel wool. The gently rub the battery terminals across the steel wool and blow gently. The wool should glow and become superheated. This happens because the battery is short circuiting and the very thin steel wool is being melted by the high current. Once the steel wool is hot it can be used to ignite small pieces of flammable material such as ki...

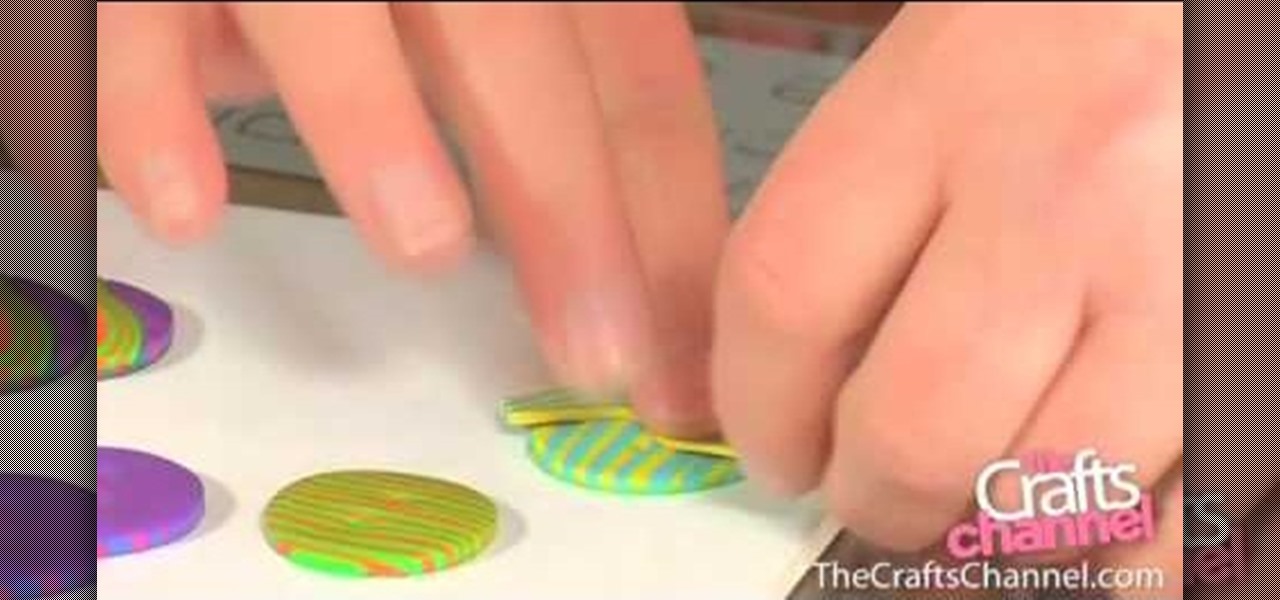
In this video Corinne Bradd explains the steps involved in the creation of stripy fimo buttons. It is rather simple and requires only a few materials such as polymer clay, rollers, cutters and needles. At the start you have to place clay pieces (varying color) in the form of a rectangle one on top of the other and fusing them together by making use of rollers. After they have been fused they are shaped into circles by making use of cutters. Holes are punched into the circle by making use of n...
In this video Rich explains how to maintain a grout and tile floor. He uses a chemical cleaner which he describes as a "grout-smart type product." For regular maintenance of the floor Rich recommends using only 1oz of the product per gallon of warm water but for really badly stained floors using up to 12oz per gallon of warm water. Rich mixes the chemical into his water then applies the mixture to the tile using an ordinary deck scrubber, he then uses an angled scrubber which has bristles tha...
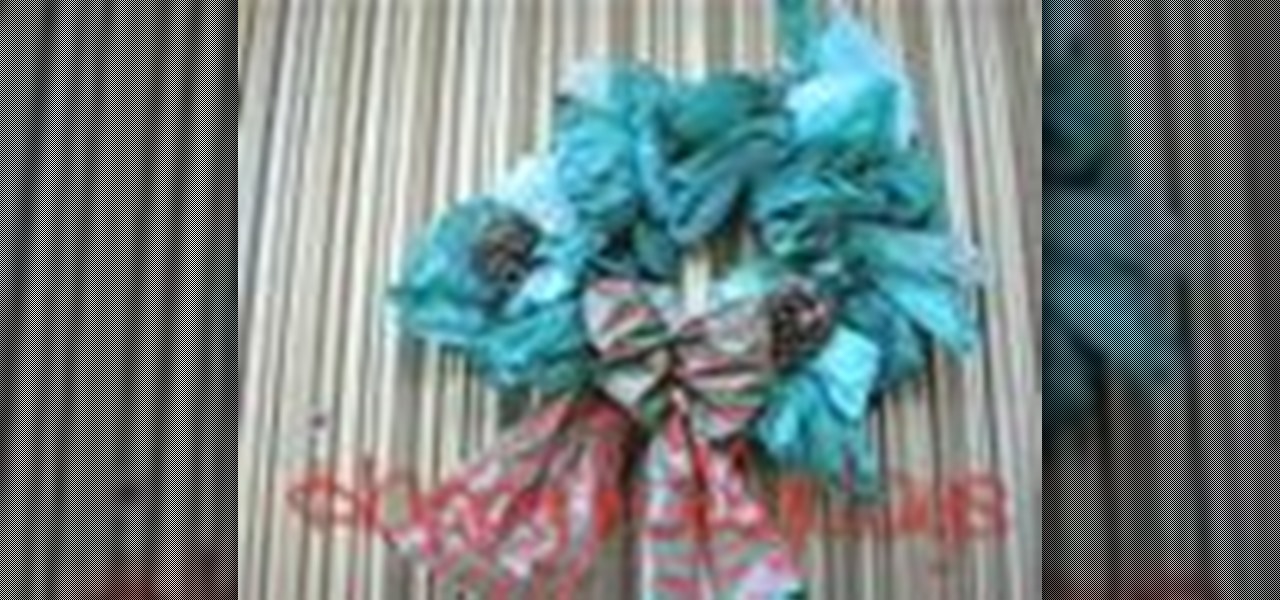
The old frame of the wreath of a previous year containing only two old ornaments is used. Placed on the frame are plastic bags from the grocery store . The bags were green in color however colored bags may be used for creativity . Fluff and fold the bags and wrap them around the frame. Nearly a dozen bags are used. A boy is made using two pieces of the same cloth of a complimenting color to that of the wreath, to form a bow. The bow is attached to wreath and placed on the outside part of a do...
In this video tutorial, viewers learn how to grow a tuberous begonias. It is recommended to pot the tuberous begonias in the early spring of March. Begin by removing the tuberous from it's bad and discard any packing material. Be gentle and do not remove the buds. Select a small pot that is slightly larger than the tuberous begonias and fill the pot 2/3 with well drained soil less potting mix. The carefully place the tuberous rite-side up in the potting mix and cover it with more mix. Water t...
Watch this video and teach yourself how to make an easy and cheap clutch wallet using duct tape. The materials required for this are a pair of scissors, a rod, Velcro sticky tacks and duct tapes of different colors and you can use as many colors as you want. Cut out 12 inch strips of duct tape and stick five of them slightly overlapping one over the other. Then stick five more of the duct tape strips as in the above procedure so that the sticky sides of the two layers will be stuck together. ...
In this video, we learn how to remove acrylic nails easily! First, you can cut down the acrylic nails using fingernail clippers if you want to keep your natural nails the same length. Next, take a drill or buffer to remove the shine from the acrylic. After this, put acetone on a cotton pad and place on nail, then wrap the nail in foil. Repeat this for all nails then leave on for one hour. Next, you should be able to easily remove the acrylic. Make sure you buff off any excess material then ap...
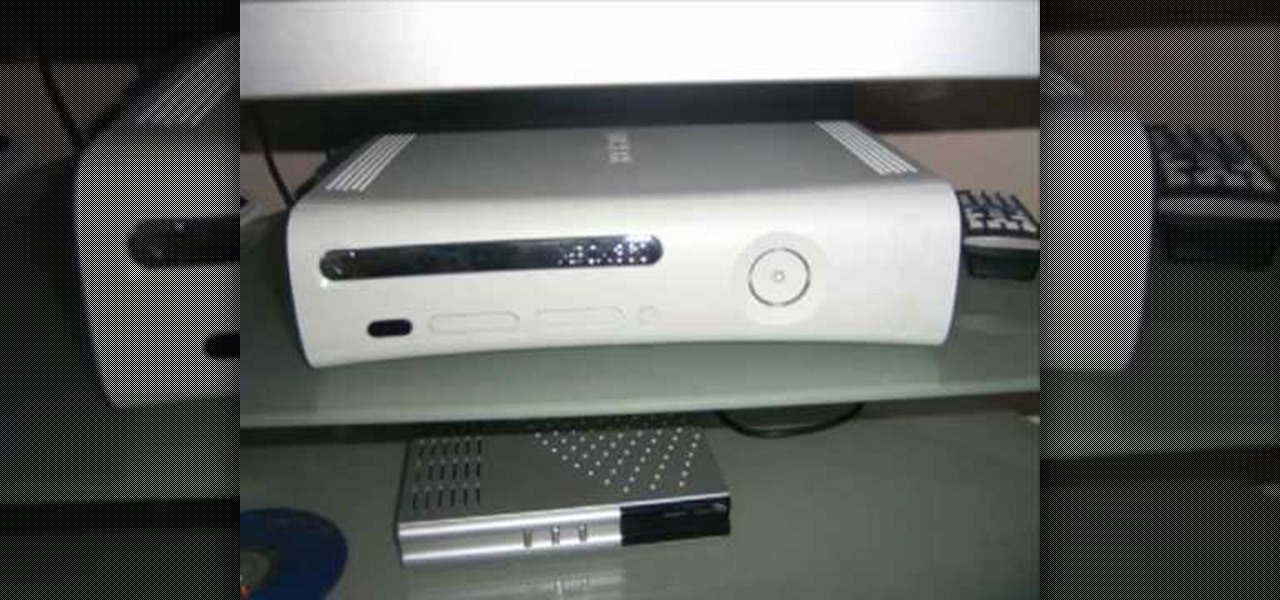
In this video tutorial, viewers learn how to use pennies to fix the "red ring of death" on an Xbox 360. The materials needed for this procedure are: 3-12 pennies, duct tape and a hot glue gun. Begin by disassembling the console. Now stack 2-3 pennies on top of each other and wrap them with the electrical tape. Make 4 stacks and wrap until there is no copper showing. Glue the stack of pennies to each RAM chip and assemble the console back together. This video will benefit those viewers who hav...
In this tutorial, Jacob from AutoLavish shows us how to properly wash and maintain a car. First, clean the dirtiest parts of the vehicle first, this will make it so dirt doesn't spread onto the rest of the car while you're cleaning it. Then, clean the body wiping in round movements. Make sure to clean softly with your brush, the paint can easily chip depending on what type of car and paint job you have. Once you are done cleaning the outside move to the interior of the vehicle. Clean with top...
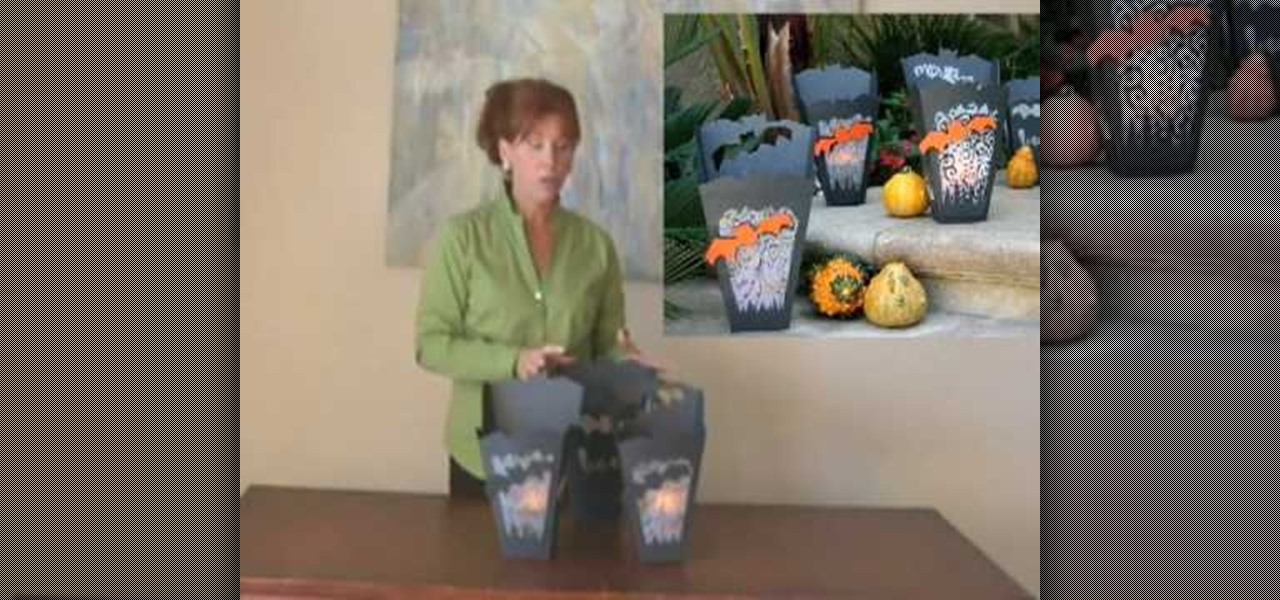
In this video tutorial, viewers learn how to make a Halloween lanterns. Users will need to visit this website: jennadeangeles/] and download the Halloween template. The materials required for this project are: download template, vellum, poster, rubber stamps, metal ruler, glue and orange card stock. Begin by cutting out the lantern with the openings as well. Now stamp the vellum with some black acrylic paint. Finish by closing the lantern with glue. This video i...
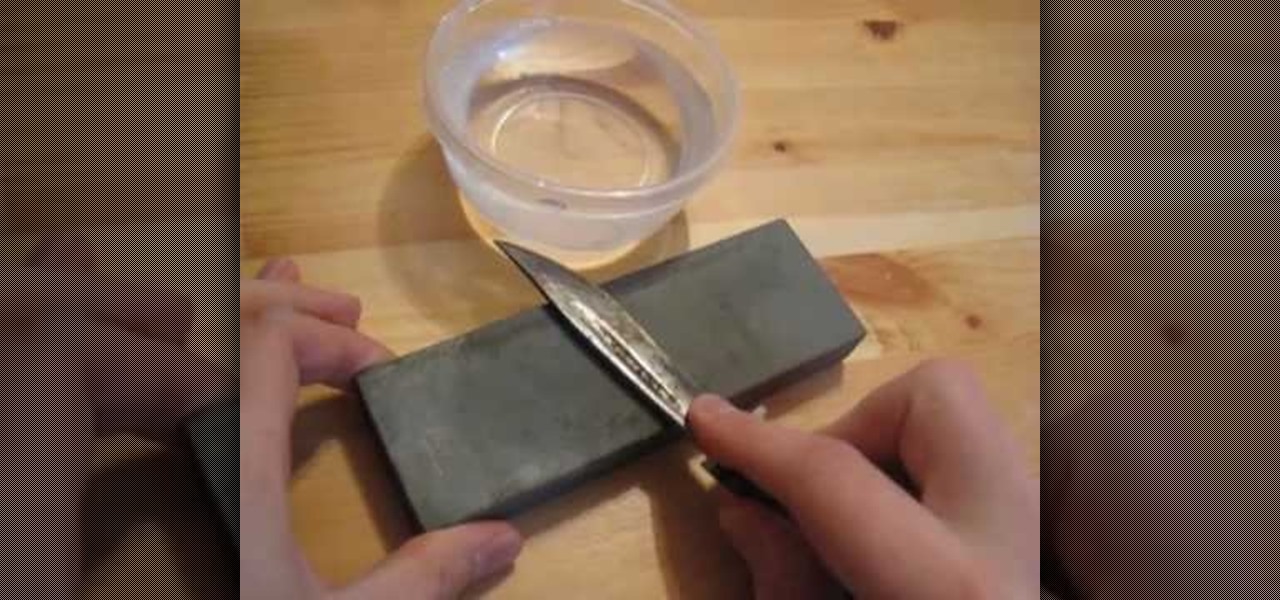
In this video tutorial, viewers learn how to sharpen a knife. The materials required are: water or oil, stone and the knife. Begin by dipping the blade into the water and start grinding with a rolling movement on the rough side of the stone. If it gets dry, add some water. Grind on both the sides of the stone. Now flip over the stone and grind with a pulling movement on the smooth side. Then finish the sharpening with a leather belt. This video will benefit those viewers who need to learn how...
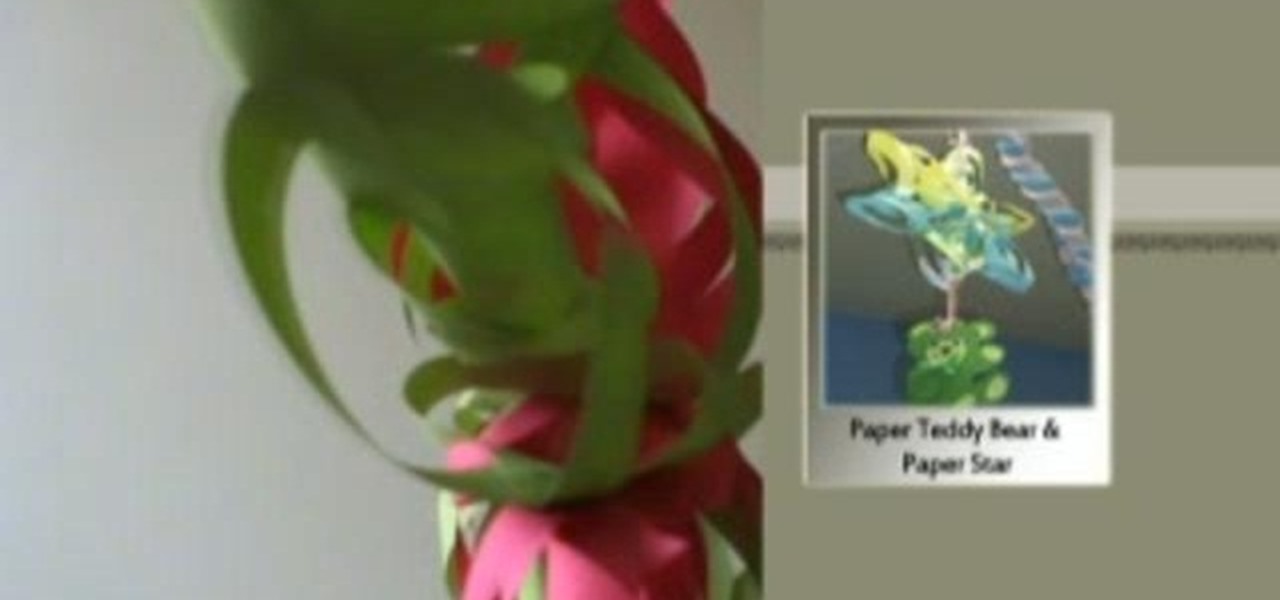
This is a great instructional video on how to make a decorative paper star. The materials you need are color papers, ruler, stapler, scissors, adhesive tape, pencil and cutting pliers. Take a paper and make a square of 20 cm side. Now fold the paper twice and get a triangular shape. Now draw four lines on it. Then cut along the lines with the help of scissors. Take the middle square and staple it. Then go to the back side and staple the ends. Repeat this process and get a star. You can make t...
The wilderness can give you all sorts of different types of material needed to survive. If you need food making a trap can be made with ease, but what if you need glue? Well in this two part tutorial, you'll find out how to make pitch glue with a variety of uses, such as fixing equipment and fletching arrows. Enjoy!
In this two-part tutorial, learn how to use a stencil on a shirt to create a screen printing effect. Although this does not show you how to do real screenprinting, by using a stencil you will create the look of a screenprinted shirt and be able to transfer your image. Materials you will need include: A blank t-shirt, a high contrast image, acetate, Scotch tape, a sponge, a Sharpie, Exacto knife, some acrylic paint, and glue adhesive. Get your favorite image on a t-shirt you can wear with help...
Chau-Minh, a private tutor, discusses cramming and how to do it effectively. This video does not intend to endorse cramming, but if you are probably screwed then you might as well see it. When you cram, don't expect to get a high grade because you lack time. To pull out a high grade, we need to do deletion. Deletion is just like chopping a branch to make the tree smaller. The tree would signify the lectures of your professor. Crossing out the topics that are discussed rarely by the professor ...
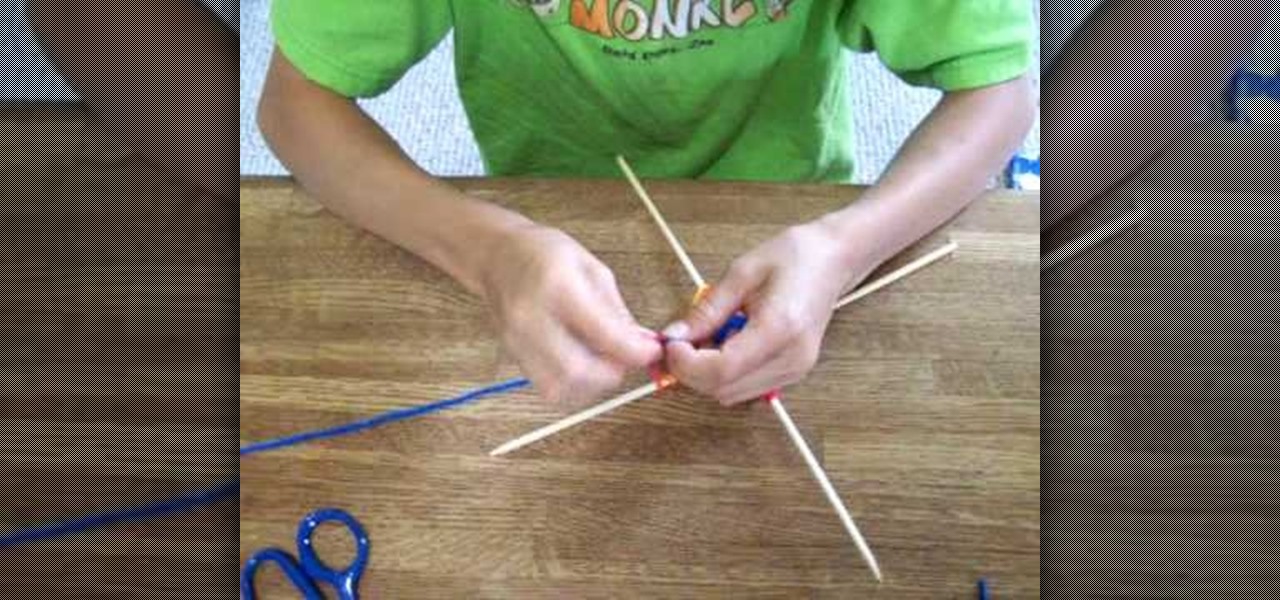
In this video and boy and a woman are showing you the steps to create a "God's Eye" or "Evil Eye". The materials that you will need are 2 sticks, yarn of your selected colors, and scissors. First, you take 2 sticks and use the yarn to knot around the middle wrapping diagonally to form a "t" shape. Then you take another piece of yarn, hold the end in the middle, and start wrapping around each stick going over one and under the next. Continue this pattern until you are done or unless you decide...
This is a video demonstrating how to make a cute and cool hair band scarf. Take a scarf. You can use any material, including a ready made scarf from another outfit, or a ribbon. Hold the scarf in the middle and make a bow. Pull the bow until both sides are even. Lay the bow on the top of your head with the scarf tails hanging down. Tuck the tails behind your ears. Tie the scarf into a knot on the back of your neck. Adjust the angle of the bow on your head. It is good because it gives you opti...
Follow this video to learn how to use copper push-fit fittings to connect piping. 1. Sometimes we connect pipes by means of push-fit fittings which are not very appealing to look at since they are of a different color and material and so do not match with the pipe. However a good alternative is to choose copper push-fit fittings rather than plastic ones. Copper push-fit fittings would be similar to the pipe itself. 2. Open the pipe and ensure that it is clean before fixing the fitting by simp...
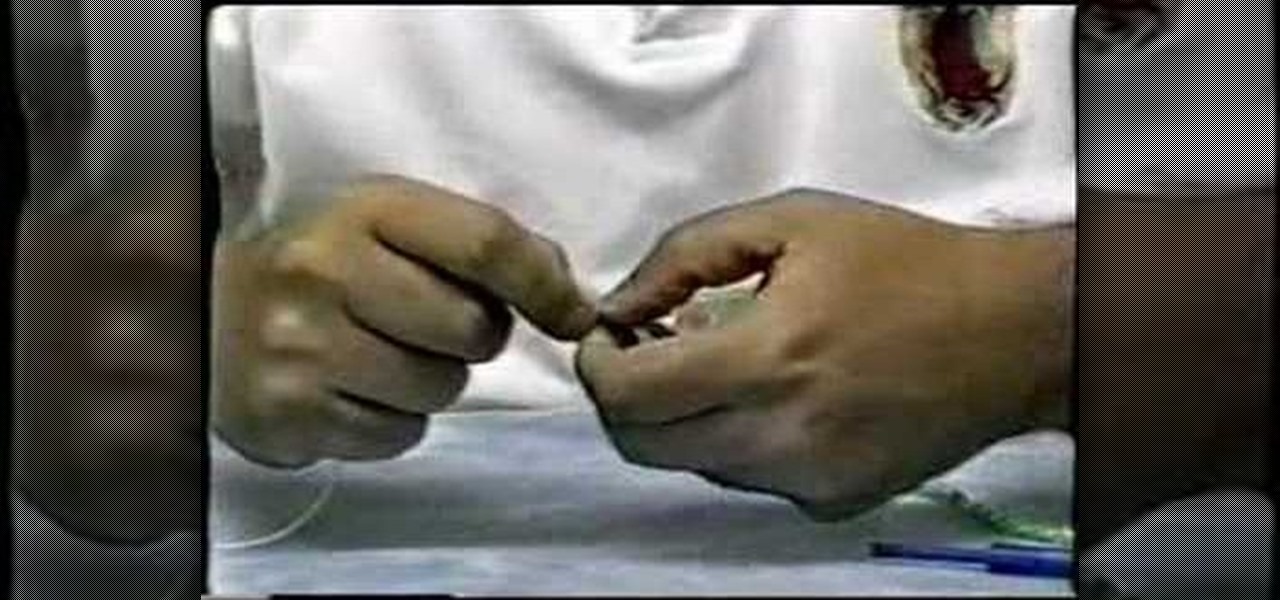
The alternative to the wire and bead rosary, this much more organic cord rosary is a great family activity. In a few simple steps, this video demonstrates the necessary material and techniques to knot one together.
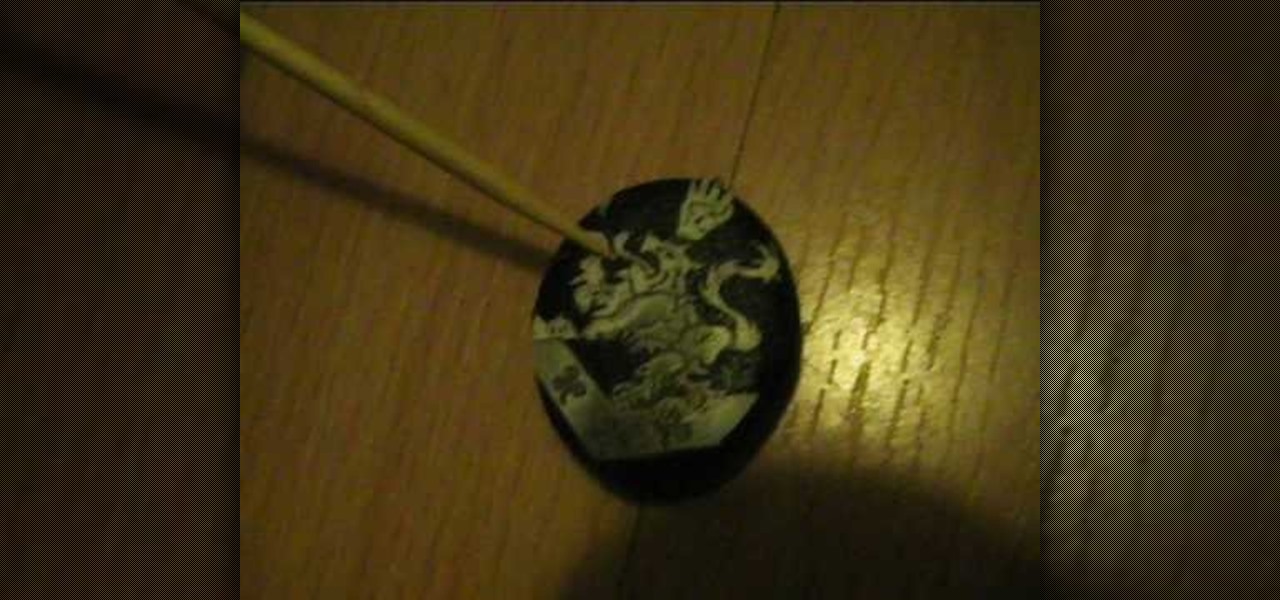
In this video, Alice demonstrates how to make a crest necklace using simple things. For making this necklace she collects some materials such as oblong shaped rock or polymer clay, some paints, a computer print of a cullen crest and so on. She uses the ordinary black paint to paint the rock completely. Next, she collect a computer print of a layout for the culler crest and carefully cutout the shape and using craft glue she stick it on the painted rock to see it fit. she takes some white pain...
In this video you will learn how to draw a graffiti version of "Slimer" from the movie "Ghostbusters". The materials you will need are a writing utensil (the artist in the video uses a permanent marker) and some paper to write on. The artist begins by drawing the eyes and the pupils (the pupils appear cross-eyed). Then you draw the nose, the mouth and start outlining the area around the top of the eyes. Then draw the outline of the ghosts body then continuing around the left arm to the hand. ...
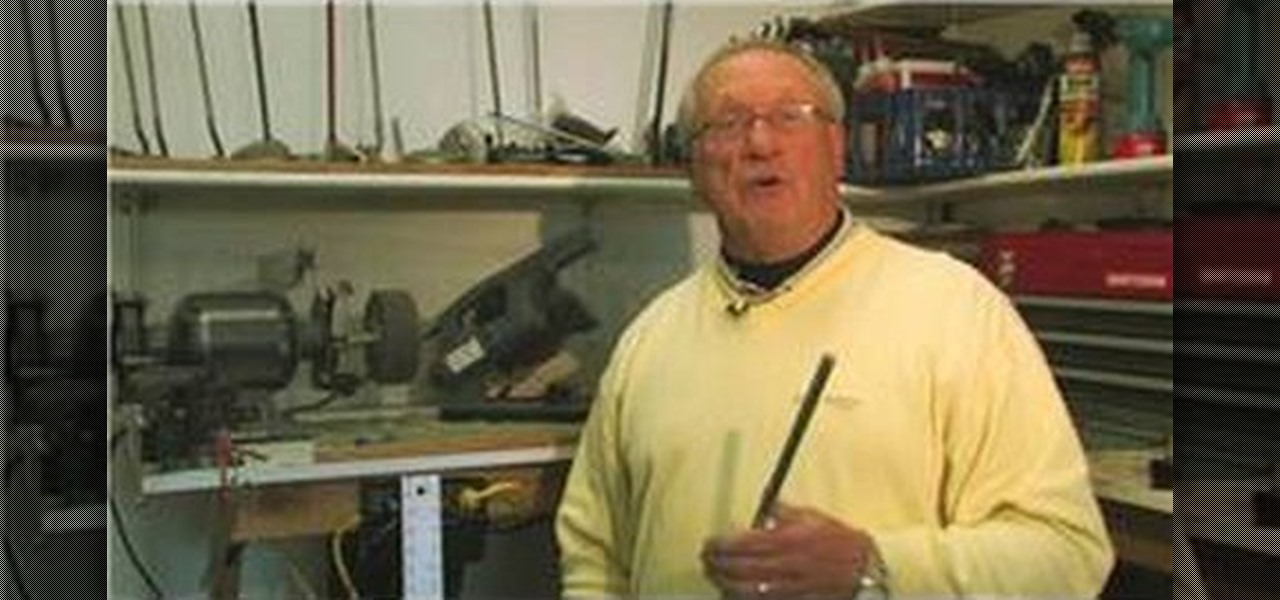
In this video tutorial, viewers learn how to trim golf club shafts. The materials required are: a golf club, yardstick, marker, chop saw and grinder/buffer. Begin by determining how long you want your golf club to be. Measure and mark where you want it to be cut. Now place the shaft in the chop saw holder and tighten it. Make sure that it's lined up with the blade and cut the shaft using the chop saw. Now smooth the rough edge with the grinder/buffer. This video will benefit those viewers who...
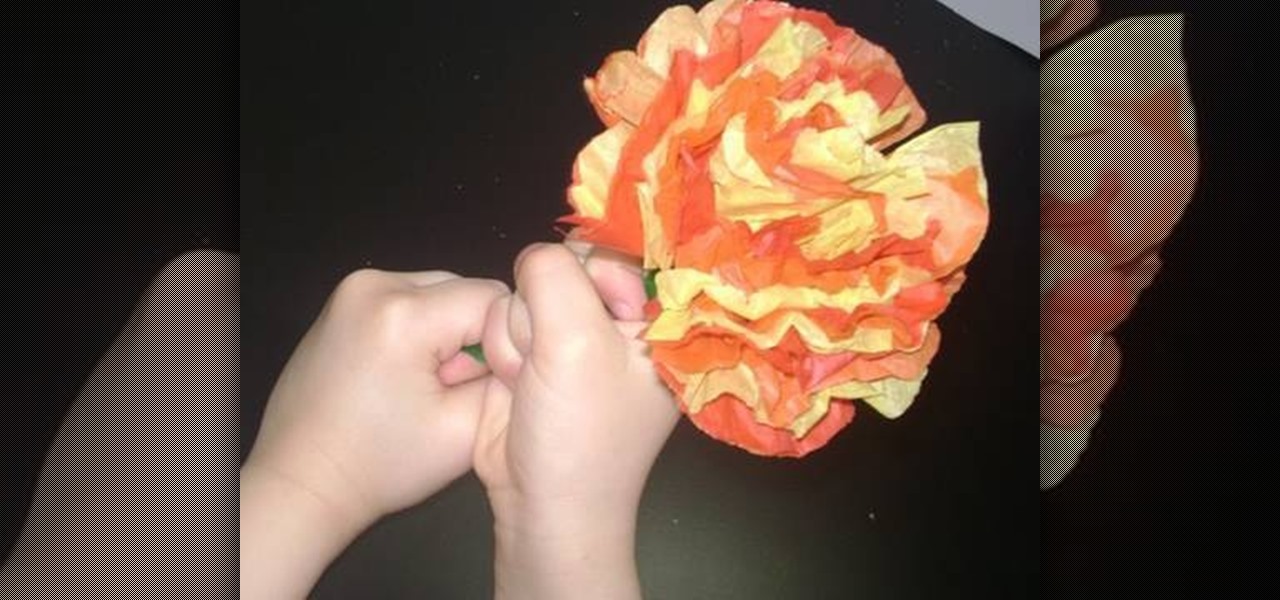
In this video you will learn how to make a tissue paper flower. The video begins with a little introduction to their website simplekidscrafts.com where you can learn more easy crafts that you can do with your children. The materials you will need to begin your project are colorful tissue paper, pipe cleaner, and scissors. This is a very easy to follow guide and only takes around two to three minutes to do. The host shows all of the steps to making her flower by filming an above view over her ...
The hosts, Robin Burke and David Musial, show how to install weather stripping to keep the heat in your home and the cold out. David demonstrates how to remove old, worn weather stripping. He shows the new weather stripping and makes a cut, demonstrating what to do if a new piece of stripping doesn't fit your door. Robin then shows us how to install weather stripping on windows, demonstrating how easy it is to attach the material. Using these techniques, you can further insulate your home fro...
This video shows you how to set up XBox Live using a laptop and Ethernet cable. The materials you will need are an Ethernet cable, an Xbox 360, and a laptop or desktop computer. First, you will need to connect your computer to your wireless network. Next, you must connect your computer to your Xbox 360 using your Ethernet cable. Power up your computer, go to the start menu and select network. In the window that appears, select the Network and Sharing Center located below the address bar. A ne...
If you're camping or stuck out in the middle of nowhere, chances are, you could be faced with dark and freezing cold nights. Learn how to make a simple camp fire out of flint and birch bark. This is for in case you do not have a lighter on you at any given time. To start the fire, you're going to need some bark from a birch bark tree. You're also going to need a flint and a paper napkin as well. After you've gathered the proper materials, just look for a barren spot on the ground, place your ...
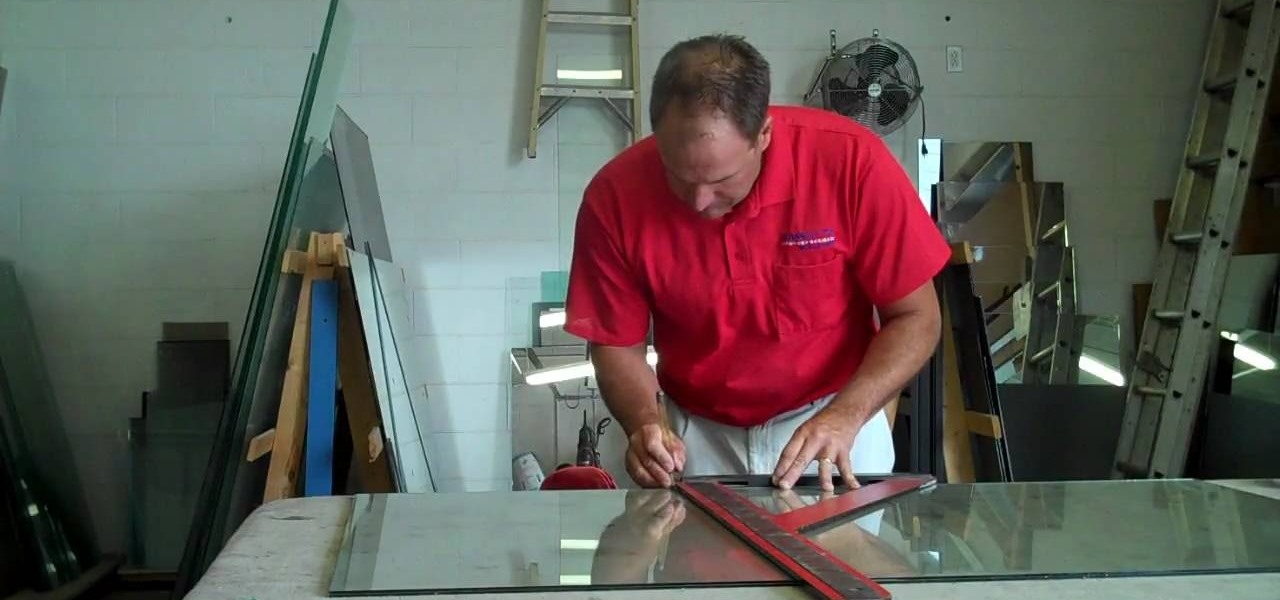
In this video tutorial, viewers learn how to cut laminated glass. Laminated glass is a safety glass that has two pieces of glass with a plastic foam in between. The materials required to cut laminated glass are: an oil glass cutter, L-square, razor blade and an optional propane torch. Begin by marking the glass to your preferred measurement. Then use the L-square to line up the marking. Then use the oil glass cutter to cut down the marked line. Flip it over do the same on the other side. Then...
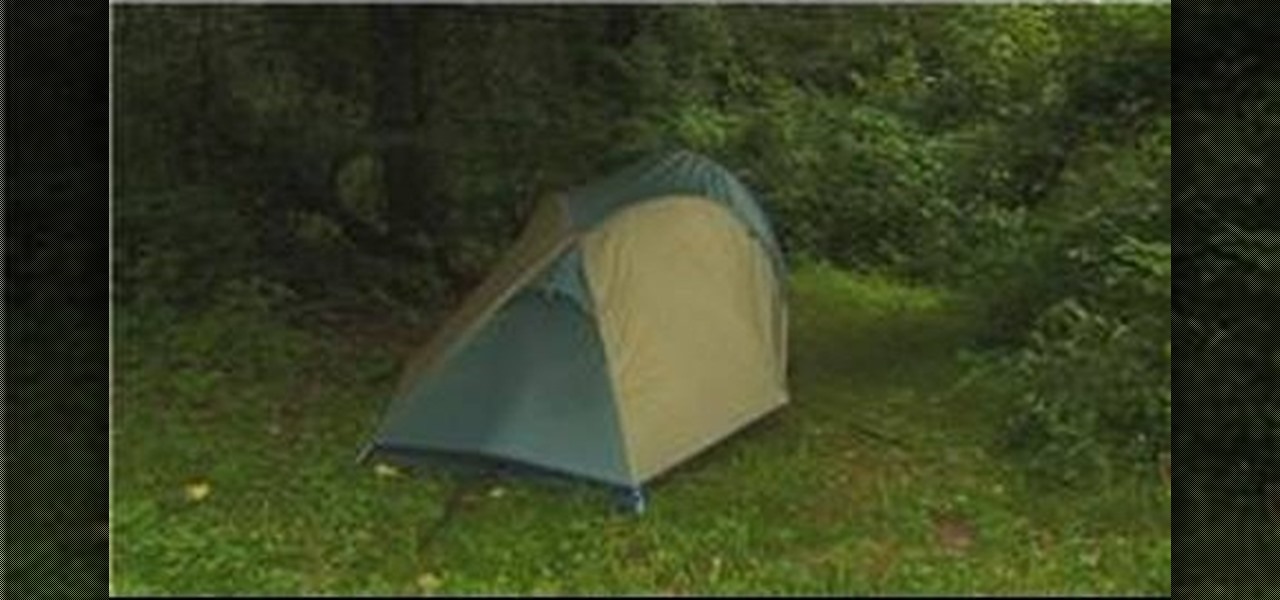
The first advice in this video on how to choose a camping tent is to consider the size of your family. You may want one tent for the whole family or one for the kids and one for the adults. Take time to choose a good camping tent that will last. You may need to spend some money to get a good investment in a tent, one that will last. Do you need the tent for car camping or carry camping? For carry camping you need lightweight materials that will be easy to carry. Large tents may have several r...
In this video tutorial, viewers learn how to make a basic survival shelter using an emergency blanket. The materials required for this shelter are: an emergency blanket, paracord and duct tape. This is a basic shelter that would be great for certain conditions. This setup would be ideal for the following conditions: light to medium rain, low wind, and above freezing temps. This video is very descriptive and clearly explains all the instructions. This video will benefit those viewers who are c...
In this video tutorial, viewers learn how to make a simple pair of earrings. This craft only takes a minute to do. The materials required to make these earrings are: 2 large beads, 2 medium beads, 4 small beads, 2 seed beads, 2 earring pins, 2 earring hooks and pliers. Put the beads on the earring pin in this order: small, seed, medium, large and small. Use the pliers to bend the pin to a loop and hook it with the earring hook. This video will benefit those young viewers who enjoy making arts...
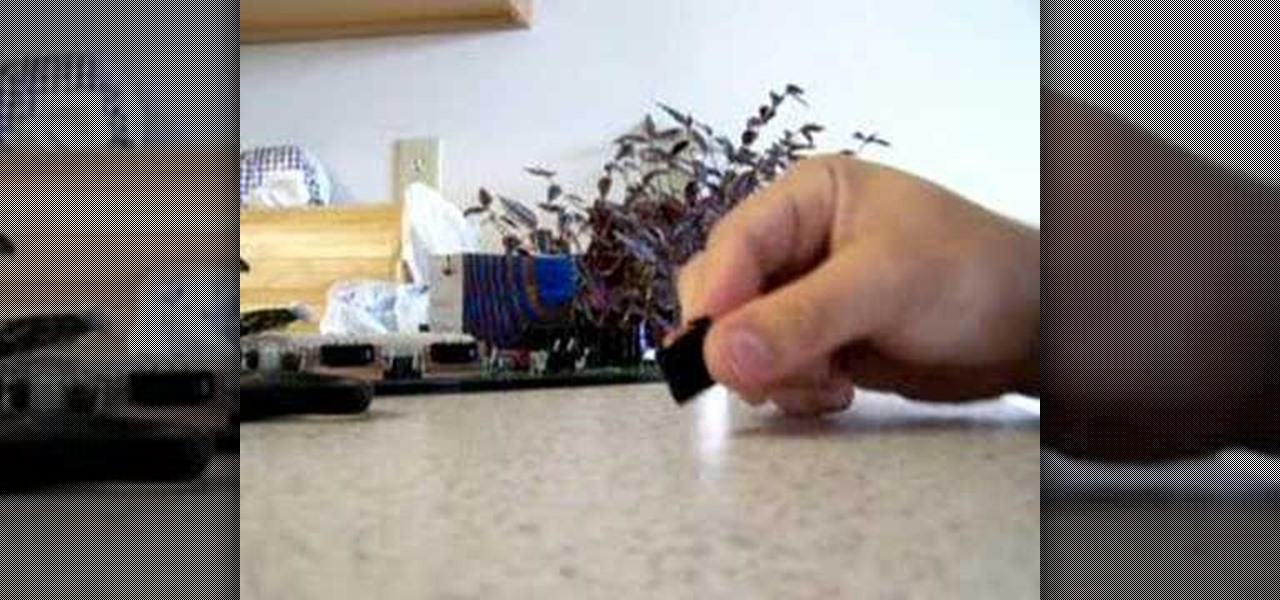
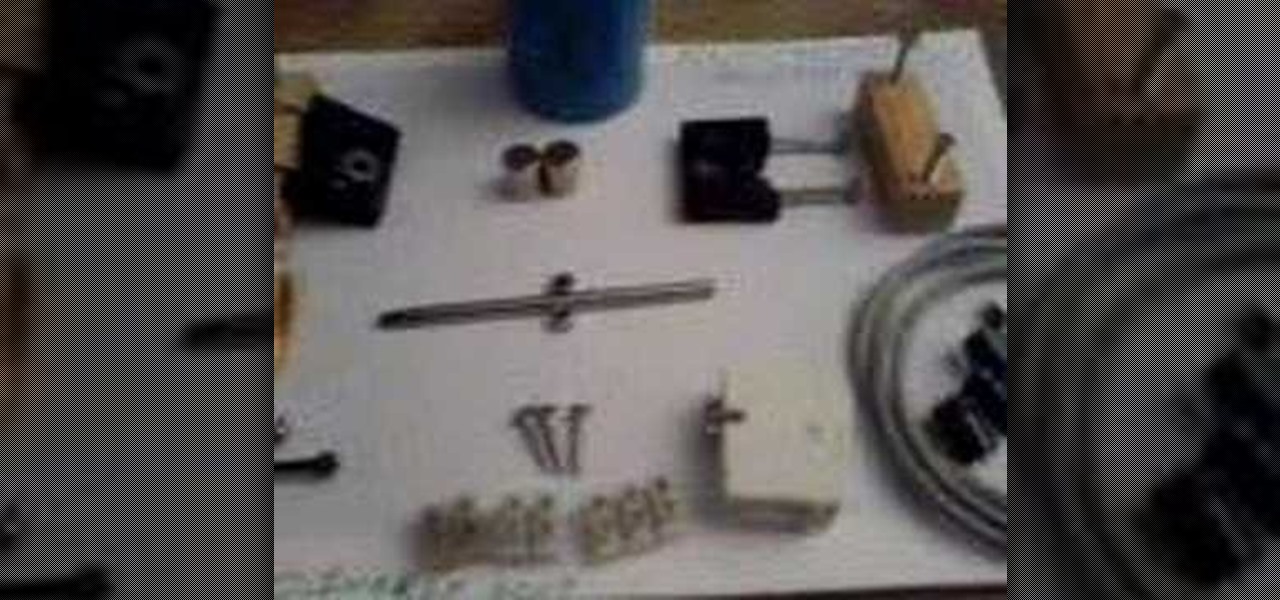
In this three-part video tutorial, learn how to build a "Newman Motor". From the website of Joseph Newman, this motor is an "electromagnetic motor that runs cool (unlike all conventional motors) and harnesses the
This video tutorial demonstrates how to make a simple vintage style button earring. Materials required are two pairs of vintage style buttons, a button shape remover or pliers, some earring poles and super glue
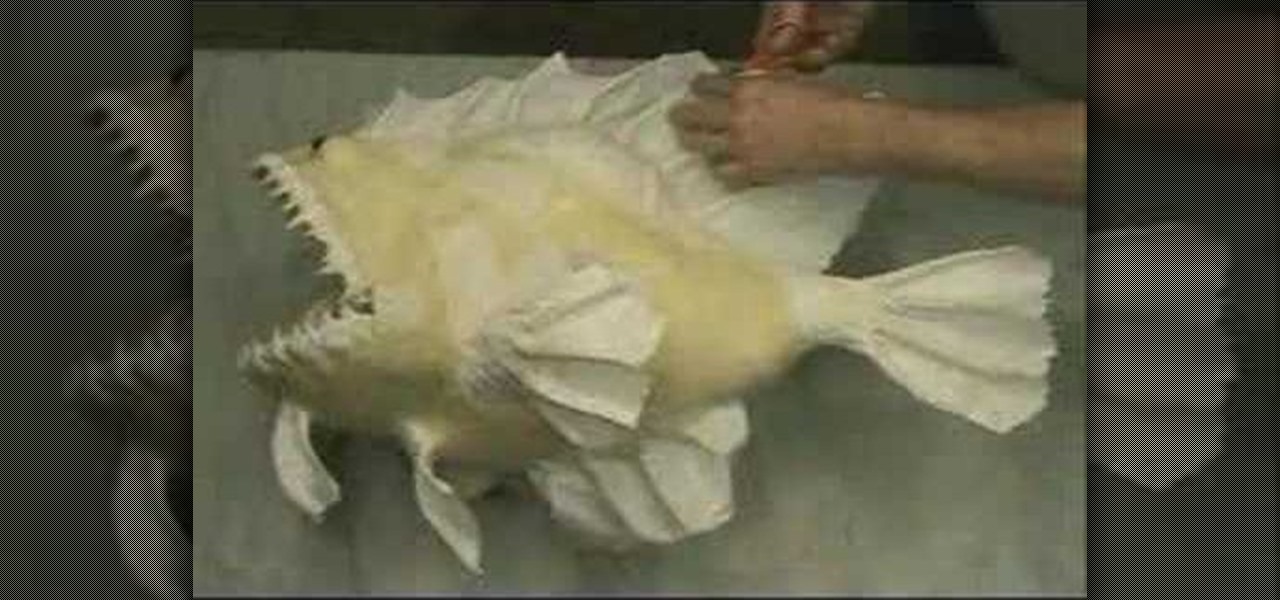
In this video you get to watch a talented mache artist make a fishwichwich from paper mache. It is fast paste but you get the idea of how he does it. Starting with the paper mache materials, the paste and paper, he makes the body and head in several pieces. He pastes these together and uses some sort of stick to make its spikes. He covers the spikes with mache so they have a more realistic look and starts to smooth out the features of the fish. Once the body is done, he's got the teeth and so...
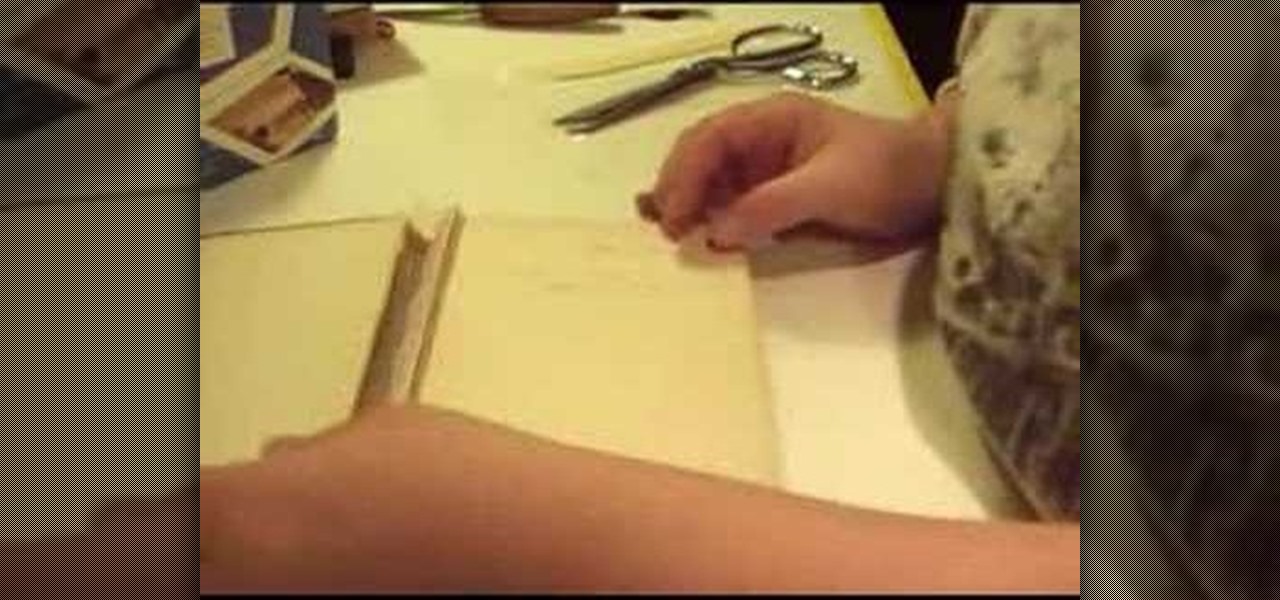
In this video molly1216 explains her method of repairing a hardcover book hinge. She mentions that this method should be used for inexpensive books that are not worth being sent to professionals.
Hacker Daily teaches you to how to make a rocket "outta trash". They take a bunch of everyday materials (paper towel roll, body spray cap, paper cup glue gun, scrap cardboard and a model rocket engine) and create a rocket, by first cutting cross hairs in the bottom of the cup and gluing the rocket engine inside. The video than tells you to insert the paper towel roll trough the bottom of the cup. Than they tell us to glue the body spray cup on top of the "rocket". After adding fins the rocket...