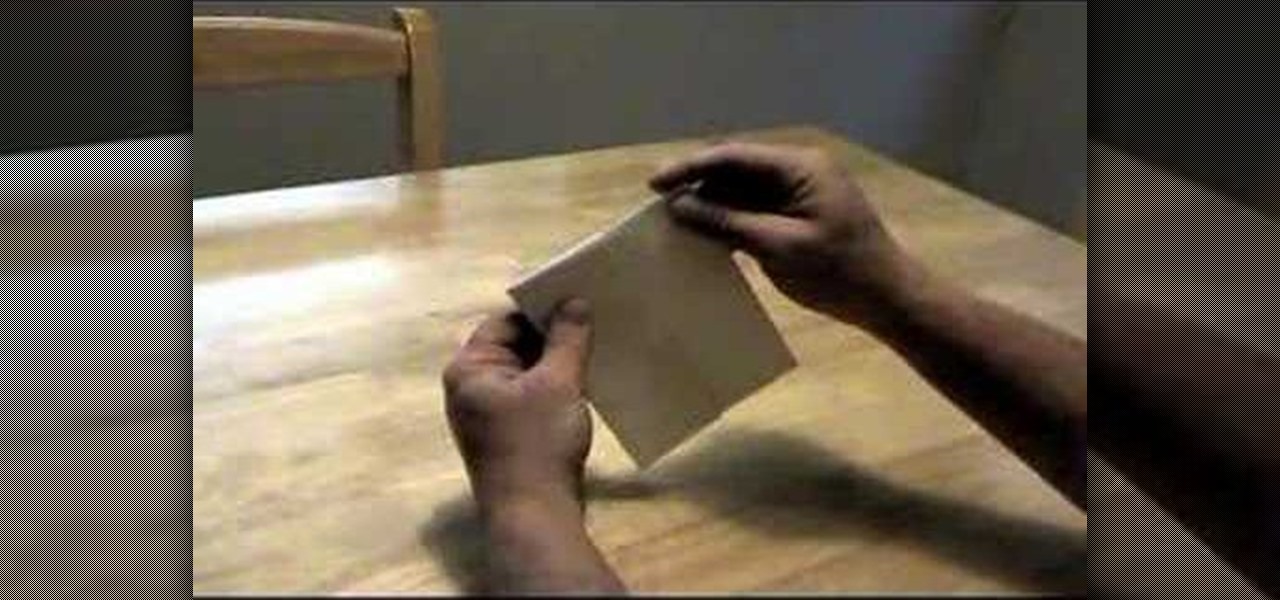
This video demonstrates how to make a loud and annoying paper popper. Prepare a regular sheet of paper and lay it down on the table or a flat surface. Fold the lower portion of the paper at about an inch and a half (1.5") or two inches (2"). Fold it the second time at about the same length you did with the first. Then, fold the paper right in the middle in the opposite direction with your first two folds. Your paper should now be folded to resemble a nurse's hat. Hold one corner of the folded...

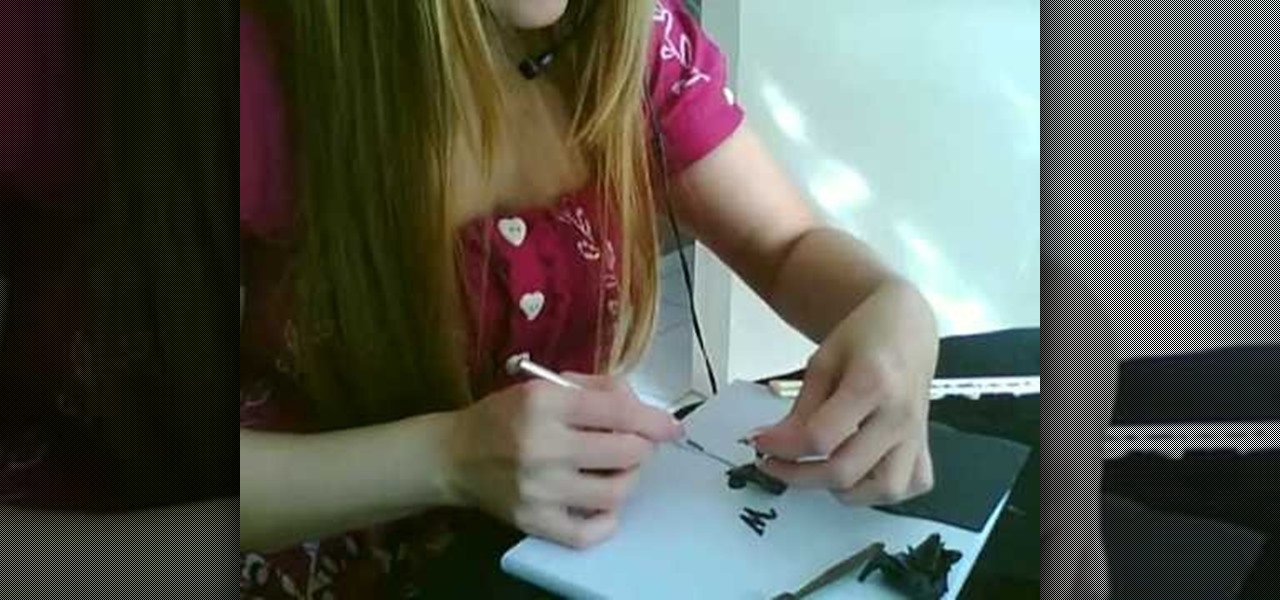
This video shows how to make a paper "popper" that you can use to make a loud popping noise. Start with piece of paper. first fold it in half the skinny way, then fold it in half again the other way. Set the paper down on a table or flat surface so that the flaps of the paper make an "M" shape. Now take the paper in your hands and grab the outer sheets of the "M" with the index finger and thumb of your right hand. Pull the inner sheets out with your other hand. Take the popper in your right h...
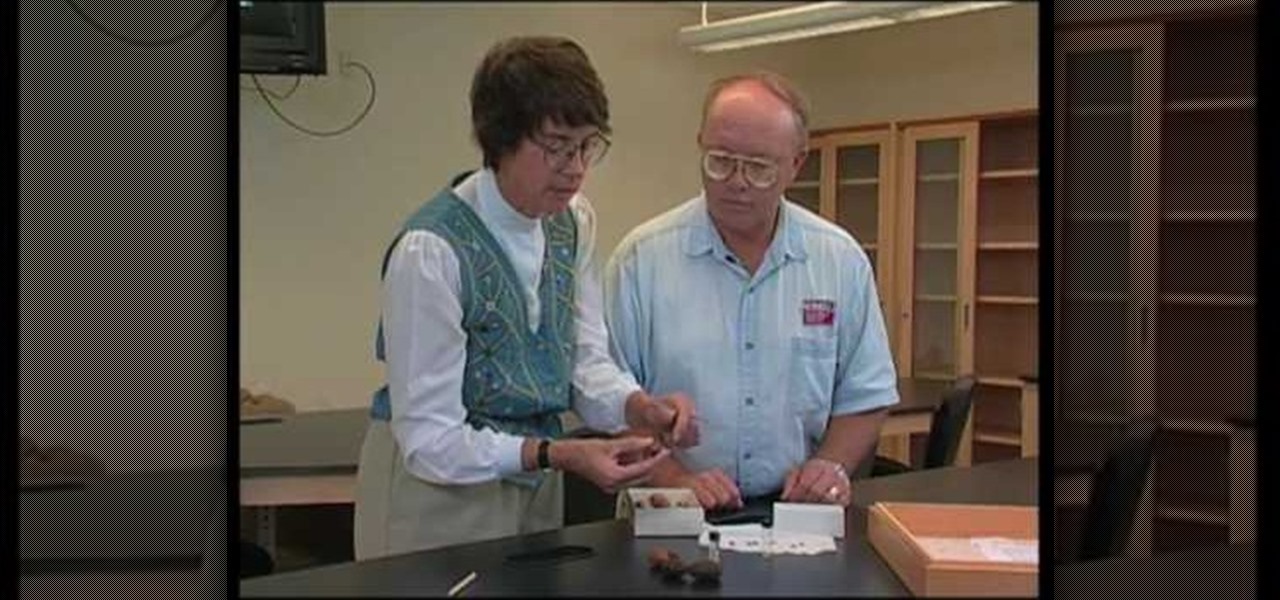
In this Home & Garden video tutorial you will learn how to identify pecan weevil problems. John White presents this video along with Carol Sutherland, extension entomologist. After pecan is infected with pecan weevil, it has the potential of spreading in the entire area. The indication of pecan weevil infection is an opening on the crust of the pecan which may or may not be a perfect circle. But, on the nuts the holes are perfect circles. There is usually one hole on the nuts; though sometime...
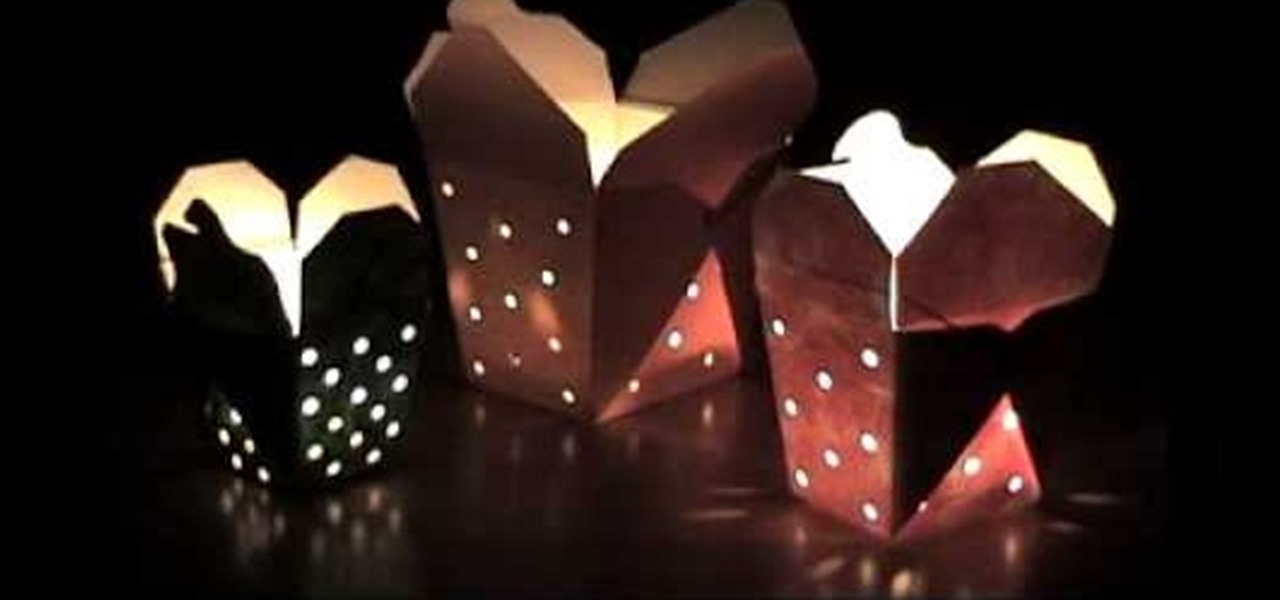
For this project you will need a Chinese takeout container, a hole punch, paint brush, paint, a container for the paint and newspaper. Flatten the Chinese takeout container. Use your hole punch to make holes in it, choosing any pattern you would like. Place the container on the newspaper and paint the outer surface, using any color you prefer. Once you have allowed the pain to dry you can reassemble the Chinese takeout container, back to it's original look. Then you simply place a tea light i...
You will learn how to get a nice, even stain on wood in this Home and Garden video tutorial brought to you by TheSoapGuy. It’s really easy and simple to do. Get a finished piece of wood. You should work in a well ventilated area because wood stain generates a lot of fumes. Wood stain comes in aerosol spray and in cans. Mix the stain in the can by rolling the can. Don’t shake it, it will generate bubbles. Open the can and apply the wood stain with a brush evenly on the surface. The more coats ...
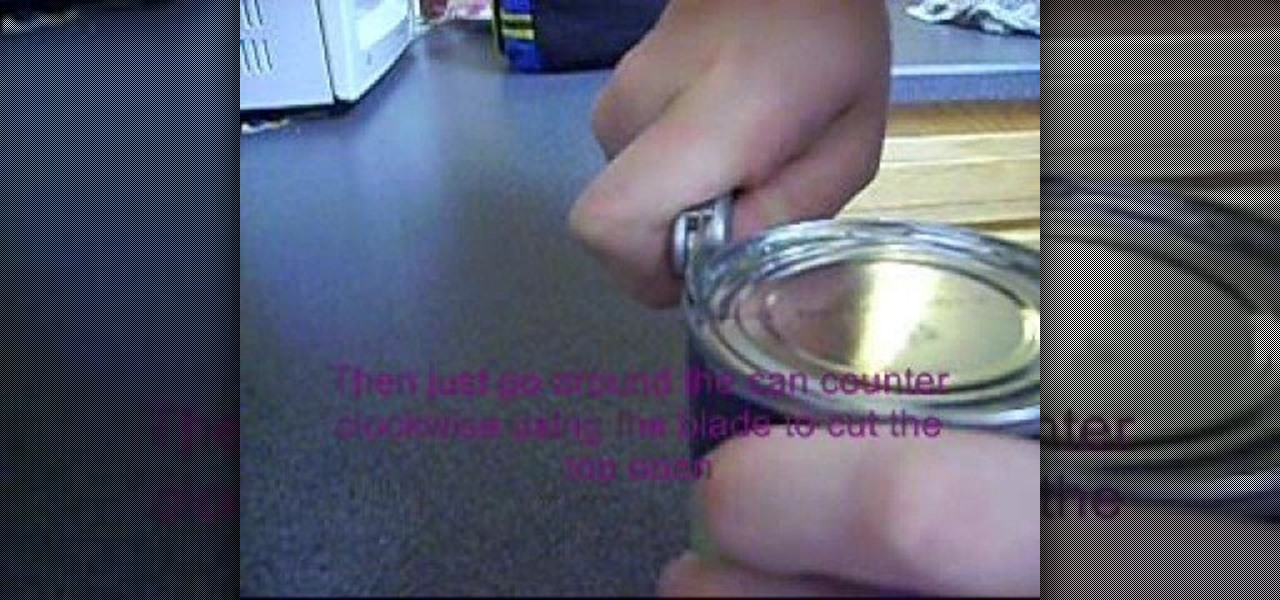
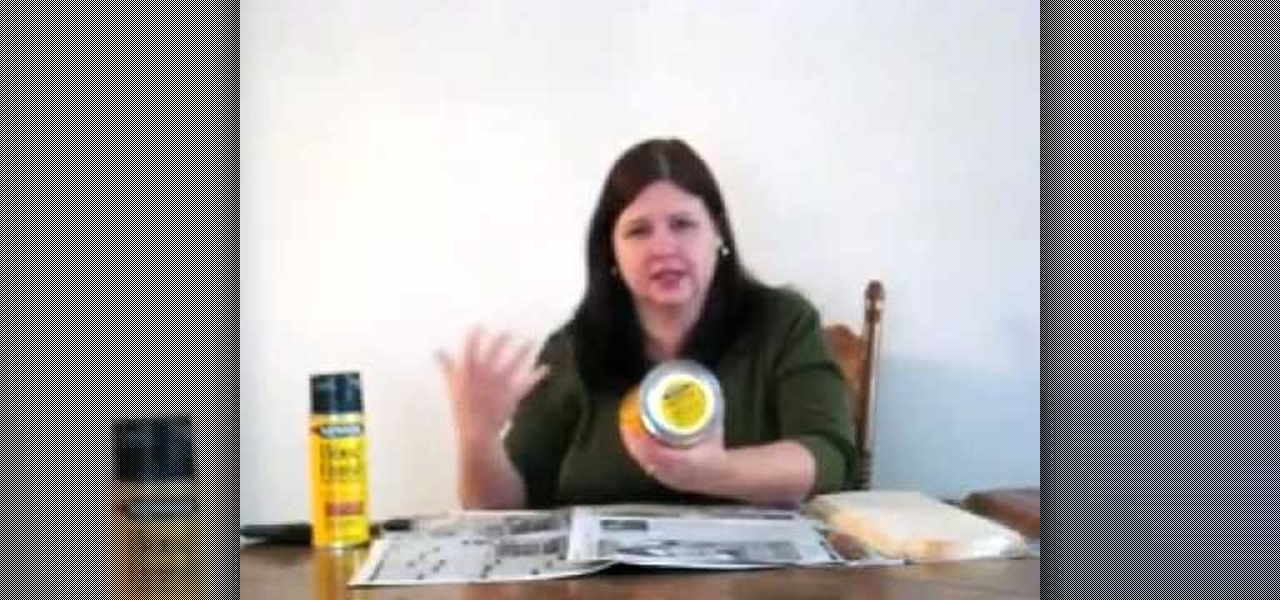
This is a video demonstrating how to open a can with a Swiss Army Knife can opener. To begin, place the can on a flat surface. Open the can opener on the Swiss Army Knife. Make sure that the hook of the can opener is on the outer ring of the can and that the cutting part is on the inside. Use the blade to puncture a hole in the can, pulling up on the handle and pushing the blade along the can. Move the can in a counter clockwise motion cutting along the way. Use the tip of the can opener to p...

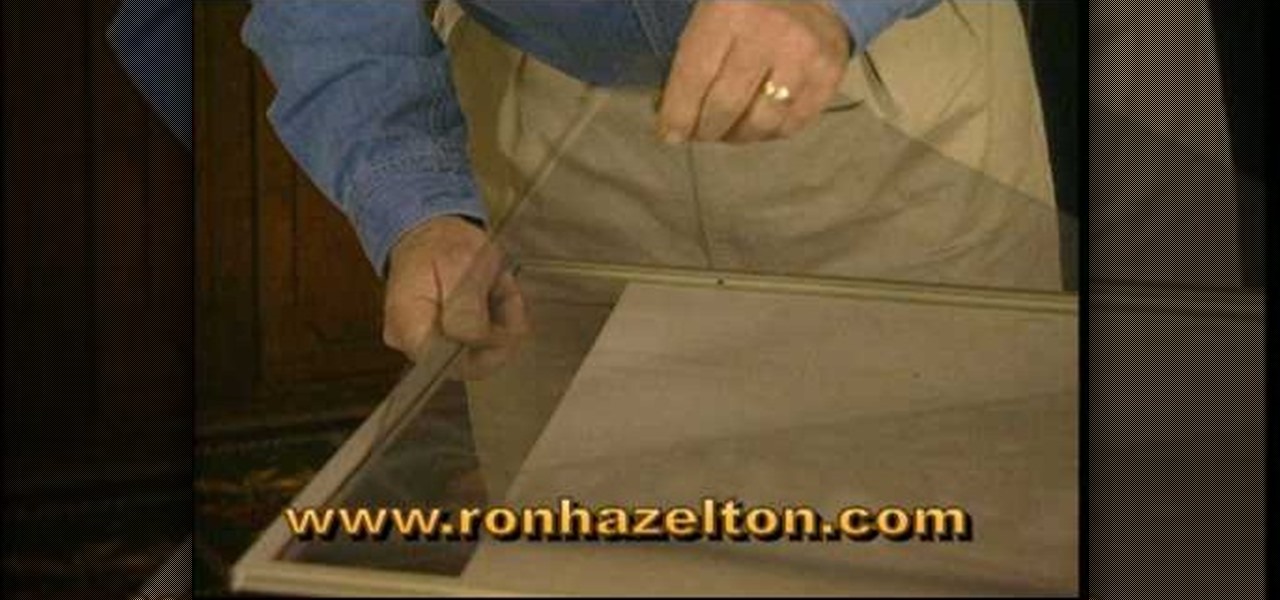
Ron Hazelton describes how to replace a screen in a door or window. The screen is held in the frame by a vinyl cord that can be removed with a knife. Lift the old screen out of the frame. With the new screen on a flat surface, using the frame as a template, cut the new screen a half-inch larger than the frame all around. Cut 45-degree notches in the screen at each corner. Place the screen evenly on the frame. Press the cord back into the groove on the sides first, then the top and bottom. Fin...
Photoshop can be a confusing program, especially with all the different settings and effects you can tinker with. Learn to master the vanishing point filter in this fun, easy to follow tutorial with the Pixel Perfect team. Clean up your pictures and smooth over any unwanted imperfections as he takes you how to make them "vanish" with the program. Alter the perspective of an image and add it on to another and change that cloudy day into a snowy background. Each step is carefully explained with...
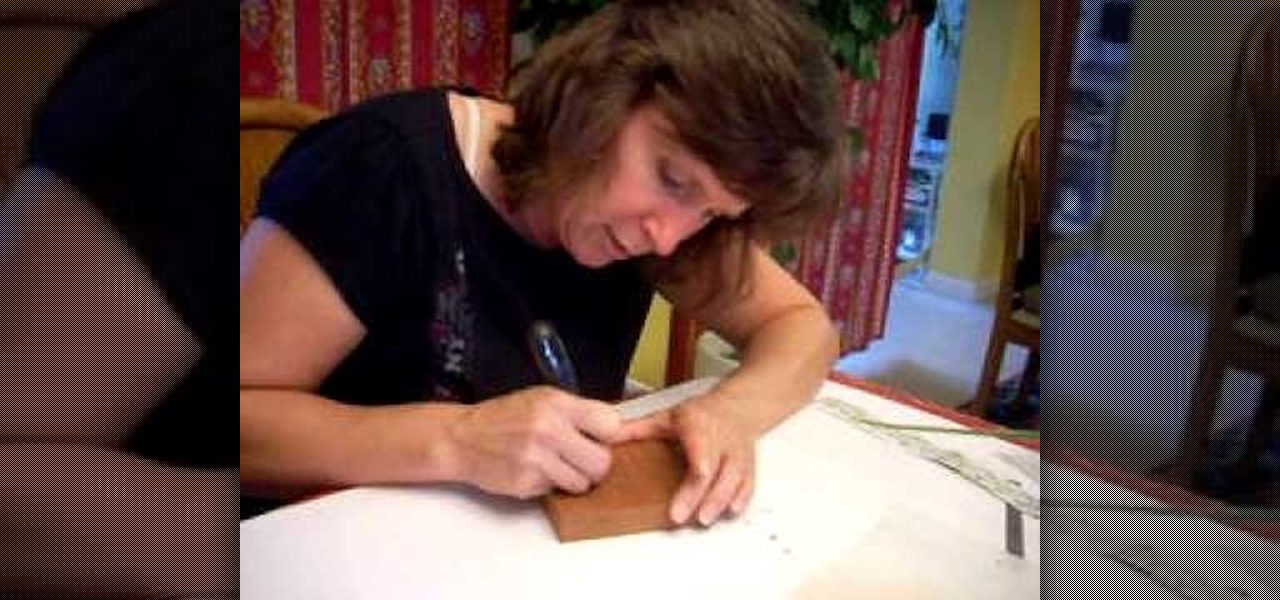
In this three-part carving tutorial, Valerie Jones demonstrates her chip-carving techniques on Mahogany wood. Using an X-acto knife, she carves the wood by hand & describes how to carve German-style, geometric patterns into the wood after stenciling the pattern on the outer wood surface. Later, Valerie talks about her methods when chip carving wood: how to hold the knife, how to guide the blade, finishing the final product, how to follow a stencil pattern & goes over more useful information.
Grace Bonney shows us an easy way to create an upholstered headboard for your bed. Using a low-end easy budget, you will be able to create a elegant looking headboard using wood, foam, batting, fabric, scissors, a utility knife, a staple gun, and flush mounts. After cutting out the shape of your headboard or starting with an existing headboard, cut out a piece of foam that is the same size. Pull batting over the foam to even out the surface, and then put the fabric onto the headboard. With th...
Find out the best ways to use the creep swab in Houdini. An architect in New York came up with a very clever means of distributing various shapes onto a surface using a creep swab. So, if you want to know how it's done, watch this two-part video, which focuses on using the creep tool in conjunction with copy stamping to achieve some unique results in Houdini 9.
This is a great tutorial on making wonderful little artsy butterflies with your own two hands! They're sparkling butterflies, which you make with fantasy film, a butterly image, permanent ink that dries on non-porous surfaces, craft iron, acrylic stamps, and a non-stick craft mat.
In this tutorial, you will learn how to model this cool looking diving knife. The model can be set apart into two pieces, blade and handle. Both having some nice features.
Check out this DIY video tutorial from Curbly, the best place to share pictures of your home, find design ideas, and get expert home-improvement advice.
Need to upgrade your bathroom's mirror? Well, first you need to take down the old one! And Eric shows you how it's all done in this video guide from GardenFork. Removing a mirror that's been glued to the wall is tricky, but it's nowhere near impossible to take down. Eric covers the mirror surface with contact paper to prevent broken shards dropping everywhere, then start banging on to break it, so you can take it down in sections safely. Once you get it down, see how to hang the new mirror up...
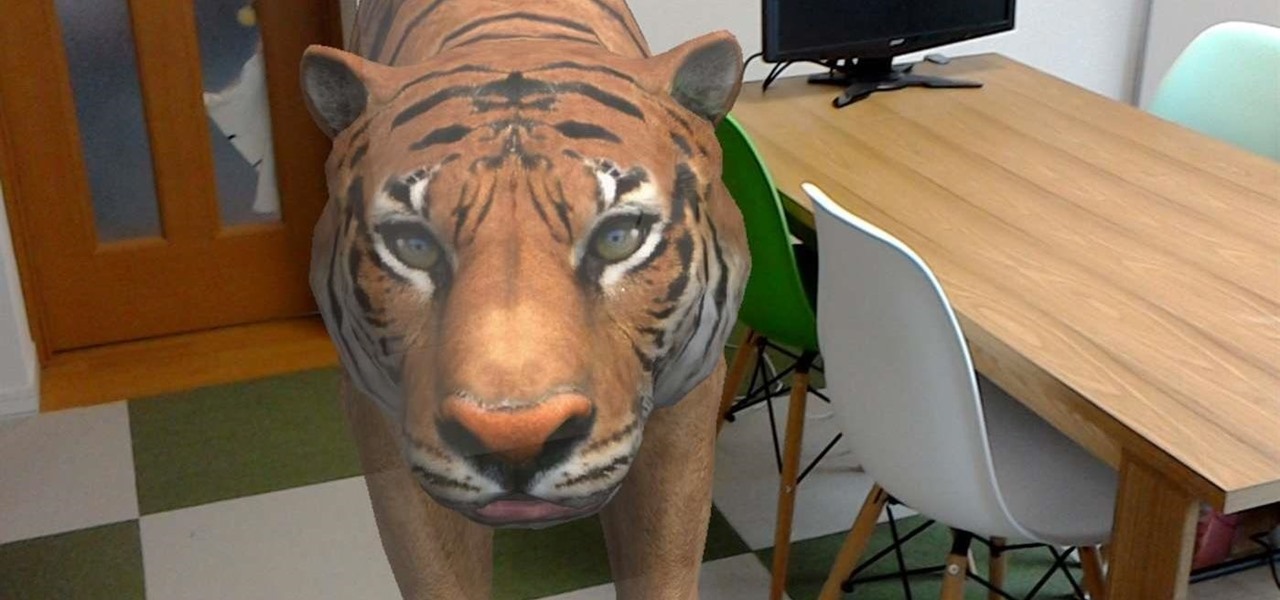
Augmented reality headsets with depth sensors, like the HoloLens, offer a much more immersive experience than the average smartphone at present, and one app demonstrates that in a uniquely entertaining fashion.
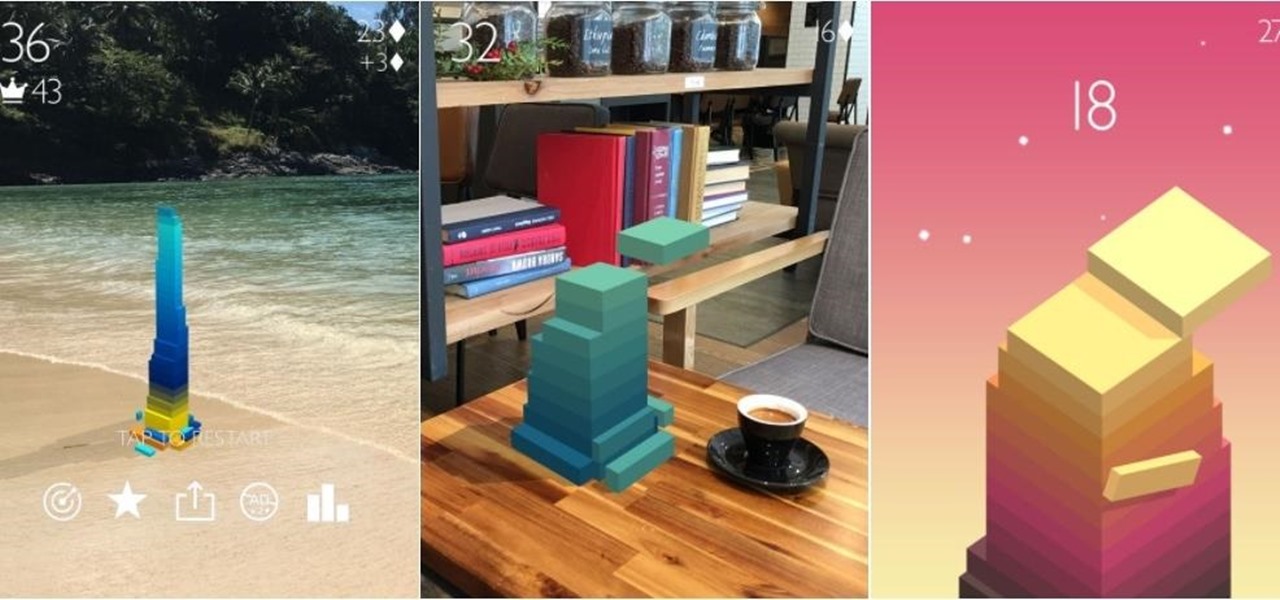
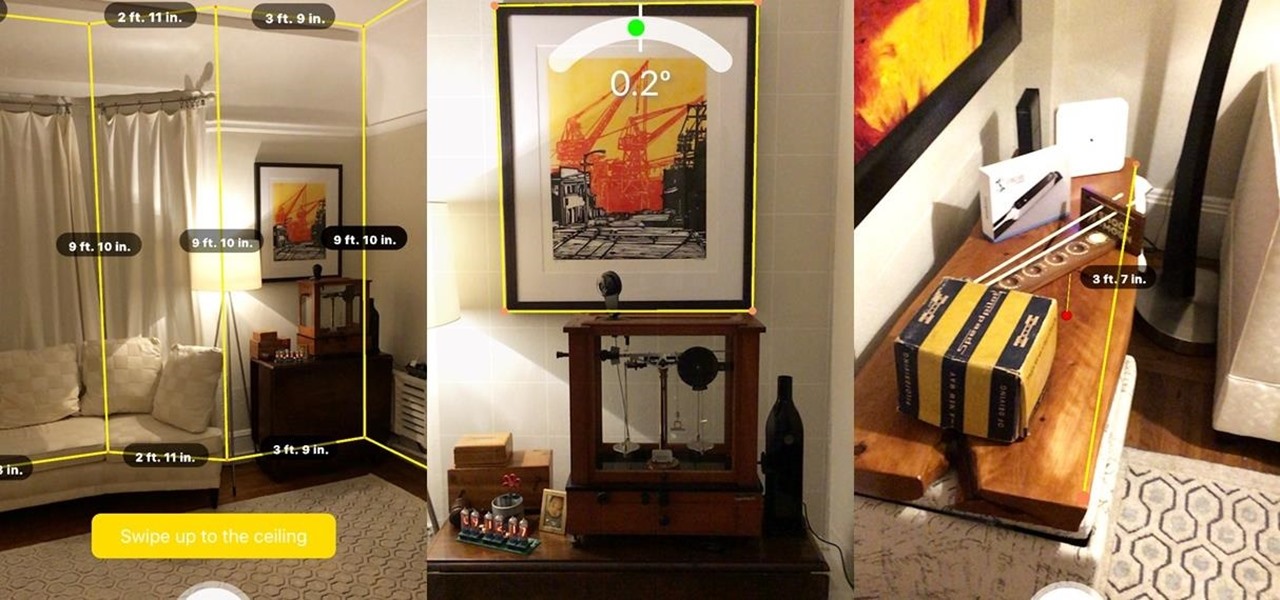
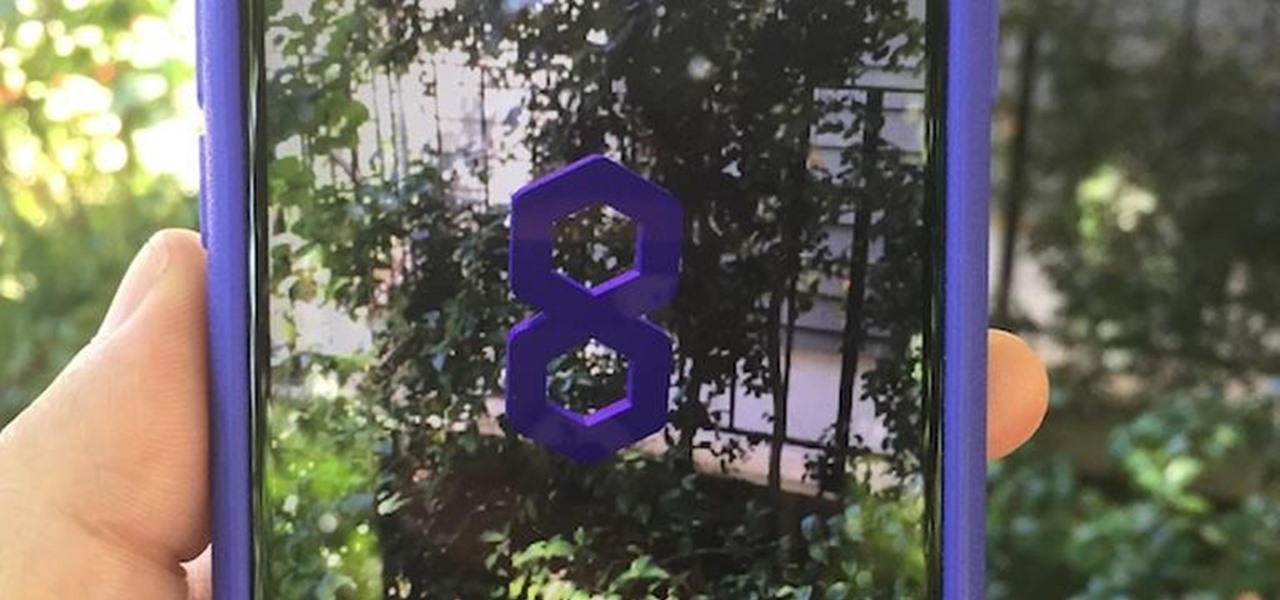
If you're an Android user, you're very likely jealous of your iPhone friends who have access to the wide, wonderful world of augmented reality thanks to ARKit.
When explaining augmented reality to the uninitiated, Pokémon Go is often cited as an example. For all its popularity, though, many players would recommend disabling the AR capabilities in catching Pokémon.
The promise of augmented reality when it comes to gaming is the conversion of the player's real-world environment into a virtual playground.
In off-record discussions with AR experts, the consensus on ARKit is that it takes a software approach to the depth-sensors available on Tango devices. As a result, the toolkit has shortcomings, such as detecting walls and vertical surfaces.
During Google Developer Days, taking place now at the ICE Congress Center in Krakow, Poland, an introductory session on ARCore provides some insights on how the platform operates.
With Apple ready to unleash ARKit to millions of iPhones and iPads and ARCore on its way to supporting millions of Android devices, is there room in the world for a cross-platform mobile AR platform?
Lightform might just be the thing to have at your next party. The San Francisco-based company just created the first computer ever able to connect to a projector and instantly scan 3D scenes to mix reality with projected light.
Norovirus outbreaks occur all year long, but peak in the winter months, which means we are in the middle of norovirus season. But there's still time to protect yourself from the highly infectious bug.
We live in a marvelous age, a time where technology is driving us forward as a species at a rapid pace, and tech-driven miracles are becoming more and more commonplace. While the human race may not be focused on building the largest wonders of the world, as it once was in history, the current order of wonders are much smaller in scale—even internal.
What's in a sneeze? Quite a lot—dirt, mucus, and infectious germs—it seems. And sneezing the right way can reduce the germs you share with neighbors.
The biggest problem with plastic wrap is also its most useful trait: its incredibly clingy nature. Plastic wrap seems to stick to itself or you before you can get it over the plate, bowl, or food you're trying to preserve. And once you do manage to get it in the right position, it never sticks as well as you need it to. Fortunately, you can combat these inconveniences with two extremely helpful methods—a change in temperature or a bit of added moisture—as Jenny Stewart of CHOW explains in the...
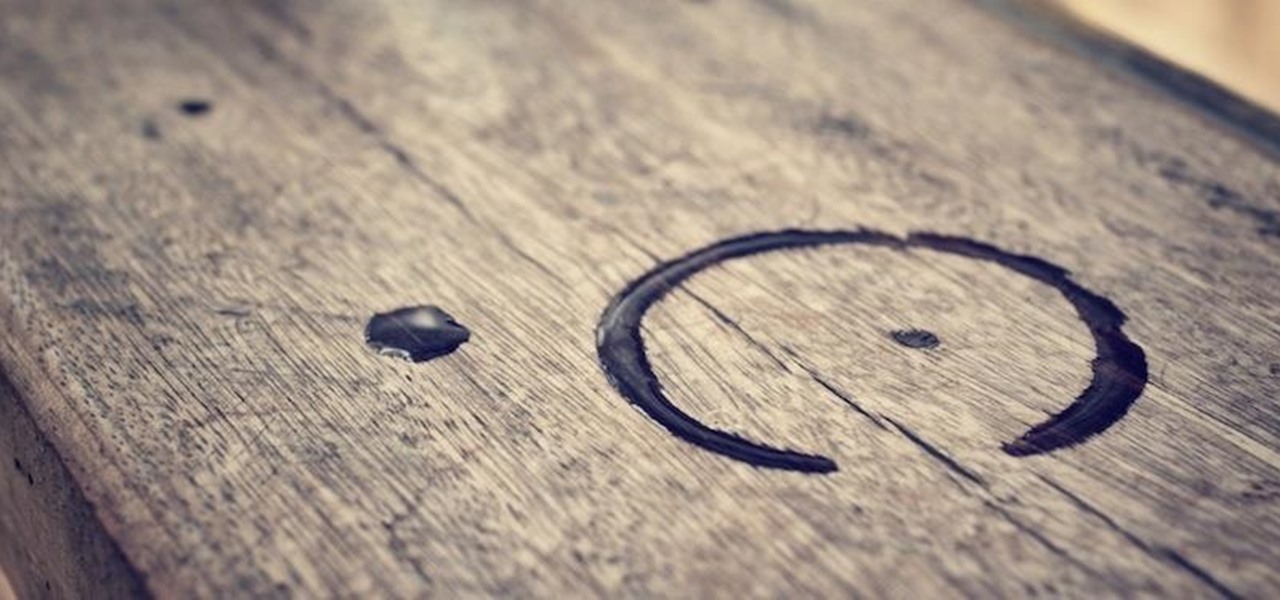
Most wood furniture is long-lasting, durable, and resistant to great wear and tear over the years. However, set a single sweaty, wet cup or bottle on the surface of your favorite wood dining table, or your prominently placed wooden coffee table, and you'll end up with a round water ring stain that is difficult to get rid of.
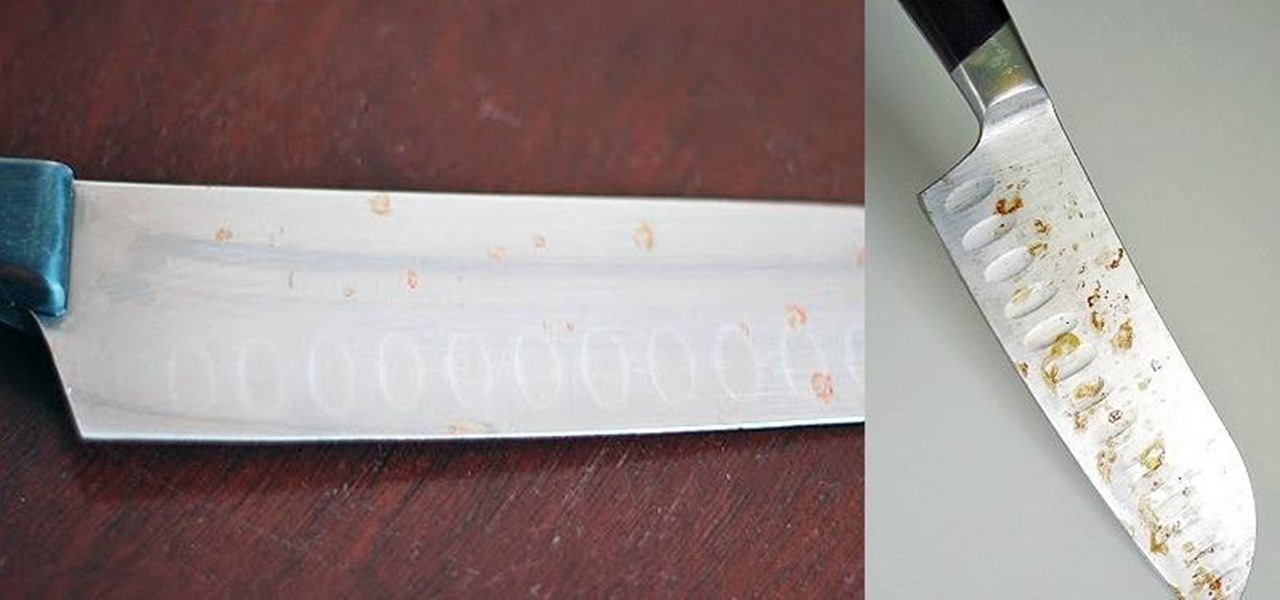
If you're careless and tend to leave your knives lying around or in the sink, chances are you've struggled with rusty blades.
Living on a budget often means compromising what you want for what you need—or at least, for what's affordable. But that doesn't necessarily mean you have to compromise on flavor, especially if you know the right tips and tricks to make something spectacular out of the ordinary.
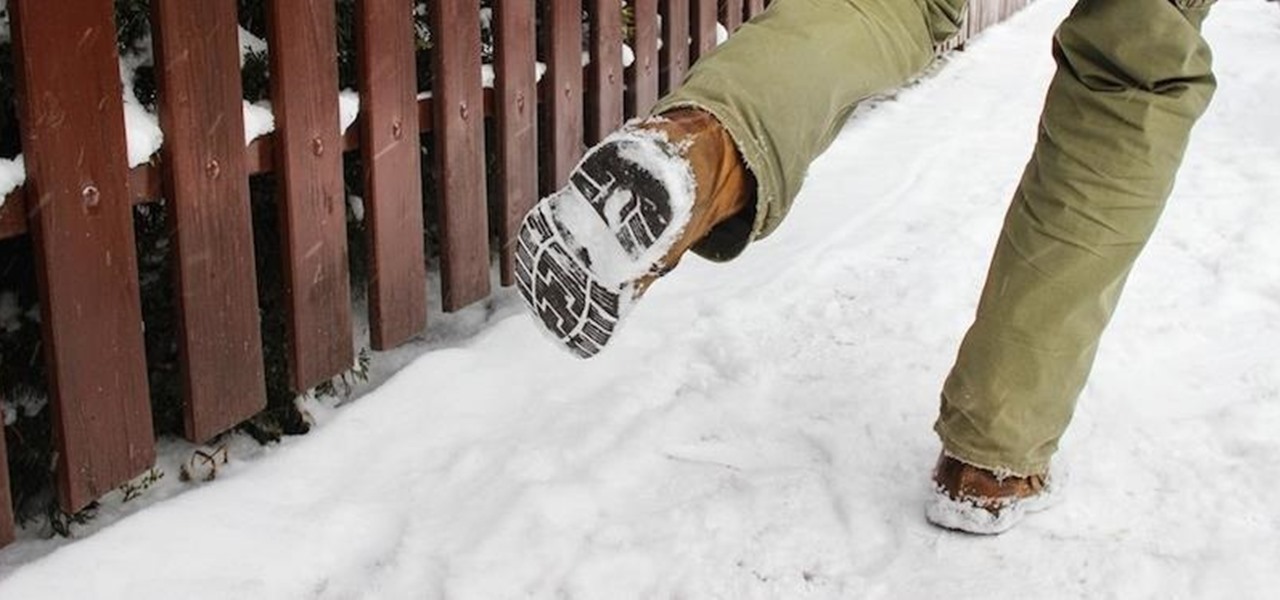
The months of constant snowfall and freezing temperatures seems endless once the excitement of the first snowfall fades, and you become weary of traversing black ice and other slippery streets.
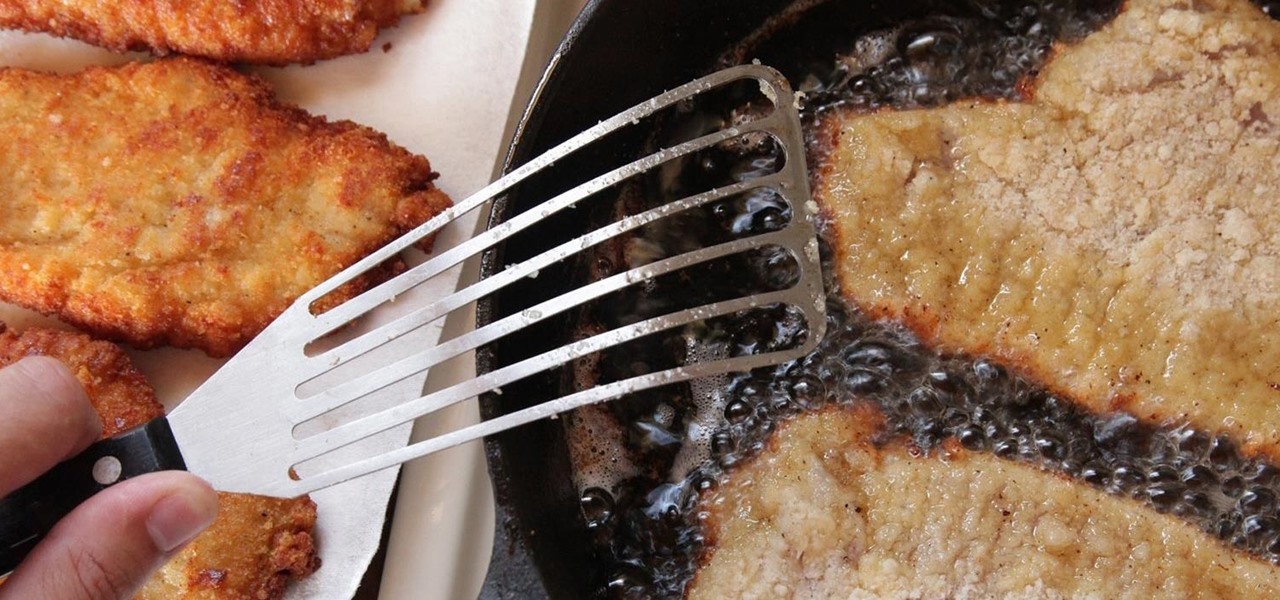
Most people who cook end up having at least three or four different kinds of spatulas in their drawers. I personally have at least five. However, if I had to do it all over again, I would purchase only one, and that would be a flexible fish spatula.
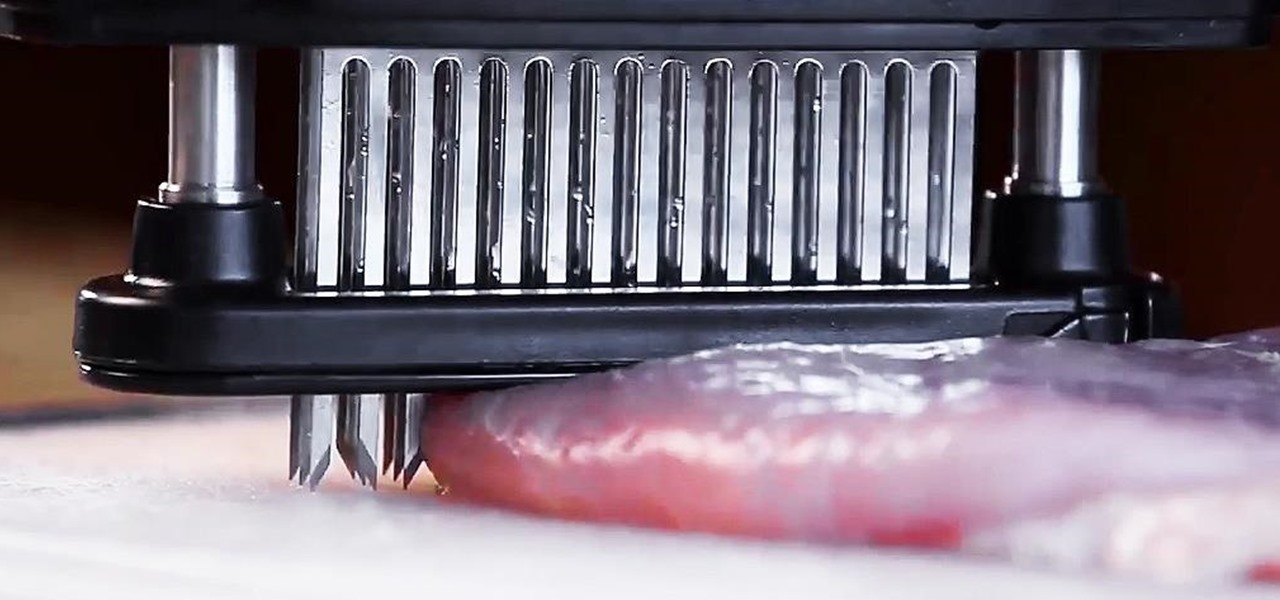
Meat tenderizers are absolutely necessary when dealing with leaner, tougher cuts like flank or skirt steaks. And while fruit like papaya, kiwi, and pineapple contain enzymes that can tenderize meat, the results can be hit-or-miss, and impart a fruity flavor that you may not always want.
Video: . Dent Repair - Using a Stud Welder Gun
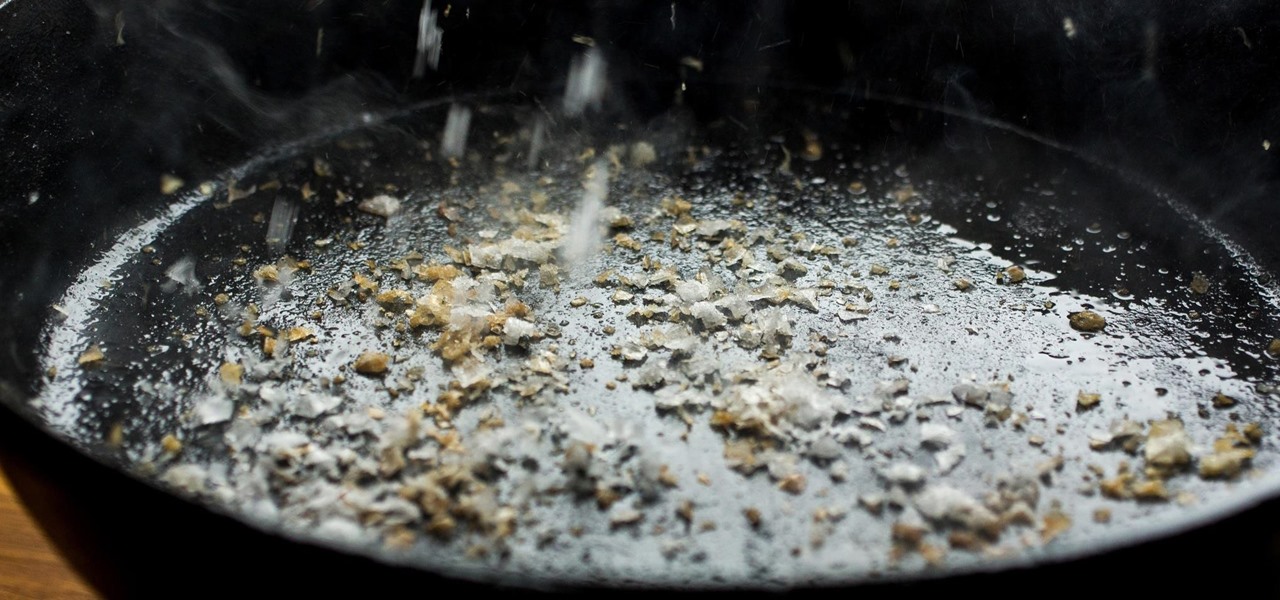
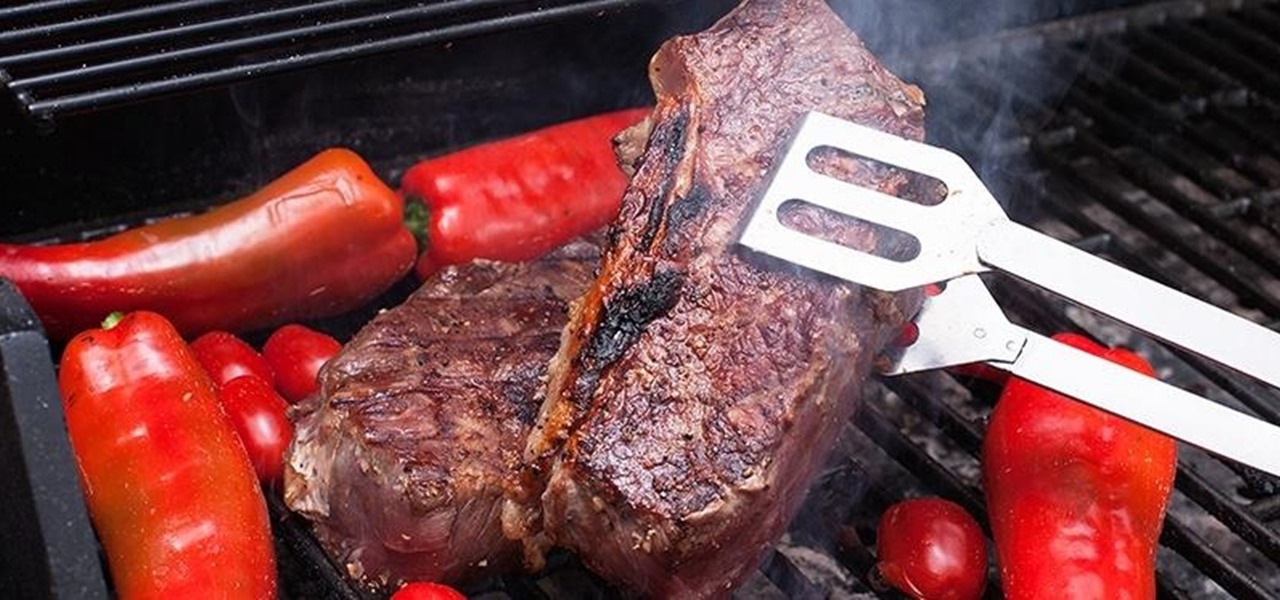
There are a lot of techniques out there for how to cook the perfect steak, from flipping it multiple times to applying a spice rub or dry brine to aging the beef. But it turns out that there's a super-easy way to make a great steak at home, and all you need is a good cast-iron skillet and some salt.
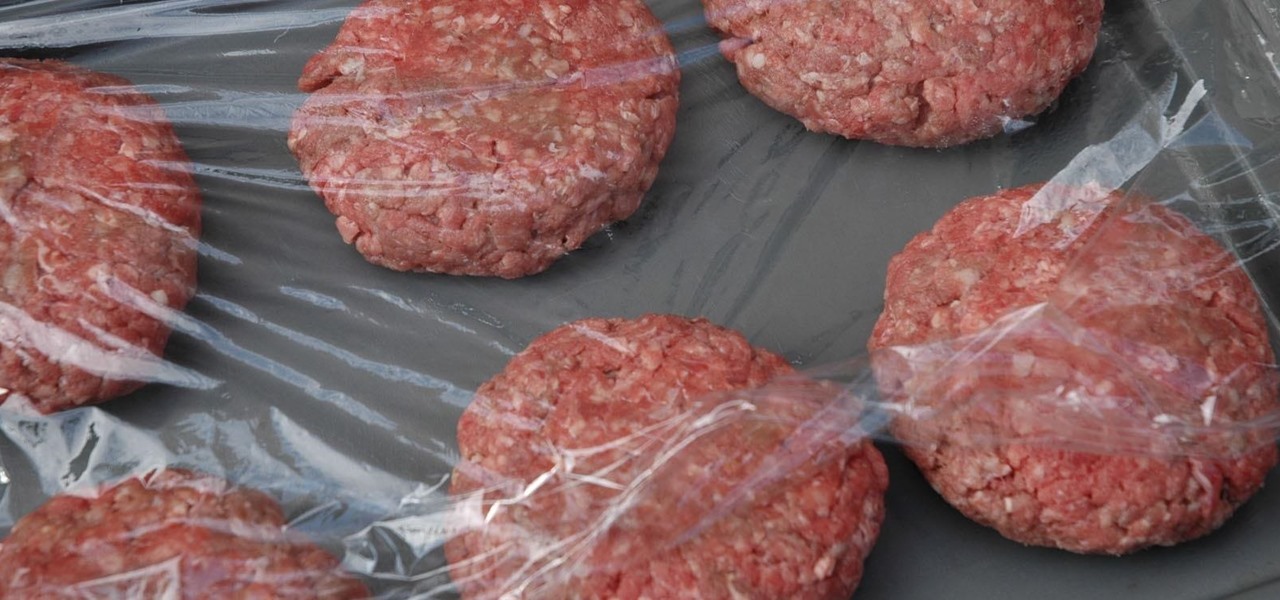
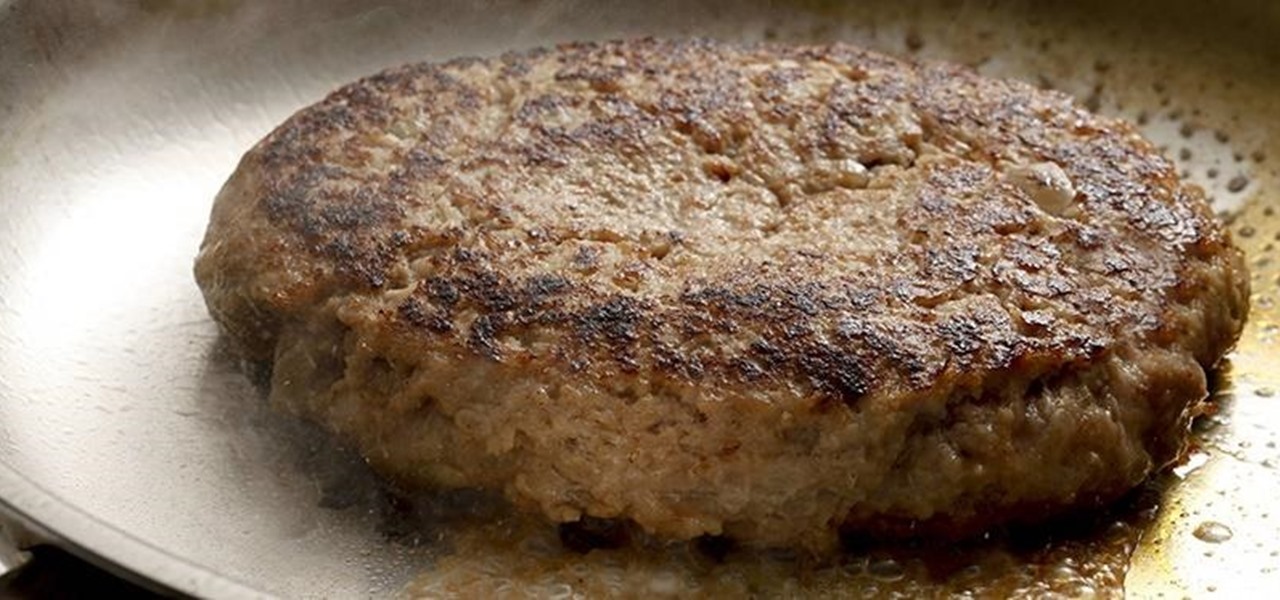
A homemade burger is a delicious thing, but it can be hard to load up with all the fixings. Why? Because said burger is usually wider in the middle and thinner around the edges, like so: Chances are that patty will still be delicious, but your lettuce, tomato, et al. are going to slide off the surface because of this patty's dome shape.
To flip, or not to flip, that is the real question. When you're nervously standing over the stove or grill, what do you do with that steak before you?
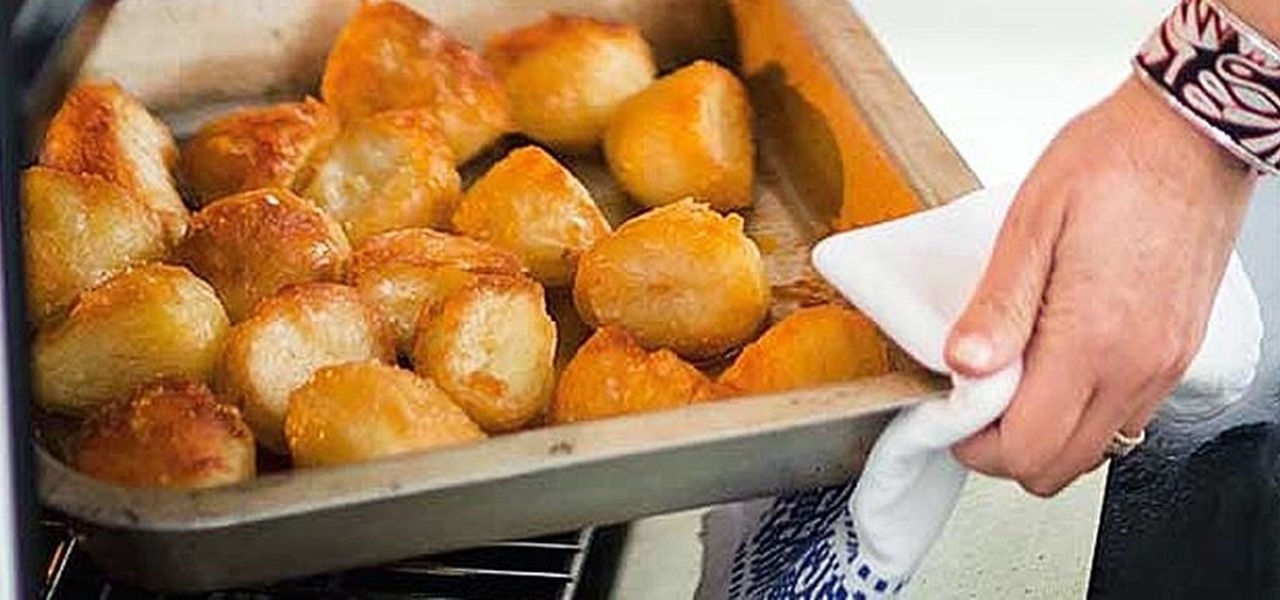
A perfectly cooked roast potato is a study in contrasts: the outside should be crisp, crunchy, and salty, while the inside is tender and fluffy. Too often, however, roast potatoes come out overcooked, greasy, and tough.
In this video, we learn how to tort, level, and fill cake. When your cake bakes, you get a mound or crown at the top. You will want to cut this off, or else your cake will crack. The next step is to just stick a cake board underneath and remove it. You can also torte the cake, which means to use a cake leveler to make it completely even on the surface. After you do this, you can make a dam around the cake about 1/4" of the way in. use a coupler on your bed and fill it in so it can hold what y...
In this video, we learn how to do gumpaste cake decorating lettering. First, you will roll the gumpaste, then add some crystal to the surface so it will stick. Next you will roll it out until it's thin. Cut a piece of it out, then put the rest on the side. Take the small piece and cut it into a small square. Use a letter Tappit to press onto it until it's completely cut out. Once finished, you will be able to use this on a cake! Cut out all of your letters from the remaining piece of gumpaste.