'Tis the season to be jolly, and what's more jolly then unleashing a torrent of bullet fire on the opposing team using a LMG emblazoned with a Santa Claus emblem?
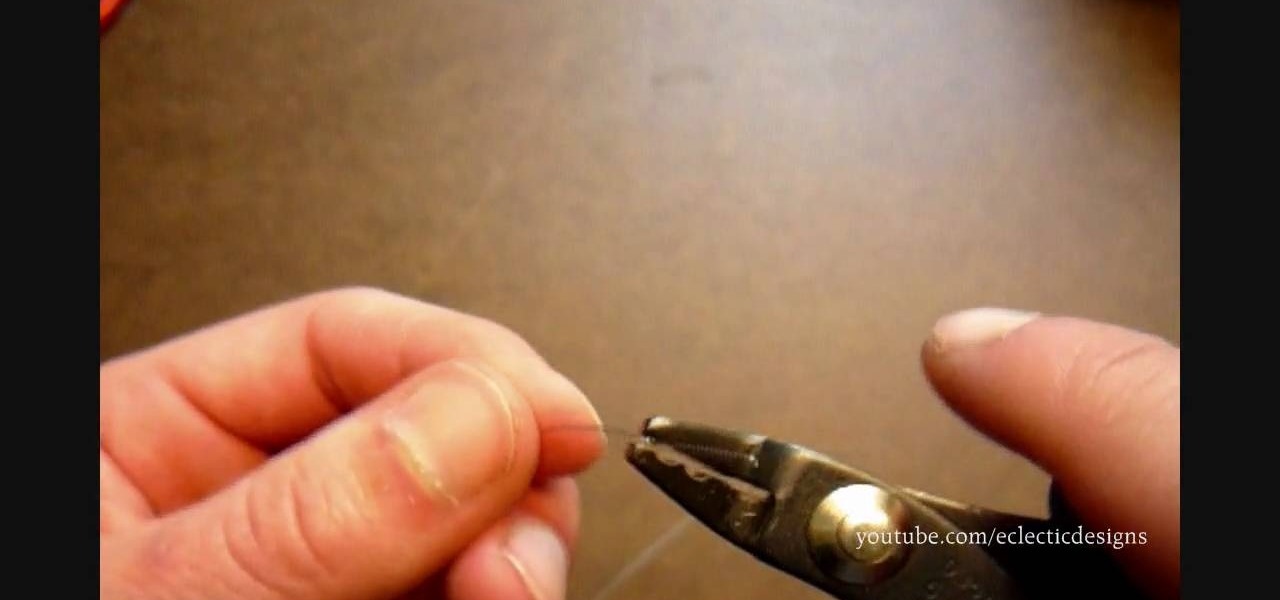
Attention jewelry makers! When making your own unique jewelry designs, one must learn how to secure the end crimp beads with crimping or chain-nose pliers. Crimp beads can be used for finishing off your strung jewelry or as "stoppers". In this tutorial, learn how to hone your jewelry-making skills!

Are you into Gaara? If so, why not make one of his gourds? Materials you will need:

This video instructs you on how to clean the trackball on the Blackberry Bold 9000. Begin by turning off your Blackberry and removing the battery. Using a torque T5 screwdriver, remove the 6 screws around the edge that hold on the cover. Remember that doing this will void your warranty. Once the cover is removed, use your screwdriver to lift off the circuit board. Be aware that the USB port can get stuck. If that happens just push the port down slightly and you should be able to remove the ci...

In this video arsbeadsvideos instructs you on the use of crimping pliers, crimp tubes and how to use crimp covers. Make sure you use jewelry wire that is fine enough to fit through the holes in your jewelry. On your crimping pliers you'll notice there are two notches, also called stations. The first notch is furthest from tip of the pliers and has a raised bump or dimple in the middle. This helps to created figure-eight crimps. The second notch is used to form the crimp into a tube shape. To ...

Whether you’re headed for a half-pipe or your driveway, always be safe. Wearing protective gear and taking a few precautions can help prevent you from landing in the ER. Watch this video to learn how to practice skateboarding safety.

In this series of video clips, you’ll learn tips and techniques for using various types of metal shears, including how to use hand-held and foot-operated types of metal shears, and how to use a metal press and metal hole punch. Expert Jon Olson offers advice on cutting procedures, the proper clothing and precautions, and advice on maintaining and cleaning metal shears. Jon also covers the electrical requirements for operating an electric shear, the various points of danger when operating the ...
This how to video will give you the basics on inward screaming (also known as pig squealing.) Improve your heavy metal vocals with this tutorial.
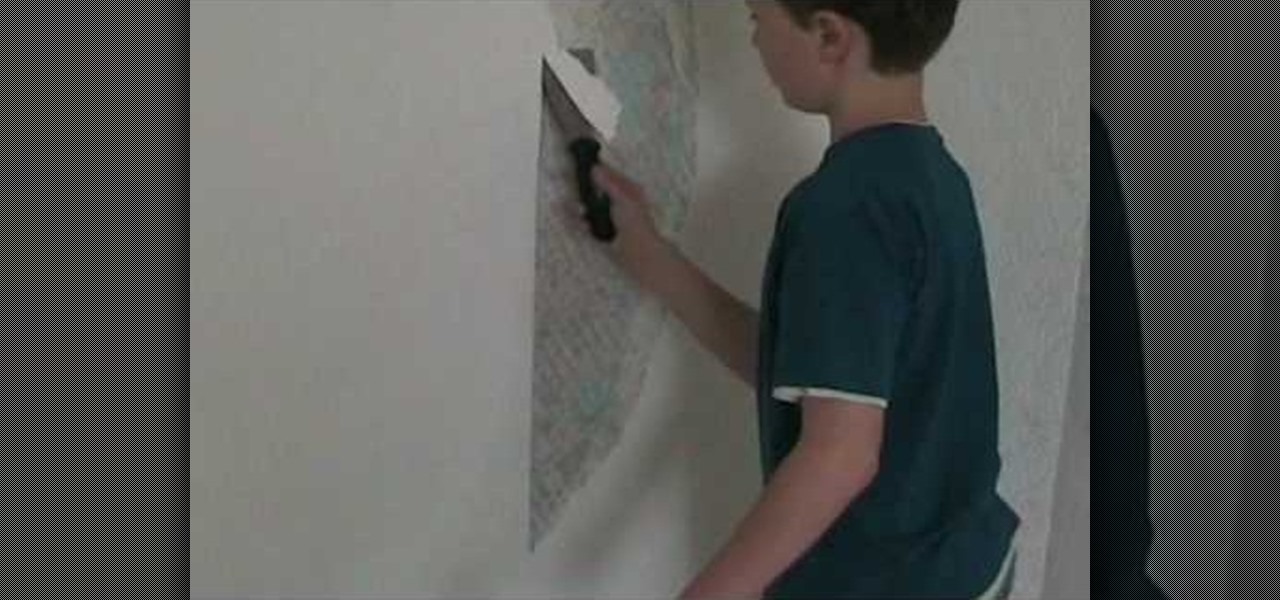
In this tutorial, we learn how to strip wallpaper easily. First, you will need to take a wallpaper stripper and run it along the wall so you cover all of the spots that it touches. After you have done this, run the stripper diagonally along the wall, then spray the wall with some warm water mixed with dish washing soap. Once finished spraying, use a flat metal putty tool to pry the wallpaper from the walls. Once you tear it off in one spot, you should be able to remove larger pieces. Once fin...
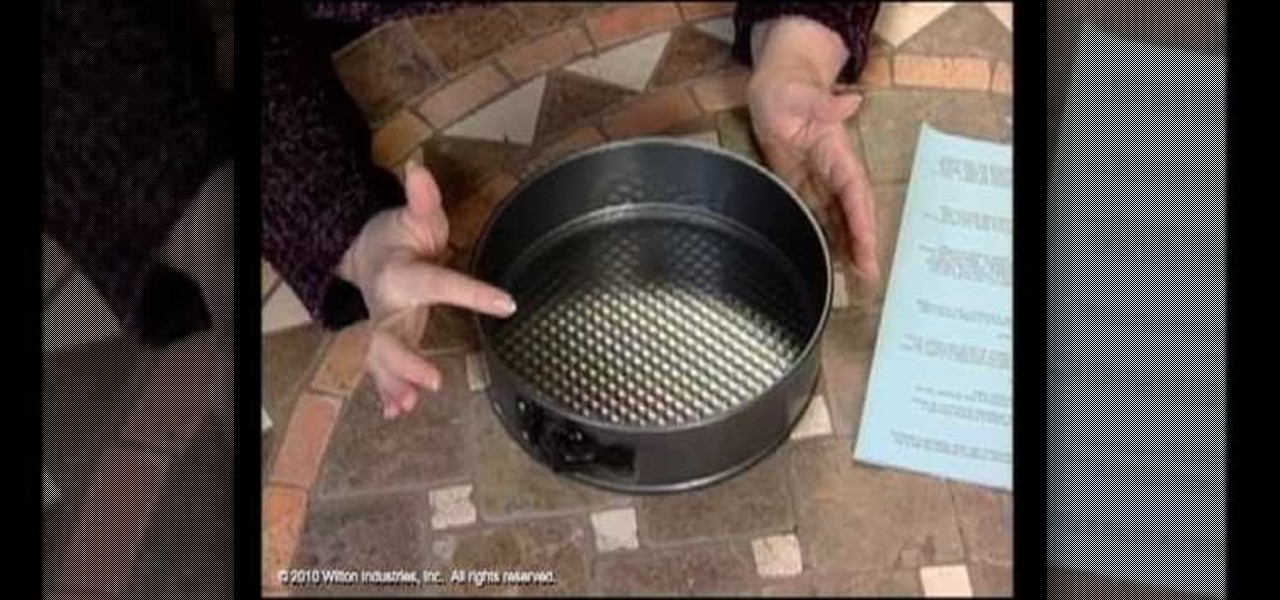
Springform cake pans intimidate lots of home cooks - With a rigid, industrial ring around the side and a metal clasp, it looks difficult to maneuver. But this shape is actually super beneficial if you haven't quite mastered transfering a cake perfecting from the pan to a cake stand. The ring comes apart to let you serve the cake on the cake pan itself.
In this tutorial, we learn how to install a foot throttle on your lawn tractor. First, weld the petal onto the base and create your own holder for the rod so it stays in position. You will have to bolt it down so it stays in place and doesn't move. On the other side, put a holder on it so the rod stays in place and doesn't move. There should be a bolt on it so it doesn't move and a clamp that is welded onto the end of it. The, string a thin metal wire to connect onto the end and bolt it onto ...
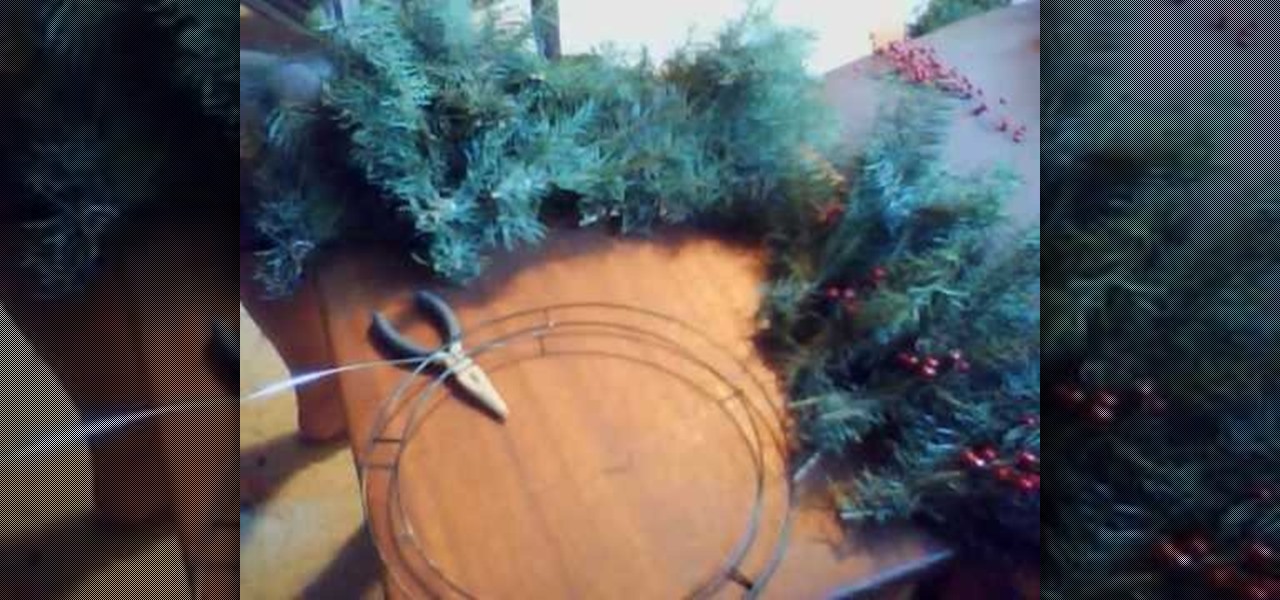
In this tutorial, we learn how to make a holiday wreath on a budget. You will need: branches, round wire frame, Next, buy some holiday flowers, and ribbon. First, start to arrange your branches with some wire and mix different types of branches together. After this, start to add in the flowers and some holly to the branches as well. Tie these tight in different bunches so that you have a more secure bundle. After this, start to wrap them around the round metal frame that you have, then situat...
In this tutorial, we learn how to clean black suede shoes. First, remove all the dirty from the shoes. After this, spray on a lot of shampoo to the shoes, then brush with a suede shoe brush. After this, use black suede dye and spray it all over the entire shoe. Make sure you have plenty of color, so your shoes don't turn out different colors. To finish this up, use a rag to clean off the metal parts on the shoe, then you will be ready to wear them! This method only takes a few minutes and wil...
Love bangles? Even know what a bangle is? Well, it's a rigid bracelet or anklet, and can be made from metal, wood or other rigid surface. They're quite fashionable, and what's even more fashionable? -- homemade bangles!
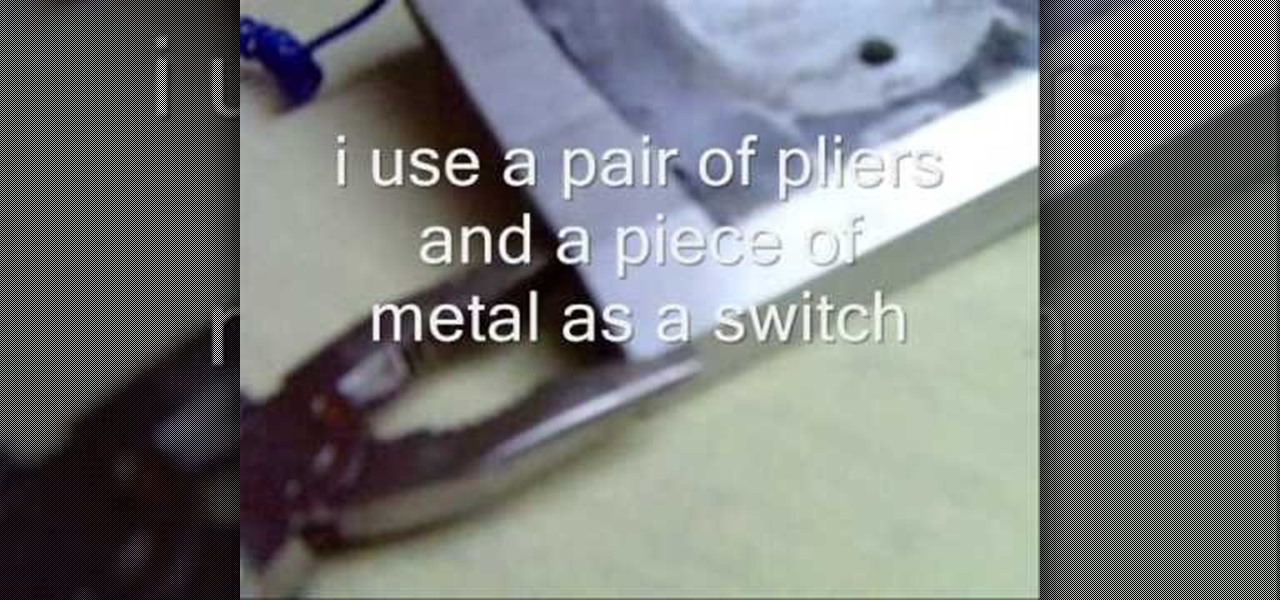
In this how to video, you will learn how to make a tight rope walking magnet. You will need a power supply with currents between 15 to 25 amps. A thick wire from a half to one centimeter is also needed for the tight rope. A small neodymium magnet will also be required. String the wire from one end to another. Place the magnet at one end. Use a pair of pliers and a piece of metal as a switch to run the current through the wire. Once that is done, the magnet should go down the wire. A magnetic ...
In this tutorial, we learn how to install a gutter guard. First, clean out your gutters of any rocks or leaves that may be inside of them. Next, gran the gutter guard and place it between your roof and the gutter. Gutter guard is a mesh type of metal that is flexible and easy to use. Now, take your gutter guard and place it on a long and thin piece of wood so it gets to be the same shape as the wood. Now, take the gutter guard and place it into your gutter. This is a great way to keep your gu...
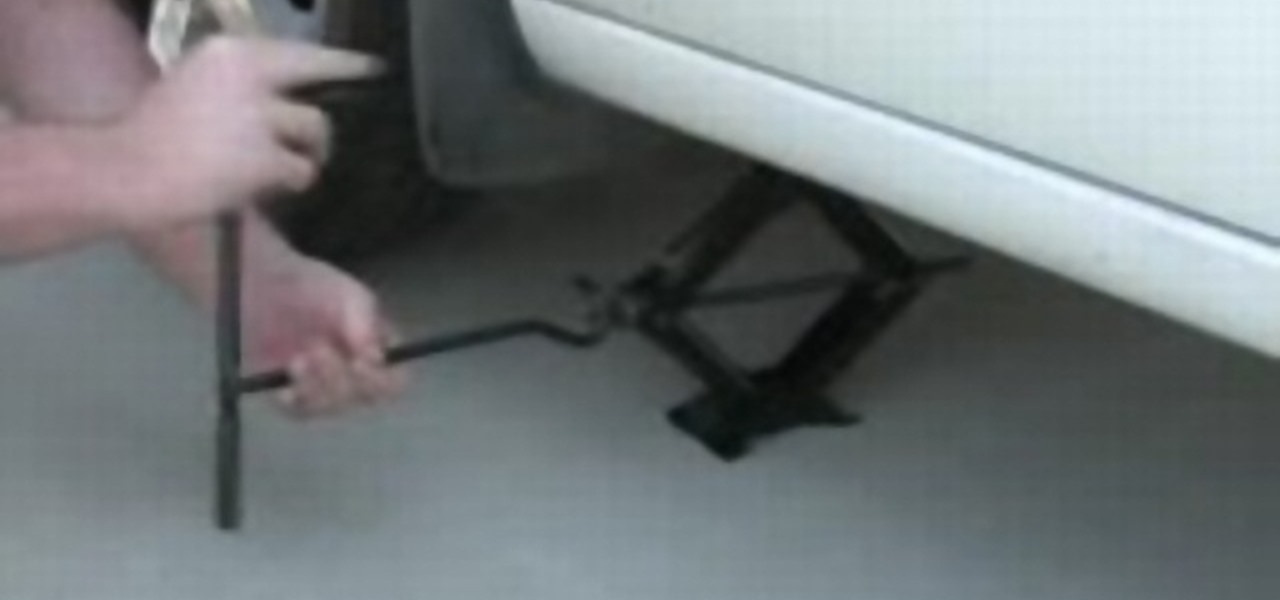
Graham from TV Lesson explains how to change a tire. In most cars, the spare tire is located in the trunk, along with the jack and tools. First, look under the car and locate the folded pieces of metal to find the jack point. Raise up the jack a bit and slide it under the jack point. Next, using the lug wrench, break the torque on the lug nuts. Then, jack up the car. Once the car is jacked up, remove the lug nuts. Next, remove the flat tire and place it into the trunk of the car. Place the do...
Tim Carter demonstrates how to use hole saws. These tools drill perfectly round holes from one-half-inch diameter up to 2 and 1/4-inch diameter using your standard drill.
Over time, stains can collect in your crockpot. Learn how to properly clean your crockpot and remove stubborn mineral stains and water marks. When cleaning the crockpot, fill it with hot, soapy water once the cooker has cooled. Let it soak for 15 to 20 minutes, then scrub with a cloth, nylon pad, or plastic sponge. Do not use harsh cleaners or metal pads. Rinse well in hot water and dry.
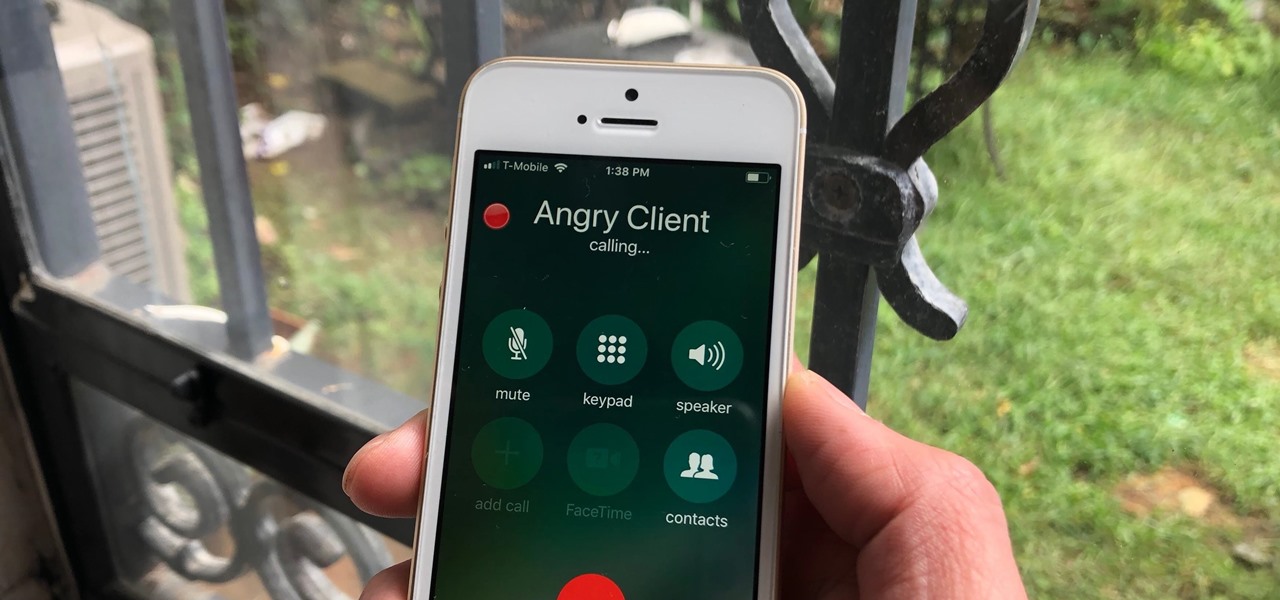
You don't need an obsessive ex stalking you to benefit from the ability to record calls on your iPhone in a pinch. Besides protecting yourself from nefarious intent, recording important conversations like verbal contracts and agreements can help you cover all your bases and ensure you're insulated from any potential liabilities that may appear down the road.
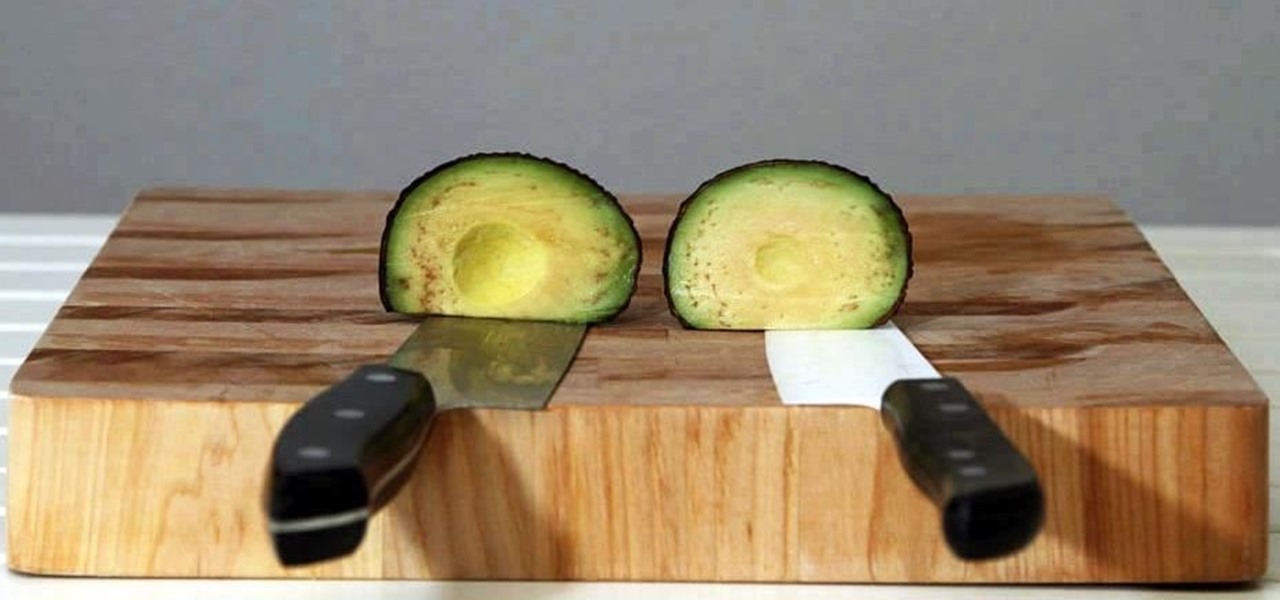
Keeping apples or avocados from browning after being cut is impossible; within minutes of being exposed to air, these fruits (yes, avocado is a fruit) begin to brown. No matter what you try—adding lemon juice, keeping the pits in place, immediately sealing the produce in an airtight bag—brown discoloration always occurs. However, air is not the only reason that foods like apples, avocados, and lettuce brown: it's also due to the knife you're using.
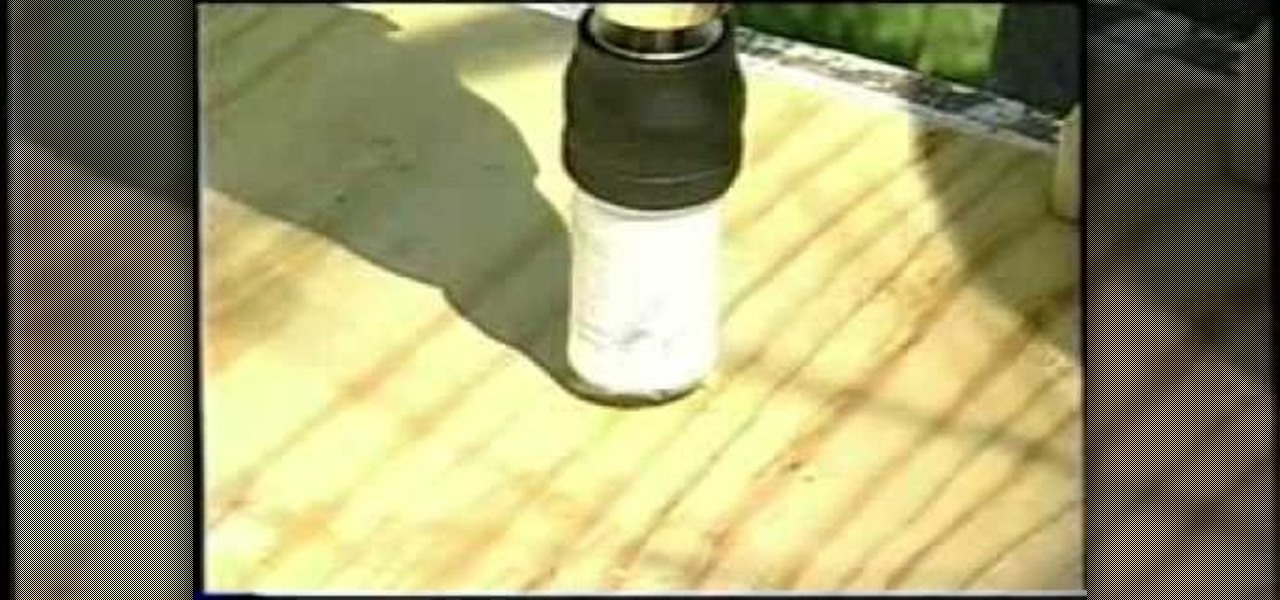
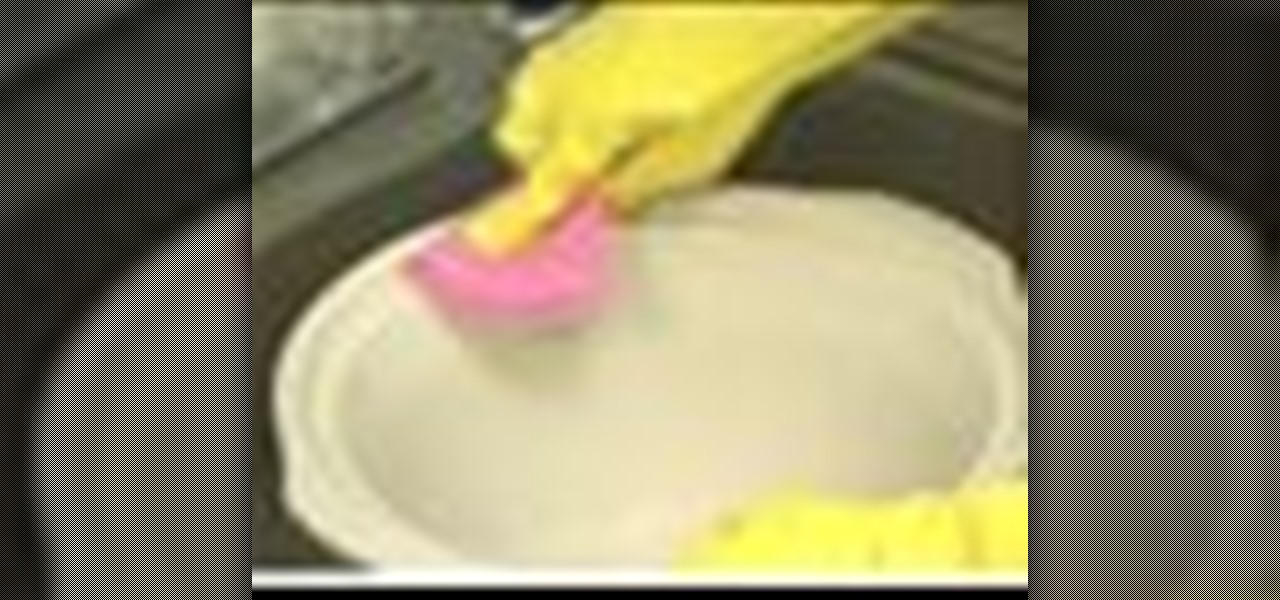
I record close-cropped videos and take macro still shots with my smartphones on a daily basis, so as you would expect, I spend a lot of time cleaning these devices. Over the course of a couple years, I've fine-tuned my cleaning regimen, and at this point, it's down to a near-science.
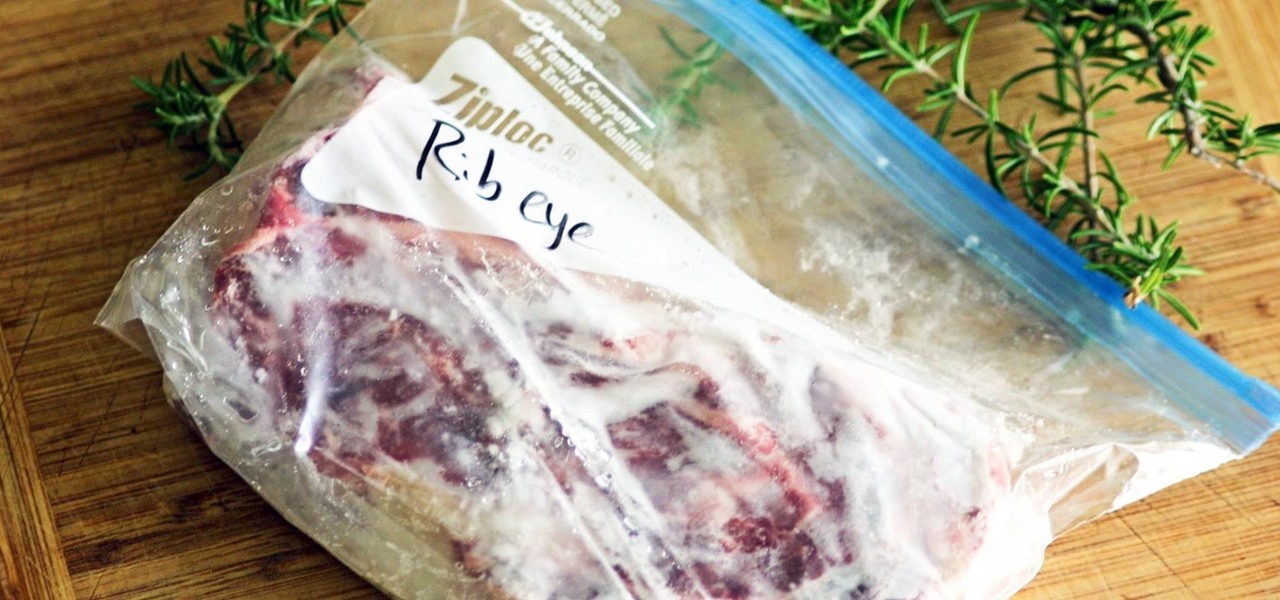
It's a basic law of cooking: whenever you're really craving something, you don't have it. All you want is a glass of wine? Chances are you finished the bottle while braising meat last night. Want nothing more than a sandwich right now? Yep, you finished the bread with breakfast. You'd kill for a steak? They're all in the freezer, and you don't want to wait while they thaw; you want your steak now.
Google inconspicuously announced an Android update yesterday, and while it's not quite the overhaul that the initial Lollipop release was, version 5.1 brings plenty of bug fixes and new features.
While the official unveiling will happen at Mobile World Congress in Barcelona on March 1st, several images and promotional videos for the HTC One M9 have leaked online.
Whether you choose to hang an authentic or artificial pine Christmas wreath on your door — or an entirely different type, like ones made of paper waste or even food — chances are you've spent a year or two struggling with how to keep your decor hanging. With one easy to apply, quick to remove trick, you can skip the shiny wreath holder and any further damage to your front door.
Today was a big day for Samsung at IFA 2014, with announcements of two new devices as successors to the Galaxy Note 3: the Galaxy Note 4 and Note Edge.
Say goodbye to the age of metal robots—C-3PO and K9 are a thing of the (future) past! Anette Hosoi, Professor of Mechanical Engineering and Applied Mathematics at MIT, and her former graduate student Nadia Cheng, have created a robotic material closely resembling human skin.
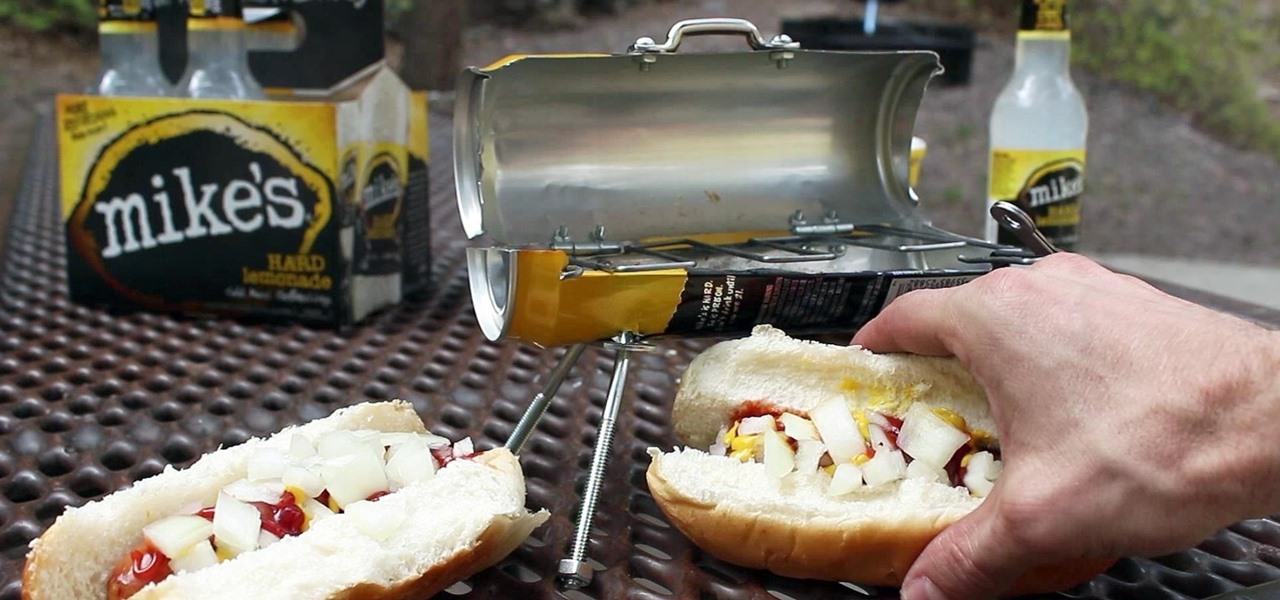
In this project, I'll show you how to make an itty-bitty outdoor BBQ from leftover beer or soda cans. It's the perfect summertime hack if you don't have a grill and are cooking for a small group of people—one bratwurst at a time. You can grab the wire grill template here.
Gravity can be a real pain when you are trying to finish a project and your supplies wind up on the ground.
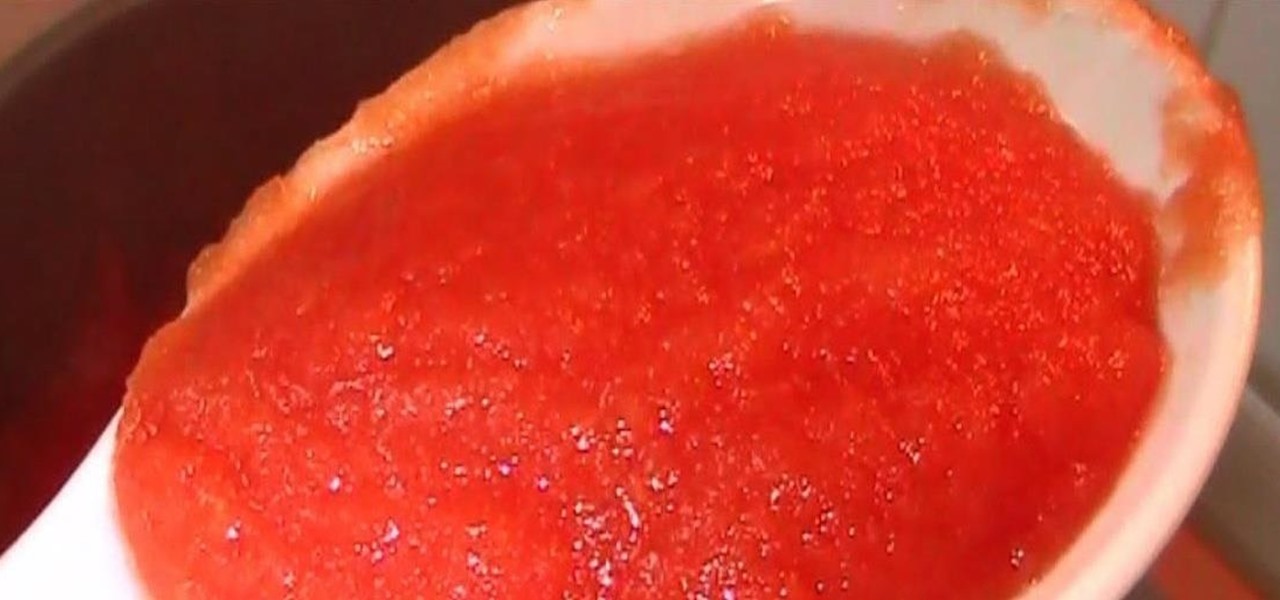
Yesterday, I was halfway through a recipe when I realized it called for puréed tomatoes, and all I had was diced. I definitely wasn't going to abandon ship and start over on something else, but I didn't want my sauce to have the wrong texture, either. So, I did a quick search and found that I could use my metal sieve to purée the tomatoes.
How to make a heart shaped fried egg for a Valentines day breakfast. Short and simple guide showing you how to make a delicious breakfast for your loved one.
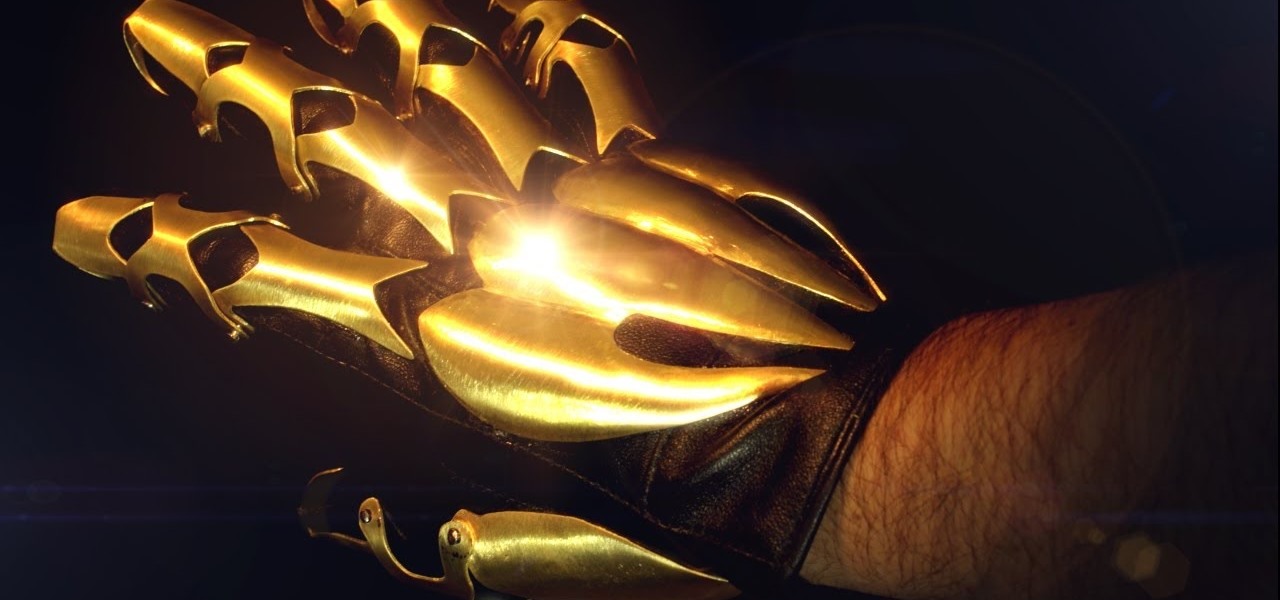
Here's my latest armor tutorial...what I call the "Demon Hand". The method used in this tutorial can be used to create pretty much any armor. This one is is 18 gauge brass, but if you use stainless steel I suggest 20 or 22 gauge. This is the easiest of all of my gauntlets to create, and it takes a lot less metal. Less than an 8.5" x 11" piece (per hand). Would make cool motorcycle riding gloves!
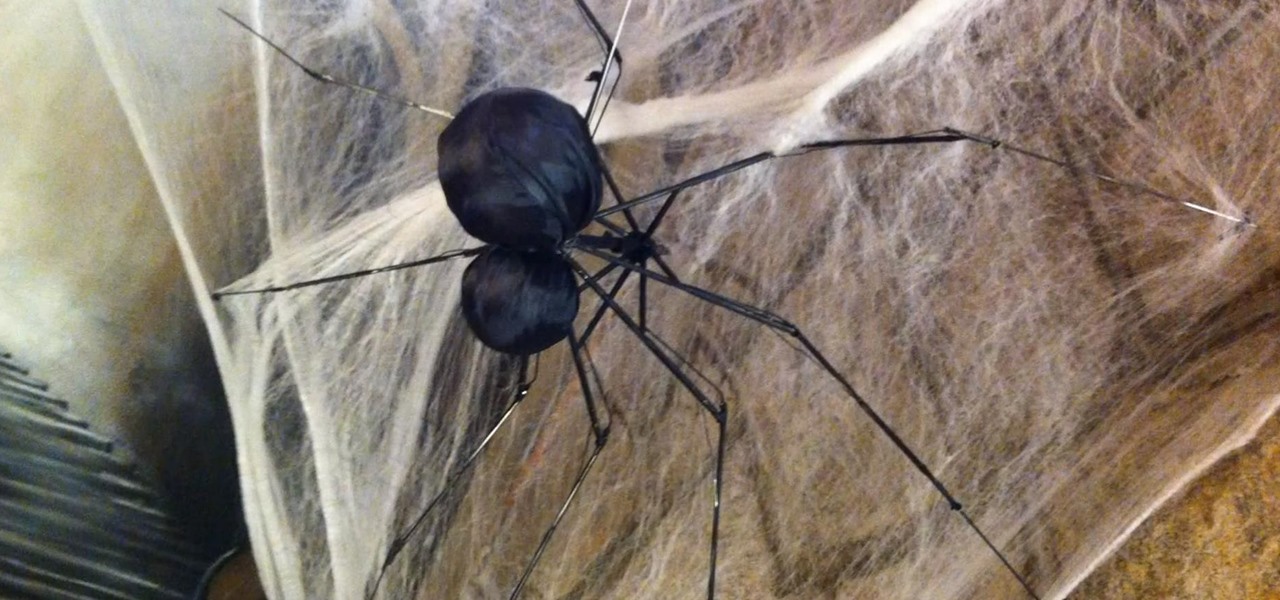
Spiders are my least favorite thing in the world. My second least favorite thing are cheap umbrellas. So, it's only fitting that the two work perfectly together as a creepy Halloween prop. In my video below, you'll see how to make a Spiderbrella, which is just the inside metal skeleton from the umbrella (which looks like a crawling spider), the umbrella's original black fabric, a couple Styrofoam balls, and some floral wire.
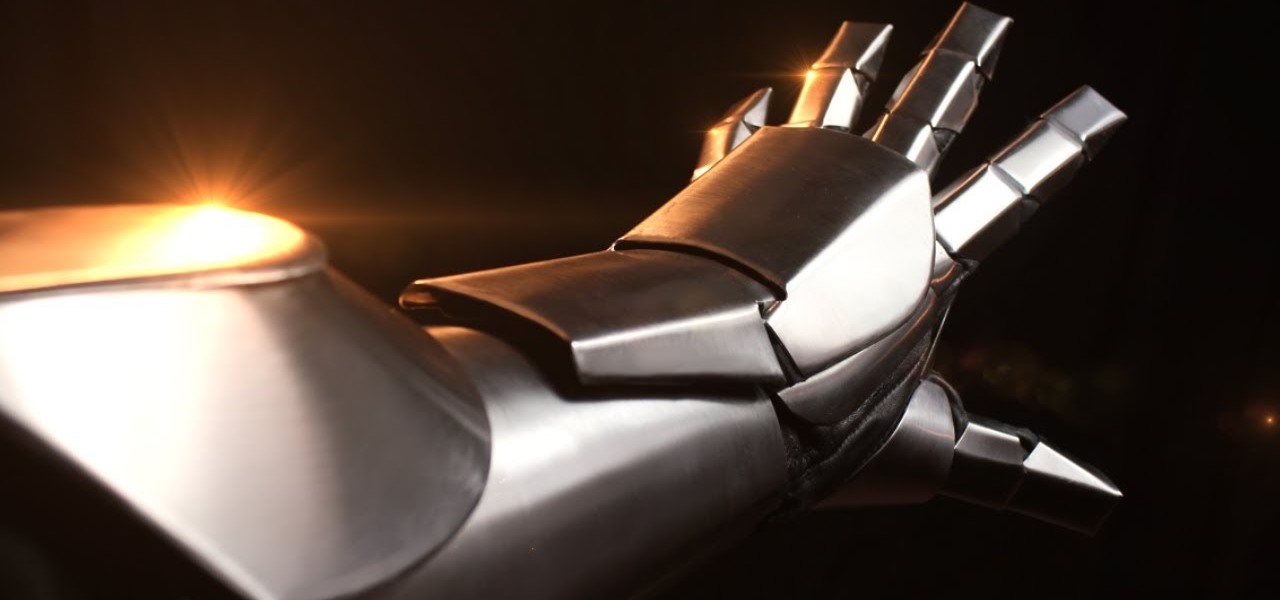
Here's my latest gauntlet, made in 22 gauge stainless steel using ordinary hand tools you probably already have in your garage. I used Iron Man for inspiration, but it's far from an exact replica. Unlike my previous gauntlets, there is minimal riveting, as most of the parts are held to the glove using epoxy, along with some small nuts and bolts. Aside from cutting out all the parts, which is a little tedious, it's actually fairly easy to do. A fun project for anyone into metalworking, prop ma...
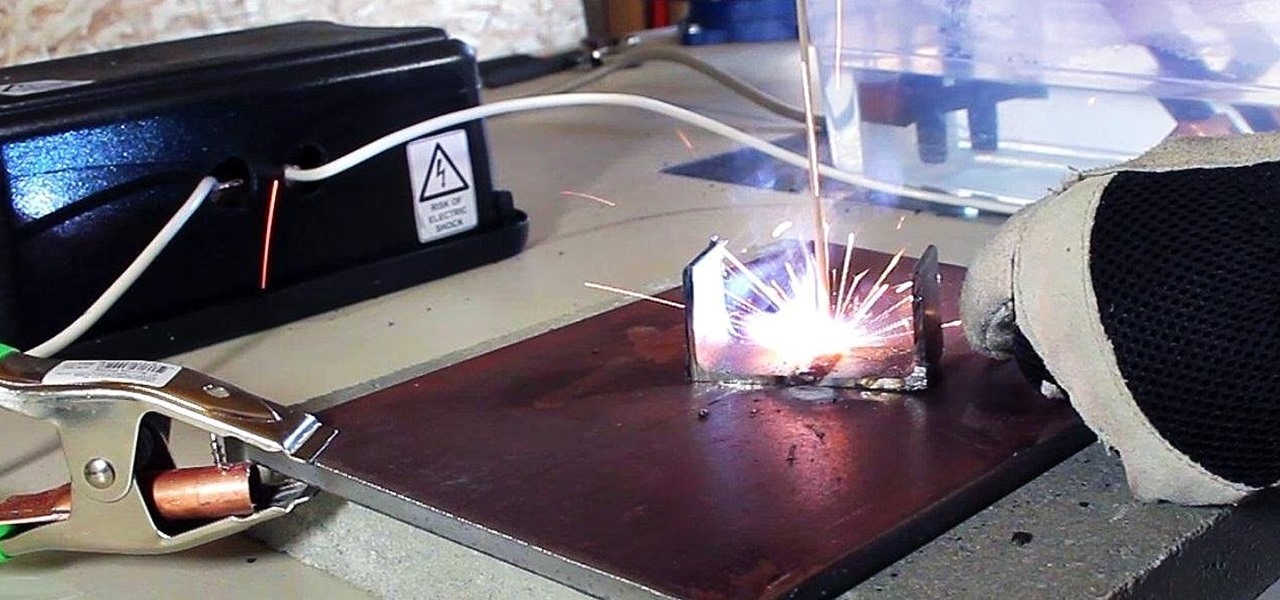
In a previous article, I demonstrated an Arc Welder made using parts from old microwave ovens. Video: .
Let me start out by saying that Steampunk isn't about being historically accurate, and that everything I'm about to tell you is entirely optional. That said, let's take a look at the history of screws! What many people don't realize is that before we had metal screws, wooden screws were in wide use for things like wine and oil presses. Generally, the invention of the screw is attributed to Archimedes in the 3rd century BC. That was a long, long time ago. Metal screws and even screwdrivers hav...
Want to search through your Samsung Galaxy S III or other Android smartphone using only a web browser? Thanks to XDA-Developers member Metal Droid, you can now access and download anything from your phone through any browser on your computer using DroidXPlorer.
There isn't as much use for old-school four-function calculators anymore since we all have them on our cell phones now. If you've still got one lying around, you can hack it to play recorded sounds, use it to make a metal detector, or turn it into a custom name plate that says anything you want...
Costume parties are in full effect this weekend, so with that said, how cool would this look at your Halloween party? Instructables user castor009 made two holes in the head (one for inserting the PVC tube, the other where the liquid will spew out) and insert the pipe and tubing, then stuffed it to secure everything. He then fit the bottom tubing through a pencil holder and attached it to a water pump. Then just add whatever you want to serve at the party (I would suggest anything red or blac...