In this video, we learn how to set up the mast on the Open 570 single-handedly. First, look to see where the mast is going to fit on the boat. Pick the mast up in the middle so it balances out on each side, it's very long. Turn the mast around and place the edge facing the foyer. Put the base of the mast into the mast step, then let it rest on a step ladder. From here, get into the boat and add the safety pin into the base of the mast to keep it locked. Now take the mast and push it up into t...
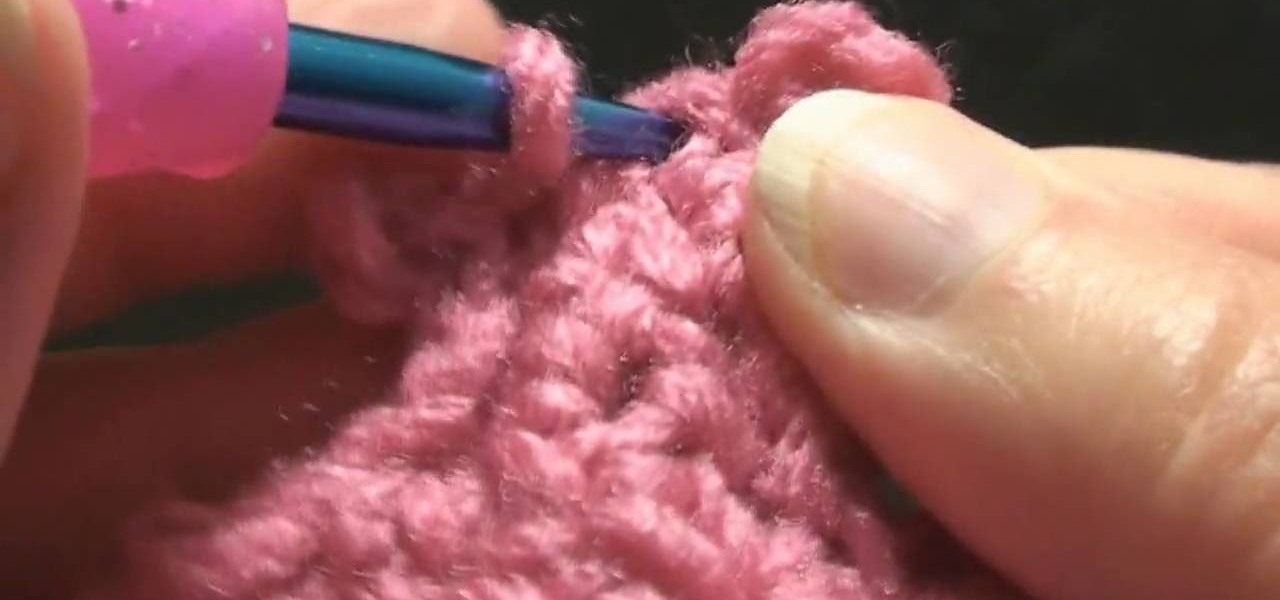
In this video, we learn how to join a crochet round left-handed. First, join with the top level of the crochet. After this, half double crochet of the shell and join with the beginning of the shell. Now, join with the beginning of the double crochet. Go around to the beginning and join with the beginning of the single crochet using a slip stitch. Then, slip stitch between the joining. Now you will want to join with the slip stitch in the beginning of the double crochet. To finish, join with t...
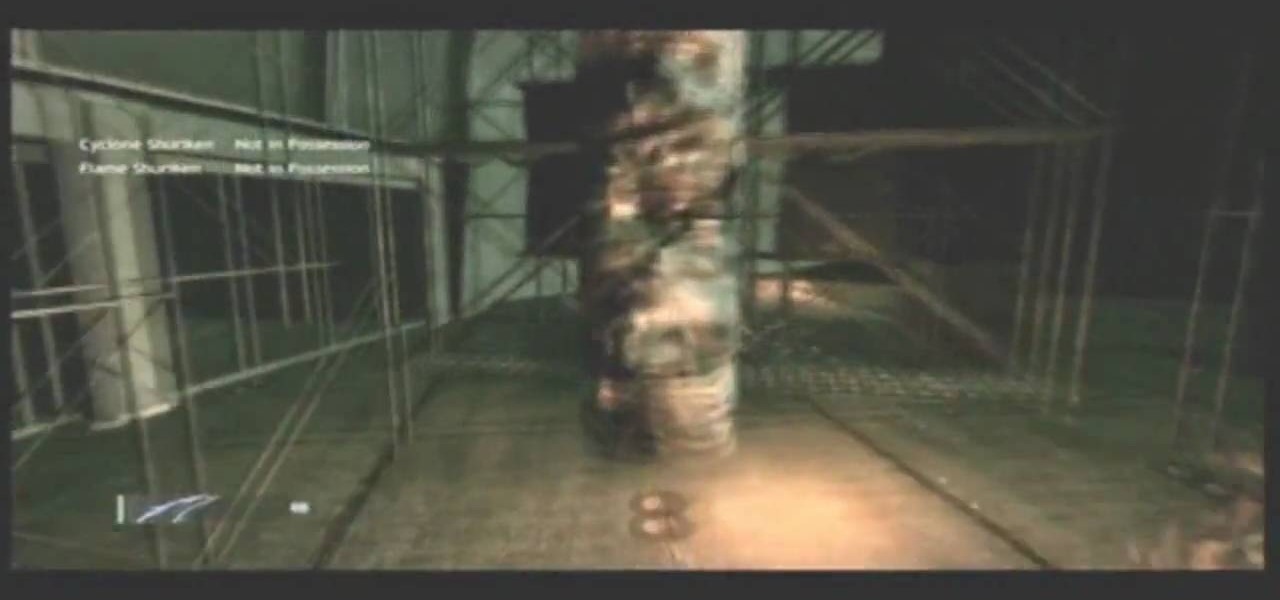
You can do a Ninja Blade glitch on the Xbox 360. So to do that, first thing you need to do is to go on the level 7. Then you need to go to that part of the level where video is showing and get up there. Now you have to land there with the help of twin falcon knifes sprint by jumping and rapidly pressing the y and x buttons. Now you can see a hole in the middle and you need to jump over there. After that, get over there where video is showing and that's it. You will see the deleted objects in ...
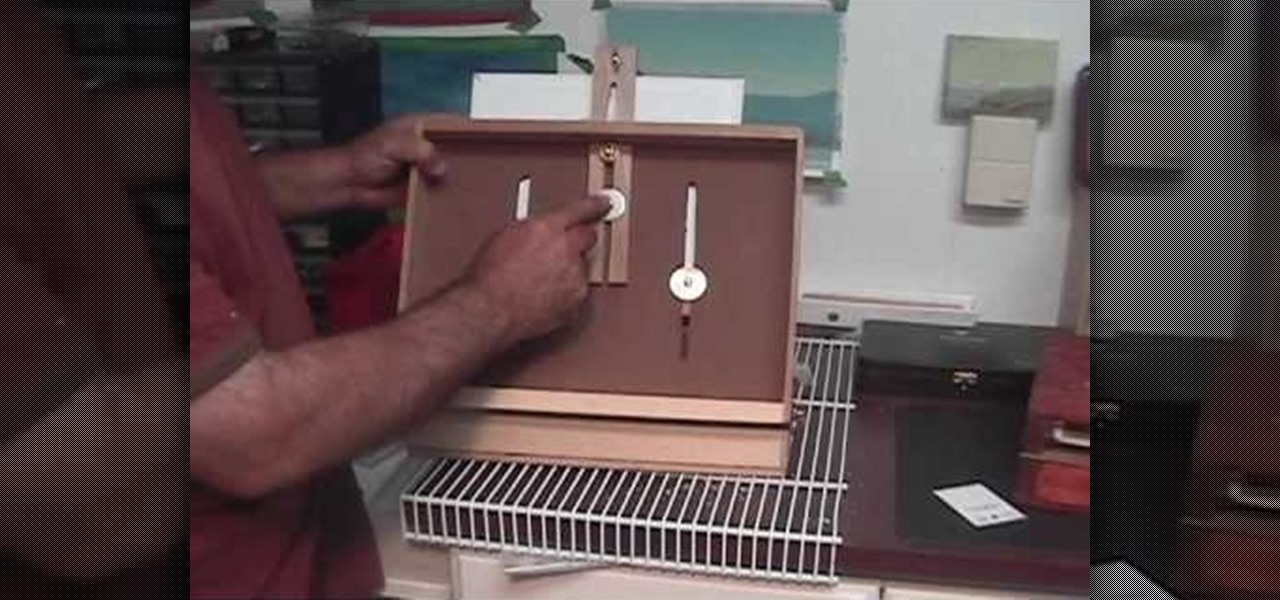
In this video, we learn how to build a pochade box for outdoor painting. This box will hold two wet panels in the back and help you hold other things you need to carry. You will need a medium sized box first, then you will need to cut the back and sides of the top to make slits where you can place in the panels. After this, you will create a barrier for the middle that has two slits in the bottom of it where you can slide it. On the bottom of the box you will have a hold where you can thread ...
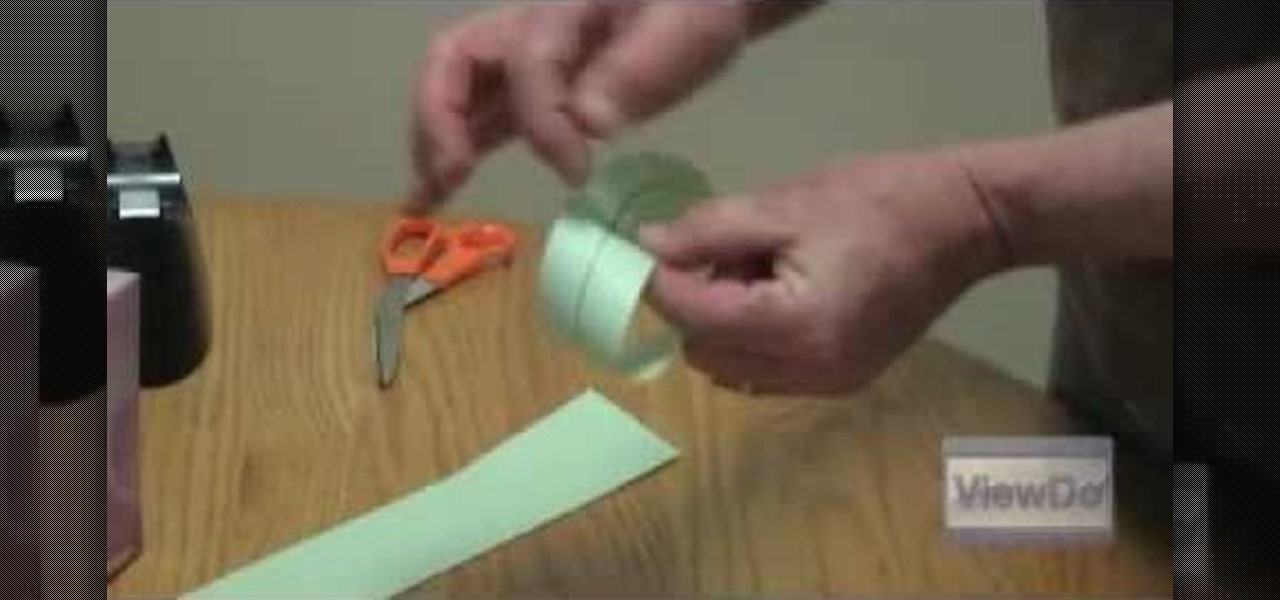
This video will show you how to make a 2 dimensional object in a 3D world. A well-known example of this is a mobius strip, which can be made with a strip of paper, scissors, and some tape. After cutting out a long strip of paper, you should take the strip of paper, give it a half twist and tape it together, making a loop. This loop, or mobius strip, exists in a three dimensional world, where by following the loop, you seem to always arrive at the same point. Furthermore, the loop can by cut d...

In this video, we learn how to quickly make an origami kusudama. This only requires six pieces of paper to make. First, fold one piece of paper into a triangle, then open it up and fold it in a triangle on the opposite side. Open this back up then flip over. Bend in the edges to make a new triangle, then press down the creases on the side. Bend the middle of the triangle up to the point on both sides. Bend these back down, then fold over the side and make a crease. Open up the bottoms where y...

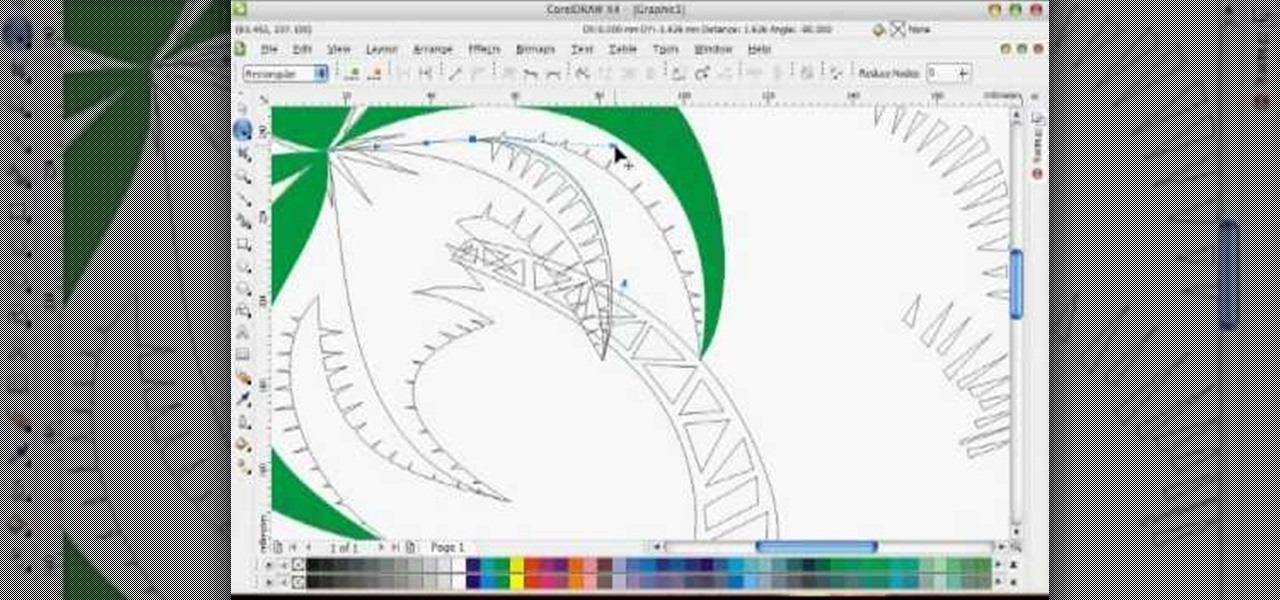
In this tutorial, we learn how to draw a vector art palm tree in CorelDraw X4. Start off in the CorelDraw program and create the base of the tree with a drawing tool in black. After this, draw small triangles inside of the base of the tree and then draw the leaves and branches of the palm tree. Fill this in with small spikes and then erase the middle nodes. From here, use a shaping tool to make the spikes on the palm tree more rounded and lifelike. After you do this, start to color in the ent...
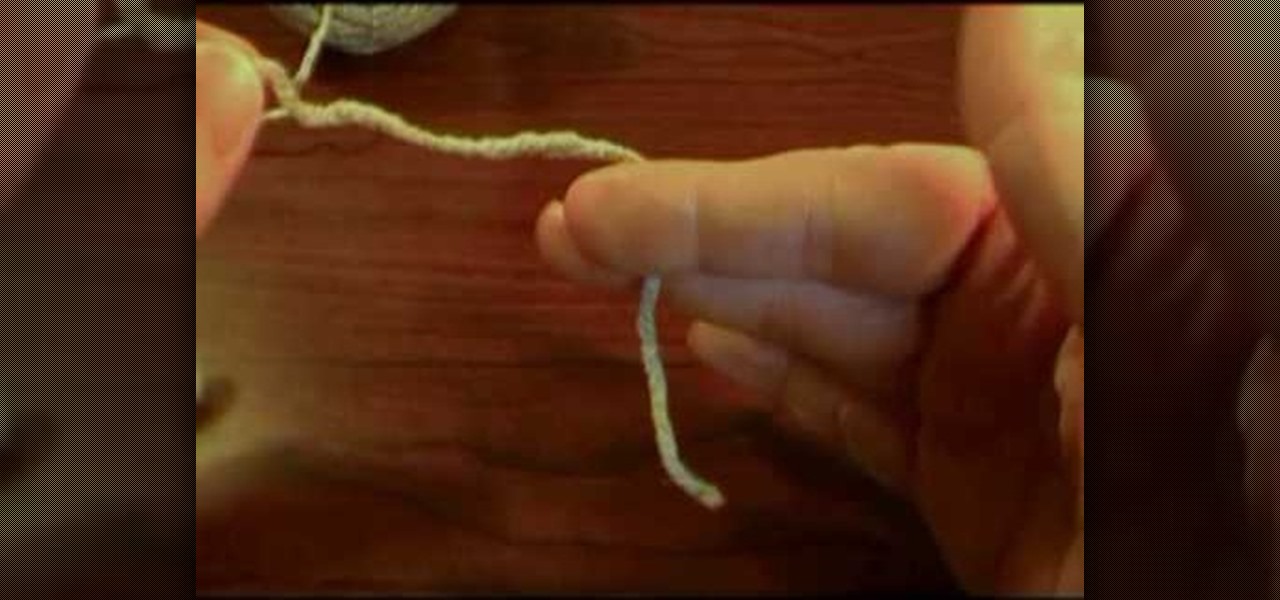
In this video, we learn how to hold a hook and yarn in crochet. First, grab your hook at the thumb grip. Then, practice how you like to hold your hook so it feels most comfortable with your hand. After this, grab your yarn and wrap it around the hook, placing tension in the string. To do this, wrap it around your pinkie then your pointer. Then, hold in between the thumb and middle finger. After this, you will be able to place the hook in the yarn easily to start out your stitch. After this, s...
Know why people dwelling in the Mediterranean region never get fat? Hint: It's not because they don't eat. In fact, these islanders eat a lot, just not any of the bad stuff we tend to consume too much of in the U.S. (french fries, hamburgers, etc.).
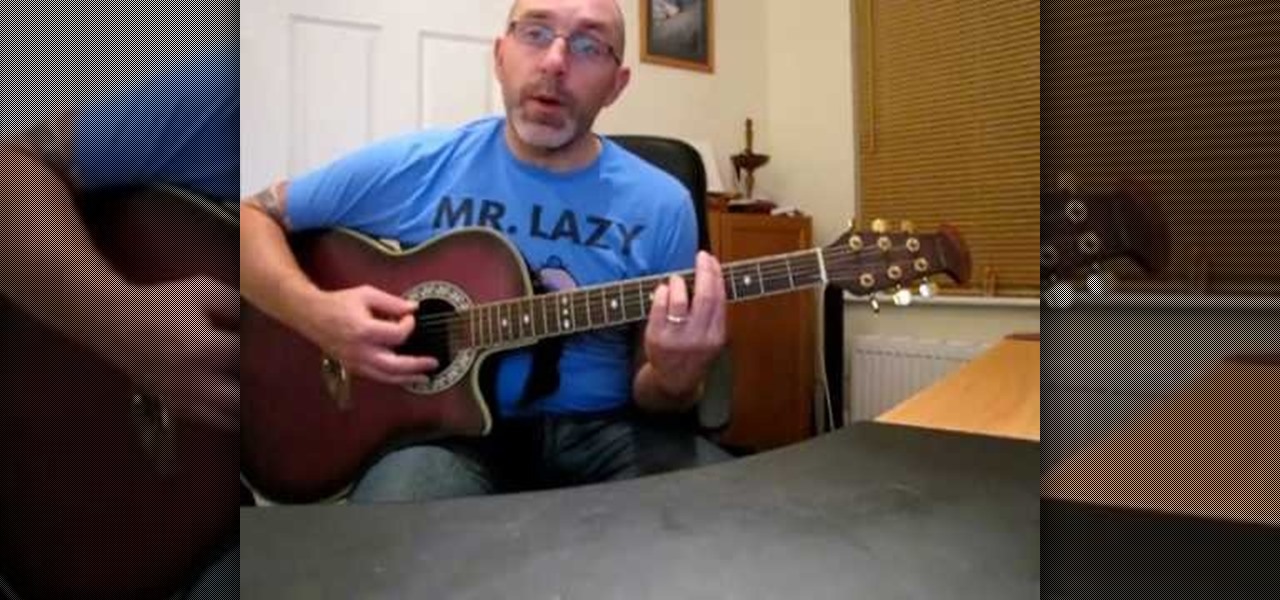
In this video, we learn how to play "Face Down" by Red Jumpsuit Apparatus on guitar. Start out by playing an E minor 7, then put your middle finger on the third fret. Next, play the G chord and then a D/F#, which is a D chord that ends with an F# note instead. Move from this to the rest of the chords, continuing to play the entire song together. Practice playing the different chords until you get the sounds that fit in the song, then you can add in the lyrics once you are used to how the melo...
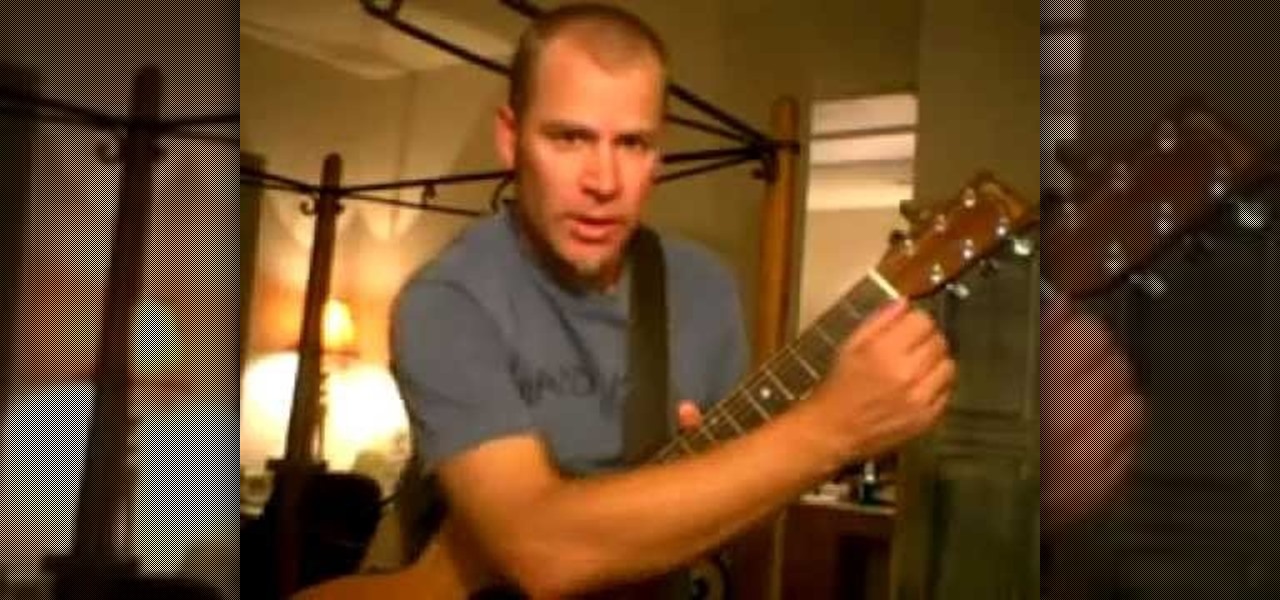
In this video, we learn how to play "The Master Plan" by Oasis on guitar. First, play the A minor at 9 with G sharp and with G. Continue to play the A minor at 9 with F and D, then you will have the introduction to the song finished. Continue to break the song down into different sections, playing out each part until you have the chords memorized. You may need to take more time with others in the middle of the chorus because the finger placement becomes tricky. Once you have this mastered, mo...
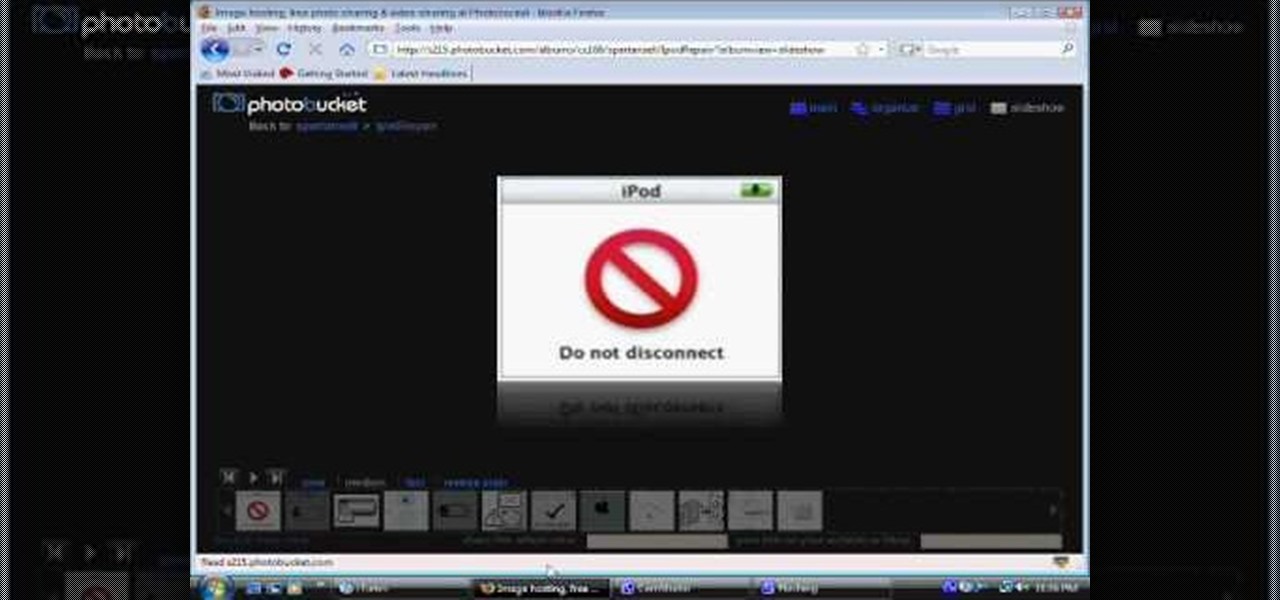
In this video, we learn how to fix a frozen iPod. This is for when you are getting a "do not disconnect" message from your iPod while using iTunes or any other program with your iPod. To do this, you need to hold down the top of the wheel and the middle of the wheel simultaneously. Do this for several seconds, then the Apple logo will show up on the screen. Now the device will release your computer from being in a frozen state. Quickly remove the USB cord from your computer when the Apple log...
In this video, we learn how to tune a violin or fiddle with an electric tuner. The tuner may not know the difference between the strings, so make sure you know what you are playing before you begin. Clip the tuner to the bottom of the violin or fiddle, then play your strings to see where the needle on the tuner goes. As you play the strings, the needle should reach the middle. Twist the clasp on the strings to either loosen or tighten them, then you will be able to correctly tune the strings....
In this video, we learn how to play "Half the World Away" by Oasis on acoustic guitar. Start with a C, then CF, then move your middle finger to the fourth string. After this, you will repeat this and your intro will be finished. Now, verse one will start with C again, then F, then C, CB, A minor, D7, then back to CF. This will finish up verse one, then start the chorus in A minor, then C, and B7. Continue going back to A minor, then CF, D7 suspended, and G. Once you have the chorus, you can c...
In this video, we learn how to add more gestures to your track pad for fast browsing. To get these gestures, you will first need to go to the website jitouch, where you can download their software and watch videos on how to use different gestures. The first gesture is great for while using browsers, to scroll between tabs quickly. You just have to use two fingers, putting the middle one on first, then swiping the other. Another gesture is to open a link in a new tab, just put one finger on th...
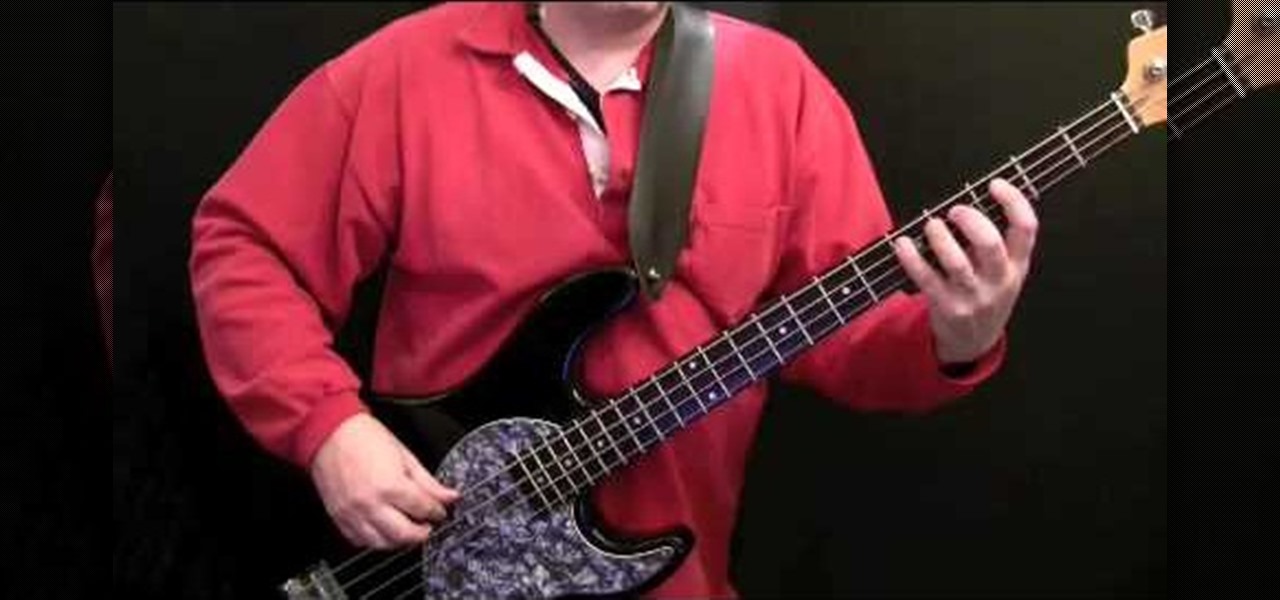
In this video, we learn how to play the bass line from "Time is Tight" by Booker T. Start with the intro playing the metronome, the chords will be: C, A, and G. You will have CCA, CCA, then CCAG for your rhythm as you are playing. Practice playing this over until you reach the first verse of the song. Now, play F on a higher string, then D, and C. The sequence is, F, F, D, F, D, C, F, D, C, F, D, C, and D. Play eight bars, then continue on to play the rest of the verses throughout the song. W...
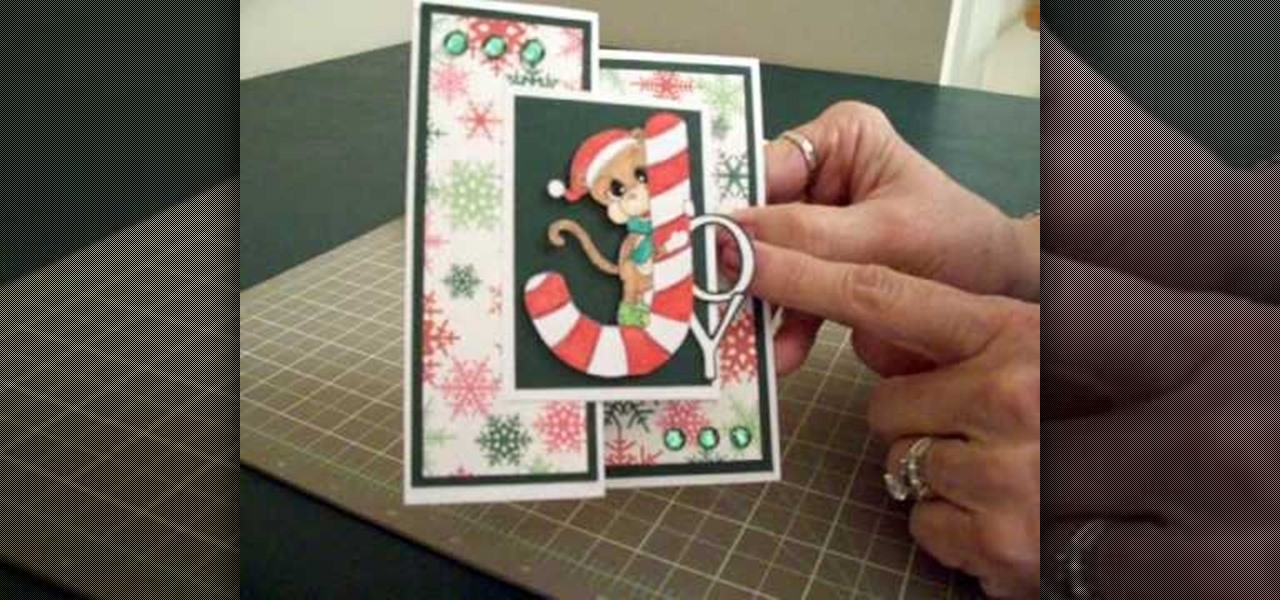
In this video, we learn how to make a Joy S-fold Christmas card using Cricut George. First, fold the card and mark it so it's in the S shape, then stamp the background of the card with colored snowflakes in different sizes and shapes. After this, use a black outline along the sides of the papers, then add in a black piece of paper to the middle of the top fold. Apply a monkey with a Santa hat to the front and wrap him around a J shaped candy cane. Add in the letters "o" and "y", then add in a...
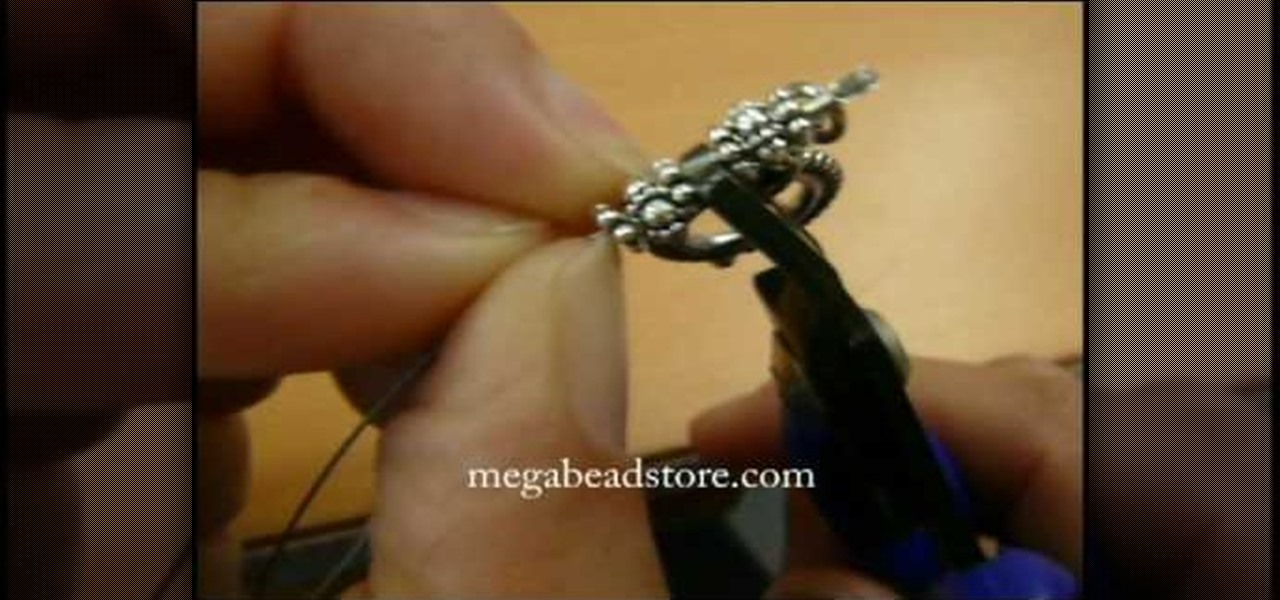
In this video, we learn how to hide a crimp bead with a crimp bead cover. First, string your spacer followed by a crimp bead and another spacer. At the end, you will have the end piece with the wire protector next to it. Then, bring the piece of jewelry through the crimp bead twice, then through the spacer once more. Now the spacers and crimp beads will be pressed with the crimping tool tightly. Pull on the string to test it out, then slip in your crimp bead cover so it looks like another bea...
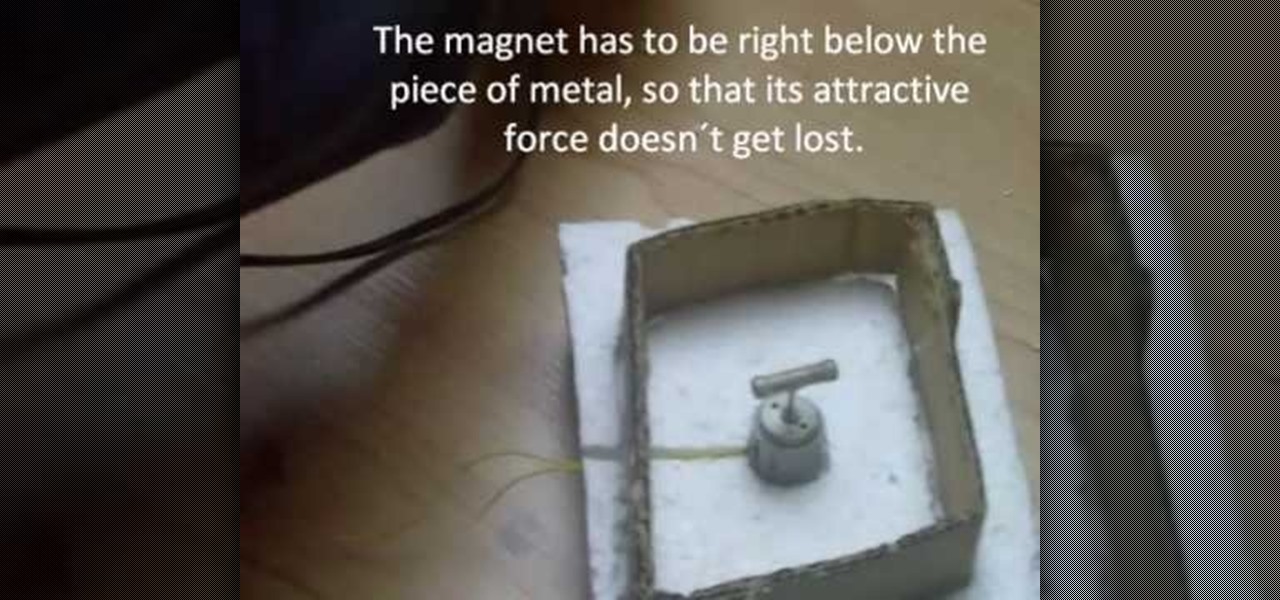
In this video, we learn how to build a magnetic stirring device. First you will need: a block of 1 inch thick Styrofoam, a piece of cardboard, 2 magnets, a small electric motor, a piece of non-magnetic metal, a hot glue gun, and a soldering iron. First, draw the shape of your cardboard square on the foam and cut it out. After this, take your soldering iron and melt away the Styrofoam from the outside. Then, make a hole in the middle for where the motor will be placed and push it inside. After...
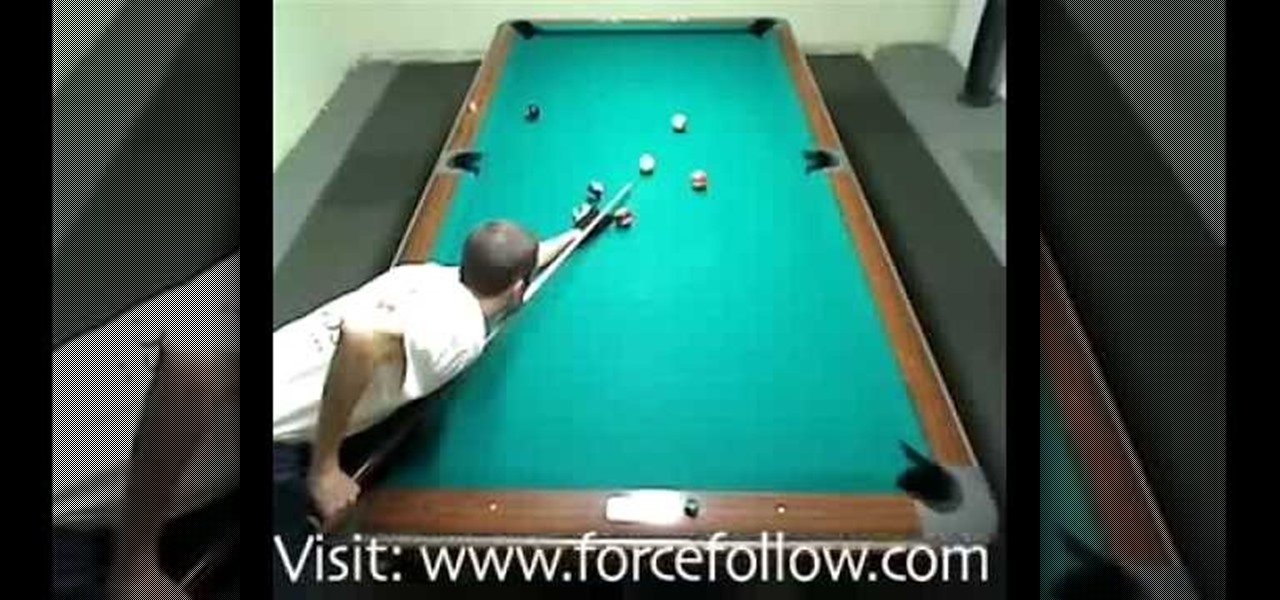
In this video, we learn how to play pool with a lesson in 8-ball position play. If you are playing a game of 8-all and you are the stripes, it's good if you end up in a position in the middle of the balls. You want to increase the margin of error by playing for an area of the table that supplies options. When possible, you want to play for more than one ball. Choose a ball that will give you the best chance of getting a ball or two in and placing the cue ball in a spot to where you will be ab...
In this video, we learn how to wear smoky royal blue eyes with glasses. First, find the dark circles of your eyes and apply concealer to them to cover it up. Next, apply concealer to the face and define your eyebrows. After this, apply a silver shadow to the eyes, followed by a blue to the crease of the eye and on the inner corner. Apply a gray shadow to the crease of the eye, then take a bright blue shadow and blend it into the eyelid, avoiding the middle of the lid. Next, apply a black shad...
In this video, we learn how to play "Candy Says" by Velvet Underground on guitar. Start off by tuning down the guitar one step for all the strings. Start to play the introduction chords, doing small sections then piecing them together. The chords are E, G sharp minor, G, and C sharp for the chorus. Once you get past the first chorus, start with the middle of the song and add in the lyrics as you sing the song. Continue to play the rest of the song adding in the other chorus parts, then when y...
Tumbao is a basic beat. It is 4 4 timing. The fingers on both hands are bandaged on ring and middle fingers. The left hand looks flat, but is played in a heel, tip, heel, tip rhythm. Fingers on right hand are curved to meet the drum head. The left hand keeps the constant rhythm. Right hand does solo portion and moves from one Conga drum to another. Video is slowed down to see the exact rhythmic patterns. It also makes it easier to practice.
In this video, we learn how to play practical jokes using your guitar. The first trick is called the jack in the box. First, take your pick and put it in between your strings and slide it down. Then, put your hand over it and play the jack in the box song. The next trick is to give the illusion you are tuning your guitar in the middle of a song. You will cover your fingers with your forearm to give the appearance and play with your other hand to make it look like it's being tuned. The last tr...
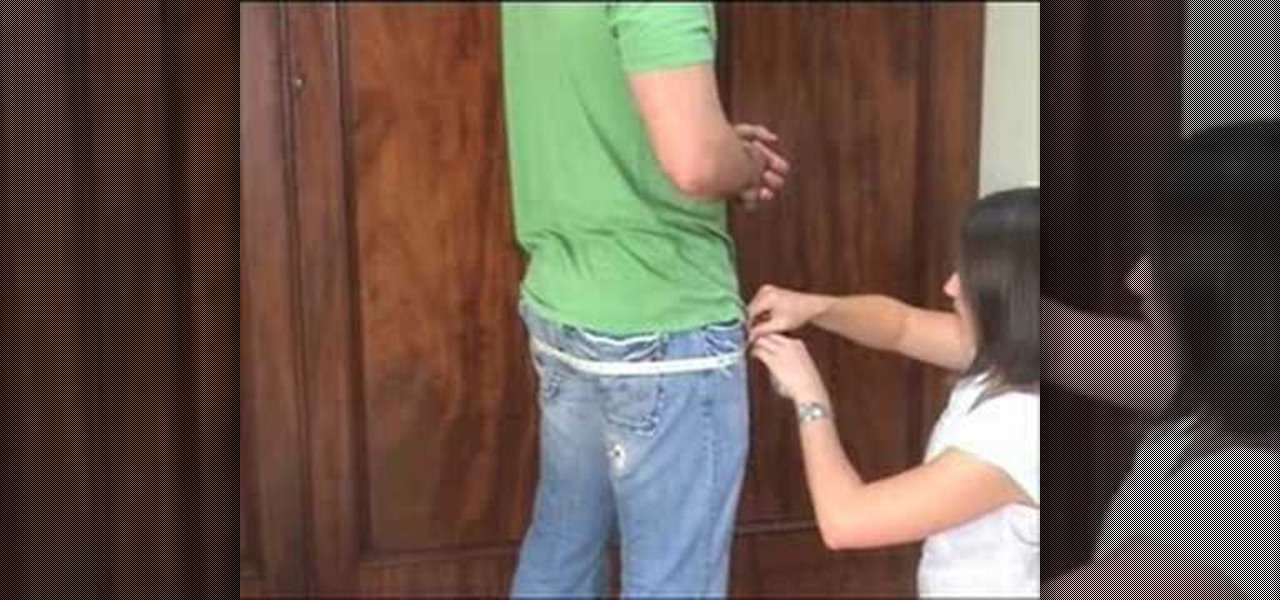
In this tutorial, we learn how to measure a traditional 8 yard kilt. First, make sure you have someone else take your measurements, don't do it by yourself. Have your waist measured first, measure about two inches above the belly button or where you want your kilt to sit. Next, measure the seat by taking the measurement around the widest part of your hips. Finally, measure the kilt length by measuring straight down from the waist line until you reach the middle of the knee cap. After this, yo...
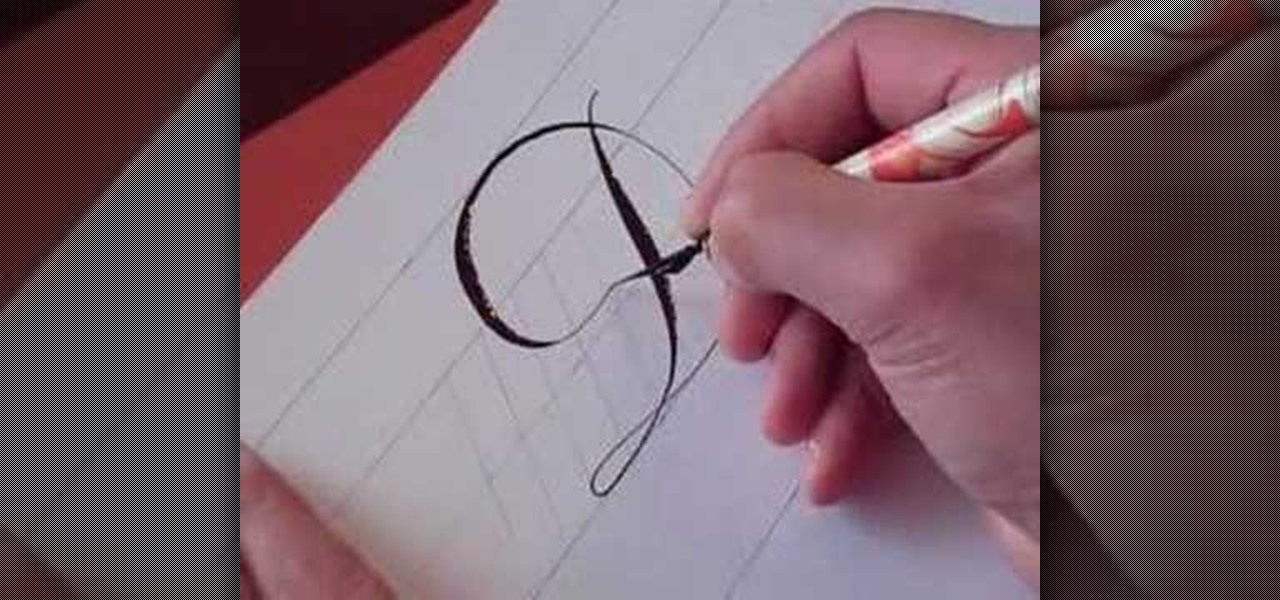
In this video, we learn how to write the letter D in calligraphy copperplate. Start off by drawing a thin line down the paper, pressing on the pen harder to make a thicker line in the middle, then thinning out at the end. Drag the line to the left making a thin line, then loop it around to the front of the line and make the D shape. After you make the shape, bring the line to the back of the original line and loop it. Do make a lower case letter, make an oval shape with a thick line on the le...
In this video, we learn how to get a feathered look with your hair. First, take the top of your hair and hair spray it on the back. After this, tease the hair and then place a large barrel curling iron in it. Then, take a clip and roll it into the clip. Continue to do this all the way down until you reach the bottom middle of your hair. After this, hairspray your hair, then do this on the sides of your hair and on your bangs. When finished, take the pins out of your hair and hair spray, then ...
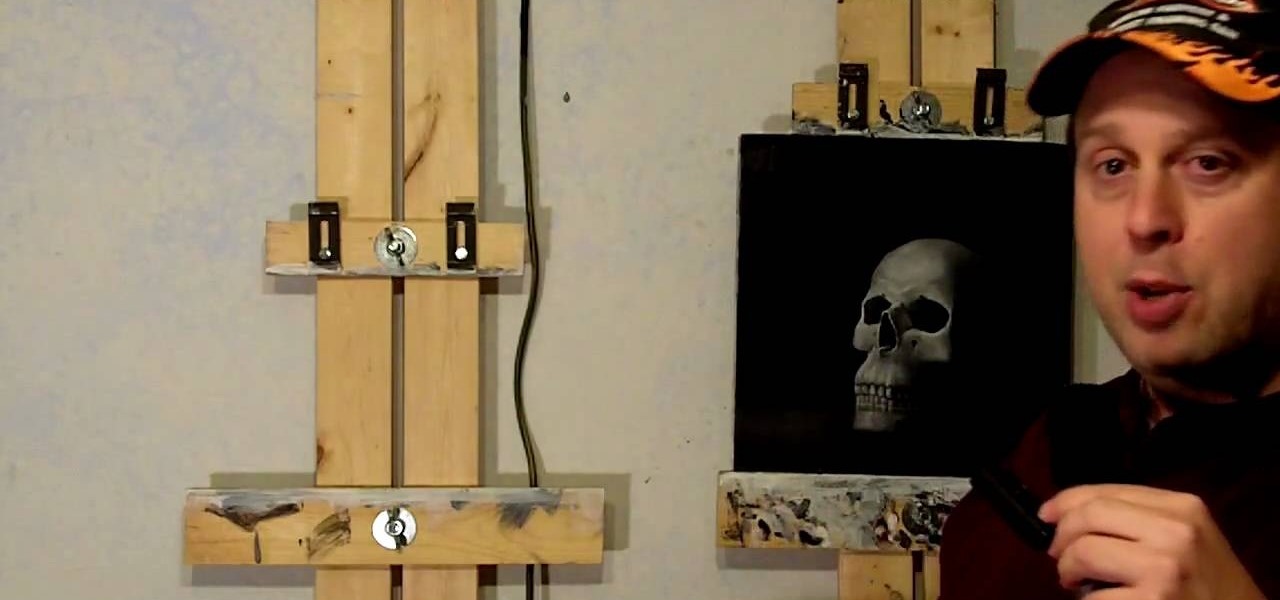
In this video, we learn how to make an easy $20 DIY art easel with Patrick Lawrence. Each side should be about 6' tall, and make sure you screw it into the wall when you are finished. First, you will hold these together with a carriage bolt that slides up and down the two pieces of wood. At the top, screw the screws into the wall and at the bottom, bolt it up the same way as in the middle using a wing nut and a big washer. That's all there is to making an easel yourself, saving you tons of mo...
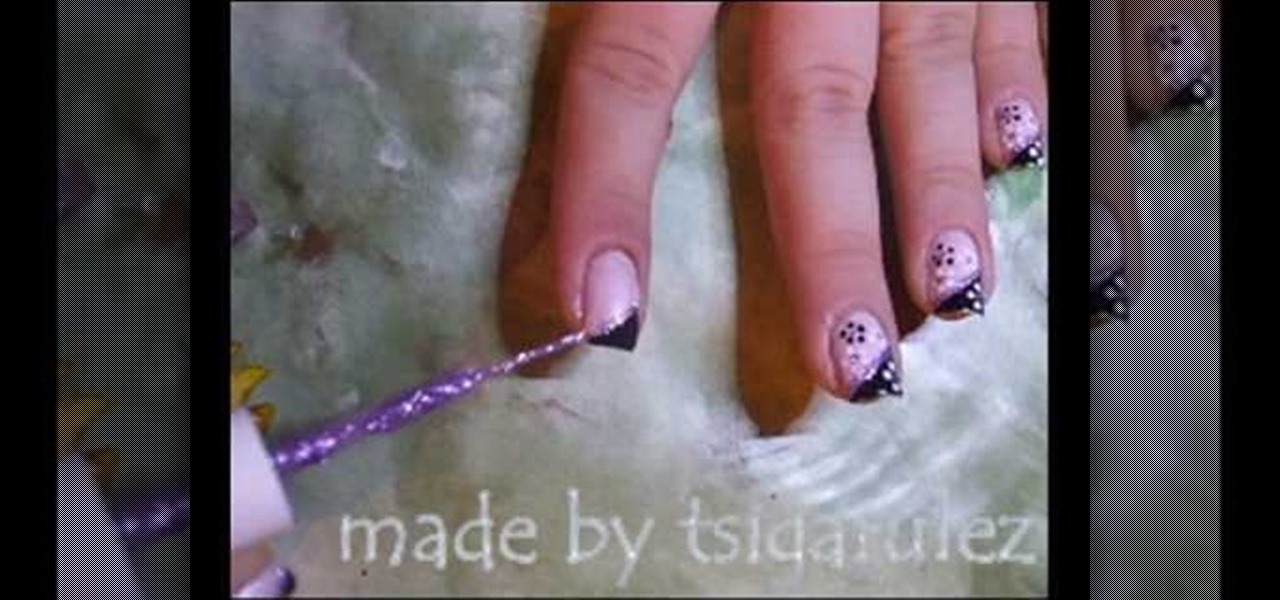
In this tutorial, we learn how to paint a black & pink French manicure with flowers. Start by painting the nails with a light pink nail polish, adding a couple layers so the color shows on top of the nail. Wait for this to dry, then paint black nail polish in a diagonal line across the top corner of the nail. Now, allow this to dry and take a sparkly purple nail polish and paint it in a line directly underneath the black polish. Next, use a toothpick or dotting tool to dot white nail polish i...
In this video, we learn how to make Trinidad hot pepper sauce. First, cut up any hot peppers that you can find and remove the seeds from the middle of them. After this, place the peppers (you want about 8) into the blender with 1/2 of a garlic and 3 green onions. Also add in a handful of cilantro, then cover with vinegar. Place the top onto the blender, then blend it until you get a liquid consistency and everything is well blended together. When this is finished blending, pour into a couple ...
In this tutorial, we learn how to make cloth flowers. Start out by grabbing several different strips of fabric and folding it into a shape that makes a flower. After you do this, place a needle into the fabric so it doesn't come unraveled. After this, start to twist the fabric and then thread the needle through the strip. Now, pull the fabric up and it will scrunch up into a flower shape. Now, wrap this around a stick with a piece of fabric on it, that will become the middle of the flower. Wh...
In this video, we learn how to draw Naruto. Start out by drawing a circle as the outline. After this, draw the jawline. Next, draw lines in the middle so you know where you are going to draw the eyes and the rest of the facial features. Next, define the features on all the different parts of the face. Start to add in shading to the face, then draw in the hair. Next draw in a hair band at the top of the head, followed by spiked hair coming out of the top and ears on the side of the face. When ...
In this video, we learn how to make chocolate dessert cups for an event or party. First, tape a cupcake pan and paint pink colored hot chocolate into a shape at the bottom. Next, add in melted chocolate to the individual cups. After this, place in the refrigerator for 10 minutes, then push the cups out of the trays. Then, you can place icing or cream into the middle of them and serve to guests. These only take a short amount of time to make, and everyone will love them. It's a great way to ke...
In this video, we learn how to make looming easier. First, you will want to use a table loomer to help make this much more simple. Start to thread the different colors or one color through the loomer and then grab a plate when you are done. use the side of the plate to run it through the middle of the string. When you are finished, this will help push the thread down into the looming machine and you won't have to do it manually with your hands. When you are finished, you can take out the loom...
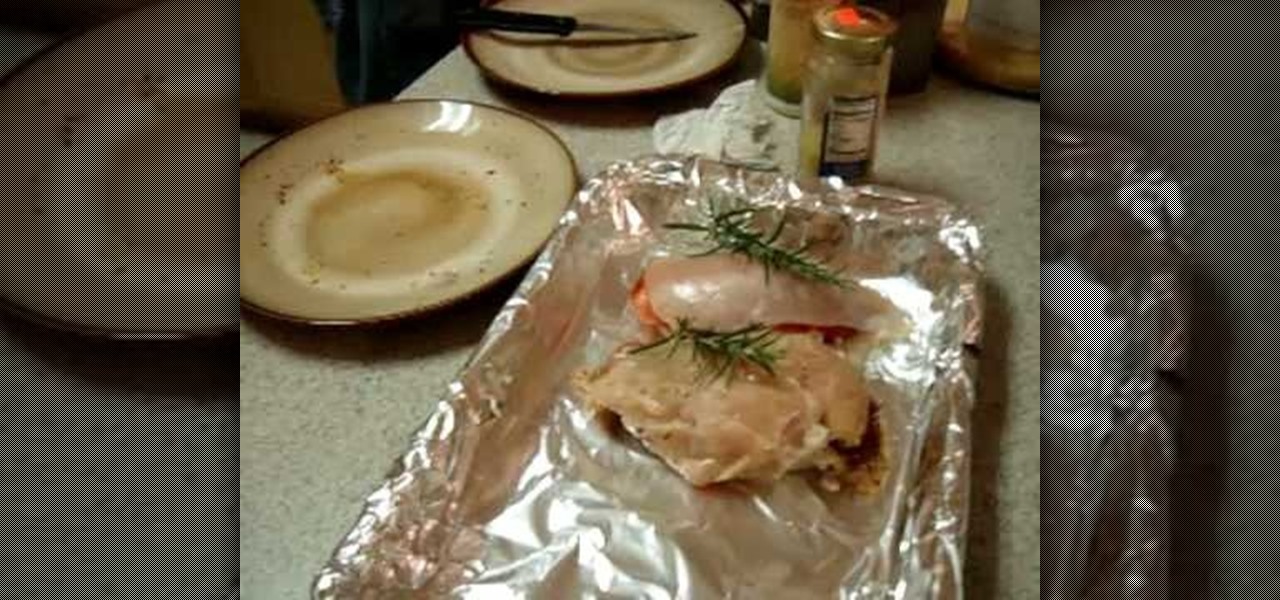
In this tutorial, we learn how to prepare stuffed chicken breasts with ham and cheese. You will need herbs including: pimentos, chopped onions, garlic, and black pepper. First, take your chicken breast and cut it in half. Make sure it's thawed, but slightly frozen in the middle. After this, put the ham and cheese on the inside of the chicken, along with pepperoni, then add in all your different spices and herbs. Next, close your chicken breast up, then place it on a baking tray with foil. Spr...
Kameron Kay teaches us how to make a floating flower crystal toe ring in this tutorial. You will need: stretch cord, large crimp bead, flat nosed pliers, flat backed crystal flower, glue, and small scissors to make this. First, cut out your chord to the exact size that you need. After this, use glue to attack the ring into the middle of the string. Place a crimp bead on the bottom to help the bead stay in place, then glue these together as well. Next, tie this together and attach an end to th...
In this tutorial, we learn how to do a side headband braid with ribbon intertwined. First, grab a ribbon that is around 32 inches and any color you want. Now, take a chunk of hair on the side of your head, and place the middle of the ribbon underneath it. Now, separate your hair into three sections, then start to braid by connecting the ribbon in with the strands. Once you finish this, tie off at the end. Now, make a messy bun in the back of your hair with the braid on the side still. After t...
In this video, we learn how to measure your space when drawing a landscape. First you want to draw a line in the middle and measure out the line to the top of the building, and create another line there. Measure the length and then measure the edge of the outside of the building. After this, find the end point for the building and measure from the top down or from the second line to the roof, then draw the line across. Measure in from the end to get the angle, then find the layout for the tre...
In this video, we learn how to create tiny planets in Photoshop. First, unlock your background layer and create a line in the middle of the image. Now, select the bottom that is underneath the line and drag it down to the bottom of the canvas. After this, make your image into a square by resizing the image with your tools. After this, you will need to rotate the image 180 degrees, then select "polar coordinates" in the distort tools. After this, you can rotate your canvas back around 180 degr...
Clinton Kelly teaches us how to prepare an easy radish appetizer in this tutorial. First, take a radish and cut off both ends. Next, scoop out a little bit of the center of the radish going in a circular motion with a pairing knife. Now, take softened butter and place it into a plastic bag and push into the corner. Snip off the corner of the bag, then fill the middle of the radish with butter and sprinkle with kosher salt. Next, place this on a platter with a bed of kosher salt on the bottom ...