In this video, we learn how to create a "purple smoke" fashion makeup look. start out by applying foundation to the face, then apply purple liner around the lips and fill them in half way to the middle. Then, smear the color into the middle and apply purple shadow over the lips. From here, apply black eyeliner to the tops of the eye, then apply black shadow underneath the brown on the crease of the eye, then rub on a silver shadow around the entire lid. Use liquid liner to draw on lashes on t...

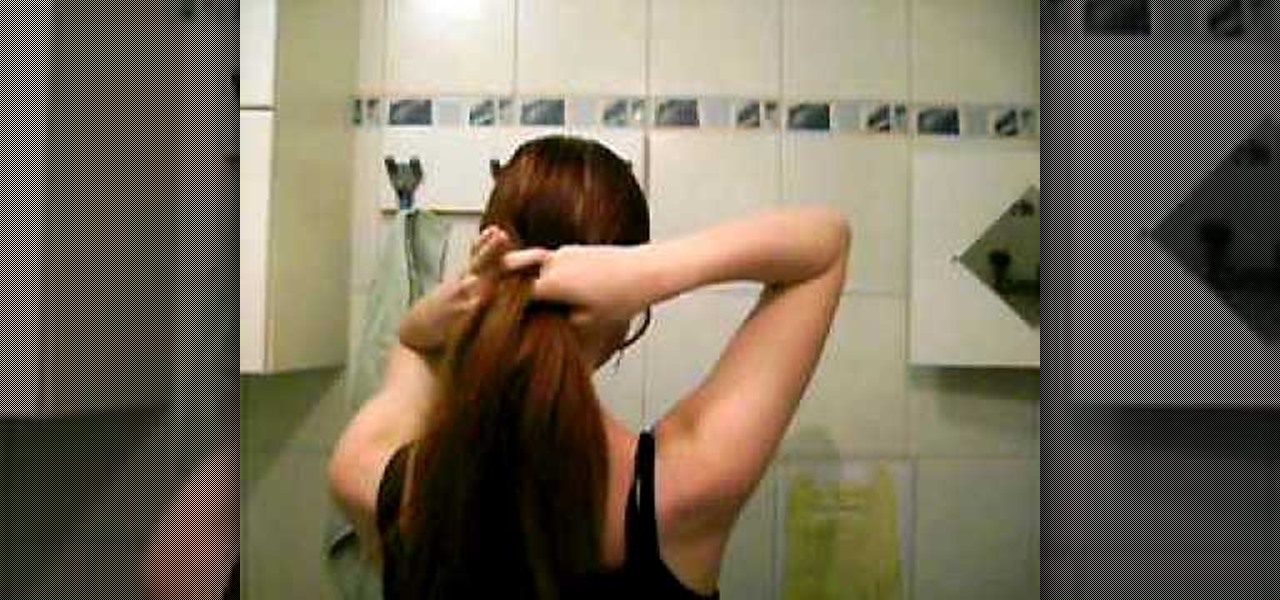
In this tutorial, we learn how to do a cute braided hairstyle on your American Girl. To start, you will first need to brush out the hair and then part it in the middle. From here, clip the right side of the hair and then clip the other side. Take the rest of the hair and tie it into a ponytail. From here, take the left side and start a braid, then do the same thing on the right side. When you finish, clip the middle hair into a bun and then clip the braided section in the back. This will fini...
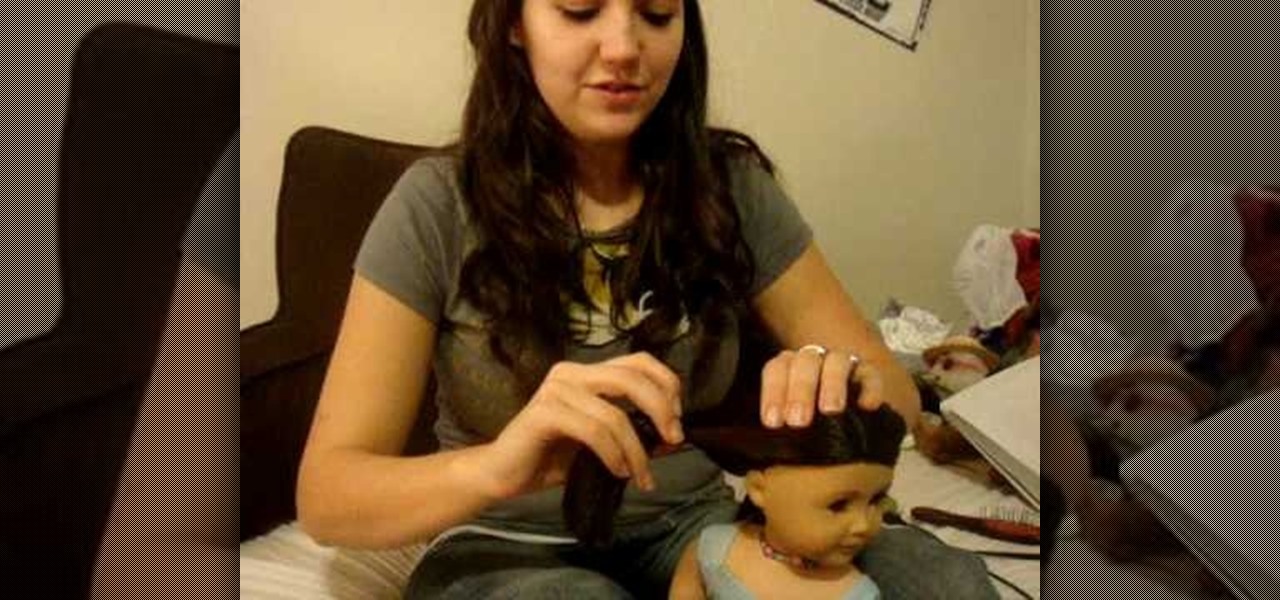
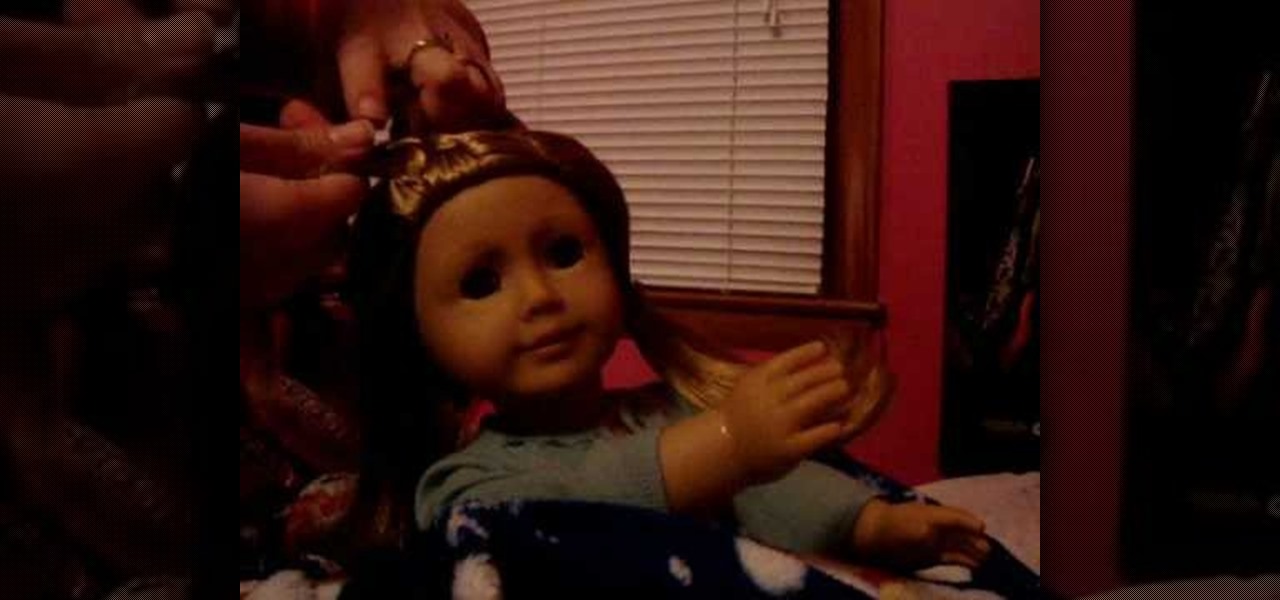
In this video, we learn how to do a double twist flip on your American Girl doll. First, part the hair down the middle and then brush it out. From here, pull out the rubber band one side and then split the middle of the hair in half. Push the rubber band with the hair through this, then tighten it up. Do this on the other side of the hair to make them both even. This will finish the hairstyle on your doll! The great thing is that you can do this on dolls that have short hair or long hair and ...
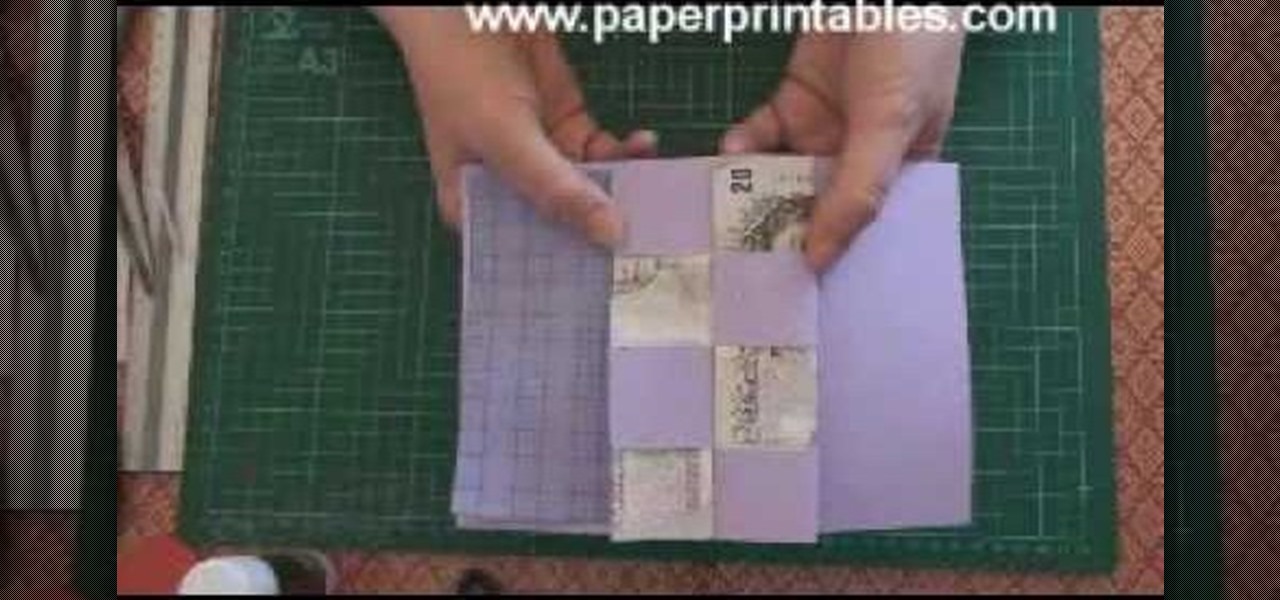
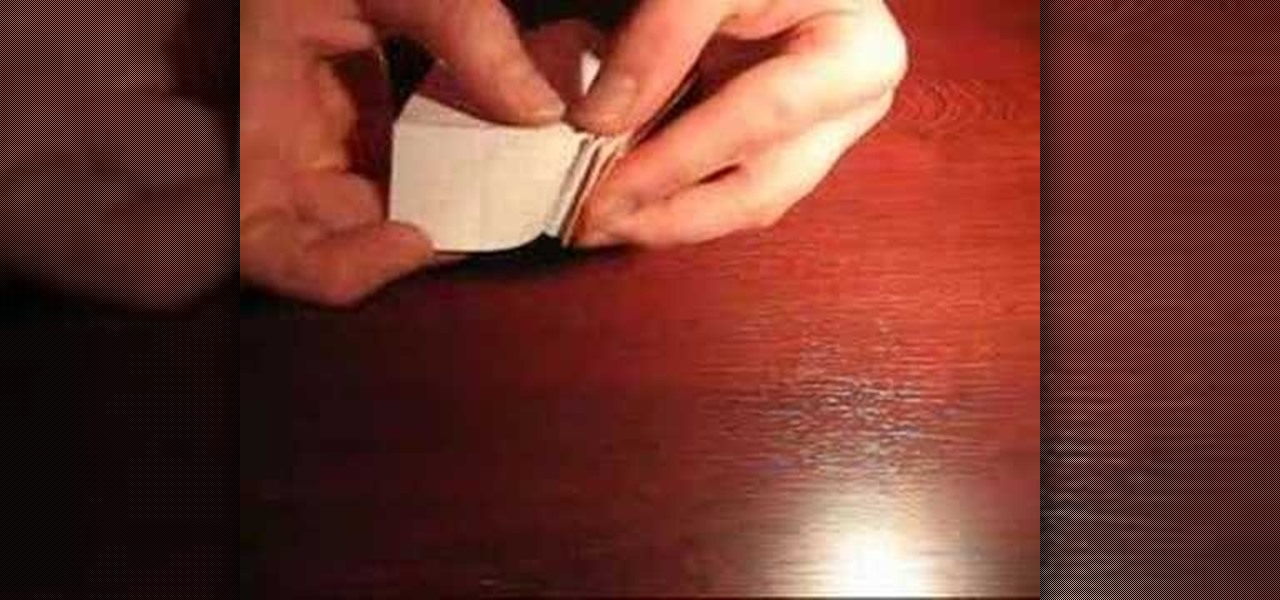
In this video, we learn how to make a pop-up concertina money card. To start, you will first need to take a piece of paper and measure your money on the inside of the paper. Then, cut this out in a strip and cold your money in half lengthwise. After this, measure the depth out from the center using a ruler. Then, fold the paper in half and on the sides where you marked. Then, you will cut three holes in the middle of the paper and these will hold the money in. Stick the bill in the middle of ...
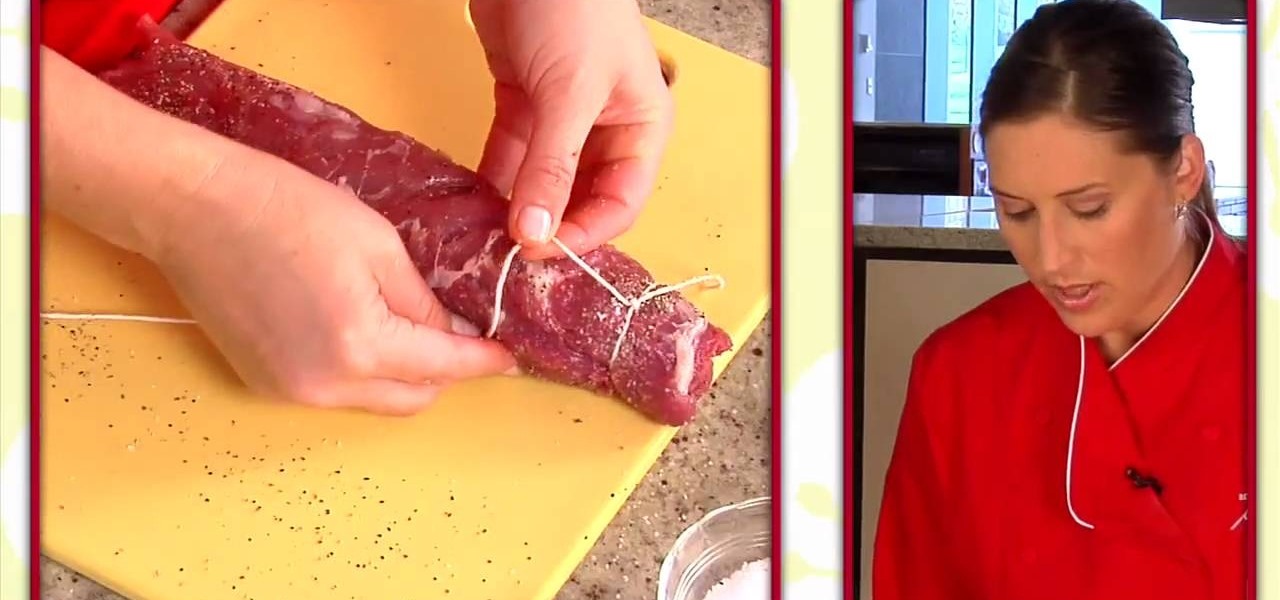
In this tutorial, we learn how to cook a chorizo stuffed pork tenderloin. To start, you will need to take your pork tenderloin and butterfly it so it is opened up in the middle, but not cut all the way through. From here, you will place several pieces or as much chorizo into it that you want. After this, close it back up and then sprinkle salt and pepper on top of it. Then, grab a string and tie this around the top, middle, and bottom of the pork. Then, bake this in the oven until it's cooked...
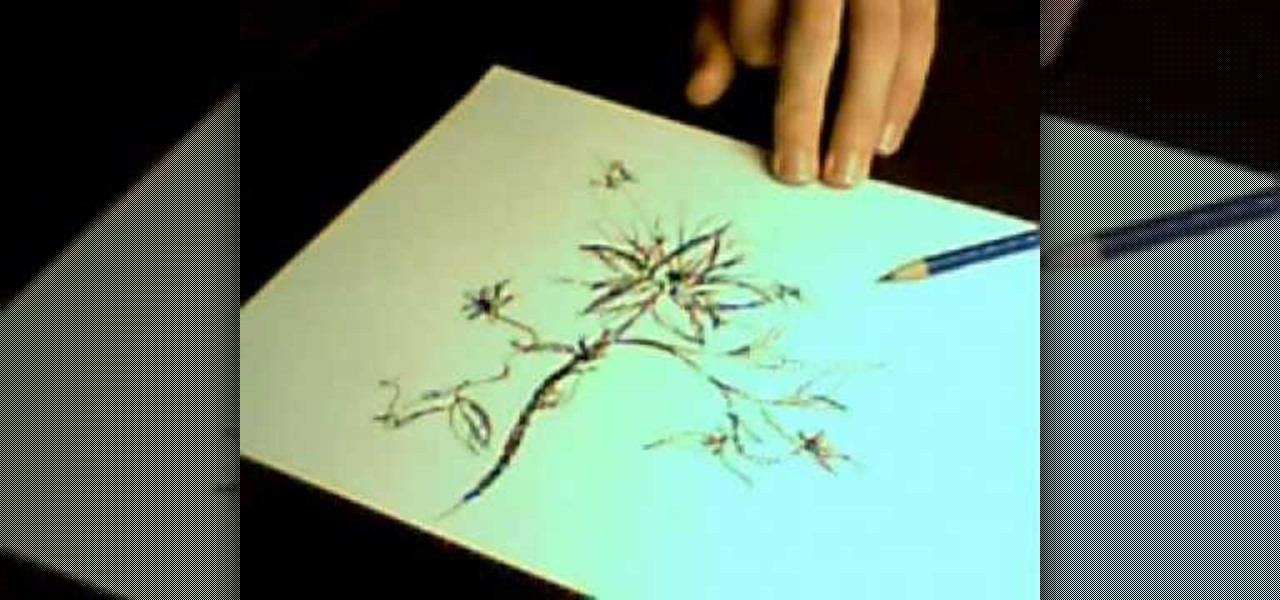
In this tutorial, we learn how to draw a wild magical flower. Start out by using a pencil with a light touch to create the outline for the flower. Make wispy lines to create the leaves and the flowers. Also, draw in the middle of the flower to create additional details. Then, draw in the leaves with the middle vine going down off the page. Continue on the draw in additional flowers off of the vine. Use the wispy edge of the pencil to create a more majestic and magical type of flower. Color in...

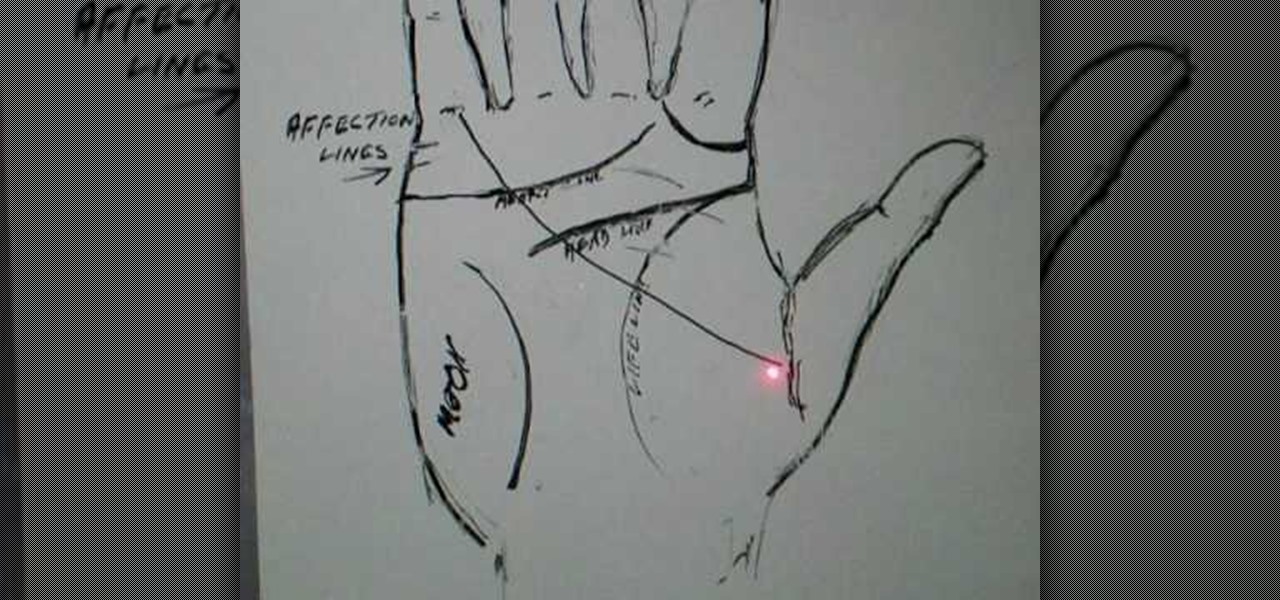
In this tutorial, we learn how to read the intuition and success lines in palm reading. The affection lines are the lines that go vertically and are underneath your pinkie. The lift line is the line in the middle of your palm the curls to the right. The head line is in the middle of the hand and meets up with the life line, this line shows success in business. It also shows someone that will go into business and tends to take control of businesses. The ring around the pointer finger also show...
Factor a trinomial by grouping
In this tutorial, we learn how to make a homemade compost tumbler. Find a large barrel and mount it on a wood frame. You can use recycled materials, like an old pickle barrel if you can find one. There should be an axle in the middle of the wooden posts that runs through the tumbler as well. There should be a pipe in the middle bottom of the barrel to run air through, that will exit through the top where the handles are at. The aeration system will help your compost work properly, so you can ...
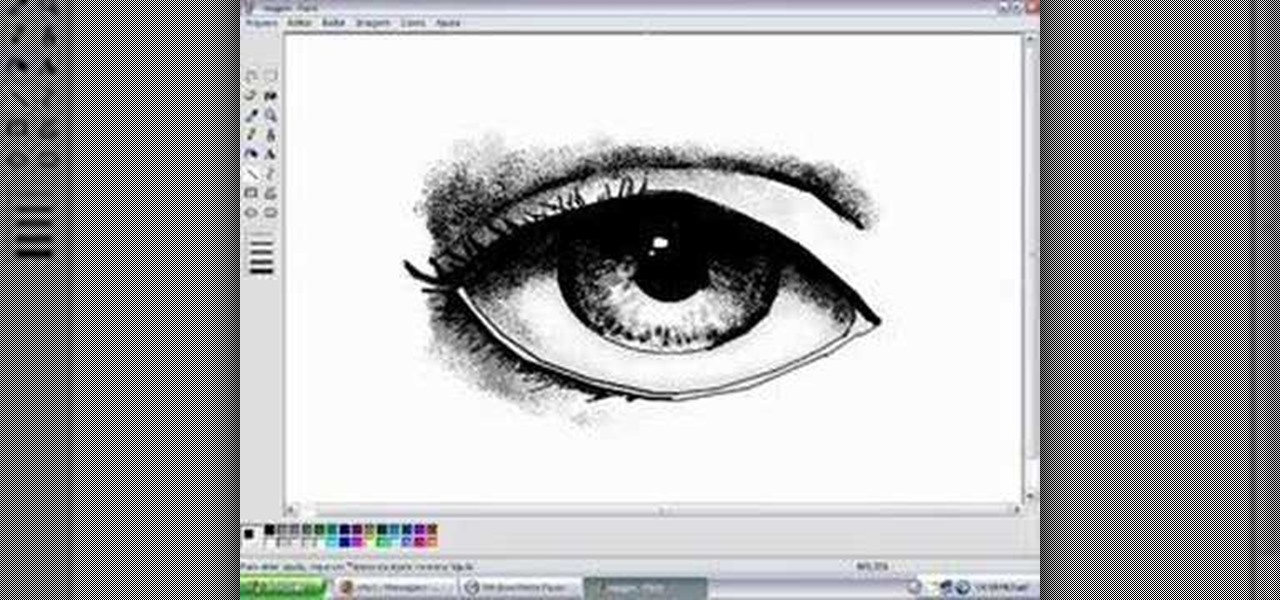
In this tutorial, we learn how to draw eyes in MS Paint. Start out by drawing the outline for the eye using a thin marker. After this, draw on a thicker line at the top of the eye and then draw on the crease of the eye above this. Now, draw in the details of the middle of the eye and start to shade in around the crease of the eye and the middle of the eye. From here, draw in the eyelashes on the top and the bottom of the eye, making them longer if they are for a woman. When finished, save thi...
In this tutorial, we learn how to double French braid your American Girl Doll's hair. First, part the hair right down the middle so you have the left and right side. After this, pull one of the sides into a pigtail. Next, go to the other side and grab a small section from the top. Brush this out and then divide into three pieces. Start it like a regular braid, then start to grab hair from the bottom on each side, crossing it over the middle. Continue to do this until you reach the bottom of t...
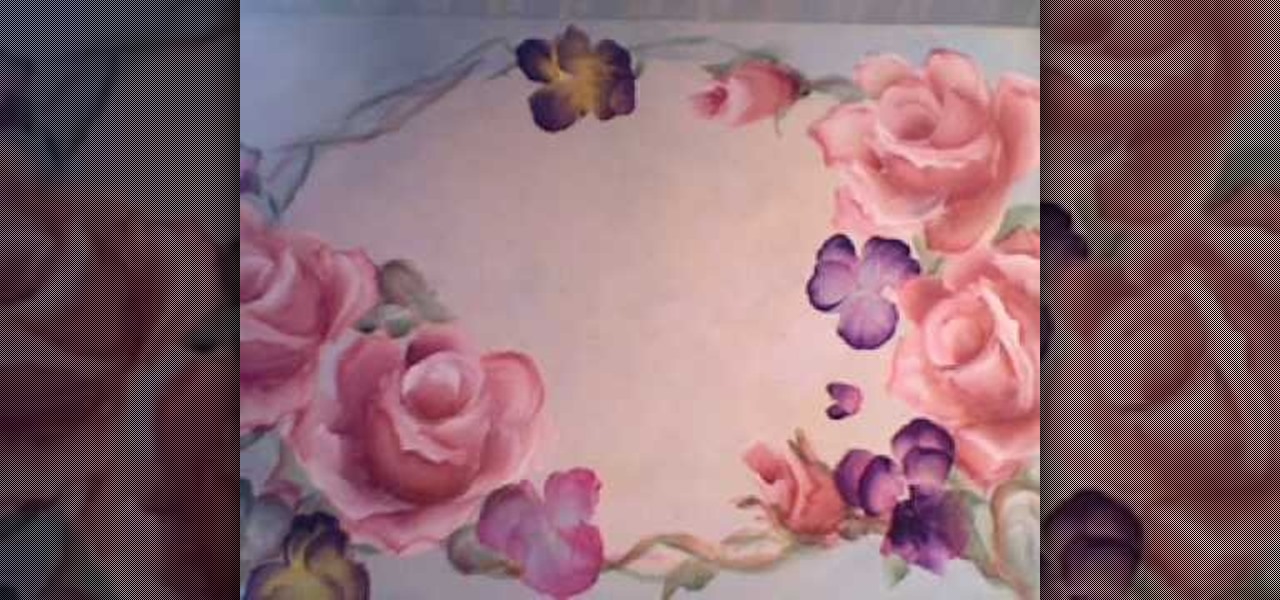
In this video, we learn how to paint pansies flowers with Marjorie Harris. Start out by using a purple color to paint the petals with a small angled brush. Then, move your brush in an up and down motion to create the petals. You can also use different colors with your brush to make the middle of the flower more appealing. Then, use black on a pointed brush to create lines in the middle of the flower petal. From here, you will be able to paint on the stem of the flower green to create a beauti...
In this tutorial, we learn how to add 3D effects and shading to graffiti letters. To start, you will draw a simple letter with a pencil. Then, take one point under the letter in the middle and draw a darker outline. Next, you will draw an outline around the first outline to make it look 3D. Next, you will shade in the area in the middle of the letter and anything that is in between the first letter and the second. After this, you will add in lines and additional detailing to make the letters ...
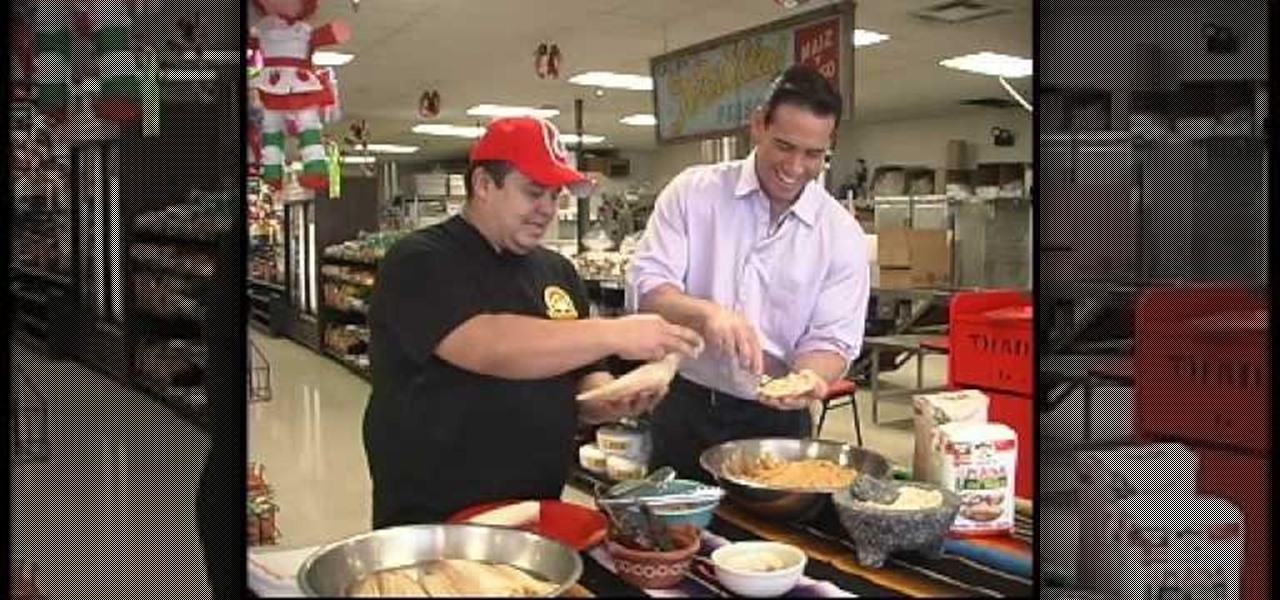
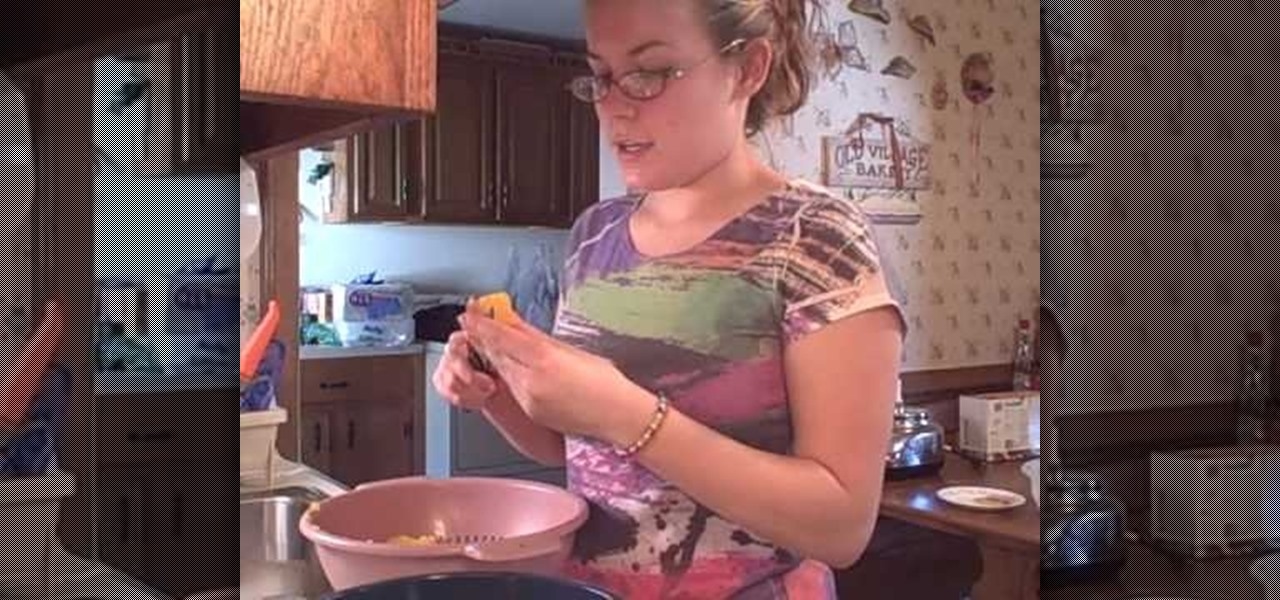
In this tutorial, we learn how to make tamales by hand with masa. To start, you will need to make masa, you will need to make your meat, and grab your seasonings. Make sure you have tamale wrappers as well that have been soaked in hot water for 30 minutes before you are ready to use them. To construct the tamale, you will wipe of the wrapper and dry it, then you will scoop manza into the middle of it. Then, spread it out all over the wrapper until it's covered. After this, put your meat into ...
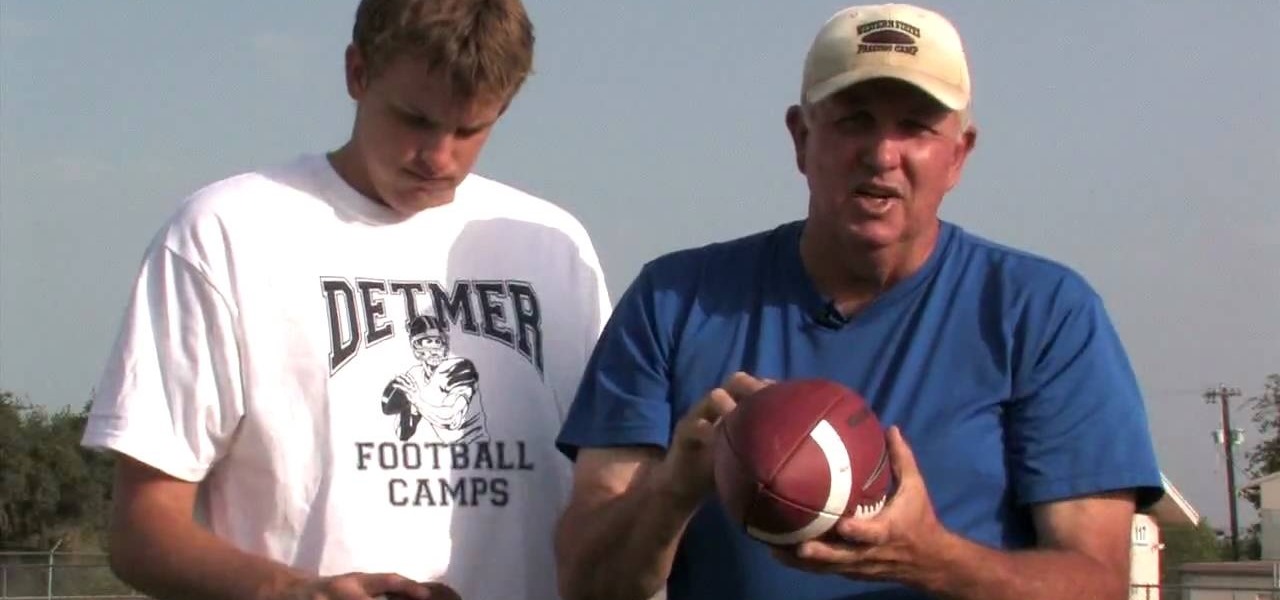
This video tutorial is in the Sports category which will show you how to properly throw a football. First ensure the football is the correct size for the thrower's hand. You can't throw without a proper grip. To get a proper grip the middle finger should be on and parallel to the white stripe on the football. The 4th and 5th fingers should be on the laces. The index finger must be separated from the middle finger and be parallel to the seam. While throwing, the thumb should be pointing downwa...
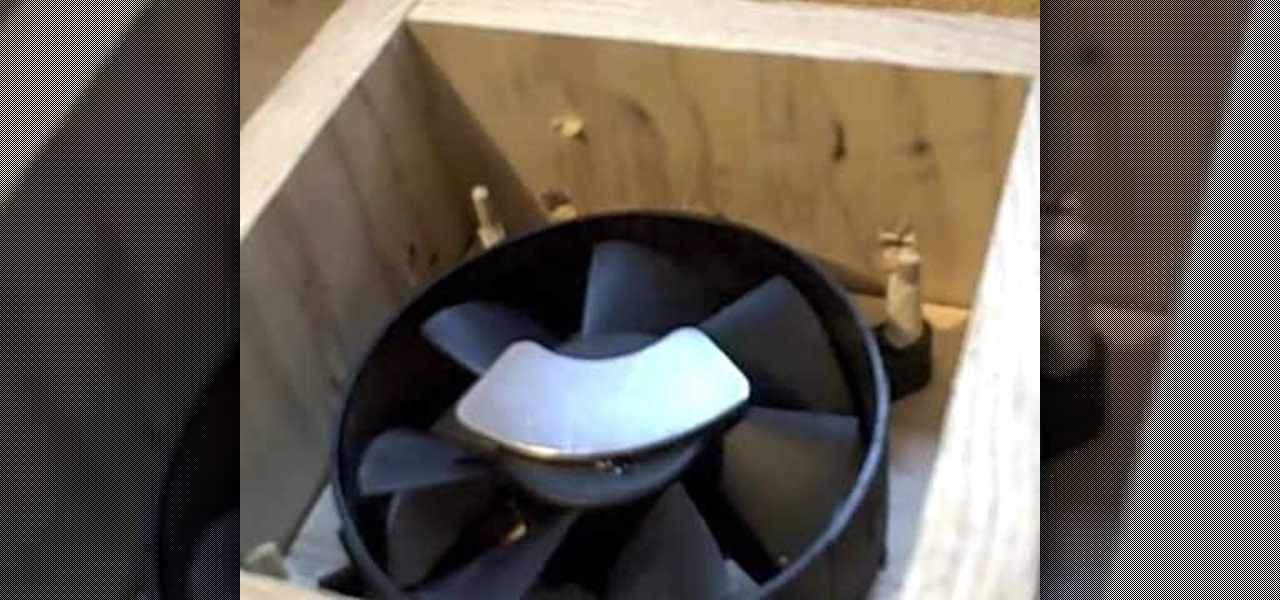
In this tutorial, we learn how to build a magnetic stirrer from computer parts. This is a simple thing to make, and is great if you are going to be mixing chemicals and don't want to get your hands dirty. First, you will need to create a wooden box with the top empty. Then, place a computer fan into the middle of the box and pin it down. Place a magnet from the hard drive in the middle of the fan, then place a stirring rod on the glass that will go on the top of the wooden box. Now you will b...
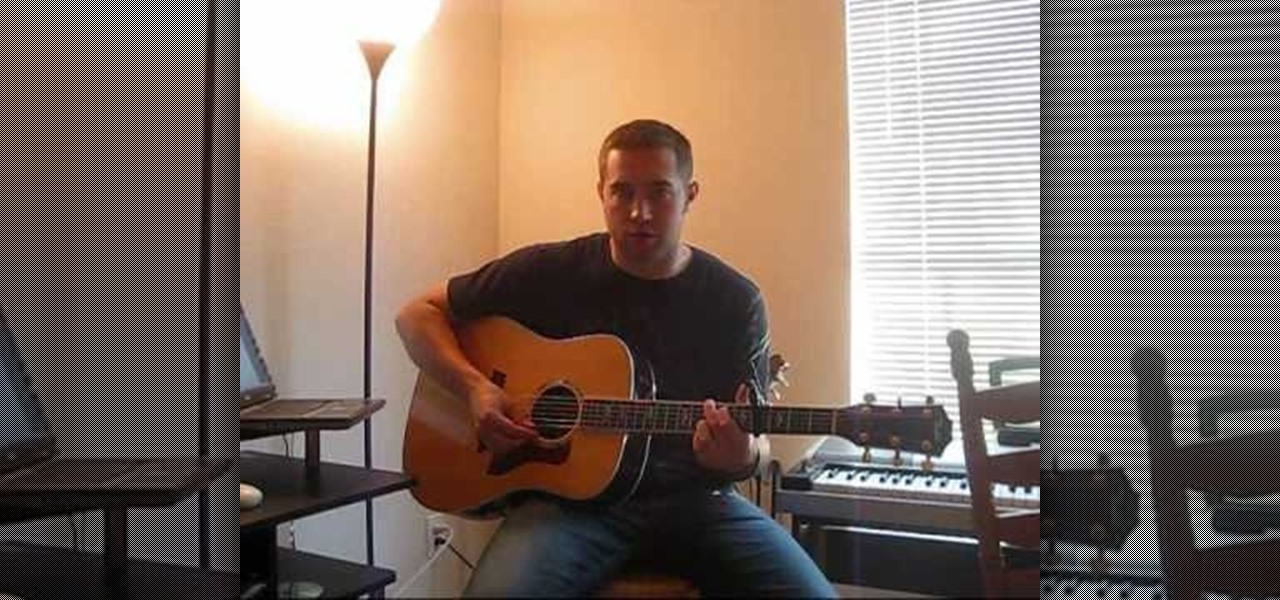
In this video, we learn how to play "I'm a Little More Country Than That" by Easton. There is a riff that is played at the beginning, which is played on the fourth fret. Put your middle finger on the third fret of the high E string and your pointer finger on the second string. On the third note, move your middle finger to the third fret and then play it over several times. Once you finish this, you can move into the intro of the song and then start to play the verses. Incorporate the lyrics i...
In this tutorial, we learn how to make a pumpkin pie with fresh pumpkin. First, take your pumpkin and cut it in half. After this, take out the middle of the pumpkin, then cut it into several large cubes in a large bowl. After this, place the pumpkin into boiling water and cook until they are soft. Once finished, take the filling from the middle and peel the skin off the pieces. Now mash these pieces up using a food processor and add together with the other ingredients for your pumpkin pie. Po...
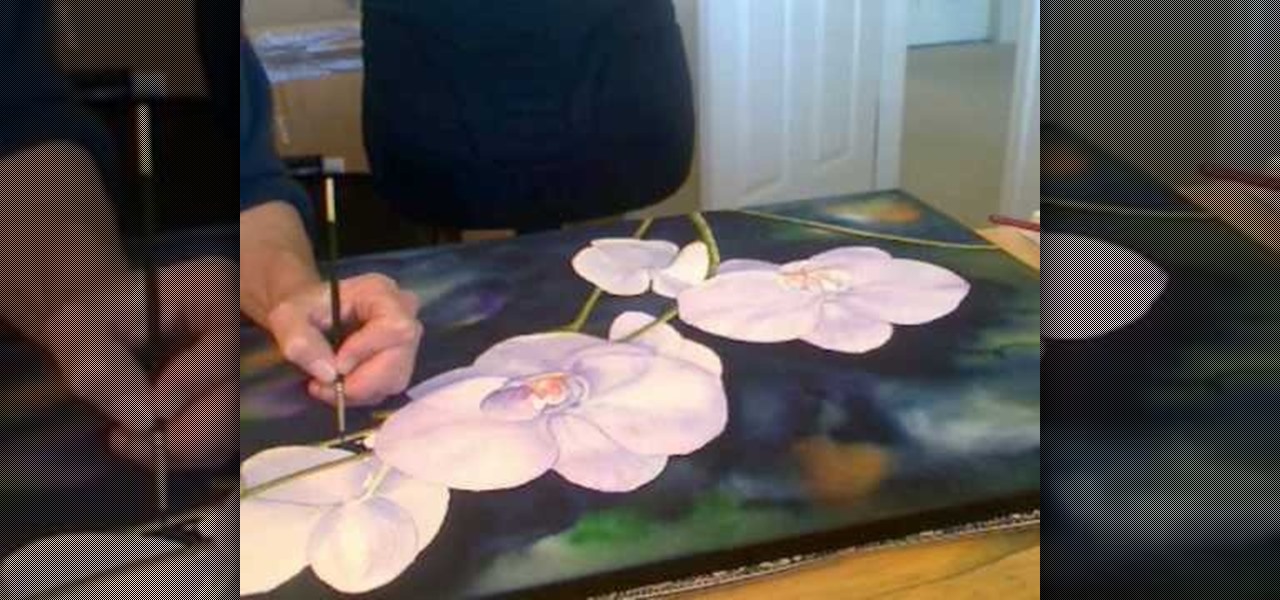
In this video, we learn how to pain orchid flowers with watercolor paints. Start out by using a light lilac color on the petals. Use a thin brush to push the colors around on the picture so you have slight shading around the different petals. Use a darker purple color in the middle of the flower. Then, use a yellow color in the very middle. Add in a green leaf and stem on the bottom of the flower. Use a paper towel to smudge any excess moisture or water off of the flower to make it more prist...
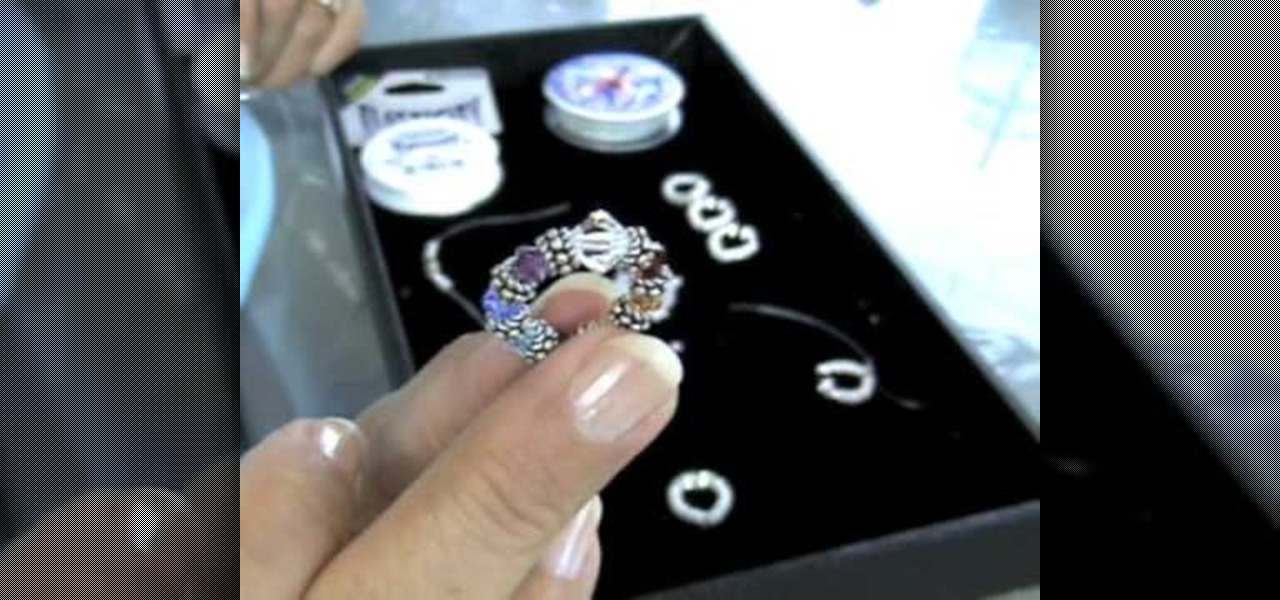
In this tutorial, we learn how to make an elastic Bali bead & crystal ring. First, you need to get all of your supplies together, which include: elastic cord, crystals, glue, beads, and scissors. Start by cutting a 6 inch piece of the elastic cord, then string a bead to the middle of it. Then take a crystal and string it onto one side along with another bead and a silver bead. After this, place more beads around the other side of the middle bead then put it around your finger to see if it's t...
This video will show viewers how to fold a small book out of origami paper. You will need a square piece of paper for this project. First, fold the paper downwards in half, then fold it into quarters by folding down both edges of the paper to meet in the middle. Unfold and fold the two top sections down to make eighths on your paper. Then turn the paper around and repeat. Mountain fold both sides of the paper until you reach the middle, after which you should have a strip of folded paper. At ...
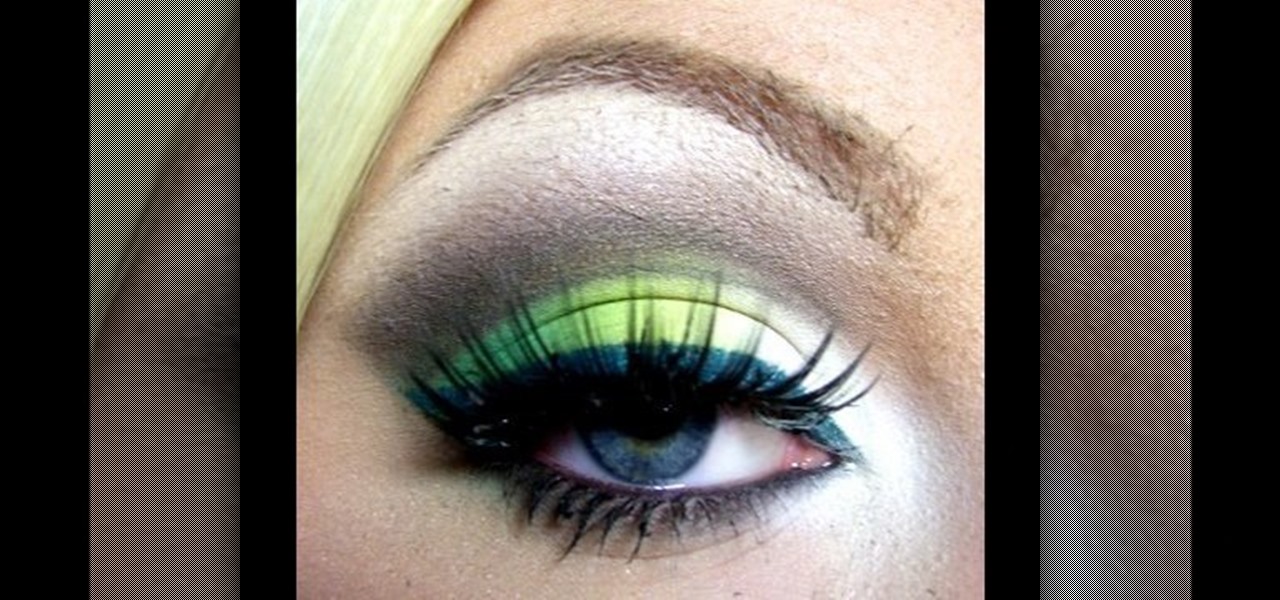
In this video, we learn how to get a spring makeup look with greens and whites. Start by applying a highlight underneath the eyebrow, brushing it on slowly, then blending down. Next, apply a white eyeshadow to the inner corner of the eye, into the middle of the eyelid. Follow this by applying a neon yellow color to the middle of the eyelid, then slightly blending the two colors together on the edges. After this, apply a dark green shadow to the outer edge of the eyelid and blend with the neon...
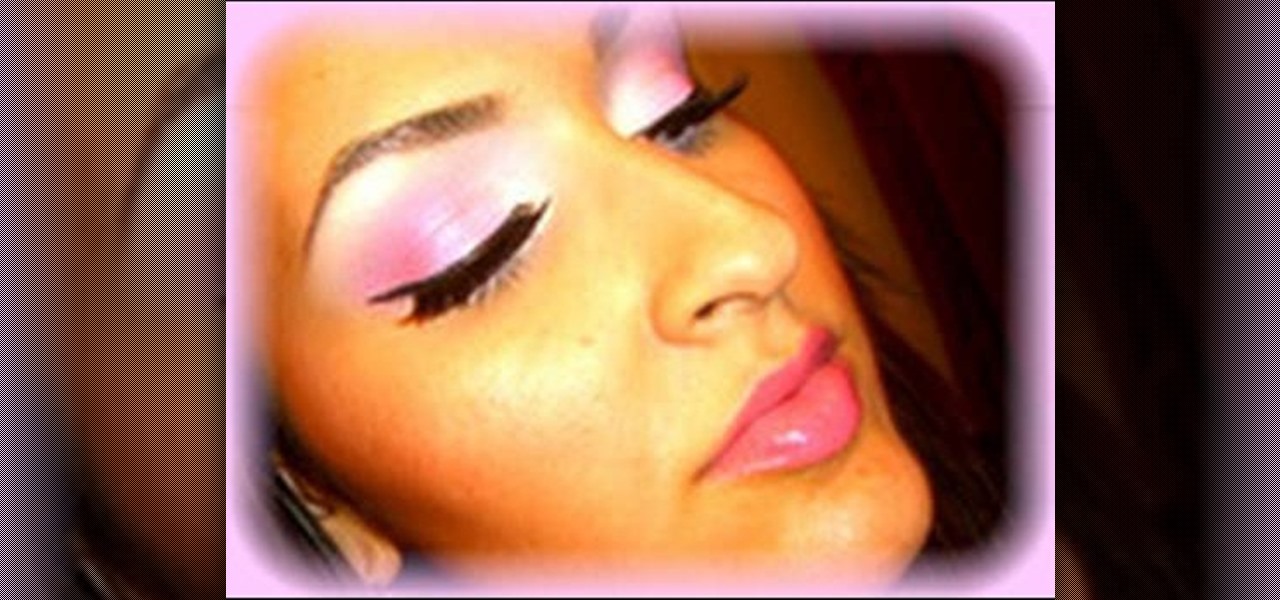
In this video, we learn how to apply ice princess pink shades with your makeup. First, apply a white cream pencil to the inner eyelid and underneath the eyebrow, then blend in. Next, take a white cream color and brush it on the inside of the lid and around the entire eyelid. Now, take a glitter pink shadow and brush it onto the middle of the eyelid. After this, take a bright pink shadow and brush it on the outer corner of the eye, blending it in with the middle pink. Now, take a lavender eyes...
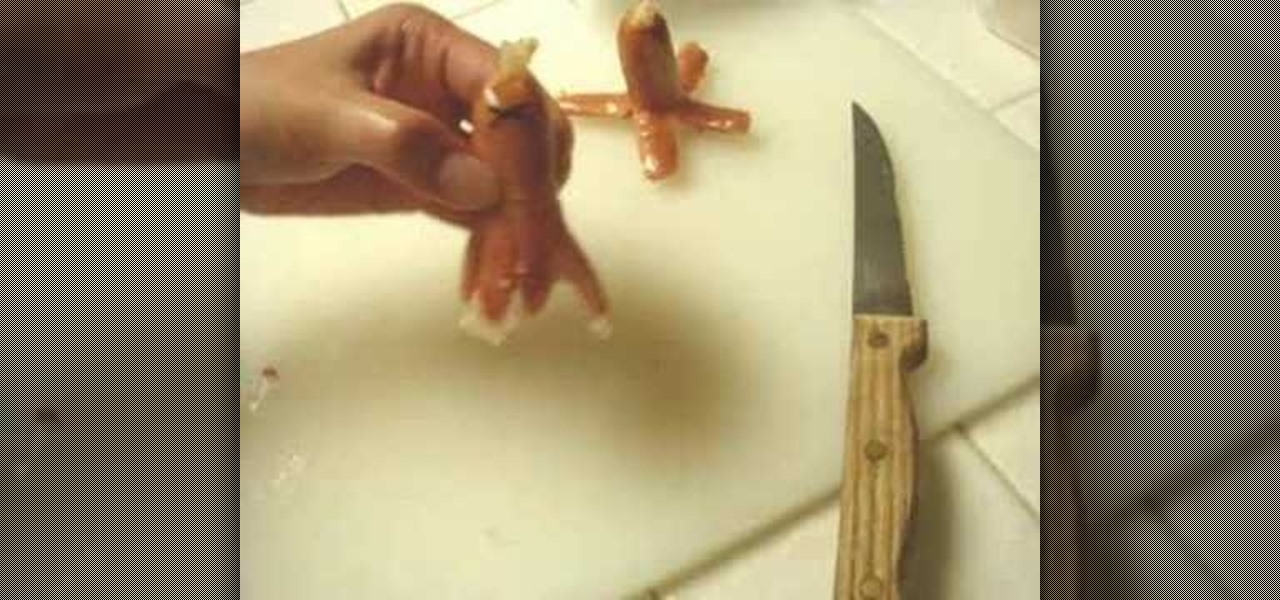
In this video, we learn how to make bento. First, you will need to purchase small quail eggs from a Japanese market, then place dried seaweed cut into two small circles on the top. Next, cut the middle of the egg with a knife, then pry it open to make it look like a knife. After this, take a small sausage and cut it at the bottom so there are eight pieces hanging, and it looks like a squid. Place an "x" cut out of seaweed on the top and cut the middle to make a mouth. Slice a strawberry while...
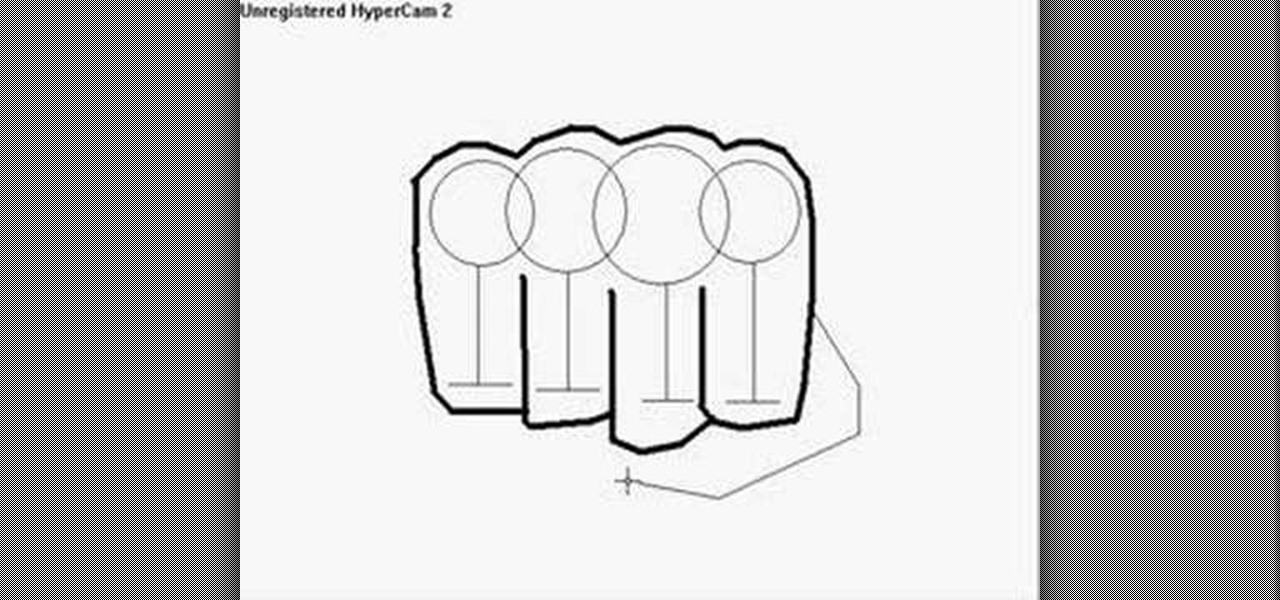
In this tutorial, we learn how to draw a fist. Start off by drawing for circles linked to each other, then draw lines coming down from the middle of each circle. Then, draw a line across the bottom of each vertical line, going horizontally. After this, use a dark line to outline around the circles and the bottom of the lines. Make sure to draw a line in between each of the individual lines. Next, add a couple of curved lines to make a thumb appear on the side. To finish, erase the original ci...
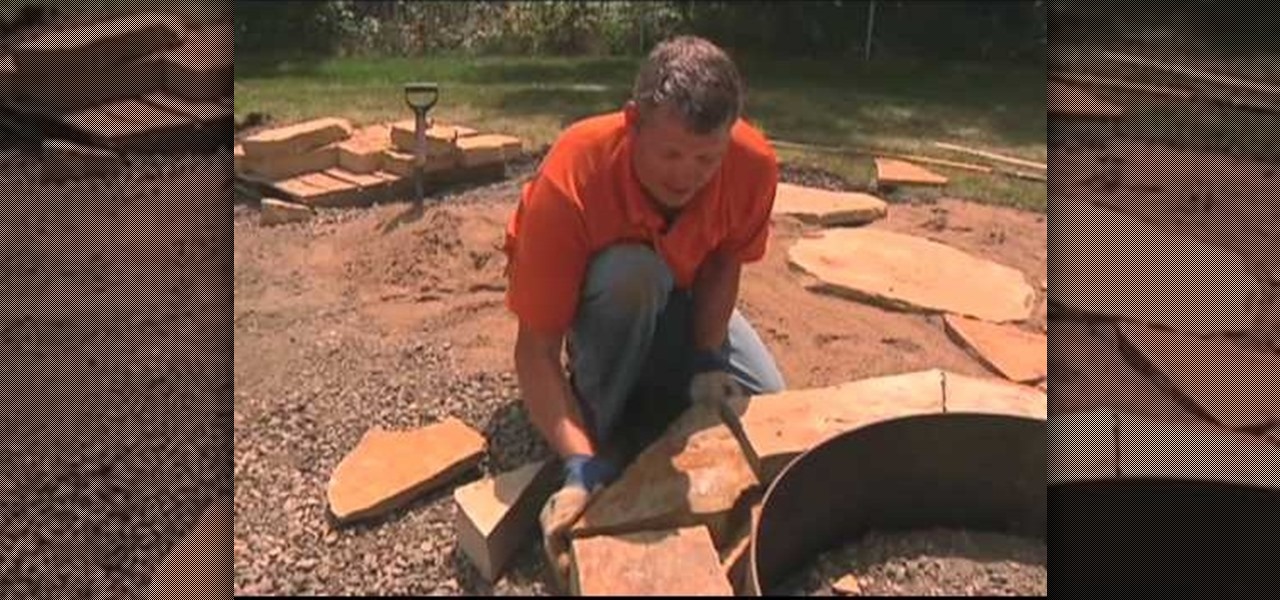
In this tutorial, we learn how to properly build a firepit. First, prep your base by filling it with dirt and small rocks. After this, set your ring down onto the dirt and make sure it's level. You can also raise it up if you want a foot rest or beverage holder. Next, apply your stone around the ring and then mortar it. Make sure all the pieces of stone fit nice and tight together. After you've done this, lock in all the joints on the stone patio by using sand and brushing it into the middle....
In this tutorial, we learn how to build spinning tops with everyday objects. You will need: round recyclable plastic lids, skewers, hot glue gun, and washers or pennies. First, take your plastic lid and weight it with a penny, then poke a skewer through the middle of it. After this, you will have a top made out of homemade products! You can use anything that is laying around your home to make a top, no matter what it is. Just make sure you have something to place int he middle and the weight ...
In this tutorial, we learn how to draw an eye in GIMP. First, open up the GIMP software and set up a circle, then color it dark blue. Next, add in light to the middle of the eye, so it looks like a light is shining onto it. After this, make a small circle in the middle of the eye, coloring it black. When done with this, create a new layer and then add brightness to the pupil of the eye. Continue to play around with the contrast and colors of the eye, so it looks more realistic and life like. ...
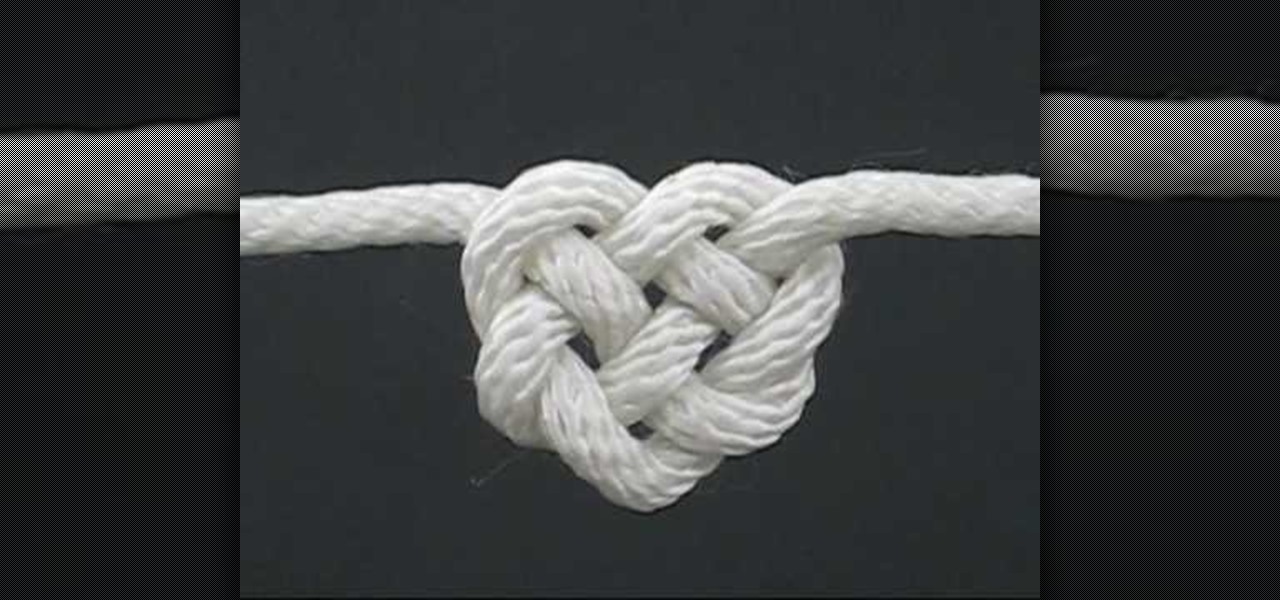
In this video, we learn how to tie the Celtic heart knot. Start off with your rope and make a loop in the middle of it. Now, bring the working en on the right side into the loop so you have a circle. Now, bring that end back into the knot and braid it through the other loop. Next, push this through the bottom loop, then braid it through the lines that are on the shape. After this, you will see a heart shape start to form. Pull gently on the heart with both sides of the rope and shape the midd...
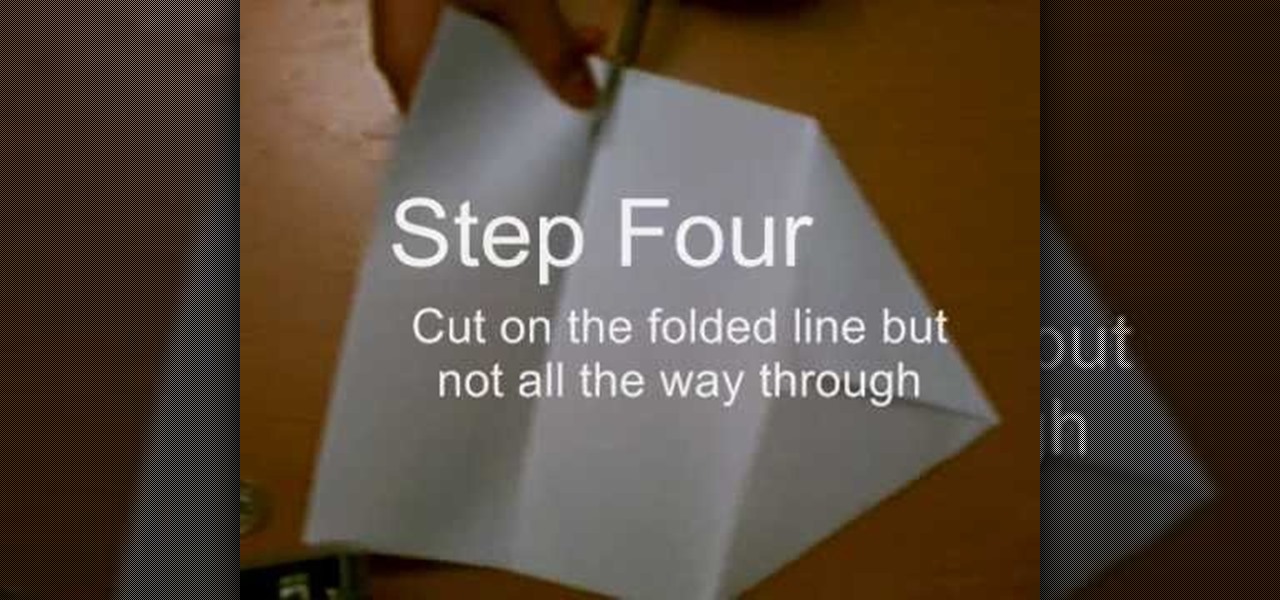
In this video, we learn how to make a whirlybird paper helicopter from printer paper. First, fold two triangles together on the paper. Next, fold the back to the triangle you just created. Next, fold the paper back and, then cut on the folded line but not all the way through. After this, fold the middle flaps until they reach each other. Then, cut through the middle of the bottom and fold one flap on the top, then fold the other flap on the flip side. Now you will be finished with your helico...
In this video, we learn how to make easy custom ornaments from clear bulb ornaments. First, you will need to grab your clear ornament, then grab some glitter glue and pour it into the middle of the bulb. Continue to fill in different colors into the bulb, then wipe off the top and shake it so the colors cover the entire bulb. The more you shake it, the more the colors will mix. After this has dried, place the clips back into the middle of the bulb, then you can hang this on your tree. This is...
In this tutorial, we learn how to make knit stitch markers. First, knit to the middle, doing two stitches together, then flip stitch over. When you get to the middle of your item, place your marker on the stitch to keep track of where the loops are at. You can purchase a knit stitch marker from a variety of different craft stores. Use this as often as you'd like, especially if you need help finding the gap when you are creating something. Set this aside when you are finished, and make sure yo...
In this tutorial, we learn how to throw an upside down double walled pottery vase. Start off by using water every few seconds to craft your vase. Use your fingers to press down in the middle, to make the round shape and have the vase rise up into the air. Make this into a bowl shape, which will be into the air. Next, shape the middle using your hands into a triangle shape. Raise the side bowl around it, and keep using water to increase the size of the bowl. Collar the bowl in, then start to m...
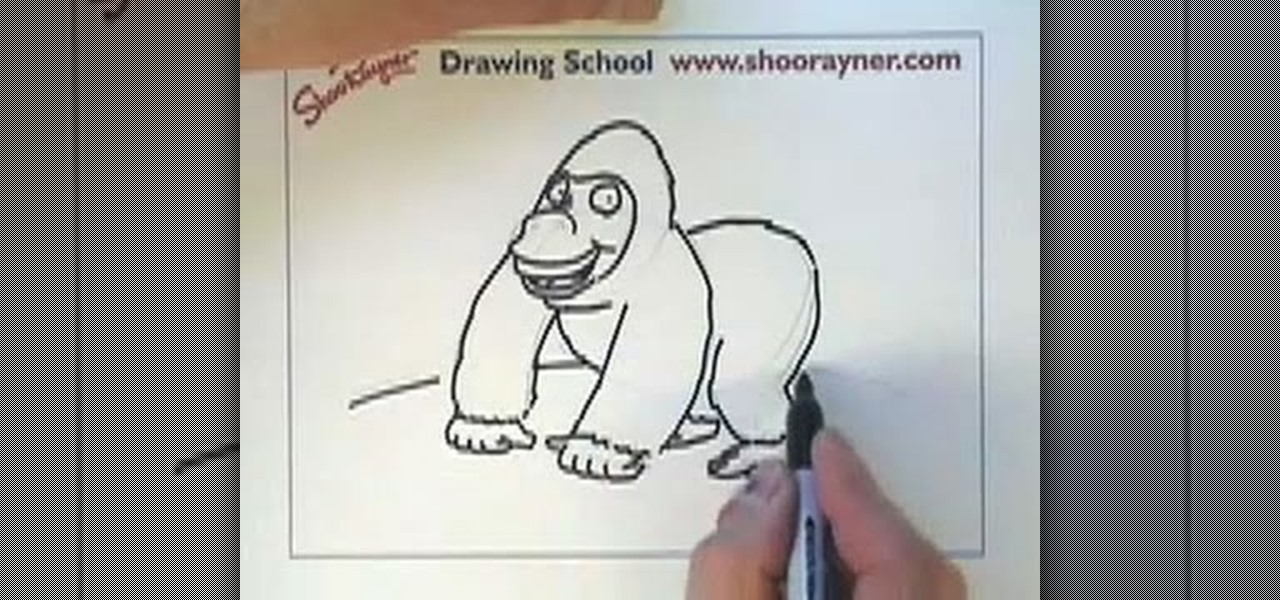
In this tutorial, we learn how to draw a gorilla. Depending on what type of gorilla you want to draw, there are various ways to change the look easily. To start, draw a bean shape that will be the body. Next, draw a smaller bean shape for the head on the side of the other shape. Now, draw the middle of the face, making eyes in the middle underneath the brow bone. Now, make the nose and mouth of the gorilla. After this, continue back down on the rest of the body and draw arms and legs for the ...
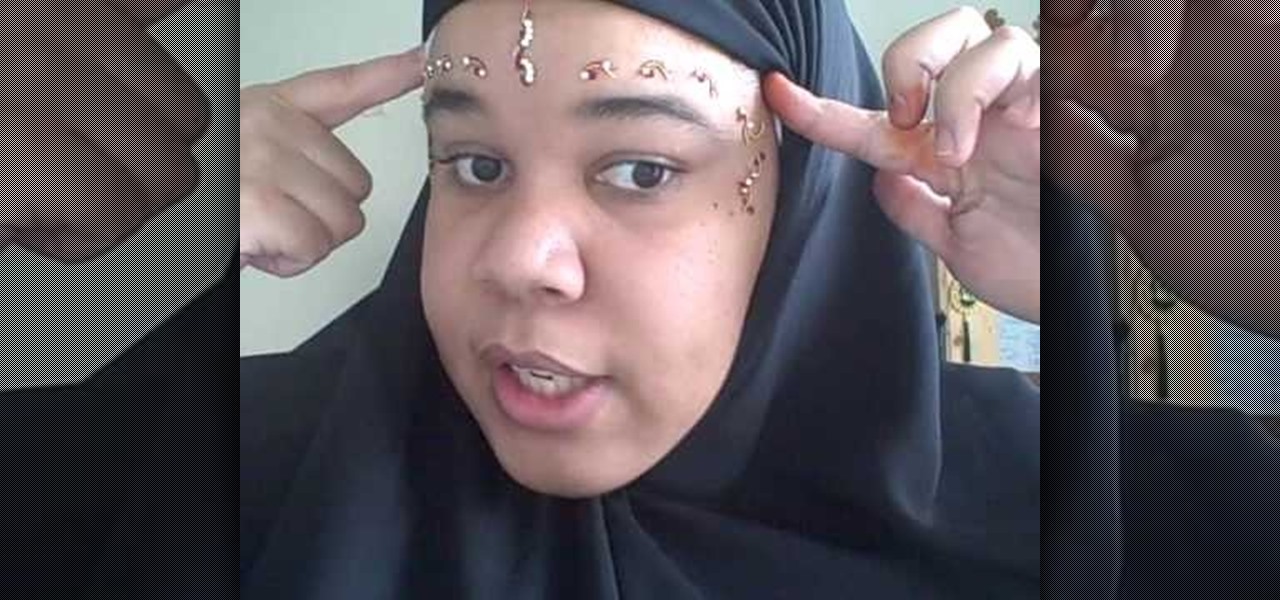
In this tutorial, we learn how to wear a peer bridal bindi. First, line a pencil with your nose, and mark the points where the points are parallel to the eye on all sides. After this, remove the bindi from the package and place the middle section onto the middle dot. After this, remove the other pieces and place them in the spots that correspond to the other marks. Continue placing these on until you have applied the entire bindi. You may need to use bindi glue to help apply these if you are ...
In this tutorial, we learn how to make mini paper square boxes. First, grab a piece of paper and fold two ends in so they touch in the middle. After this, fold the bottom up so it covers the triangles and they meet at the middle. Crease the edges, then cut down the edges on both sides where the crease is. Next, fold the sides in so you have a shape that looks like a sword. After this, fold the sides up, then fold the other sides in. When finished, push the creases in and you will form a box, ...
In this video, we learn how to perform a flat four string braid on your hair! First, you want to start off with either wet or dry straight hair that has just been brushed out. Next, you will grab the top three piece of hair on your head and perform a regular braid by placing the right section under the middle, then the left under the middle, and so on. Keep doing this for about 4 braids, then start adding in hair on the right and left hand side each time you get to them. Repeat this until you...
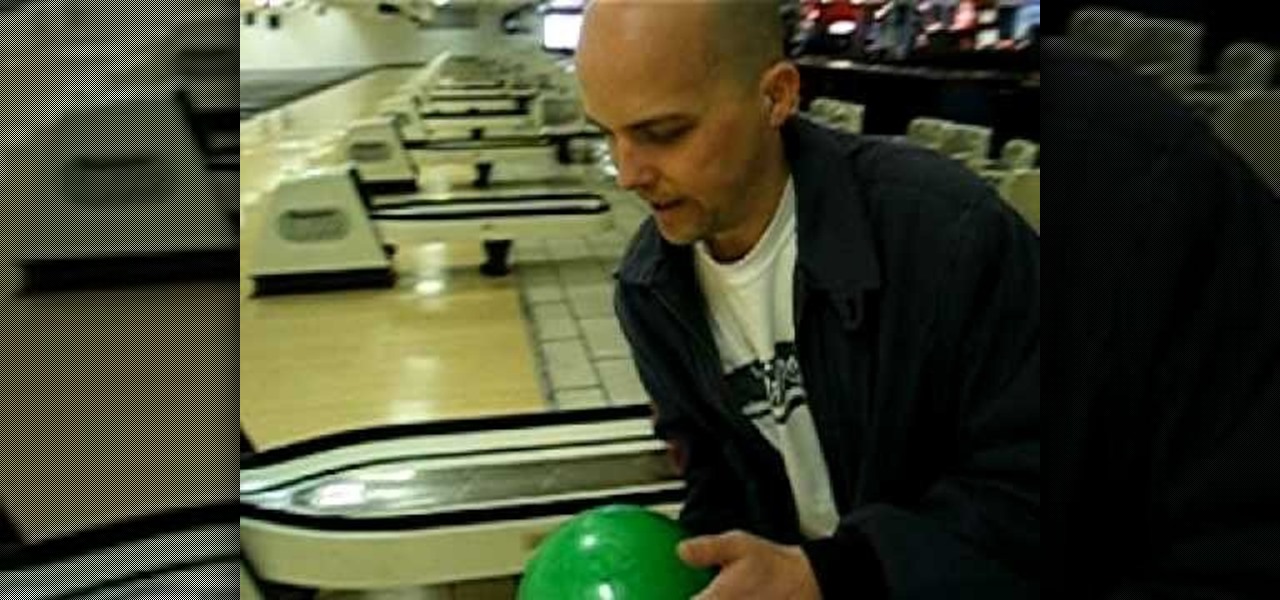
In this video tutorial, viewers learn how to curve a bowling ball. When holding the ball, users will only be using 2 fingers: the middle and index finger. Place the middle finger in the left hole and index finger in the right hole. Make sure that the bowling ball is not too heavy. Do not use your thumb to hold the third hole. When you let go of the ball, spin the ball really hard with just one finger. This video will benefit those viewers who enjoy bowling, and would like to learn how to curv...
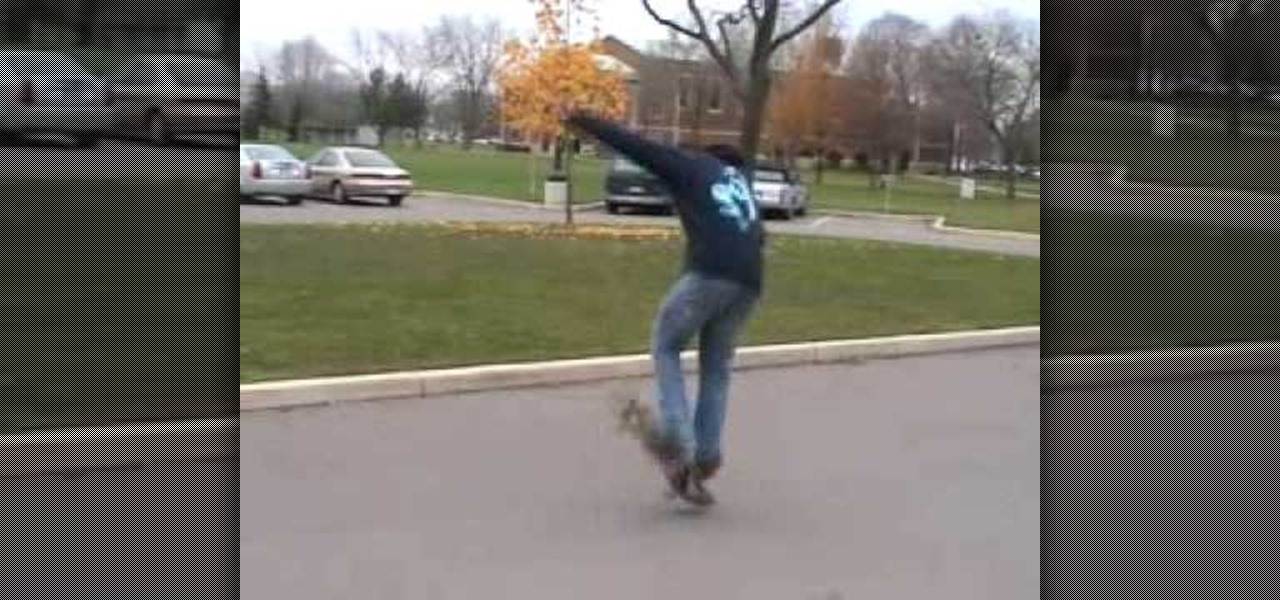
In this tutorial, we learn how to perform basic skate tricks. To start, you need to know which end is the front and back of the skateboard. Flip the board over and look to see that there are four wheels on the bottom of it. To get on the board, put it in front of you and put one foot where the wheels are then one foot in the middle. To get off the board, lean on the tail and walk off. When you are ready to move, put your foot in the middle and use your other foot to push off. You can now prac...
In this tutorial, we learn how to make stacked hair bows. Start off with three separate bows: red, white, and blue. Make sure there is a string still hanging from the red one, but the strings on the white and blue are cut off. Now, put glue from a hot glue gun and place it on the middle/side of the blue ribbon, the glue the white one where the glue is and hold together. Next, take the red bow and glue it to the center of the blue and white bow. Hold the red bow in place until it's completely ...