In order to replace a headlight in a Cadillac, you will need the following: a screwdriver and the appropriate type of bulb. There are several different types of bulbs in your car. If you touch the halogen bulb, the oils from your hands will be transferred. Therefore, you'll need to clean them with alcohol, before you place them in the car.

In order to build a backyard swing arbor, you will need the following: 2x4s, 1x6s, a bench swing, 4x8' sheet, a drill, carriage bolts, galvanized nails, and screws.

In order to change a flat tire on a motor scooter, you will need the following: the wrench that came with your scooter, a tire tube, a socket wrench, an allen wrench, a standard wrench, and a Phillips head screwdriver.

Sick of spending your hard earned money on the bourgeois bubbly water? Why spend extra money on bottled seltzer when you can make it at home? Plus, by using fewer plastic bottles, you can reduce your carbon footprint.

Whether you’re looking to save money or to avoid allergens, homemade body powder lets you know exactly what you’re putting on your skin.

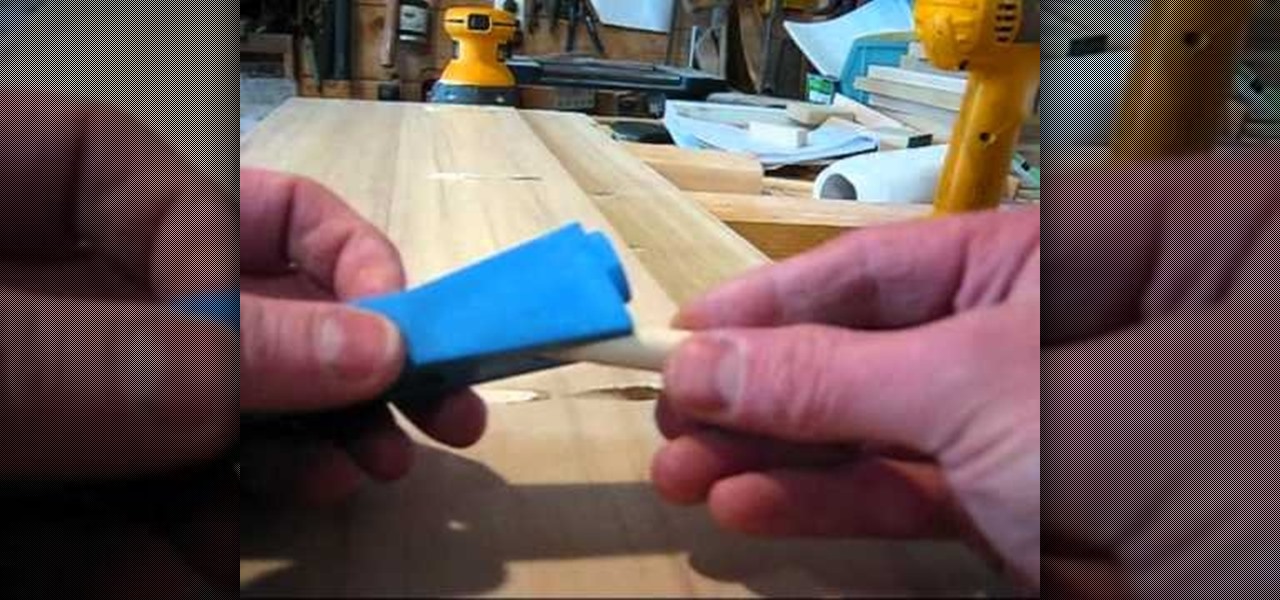
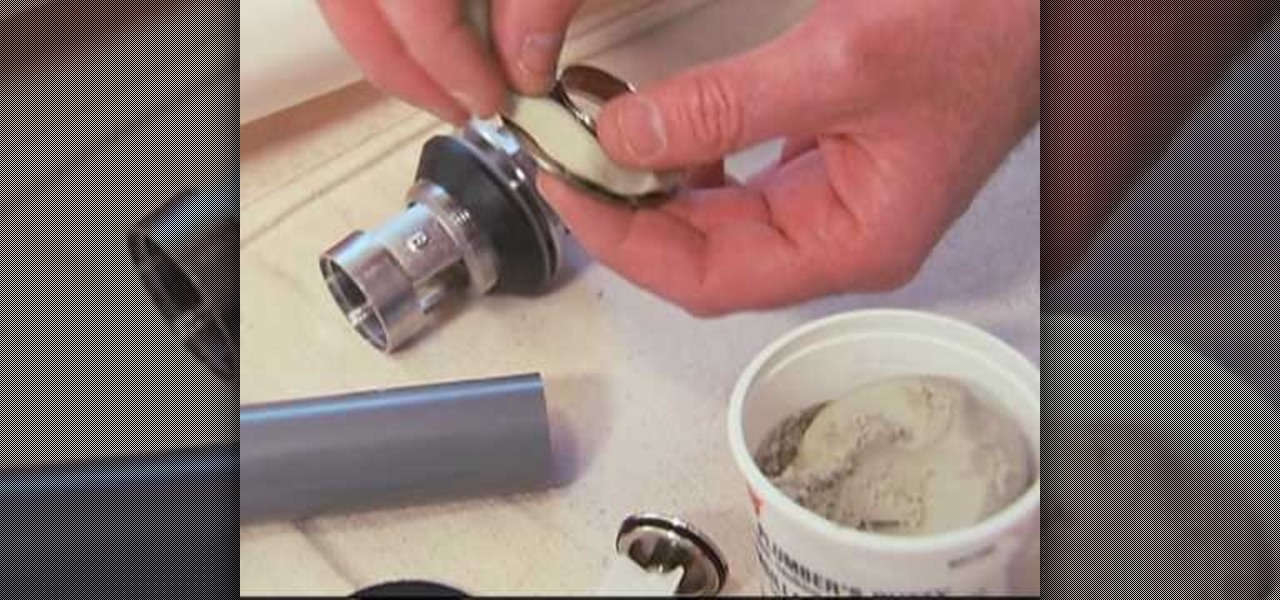
A CNC router machine is probably the most useful tool a hobbyist can own, but the price for a CNC machine on the market is way more than the average hobbyist is willing to spend. You can build your own CNC with very basic tools, little knowledge of machinery, mechanics, or electronics, but be warned, these machines are inherently dangerous, so wear the proper protection and use common sense. At the very least, read the instructions and precautions on every tool you use.

A CNC router machine is probably the most useful tool a hobbyist can own, but the price for a CNC machine on the market is way more than the average hobbyist is willing to spend. You can build your own CNC with very basic tools, little knowledge of machinery, mechanics, or electronics, but be warned, these machines are inherently dangerous, so wear the proper protection and use common sense. At the very least, read the instructions and precautions on every tool you use.
Check out this video to see how to collect blood with the BD Vacutainer Eclipse Blood Collection Needle.
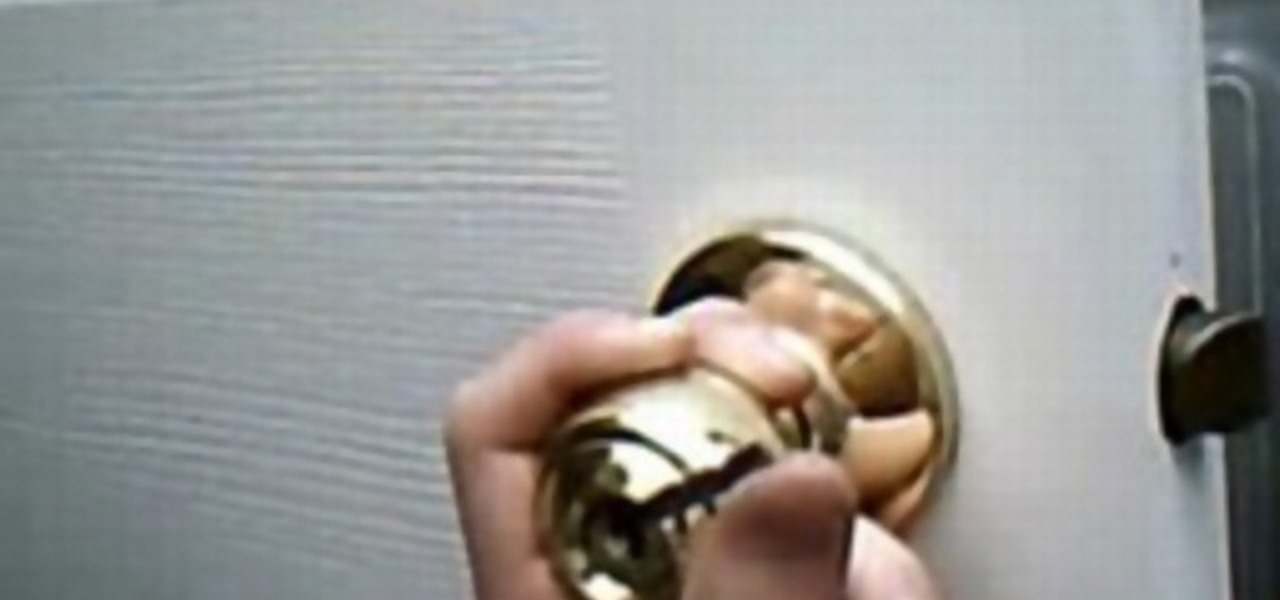
Ahhh! You're locked out of your bedroom, or your bathroom! Well, watch this video and you won't be locked out for long. Fortunately, interior privacy locks are very simple to pick. There are essentially two kinds: one that requires a blade, or knife and the other which requires a long sharp "pin" like object to insert into the handle. Check out this video and never be locked out again! You'll need something like a flat head screw driver for locks with a "slot" in them, and something long and ...
In this tutorial by Lowe's, we learn how to prep and paint kitchen cabinets yourself! First, you will want to make sure you don't have laminate or tile countertops, because these can simply be replaced. After this, you will need to use sandpaper to sand down the surface of the cabinets. Next, you will need to paint primer on the surface of the cabinets, making sure you get into the creases of them as well. Now, paint over the primer once it has dried with your choice of glossy paint. After th...
In this Electronics video tutorial you will learn how to build and use a tinyCylon kit. The kit contains a battery pack, a PCB, LEDs, resistor, a momentary switch and a screw. The long end of the LEDs will go into the square shaped contacts. Don’t push the LEDs right up to the board. Instead, use some poster putty to hold the LEDs standing upright so that they can be bent later on. Fix all the LEDs in this manner and solder them on the other side. Then solder the leads of the battery pack. ...
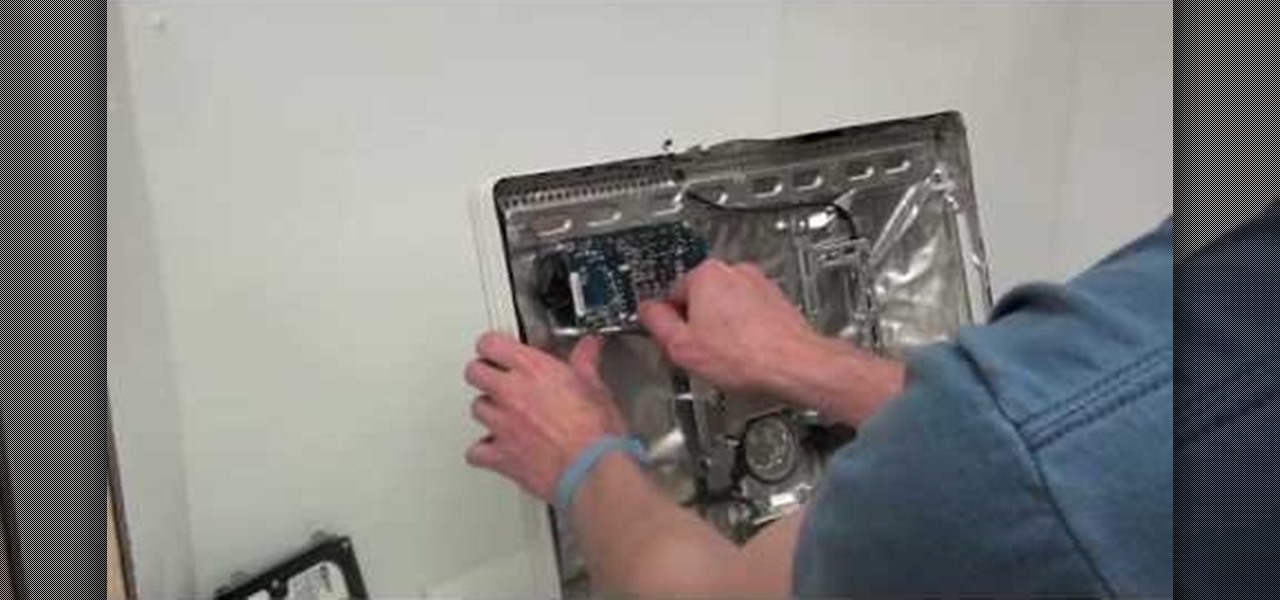
Removing the power supply from the iMac G5 is a two step process. First, see where the power supply is located. Then begin the process of removing it. You can do using a very easy way described in this video. First unscrew the 4 torx screws that are located around the edges of the power supply. Be careful not to be too rough while doing so. Once you have unscrewed them, then gently lift or remove the power supply. However, we still have to unplug it from the iMac. Therefore, carefully unplug ...
Joyyan King, Fashion editor and Marsha Welcher shows you how to create a tie dye t-shirt for yourself. A white cotton t-shirt dress is chosen and taken to the work table. Cotton holds the dye well hence it is ideal to go for a cotton dress for tie and dye. Lay out the dress over a table covered with news paper then pinch the center of the dress and twist it to screw it around, the tighter it is twisted the more better the designs would be. After twisting tight it would look like a flower, the...
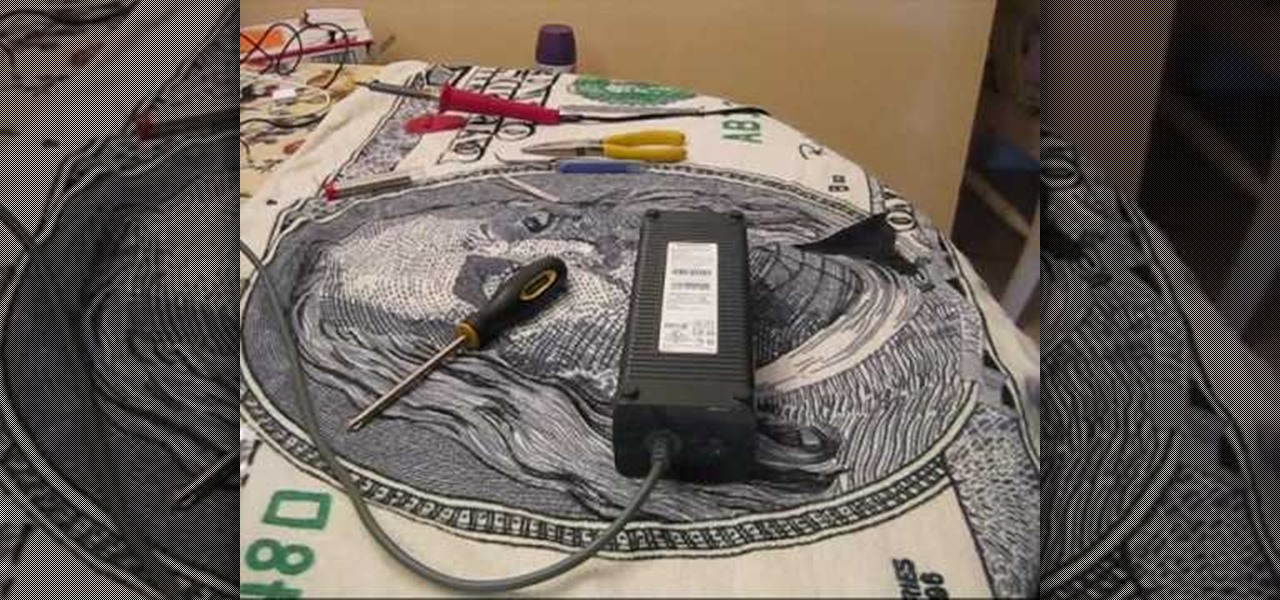
CIA360MODS teaches you how to change the LED colors on your XBox 360 power brick. You need pliers, tweezers, a screwdriver, a soldering iron and smds. Unscrew the screws from the power brick and then take out the fan from inside. Follow the schematics and use the tweezer to grab the smd. Solder your new smd where the old one was. If you remove the green one, you can add a blue one instead and only that color will change in the power brick. Remember to be careful when doing soldering and keep ...
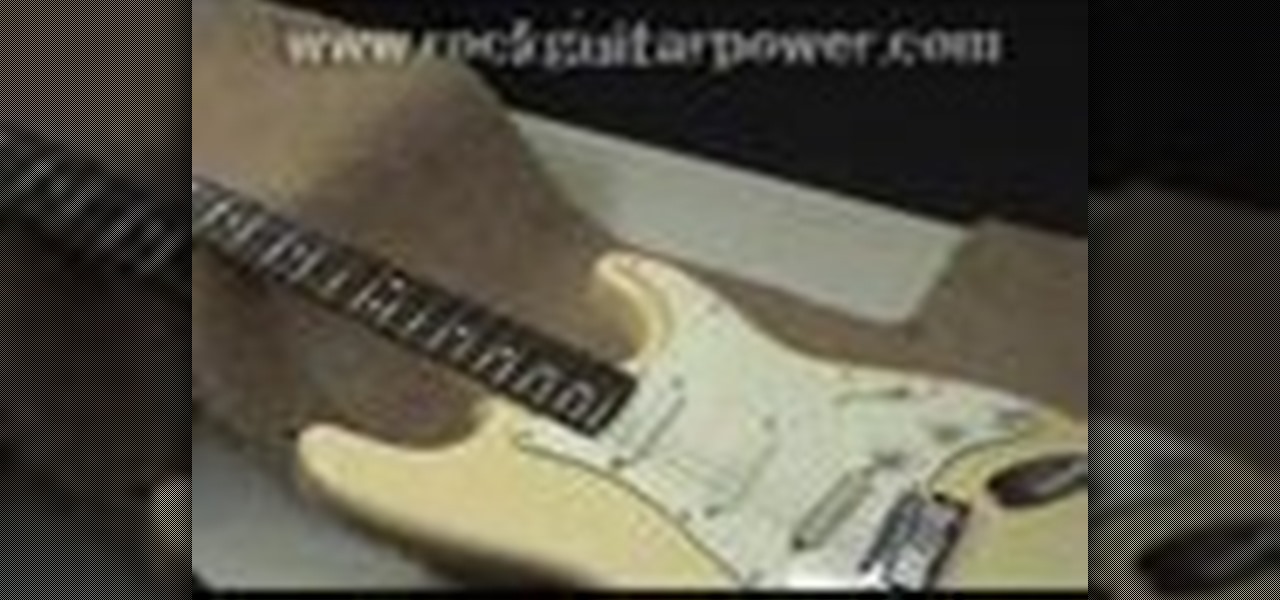
Using a Strat guitar since it has a basic type of string system, this demonstrator shows how to properly adjust the string height of a guitar. In order to do this, one must use an Allen wrench screw or a screwdriver for each saddle, a flathead screwdriver, and a 64th ruler. The viewer is given an example of a height that could be used for a solo guitar. It is important to measure the distance you want correctly by measuring from the top of the fret, not the fretboard to the string. This video...
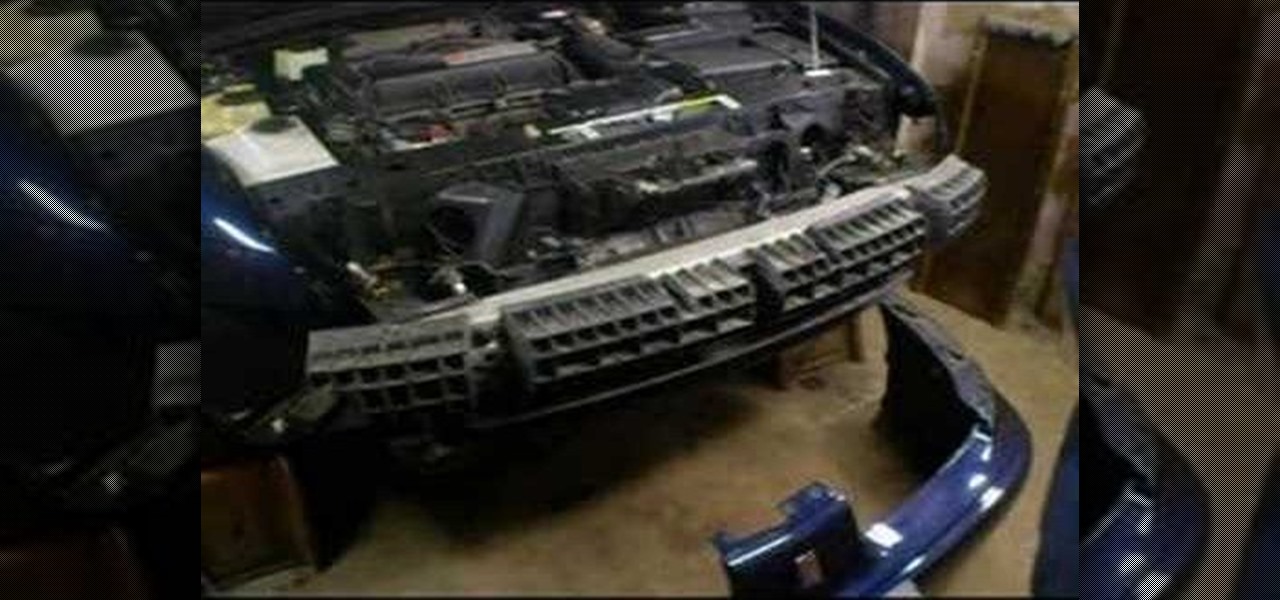
One day, your car may break down and you won't be able to afford to hire a mechanic, so what do you do... you look on the web for some how-to vehicle repair videos and become your own car mechanic, that's what. You don't need any advanced training to perform repairs and simple maintenance on your automobile, but you may need a few tools. Invest in the basic tools and you'll be prepared for just about any car malfunction you can think of. These tutorials will help get you on your way, as long ...
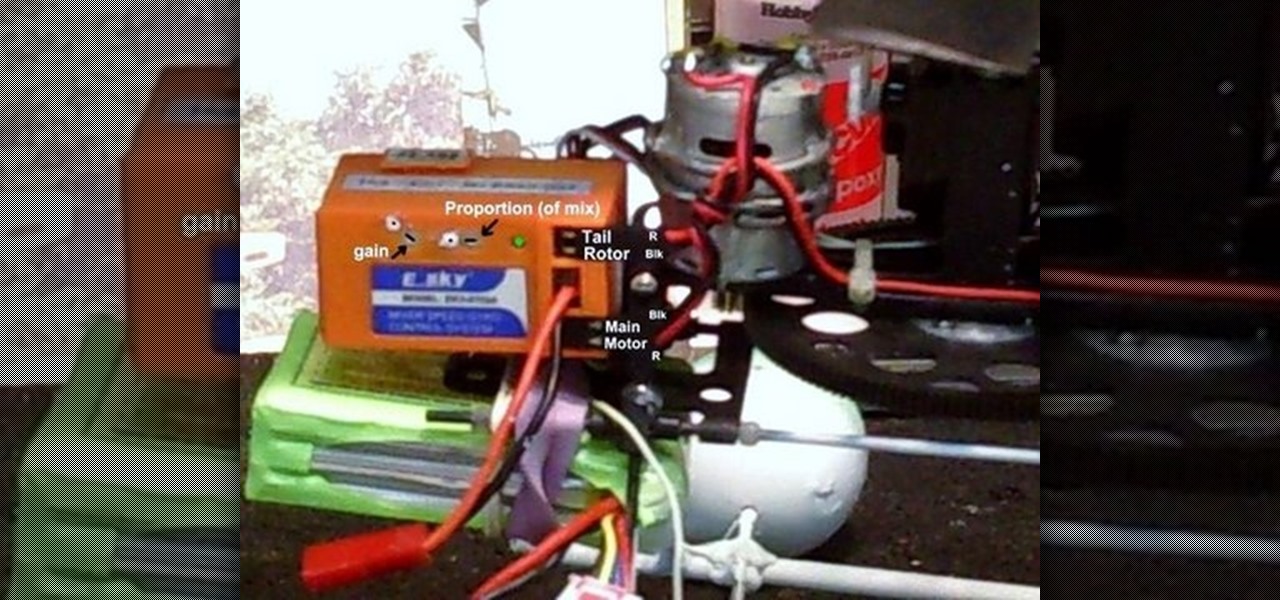
Watch this instructional hobby video to properly set up and fly a remote control helicopter. Transmitter switches and servo wires should all be set up this way. Charge the flight pack and you are ready. If you are a beginner, leaving the flybar weights at the outer position will dampen the controls and make the helicopter easier to fly. As you improve, move the weights in for quicker response. The swashplate has a metal ball for reduced wear and precise control. The servos are screwed to the ...
If you're a regular gym-goer, you see a lot of strange things and people. Perhaps you've even seen someone pulling one of these pranks and wondered, "Why is this guy giving me a spot yelling about the Bible?" There's a good chance you were being messed with. Now is your chance to try out messing with people at the gym yourself. This video will teach you a bunch of great ways to prank exercisers without additional equipment or setup. Brilliant!
Your Apple Watch only looks as good as the band that it's bound to, but if you're looking to purchase one directly from Apple, expect to spend anywhere from $149 (for the Milanese Loop) to $449 (for the Link Bracelet).
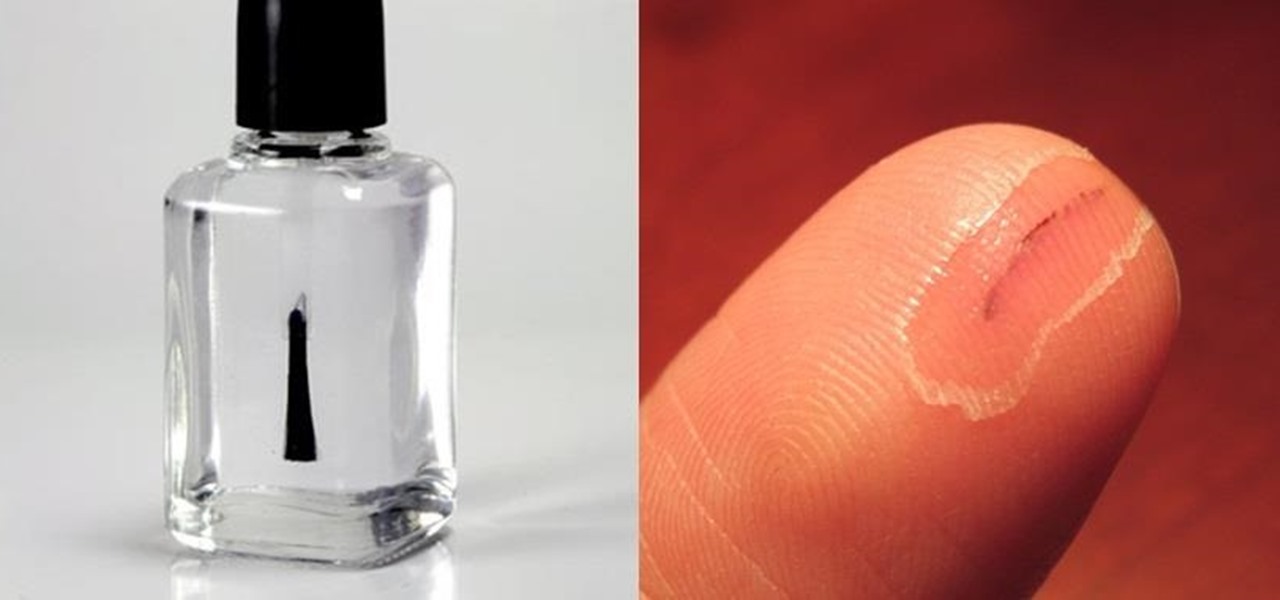
When you think of nail polish, it's probably almost always in the context of a manicure. I mean, that's what it's made for, right? But there are plenty of other things you can use clear or colored nail polish for besides painting your nails.
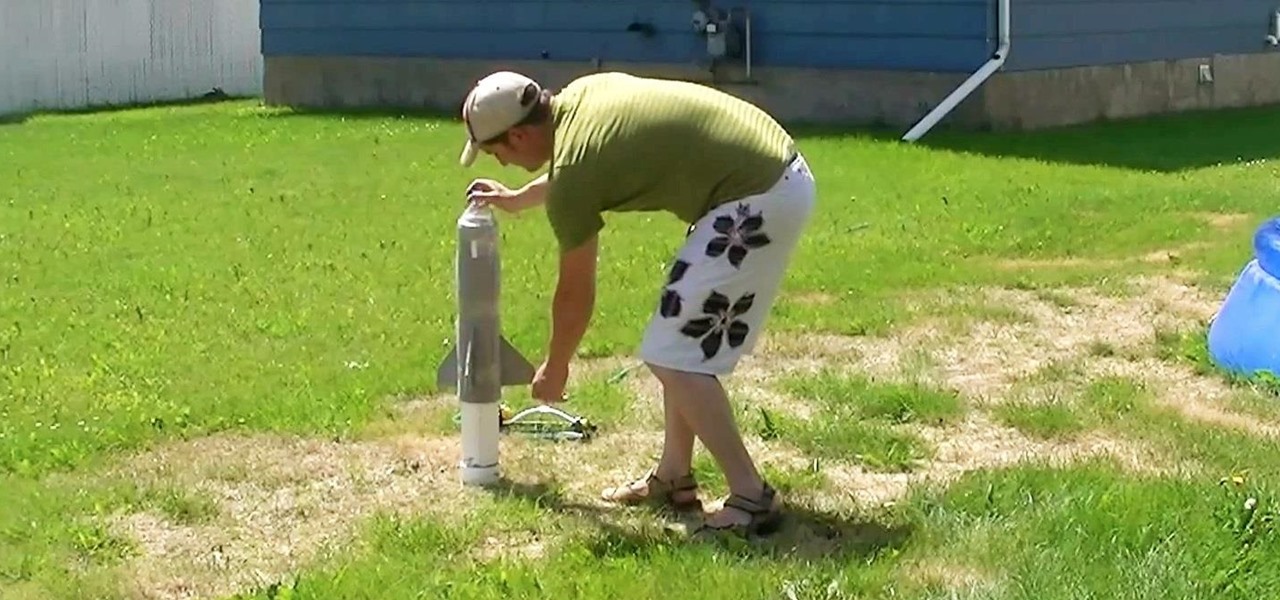
This homemade hairspray-powered PVC rocket takes less than an hour to construct and only costs about 20 dollars to make. Check out my video below for the step-by-step instructions on building your own backyard rocket, and follow the written guide below for reference.
A piano hinge is also called a continuous hinge, and is a popular hinge to use on side doors and other small doors. This tutorial shows you the proper method of installing a piano hinge on your current project. Besides the door and the hinge, you will also need some basic hardware: a drill and some screws, as well as a chisel to carve out an inset for the hinge to rest. Make sure you always measure carefully before cutting anything!
In this video, we learn how to install a vanity and sink with Lowe's. A great way to give your bathroom a makeover is to give it a new vanity and sink. First, turn off the water from the water line, then take down the pipes from under the sink. Use a bucket to catch extra water that's falling out. Next, separate the top from the base and then remove the old vanity. Remove the old base unit from the bathroom and then install the new vanity. Measure out the area to make sure it will fit. Place ...
In this video, we learn how to use extension tubes in place of a macro lens. First you will need to have your camera and a tube insert that will attach to your lens. Once you have this, you can attach it to the lens by screwing it on with your hands. Then, you can focus extremely close, much more than you would be able to do with a regular lens. After you have attached this, look through the camera and start taking shots close-up. Then, you will be able to see a better picture than you had be...
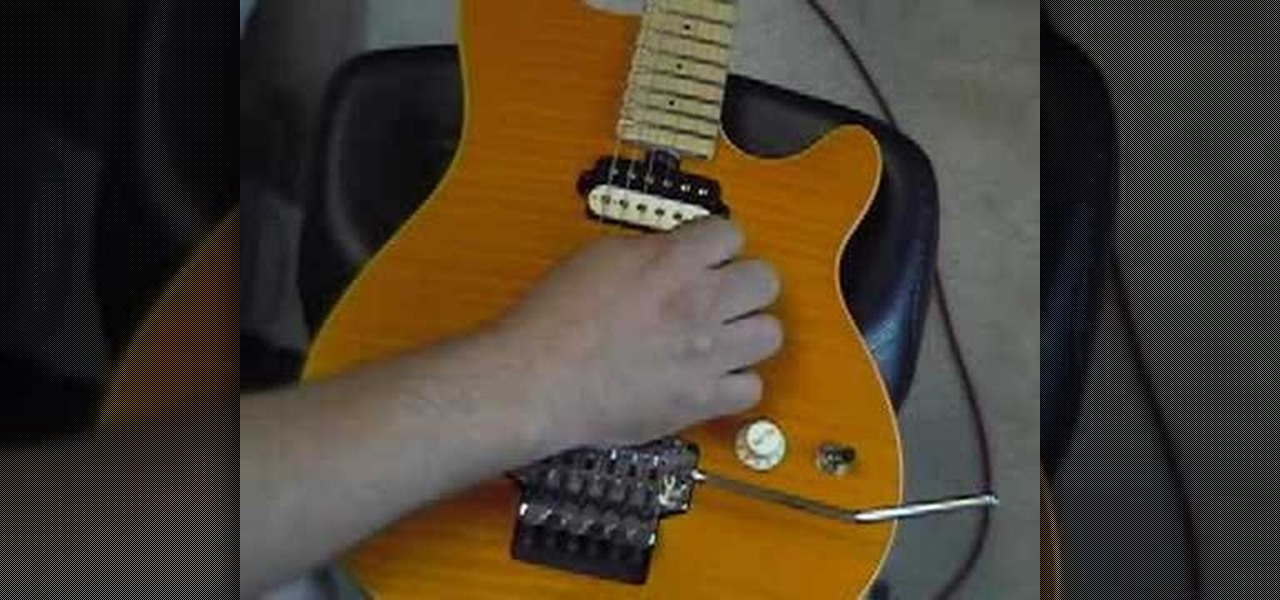
In this video, we learn how to adjust the spring tension on a Tremolo. First, find the strings in the back that are parallel to the body of the guitar. Then, unlock the nut and set the fine tuners so you have maximum range of adjustment. Start to twist the tuners at the bottom of the guitar until the tension on the strings is enough for you to play correctly. Then, go to the back of the guitar and adjust the crimp screws that are along it. When finished with tightening your guitar, test it ou...
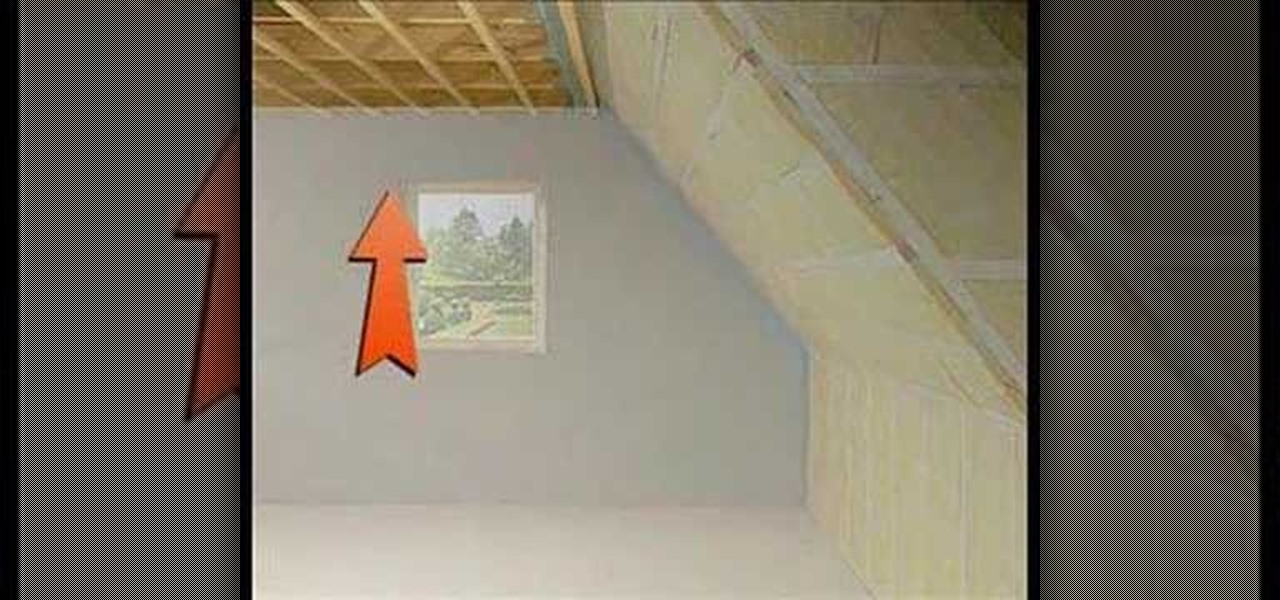
In this tutorial, we learn how to drywall your attic & loft with Fermacell. First, you need to consider the nature of your build and how much you will need to drywall. It is recommended that you install a film to ensure air tightness. You can place this down with a staple gun and tape it down as well. Large holes should be properly sealed as well, to enforce building regulations. Once you do this, you can add the boards on top of what has already been installed. Insulation will be now place o...
One of the most commonly damaged parts to a dishwaher can be the face plate or fascia panel. They can easily get dinged up, scratched, and much more. So, if you're looking to get rid of your damaged faceplate, this next tutorial should help.
In this tutorial, we learn how to draw Ironman. Start off by drawing the feet to Ironman, making sure to pay close attention to the detail that is on the outside suit. Make sure to include bolts and screws to make the picture more lifelike. Use shading on the outside of the sides to make it darker and more realistic. Continue working your way up on Ironman until you reach the torso and the rest of the upper body. Then, draw the head onto the top followed by the large mechanical arm and the he...
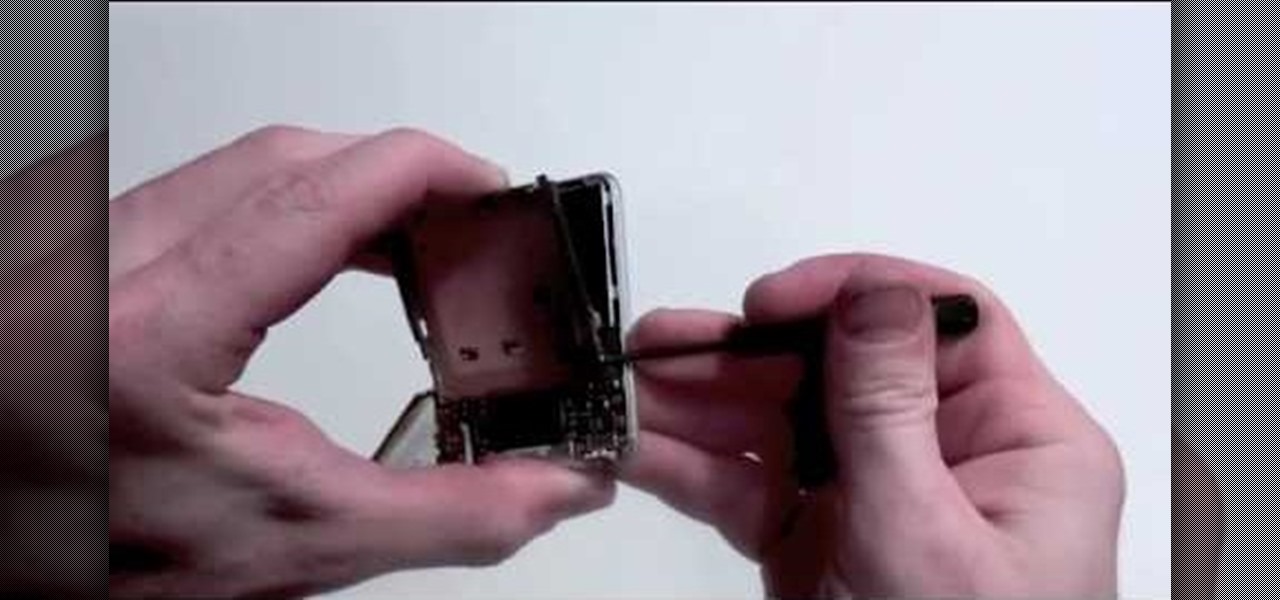
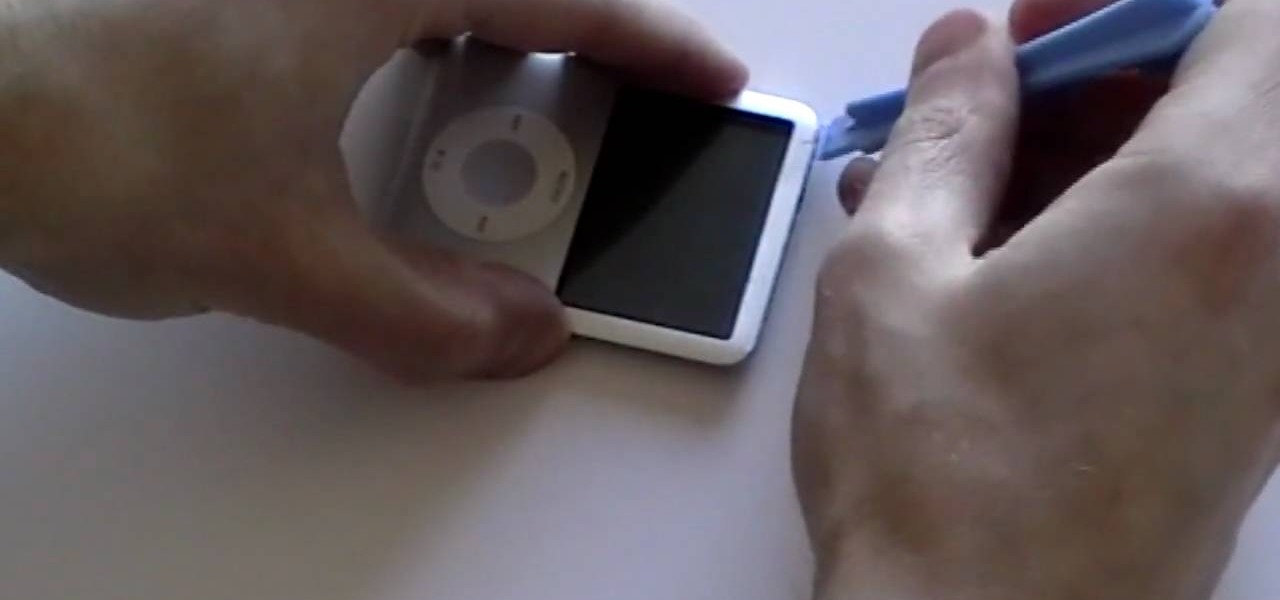
In this tutorial, we learn how to take apart an iPod Nano 3rd generation for repair. First remove the back casing using a guitar pick. Next, use a flat tool to lift up the battery carefully and remove it from the casing. You will see three wires that lead to the launch board, which are soldered into place. Now, use the flat tool to remove the back of the battery casing from the device. Now, remove the logic board by removing the 6 small screws inside of it. Next you will remove the LCD by lif...
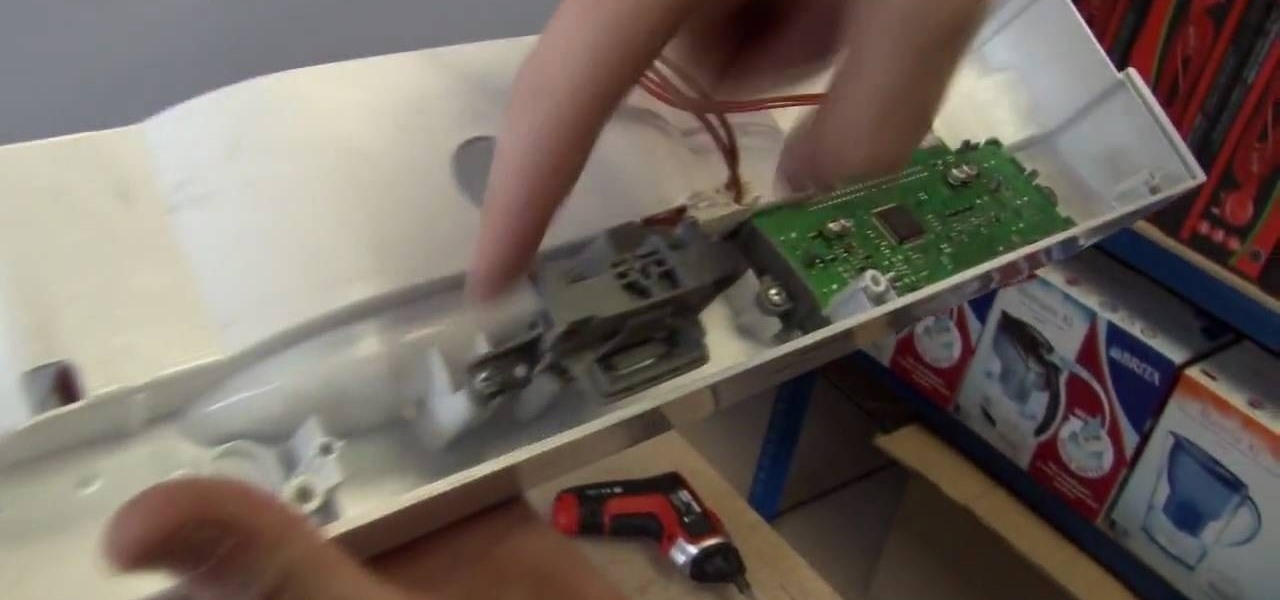
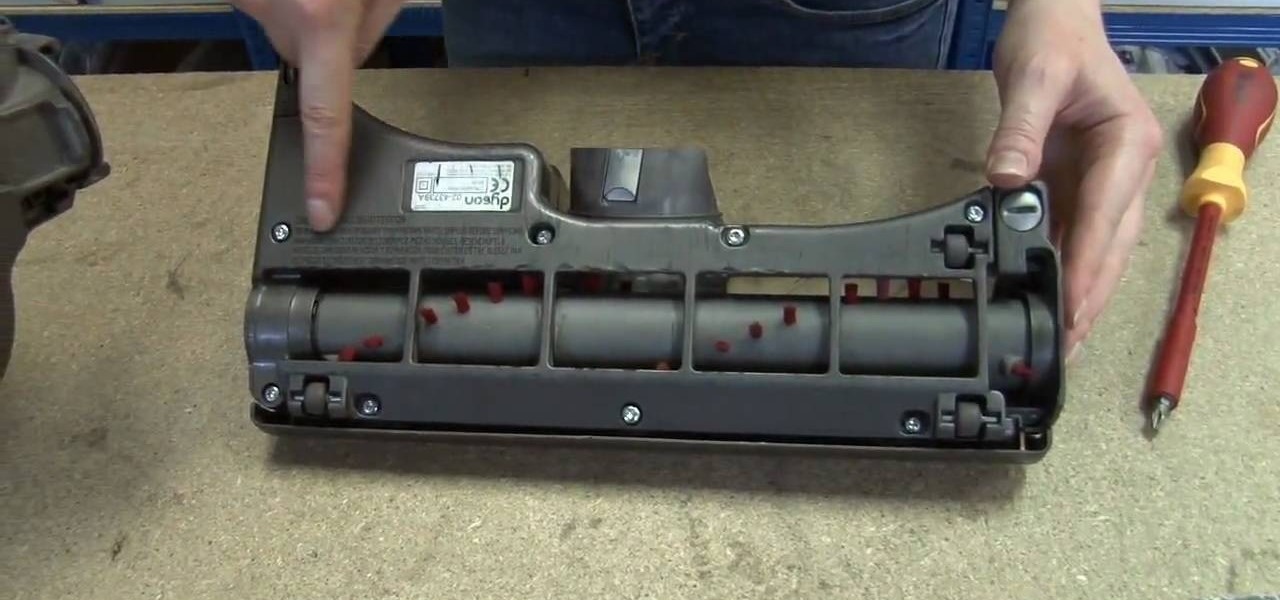
If you're having a problem with you vacuum cleaner's faceplate then this tutorial should offer some help. In the tutorial, you'll find out how to replace the soleplate on a Dyson DC25.
In order to make a mini cappuccino machine for a dollhouse, you will need the following: a copper fitting (from the hardware store), glue, pliers, and old jewelry.
In this tutorial, we learn how to make a Japanese screen. First, cut your wood out and sand it down. Then, use a corner clamp to drill a hole in and screw the different sides together. Also use wood glue to help stick the pieces of wood together. Once your frame is assembled, sand the corners of it. Next, you will stain the wood with black Japan wood stain. You will only have to put one or two coats of this on, because the color is so dark. Now score notches onto the wood to allow your screen...
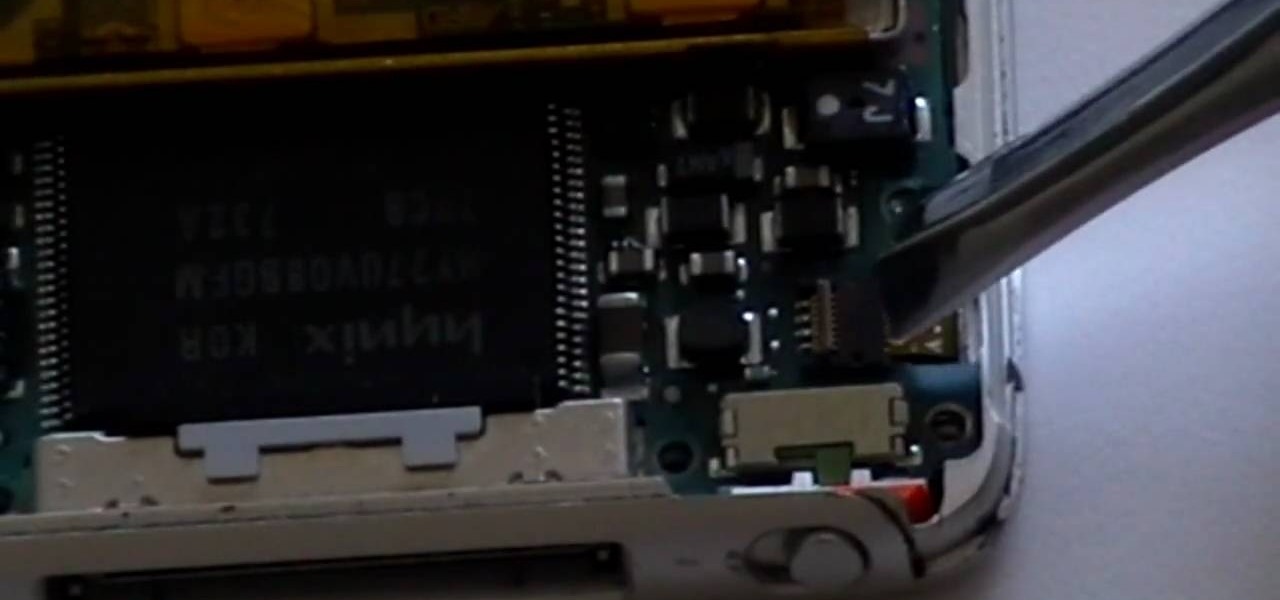
In this how-to video, you will learn now to dismantle an iPod Nano 3rd Generation. First, run a plastic tool on both sides of the device. Once this is done, remove the back cover with your fingers. Next, unscrew the six screws on the circuit board. Store them in a place where they will not be lost. Next, remove the click wheel ribbon cable from the jaw connector. Lift the jaw connector with the tool and use a pair of tweezers to gently remove the cable from the jaw. Next, remove the small met...
This video shows us the method to protect your lens. This can be done by putting the lens caps. The cap for the part of lens going into the camera can be screwed on to the lens. It stops dust from getting on to the lens surface. The front part of the lens can be protected by a lens cap which can be put into the position and pulled out when needed. You can also put a filter on the lens. The filter can be used to protect the lens in case you drop it in the sand and any other similar condition. ...
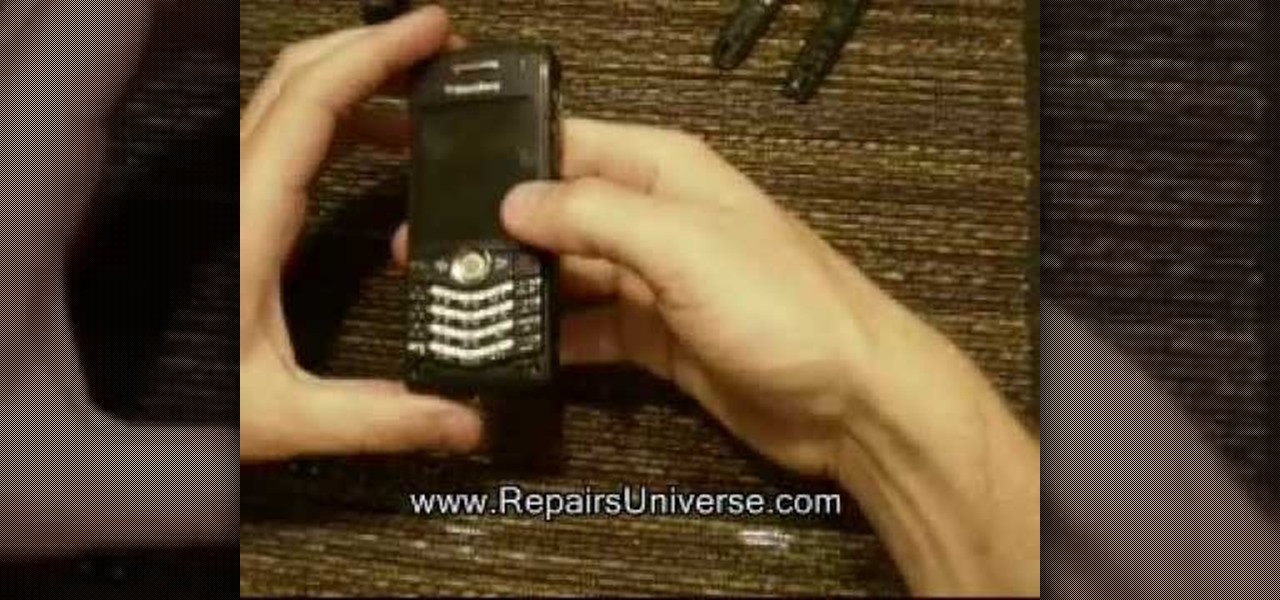
In this tutorial, we learn how to install a replacement LCD screen on a Blackberry Pearl. First remove the cover and battery from the phone. Then, you will take a tool and remove the clips from the left and right side of the back to remove the bottom. You will now find two more screws that need to be removed from the phone that are on the top. Once done, you will nee to pry open the top and bottom of the phone and take it apart. You can now remove the motherboard from the casing which is wher...
If you need to fix your plasterboard or drywall, you will probably need to use hollow wall anchors. In this tutorial, learn how to identify, buy and use hollow wall anchors with the Ultimate Handyman. Once you master this skill, you will be able to repair almost any wall easily. Hollow wall anchors are also very useful for hanging anything heavy on an otherwise weak wall. They attach to the back of the plasterboard with little legs so they are more secure than normal nails or screws.
This video shows you how to replace the LCD screen on a third generation iPod nano. Using a plastic safe pry tool, run it along the edges of the iPod, releasing the clips. Once the clips have been released, you should be able to remove the back cover. There are six exposed screws on the bottom of the inside back cover, remove all of them. Next remove the click wheel ribbon cable from the jaw connector. To do this, use the pry tool to lift the connector. Use a pair of tweezers to gently remove...
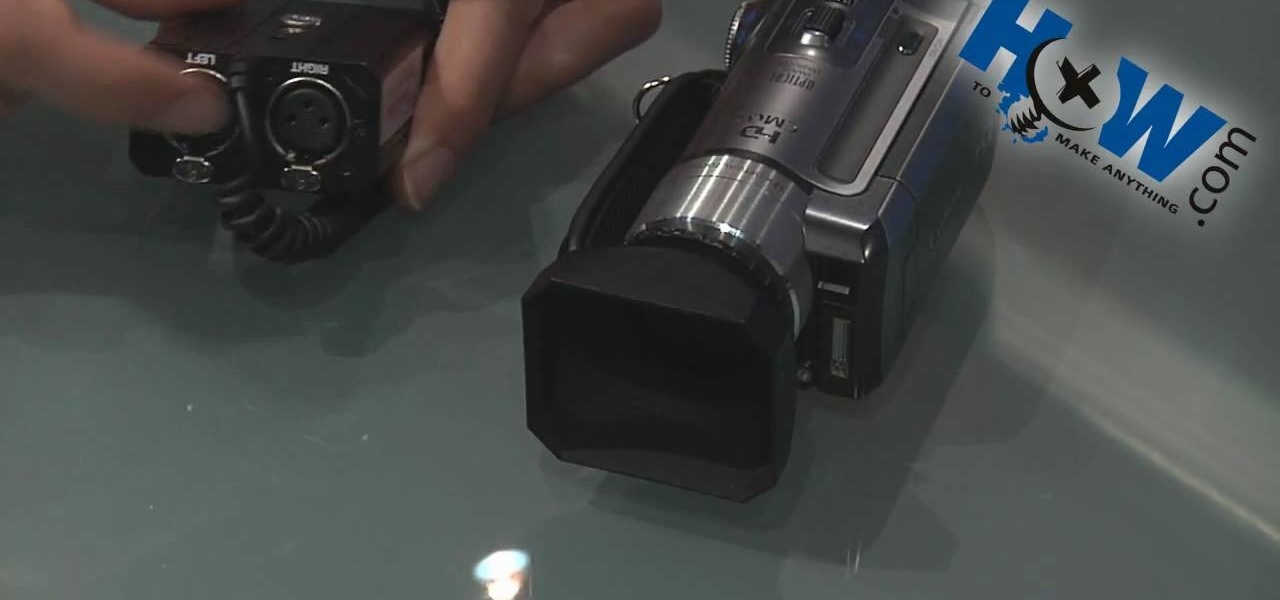
How to Make Anything demonstrates how to use a three prong XLR mic with your camcorder. The XLR plug on the mic is not going to fit into the 1/8 inch plug on your camcorder so you will need an adapter. You can find an XLR to 1/8 inch adapter for about 10 dollars. Try to get an adapter with as short of a cord as possible to reduce noise and radio interference. You can also get an XLR box which is an interface which goes between your camera and the microphone. The XLR box will be about 180 doll...
DYI-FYI #57 teaches you how to fix a leaky faucet in this video. First, have to distinguish if the water drips from the tap or from the handle. If the water is leaking form the tap you need a new washer; if it drips from the handle you need a new o-ring. First, turn the water off using the valves under the sink. Next, drain the faucet by turning it on of course and grab a towel to place in the sink to prevent scratching while you work! Next, you'll have to remove the decorative topping to rev...
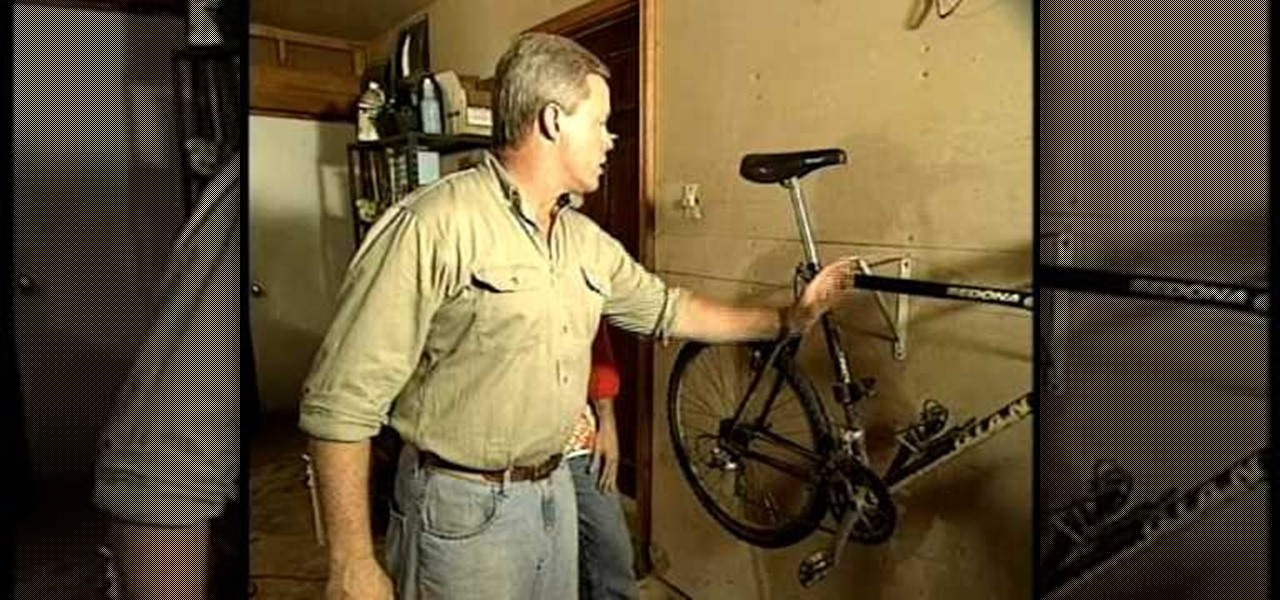
Danny Lipford and Joe demonstrate how to make a bicycle rack out of repurposed closet racks. Closet brackets can be used to store bicycles. Instead of hanging the bicycle on the ceiling for long term storage, fasten closet brackets to your garage wall to more practically easily access your bicycles on an everyday basis. First, drive drywall screws into the wall studs. Space the brackets about 16 inches apart. Hang the bike right on its crossbar from the brackets. This method only works with b...