

How To: Fix a door that sticks
Instead of pushing, pulling, and cursing, why not fix that door that sticks? You Will Need

Instead of pushing, pulling, and cursing, why not fix that door that sticks? You Will Need
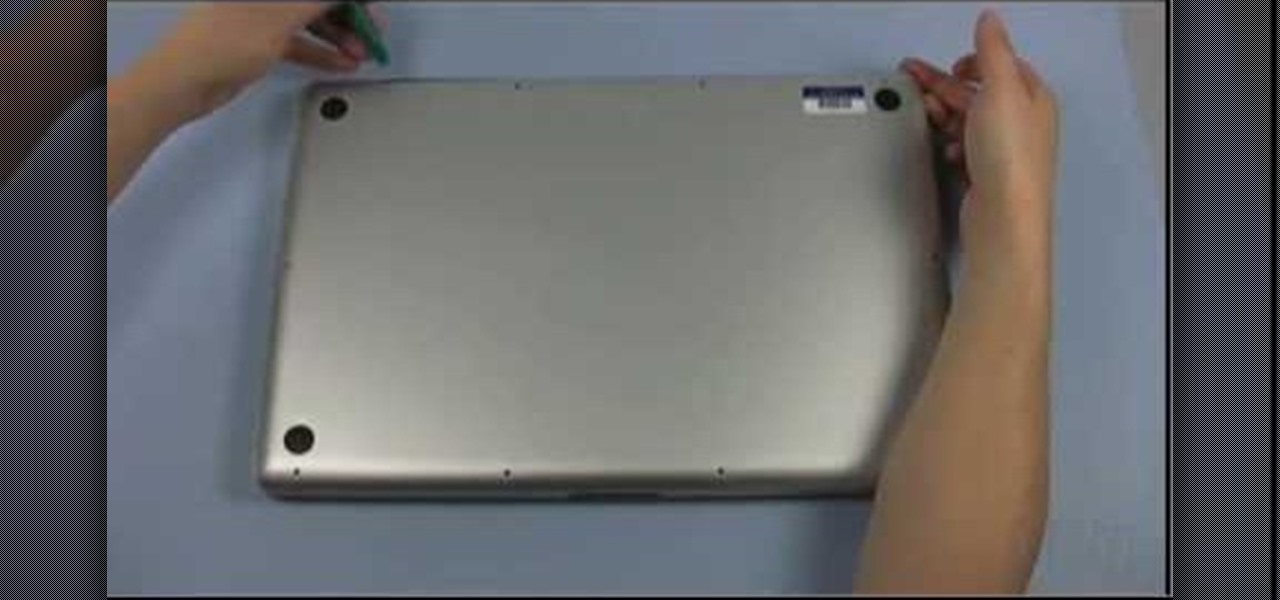
This video from OWC presents how to install memory in a 17" Macbook Pro.The operation will take about 15 minutes and doesn't require an experienced user.First you need to provide all necessary anti-static precautions - discharge static electricity, use static-free surface.You'll need #00 Phillips screwdriver and nylon pry tool.You can find these in the Newer Technology 11-piece tool kit.To start, shut down the computer, close it and flip it over.You will need to remove 10 screws. Use #00 scre...

In order to install a new hard drive in your MacBook Pro, you will need to save everything on Time Machine. You will need to be in a static free environment, a hard drive, and small screwdriver.
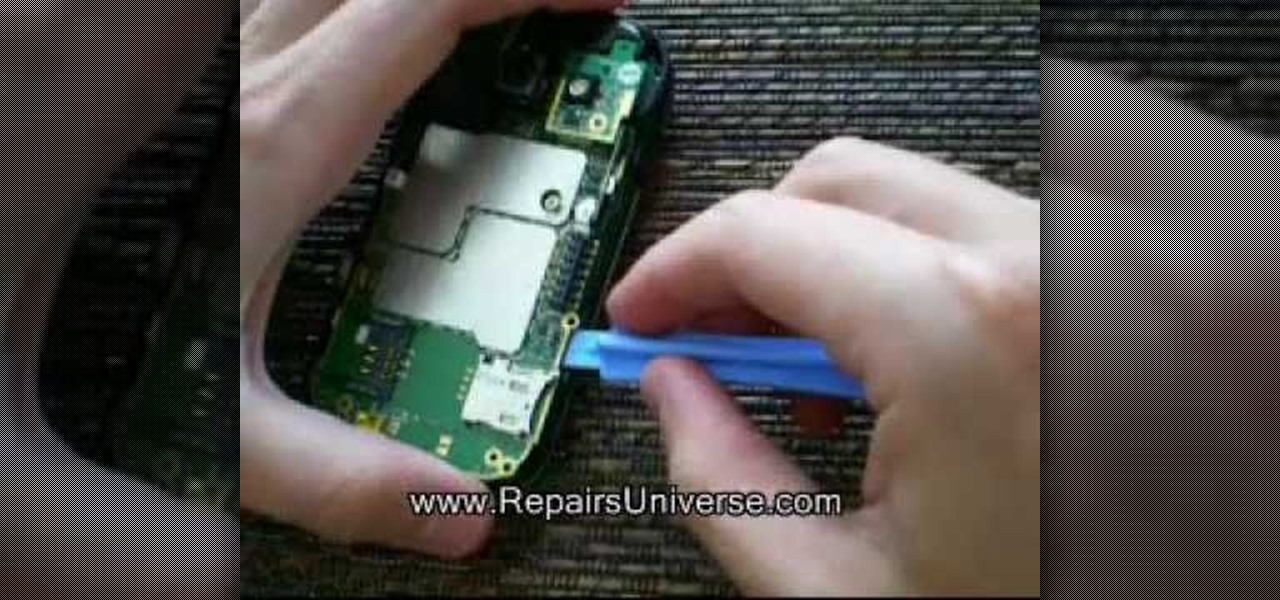
This how to video shows you how to take apart an HTC 8525 and replace the LCD screen. First, remove the SIM card and the battery. Next, remove the screws in the back. Using a pry tool, slide it along the edge of the phone at the bottom to release the clips. Once they are released, remove the back piece. To remove the motherboard, release the ribbon connector with the pry tool. Carefully lift the motherboard from the case. Remember that it is still connected to a ribbon that must be released. ...
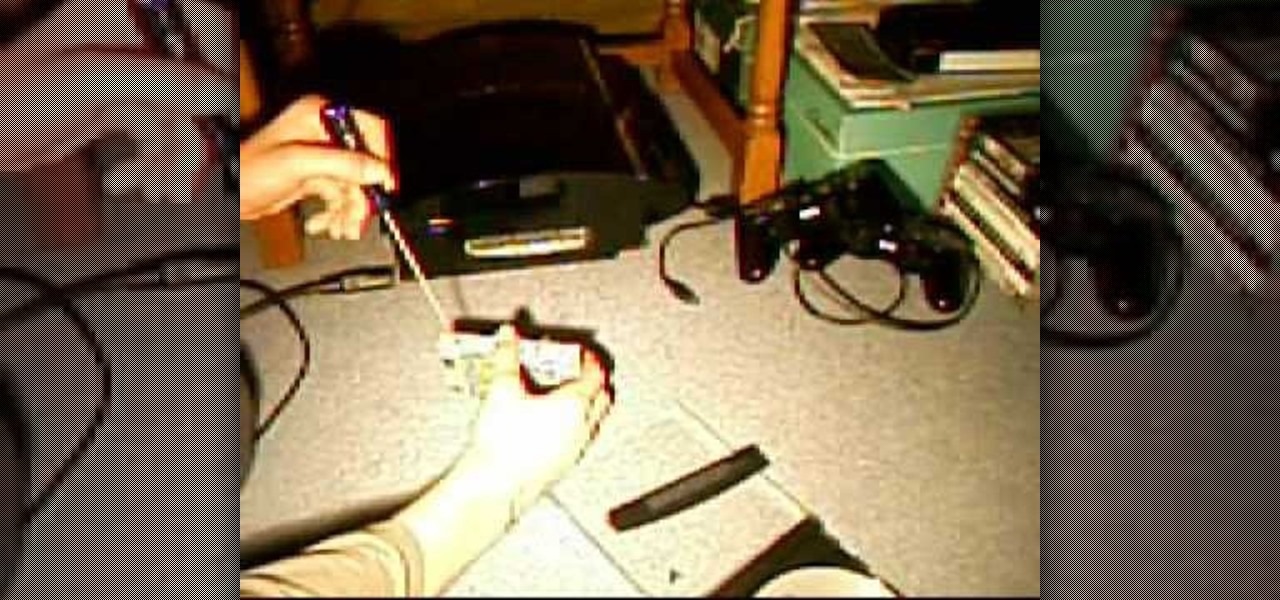
If you download a lot of content onto your Playstation 3, you're eventually going to have to upgrade your hard-drive for more memory to be able to keep all of your content. This video tutorial will show you step-by-step how to do this once you have the appropriate hard-drive. It involves a lot of unscrewing but the process is relatively easy. As precautionary measure the narrator advises you to have a place handy to keep all the screws since they are very small. First you remove the small cov...

This video shows you how to countersink a wood screw. 1. Find appropriate pilot hole drill. This should match the shank size of the screw.

Looking to take some safety precautions for the exterior of your home? Motion detector lights are a good way to ward off unwanted intruders. Installation of motion detector lights isn’t as difficult as it sounds, since most are pre-wired and preassembled.
A CNC router machine is probably the most useful tool a hobbyist can own, but the price for a CNC machine on the market is way more than the average hobbyist is willing to spend. You can build your own CNC with very basic tools, little knowledge of machinery, mechanics, or electronics, but be warned, these machines are inherently dangerous, so wear the proper protection and use common sense. At the very least, read the instructions and precautions on every tool you use.

A CNC router machine is probably the most useful tool a hobbyist can own, but the price for a CNC machine on the market is way more than the average hobbyist is willing to spend. You can build your own CNC with very basic tools, little knowledge of machinery, mechanics, or electronics, but be warned, these machines are inherently dangerous, so wear the proper protection and use common sense. At the very least, read the instructions and precautions on every tool you use.

In this video, we learn how to make a BBQ smoker out of a drum. First, turn the drum upside down. Next, paint the entire drum green and make vents in the side bottom of it, with covers that can be moved or set aside. Drill screw into the top of the drum then add in wood and charcoal to the bottom of it. When you are done with this, you will be able to hook your propane to this, then light it on fire. To smoke a piece of meat, you will need to put the foil underneath a grill rack and then plac...
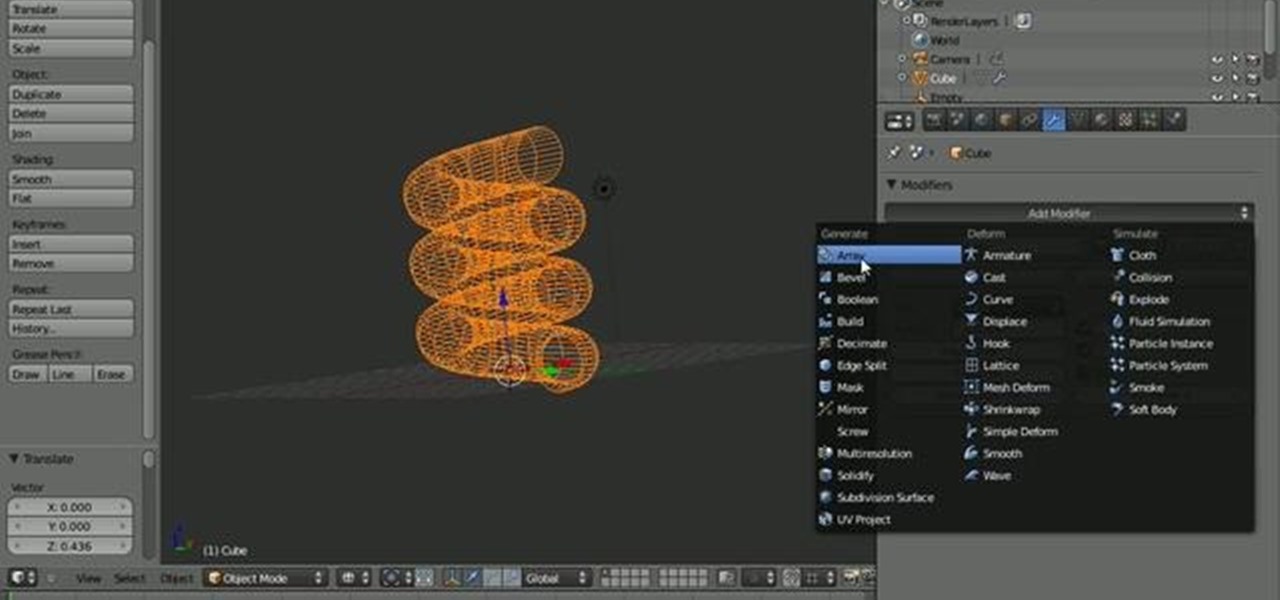
In this quick Blender 2.5 video tip, you'll see how you can use the Screw modifier to quickly create threaded objects or springs. This method is non-destructive and very quick to use. Whether you're new to the Blender Foundation's popular open-source 3D computer graphics application or are a seasoned digital artist merely on the lookout for new tips and tricks, you're sure to be well served by this free video software tutorial from the folks at CG Cookie. For more information, including step-...

In this how-to video, you will learn how to remove the front case of an iMac G5. First, lay the case on its back. Remove the screws in order to get the ram bay cover off. Once this is done, pull on the release tabs to remove the ram modules. Next, remove the torx screws on the bottom side of the casing. Once these are removed, work your way around the casing to remove the front from the back. Do not pull too far as you might damage the wires to the camera. Unplug the camera once you are able ...

In this how to video, you will learn how to remove your hard drive from an iMac G5. First, open the cover of your iMac. There will be torx screws that have to be removed from the left hand side of the hard drive. Once this is done, you will have to unplug the two cables located on the bottom of the drive. From here, remove the hard drive up and out. Unscrew the screws attaching a bracket to the hard drive. Once this is done, you can swap in your old drive for a new one, or make modifications ...

This is a video tutorial that is showing its audience how to make a super cannon arm. The first thing you need is a plastic jug, a switch, a wire, a wooden dowel, spray paint, a tap light, nick nacks, foam lining, and a pin light. The plastic jug will be the casing, cut out a hole for the lightsource and a hole for your arm cannon. Spray paint the jug. Make the handle with the wooden dowel. Then screw the handle into place with two screws into your plastic jug. Once you put the handle in then...
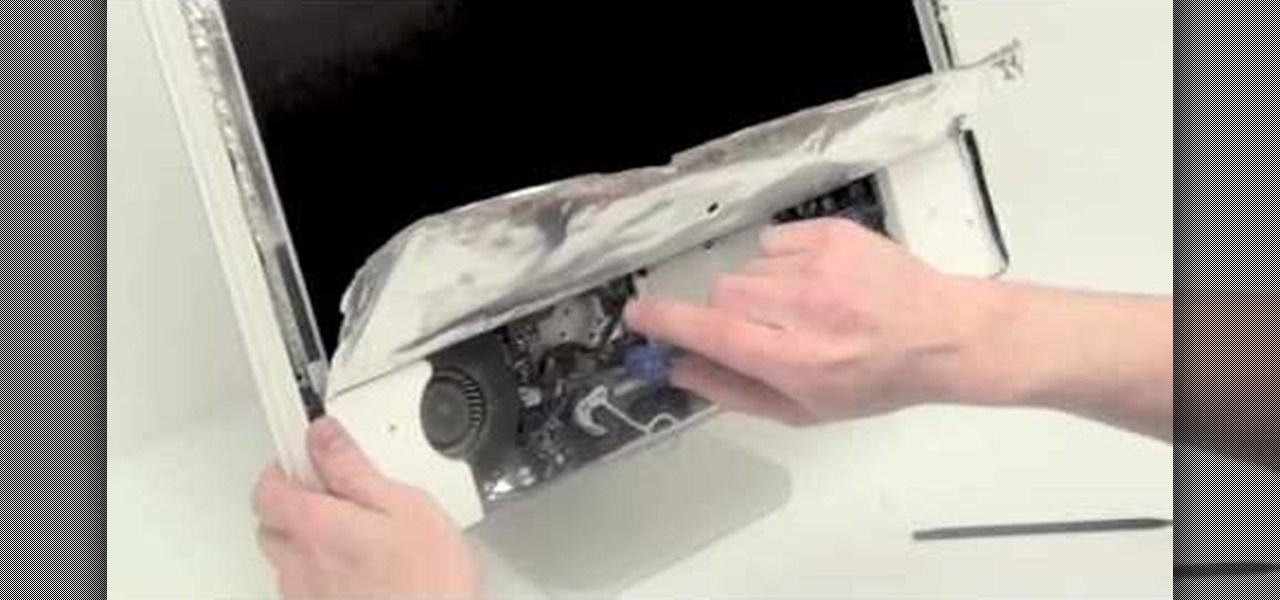
In this Computers & Programming video tutorial you will learn how to remove the LCD display from a G5 iMac. This video is from powerbookmedic.com. First, loosen the rubber band around the display by inserting a pointed object and freeing it slightly with your fingers. On the bottom, free the lower end of the sheet and lift it up. Now remove the two screws and dismantle the part as shown in the video. Then on the top of the display unstuck the two stick pads and remove four screws from the fro...
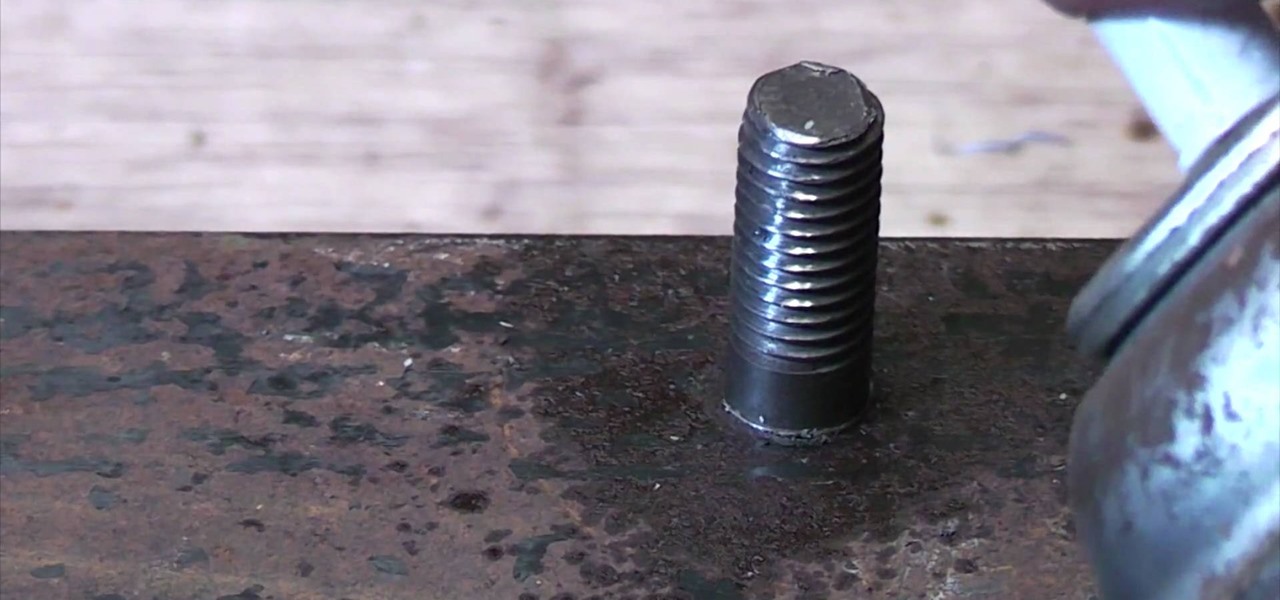
Ultimate Handyman demonstrates how to remove a threaded stud from a threaded hole. You will often find threaded studs when you are doing car repair. First, remove the nut from the stud. Then, spray it with lubricant. Next, screw the nut back on the stud. Screw another nut on top of the first nut. Grip the bottom nut with a wrench while tightening the top nut. Grip the bottom nut and turn it in a counter clockwise direction. The stud should then pull out of the threaded hole. It may be difficu...

In this video tutorial, viewers learn how to repair a broken Les Paul Guitar Hero guitar controller for the Xbox 360. Begin by unscrewing the screws in the neck of the guitar. It is recommended to detach the neck from the guitar for easier access. Now open the top part of the neck and carefully remove the green chip from the tab. Then put the green chip in front of the original tab. Now screw the neck back together and attach it to the guitar. This video will benefit those viewers who enjoy a...
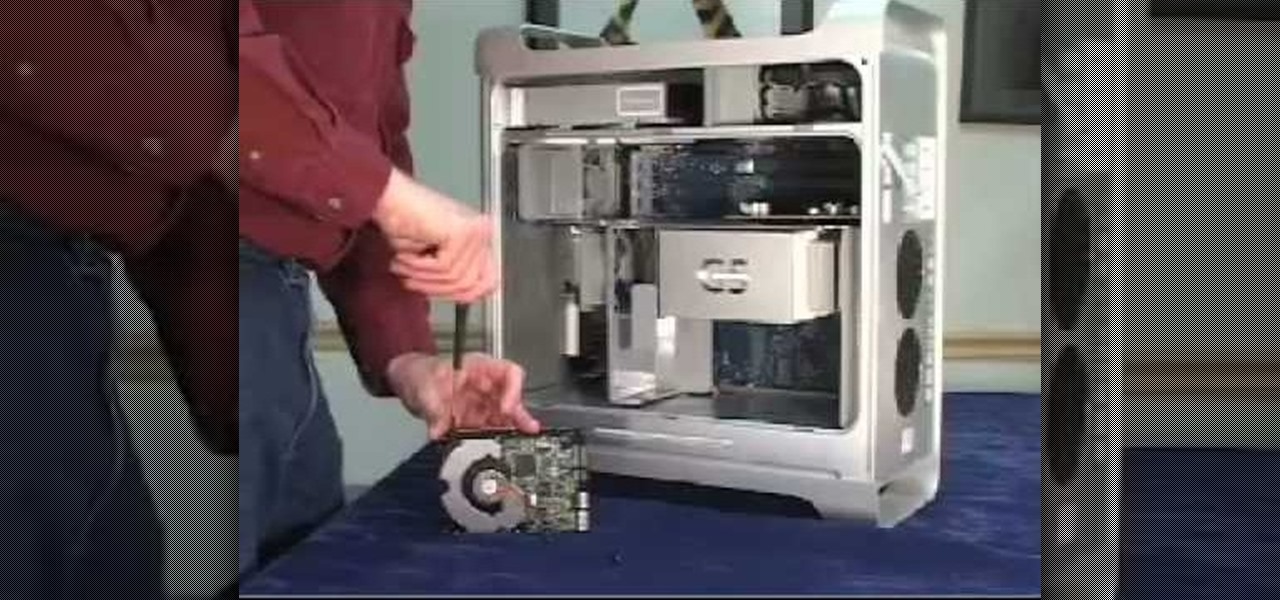
This video is about installing second serial ATA drive into a Power Mac G5 system. The video is a step by step demo starting with the removing of the door to the machine and the air pack. The first hard drive is at the top rack and you have to remove the four screws at the bottom and insert them into the top and bottom screw alls on each side of the drive. The hard drive is inserted below the first hard drive and the data and power cables are plugged into their respective slots. The video is ...
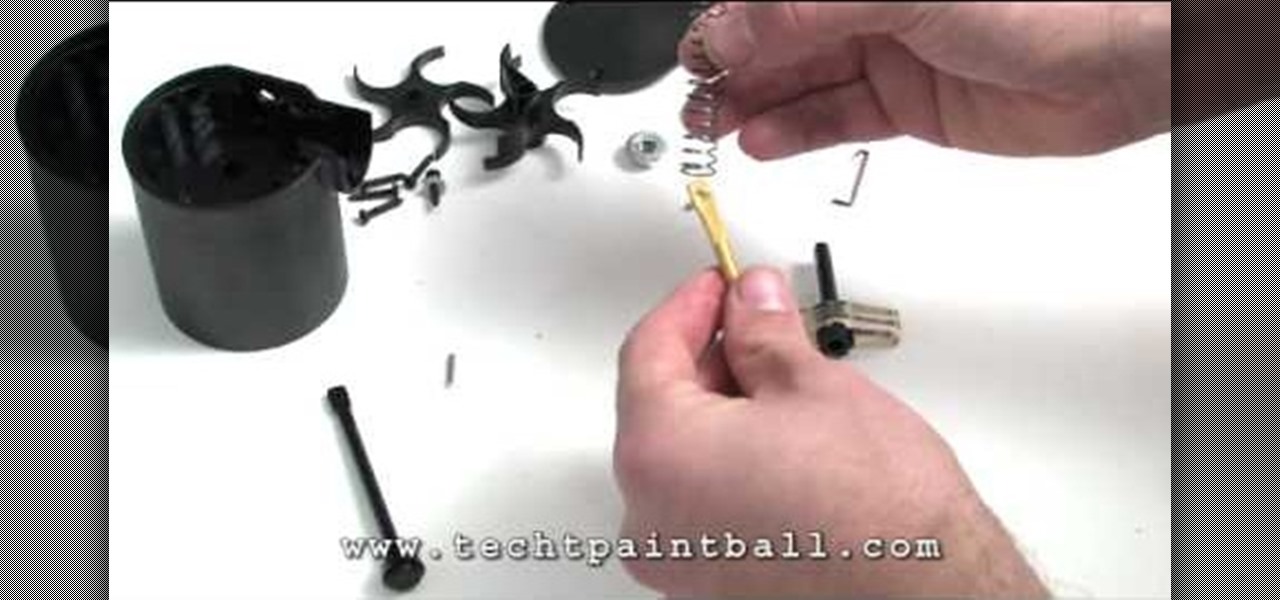
In this video, our author, KRASHARPSHOOTER, shows us how to install a TechT Lightning Rod. First we remove the screw on the underside, and turn it over and remove the four base screws. Now lift up on the piston housing and remove it. Then, remove the nut and the tension guide. Now you can remove your ratchet axle and rod. Now remove the pin that hoods the ratchet rod and axle together.

In this video, we learn how to fix a wobbly chair. First, you will need to flip the chair upside down to see what the problem with it is. After this, you will need to apply wood glue to the inside of all the joints on the chair. Next, you will need to push the pegs to the inside of where they belong and then wipe off any excess glue from where it leaked out from. Allow this to dry for several hours then flip it back over and test it out. If this worked you are done, if not, you will need to p...
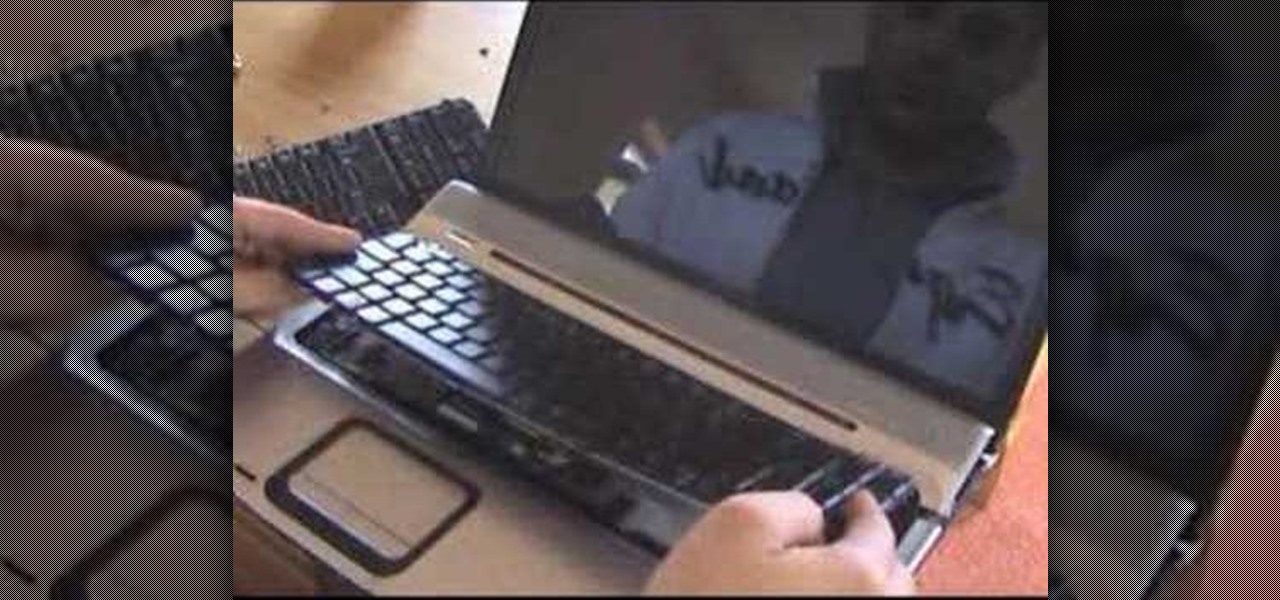
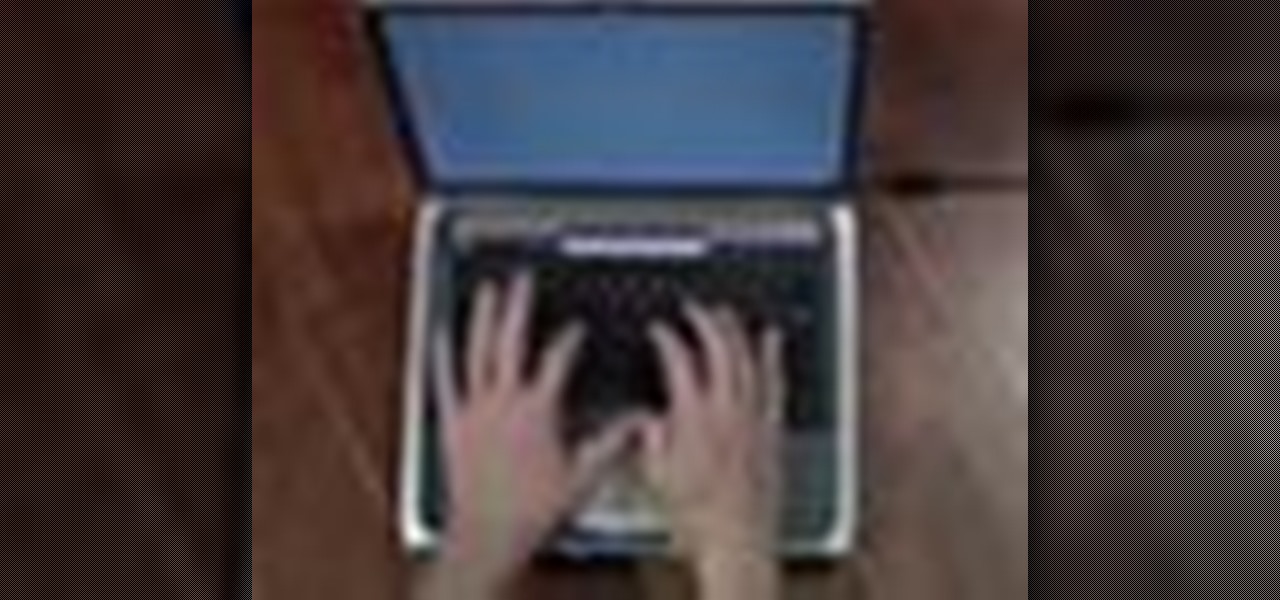
This video tutorial is in the Computers & Programming category which will show you how to change the keyboard on an HP Pavilion laptop. First remove the battery and then remove the 6 screws in the battery cabinet. Now remove another screw as shown in the video. Open up the laptop and remove the panel located on top of the keyboard. Now remove the screws that hold the keyboard in place, slide out the ribbon connector and take out the keyboard. Then take the new keyboard, slide in the ribbon co...
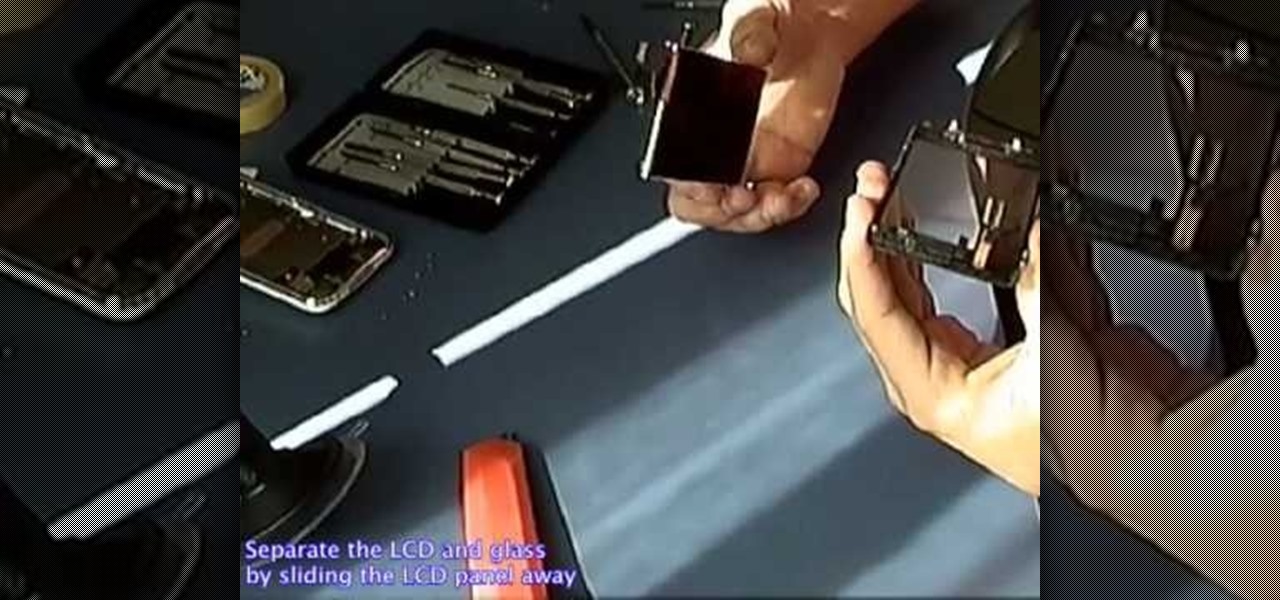
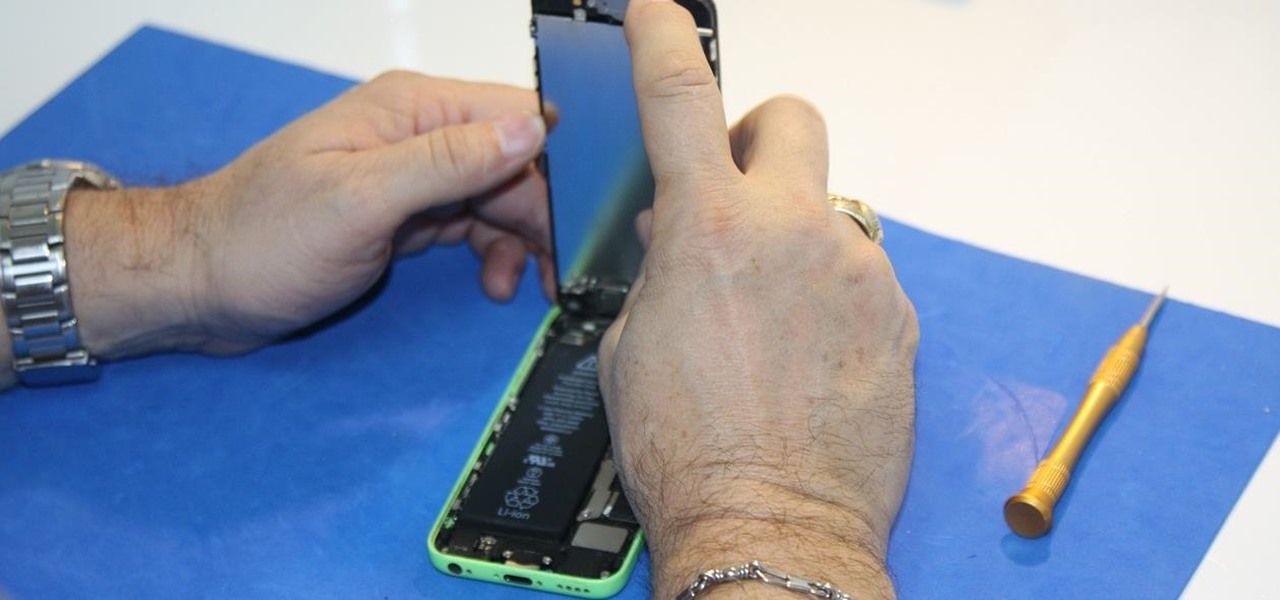
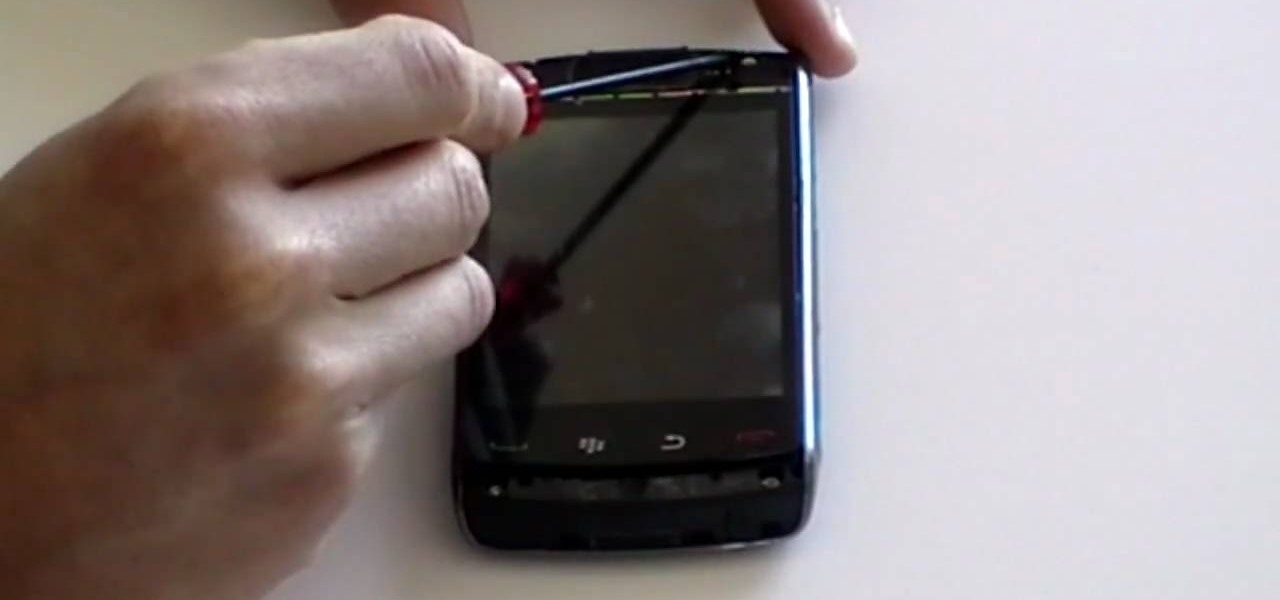
In this Electronics video tutorial you will learn how to repair and change your iPhone 3G touch screen. Remove the 2 Phillips #00 screws from the dock connector end. Use a suction cup to gently pull up the display assembly. Use a spudger to disconnect the black ribbon cable labeled 1, 2 and 3. Remove the screws of the display assembly. Peel up part of the black tape and remove the screws under it. Gently rotate the spudger, lift the LCD from the glass and separate it. Heat the top left of the...
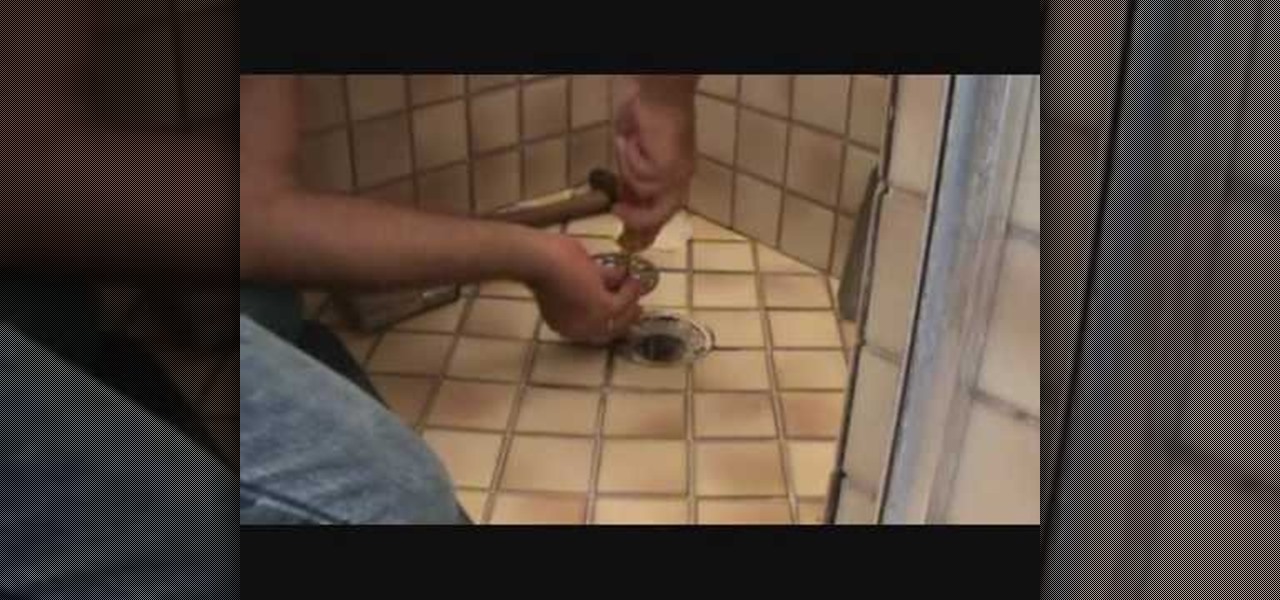
To replace your old rusty drain cover. First, some masking tape over drain cover, to prevent screws from falling into drain. Sweep debris away, as so not to clog up the hole. Remove old shower drain cover to measure, take it to the store, to get the exact size. It's best to take along the screw too, just in case there isn't a screw thats of the same length. Chip away debris from old drain cover, as to make new drain cover fit in easily. If you follow this video, you'll able to replace your ol...
Not enough space on your laptop? No problem! Grab a new hard drive from your local office supply store and follow this tutorial to learn how to install it.
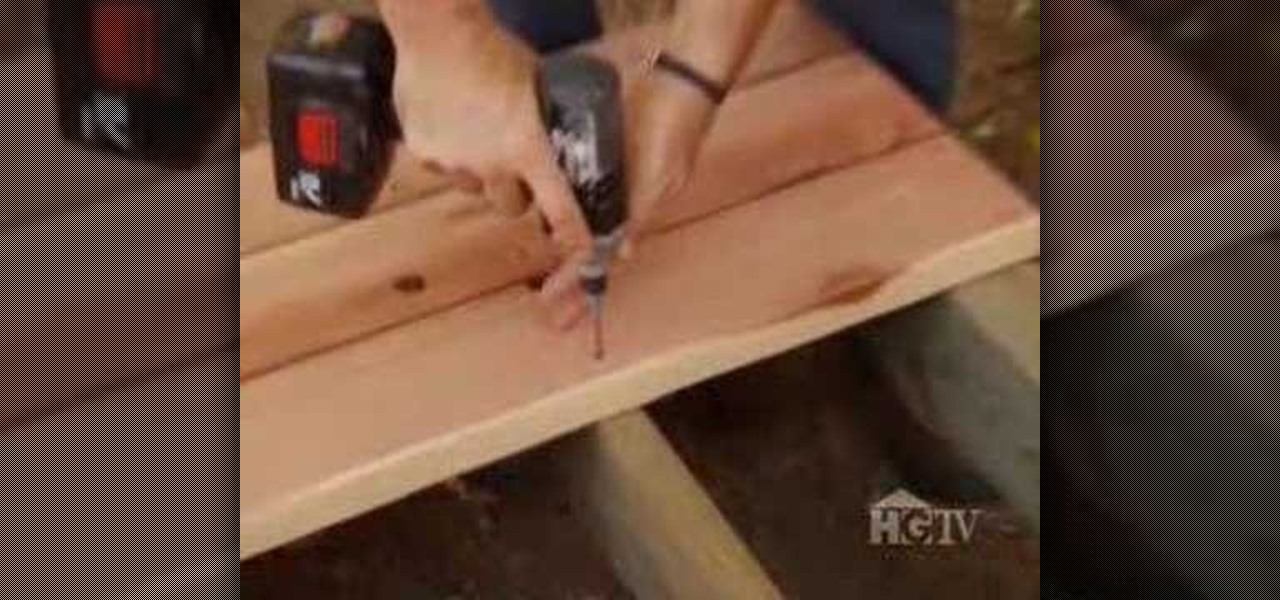
Doing a little remodeling and construction around the house? Choosing the right tools can be a daunting task. This home and garden how to video demonstrates the proper operation and use of an impact driver to drive screws into wood.

In this video Bob Schmidt shows you how to properly use nails and screws while nailing and screwing the drywall your hanging in your home remodeling project.
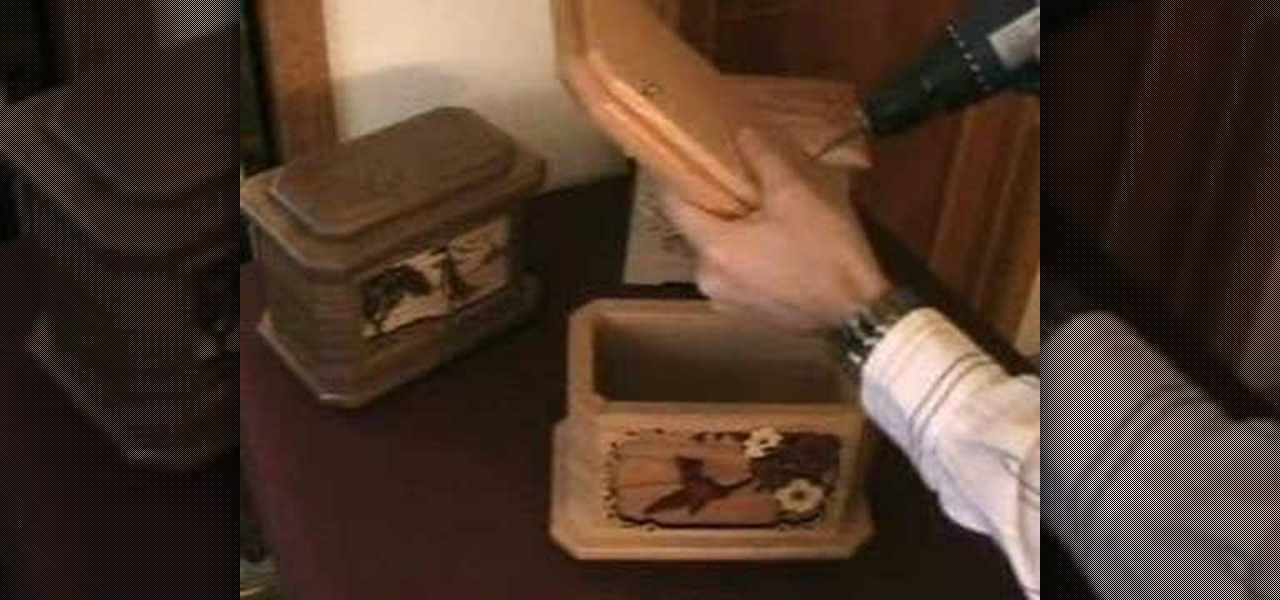
Learn how to open a wooden cremation urn. Most have four screws that retain the base or inset base. These screws can be removed with a Phillips Screwdriver or electric screwdriver.
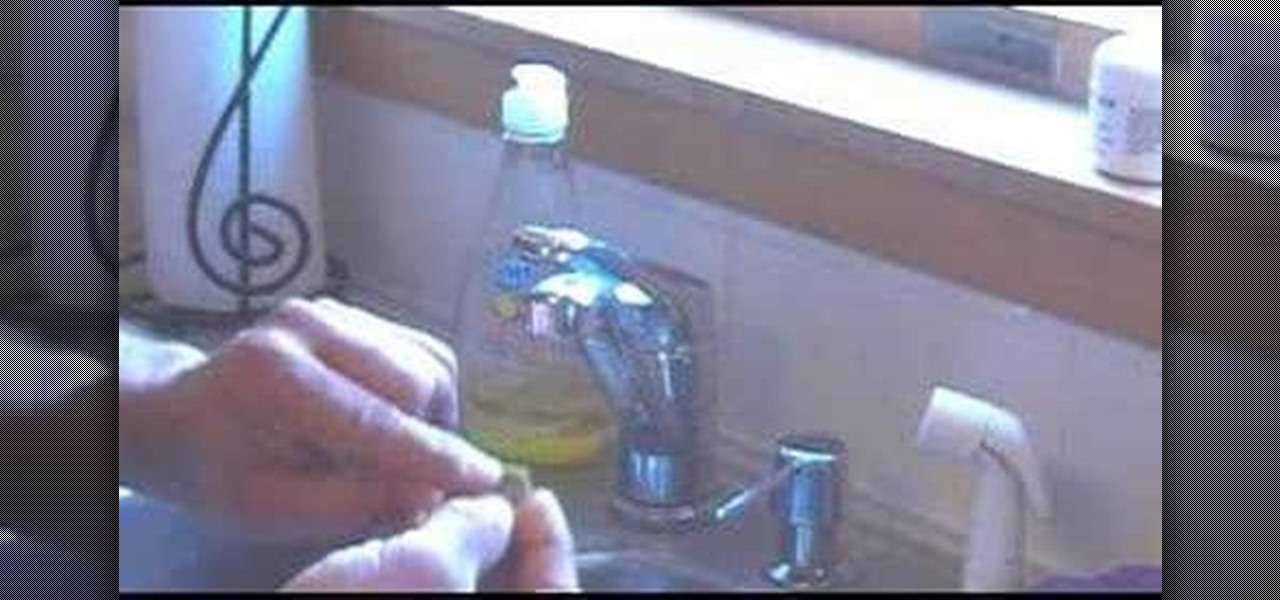
Ever notice that water just doesn't come out of the faucet like it used to? Chances are that the screw on the aerator is clogged.
In my days as a hardware tech, I often came across motivated do-it-yourselfers who watched a video or two on how to repair a phone and thought that they'd give it a go. More often than not, they failed miserably and damaged their phones (and wallets) even more in the process.
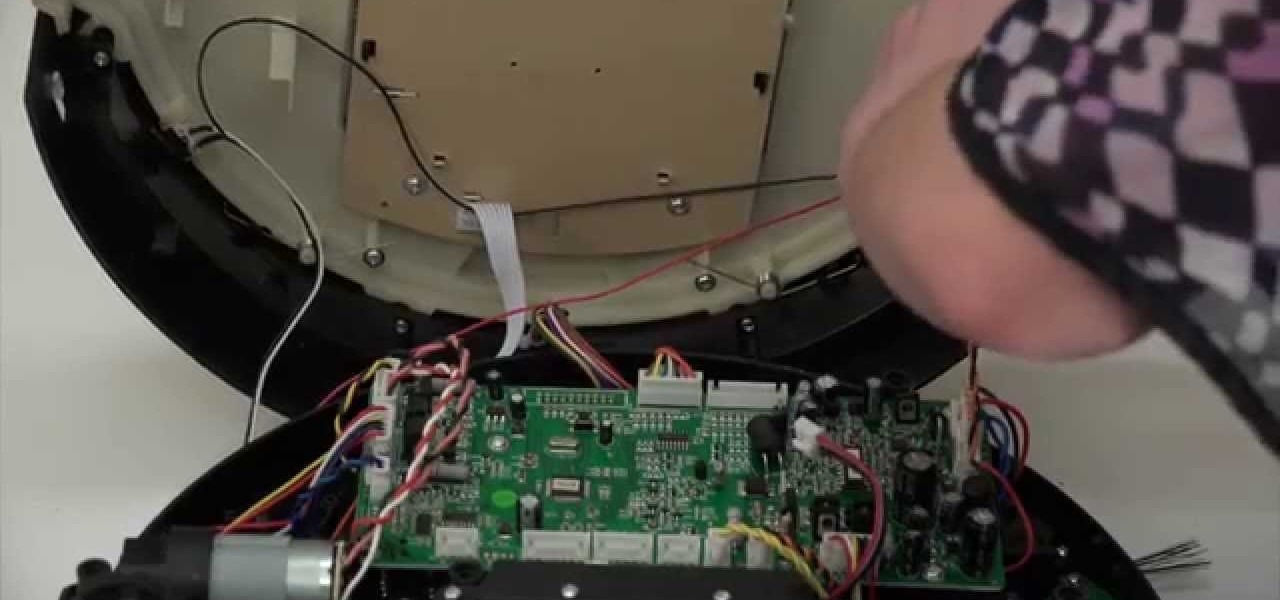
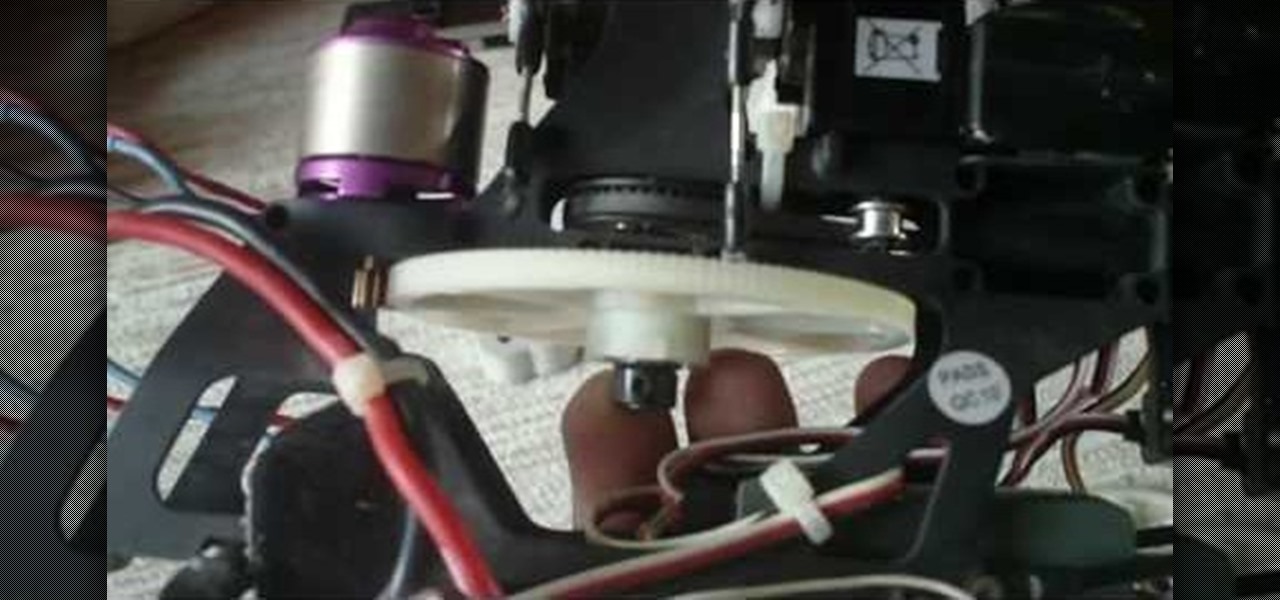
A step-by-step guide to replacing the side brush motor on bObsweep Standard or Pethair. Follow the video or multimedia directions in order to open up bObsweep, remove the main board, replace the side brush motor, then close your vacuum for future use.
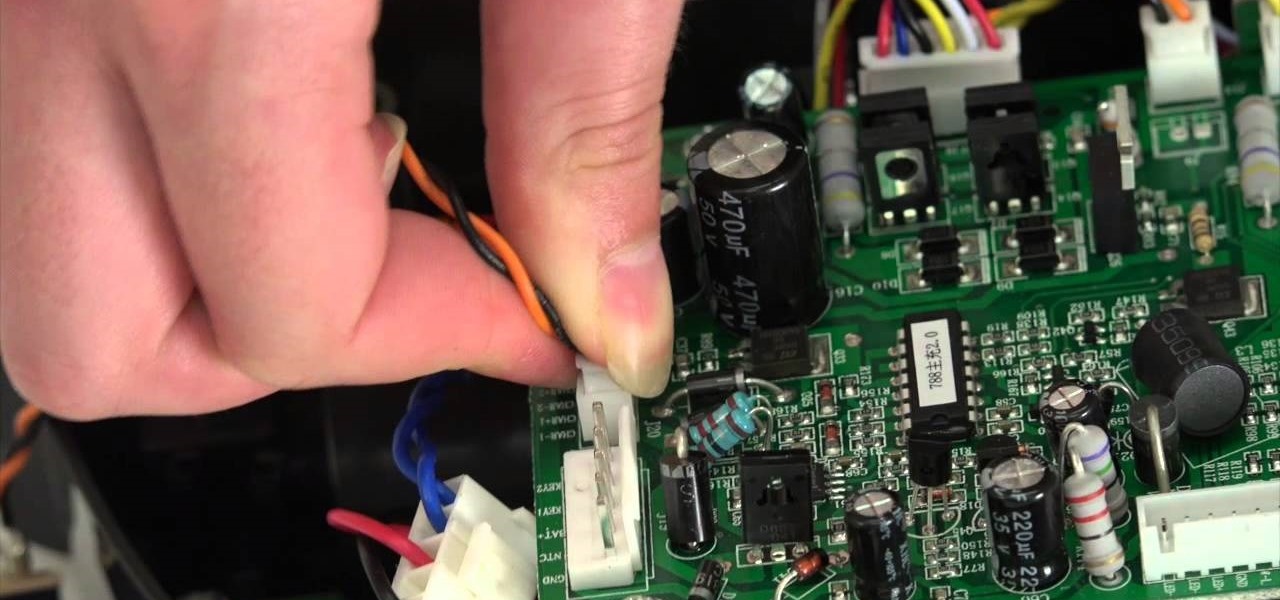
The guide will walk you through a power switch replacement on a bObsweep Standard or Pethair. It includes:

Making a rifle from scratch can be a fun and challenging experience for gun lovers. Building old fashioned weapons using wood and other metal pieces can give the creator something that may resemble a piece of history.
In this video, we learn how to replace the main gear on a Honey Bee King 3 helicopter. First, take the main blades off with a 2.5mm wrench. Remove the connectors, then remove the nut from the bottom gears and set it aside. Take out the gear and replace it with a new one. Screw it back into place, then make sure it's tightened. After this, you can place the blades back onto the helicopters and screw them into place. It will be hard to place some of the nuts back on, since they are located in s...
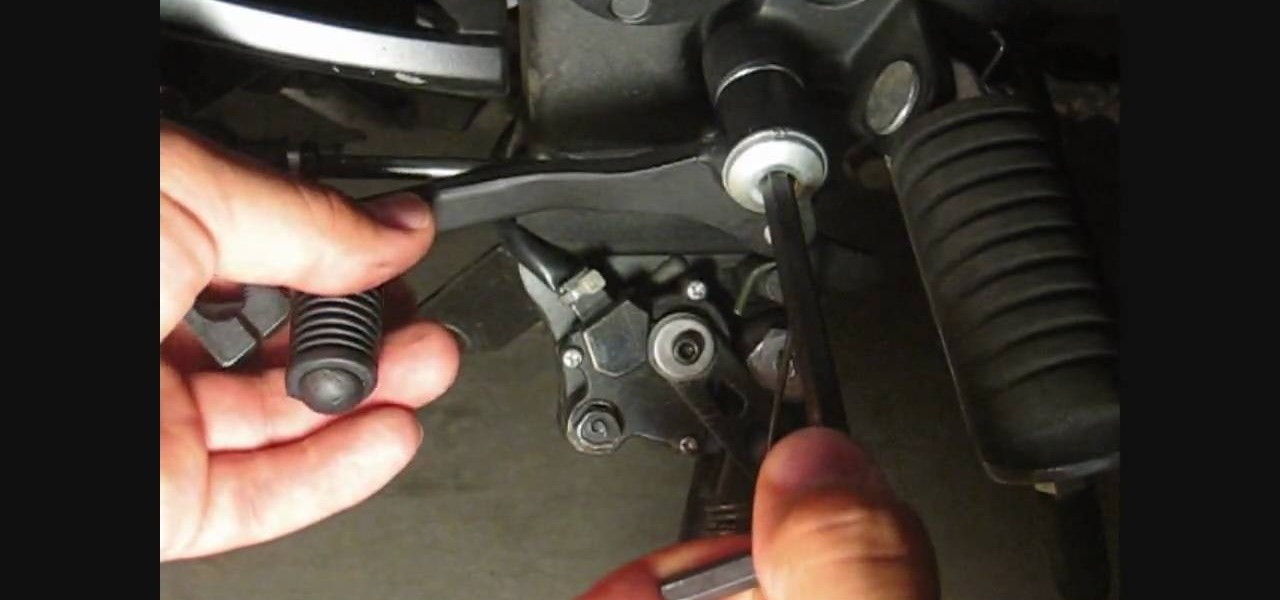
In this tutorial, we learn how to change your shifter lever and tie rod on a motorcycle. Remove your shifter level first, then you will see a washer on the end of it. You will also see the screw with another washer. Now, come around and loosen the bolt around the shifter lever so you can remove everything completely. Next, replace your shifter lever and then replace the washers and bolts around it. Tighten these up so they will not fall off of their spot. Place the bolt back on, then apply it...

In this tutorial, we learn how to install a chin spoiler on a Ford Mustang. First, you will need to remove the four screws below the front bumper of the car. Now, remove the underneath section that is located just below the license plate. Drill holes inside the new spoiler, then reattach the sensor and put it back in place where the old chin spoiler was located. Make sure you replace any bolts that you took out in the beginning. You can use double sided tape to make sure the spoiler sticks, a...
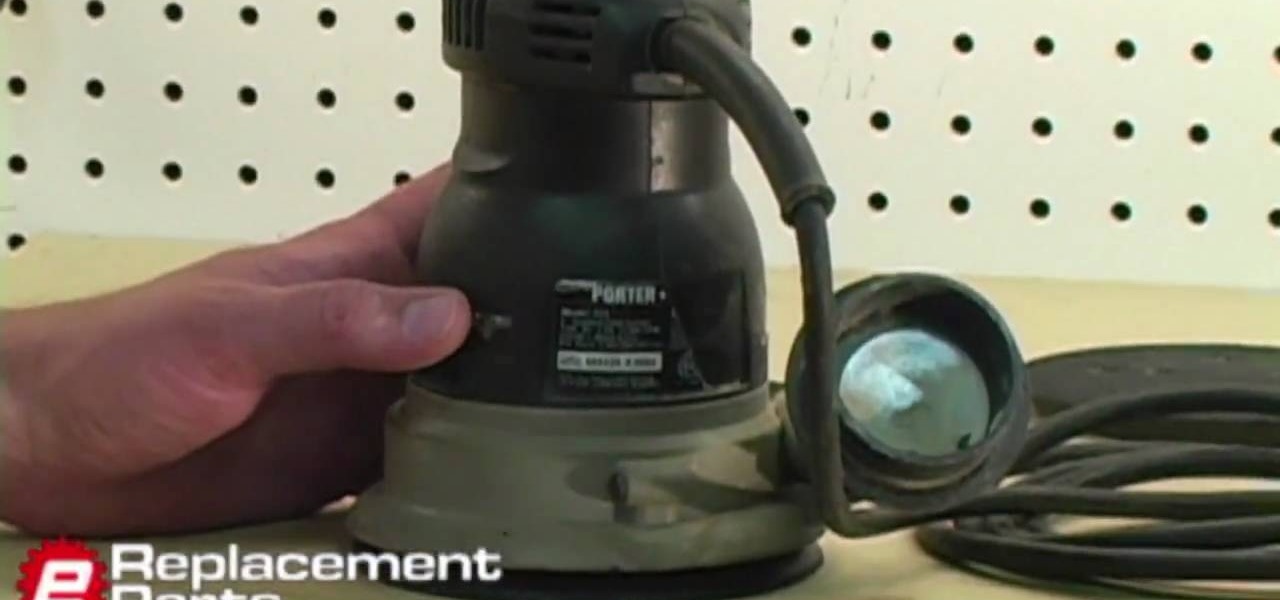
If you, for some reason, damaged the pad on your orbital sander, it's not the end of the world. The pad can easily be replace by just locating and removing the screws on the sander. Once that's done you can easily screw a new one in without much of a fuss.
In this Computers & Programming video tutorial you will learn how to replace a keyboard for Acer Aspire One 10.1 netbook. Disconnect the netbook from the power supply and remove the battery. You can use a small flat screw driver or a razor blade for replacing the keyboard. You don't have to remove any screws. You need to unlatch three tabs; one located above the f8 key and two on either side of the keyboard. With the razor blade unlatch the tab above f8, and then the two side tabs as shown in...
Repairs Universe demonstrates how to take apart the BlackBerry Storm 2 to replace the LCD. First, flip the phone over and take out the battery, SIM card and memory card. Then, use a safe pry tool to pry off the top and bottom covers which are held on by adhesive and clips. Next, use a T-6 screwdriver, remove the size screws on the front of the device. Flip the phone over and remove two more screws. Use the pry tool to release the clips and remove the outer casing. Flip the phone over and usin...
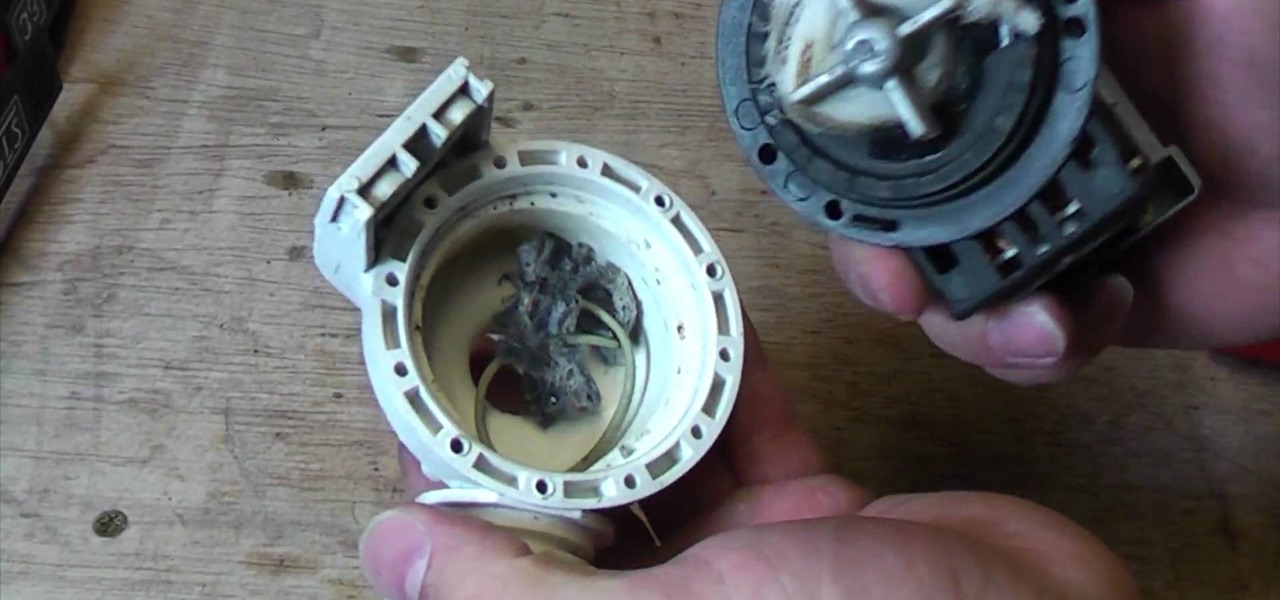
Ultimate Handyman demonstrates how to check a washing machine pump for blockages. First, disconnect the washing machine from the electricity source and remove the pump. The water sucks through the inlet and is pumped out of the outlet. Check to make sure that the pump doesn't have any open circuits by attaching the leads to the multimeter. Remove the screws to look inside the pump. Remove any debris that may be clogging the propellor. Make sure the O-ring around the edge creates the seal and ...
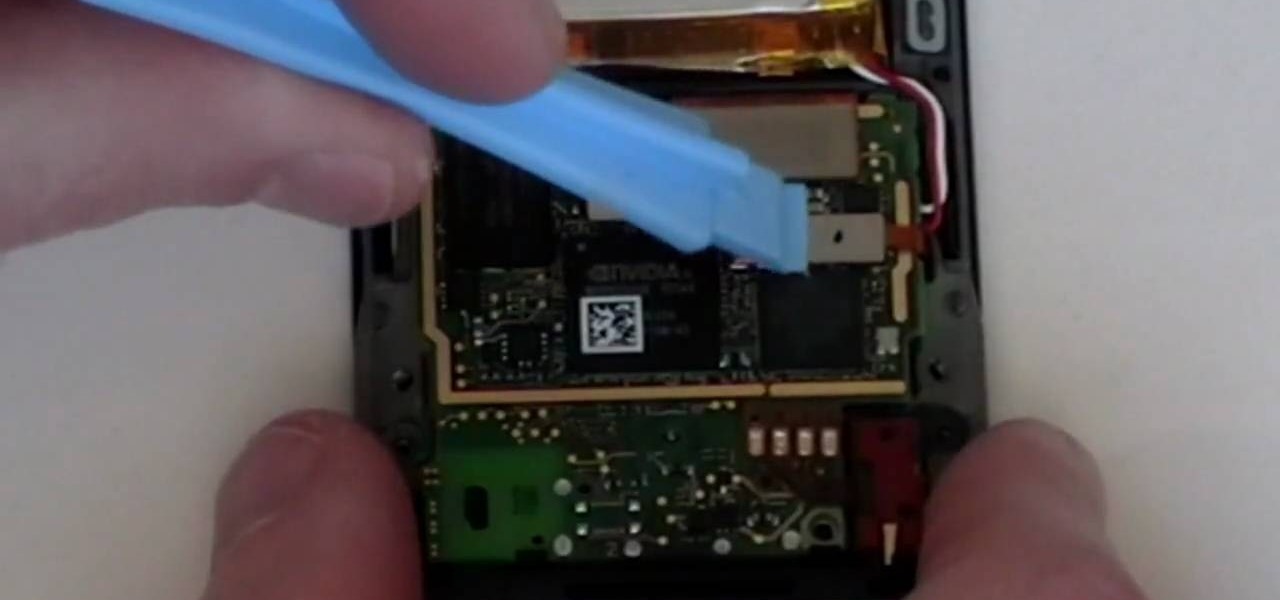
Repairs Universe demonstrates how to replace the battery on a Microsoft Zune HD. First, use a tri-ring screwdriver to remove the four screws on the back of the Zune. Then, remove the back cover. Next, remove the bottom cover by using your fingers to gently push it off. Then, use a T-5 screwdriver to remove the four screws on the back of the Zune. Release three ribbon cables from their pop connections with a safe pry tool. Use the pry tool to also release the battery from the Zune. Lift the mo...