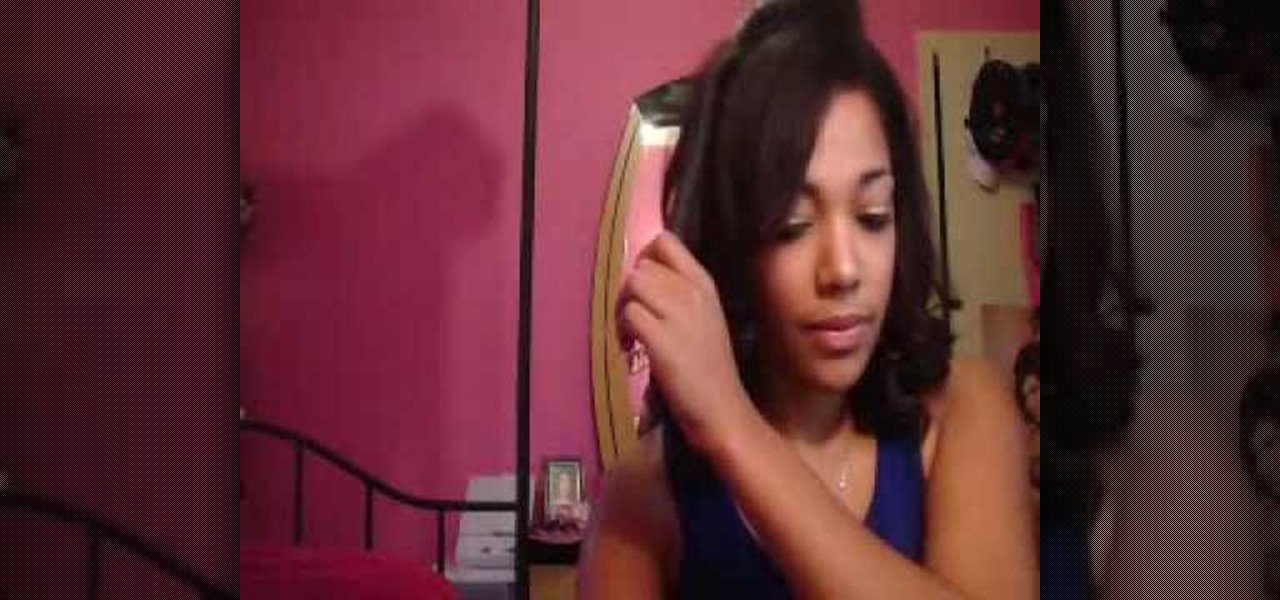
In this tutorial, we learn how to do a big anime inspired hairstyle for cute pictures. First, part your hair slightly to the side of your choice. Next, tease your hair in the back and then straighten your bangs with a flat iron. After this, comb your hair so it flares out on the bottom and hair spray it. Then, tease it more on the higher side so you have a very messy and volumized side. Then, slick the other side of the hair back. When finished, you will have a big anime hair style ready to g...
In this tutorial, we learn how to get big teased hair with clip-in extensions. First, put half of your hair up and then clip the extensions in from the root until they are secured in place. After this, you will grab sections of hair at the top of your head. Hair spray the hair and then brush the section of hair against the way it grows. Continue to do this until you have teased all the hair on the top of the head. Brush your hair softly when finished, then style how you want and spray with ha...

In this tutorial, we learn how to do a ninja sketch. First, you will draw out the outline of the body. Draw in two arms that are crossing and then draw in blades in the hands. From here, draw in the hair, which should be spiked and short. After this, draw in a mask around the face and then start to draw in the clothing. Draw in lines on the clothes for the folds, then create a band around the arm and a skirt around the waist. To finish, you will draw in fishnets around the legs and then woode...
In this tutorial, we learn how to make cute little hair clips. These will add a fashion statement to any hair style and they are easy to create! To start, you will take some thin ribbon and bend it all together until it creates a large ribbon. After this, you will wrap it together in the center until it's a bow shape. From here, add in more colors or accessories. Then, use a hot glue gun to attach a clip to the base of it. Let this dry and then you can clip it into your hair! Make a lot of th...
In this video, we learn how to do an adorable hairstyle on your American Girl doll. You will need: two ribbons and four rubber bands to do this. First, brush her hair all the way out so it's smooth. Then, part the hair into two sections on the left and the right. After this, tie the right side into a high ponytail and then tie the left side the same way. From here, you will shape a bun into the top of the hair band and then let the rest hang down. Next, you will tie a ribbon in each side into...

In this tutorial, we learn how to tease your hair for any event. First, you will brush your hair until it's combed all the way through. After that, you will pull up a section on the very top of your head. Then, use a teasing brush to gently tease the hair until you have the volume you want. After this, take another piece of hair and repeat the same process. Continue to do this until you have teased all the hair you want to volumize. After this, you will comb the hair through gently and then s...

In this tutorial, we learn how to bottle mead. When you are bottling mead there are a lot of things to take into consideration. You can use different styles of bottles that are clear so you can see what's inside of them. Use the #9 types of corks because they work very well with bottles and create a great seal. If you use a cheap one the cork will break off into the mead. Prepare the corks before mottling by placing them in boiling water and leaving it to steam for a few minutes. Use these ti...
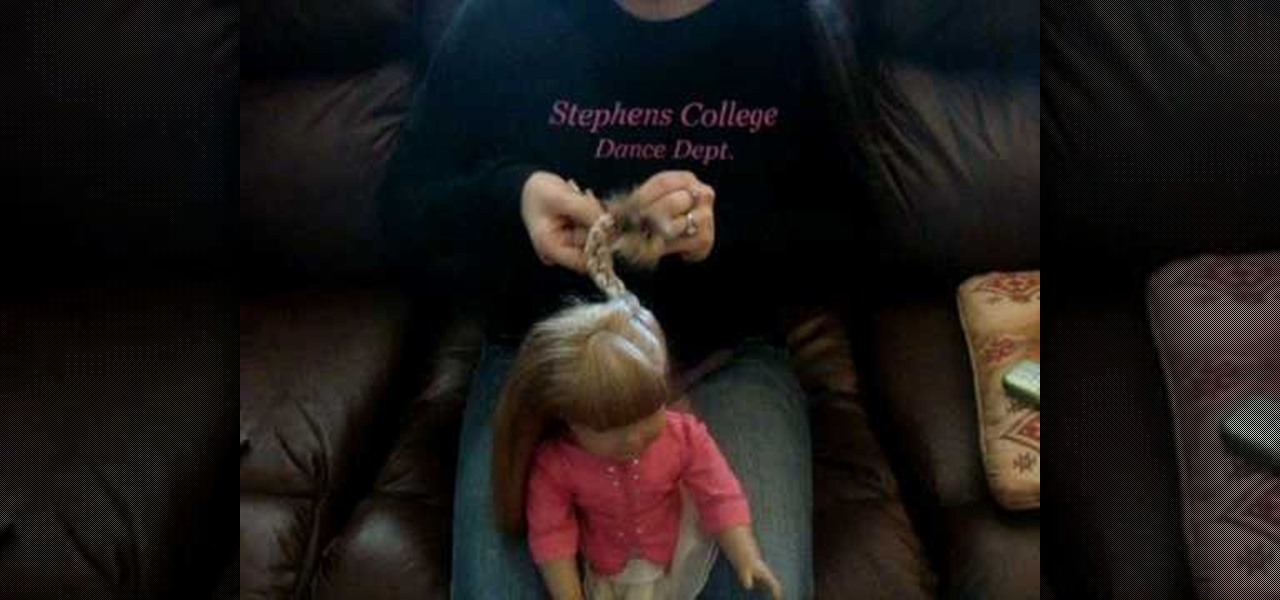
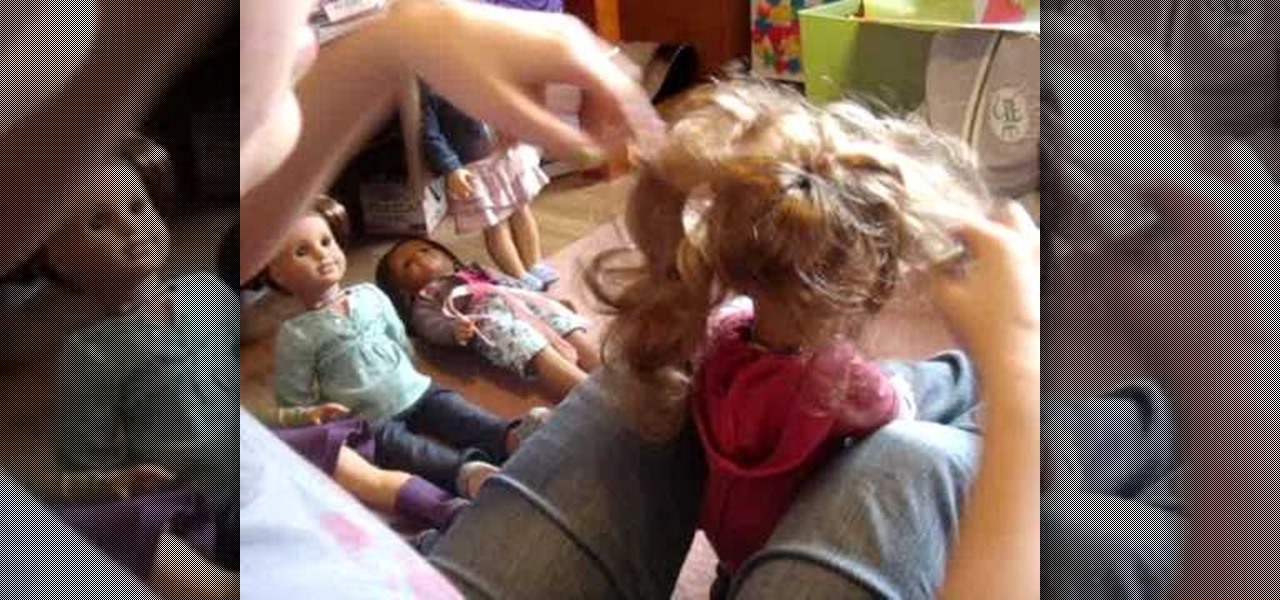
In this video, we learn how to do a cute easy hairstyle on your American Girl Doll. To start, brush your doll's hair and then part the hair in the middle. After this, break the side of the hair into three pieces and then start to braid it from top to bottom. After this, repeat the same process on the other side. Tie the bottom with rubber bands and then you will be finished with this hair style! It looks really cut on a doll that has long hair with bangs, but can also work on short or layered...
In this tutorial, we learn how to get wavy hair with a wide-toothed comb and no heat. First, spray some waving product all over your hair and then comb it out. From here, you will combine the top half of your hair and then twist it into a bun. After this, clip it to your hair with a bobby pin. After this, grab the right side of the hair and then twist it up into the head. From here, you will repeat the process on the other side of your hair. Leave this in your hair overnight and then take out...
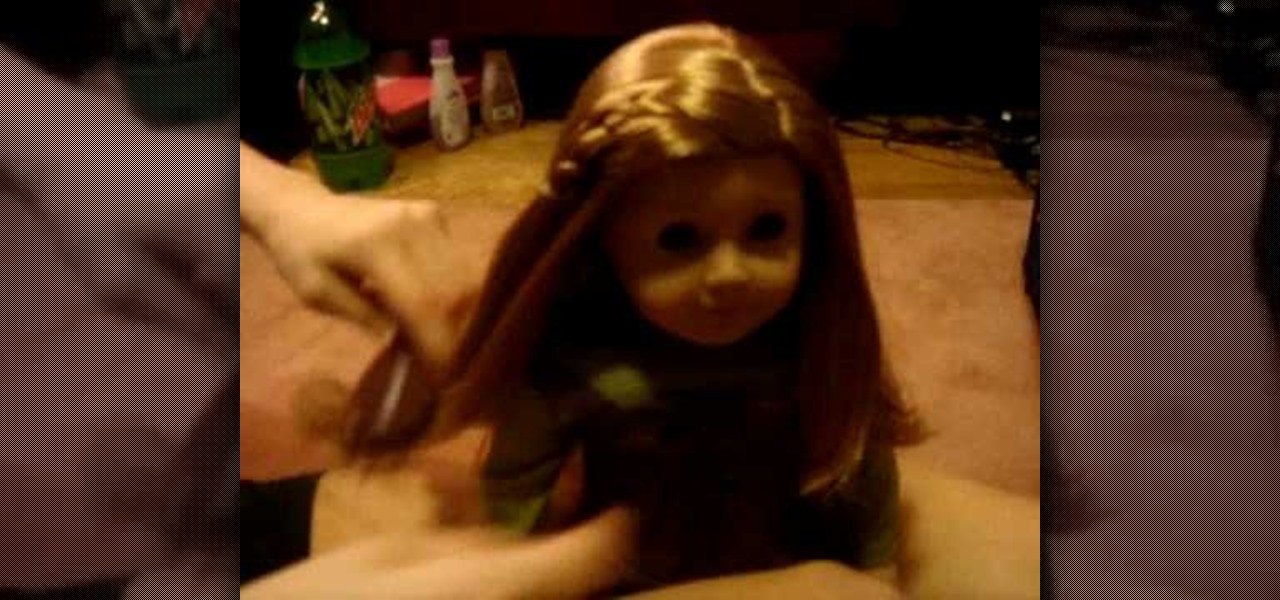
In this tutorial, we learn how to redo American Girl doll, Mia's, braid. First, you will need to brush out the hair for the doll. After you do this, you will take a little section of the hair from the front and split it into three. Then, take another little section from underneath this and clip it away. From here, you will start to braid the hair, clipping off the sections underneath separately so they don't get mixed together. Then, you will take the rest of the hair and put it into a ponyta...
Taylor Momsen has long been criticized for her too dark, too ahead of her years goth/rocker style, though you have to admit the girl's got a really good fashion sense. Though she's only 17, she already knows what looks good on her and what she enjoys wearing, which is a hell of a lot better than wearing what everyone else thinks seventeen year olds should wear.
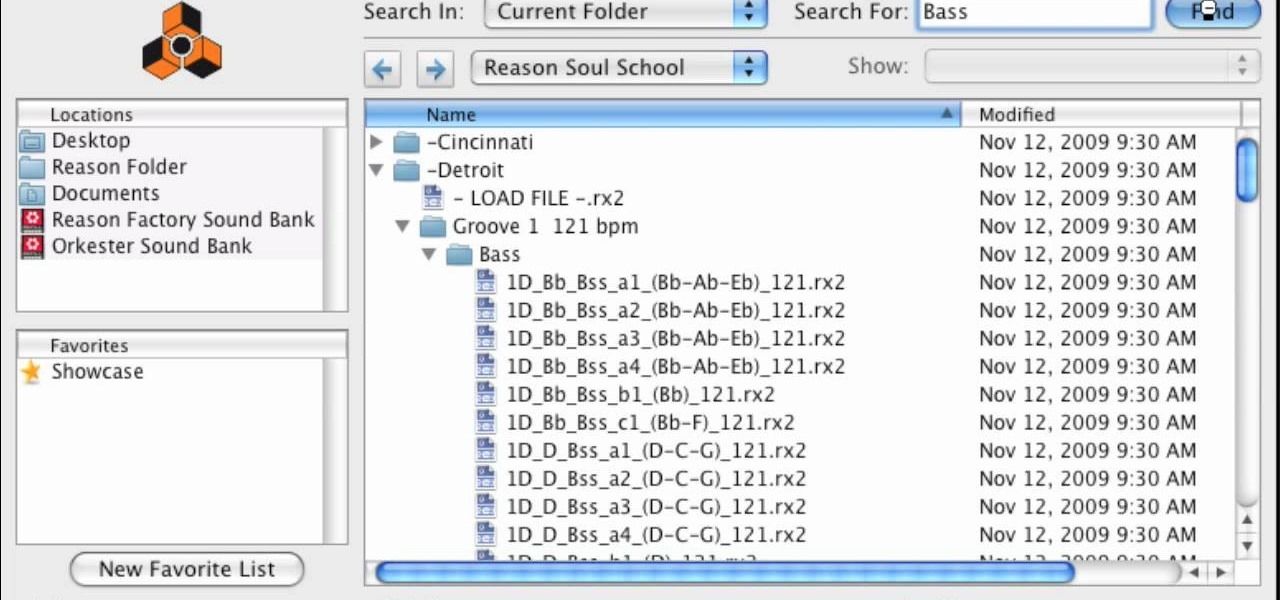
In this video, we learn how to find soulful loops in Reason Soul School. First, select to create an instrument. Then, browse through the Reason SoulSchool Refill. There will be several categories of instruments with soul styles. Select either Cincinnati, Detroit, or Memphis. In each of them, there will be instrument loops, drums, and grooves. Each are tailored to match each other. By loading these, you can start a tight groove easily. Find the different loops and then select the one that you ...
Buns are the older, more elegant sister of ponytails. And best of all, there are certain bun styles that are super easy and quick to put together if you're running late for a big soiree.
In the mornings when we wake up it seems like our hair is our own worst enemy. It just won't style right, it frizzes out, it won't hold the curls. But getting your hair ready for school or for work doesn't have to be a chore.
We have nothing against posh, elegant romantic curls or modern pin-straight hair, but don't you ever miss the days when you were just a kid experimenting with her mom's drawer of hair goodies? Creating crazy styles was so fun and the results were always unpredictable.
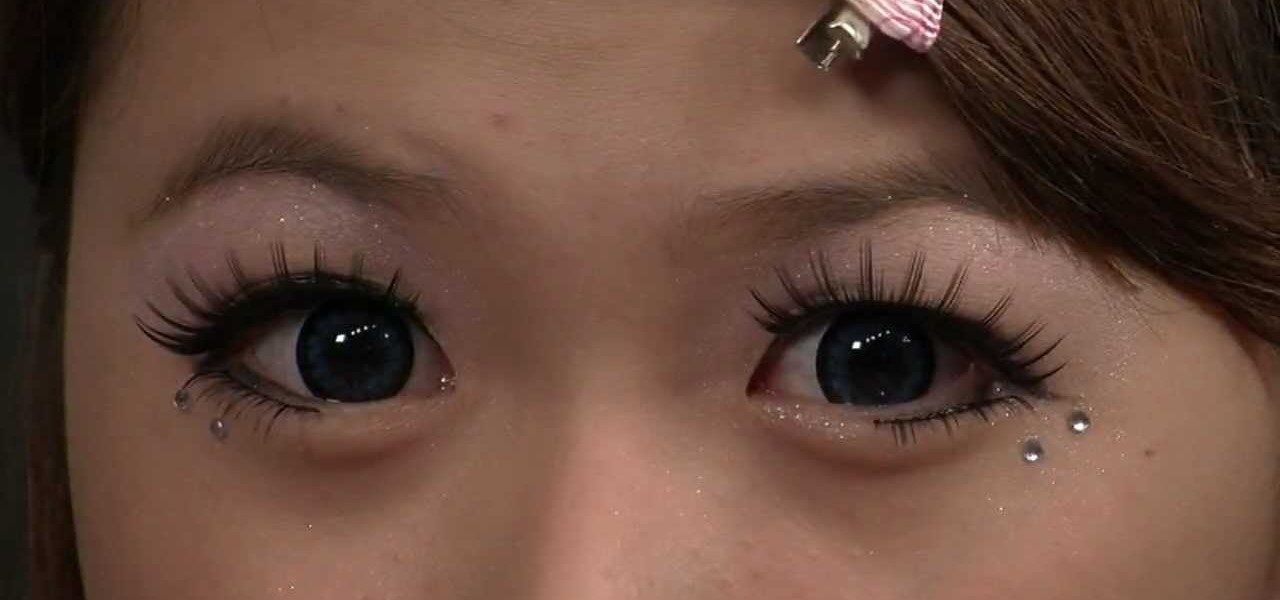
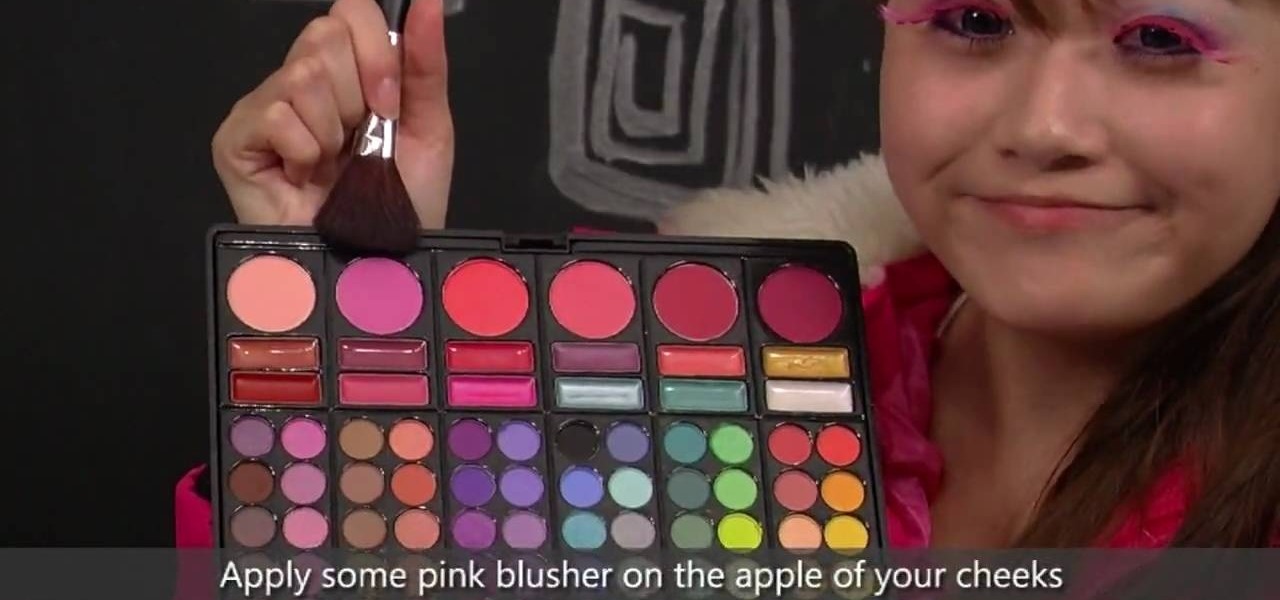
Want to look like a living doll? That's the goal of thousands of Japanese girls in the Harajuku district of Japan, where all fashion trends start. No matter what style of dress, the dolly look seems to be pretty pervasive, espcially when it comes to makeup.
"Harajuku" might sound slightly familiar to you - Gwen Stefani used the word to name her "Harajuku Girls" fashion and perfume line. But other than the cutesy little Japanese dancers she had during her tour and lots of bright clothing and makeup, what is a Harajuku girl exactly?
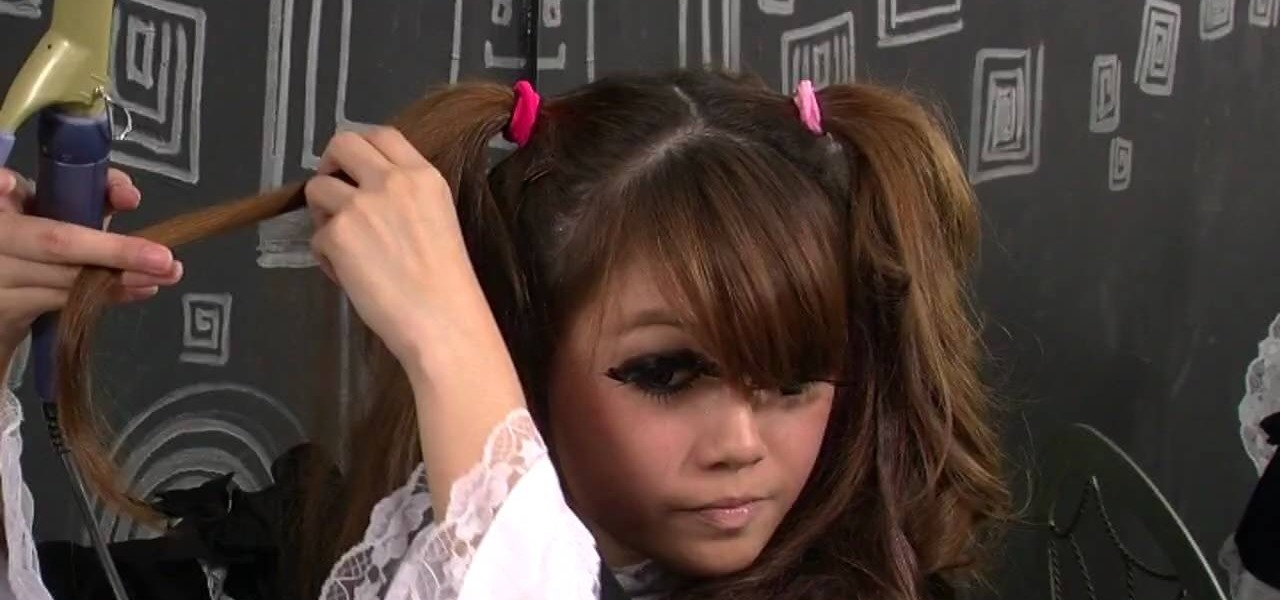
Despite being based on the ultra feminine and severe Victorian style of dressing, Japanese Lolita tends to go a little crazy when it comes to stylization and improvisation of fashion, makeup, and hair. Just take this crazy pouf of a pigtail, for instance.
Emma Watson put it best when she said in a recent "Teen Vogue" interview that there's nothing interesting about looking perfect. And it's true: A few undone hairs here, a stained red lip instead of a perfectly painted on one, and mixing fashion styles when you dress help add interest to your look and show off your personality.
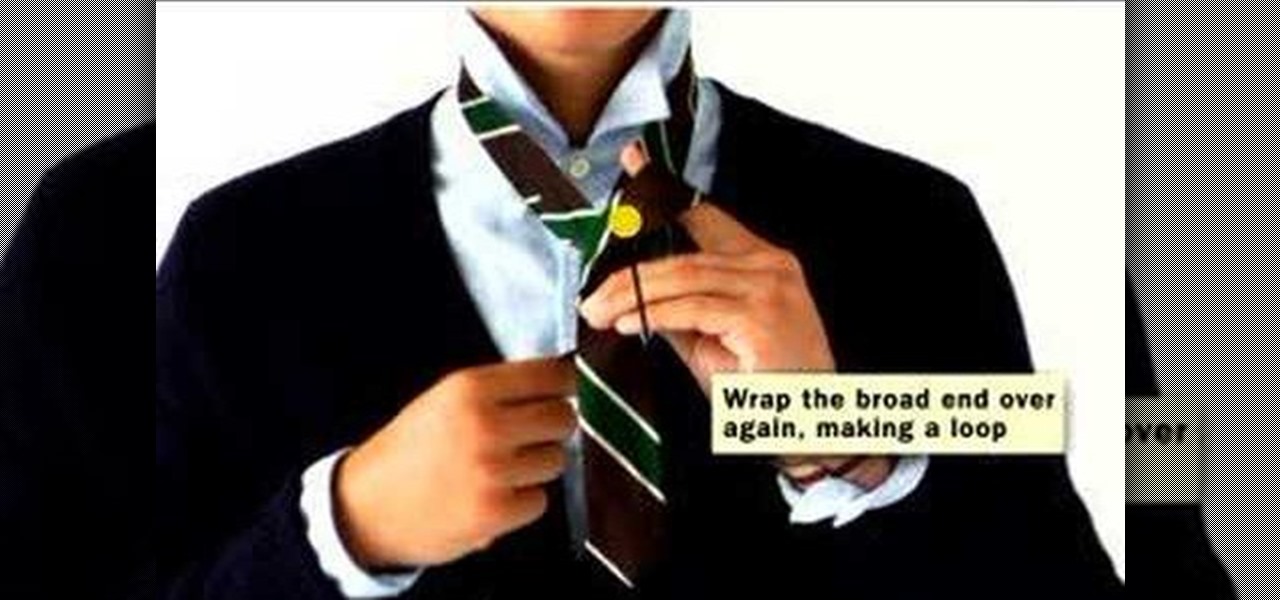
This video tutorial is in the Beauty & Style category which will show you how to tie a necktie in a four-in-hand knot. The broad end should hang lower and to the right. Take the short end of the tie in your left hand and bring the long end of the tie across it and hold it in your left hand. Then bring the long end back underneath the short end showing the back of the long end in front. From there you bring the long end back over the front of the tie to create a cross-section of the tie. Now p...
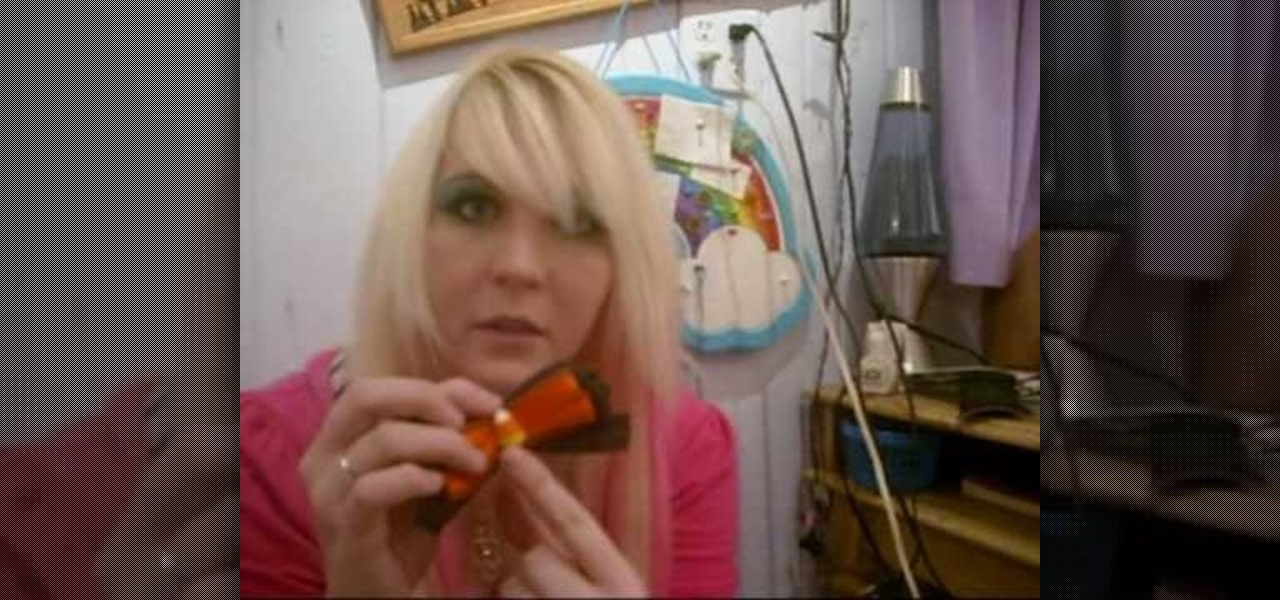
In this video we learn how to make Christmas bows. First, take the ribbon and then tie it into two separate one sided bows. Connect these together at the bottom and then continue to make these shapes and connecting them to the same brad. Once you are finished, put double sided tape on the bottom of it and then you will be finished with the bow! You can do this several times to make a whole bunch of bows or you can make it larger to create a huge bow. Have fun making these and use your own sty...
In this tutorial, we learn how to install crown molding to your room. First, choose the right size and style of molding for the room, then measure your room to find out how much you need. After this, you will need to buy a saw to cut the molding when you're ready to install. After you have the pieces cut, you will need to place these against the wall and then nail them in with a nail gun. Secure the molding to the joints in the ceiling and to the studs in the wall. To finish, putty the holes ...
In this tutorial, we learn how to curl your hair without a curling iron. First, you will need to section your hair so you have the bottom of it. Next, you will place the straightener at the root of the hair and twist the straightener. Then, pull the straightener slowly through the hair and twist at the end. When the hair comes out, you will have beautiful curls in the hair! Continue to do this throughout your entire head of hair. If you want smaller curls, use smaller sections of hair and if ...
There are few things we'd like to bring back from the '70s: After all, living through super flared bell bottoms, afros bigger than our body, and peace sign shades once was enough. Though we're glad the trendy style of the '70s has faded like yesterday's news, we do love pulling out our Disco Era dance moves.
In this video, we learn how to cut side bangs. Fist, you will need to grab some shearing scissors, a comb, a trash can, and water. Now, get your bangs wet in the area that you want it, then part your hair where you usually part it. Once you do this, separate your bangs from the rest of your hair and clip the rest back. Next, use your scissors and cut at an uphill angle from the bottom of your bangs to the top. When finished, continue to cut until you have the desired length. Keep in mind your...
In this tutorial, we learn how to cut layers into hair: the basics. Start out with dry hair and brush it out thoroughly. After this, grab the back of the hair and use a small comb to comb out from the head. Hold the hair at an angle, then cut it diagonally. Continue to do this for the hair on the back of the head so you create a bunch of layers in the back. This is a short look, so you may have to cut a lot of hair off in the beginning to get to the top of the head. Create a bob on the front ...
In this tutorial, we learn how to draw Ino Yamanaka. Start off by drawing the head, drawing lines in the center to use as reference points. After this, draw the rest of the body, including the hands, torso, and neck. Now start to draw in all of the details. Draw the eyes evenly apart, then add in frown lines, a mouth, eyebrows, and any other details of the face to make it complete. Next, start to erase the reference lines and draw in the hair of the character. Draw around your basic outline t...
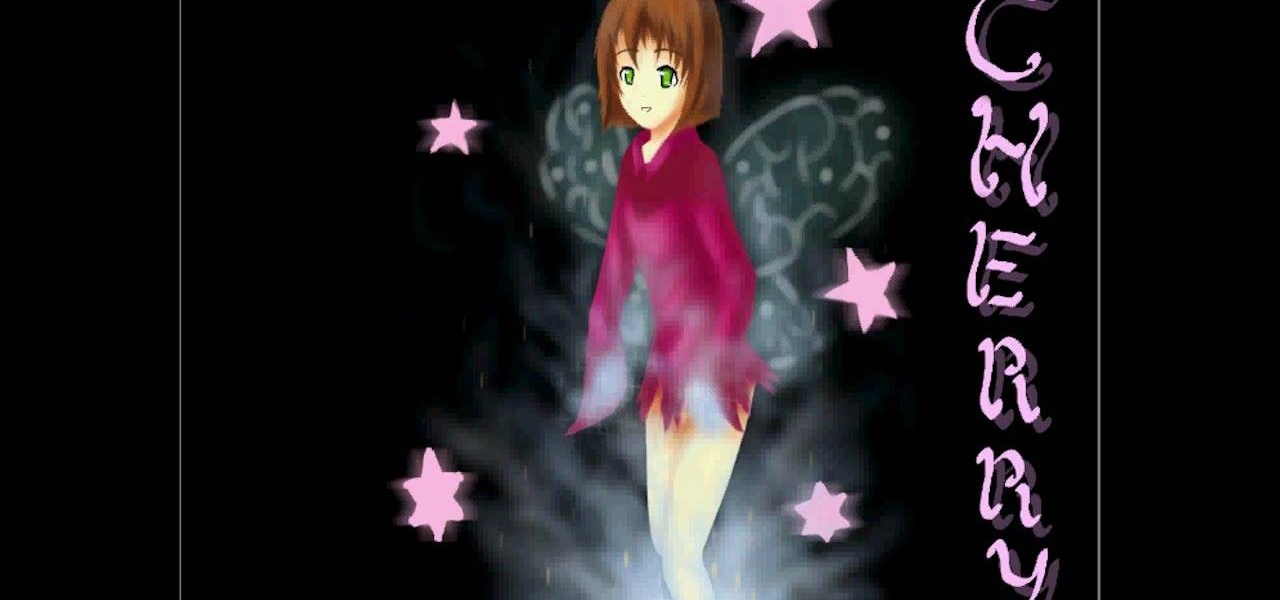
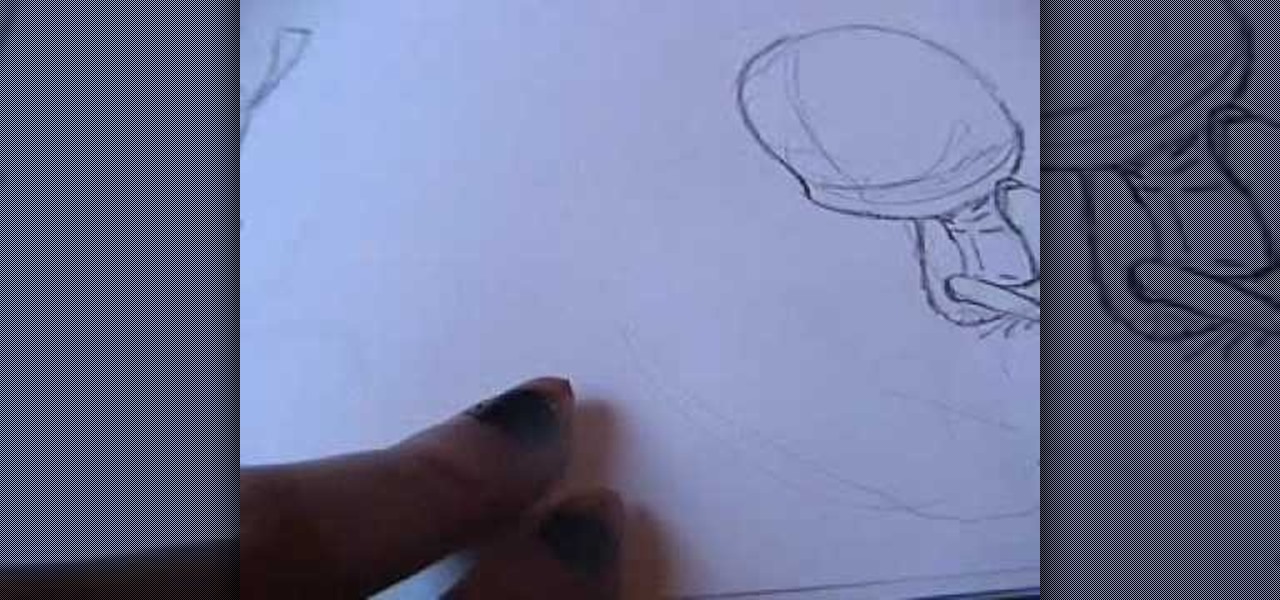
In this video, we learn how to draw a cherry fairy. First, sketch the entire picture before you start to draw in any detail. After this, draw in darker lines where you want the features of the body to go, then start to add in features of the face. Next, add in color to the face and to the outfit of the fairy. Make sure you give her hair and bangs that are surrounding her face as well. Once you have the color completed, create a white light coming from the bottom of the fairy and going up into...
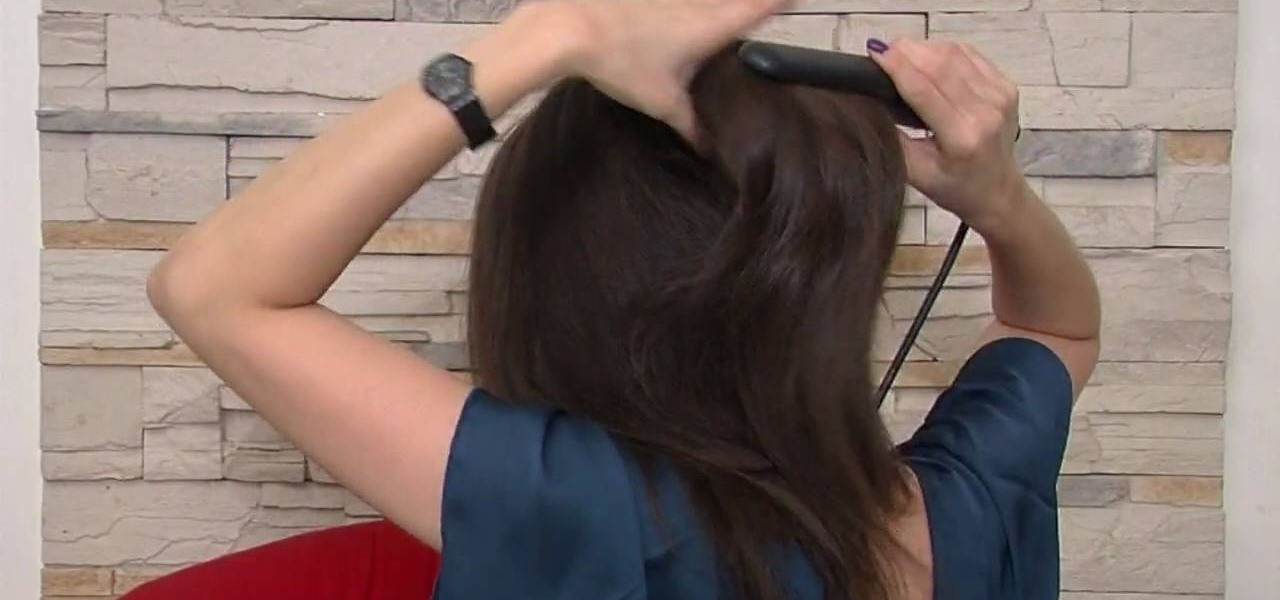
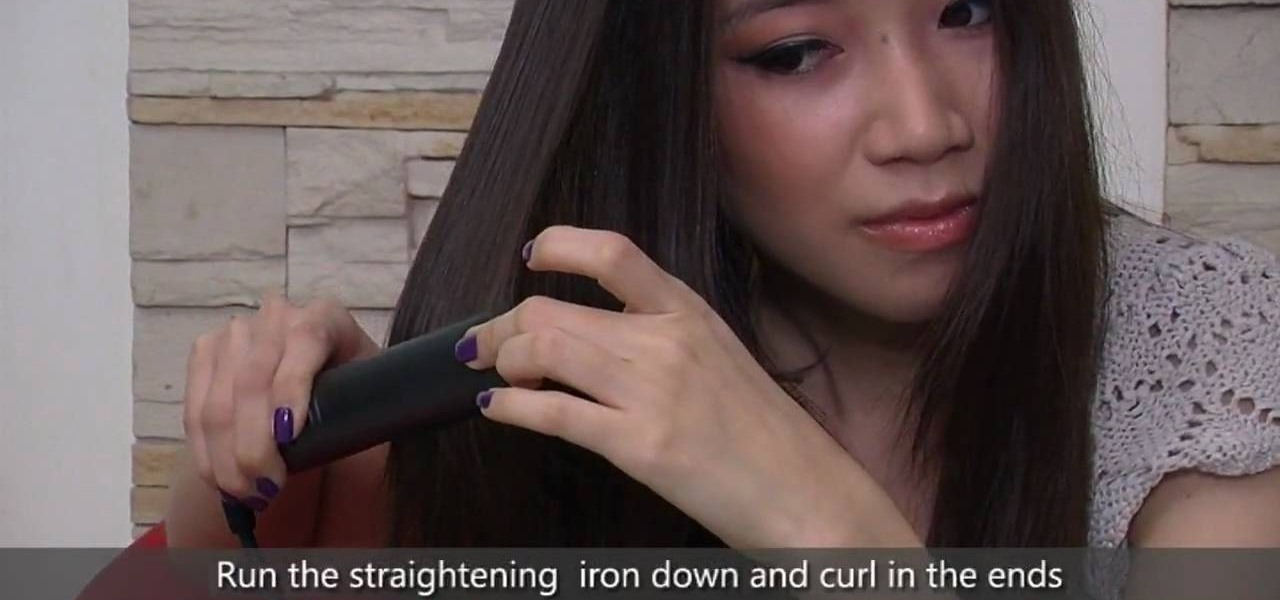
In this video, we learn how to curl hair using a straightener or flat iron. First, you will want to heat up your straightener in its highest setting, then spray heat protector in the hair. After this, take small sections of the hair, then place the straightener 3" down from the top. Twist the iron and then pull down straight through the hair, stopping just short of the bottom. When finished, you will have a nice and loose curl. Continue to do this throughout the entire head of hair, then spra...
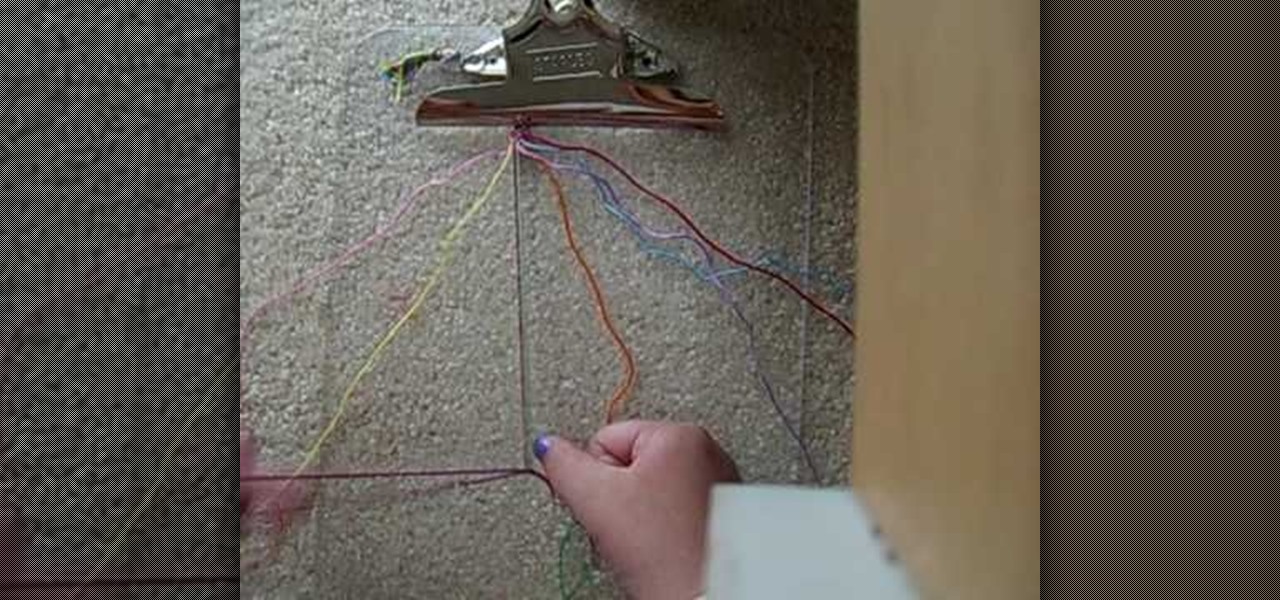
In this tutorial, we learn how to make friendship bracelets: the rag rug. First, grab eight different colors and arrange them all spaced out. Clip them to a clipboard at the top, then take your first strand and make a knot around your second strand twice. From here, you will take your third strand and tie it around your fourth strand. Continue to do this until you reach the rest of the colors that you have twice. Next, take the seventh and sixth strand and make a backwards knot. Then, do the ...
In this tutorial, we learn how to draw Husky. First, you will start by drawing the dorsal fin of the character. After this, draw the rest of the body including the lower and upper body. Also make sure you draw the head. Now, draw the arms crossing, then go over the drawing with a harder pressed pencil. Draw in the details of the face, then start drawing in the details of the fins and the upper body. Once the details are in, draw the hair and add in some scales along the entire body. Once fini...
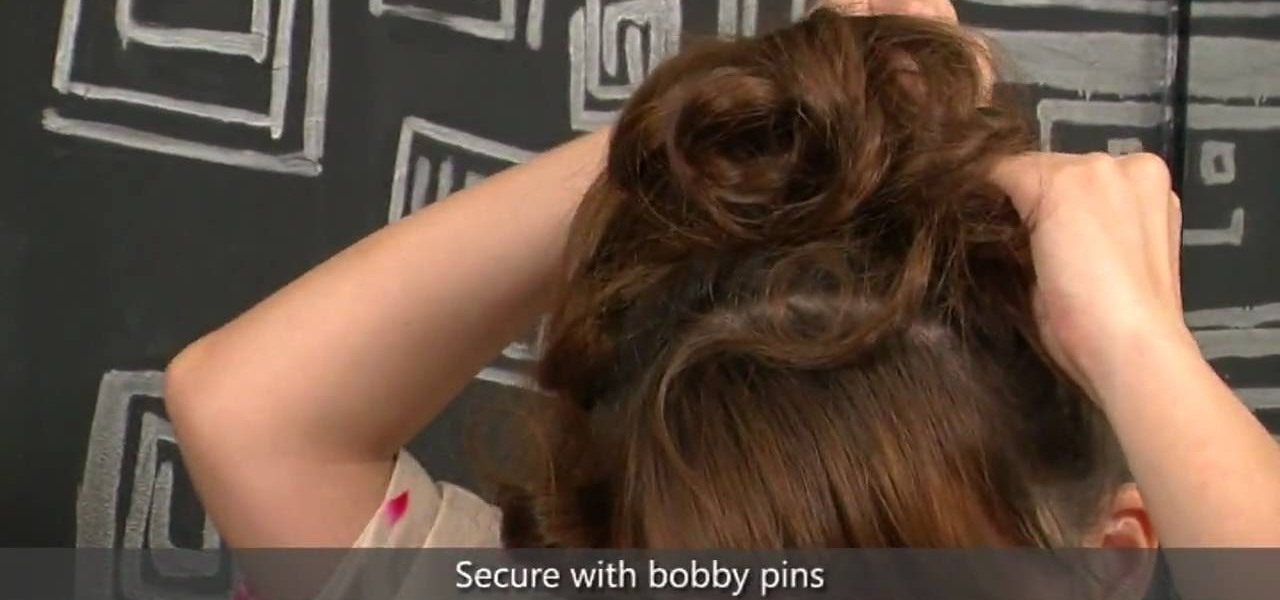
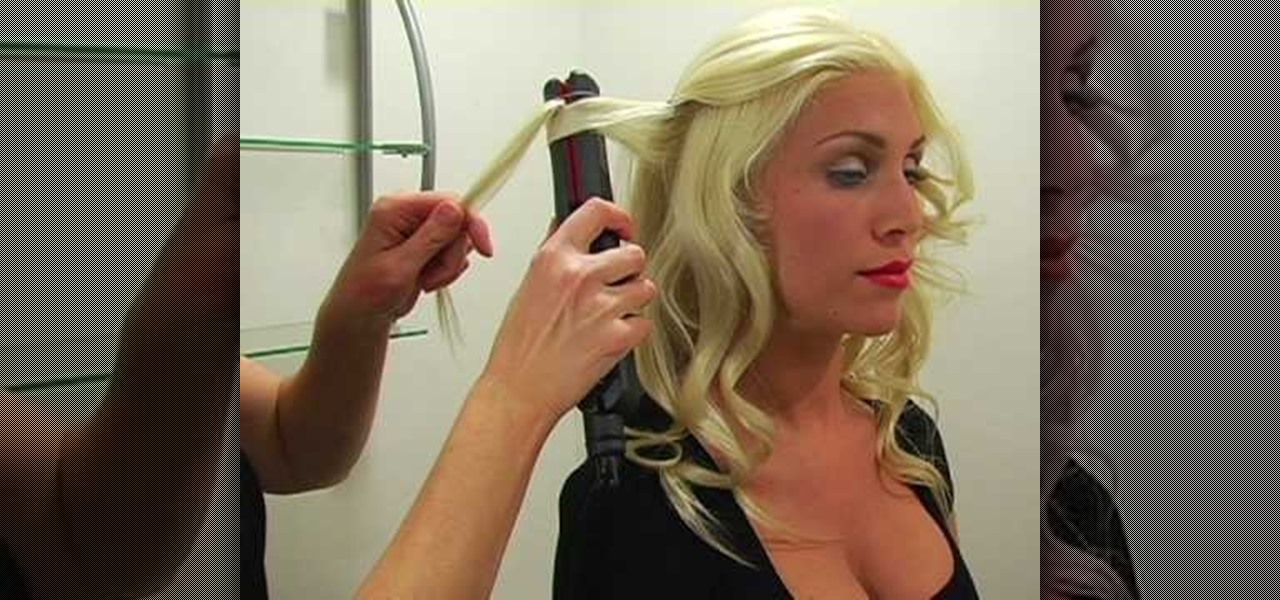
In this tutorial, we learn how to get big bouncy curls like Kim Kardashian. First, have straight and clean hair and heat up a 1.5" curling iron. Now, section your hair off and start with the bottom half. Wrap your hair around the curling iron, then after 15 seconds release the hair and spray with hair spray. Now, curl the next piece of hair facing the opposite direction. Continue to curl your hair all the way around until you have reached all the way around. Now, loosen the curls by brushing ...
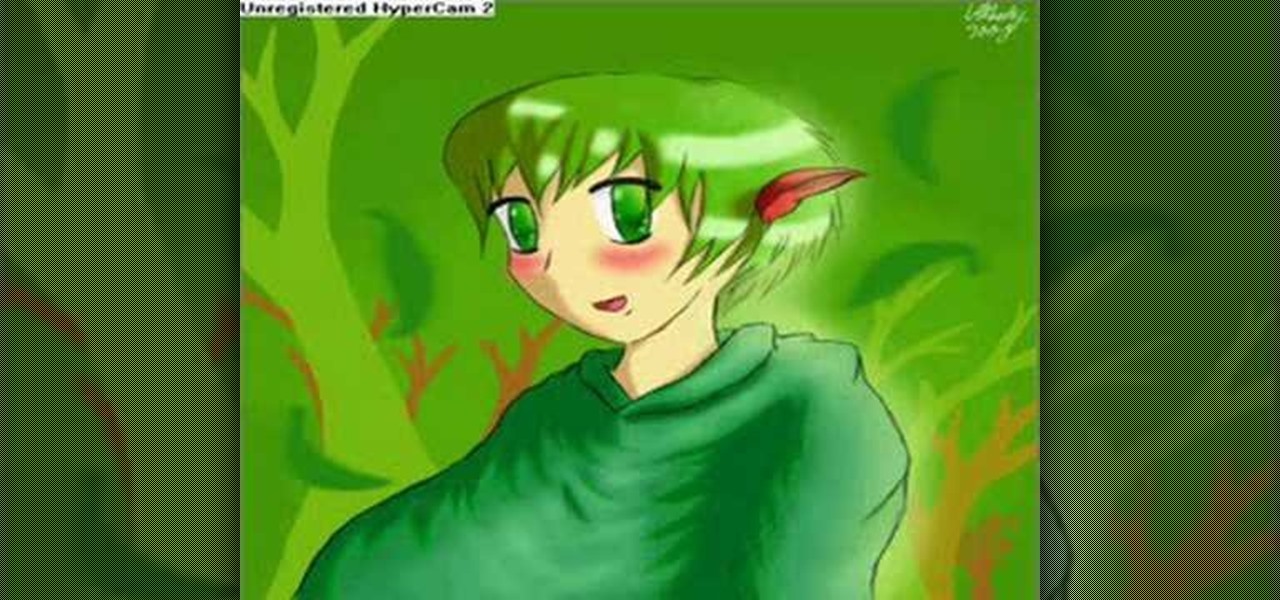
In this tutorial, we learn how to draw anime. Start off by drawing the outline of the anime, then color in the face, hair, and clothing. Add in the ear on the side of the head, then add in the features of the face. Next, add in shading to the face, hair, and clothing to add dimension to the drawing. Next, add in details to the face to make this look more realistic. Then, draw in trees and leaves for the background of the drawing and color them green and brown. After this, add in a light sheen...
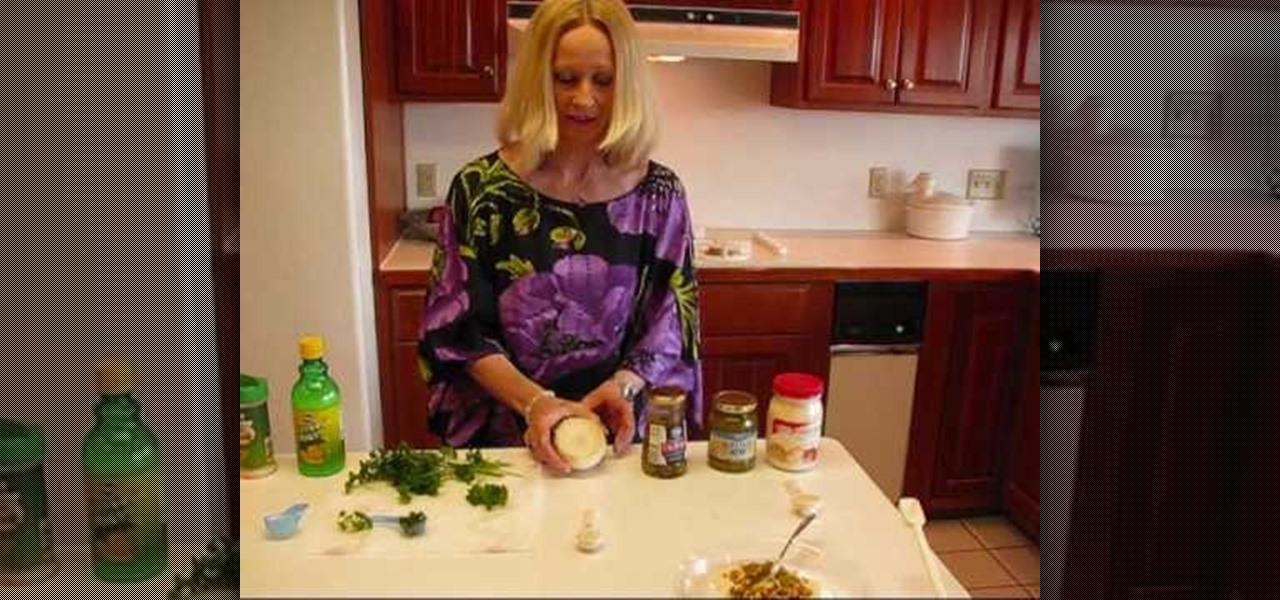
Serving fish tonight? Then you're going to need some tartar sauce, but not just any tartar sauce— tart and tangy tartar sauce. You can't buy this stuff in the grocery store! Betty shows you this sauce recipe that goes great with a catfish dinner.
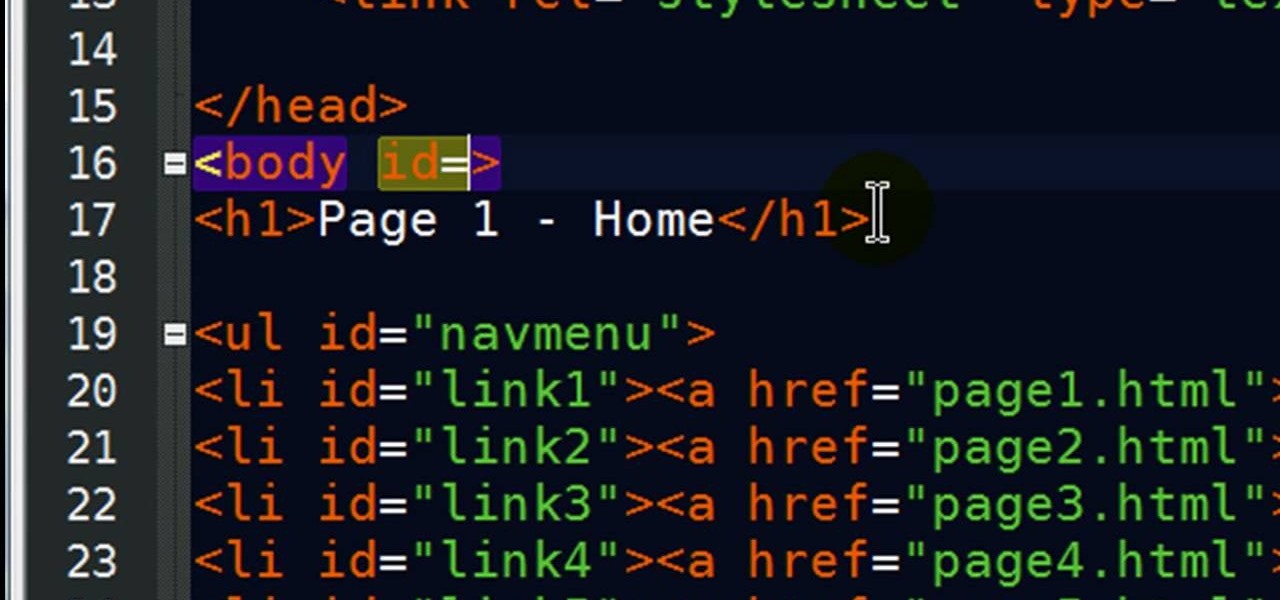
In this clip, you'll learn how to create a vertical nav menu with a current page indicator using HTML and CSS (cascading style sheets). For more information, including a complete demonstration, and detailed, step-by-step instructions, as well as to get started creating your own dynamic navigation menus, take a look.
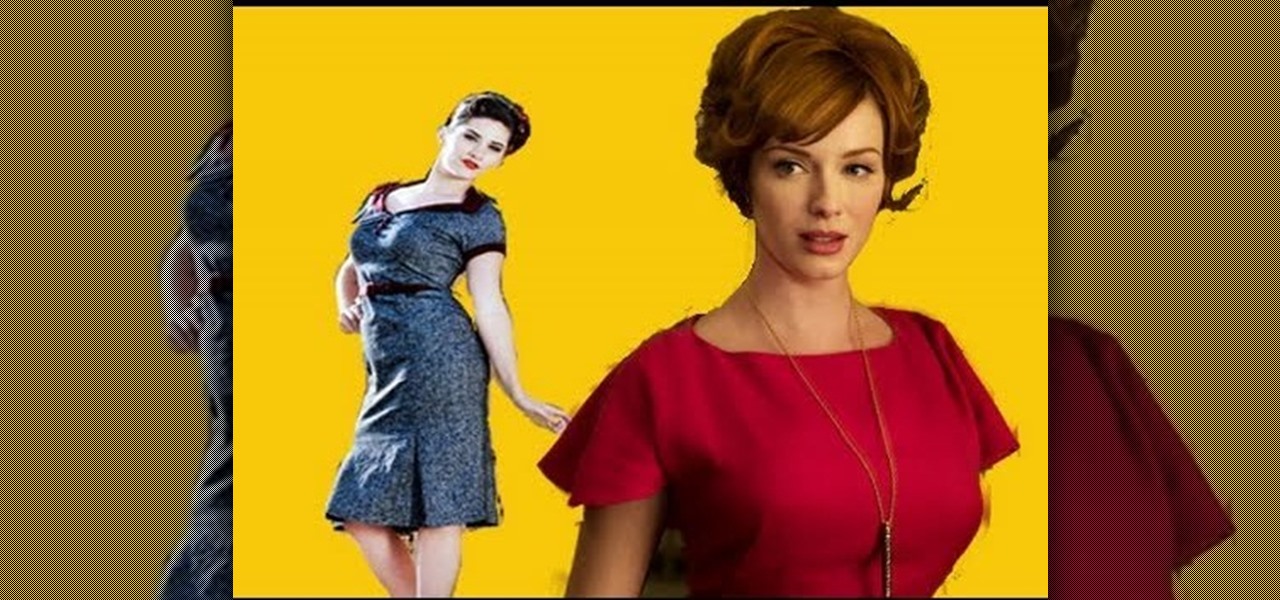
Oh, how we wish we could live in the "Mad Men" era. We'd forgo the lack of women's rights (the women's right's movement was at the time still gaining speed), but we would totally love to raid Joan Holloway's fantastic wardrobe and learn her hair and beauty secrets.
Modern day pin up girl Gwen Stefani would never leave the house without this retro updo inspired by ladies of the '40s and '50s. Inspired by the rockability style, it consists of a high updo pinned into a bun at the back and fake victory roll bangs in the front.
You may not be a Victoria's Secret super model just yet, but at least you got the right hairstyle! This hair tutorial from Zhareena will show you how to create a super sexy curly hairstyle inspired by those gorgeous Victoria's Secret models.
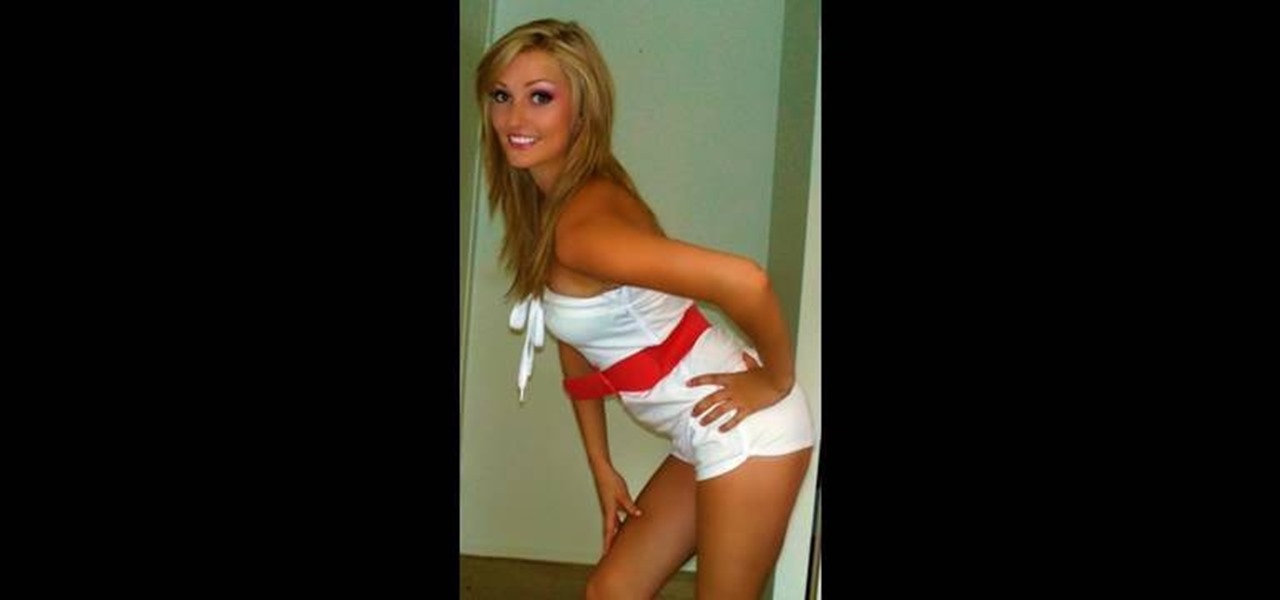
Rompers aren't just for babies anymore! Rompers and jumpsuits are totally in style these days, but not everyone can pull them off, but that's only because they don't really know how to wear them. There's a romper and jumpsuit out there for virtually everyone, no matter how big, small or curvy. One of the big worries with rompers is the dreaded cameltoe. If the romper you're trying on gives you a camel toe, then just go for a bigger size, and then you can tighten it up to your shape with acces...
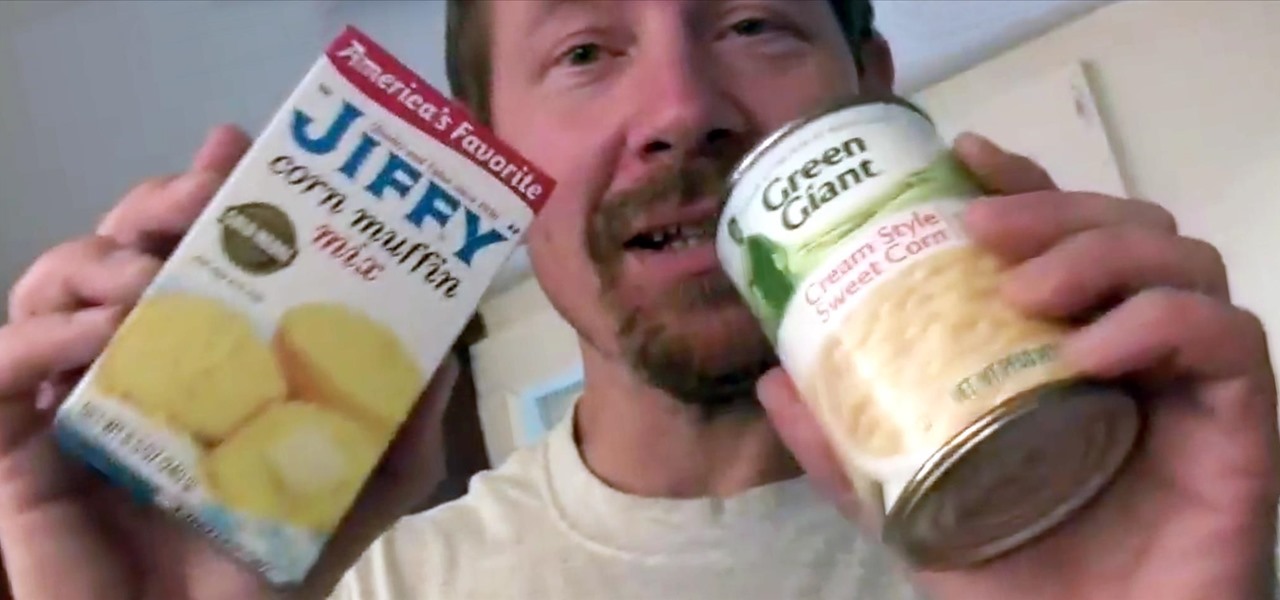
Mmm... cornbread. We can't think of any thing better to gobble down like a turkey on Thanksgiving. Whether paired with cranberry sauce or a slice of juicy rosemary-marinated turkey, cornbread offers the perfect blend of sweetness and tenderness.