This is an easy and fun project that will add a little light to any night time celebration. Take a few LEDs in any color you want, some basic electronics gear and a hot glue gun. This will be more vibrant than any glowstick you can find in the store, and will last much longer

With this thorough guide, you'll learn how to color correct footage in After Effects of Photoshop using the Curves tool. Whether you're new to Adobe's popular motion graphics and compositing software or a seasoned video professional just looking to better acquaint yourself with the program and its various features and filters, you're sure to be well served by this video tutorial. For more information, including detailed, step-by-step instructions, watch this free video guide.
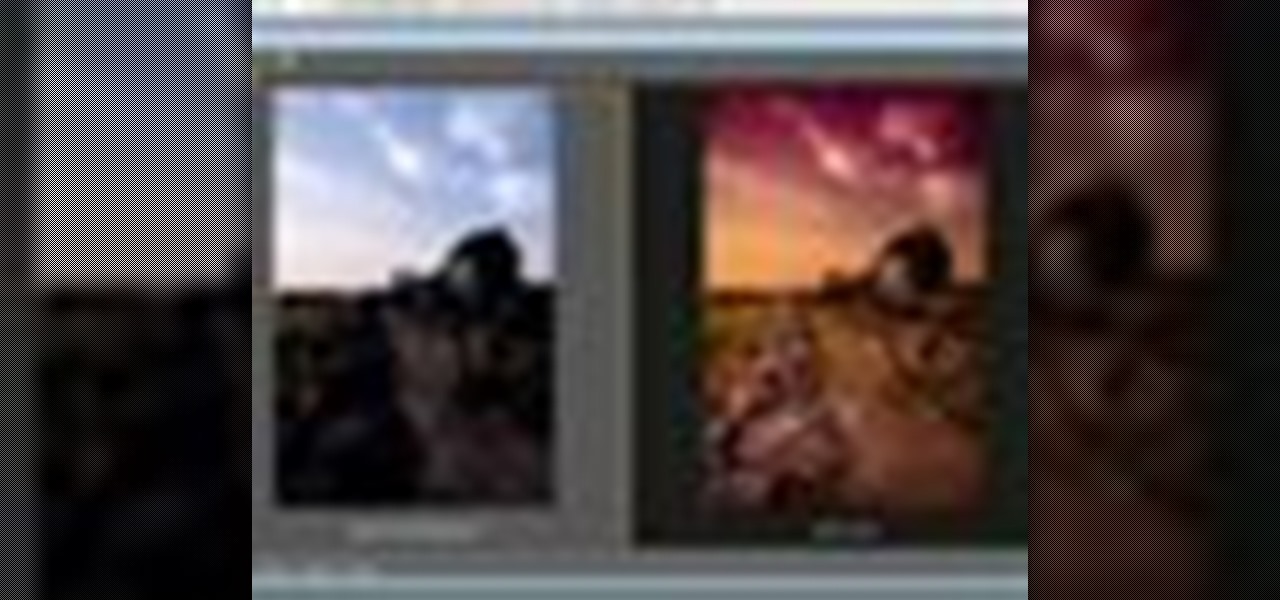
This video tutorial speaks about how to create a dramatic effect to an image using only Camera Raw in the Bridge program of Photoshop. In this example, the picture was first brought into the program and the fill light was turned upwards in order to lighten up the dark foreground. The white balance of the picture was changed to cloudy to add a nice effect and the color temperature was changed to make the picture appear warmer. The various parts of the picture can then be changed individually b...
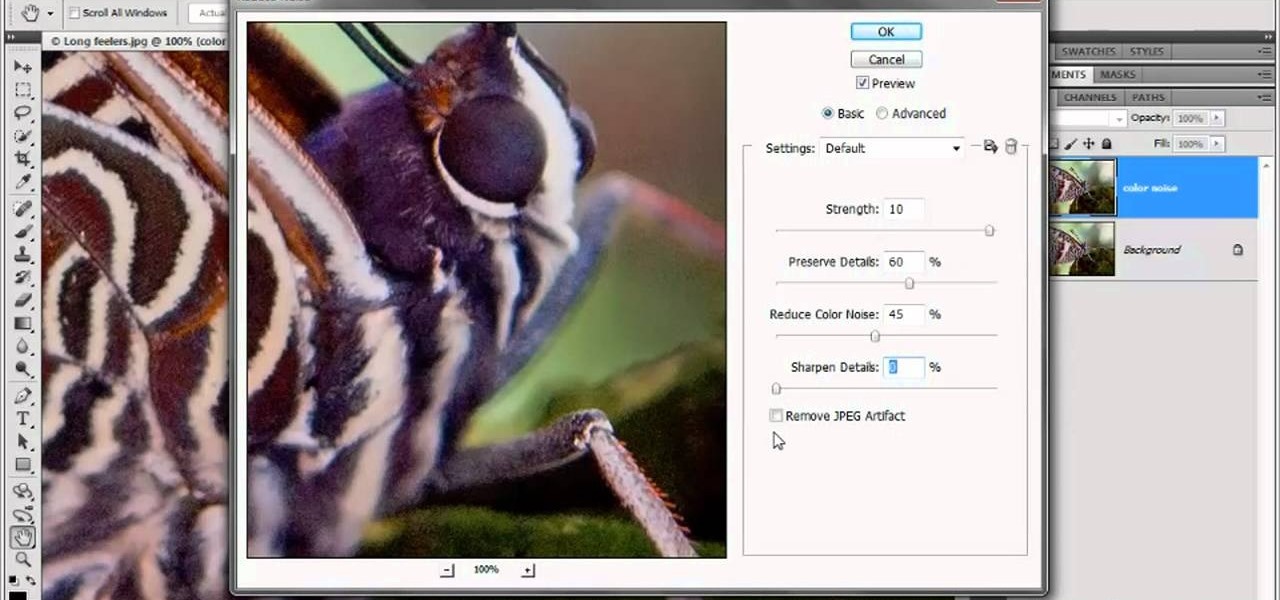
In this clip, learn how to reduce color noise with filters in Adobe Phtoshop CS5. Whether you're new to Adobe's popular raster graphics editor or a seasoned designer looking to better acquaint yourself with the new features and functions of the latest iteration of the application, you're sure to benefit from this free software tutorial. For more information, watch this video guide.

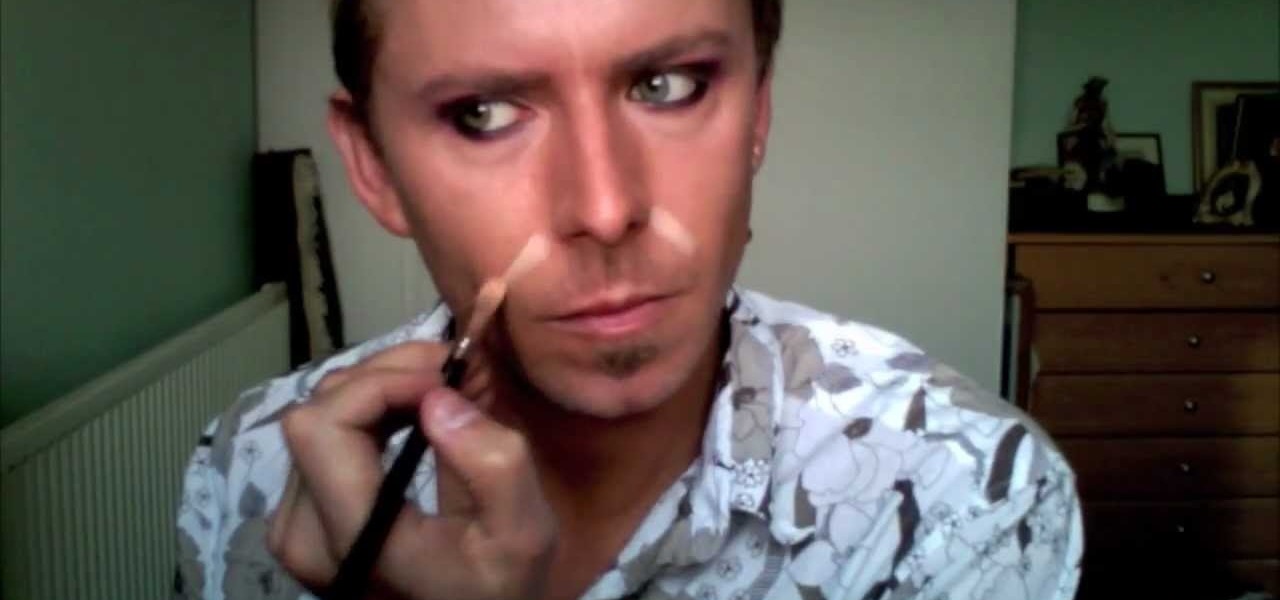
In this tutorial, we learn how to create an everyday contoured look. First, apply a full coverage foundation to your face. Mac is recommended, using a color that is a match to your skin. Blend this on the face using a foundation brush. Next, apply a loose powder over your skin with a brush to settle the foundation onto your skin. After this, you will brush a bronzer of your choice onto the cheek bones, followed by a blush brushed onto your cheekbones. After this, you can also brush the bronze...
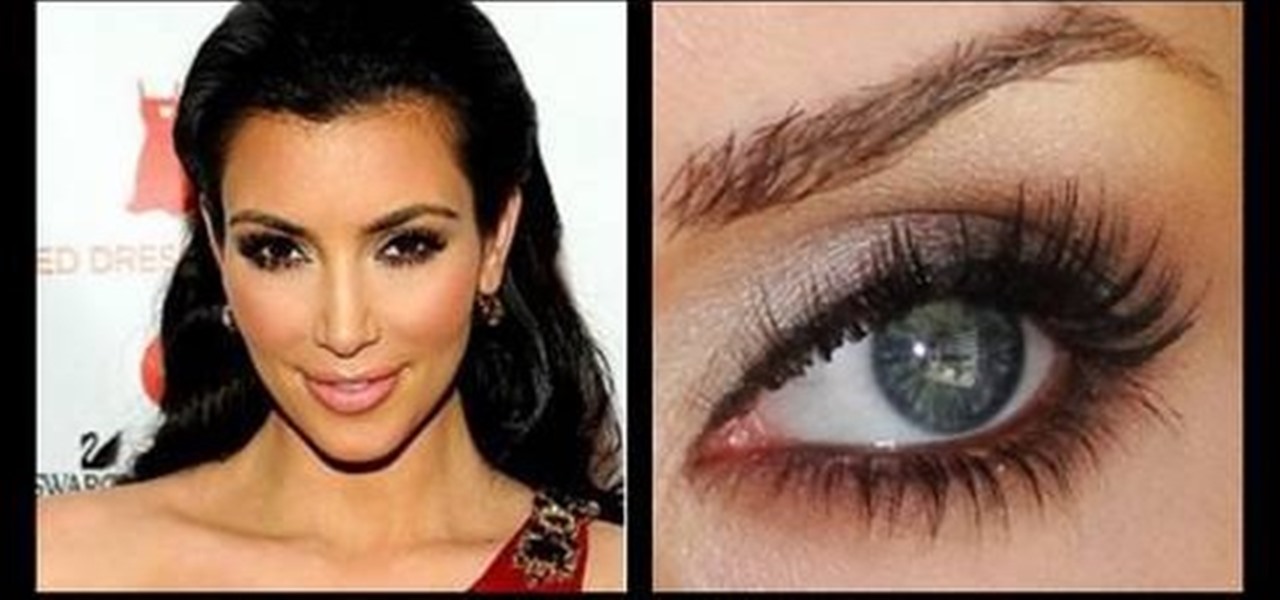
Kim Kardashian is one celebrity who knows how to work what she's got (and it doesn't hurt that she's utterly gorgeous, either). With darker, bronzy skin, perfect, sharp cheekbones, and gorgeous, huge eyes, she always chooses to highlight these features when she's on the red carpet.

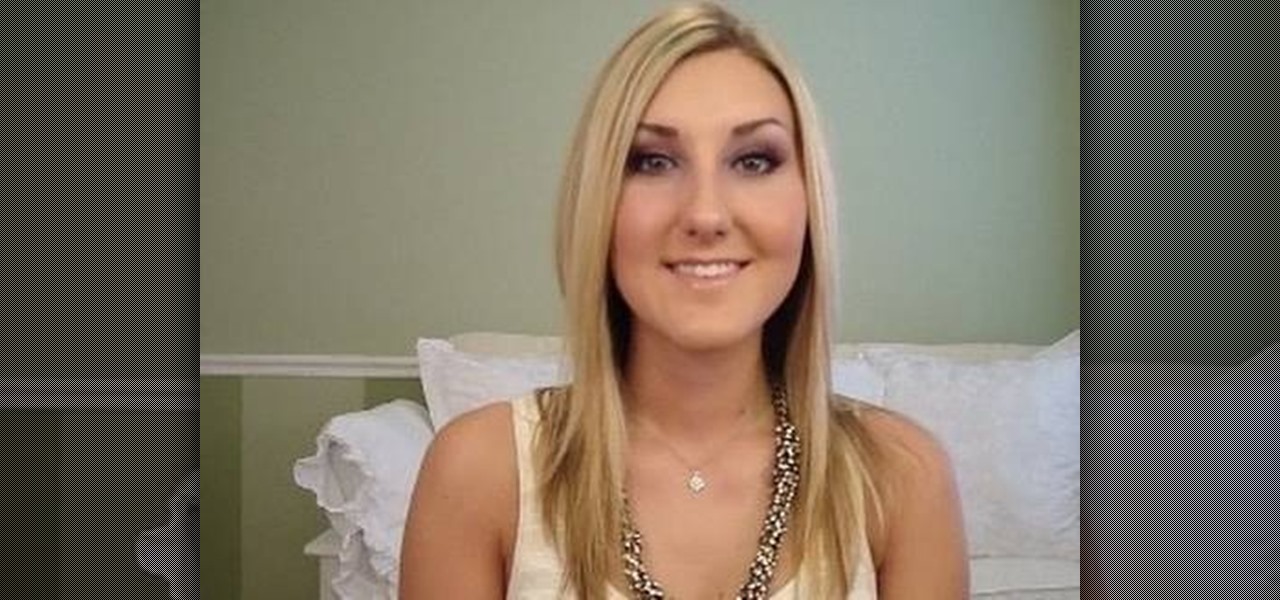
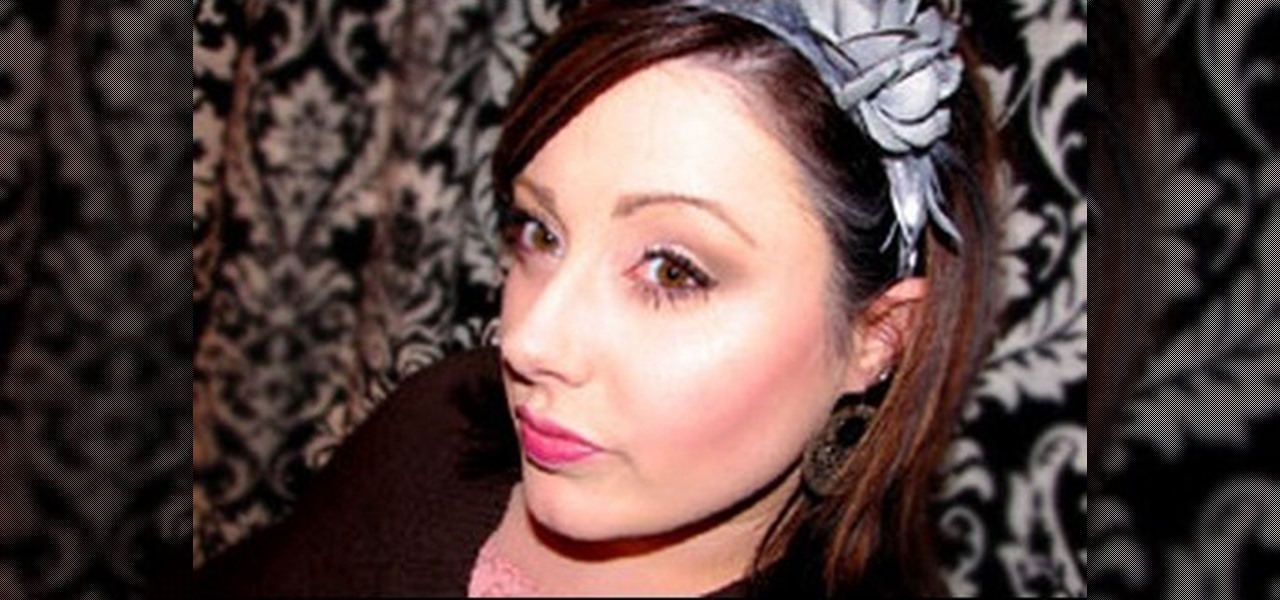
In this tutorial, we learn how to create a burnt burgundy contoured face and eye look. First, apply a primer to the entire eyelid as a base. Next, apply a shimmer pink eyeshadow with an eyeshadow brush. Next, line the lash line with black eyeliner, and then blend a burnt burgundy eyeshadow onto the outside corner of the eyelids. Circle the brush so the colors all blend into one but will still have the darker color on the outside. Next, take the same burnt burgundy color and pant it onto the b...
Purple and burgundy are not two colors that immediately come into mind when you think about eyeshadow colors. After all, deep reds and purples are much more suited to bold lipstick hues than to pretty peepers.
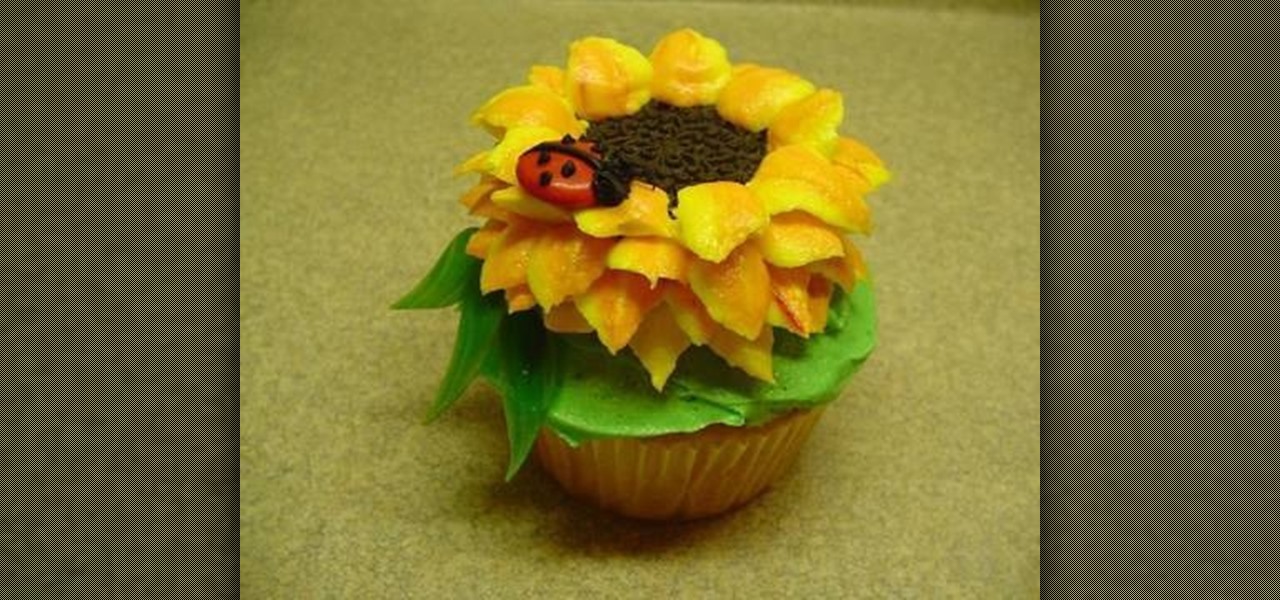
These cupcakes look a lot harder to decorate than they actually are. Using food coloring, icing, and clevery piping, you can herald the coming of summer with the pretty deliciousness of this sunflower cupcake.
Getting into editorial art department work? They may have you switching the color of a model's clothes, eyes, and/or hair in a number of photographs... so better get schooled on the subject now! In the following video, learn how to transform a brunette to a full blown blonde with a technique that is sure to come in handy in the future.
Make sure your video projects are broadcast safe with color correction and the Waveform Monitor in Apple's Final Cut Pro. This free video tutorial presents a complete overview of how to use the Waveform Editor and FCP color correction tools for increased darker blacks and whiter whites while staying with broadcast specifications.
In this video, we learn how to get a classy rich makeup look with Shar Connolly. You will first do your foundation, using a brush to make a matte look on your face. Use a concealer under the eyes to cover and dark circles. Next, grab a coffee eye pencil and eye line your upper and lower lids. When finished, color your entire lid with the same pencil, making the line darker on the top of the lid. Now, use a brush to mix in the color all over and give it a smudged look. Next, pat a light eyesha...
To make a lotus out of a single sheet of paper, use a colored, square paper sheet with a different center color (optional). With the colored side facing outwards, fold the sheet diagonally in half creating a center crease. Open up and repeat the step with the other corner to obtain a center point. Carefully fold the 4 corners towards the center point to form a smaller square. Repeat the same procedure with this square. Flip over and repeat the same procedure over again. The next step is optio...
First of all you have to draw the two big eyes and a curved line supporting them. Now draw and darken the two eyeballs. Draw the top portion of the head and make some curves of hair at the top. Draw the round cheeks on both sides. Now you have to draw the round beak and the mouth as shown. Then draw the narrow neck and then draw two lines around it. Draw two nostrils over the beak and then also draw the two eyebrows. Now color the drawing as shown. Fill in black color in the face and neck. Le...
Sessions Online School of Fine Arts brings you this tutorial video on painting. Search WonderHowTo for Sessions Online School of Fine Arts for more art tutorials. This video art lesson demonstrates how to use color as value in the art of portrait painting.
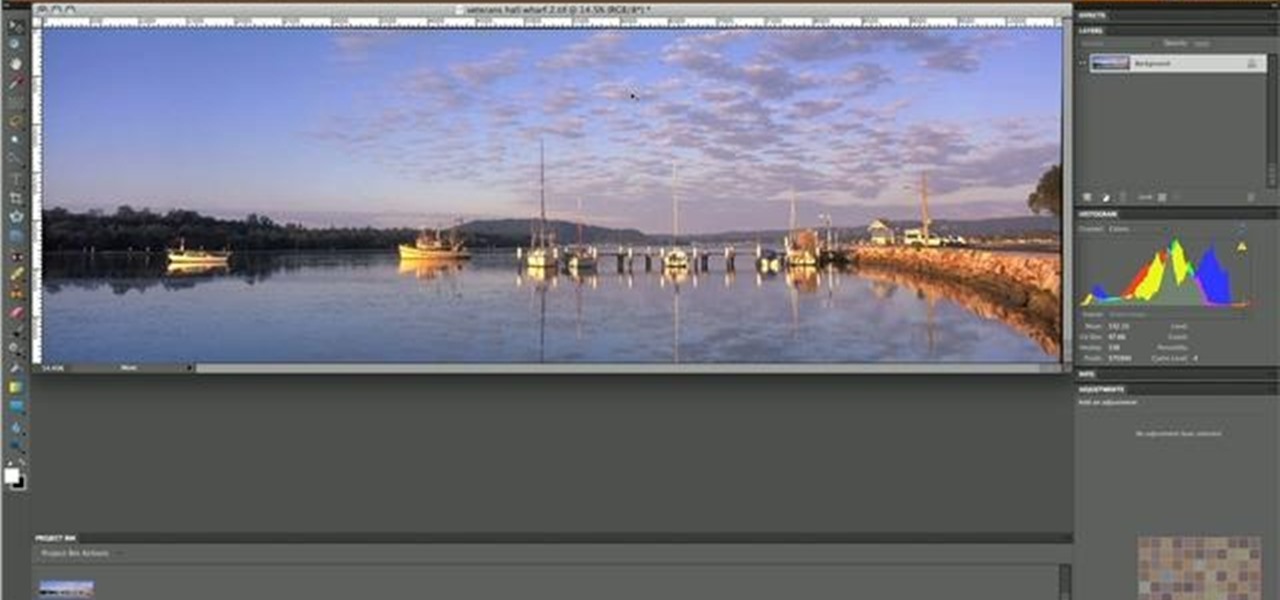
Aperture's color adjustment lets you make selective changes to hues within your image.
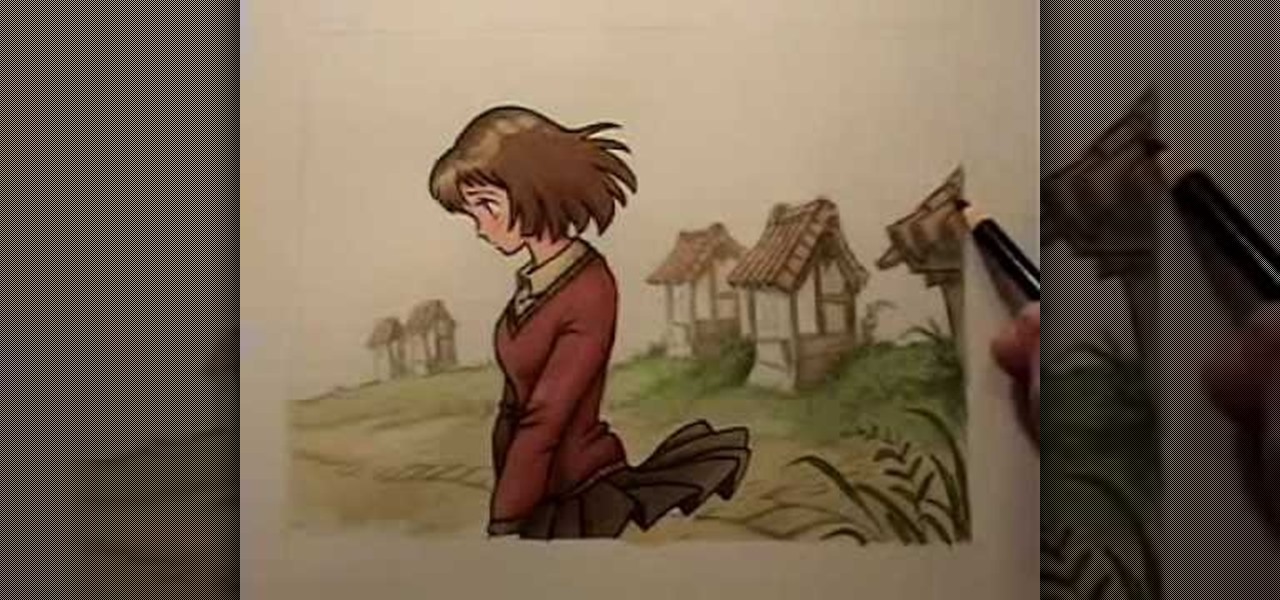
Watch this video to learn how to draw backgrounds for anime and manga. "Miki Falls" manga creator Mark Crilley presents a tutorial on how to draw and color backgrounds for a manga-style illustration. The emphasis is on using color and linework to create the illusion of depth.
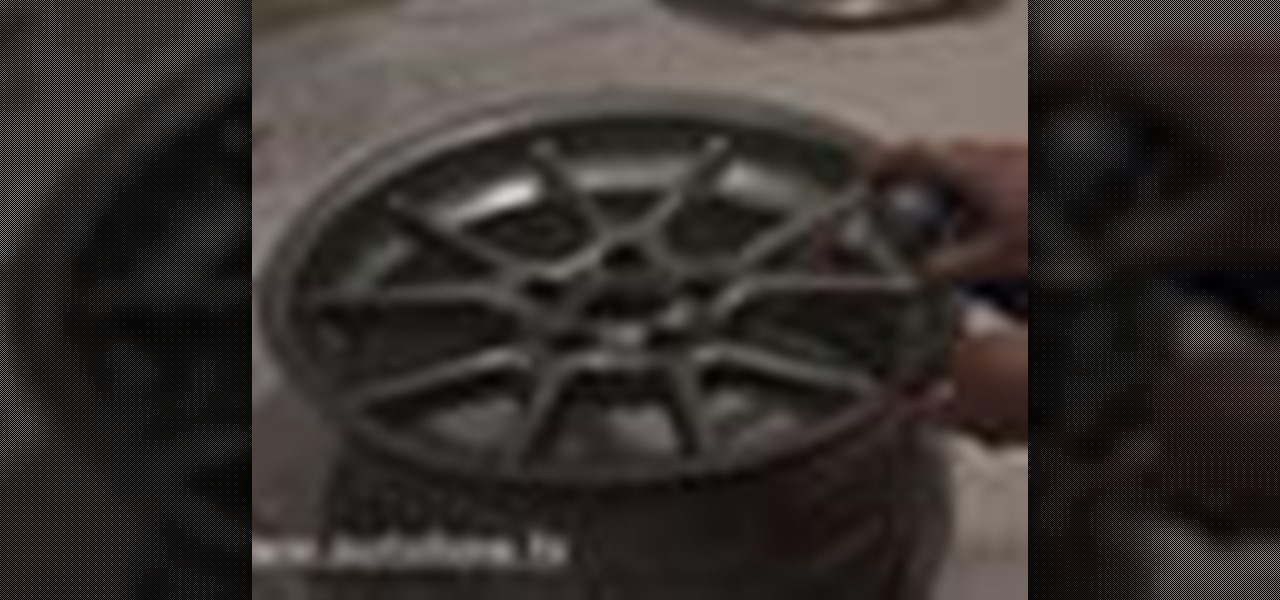
Is the finish on your rims peeling off or cracking? If so, you may want to refinish them. This video shows you how using Dupli-Color wheel paint.
In this episode, Jennifer goes over expressions related to colors in the English language. This is great for all levels of students learning English as a second language (ESL).
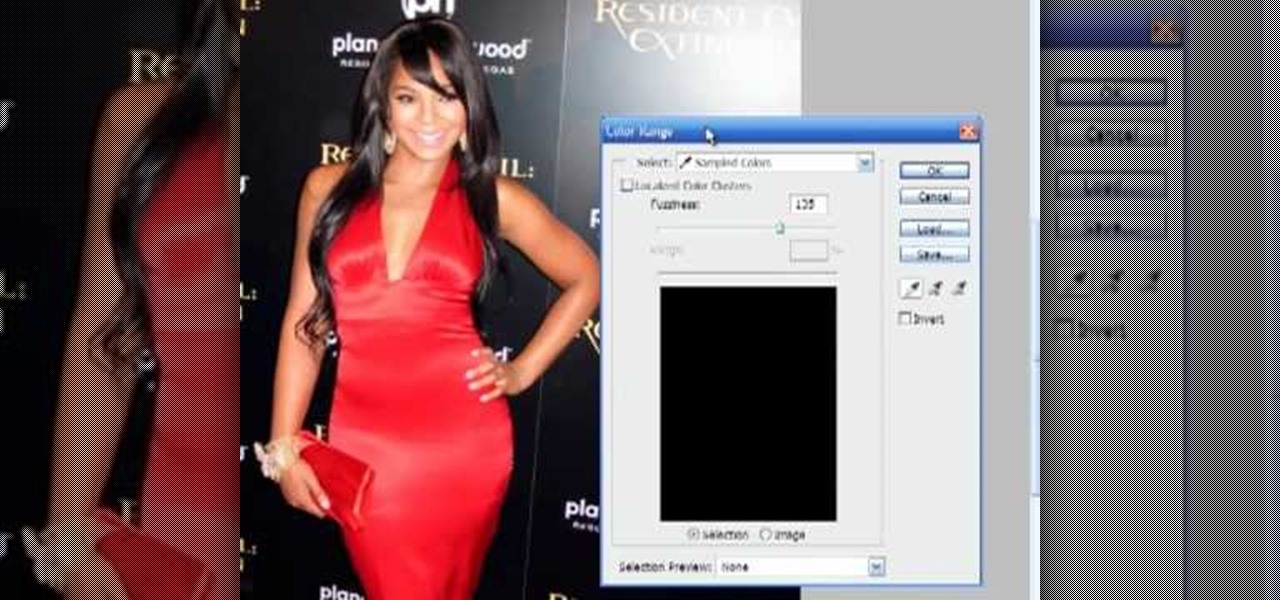
If you're using Adobe's Photoshop CS5 and want to change the color of someone's dress in a photo, this tutorial will show you how to do it. This how to is detailed, and shows a step by step guide for going from red to green, blue to yellow, basically any change you want to make! Photoshop is a powerful photo editing tool and with this trick you can choose the color of people's clothing instead of being stuck with what they were actually wearing.
Color correction is important, because it gives your finished film a professinal touch. This tutorial is a quick explanation on how you can do color correction on your digital movie projects by using the editing tools available in Adobe Lightroom.
In this tutorial, we learn how to properly apply blush. You will need a medium angled brush to help apply your blush before you begin. Then, make a fish face and apply a darker blush along the side to make your cheekbones show more. Use blushes that work for your skin, play around with different colors. Find a plum color or pink colors and mix them together as well. You only want to go a couple shades darker than your skin tone. Your cheekbones may have a flesh color, so bring the contour col...
Make your milk come alive using this at home science experiment! Mix a few drops of various colors of food coloring into a shallow dish of milk. Then add some dish soap, and put just a single drop into the middle. Then watch the ensuing cool effects!
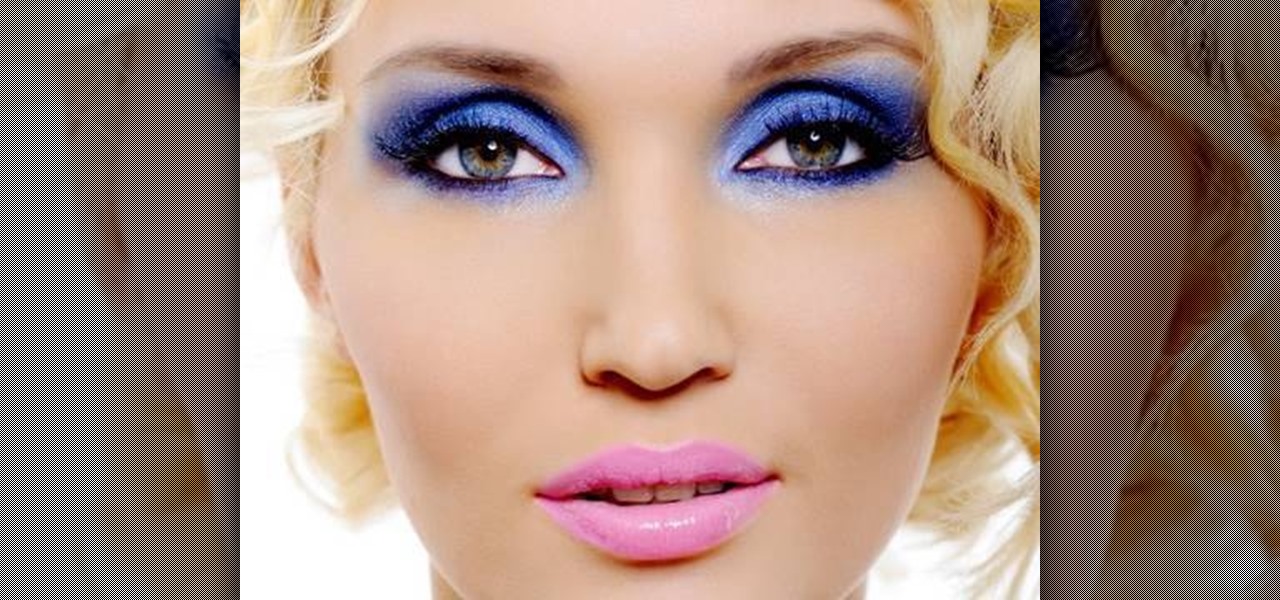
In this tutorial, we learn how to make your blue eyes pop with the right makeup. First, apply a peach or gold color all over the lid, then apply a sparkly gold color all over the lid over the first color. Next, apply a brown color and apply it to the crease of the eye and blend it in the outer edge. After this, use a dark blue color and apply it to the outer edge of the eye, creating a wisp effect on the outer part of the eye. Then, apply a white shimmer to the inner corner of the eye and mor...
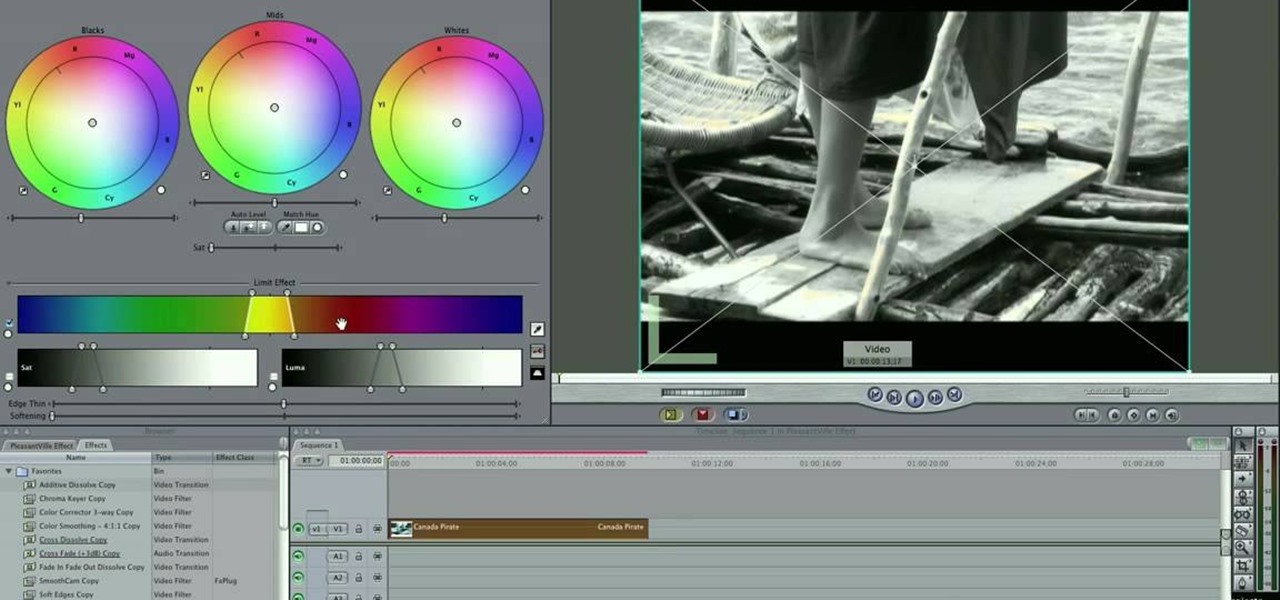
For this Final Cut Studio video tutorial, Zach King will teach you how to create the Pleasantville effect in Final Cut Pro. To create the Pleasantville color effect, you'll need to pick one very distinct color and use the Color Corrector 3-Way video filter. Let the Final Cut King show you how!
Color correct your digital photos in Adobe Photoshop Elements! Whether you're new to Adobe's popular image editing software or simply looking to pick up a few new tips and tricks, you're sure to benefit from this free video tutorial from the folks at IT Stuff TV. For more information, including step-by-step instructions on how to adjust an image's color balance using a levels adjustment layer in Photoshop Elements, watch this PSE guide.
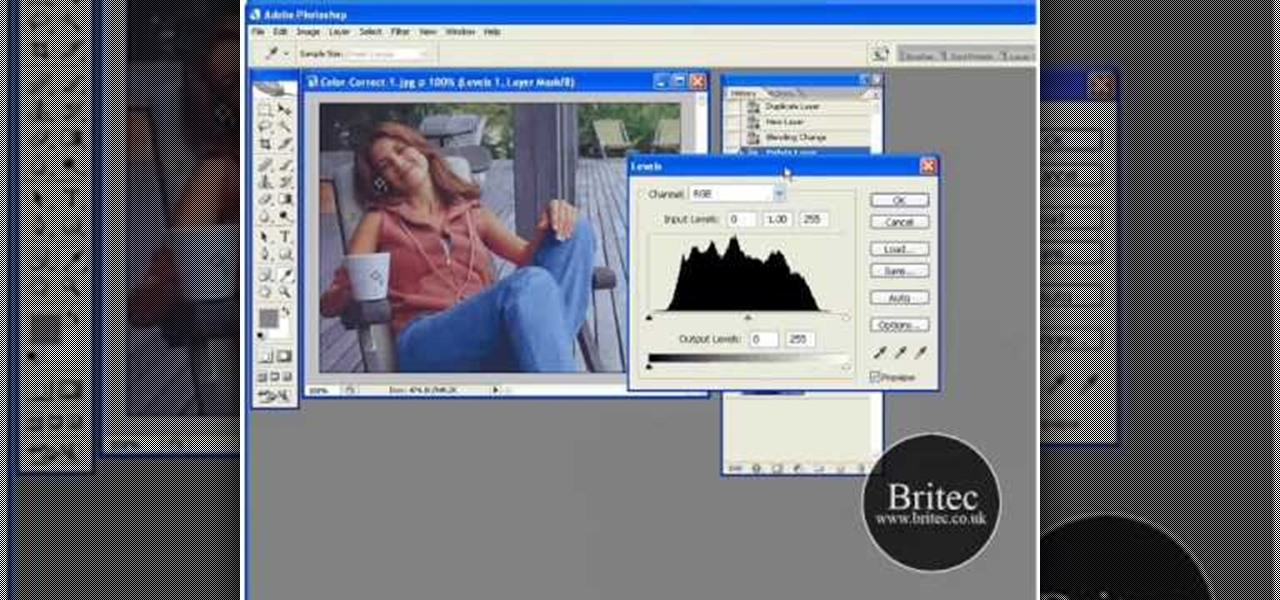
Want to color correct a digital image within Adobe Photoshop? Whether you're new to Adobe's popular image editing software or simply looking to pick up a few new tips and tricks, you're sure to benefit from this free video tutorial from the folks at Britec Computer Systems. This video offers a step-by-step guide on how to color correct images using Photoshop's curve adjustment tool.
If you want to paint a fade on your model cars you should first pick colors that will work well with each other. First, you should plan out your step. Divide the car into parts of the car where you will places your colors. You should designate where you mixing and solid areas are before you begin to paint. You should carry your mixes far and blend them well. When you do this, you'll want to lift up your airbrush a little bit. For fading, go to a solid color, and as you go to a new color lift ...
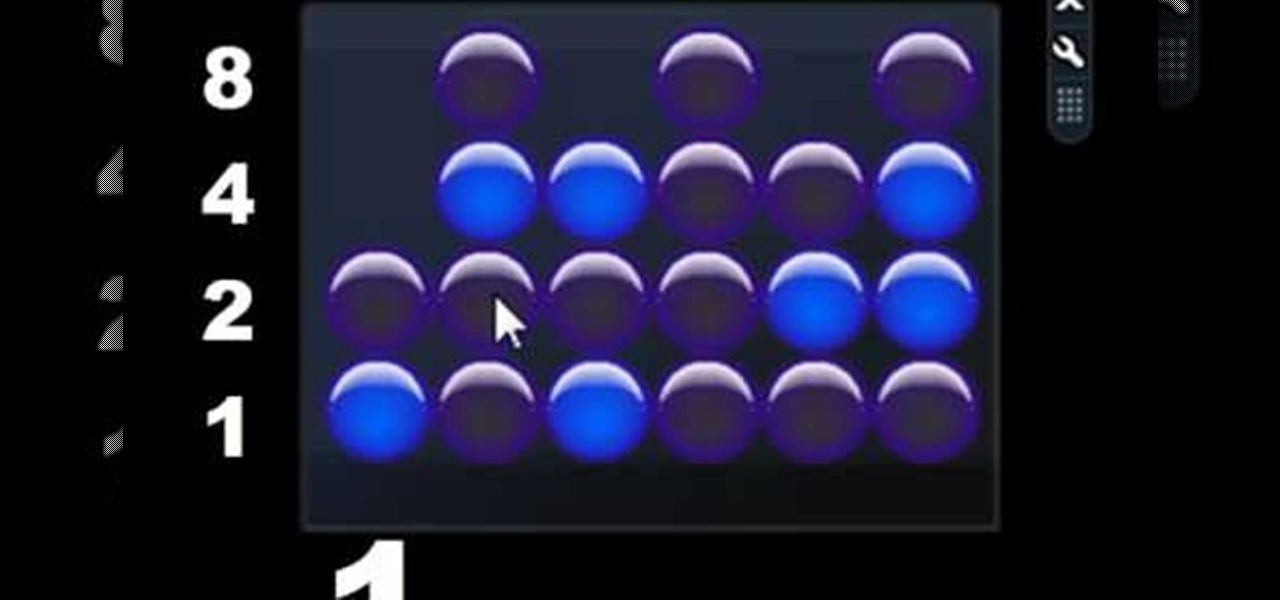
Sydus 93 teaches You Tubers how to read a binary clock by demonstrating the following process: A binary clock is made up of four rows and six columns of colored or uncolored dots. The rows, from bottom to top, represent the numbers one, two, four and eight. From left to right, columns one and two represent hours, three and four minutes and five and six are seconds. In order to tell time using the binary clock, begin at the left of your chart and simply determine which dots are filled in and a...
Before applying any make-up start by thoroughly cleansing the face and moisturizing after cleansing. Start with a good concealer to cover up and blemishes or dark spots. Apply liquid foundation with a stipple brush to ensure all over coverage of the entire face. Now using another brush apply your face powder, you can try MAC skin finish in your own personal skin shade. For the eyes, start with a white shadow and apply all over both lids. Now, take a medium-brown color shadow and apply to the ...
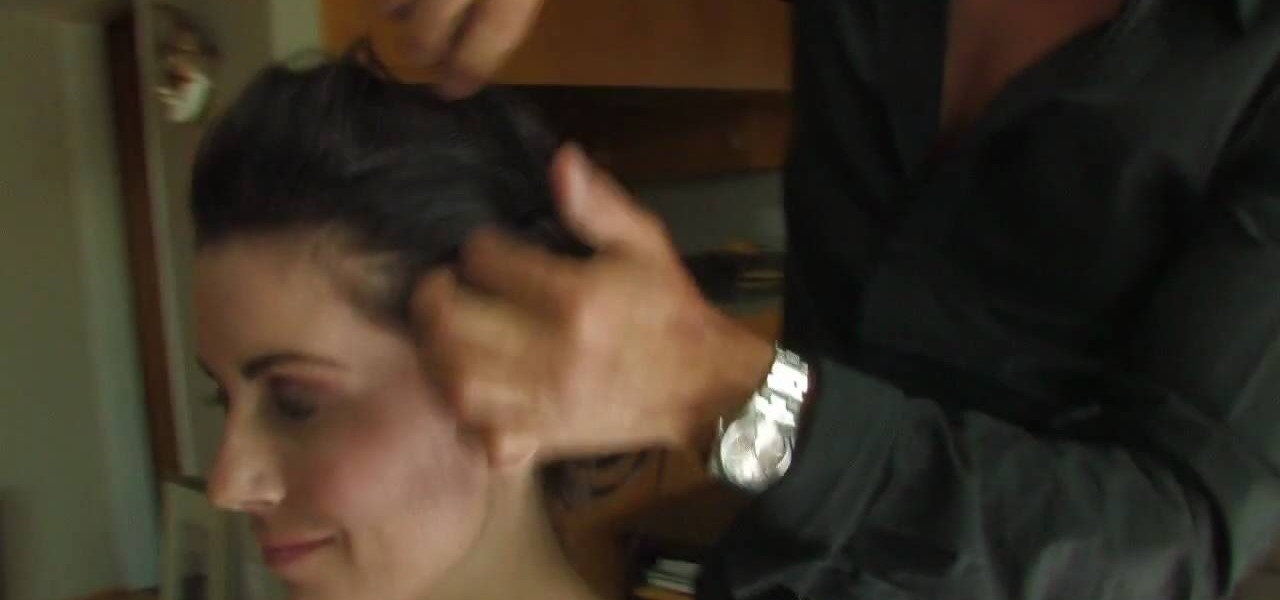
In the video Robert Steinken, who is a hair stylist tells that choosing a hair color is a very important task. Firstly it is important to go to a professional stylist who knows the products well. There are a lot of hair products in the market and each has a different effect on the hair. In the salon the professional can show you a color chart and show little pieces of hair which were colored to compare with your present hair color. They can tell what will happen once the product is applied on...
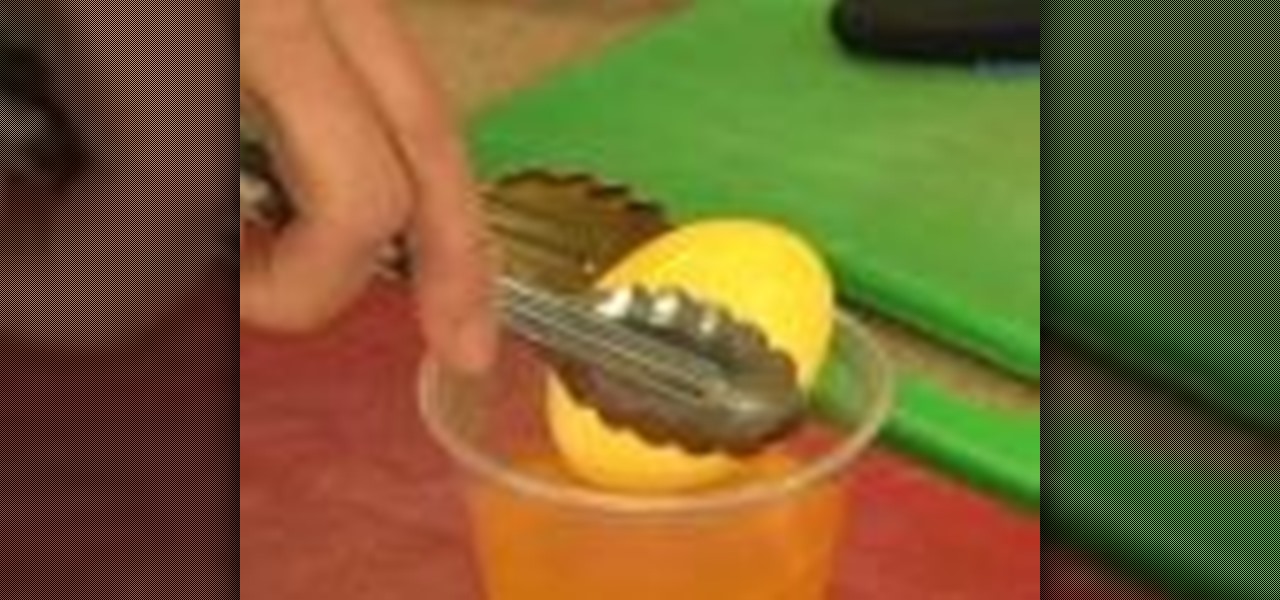
During Easter, everybody stocks up on the eggs because dying eggs is a great Easter activity. But there's something else you can try… dying and marbling. Watch this video recipe to learn how to dye and marble Easter eggs. A new twist to Easter eggs.
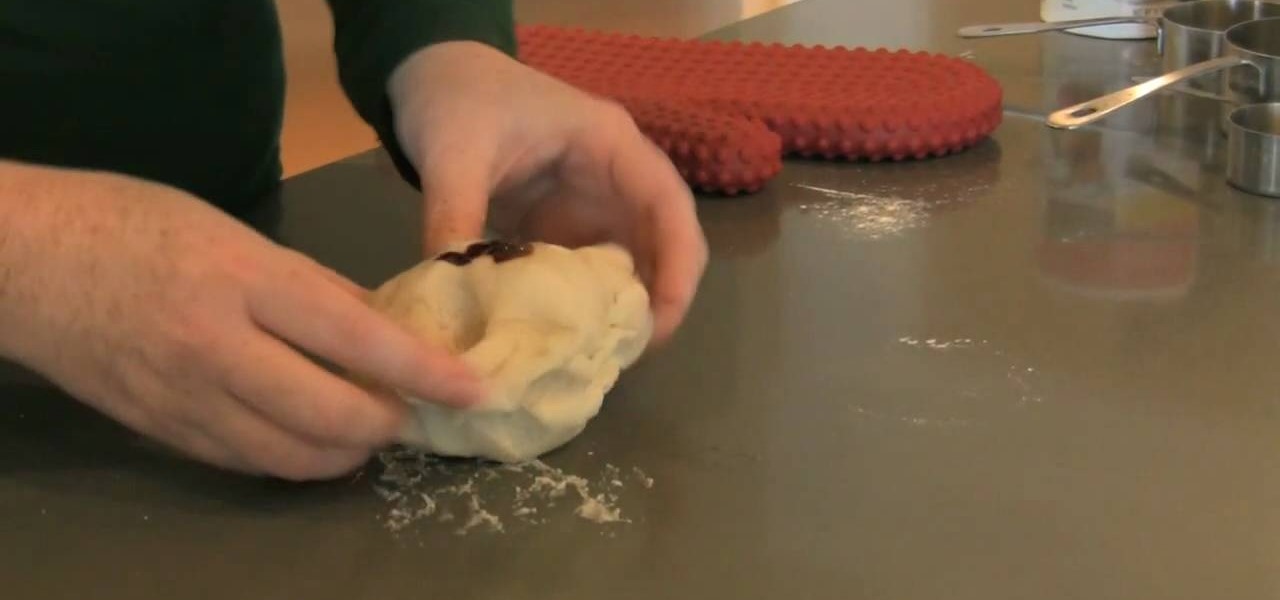
This video shows how you can make non-toxic play dough at home. The ingredients that you will need are flour, water, oil, cream of tartar, salt, food coloring, and peppermint essence oil if you want a scent. Put in a medium sauce pan 1 cup of flour, 1 cup of warm water, 2 teaspoons of cream of tartar, 1 teaspoon of vegetable oil, and 1/4 of a cup of salt. Turn on the stove to medium heat. Stir ingredients and you can add food coloring now or wait later and make separate colors. Remove when it...
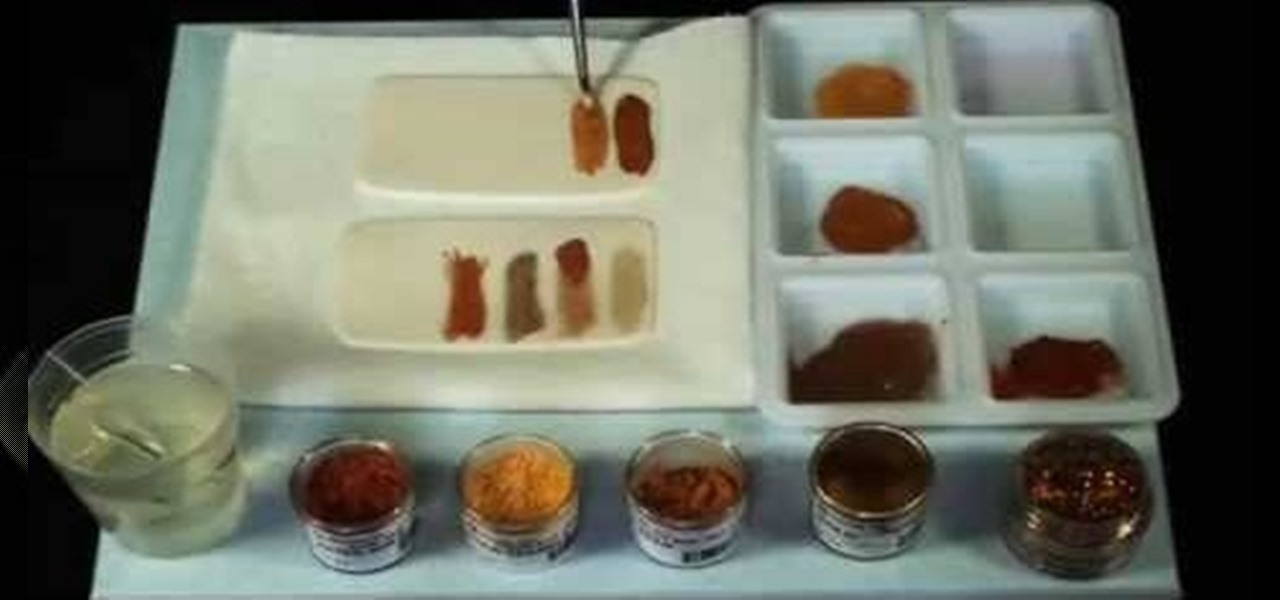
This is a video tutorial on how to design with gold dusts while decorating a cake. There are many different shades of gold available. Some of them are edible while some are not. The names of some types of gold color are Disco dust, Highlighter gold, Old gold, Sparkle gold, Aztec gold, etc. To intensify your colors, add some lemon extract or vodka to the color .When you use dry color, it looks a little lighter than when it is wet. The video will show you how to use different shades and types o...
This video shows you how to change the background color and watermark in your Word 2007 document. Both settings are found on the Page Layout tab. The background color can be chosen from a wide palette. The most frequently used colors are immediately applied to the current page as a preview. You can also choose to add a fill effect, like a color gradient, by clicking the Fill Effects item in the Page Color list. The watermark feature allows you to add either a predefined notice, an image or a ...
To create a Christmas ornament in Illustrator is very simple if you follow the steps below. Before starting the process one should ensure that all project files used in the tutorial is available. First by holding the shift key draw an oval, then go to gradient and create a new gradient which is at right side of the window. Now select red color and make it darker, then select 'Radiant' from the tool and switch the color positions. Select the ellipse tool once again and create a new shape on to...
Tutvid shows you how to add flare and dramatic color to your raw camera images (usually the format of a DSLR). In a step-by-step guide with narration, Tutvid takes you through the process of using CameraRaw (used as an extension of Photoshop but never really brings it in photoshop) to add desired colors to your picture. Pull up your raw file in CameraRaw, and press "Command" or "Ctrl + R" to open up the editing panel. With an example, he shows you how to bring out lights in underexposed (dark...
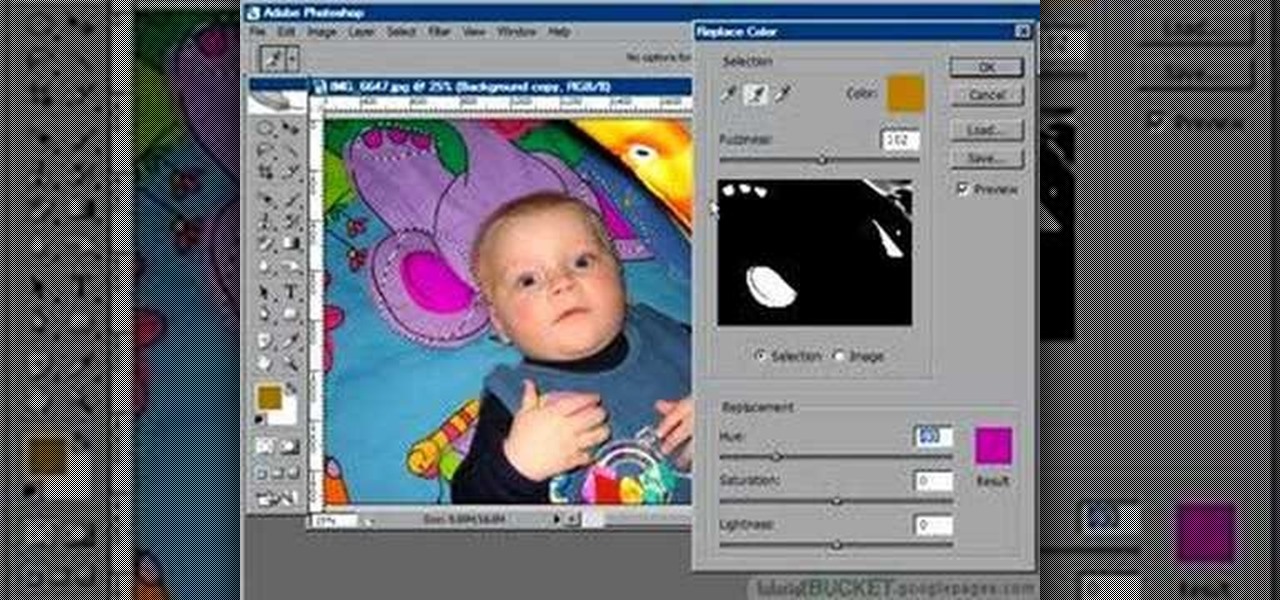
The replace color command is a nifty tool in Photoshop that enables you to change a color in an imagine very quickly and effectively. The tool requires that you make a copy of the original layer, as the replace color command is a destructive function. It requires parts that you want replacing to be selected first, to change the color of the desired areas. The result is a very realistically edited image, that is extremely fast and easy to accomplish.
Corynne from The Crafts Channel teaches how to make a stylish bird motif in minutes. You'll need: Colored/printed papers, scissors and glue. Get a colored paper. Draw a whatever bird image You like at the back. Cut with scissors. Get another colored paper of different color and draw a wing. Put a glue on the wing and glue it onto another colored paper. Cut it leaving 1/2 an inch over the first wing to have layers. Decorate bird as what You want Your bird motif to look like. Follow these steps...
To fill a gouge on a table edge you start by using auto body filler. Auto body filler is a two part substance. The catalyst is red and the resin is grey. When they are properly mixed it will be a uniform pink color. To keep the substance from spilling out of the damaged area put a piece of tape on the side of the table. Take some filler and force it down into the cavity formed by the tape along the side of the table. Let it dry for 3-4 minutes. Take the tape off and use a knife to trim off th...