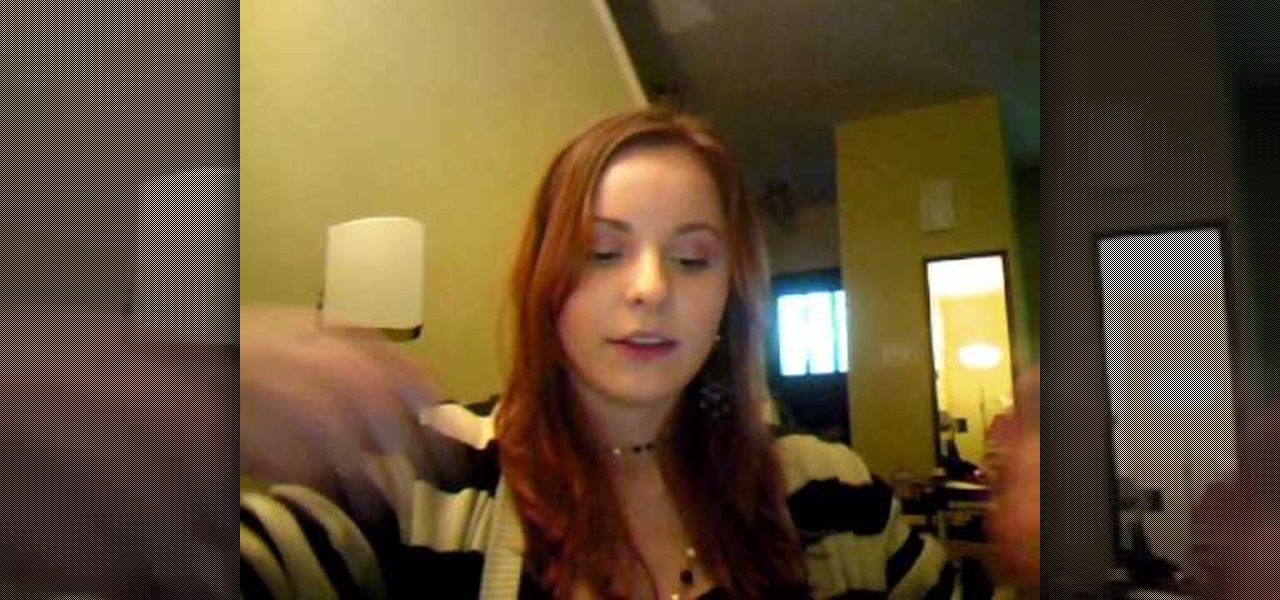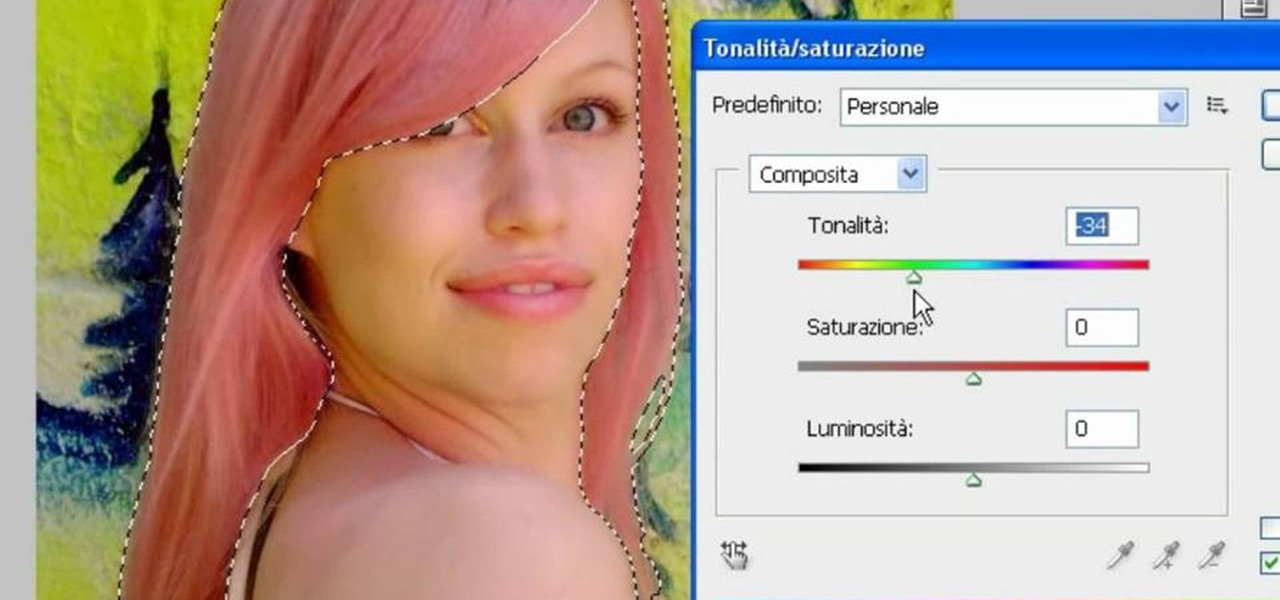
In this video, we learn how to use PhotoShop to change hair color.. First, select the mask tool inside PhotoShop. Now, zoom in on your picture and brush the hair that you want to change the color of. Zooming in and using smaller or bigger brushes will help you be more precise. After this, zoom out and press on the mask tool to create your selection. Then, select the marquee tool and right click and choose "inverse selects". Now, click on "image", "regulations", then "tonality/saturation". Now...
Robert with Roberts Productions demonstrates how to give your photos depth of field with Photoshop. You can create this effect by having a clear foreground and a gradually blurry background. First, duplicate the background layer. Then, go to filter and select Gaussian blur. Set it to a believable radius like 12 pixels. Create a mask by clicking on the mask icon. Then, make sure the foreground is set to black while the background is set to white. Next, go to the gradient tool and make sure tha...
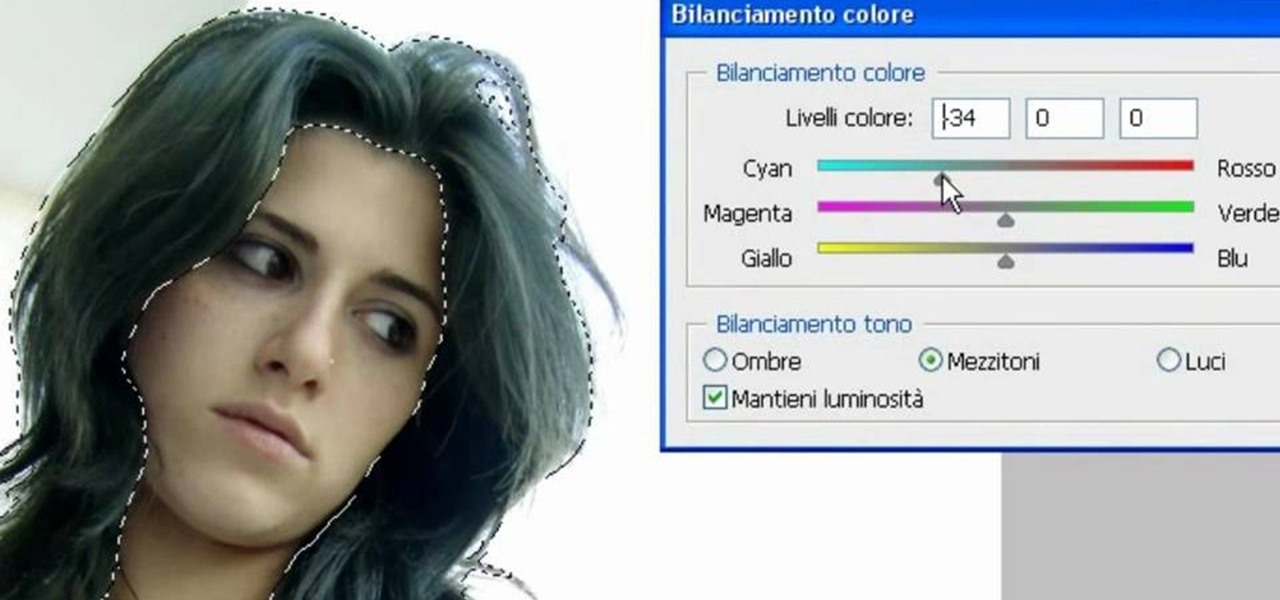
In this video, we learn how to change the color of dark hair in PhotoShop. First you will want to open up PhotoShop and open up the picture you want to change, zooming in so you can see the hair up close. Next, open up the mask tool, then use the brush to color the hair. This will only highlight the hair to change the color in the future. Use different sized brushes when you need to. Once you've done this, click on the mask tool to create the selection. Now, select the marquee tool and click ...

River City Graphix Tutorials demonstrates how to make a reflection in Photoshop. First, fill the background layer with black. Then, select the text tool and a color of your choosing. Type the words that you would like to reflect. Next, duplicate the layer to make a copy of the layer. Hold shift and bring it down, setting it on the bottom of the other layer. Select the rectangular marquee tool, right click to get the free transform tool. Right click again and then flip the image vertically. Se...
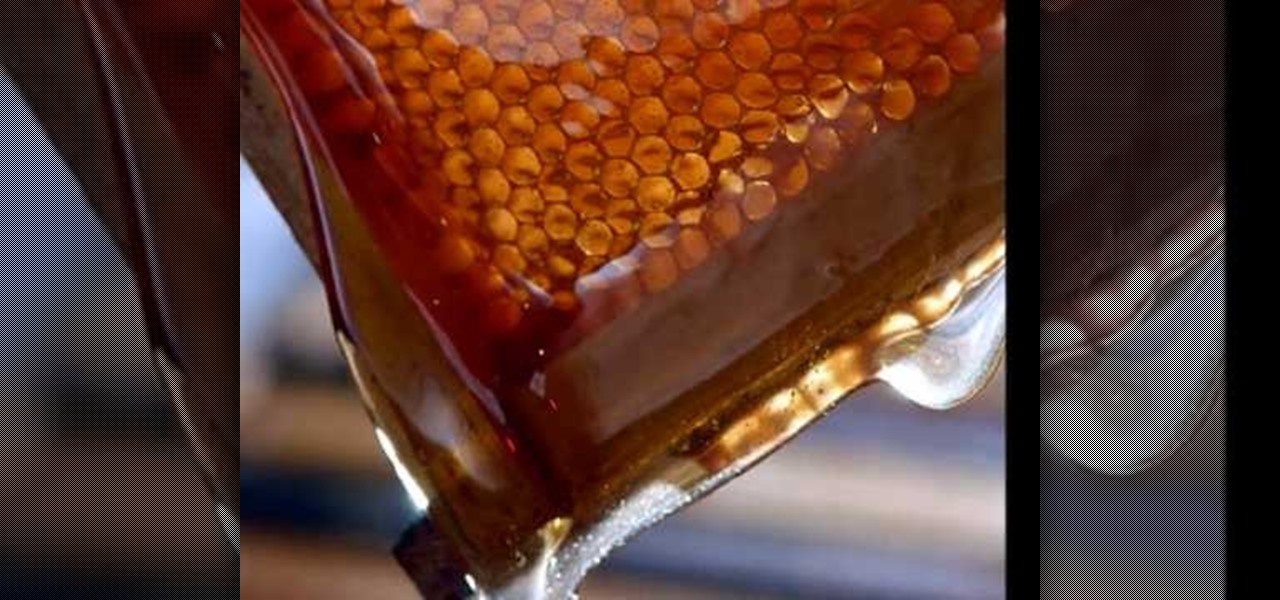
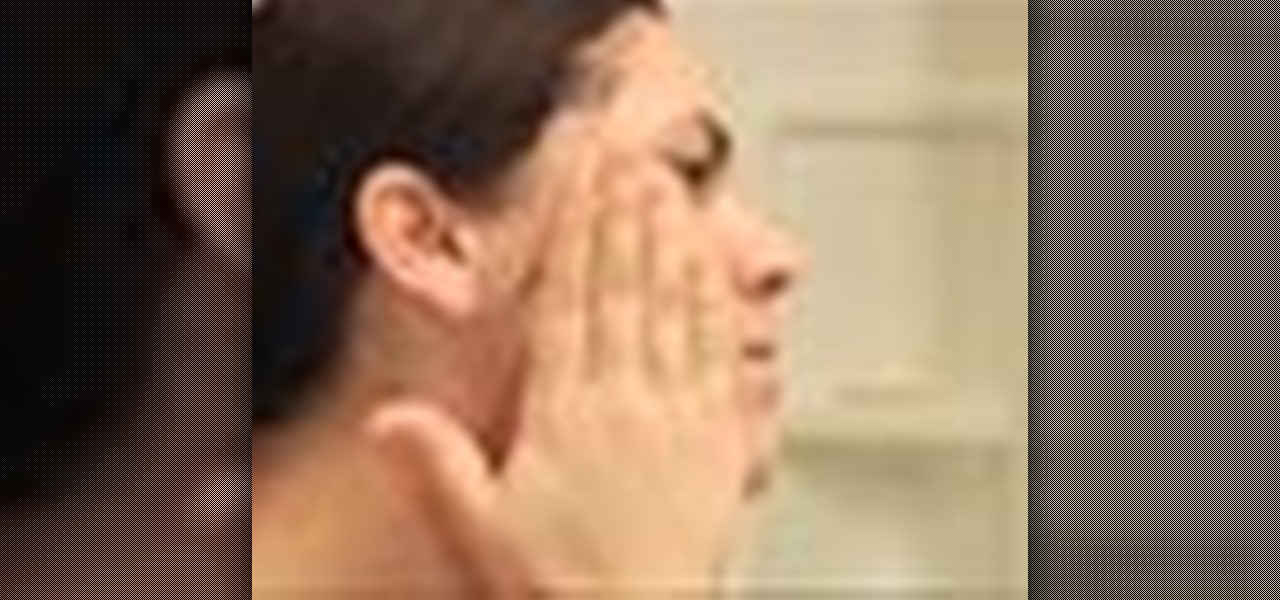
In this video, the instructor shows us how to make a homemade honey and banana facial mask. First, you want to make sure your hair is all the way pulled back and out of your face. Also, make sure your face is clean. Peel your banana and chop it into pieces, place into a bowl. Mash up the banana and then add in a spoonful of honey to the mixture. Mix this into a paste. Next, apply to your face and leave it for 15 minutes to harden. After this rinse your face with warm water and then pat your f...

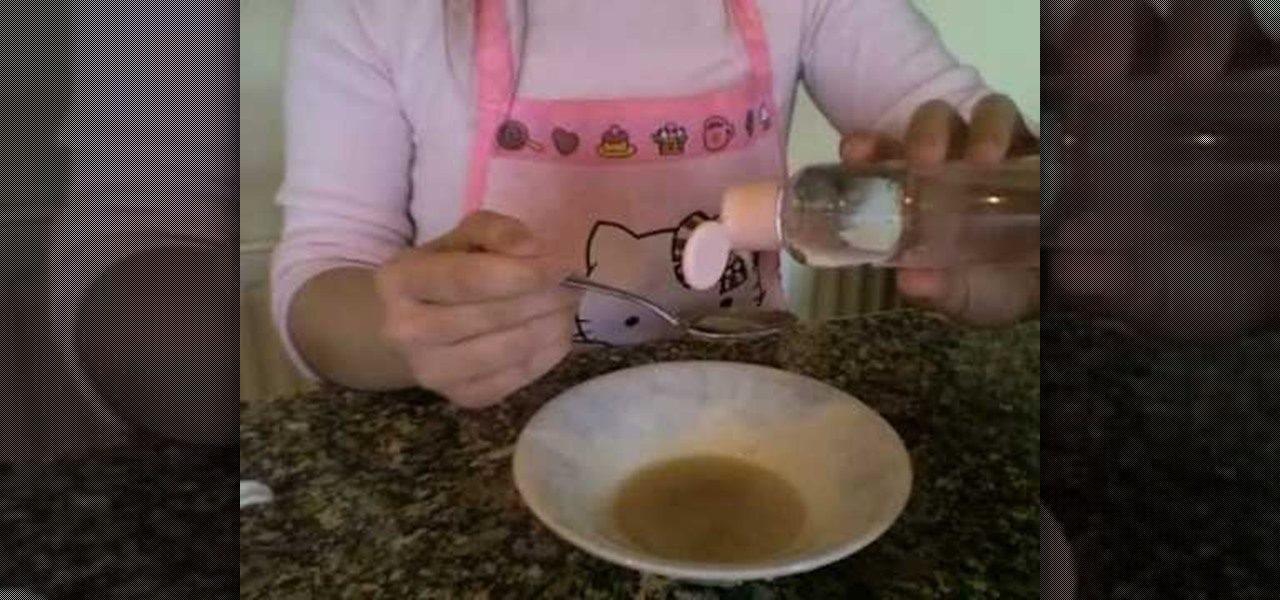
In this video, the instructor shows us how to make a facial mask using coffee grounds and egg whites. First, take an empty bowl and place a 1/4 cup of coffee grounds into the bowl. After this, add an egg white to the bowl. Now, mix up the coffee grounds and egg white until they are well blended. Now, apply mixture gently to your entire face, avoiding the eye area. Once you have it placed on your face, let it set for about 10-20 minutes or until dry. Your face will start to feel tighter and yo...

In this video, we learn how to make a facial mask for oily/dry skin with natural ingredients. First, take a bowl and place a half of a banana in it, smash the banana in the bowl until it makes a paste. Now, take a 1/2 of a lemon and squeeze the juice into the bowl. After you mix this together, add 1 tbsp of honey into the bowl. Mix this all together very well until it makes a paste. After this, apply the paste to clean skin. After about 10 minutes, rinse this off and pat your skin dry.
This video shows you a home remedy, a mask for dry skin, to get rid of my dry and flaky skin. It helps to achieve smoother complexion which dry skin people are dying to achieve. This mask is 100% natural and tested several times for the results.
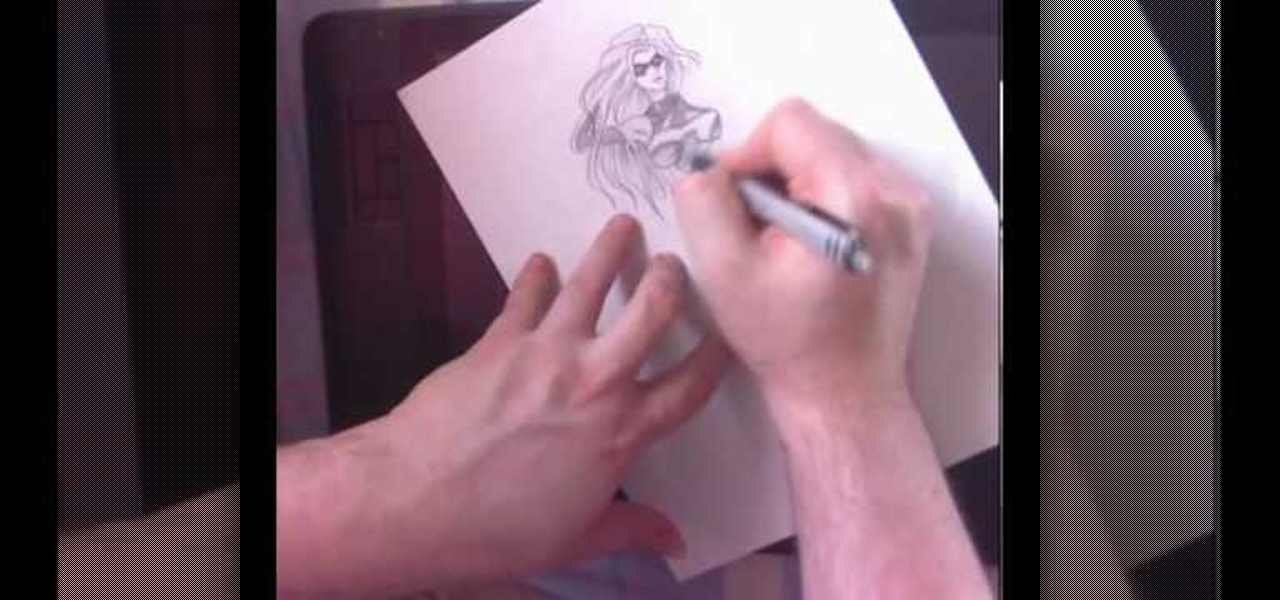
The artist begins by sketching house the outline of the face and body using a pencil. Then he begins to form the eyes, nose, hair and ears, and applies a gray mask to the face which is then covered by the tan coloring of the woman. The lower body is applied with a lighter mask which is converted to the white furry coating of the coat. The drawing is then smoothened out showing us the main features of the realistic woman. Using the software and computer graphics that he uses, the hair, eyes, a...
This video lesson will show you how to easily make frames and borders in Photoshop. Yanik from Yanik’s photo school presents this video. It’s really easy and fun. Go to select -> all or ctrl+A. Then Go to select -> modify ->contract. Put in the amount of pixels you want your border to be and click OK. 75 may be suitable for most pictures. Then Go to select -> inverse. Now you go into quick mask, ctrl+Q or click the appropriate icon. Click filters -> filter gallery and select the type of effec...
No need to spend money at the beauty shop when you can make your own green tea facial scrub at home. This video tutorial demonstrates how to mix together a homemade facial scrub that you can store and use multiple times. This homemade mask is inexpensive and great for getting rid of dead skin cells (which can pile up giving you a dull complexion). By using the scrub when it is slightly warm, it opens pores allowing the nutrients of the mask to cleanse deep within.
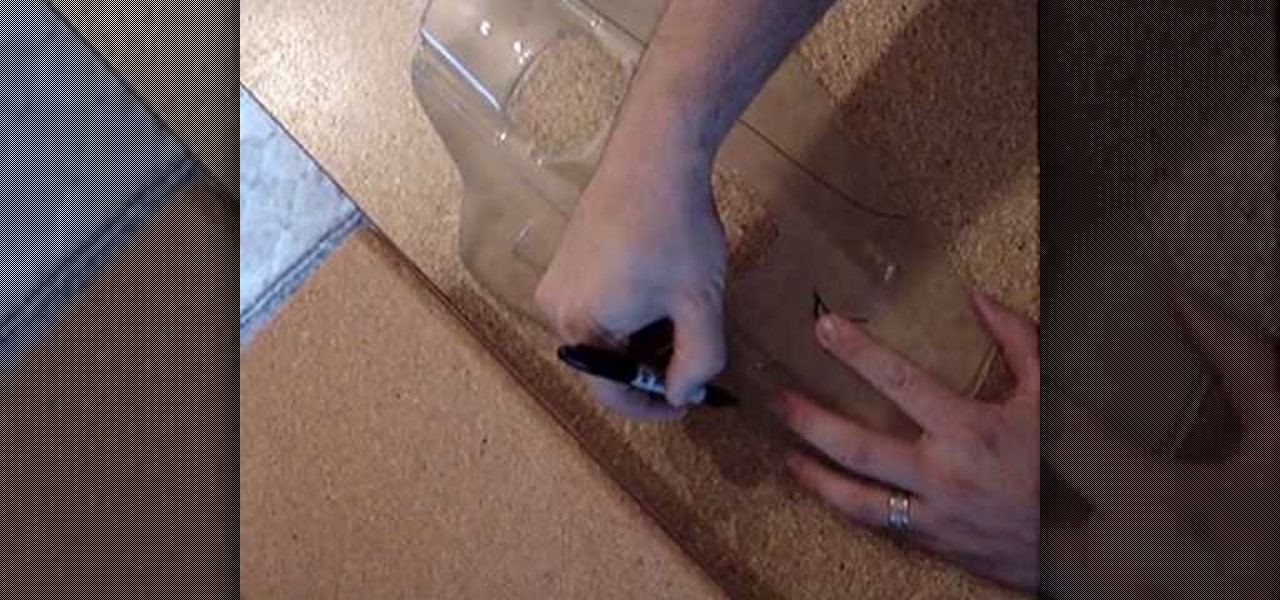
This video is on how to paint the hood of the axon racing razorback anti gravity racer and how to do some basic effects. I use the liquid masking method of Bob Dively and show how to use airbrushes such as Iwata in my other how to paint video. You can use this method with any paint from pactra to spaz stix and any color of black, blue, purple, green, yellow, silver, chrome, etc. I personally prefer Pro line (or proline) shells over their durability but there are other shells out there. Just e...
When it comes to female superheroes/supervillains, does it get any sexier than the classic Batwoman? Batman's archnemisis and equal in many ways, Batwoman is one chick whose looks really do kill. Of course, having advanced combat training doesn't hurt.
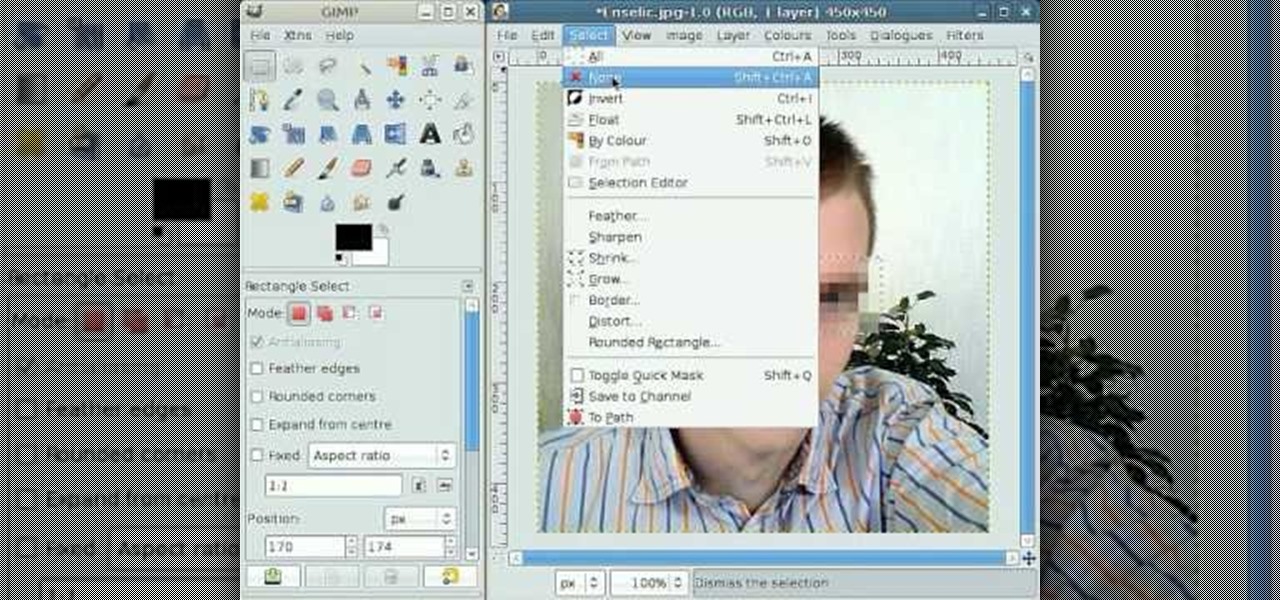
By following this tutorial you will learn the concept of selections in GIMP. Whenever he says "layer mask" he really meant "selection mask".
In this tutorial, Jenny Jones invites you into her bedroom to show you how to give yourself an easy, 6 step at-home facial. Keep your skin young and bright with these fantastic tips from America's favorite talk show host.
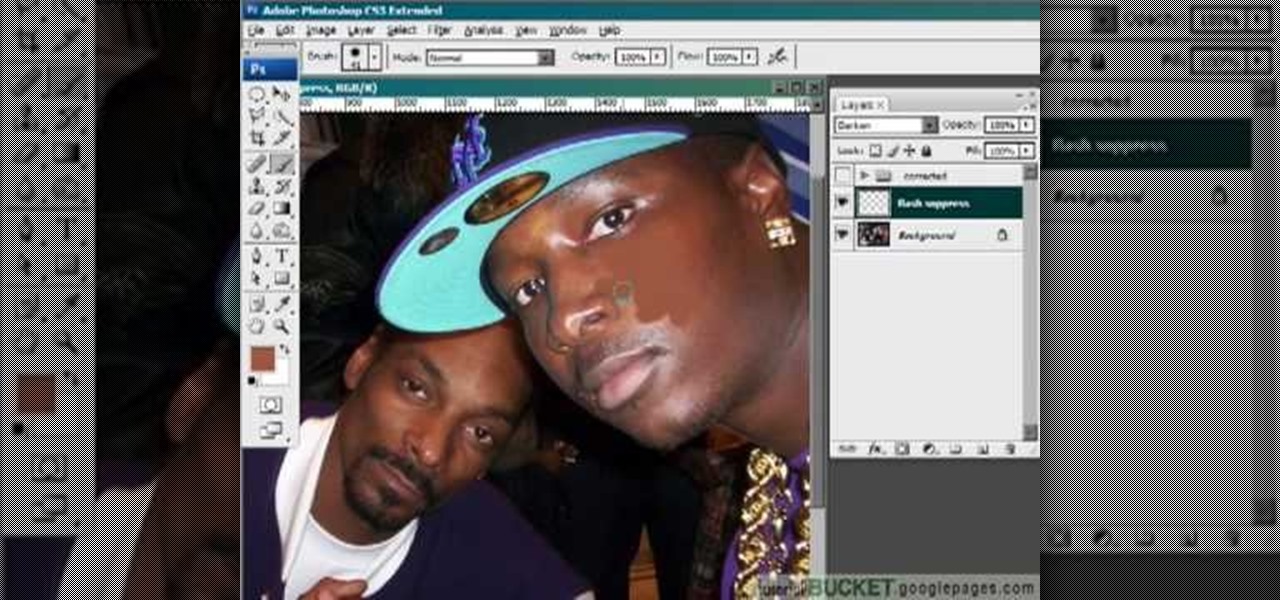
This video gives detailed instructions for removing a hotspot or flash reflection in a photo by using layers and masks. Start by adding a new blank layer and naming it something like Flash Suppress. You will use a special blending mode for this layer called darken. With your paintbrush you will loosely paint out the hotspot, having selected the color tone that you need with the eyedropper tool. Later on you can use layer masks to clean this up. Adjust the opacity of the layer until you have t...
While Snapchat augmented reality often embraces pop stars like Drake and Ariana Grande, a couple of bands from the louder side of the music industry have found a home with Facebook.
Facebook is aware that Snapchat is killing the social media game amongst the youths, which makes sense, because in 2017, video is king in social media currency. Facebook has continually shown that Mark Zuckerberg and crew seem to think the best strategy to keep up is to simply copy them.
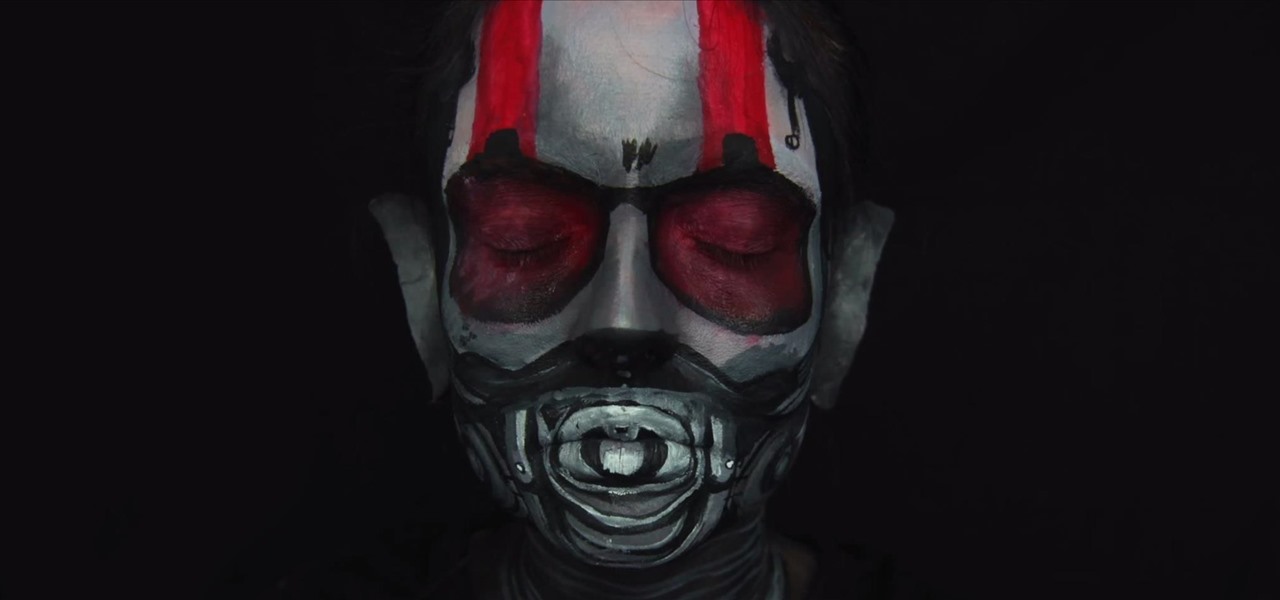
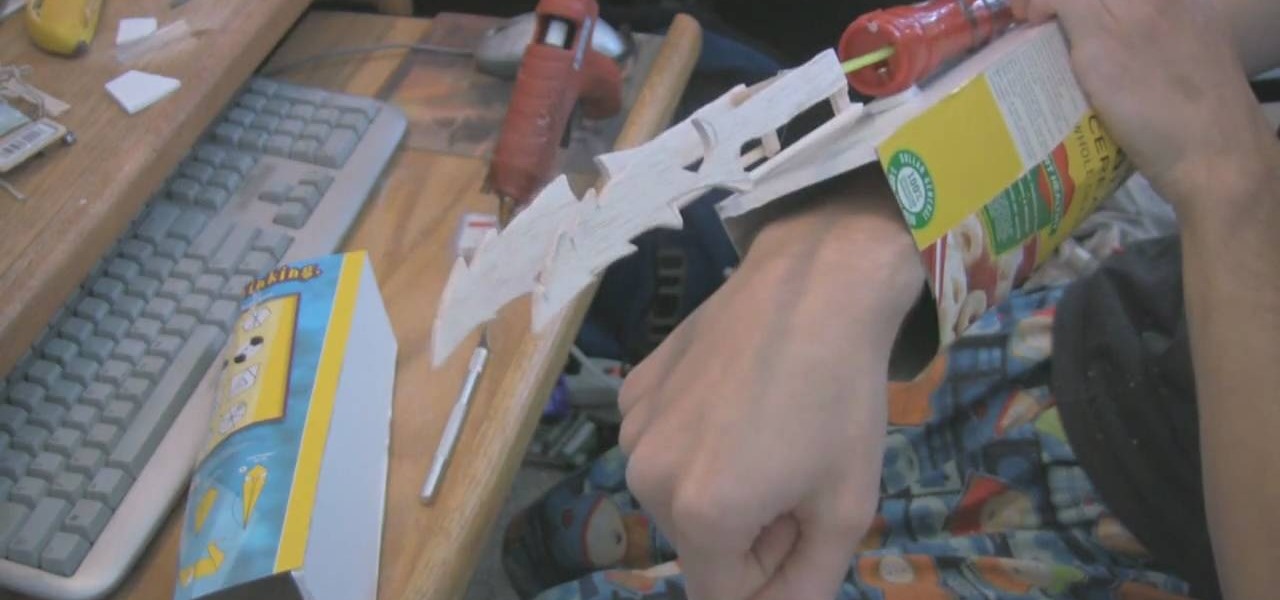
If you don't have the time or patience to build a complete Ant-Man suit from scratch, there's another way to make a Ant-Man costume for Halloween. If you're more skilled with brushes and makeup rather than drills and cardboard, this is the Halloween DIY for you—especially if you're a fan of the Marvel universe.
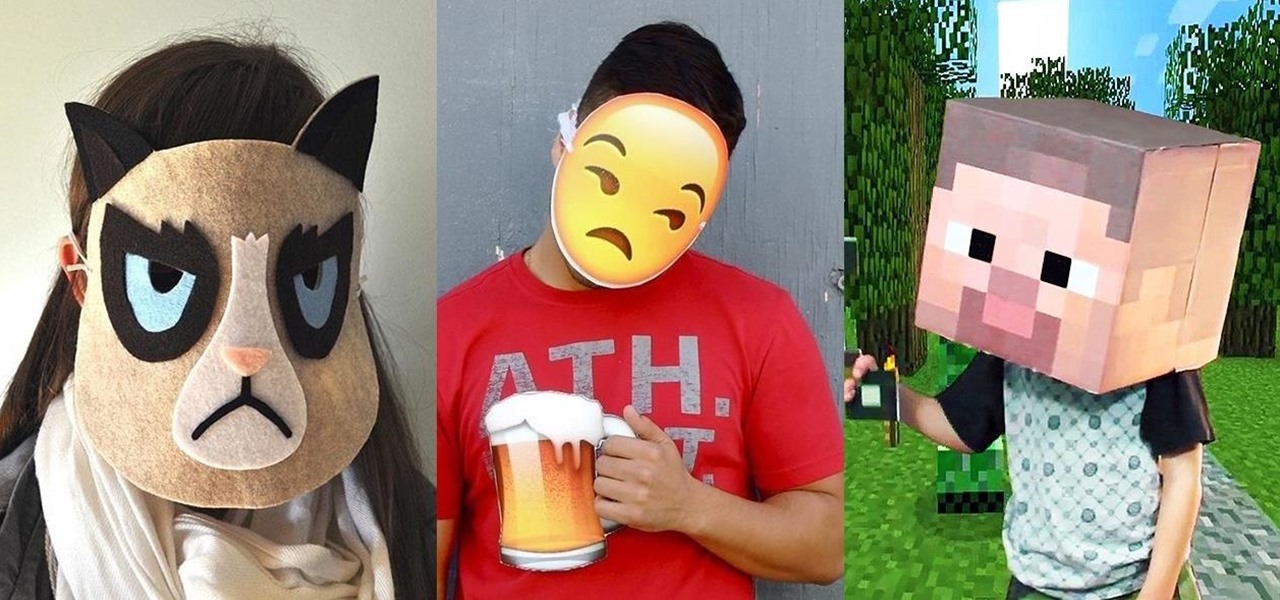
Are you one of those people that waits until the last minute to come up with a costume for Halloween? Unless you're a makeup artist, have a ton of money, or are ultra-crafty, coming up with a good Halloween costume is always a low-priority task. That is, until it's Halloween and you're having a panic attack.
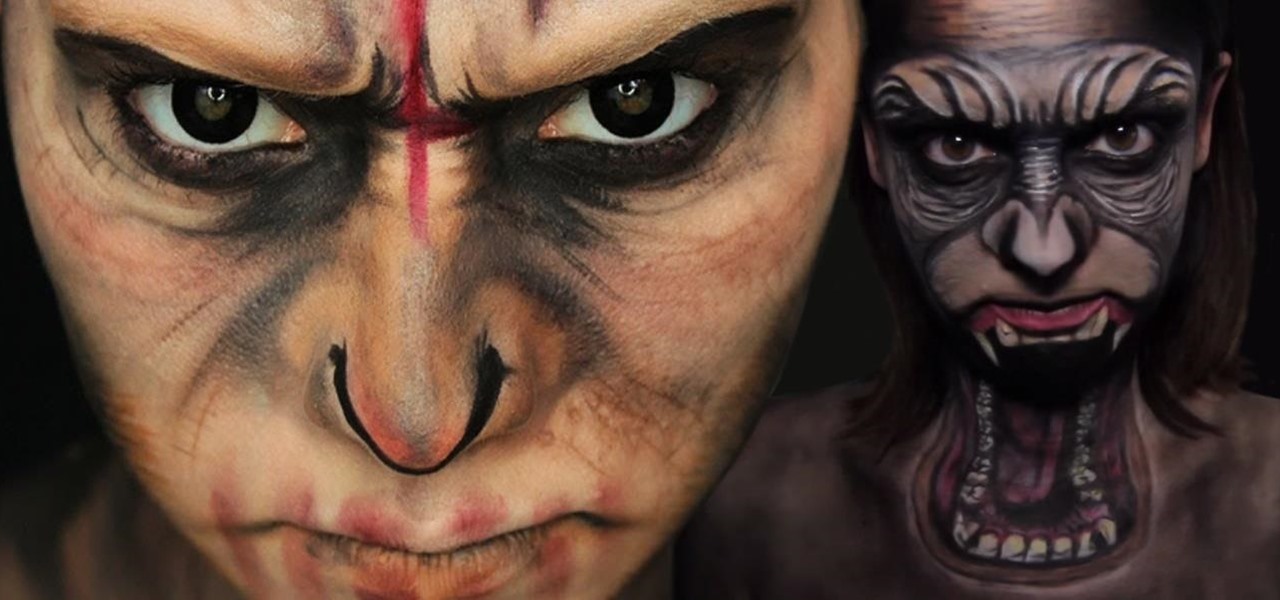
Looking for a costume that breaks the mold of skimpy and clinging fabrics? Stay warm on Halloween and impress at any spooky event by turning yourself into a perfect recreation of the apes in Dawn of the Planet of the Apes.
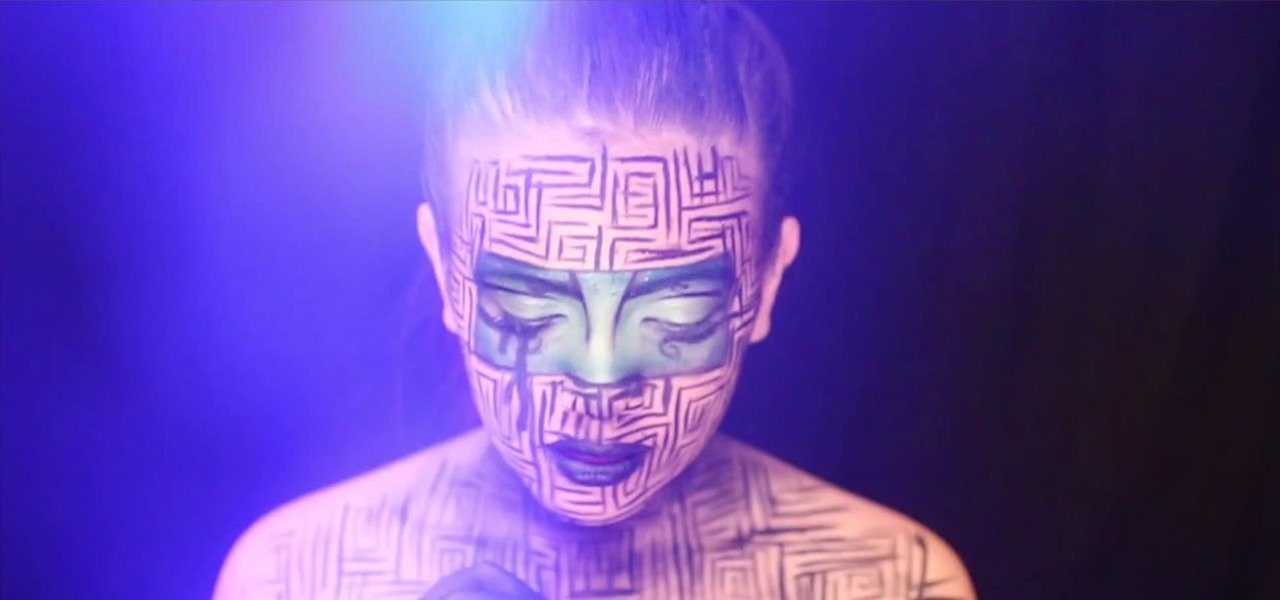
The Maze Runner tells the story of an unpredictable maze designed to kill. If you're looking for a Halloween costume that's both dark and deadly, the film offers a great option.
In this video tutorial, viewers learn how to change the color of lips in Adobe Photoshop. Begin by importing the image into the program. Select the quick mask tool and then select the brush tool. Now color the part that you want to retouch. This will allow the mask to create a selection. No click on the masking tool to create a selection. Then select the marquee tool. Right-click the selection and click on Select Inverse. Right-click the selection again and select Feather. Make it 1 pixel and...
In this how-to video, you will learn how to make grain textures in Photoshop. First, click add layer mask to an open image. Add a filter to this mask and by going to the texturizer option. Adjust the settings to your liking. Click okay to continue. The mask will make the texture transparent. Go to image adjustments and levels to adjust the intensity of the grain. Click okay to save the settings. Select the layer and then choose the color you want the grain to be. Make sure to lock transparent...
Fight your acne with the use of French green clay. In this video, learn how to use French green clay to fight infections and reduce inflammation. This remedy is used to calm down acne, or irritated, red skin and is perfect for sensitive skin. You can purchase French green clay at almost any healthy & beauty store. Also gone over? The rose petal steam method, an oatmeal scrub, and an Aspirin mask. Follow the below instructions to a more beautiful you!
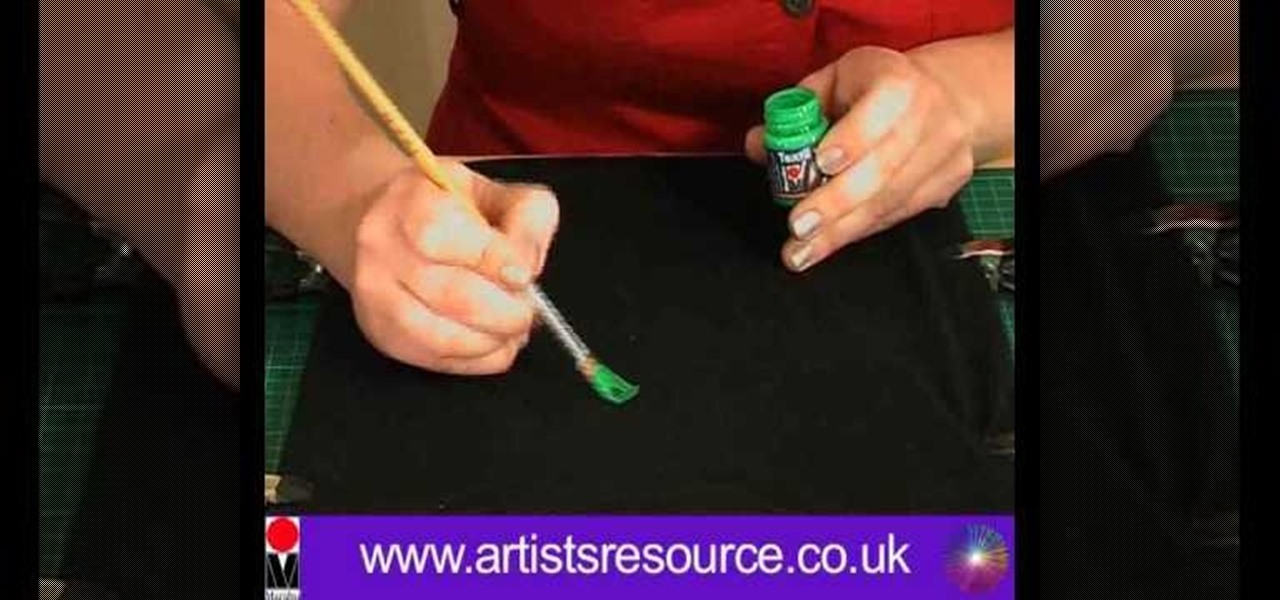
Making your own Mondrian-inspired cushion cover is demonstrated in this clear and concise crafting video. Materials required are a plain cushion cover( preferably in a tight weave such as canvas or cotton; water; medium size, firm, flat edge paint brushes; scissors; one inch wide masking tape; a sturdy piece of cardboard , saran wrap and 4 jars of textile paint - one color should be black or graphite. You may choose plain or glitter paints. Cut the cardboard about one inch smaller than the si...
Learn how to ‘Paint onto your T-Shirt’ by watching this video. Materials required for this include the following:•Marabu Textil Plus Start Kit – 6 colors included with paint brush•Marabu Metallic Outliner Paints•Crocodile clips•Masking tape•Pencil•Design printed from the computer•Tracing paper•A large cardboard wrapped in cling film•A dark colored T- ShirtBegin by placing a tracing paper over the design and secure it to the table using masking tape. Next, use a pencil to trace the design on t...
Learn how to create a cell phone icon in Photoshop with this video tutorial. Draw a rectangle of radius 30 pixels by holding shift key. Right click on the toolbar and select Stroke button. It will open Layer Style dialog box. Set stroke color and set size to 2 pixels. Select Stop Color set little light red color and click on OK. Now, check on Inner Color option change size to 4 and Capacity value to about 60%. Now select Ellipse tool which will draw a ellipse and cover half of rectangle. Sele...
You can learn to confidently and accurately sew a straight seam. You Will Need
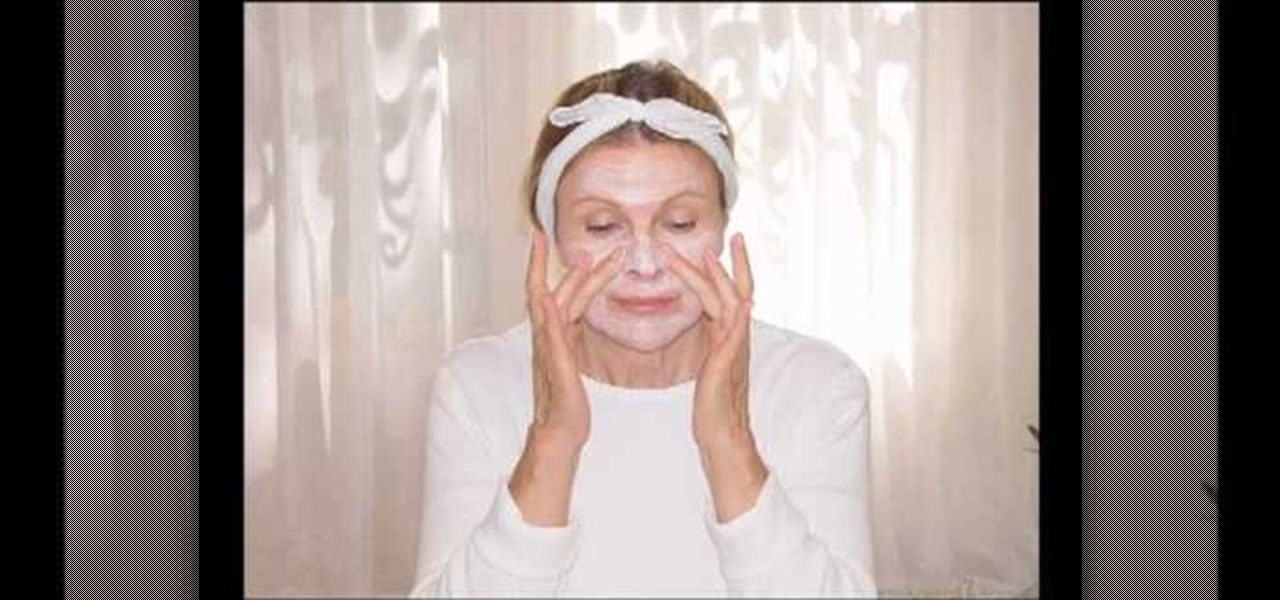
Watch this video tutorial to learn how to make your own all-natural face masks. Tired of spending a lot of money on facial products that don’t even work? Try on some masks made from items you already own—they’re all natural and good enough to eat!
Not everyone in Hollywood owes their nice complexion to a dermatologist. Here are some homespun beauty secrets you can steal.
This video will show you how to subnet using CIDR notation. If you're curious about how to determine networks, subnet masks, broadcast addresses and what makes a host range valid. A great video for anyone currently studying computer networking technology.
The Predator is a classic Sci-Fi and horror film monster, and quite possibly one of the coolest. (There will be no debating Aliens vs. Predator in these comments! :) ) If you're looking to make a costume for your indie film, or for going out for Halloween, check out this awesome video on how to make a very convincing looking Predator costume on the cheap!
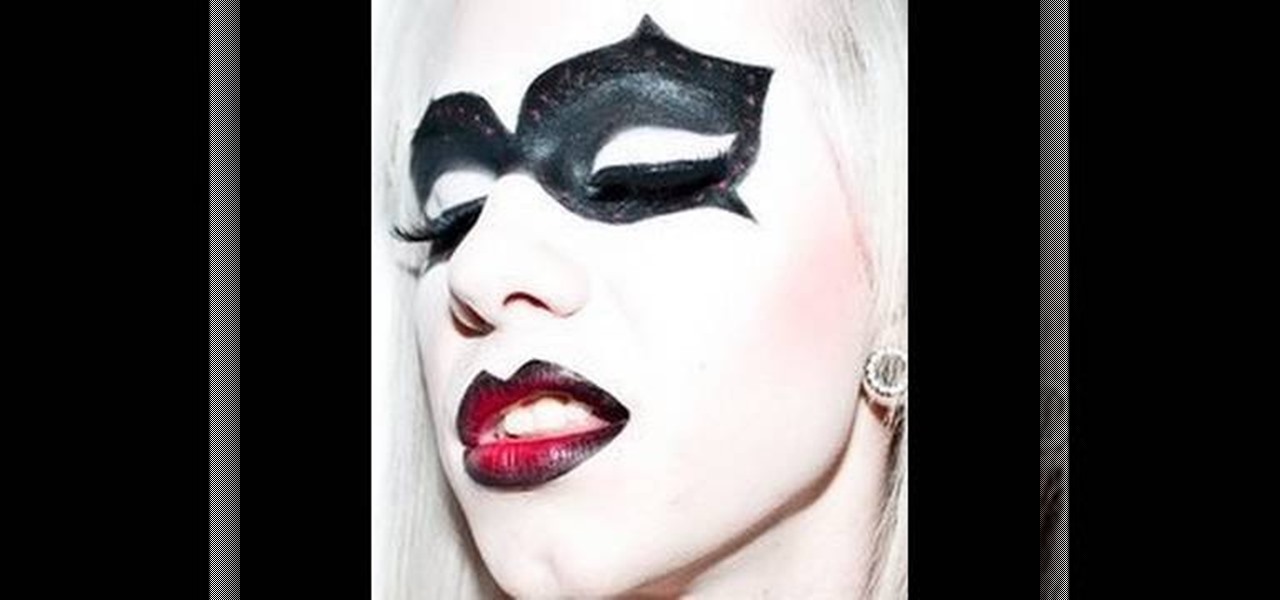
Harley Quinn is the Joker's love interest first introduced in Batman: Arkham Asylum. She is delightfully deranged, just like her boss / lover, and also quite sexy. Watch this video for a tutorial on doing her distinctive mask makeup for your Halloween or general purpose costume.
In this 35-minute clip, you'll learn how to take advantage of the Camera RAW feature in Adobe Photoshop CS4 and CS5. Whether you're new to Adobe's popular raster graphics editor or a seasoned designer looking to better acquaint yourself with the new features and functions of the latest iteration of the application, you're sure to benefit from this free software tutorial. For more information, watch this video guide.
In this clip, learn how to use masks, adjustment layers and layer effects to enhance your digital images in Adobe Photoshop CS4 or CS5. Whether you're new to Adobe's popular raster graphics editor or a seasoned designer looking to better acquaint yourself with the new features and functions of the latest iteration of the application, you're sure to benefit from this free software tutorial. For more information, watch this video guide.
As with most female comic book heroines, Ms. Marvel, created by artist Gene Colan in the 1960s, is a bodacious babe with killer curves and an even more killer abilities of superhuman strength, stamina, flight, and precognition.
Are all those days spent outside baking in the sun finally catching up with you? Solve dry skin and sunburn problems all in one step by watching this tutorial.
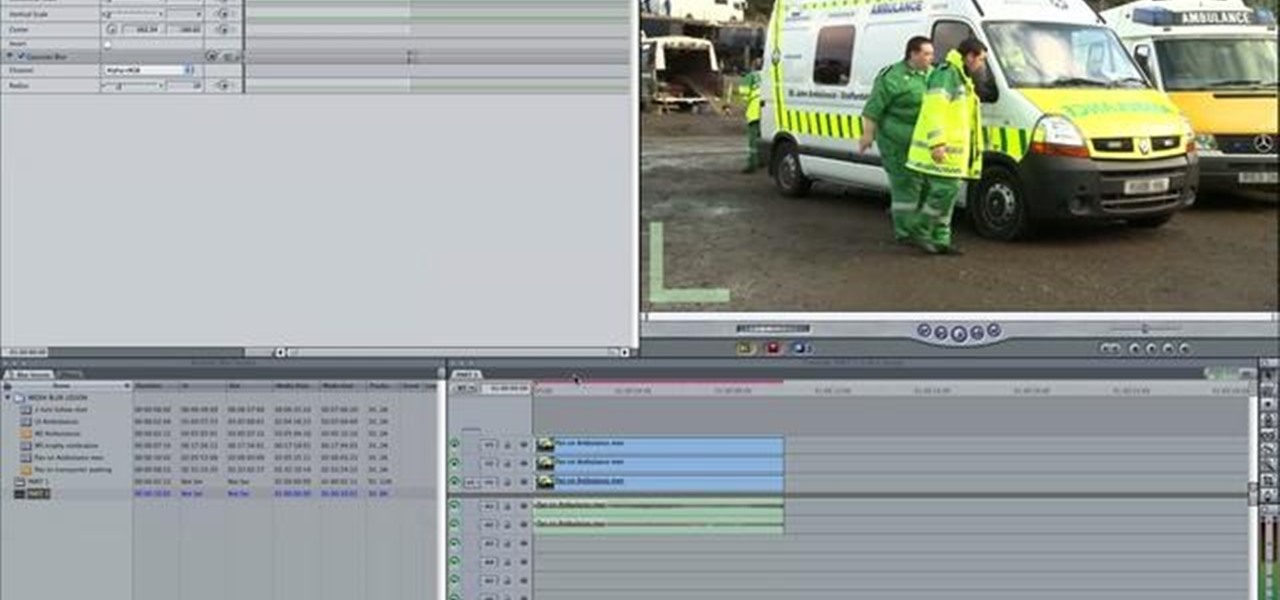
In this FCP tutorial, you'll learn how to keyframe the mask shape filter with blur to track the movement of the camera. Whether you're new to Apple's Final Cut Pro non-linear video editor or just looking to pick up a few new tips and tricks, you're sure to benefit from this free video tutorial. For specifics, including detailed instructions, watch this Final Cut Pro lesson.
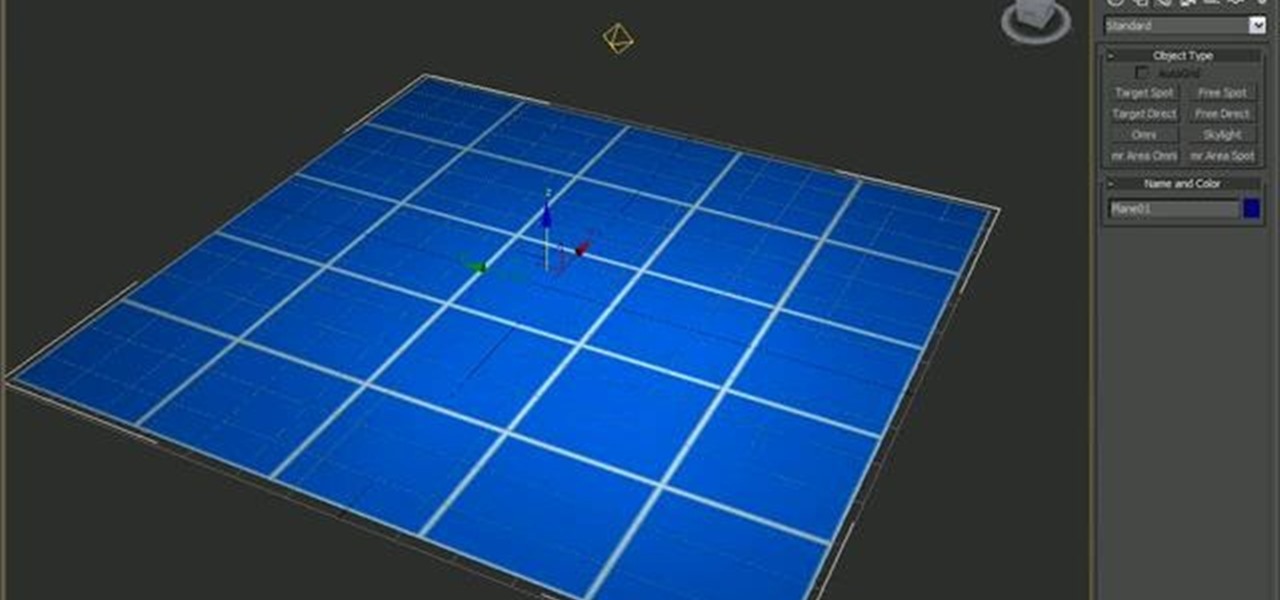
This clip will walk you through how to create a procedural tile material in 3D Studio Max. It also covers composite materials, masks and noises. Whether you're new to Autodesk's popular modeling software or a seasoned 3D artist just looking to better acquaint yourself with the application, you're sure to be well served by this video tutorial. For more information, take a look!