

News: ZIPPP Line
Cool Zip Line on the road from Libertad to the city. About 10km up the road on the right had side. You have to check this place out. The family who runs it a super nice and zip lines are great.

Cool Zip Line on the road from Libertad to the city. About 10km up the road on the right had side. You have to check this place out. The family who runs it a super nice and zip lines are great.

In this video, Tim Roth from Into Eternity show us how to play melodic lead lines on the electric guitar. Play melodic lead lines on electric guitar.
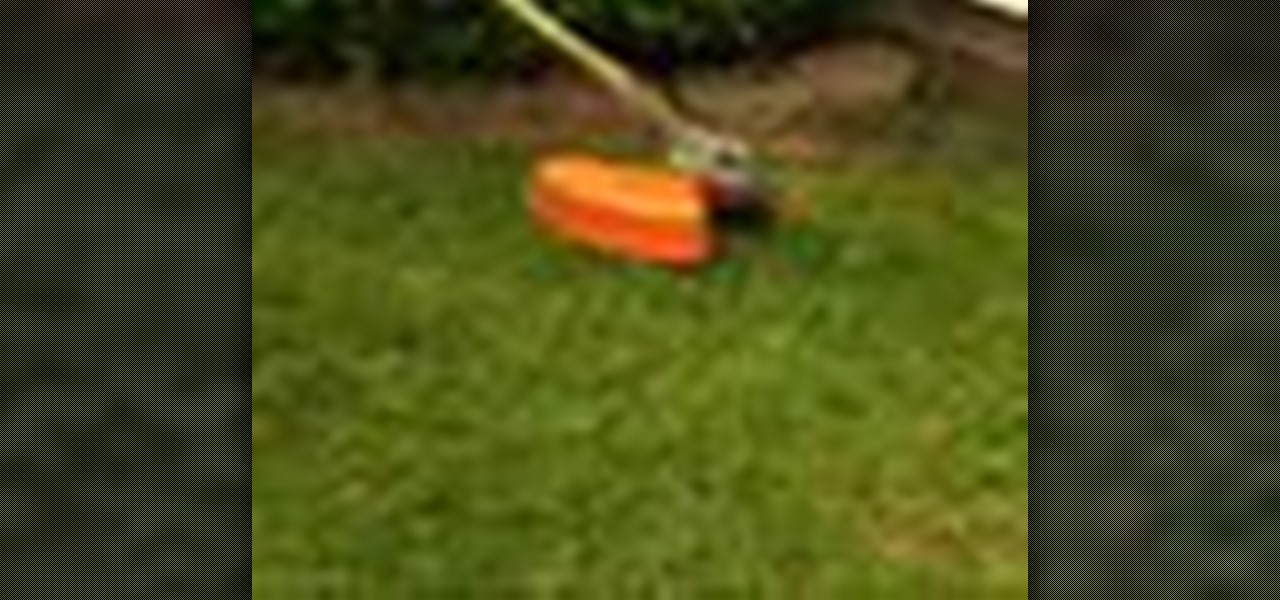
In this video, we learn how to replace the line on a STIHL trimmer head. First, remove the spool from the head by stopping the engine and cutting attachment first. Then, grasp the body and insert your thumb into the tab on the head, then rotate around and press on the second tab. After this, press down on the spool and release it from the housing. Now, remove the star nut to remove the head completely. Now, you can replace it with a new one. After this, replace the parts that you took out and...

No, this yo-yo rig does not mean attaching your toy yo-yo to your fishing line. It's a specifically deigned mechanical reel that is designed to fish while you're home in bed. It's quite the reel, and worth a try. Wade Bourne of MyOutdoorTV shows you how to rig a mechanical yo-yo rig.

In this tutorial, we learn how to do fairy princess face paint. To do this, make sure you have paint brushes, sponges, a spray bottle, and different colors of paints. To begin, take your sponge and apply a base to your entire face. Next, draw the outline for the design you want to draw with the sponge and colors. Now, fill in the colors on your face, blending in with the sponge. Now, take a small brush and draw a dark line to make the edges more exact on your face. After this, draw an exact l...
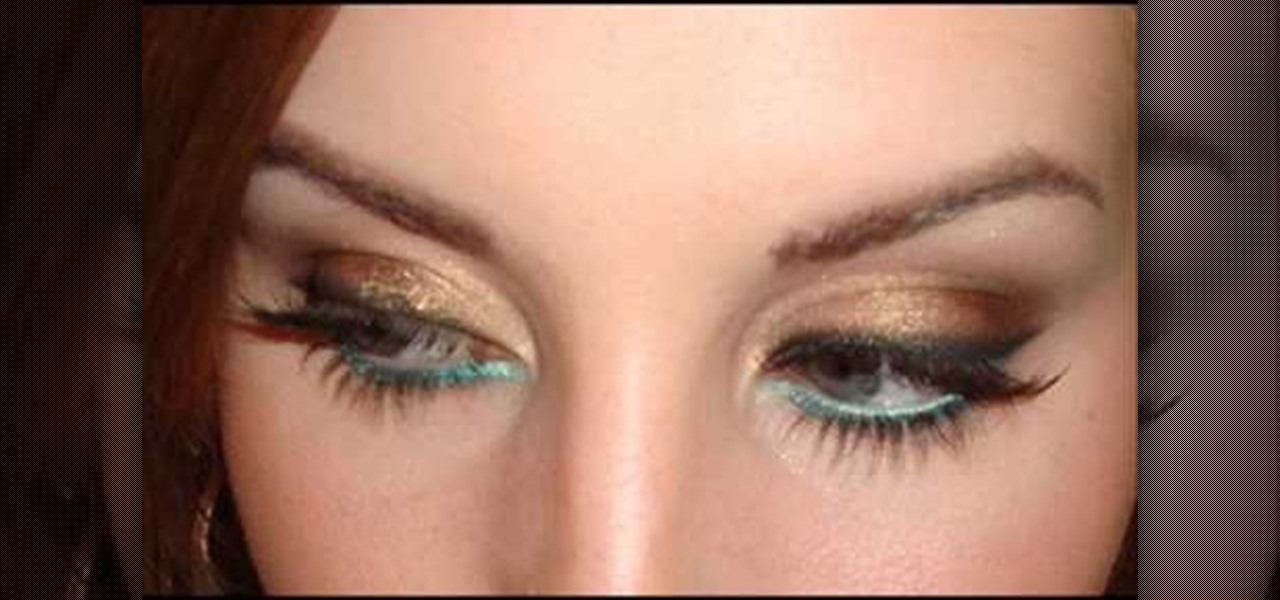
Looking to try something new with more adventurous eyeliner colors? TiffanyD teaches how to line neutral eyes with the color teal. Tiffany used MAC's Mineralized Eye Shadow and some sparkly teal eyeliner.

Learn how to tie a Spider Hitch. The Spider Hitch is one of the easiest ways to form a loop or a double in a line. It is far easier than the bimini twist and the plaiting a double but it is not as strong. In monofilament it will retain around 80 percent of the lines original breaking strenght and much less with braides lines. The knot is popular for beeing quick and handy. Tie a Spider Hitch knot.

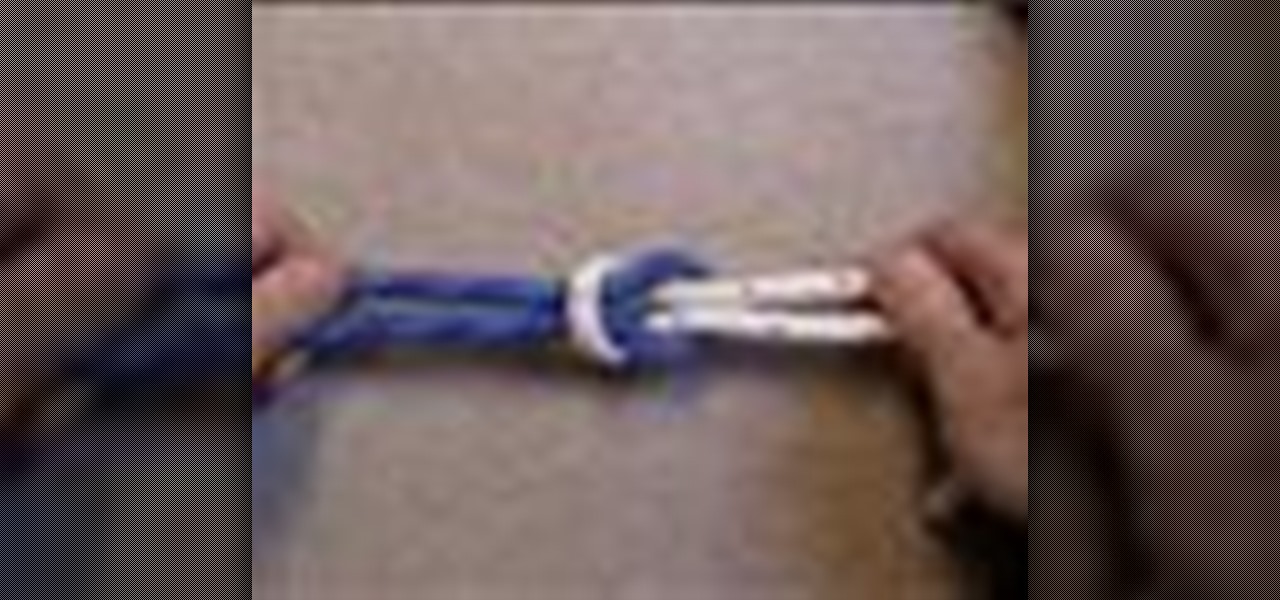
Learn how to tie the Bowline Knot. For Navy League use. One of the handier knots in sailing, the bowline (shown above) forms an eye or loop in the end of a line. In sailing the bowline knot connects the JIB SHEETS (lines/ropes) to the JIB (foresail). Tie the Bowline Navy League knot.
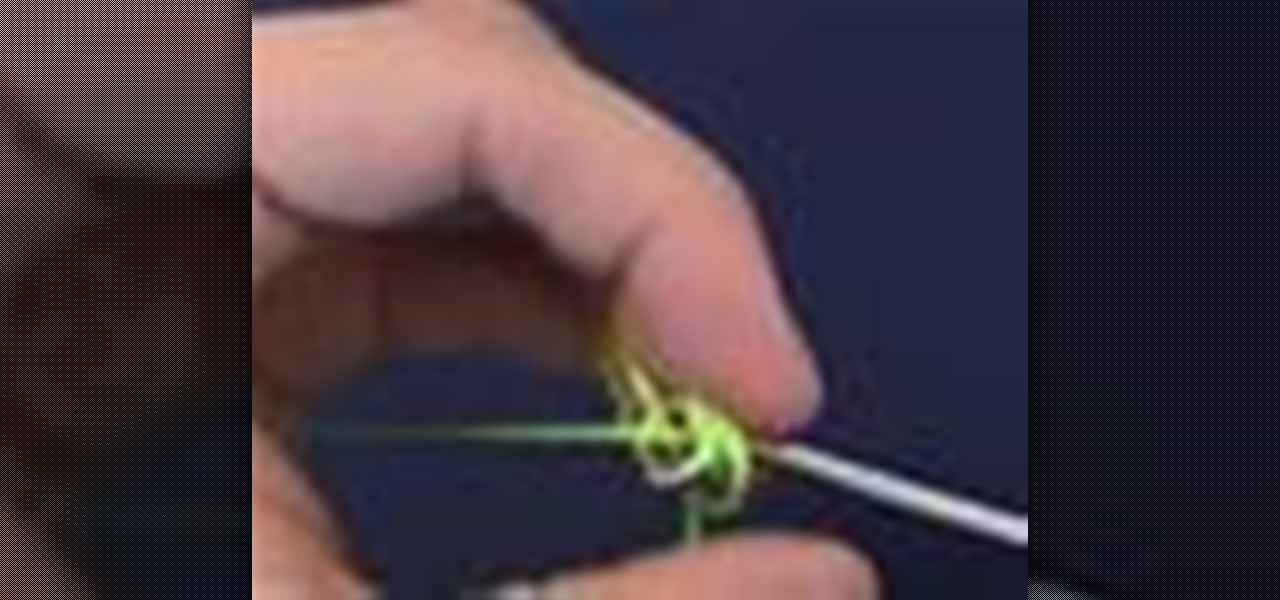
The Rebeck Knot is simple and secure hook connection. It works with most lines even braided lines if you ad a least five extra wraps. The rebeck knot will retain approximately 65 to 70 percent of the lines original breaking strength. Follow along with this outdoor recreation HowTo video tutorial to learn how to tie the rebeck knot for fishing. Tie the rebeck knot for fishing.
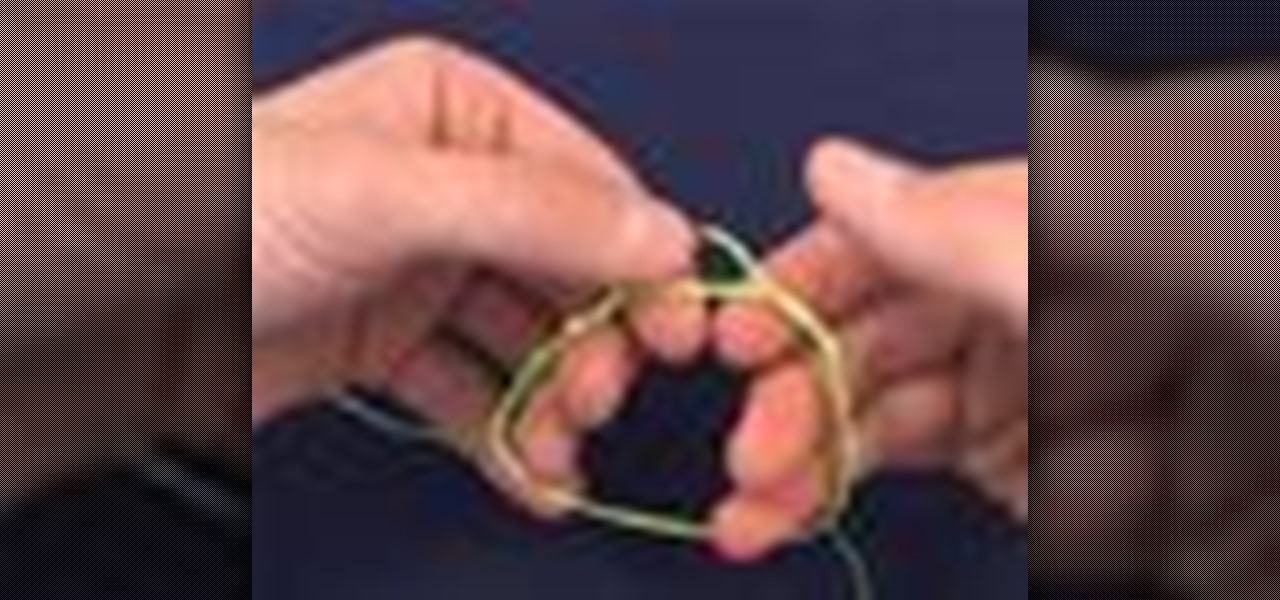
The Dropper loop is a classic loop knot which is often used on multi-hook fishing lines and bait rigs. The dropper loop is also often used by fly fishermen to attach an extra fly to the leader. The dropper loop can be created in the middle of a the fishing line and forms a loop which is off to the side of the line. Watch this video knot-tying tutorial and learn how to tie a dropper loop fishing knot. Tie a dropper loop fishing knot.

The Perfection Loop is a great knot for tying a small loop at the end of the line. The Perfection Loop is perfectly in line with the standing part of the leader and it is both quick and easy to tie. Watch this video knot tying tutorial and learn how to tie a perfection loop fishing knot. Tie a perfection loop fishing knot.

These instructional animated slides teach you how to easily fold a paper a-line dress. Learn how to use the Japanese art of origami to make your own paper dress. Use the start, stop, forward and back buttons to easily follow along. You can also speed up the instructional origami video if it is going too slow. Very cool Japanese origami how-to video! Origami a paper one piece a-line Japanese dress.

Watch this video from This Old House to learn how to install a mini-split air conditioner. Steps:

Watch this video from This Old House to learn how to reshingle a roof. Steps:

In this pool shooting video proper stance is demonstrated, from angle of approach to follow through. First visualize the impact line from the object ball to the pocket, then create an aiming line, take some practice strokes, and finally shoot, keeping your head down. Adopt a proper stance when playing pool.
A square knot is used to tie two lines (ropes) together that are of a similar size. The two ends of the line which carry the load are on the same side. This knot is also called a reef knot. Tie a square knot with two ropes.

With this simple technique the cue ball will follow the path of the object ball without scratching. If both balls are lined up with the pocket, an off-center hit will help in pocketing the object ball but not the cue ball preventing a scratch and lining up the next shot. Make a straight shot using follow.
So now you've completed everything that the Dark Brotherhood quest-line in The Elder Scrolls V: Skyrim has to offer. But now what's left to do? Anything? Well sonny, there is something you could do! After you complete the quest-line, one of your goons will suggest to you that some upgrades are in order for the sanctuary. Doing so will add some really cool bonuses.

Using only a circle and straight lines, it's possible to create various aesthetic curves that combine both art and mathematics. The geometry behind the concentric circle, ellipse, and cardioid dates back centuries and is easily found in the world around us. From an archery target to an apple, can you name these geometric shapes?
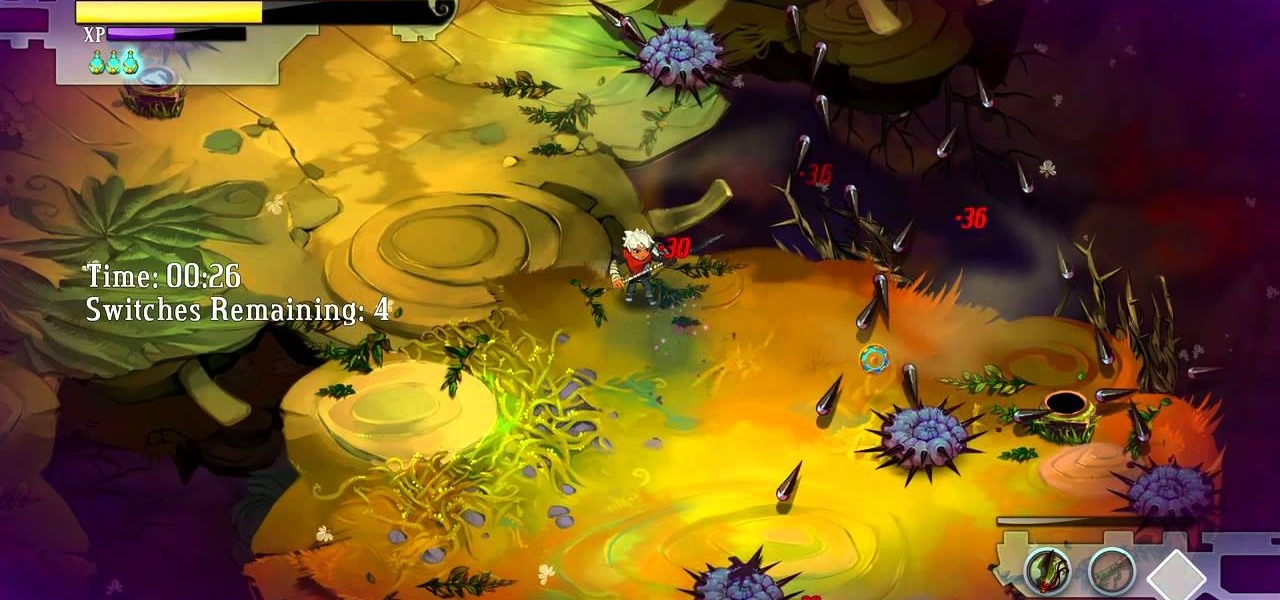
Bastion is an indie game developed for the PC and XBLA. There are several different challenges in it, and one of the most difficult to beat is the Brusher's Pike challenge located at Camp Dauncy. You will need to activate all of the switches in the area without dying to the spike lines. This walkthrough should provide you with a pretty clear path to follow.
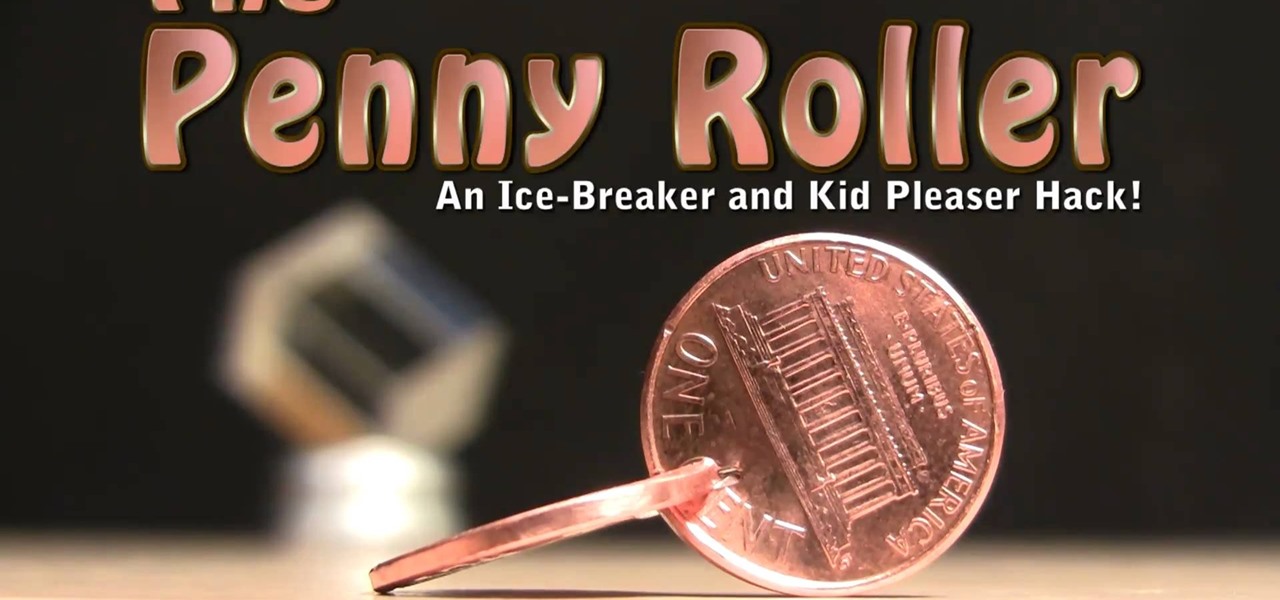
This is a great bar trick - cut a small notch into two pennies and then stick them together. Make sure they are lined up ninety degrees to each other. And then, roll them across the table, bar or floor!

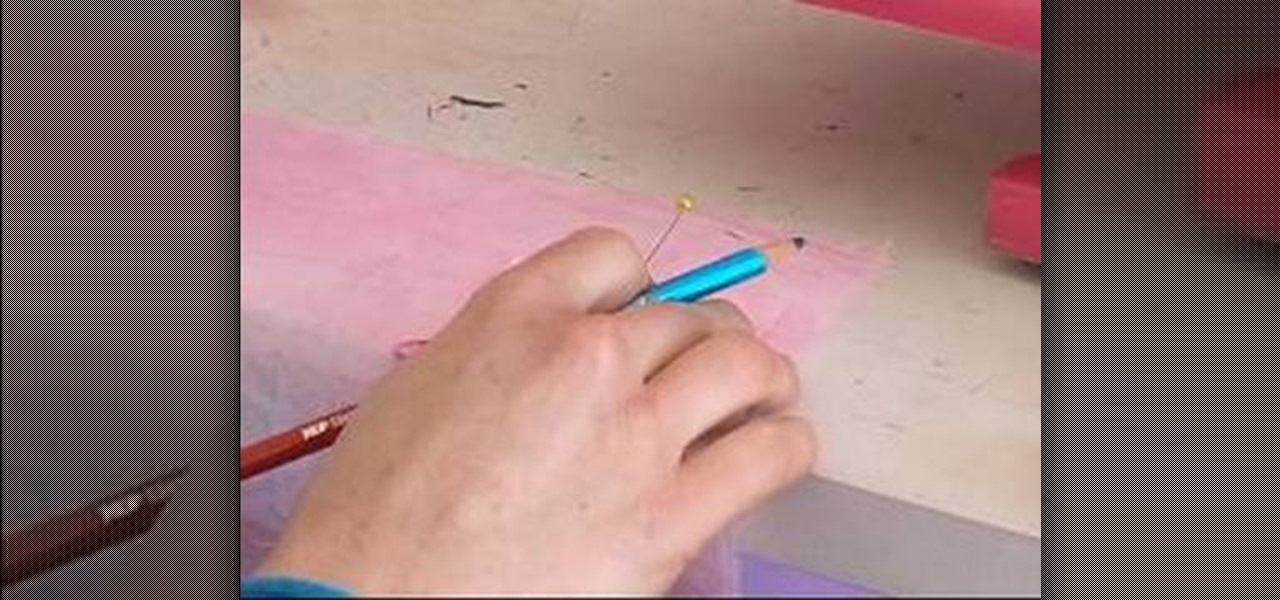
Darts add shape and a more fitted line to garments that use them. While many patterns come with the darts pre-printed, how do you add darts when you're sewing without a pattern? This tutorial shows you how to add your own darts by hand.
You don't have to sew a bound buttonhole by hand, you can replicate this fashion technique using a sewing machine. Make sure you sew slowly and carefully to get the clean finished lines of a perfectly done bound button hole.

This is a great and attractive shirt - a corset tank top. You don't need a pattern to make this, just some fabric, lining and ribbon. You'll also need some basic sewing notions and access to a sewing machine to sew this very basic item.
Start with two rectangles of fabric, both the same size. You will also need a short zipper and a few basic sewing supplies (pins and a sewing machine). Then just follow along with this video to make your own zippered change purse!
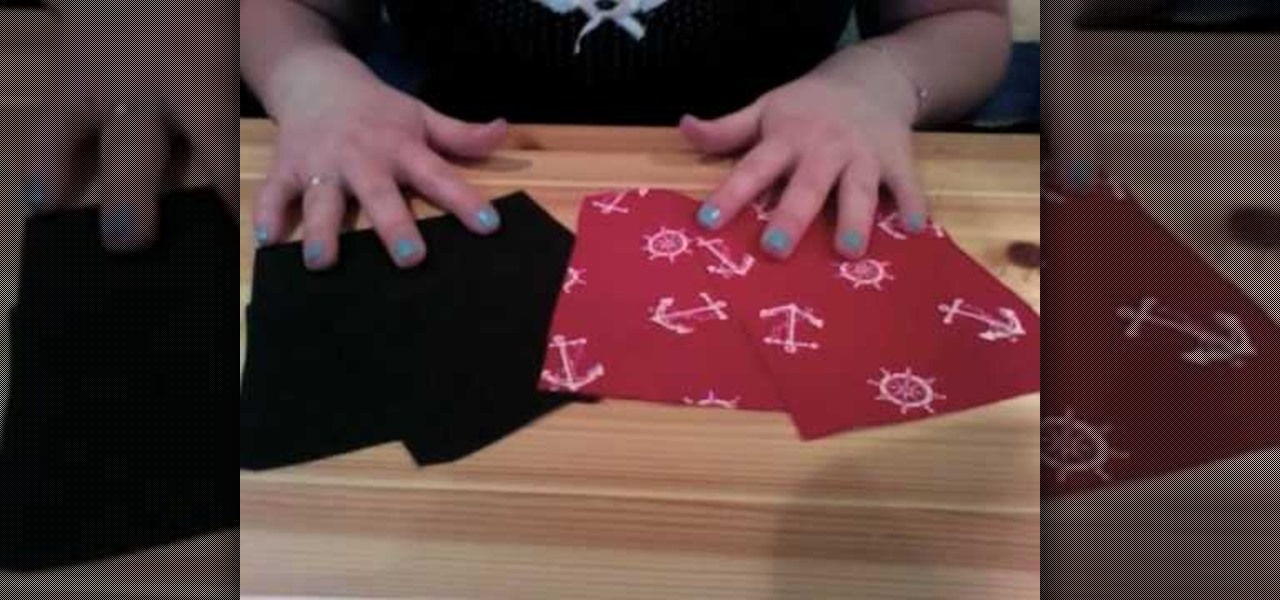
Start with an old pair of jeans and some scrap fabric. Then, using a few small sewing notions (scissors, thread and a decorative button) and the pattern given in this video, transform this old fabric into a super cute and useful lined handbag.
All you need to know how to do is trace a line in order to be able to turn a T-shirt into a cute skirt! You'll also need some tailor's chalk, a sewing machine (or needle and thread), scissors and some straight pins.
Hey, in Russia, Adidas is a huge designer label! Show your fandom of this popular sports line by turning their logo into your playercard emblem. This tutorial shows you step by step how you can make your own quite easily.
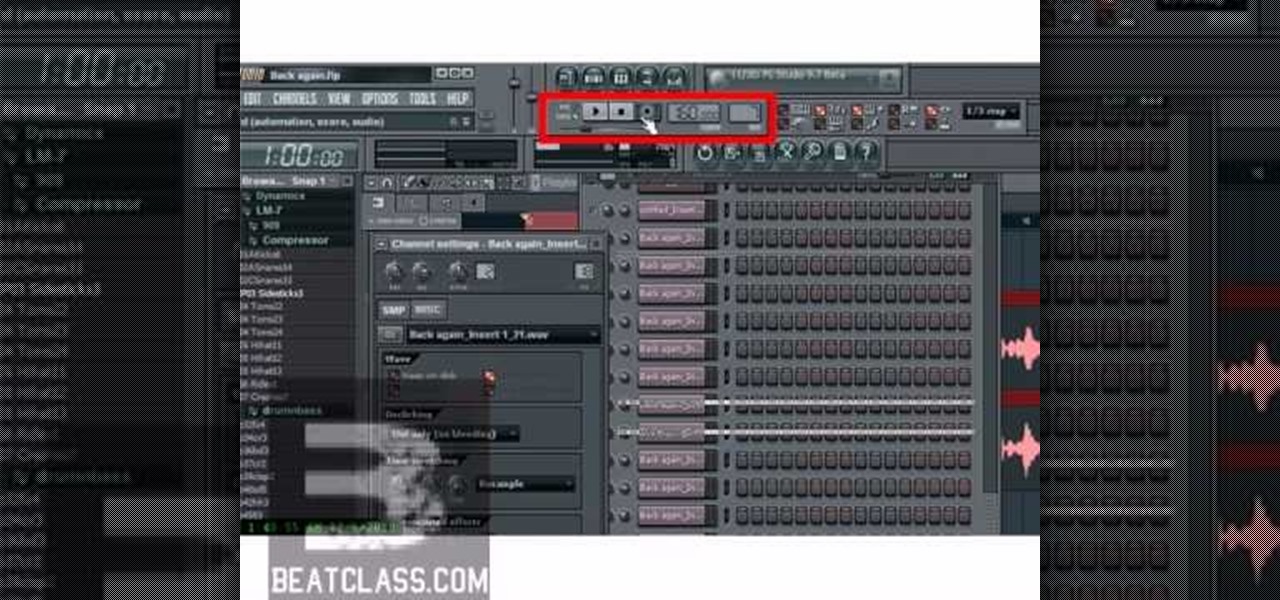
Flubbed a line in an otherwise perfect take? Punch in over the part you want to replace and keep the rest. It's easy and this free software tutorial from the folks at Beat Class will walk you through the entire process.
"Scene" bangs is just a fancy way of saying cool-looking, hipster bangs. You can't rock the hipster trend the way it was meant to be rocked if you only have the skinny jeans, loose organic cotton top, and bangles, right?
This tutorial features the Peachy Keen stamp line, and shows you how to punch out, color and use your own embellishments. These make great accents, decorations and gifts, especially for the holiday season. All you need besides the stamps are your favorite paper crafting supplies.

Cut a perfectly balanced pentagon from a square piece of paper! You can do this without measuring or drawing. Fold your square of paper as outlined in this tutorial, and then cut along several of the fold lines to end up with a pentagon!

Learn how to solve r-squared problems. Whether you need help studying for that next big stats text or just a hand finishing your homework, you're sure to be well served by this free video math lesson from Salman Khan, which presents a detailed overview of how to calculate r-squared in statistics.
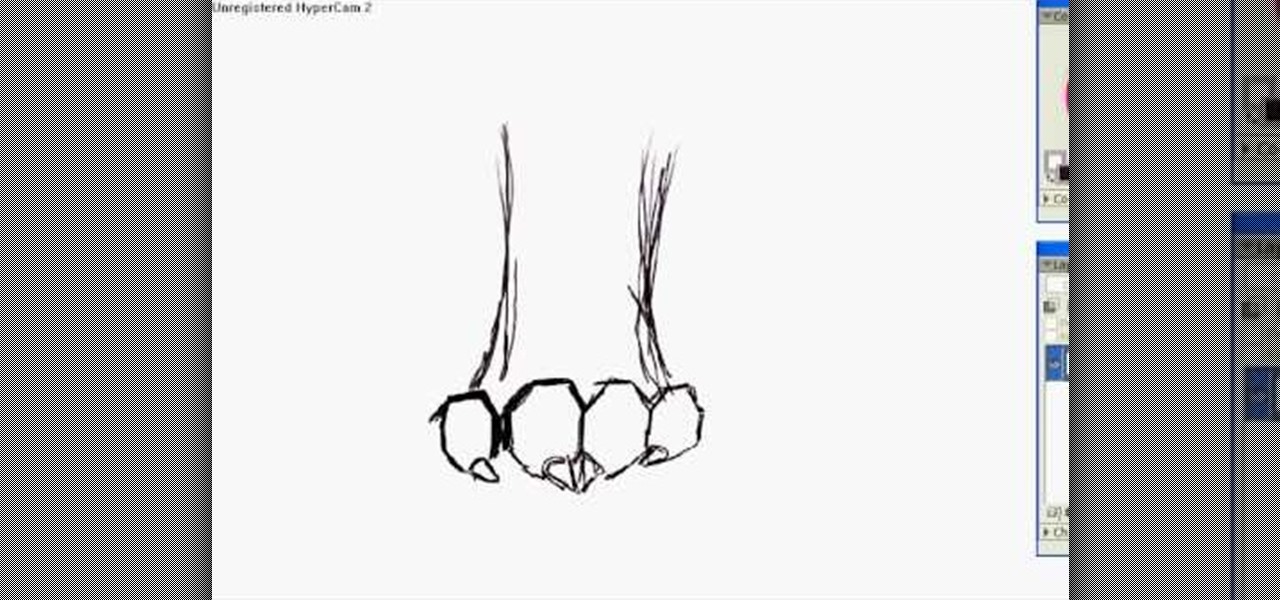
In this video, we learn how to draw animal paws from the front. First, draw the wrists for the paws and make the bottom part wider. After this, draw on the nails on the very front of the wrists. Make sure to add on a pointed tip for the claw on the top of the nail. After this, start to add in additional lines around the joints in the paws to make it more bold. Then, you will need to add in additional lines on the sides to make it look like hair. This will complete your paws, have fun with the...

In this tutorial, we learn how to draw fold legend Bob Dylan. To start, you will first draw the hair and the head along with the upper body, hands, and guitar. After this, you will start to add in the facial features. Draw on the eyes and add lines to make the face look more realistic. Make sure it looks like he is holding the guitar with his hand, showing one hand around it. After this, you will need to add color to the drawing on both the clothing and the skin. To finish, you will erase any...
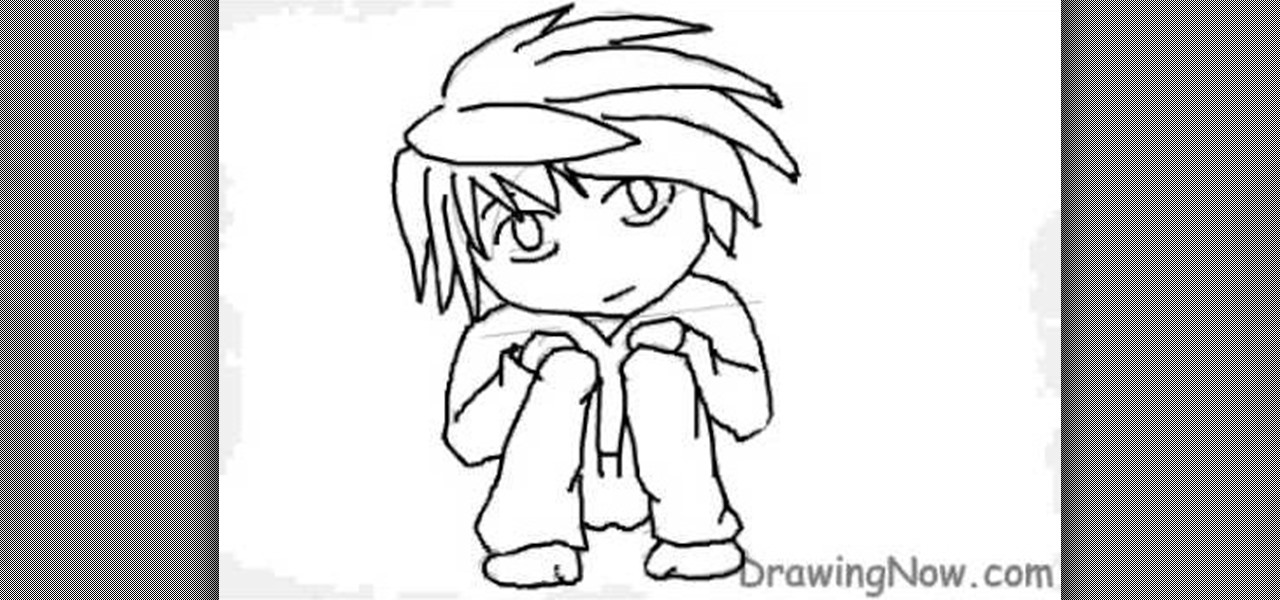
In this video, we learn how to draw a chibi L. As with any drawing, you want to start with the outline of the character to get a feel for where all the parts are going to go. After this, you will use a different drawing material to draw over this and create the final lines for the Chibi L. After this, start to draw in the details of the face and the rest of the body. Also make sure you draw in the hair, adding lines to show where the different strands are. Finish this off by coloring the skin...

In this tutorial, we learn how to draw a female face with hair. First, draw the head and then draw the shape of the chin. From here, you will draw the bangs and the hair. Draw the hair with wavy lines to make it appear curly. After this, draw on the features of the face with a darker marker. Make sure to add in small details and lines to make the face appear more realistic. Then, start to add in the details of the hair and give her a smile on the face. Finish the upper body and then add in so...
In this drawing tutorial, we learn how to draw a chibi Sokka. Start off by drawing a round circle for the head of the character. After this, draw on the ears to the sides of the head. Then, draw on the hair on the back of the head followed by the facial features. After this, draw on the body, but don't draw a neck because this character doesn't really have one. Once you have the outline finished, start to use a darker marker to create the clothing and other details onto the character. Clean u...

In this video, we learn how to draw Hinata. To start, you will draw a circle with lines in between it to place where the eyes will go. Next, you will draw in the eyebrows and the other details around the face. After this, draw in the bangs and the hair, adding lines for them to show the different details. After this, you will draw in the area of the neck and then the clothing on the upper body. Finish off the details in the eyes and then shade in the hair and around the body. When finished, s...

In this tutorial, we learn how to draw a twisted skull. First, draw the outline of the skull and then start to draw in the jaw line around the middle. After you have this drawn out, draw in the teeth on the top and bottom of the face. Then, draw in the eye sockets and the nose shape. From here, start to add in lines that look like cracks around the top and sides of the skull. There is no perfect way to draw this, draw it how you feel it should look! Add in some shading to show the depth and c...