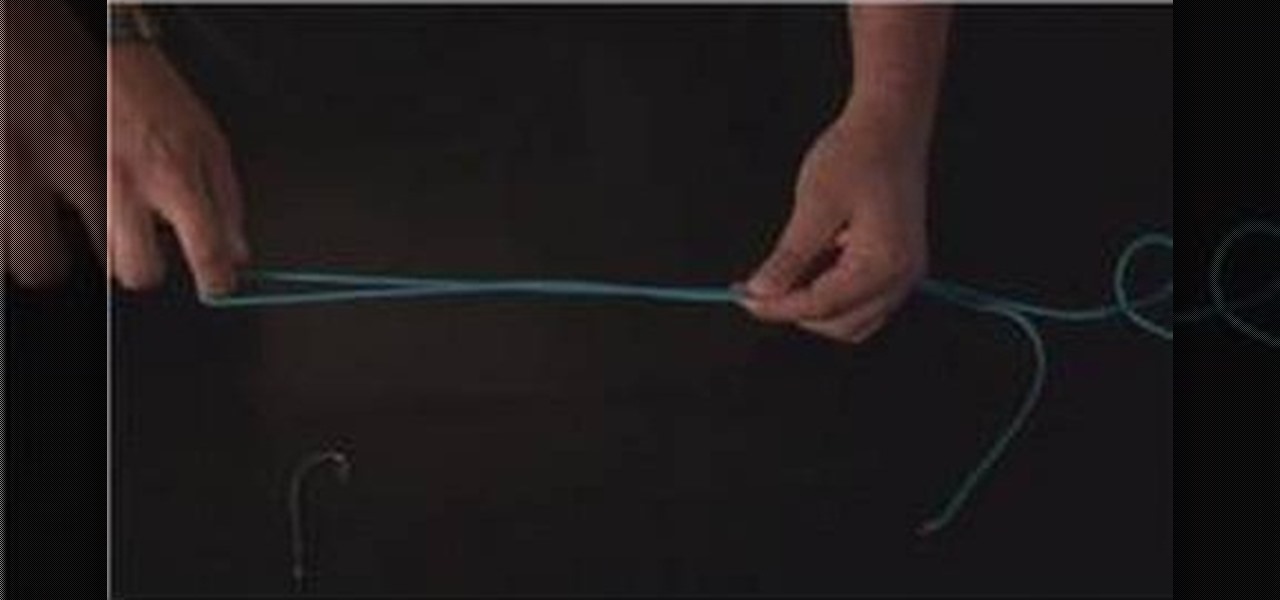
Know your knots! Learn how to tie a twisted dropper loop knot with this free video tutorial. The twisted dropper loop is great for fishing line and requires about 10 twists to get the right feel. For an easy-to-follow, step-by-step overview of how to tie this useful fisherman's knot in a minute's time or less, watch this free video knot tyer's guide.
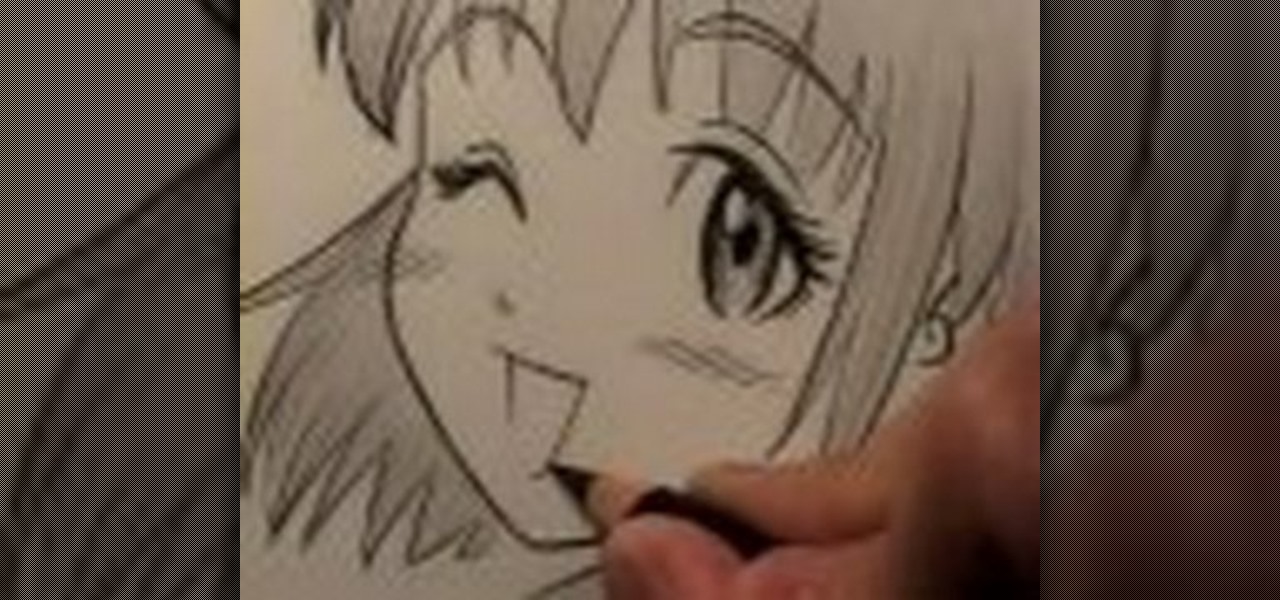
Characters in Japanese manga tend to have very expressive mouths, ranging from a smirky little line on one page to a giant "O" mouth on the next page. In this video, "Miki Falls" manga creator Mark Crilley shows how to draw mouths the manga way. And we won't just learn to draw one sort of mouth, we'll learn four different styles.
We know what you're thinking: You have two left hands and even cutting in a straight line is a monumental feat. But trust us, even butterfingers can cut their bangs professionally. In fact, if you tend to cut slightly slanted or jaggedy then your bangs will look even better!
The United Spinal Association presents this instructional video on how to play wheelchair softball. This is live from Shea Stadium in New York. This is an adapted sport for with adaptations for 16 slow pitch softball. Classification is similar to wheelchair basketball. One quadrapelegic must be in the line up at all times. You usually play in a vacant parking lot.

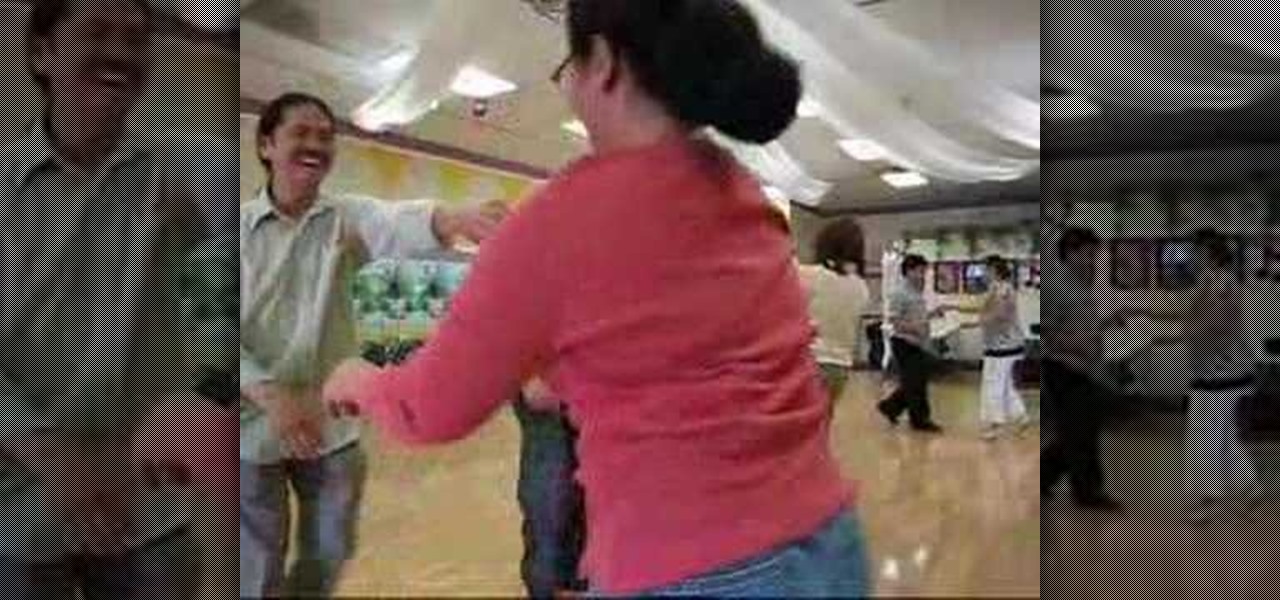
This square dance video teaches the following square dance calls on the mainstream list: Spin the Top, Alamo Style Wave, Wave Balance, Circulates (Column, Box, Split, 1 1/2), Chain Down the Line, Sweep a Quarter
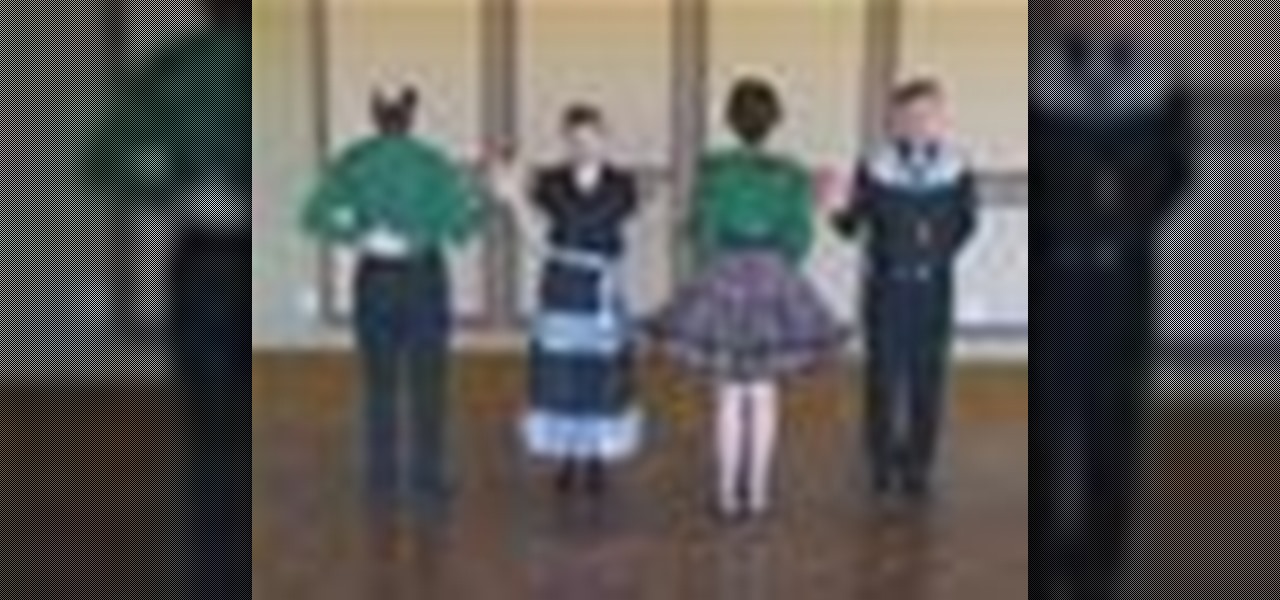
This square dance video teaches the following square dance calls on the mainstream list: Cross Run, Left Swing Thru, Single Hinge, Separate, Trade By, Wheel & Deal (Lines of 4).

This square dance video teaches the following square dance calls on the mainstream list: Veer Left/Right, Wheel & Deal (Two Faced Line), Ladies/Gents Promenade.
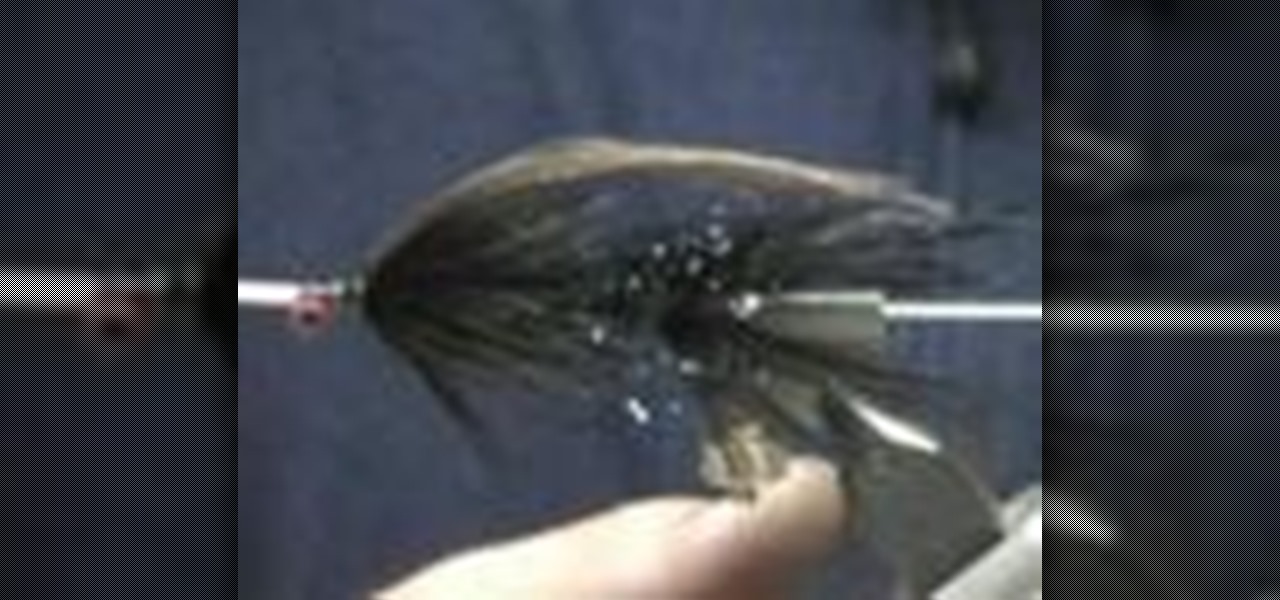
This is a step by step video on tying a variation of Ed Ward's Steelhead Intruder. The guys at Tight Lines fish this fly with great success all fall and winter. Excellent fly for migratory Steelhead and Browns on the Great Lakes Tributaries.
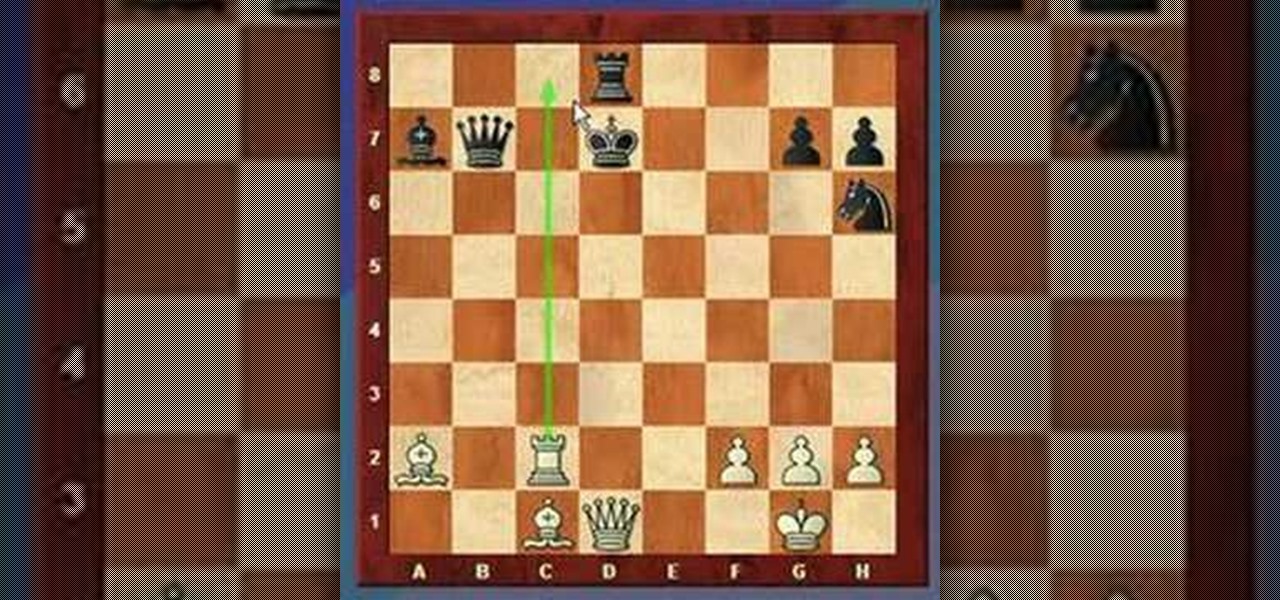
Need some more chess tactics for your arsenal? Well, why not try out this "skewer" tactic from this video lecture. A skewer is an attack on two pieces on the same line. The opponent moves the more valuable piece exposing an attack on the second piece. The skewer is a reverse cousin to the "pin."
Make a luxury brass case for an MP3 player. When a design is made, draw it on a section paper. Stick the paper on a brass plate with glue, and cut the brass plate along the line on the paper with a jigsaw.
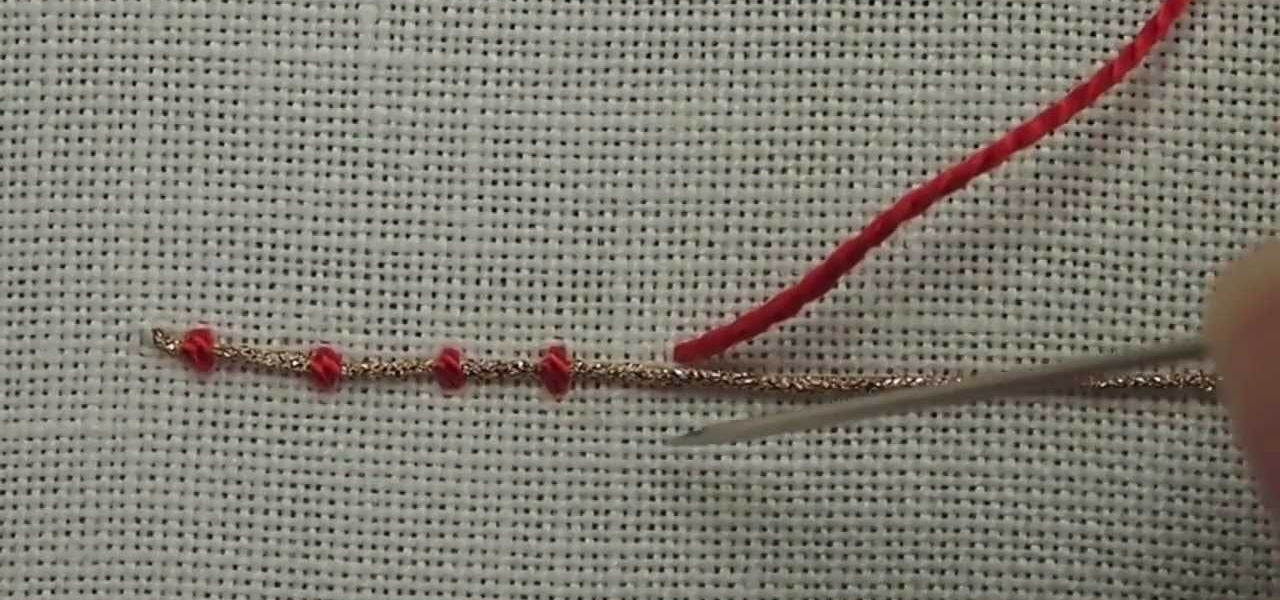
Couching is another easy embroidery stitch in hand embroidery, and a great way to create decorative line stitches that scroll and twirl about. It's also widely used for filling areas, and historically was used to great effect during the Middle Ages and Renaissance in a technique called Or Nue. Here's a video from Needle 'n Thread that demonstrates couching a single thread for an outline.
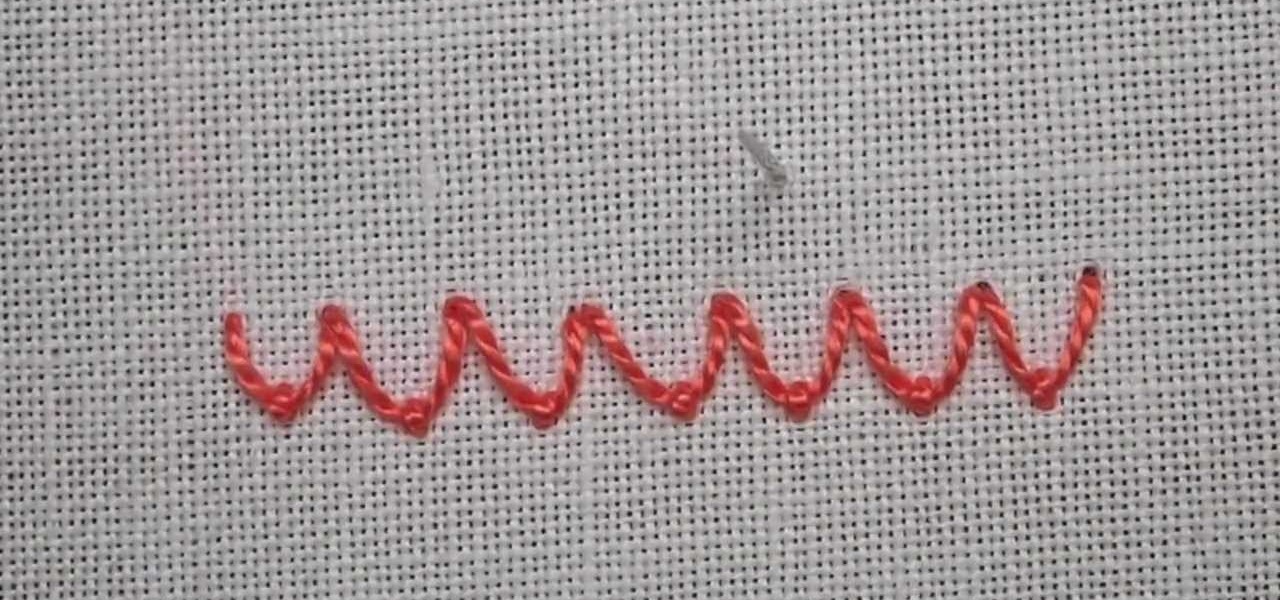
Here's another video tutorial from Needle 'n Thread for hand embroidery stitches - this one is for the Palestrina stitch. Palestrina stitch is used for outlining or filling and is common in both Jacobean designs as well as in Mountmellick embroidery, the latter because it gives a highly textured line or fill area.
The fly stitch is another basic embroidery stitch used for straight and curved lines, seam embellishments in crazy quilting, and general surface embroidery techniques. The fly stitch can be worked horizontally and vertically. In this video, it is worked horizontally. Watch this video from Needle 'n Thread to see how it's done.
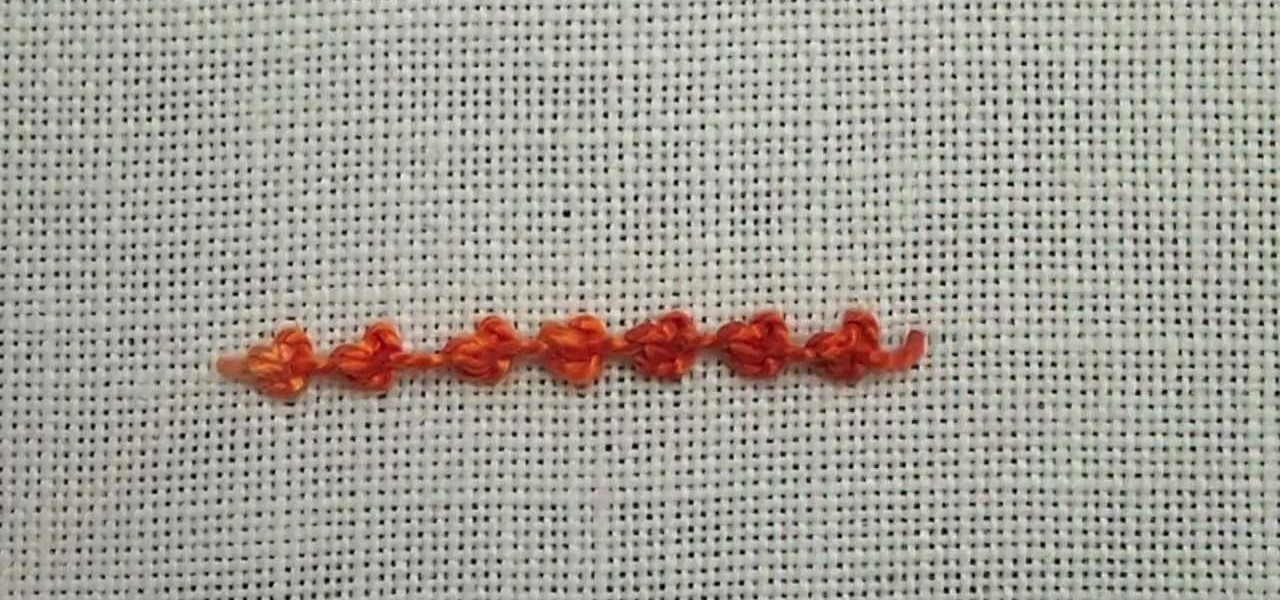
The spider web stitch and the ribbed spider web stitch are both "woven" embroidery stitches, either used as isolated accents or used in clusters. They aren't a line stitch or a filling stitch, and they aren't really a "small" detached stitch that can speckle a background lightly, either. Watch this video from Needle 'n Thread to see how it's done.
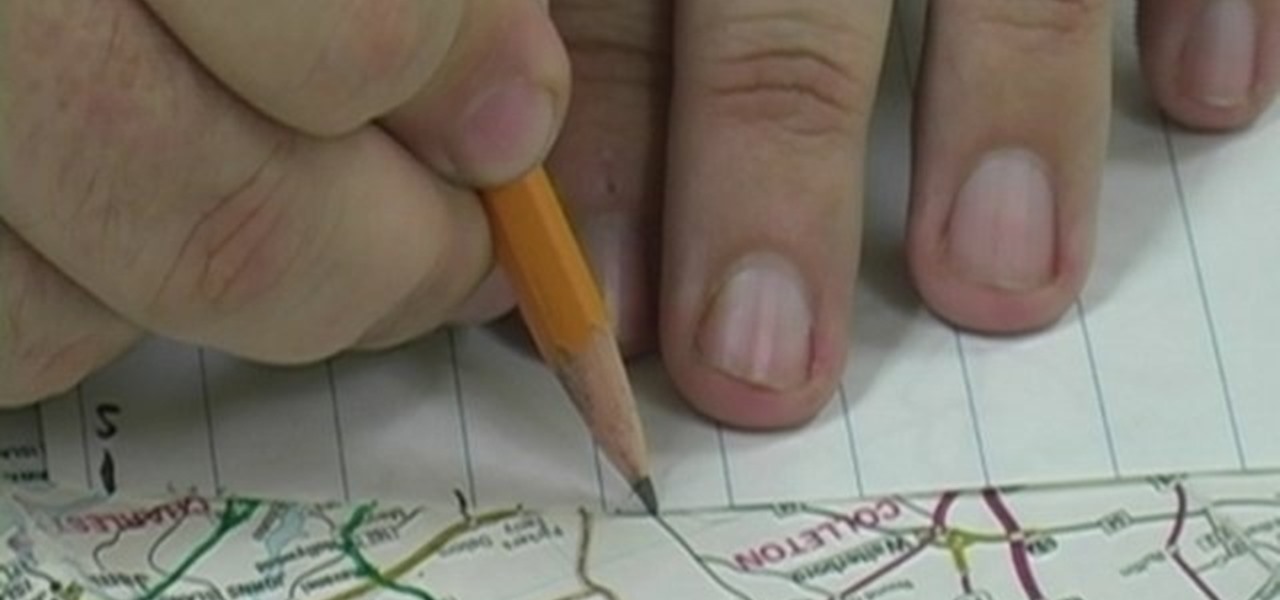
Check out this video to learn how to turn a squiggly line on a map into a straight distance that is easy to measure. This is an excellent video to help you improve your map skills.
For making videos at home, a teleprompter would greatly reduce the amount of memorizing lines, cutting and editing. Put together this easy teleprompter and start your own show today.
Welcome to the second Goonight Byte! Our second coding session was kindly hosted by th3m, so props to him for letting this happen.
Our first Community Byte went well! We had around 8 people in the room coding collaboratively and watching to learn. LukeStav did the kind task of hosting it on Gobby for all of us, so big thanks to him!
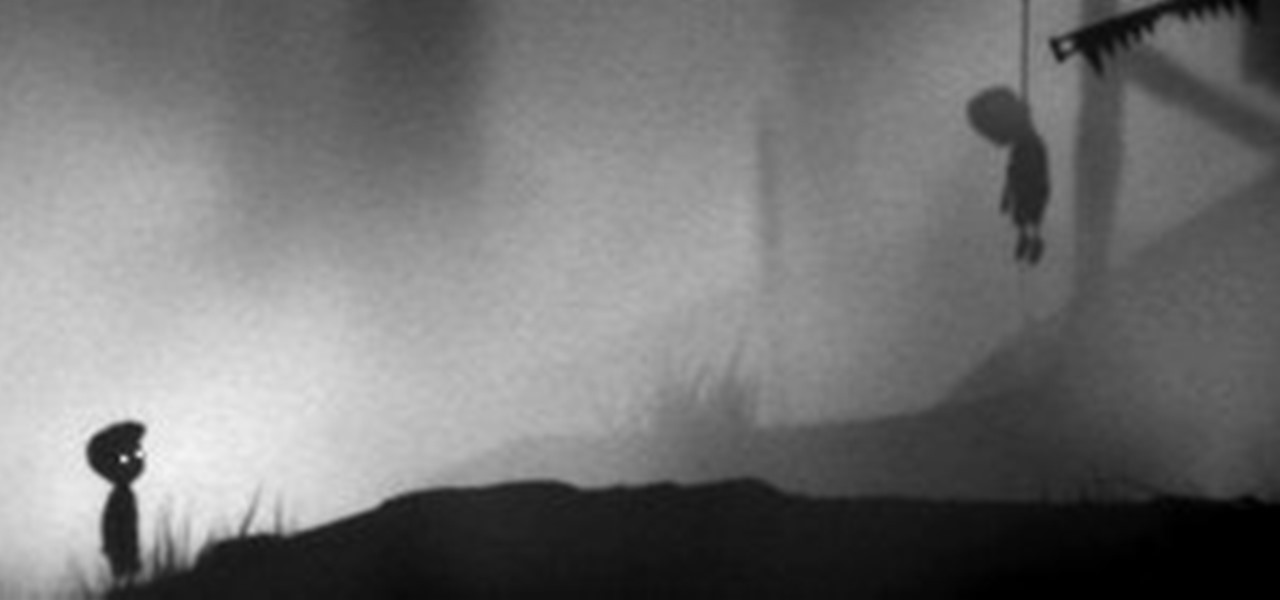
Danish developer Playdead has made only one game, a little indie, side-scrolling, puzzle platformer called Limbo. It just happens to be far and away the best video game of that prominent genre (and perhaps the best indie game period) on the Xbox 360, and quite possibly for PlayStation 3 and PC, too. Critical and financial success has followed in droves, and today... Playdead has taken advantage of that success and indie-fied themselves even further by purchasing back the portion of the compan...
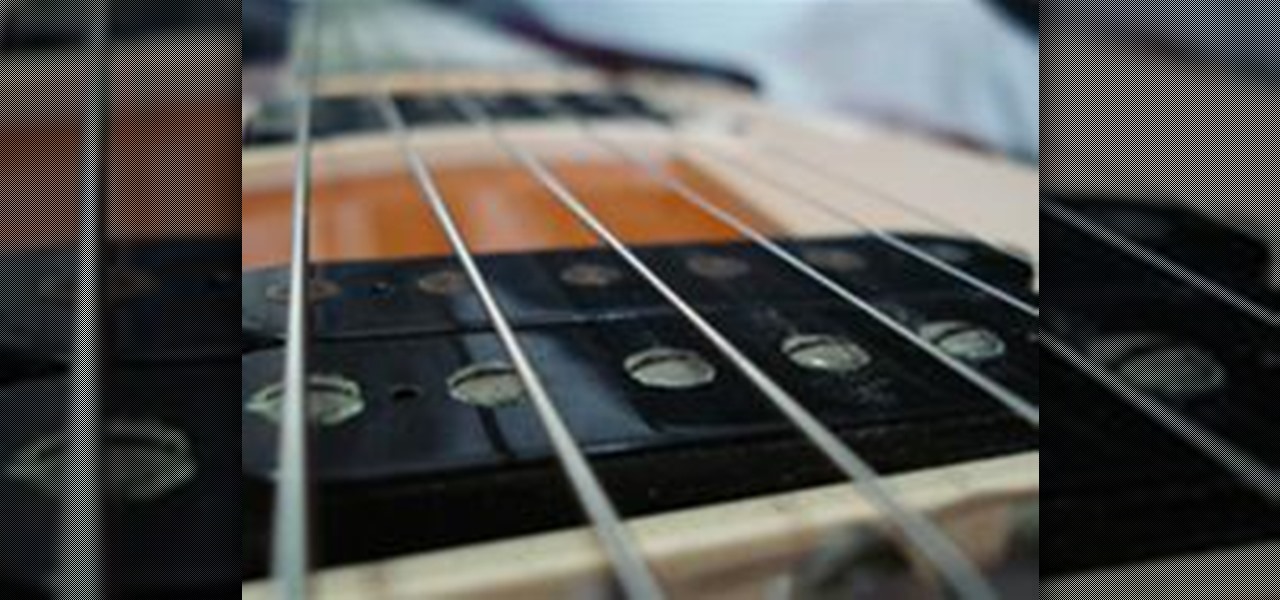
Guitar Essentials My friends and I would secretly scribble tab in the darkly lit practice rooms in our university even though we were educated musicians. So, being able to read tablature, or tab, is essential for beginning guitarists.
USE WINDOWS 7 ULTIMATE x64 w/ all the latest updates always OF COURSE AND... USE THE ASTON 2 SHELL REPLACEMENT, MENU, DESKTOP, W/ THEMES...
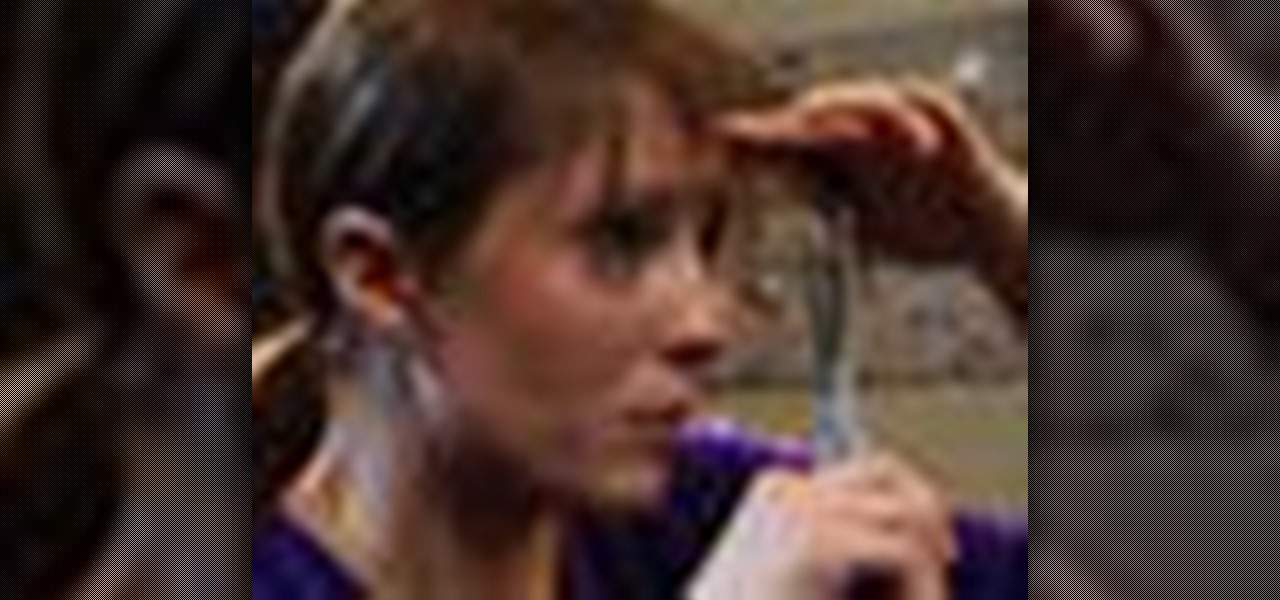
The two-hook panfish rig is meant for vertical fishing under the boat in fairly deep water, for deep-dwelling fish like crappie, catfish, bluegills, and sometimes even bass. It involves two hooks hanging off the line, off droppers, to fish close to the bottom. Watch and learn as Wade Bourne of MyOutdoorTV shows you how to fish a two-hook panfish rig.
Learn how to tie a knot, but not just any old knot... a square lashing knot. You'll never have any troubles again tying nautical square lashing knots, thanks to this Marinews knot tie animated tutorial. You can learn by simply watching the knot tying animation at a moderate speed, or if need be, click on "learn by steps" to get step-by-step rope knot instructions for square lashing knots. How to make a knot is not the hard part, choosing the right fishing knots or rope knot is.
The Clinched Blood Knot is a strong knot for tying a medium size hook to a medium size line. The clinched blood knot is very similar to the half blood knot but it differs in that the line it is passed through the eye of the hook twice. A good knot for tying the line to terminal tackle. Tie a Clinched Half blood Knot for fishing.
Learn how to use Masking, Motion Tweens, and Motion Guide Layers to create an animated pencil drawing a curved line. Tools used are the Rectangle tool, Pencil tool, and Free Transform tool. This is an intermediate level Flash tutorial. Animate a pencil drawing a curved line in Flash.
This video shows you how to use the Line tool, Eraser tool, and all of the shape tools in Illustrator. You also learn how to use modifier keys to access additional options. Check out the video by Matthew Richmond now! Use the Line, Eraser, and shape tools in Illustrator.
Tips for dealing with flaking lines. Good for both single handing and strong winds. Deal with flaking lines on your boat.
If you use the follow technique on a shot with a small cut angle, the cue ball will deviate from the line tangent to 90 degrees. Deviation from tangent line.
It's time to boogie! Get your shoes on, put on your dancing shirt, turn off your phone, and tell your friends you've gone on a permanent vacation! The boogie line dance is a simple line dance - easy enough for a toddler to learn, but hard to forget! This instructional video will get you up and boogieing in no time. So don't be shy, watch this dance video and get your boogie on.
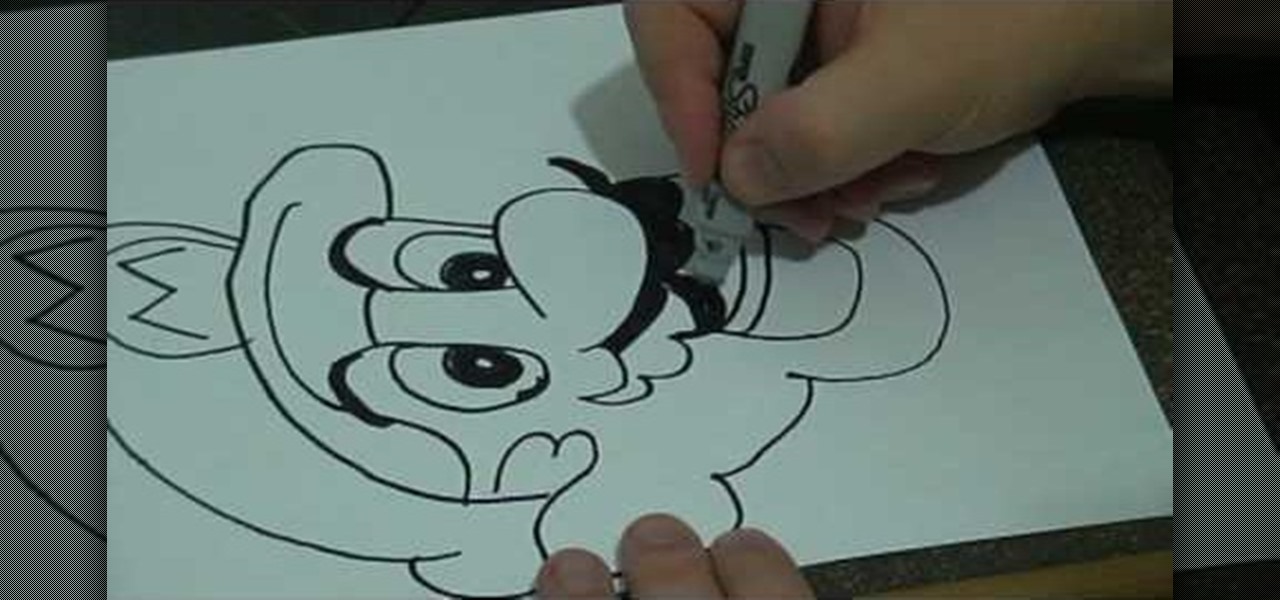
In this tutorial, we learn how to do a basic line drawing of Mario. To start, draw the basic outline of the face with a black marker. Draw in the details of the mouth, don't forget the teeth, tongue, and inside of the mouth. After this, draw in the nose and then the eyes. Draw in the pupils and then start to draw in the mustache and eyebrows. After this, create the hat and then draw around to the side of the head to draw the ear in. When finished, you can leave empty or color in with appropri...
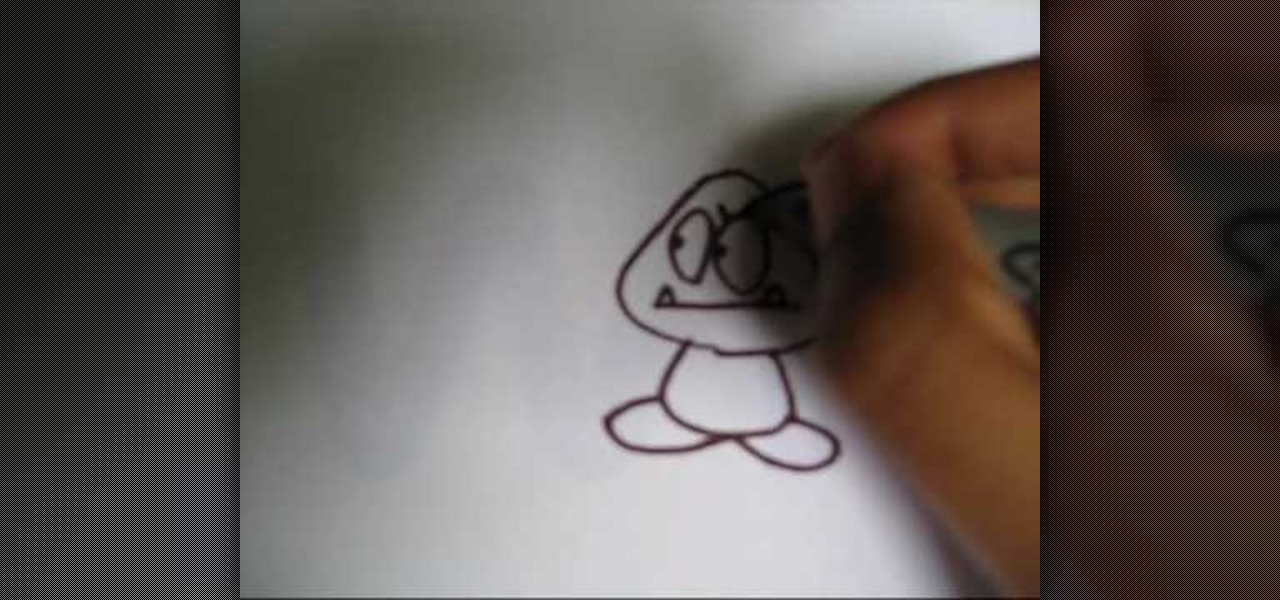
In this tutorial, we learn how to draw a Goomba from Super Mario. First, draw the softened triangle shape of the top of the head, then draw the body and the oval feet at the bottom. After this, draw on the oval eyes and then a flat mouth with two triangle teeth on both sides. From here, draw on the eyebrows to Goomba in thick lines. To draw another type of Goomba, draw the same basic shape, but then make the eyes squished into small lines and then draw the mouth with crunched teeth on the ins...
In this tutorial, we learn how to draw Sonic the Werehog. Start by drawing the outline of the character, making sure to draw in the spiked hair on the back of the head. Then, draw in the circle for the head and use crossing lines to reference where you want the features of the face to go. Draw in the features and then add in more detail to them as well. Erase the background lines and then draw in the details of the body. From here, color in the body and then shade in corners to make it look m...
In this tutorial, we learn how to draw Uncle Scrooge McDuck. Start off by drawing the outline of the hat, heat, neck, upper body, instrument, and lower body. After this, draw on the eyes, glasses, and the beak. From here, you will start to add in additional details and erase the outline lines from where they aren't needed. Start to add in lines to create folds on the character and then color him in with the appropriate colors. After this, add in shading to different parts of him and his instr...
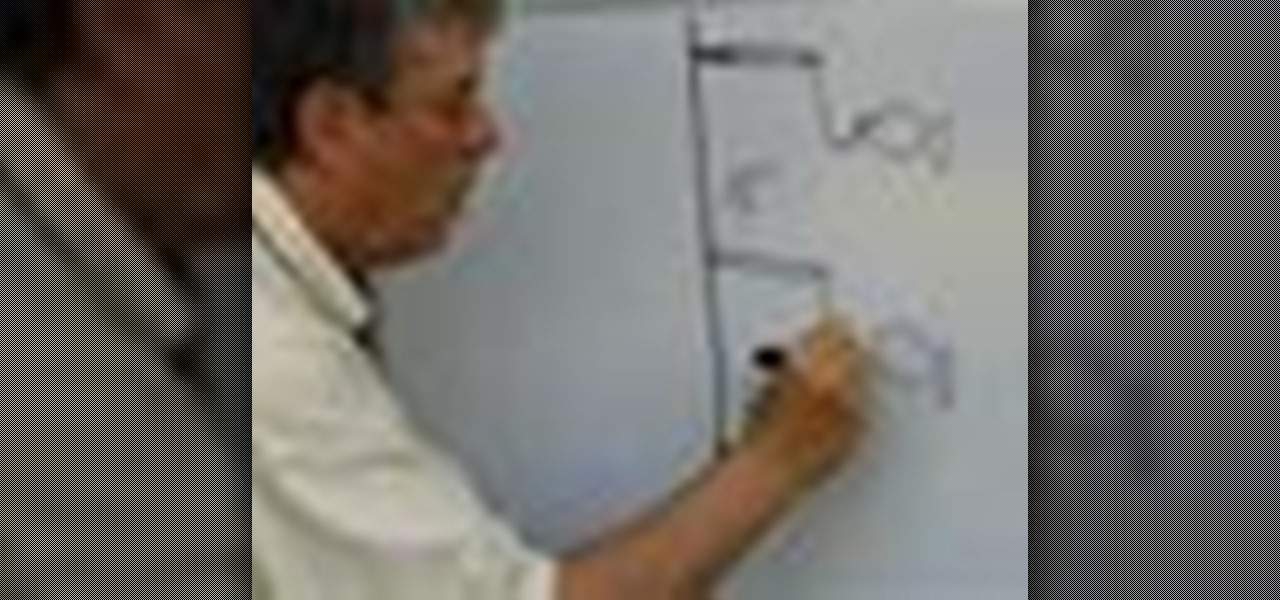
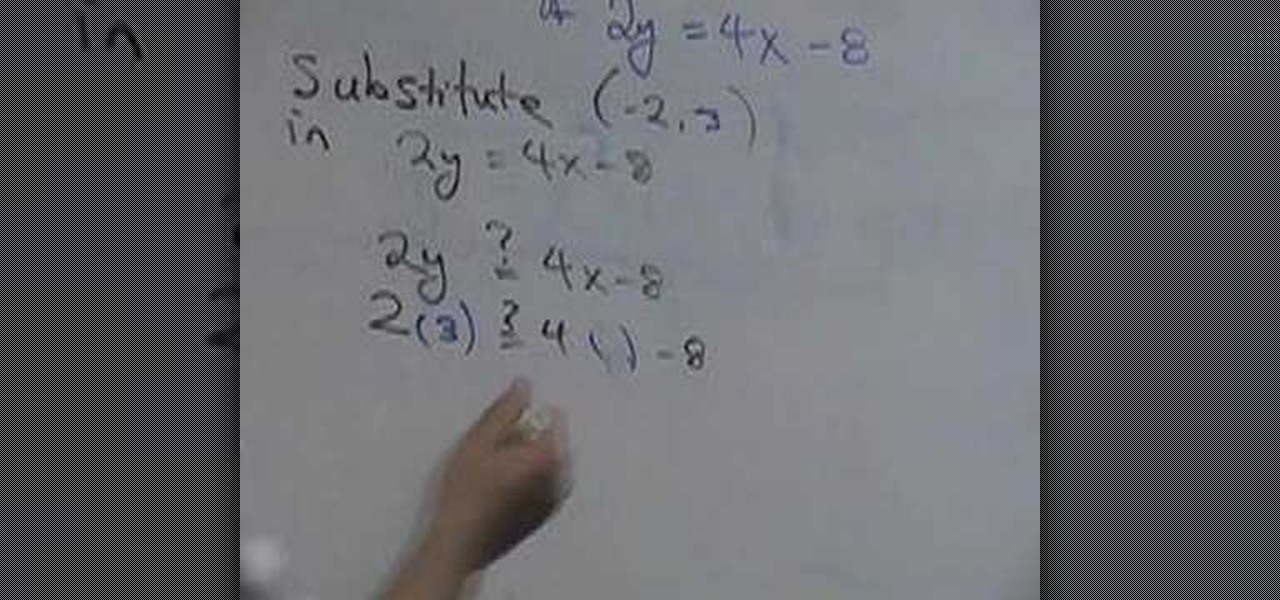
In this video, we learn how to graph an equation. First, pick a point out of the equation and see if it's a solution to the equation. This equation shows where two lines cross in the math problem. See if the two coordinates are part of the line that is on the equation. The two numbers are going to be the 'x' and 'y' that you plug into the equation. Once you have these written out, you will be able to graph them using the coordinates on the graph. Once finished, you will have graphed the equat...
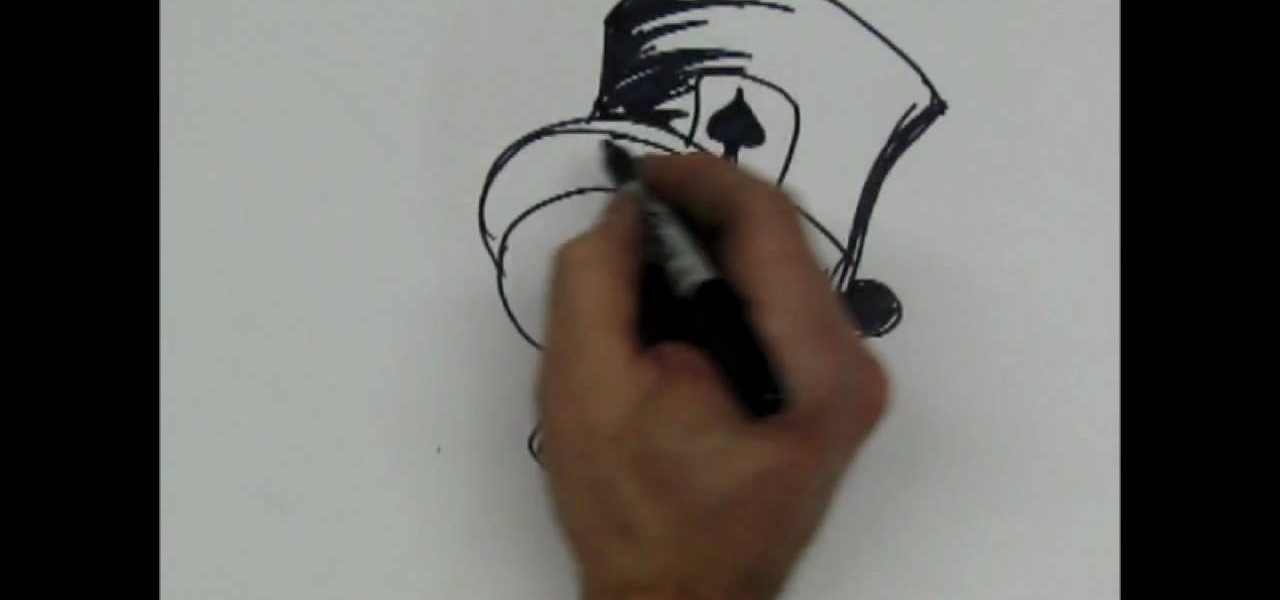
In this tutorial, we learn how to draw a skull with a top hat. First, use a Sharpie marker to draw the nose of the skull and then the eyes. Color these in completely black, since you want be drawing eyeballs in them. After this, draw the skull around it. Draw in the teeth clenched together and then add in lines around the head of the skull to show cracks in the bones. After this, add in additional details around the jaw line and on the head of the skull. When finished, draw on the hat to the ...
In this tutorial, we learn how to draw a cylinder. First, you will draw the sides of the cylinder and then the curves for the top and the bottom. After this, complete the circle at the top and then shade in the side with crosshatching. From here, draw some lines to shade in on the side next to the cylinder. If you want to draw a cylinder on its side, draw a box around it first and then continue to draw. Make sure all your lines are equal to each other so it evens up and looks more realistic f...
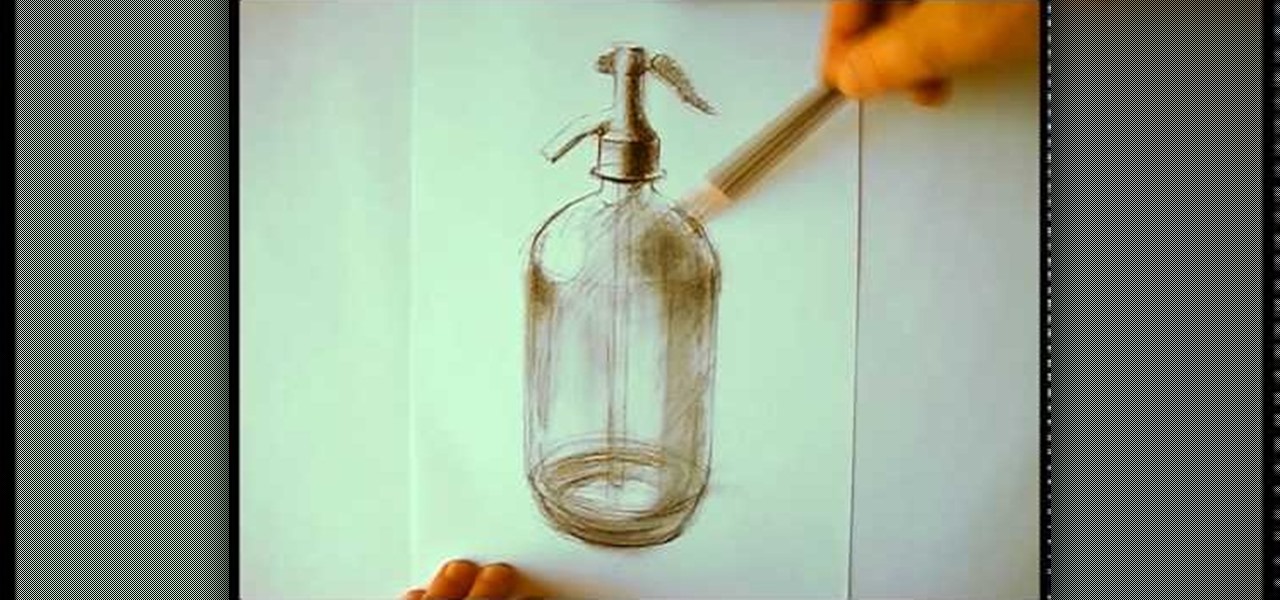
In this tutorial we learn how to draw a glass bottle. To start the bottle, you will draw the outline of the bottle starting with the cap to the base. After this, start to shade in the top and around the sides of the bottle. Small lines will create the effect of the bottle seeming to be transparent. After this, start to shade in around the sides of the bottle and on the bottom. Draw the inside lines and the other side as well so you can see that it is clear. Then, use the eraser to smear the c...
In this tutorial, we learn how to draw hands in the anime style. When you are drawing hands, they have a square look to them. So, start out with that shape and then start to draw the fingers onto the hand. Indicate where the joints will be and then you can further elaborate with the fingers. Make sure you make the fingers the correct sizes. The pinkie should be away from the wrist, as well as the thumb. Use a line to help center all of the fingers and then draw them around this. When finished...
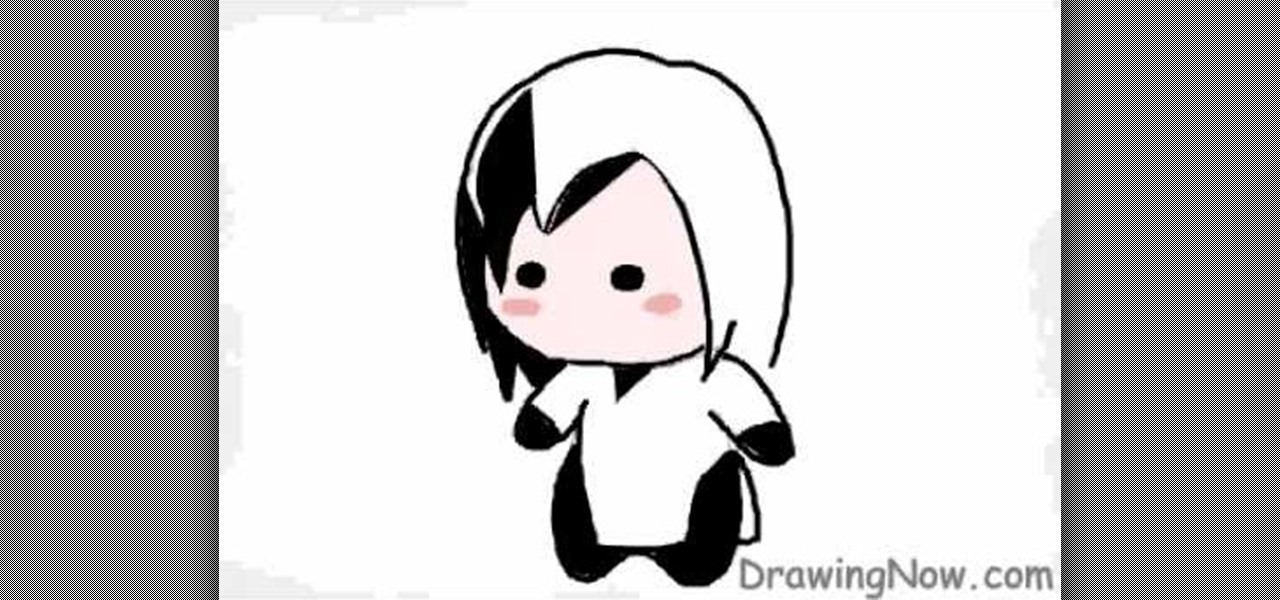
In this tutorial, we learn how to draw a Chibi Orochimaru from Naruto. Start off by drawing the outline for the character, then add in the details for it as well. After this, you will start to draw in the shading and the additional lines to give it more details. Then, you will need to erase the background lines that you used as a guide to draw the final product. From here, you will start to shade in colors on the character and then draw in any additional details or facial features. To finish ...
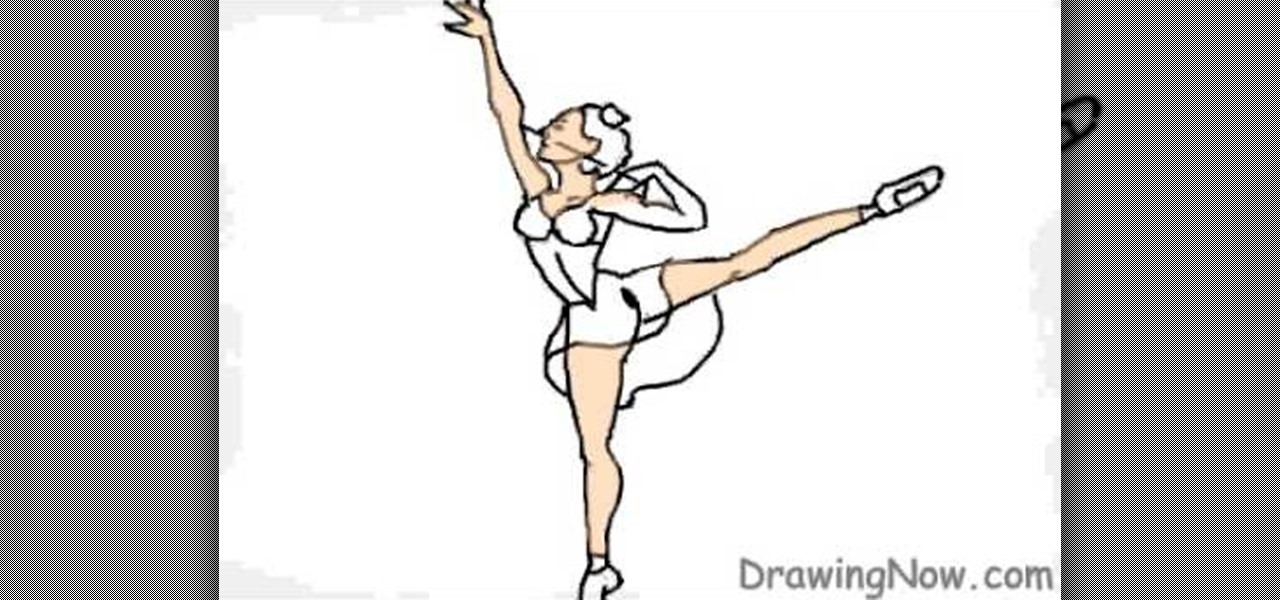
In this tutorial, we learn how to draw a ballerina. Start off by using circles and basic lines to draw the outline of the ballerina's body. Then, use a darker brush to create the body and add in the details of it as well. Draw one leg up in the air, while the ballerina is standing on the other with her arm raised high in the air. Erase any background lines, then start to draw in details of what the ballerina is wearing on her body. Draw in additional details around the figure, then when you a...