
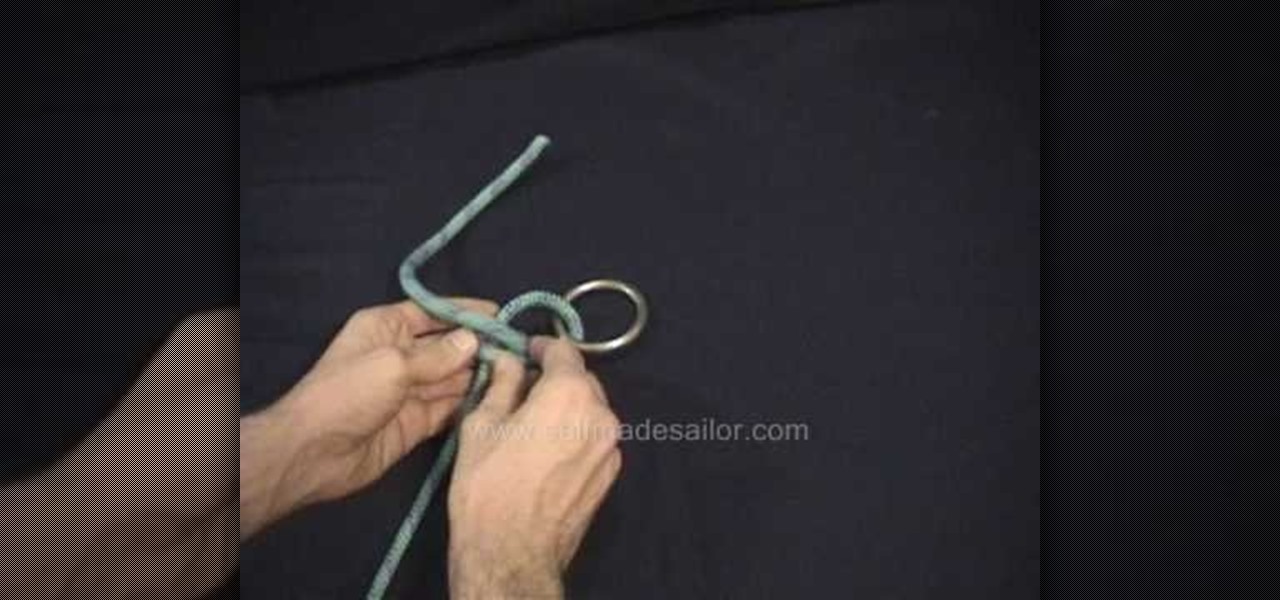
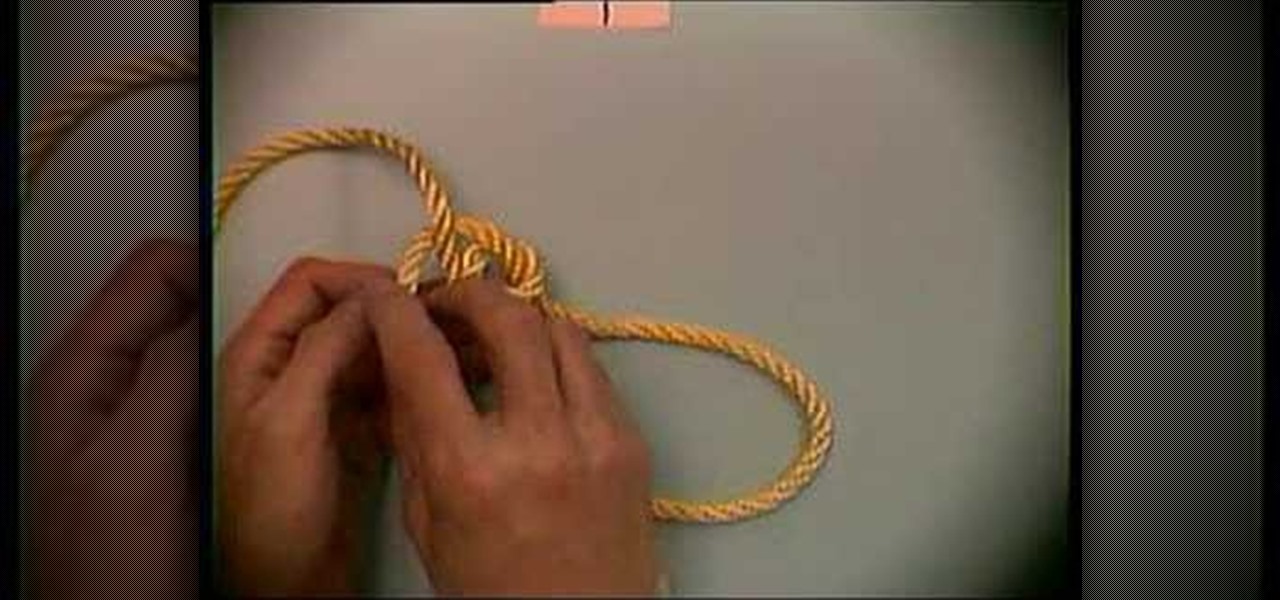
How To: Tie a Tarbuck knot for attaching a line to a post
Learn how to tie a Tarbuck Knot - a handy hitch for attaching a line to a ring, post, or other fixed object. This is a fine knot for camping, climbing, sailing or Boy Scout training.

Learn how to tie a Tarbuck Knot - a handy hitch for attaching a line to a ring, post, or other fixed object. This is a fine knot for camping, climbing, sailing or Boy Scout training.
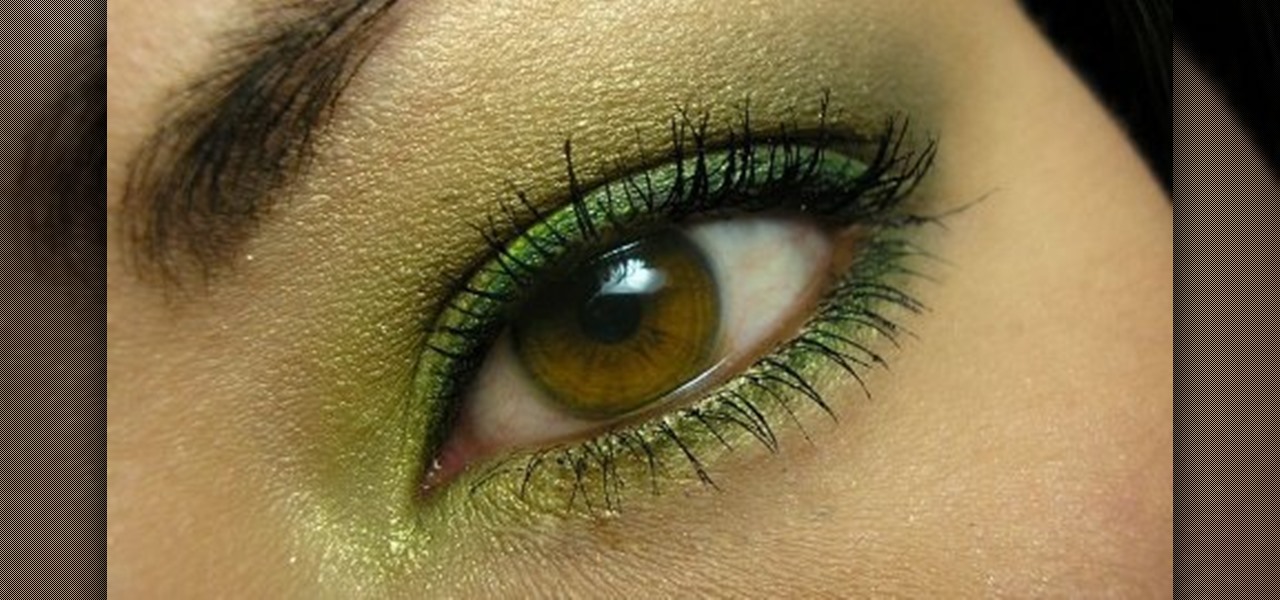
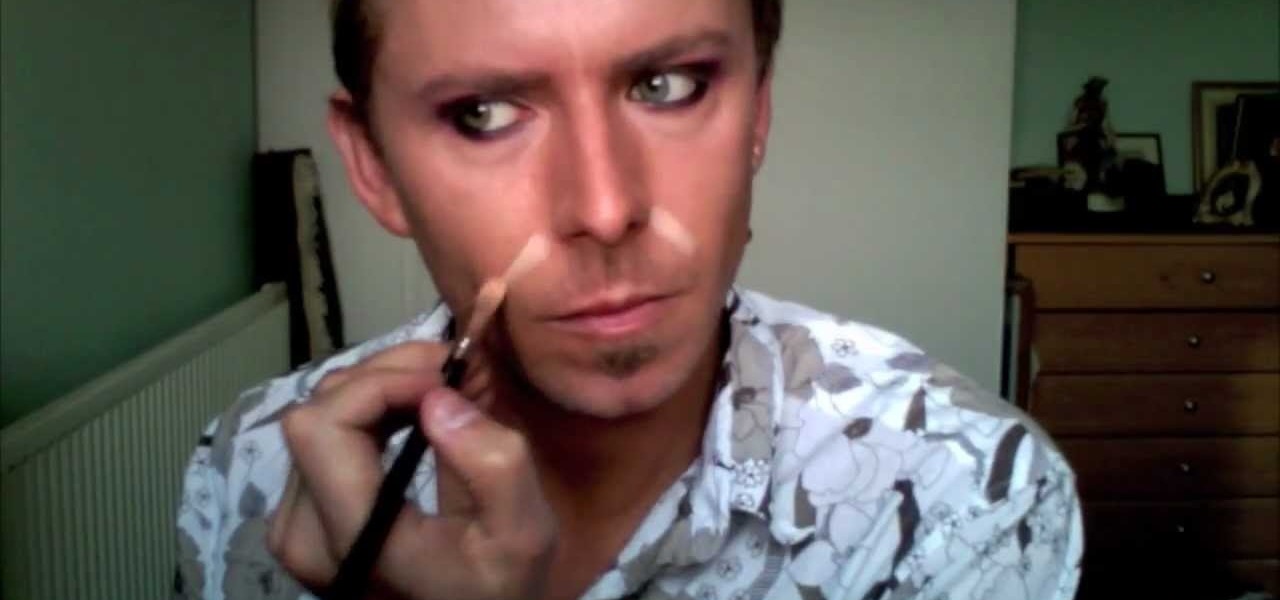
This video shows you how to create beautiful make-up using the loreal hip products. Products Used:

Listen closely or risk ending up like Jack Nicholson in The Shining, minus the whole crazy axe part. Learn how to dress properly for a snowstorm.
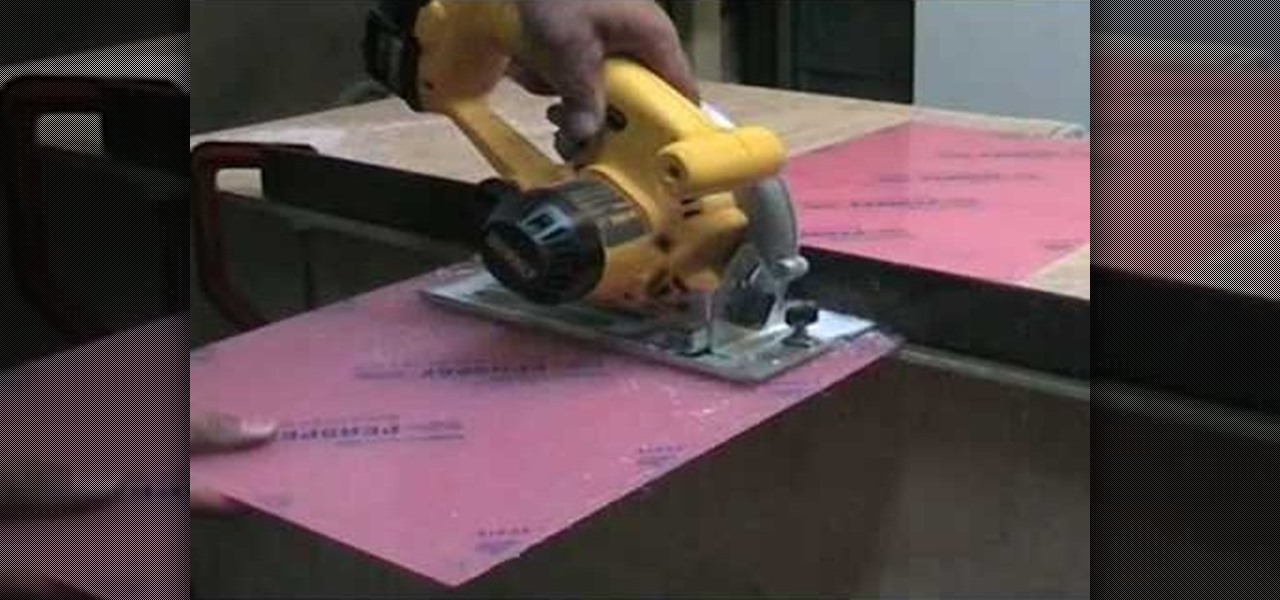
Wondering how to cut Perspex (or acrylic glass) easily? When cutting Perspex at home, you're more or less limited to using circular saws and jigsaws. For cutting straight lines, the circular law works best; for curvy lines, you'll want to use your jigsaw. For more information, including step-by-step instructions on cutting your own acrylic sheet, watch this DIY home tutorial.
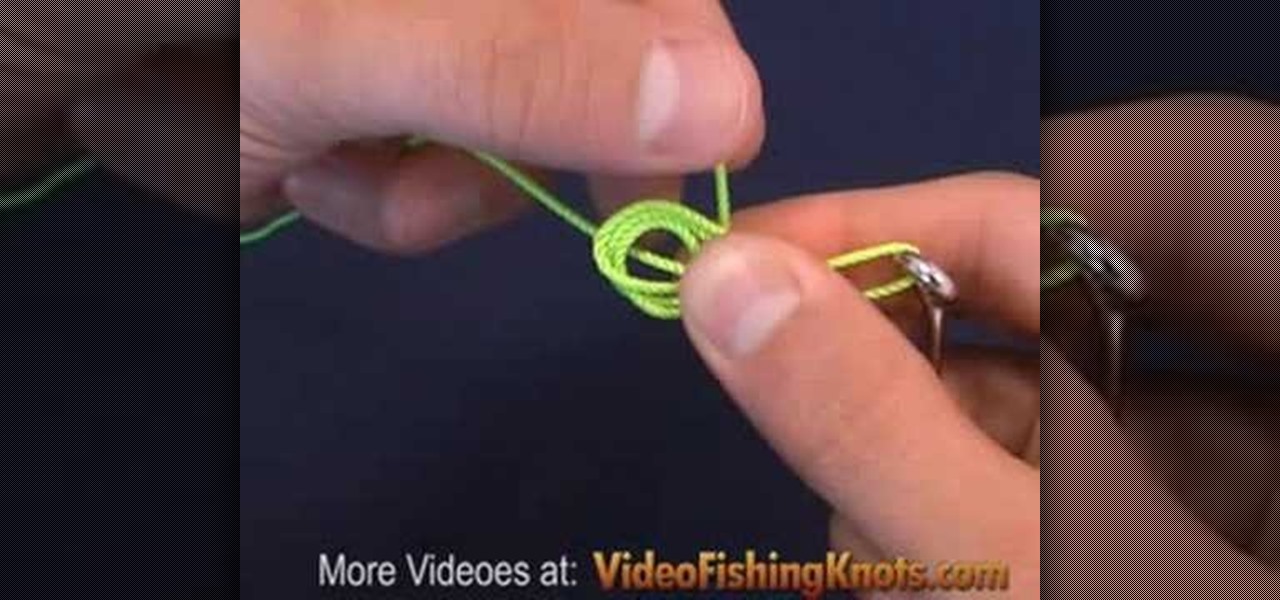
The Centauri Knot works well with a wide range of line diameters and should regain around 90 percent of the lines breaking strength. The centauri knot is also fairly easy to tie and is therefor a popular choice by many anglers. The knot is ideal for small hooks, rings and swivels. Watch this video knot-tying tutorial and learn how to tie a centauri not for fishing.
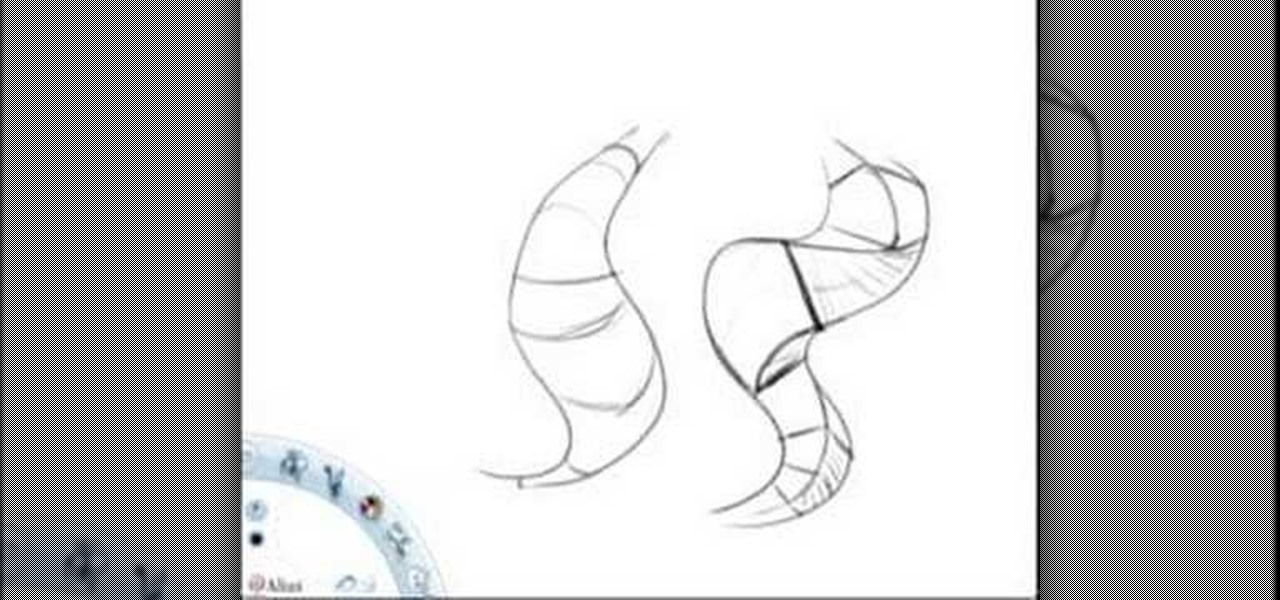
Practice drawing in perspective with simple doodling exercises. Add texture to flat looking forms by drawing patterns on the surface of objects. If you can doodle in perspective, then every line you put down can be a line drawing in perspective. Watch this instructional drawing video to doodle simple shapes with multi-dimensional form.
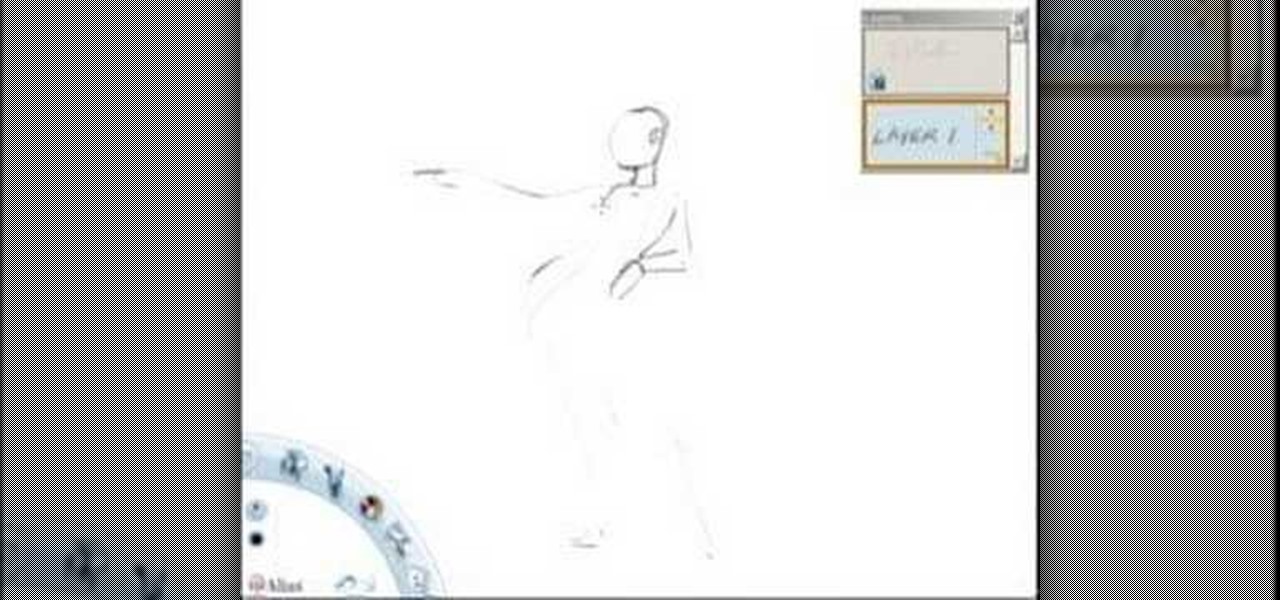
Use everything you know about drawing with perspective and line efficiency to draw a sculpted form. This instructional drawing video demonstrates how to flesh out the map of a drawing into an almost mobile being. When drawing with this technique, line drawing becomes a way of carving a figure out of boxes.
The bowline knot is called the king of knots, and is perhaps one of the most important knots you could learn how to tie. It's used for making a loop at the end of a line. It's very strong, and doesn't diminish the strength of the line much, but is still easy to untie. Watch this video survival training tutorial and learn how to tie a bowline knot.
Captain Bob Hoose talks about the advantage of re-spooling before a trip. Check out this instructional fishing video to understand a few tips that are perfect for beginners. Learn the importance of re-spooling your fishing line from the experts. Practice your fishing skills and reel in the big fish!
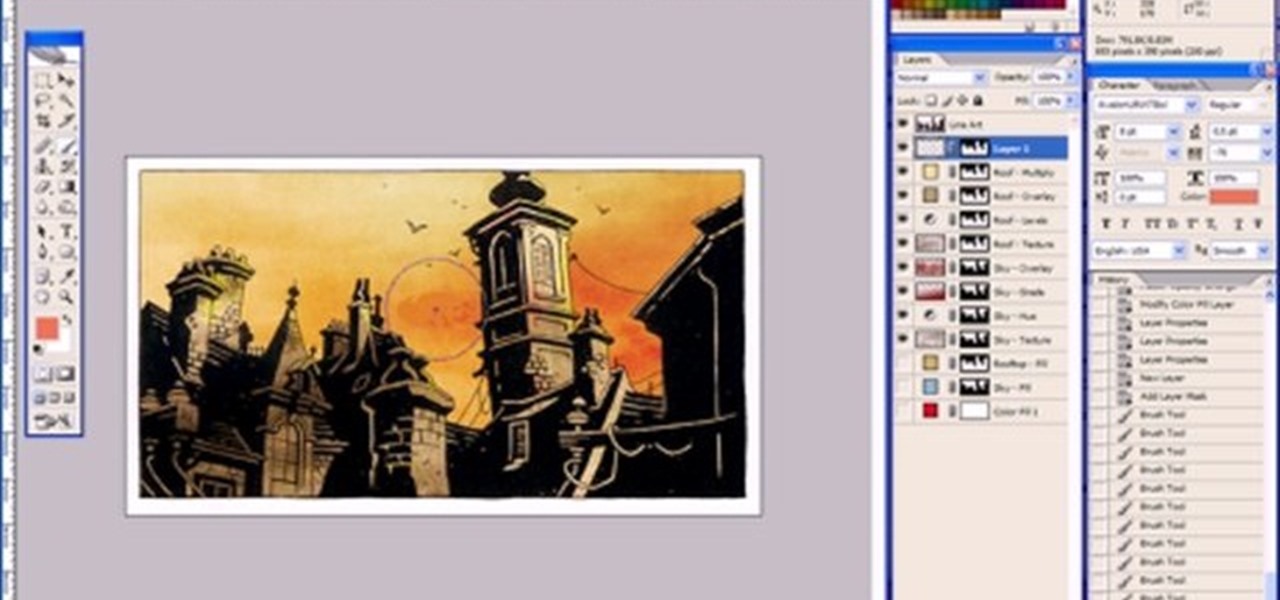
This Adobe Photoshop tutorial is a demonstration of coloring technique using Photoshop CS2's layer masks, adjustment layers, and blend modes. Just like in a coloring book, you can use Photoshop to color in line art as shown in this video.

The Tucked Half Blood Knot is a normal half blood knot where the tag end is tucked in the final step. This will make the knot stronger and prevent it from slipping open. The tucked half blood Knot is used for the same applications as the ordinary half blood knot - to attach hooks, swivels and lures to the line. Watch this video fishing tutorial and learn how to tie a tucked half blood knot.

This AutoCAD 2008 tutorial covers basic drawing & editing, AutoCAD's Cartesian Coordinate System, drawing lines, and erasing lines.

Learn how to make a simple device out of stuff you can find around the house (including a bubble tape container). You'll have straight lines each time you use this device.
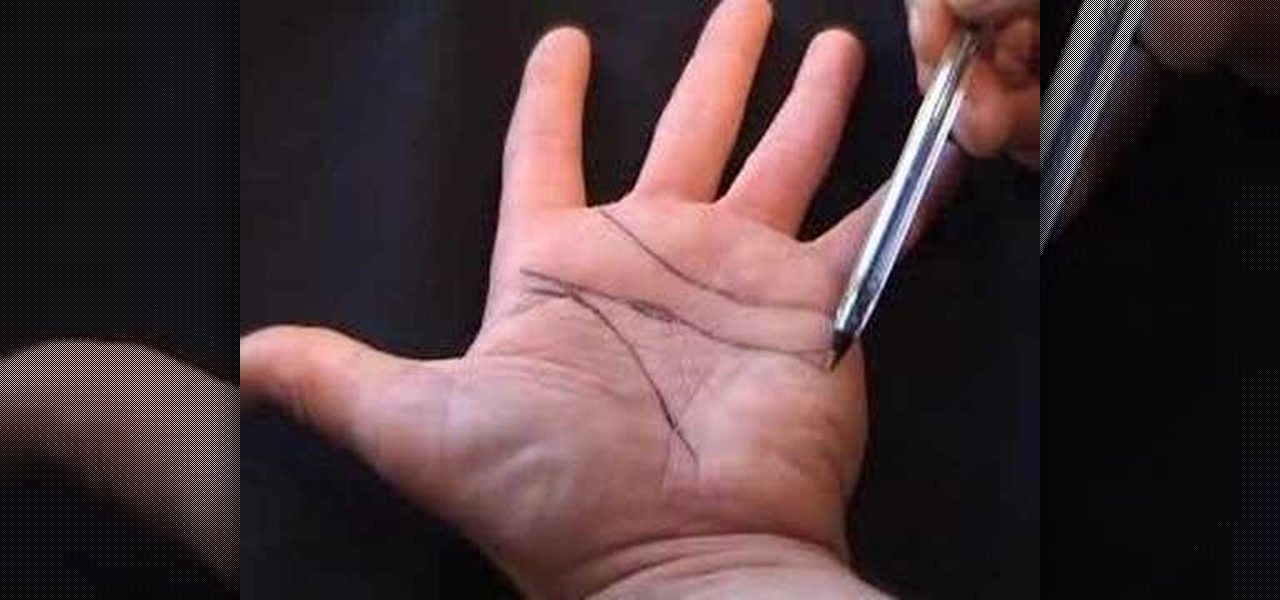
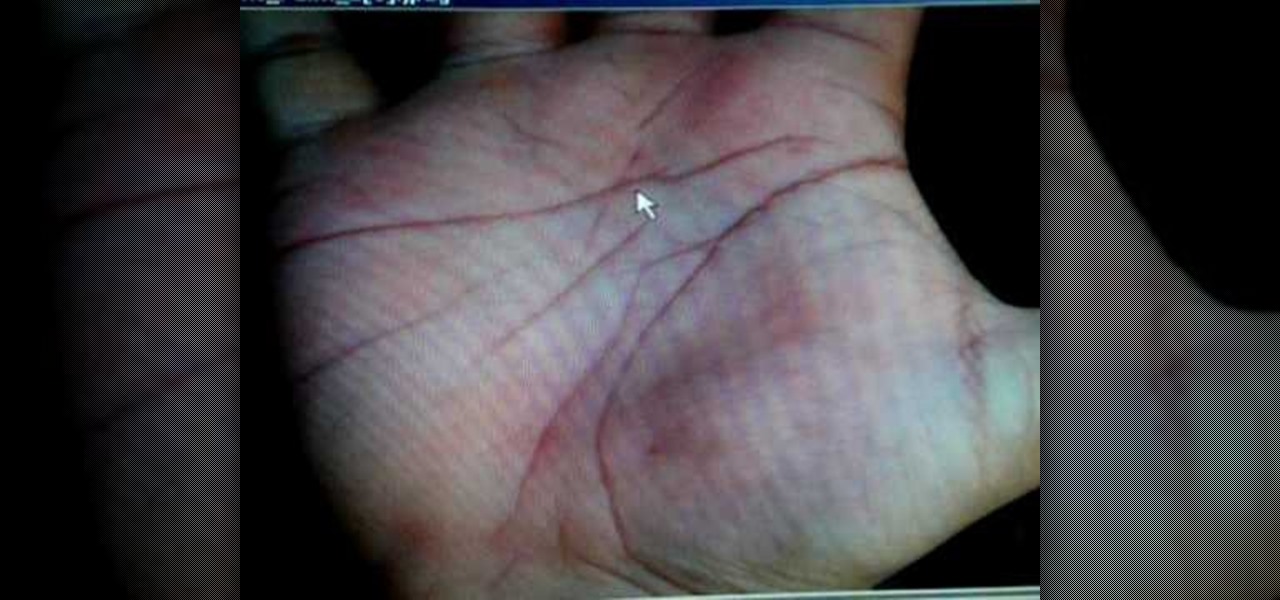
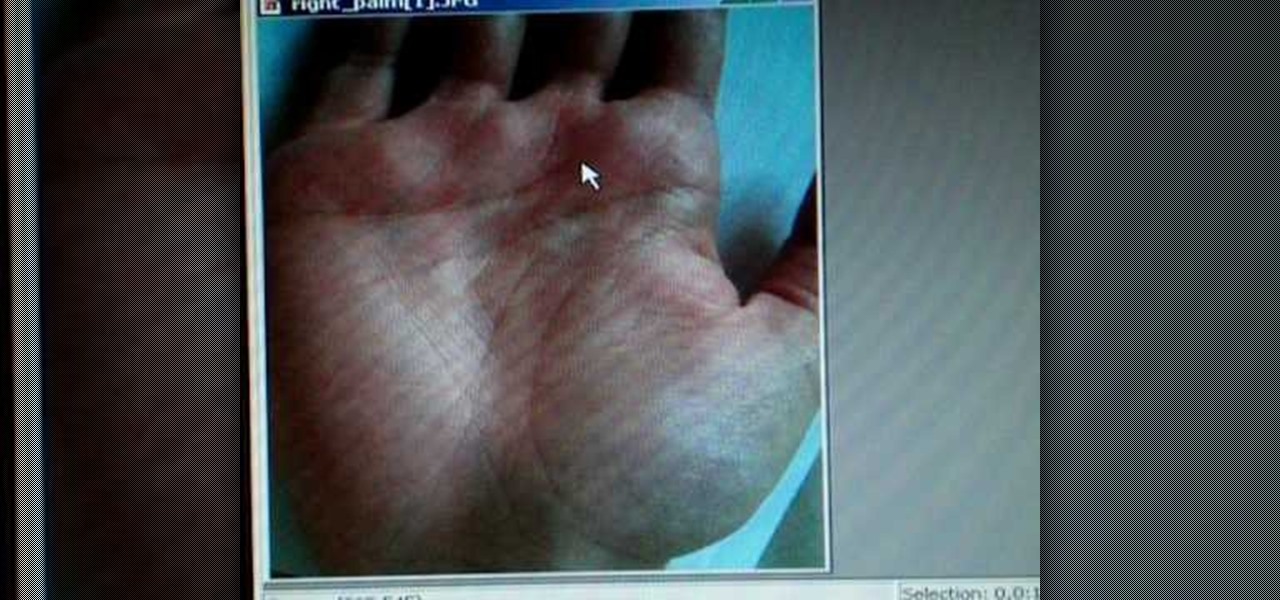
Check out this video to learn how to read the head line on your or someone else's palm. This video is cool because it is very easy to do while watching. (I tried it--apparently, I have more creative ability than writing ability, can you tell by this description?)
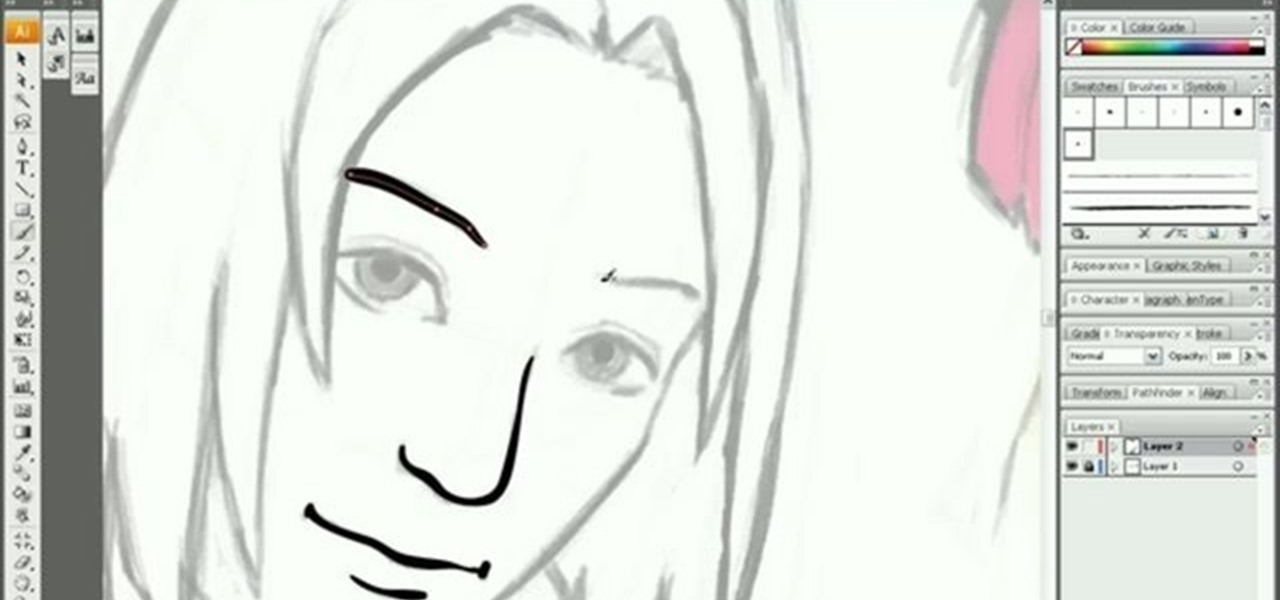
Tutorial/demonstration showing how to use Calligraphic Brushes in Illustrator to do line drawings (inking) and then import them into Photoshop as a Smart Object to retain the vector quality of the line art. By using clipping masks, we can change the color of the line art without rasterizing.
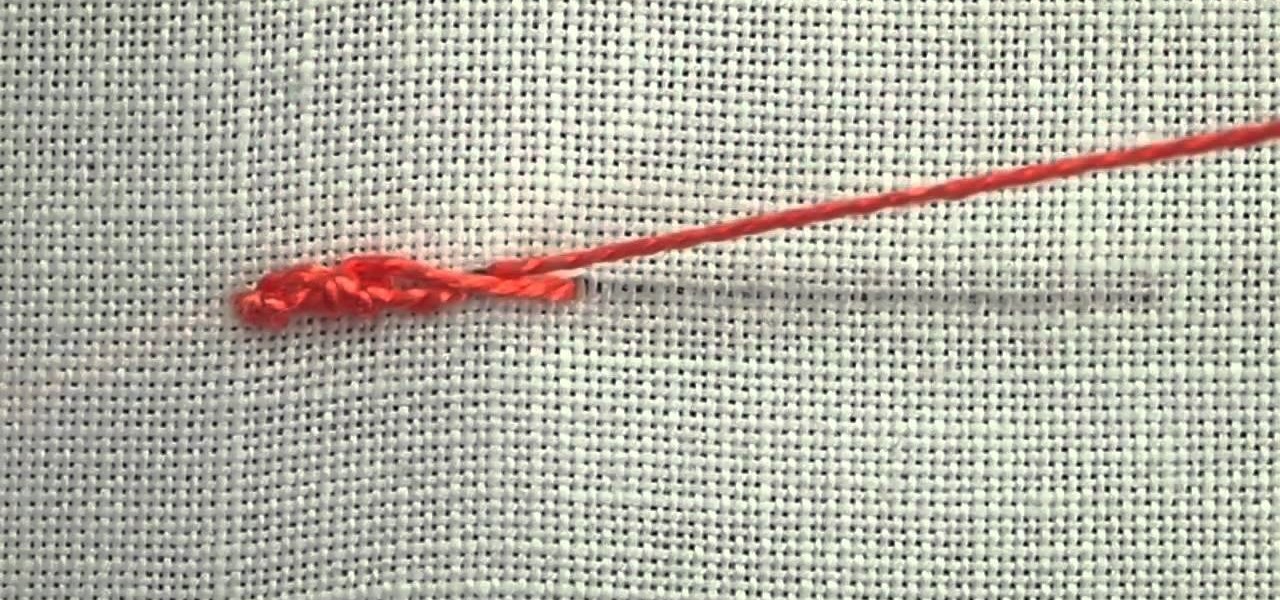
Here's a video tutorial from Needle 'n Thread for Portuguese Knotted Stem Stitch. This is a line stitch good for outlining, especially when you want a little heavier line with some texture to it.
How to do the Hustle line dance, with moves labeled to help you follow along. Based on a few hours of research and a viewing of "Saturday Night Fever."

This video is tips and tricks for emergency room medicine practitioner. It demonstrates how to put in a central line, and demonstrates different tools.

This video demonstrates, without narration, a trick to multiplying large numbers. To do the trick, just draw a diagonal line for every unit in the number and add up the number of times the lines cross.
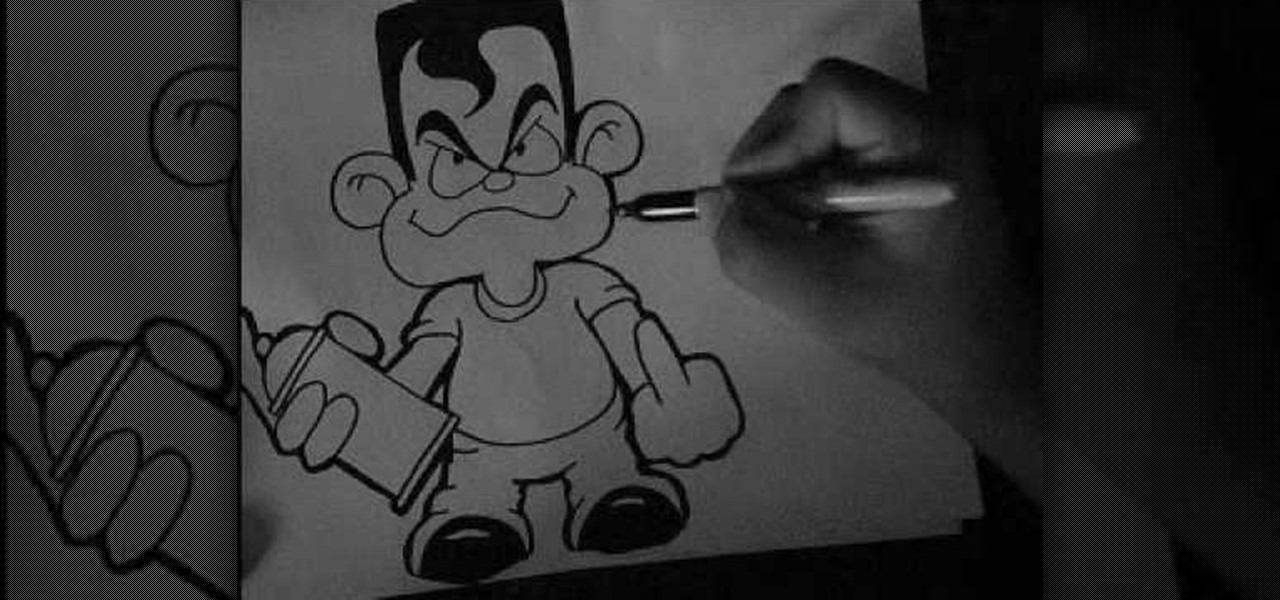
In this tutorial, we learn how to draw a graffiti cartoon character on paper. First, draw the outline of the head and then draw in a waved line for the mouth. From here, draw a circle nose and then round eyes with curved eyebrows. Draw big round ears on each side. Then, draw in the hand holding a spray paint can and draw the body around this. The character should be wearing a short sleeved shirt and the other hand should be flipping off the screen. Draw in the pants and shoes, drawing lines o...
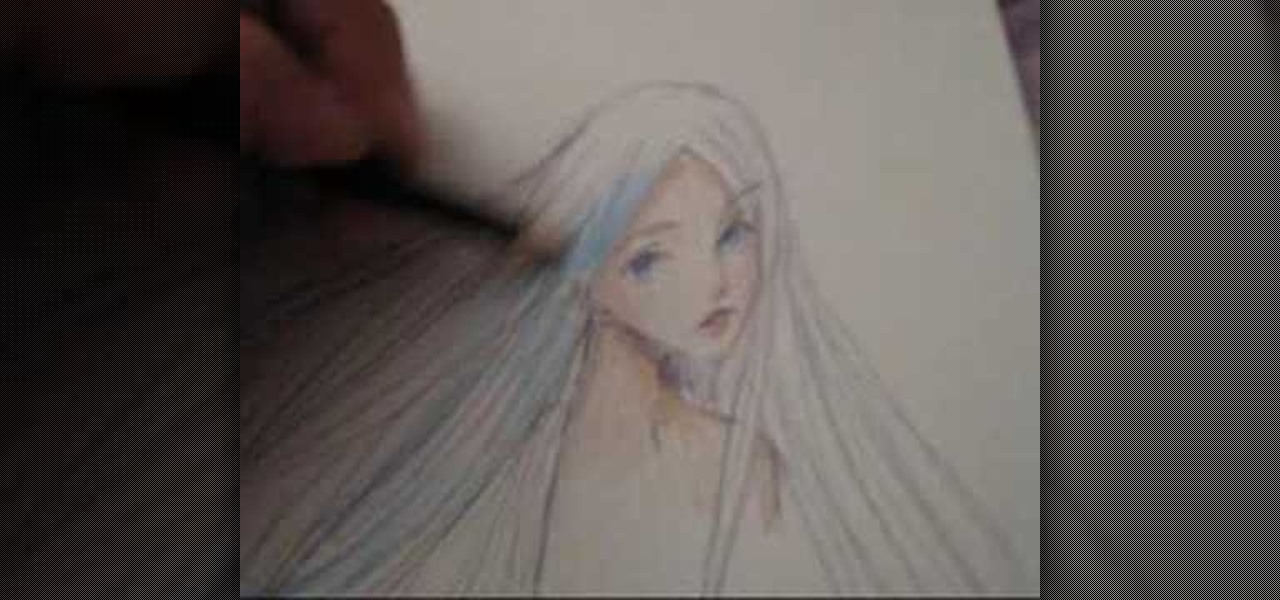
In this video we learn how to draw long manga hair. First, draw straight but curved lines going out from the top of the head to the side of the paper, giving the girl really long hair. Then, draw the other side of her head with long lines that drift down to her shoulder area. Draw in a lot of lines that are not straight, because that won't look real. Just draw them slightly curved so they look like they are falling down from the head. Then, draw on the lines to the forehead for the bangs and ...

In this tutorial, we learn how to crochet a jumbo pinwheel swirl stitch. This has the same line count as the smaller, but it will have larger lines that the normal. You will be creating a larger distance between the two colors. Start off at the bottom wrapping it twice around your finger, then pulling it over and pushing it up. From here, you will do sets of eight to create the pinwheels along the design. After this, you will start to create the next level, which will be with a different colo...

In this tutorial, we learn how to draw a plan view. To start, you will draw a horizontal line with a point in the middle. After this, draw lines from the point where you want to draw the buildings in the picture. Then, draw boxes inside the lines that you drew out. Then, you will draw in vertical lines on the bottom of the page, which will act as the ground. Around this, draw circles with scalloped edges for the trees. From here, draw in the rest of the details for the buildings. Finish this ...
This video gives an awesome makeup tutorial for the Queen of Hearts from Tim Burton's version of "Alice in Wonderland". In Burton's film, Helena Bonham Carter plays the vicious Red Queen, a character not to be messed with. Even at Halloween. Also, you'll get some costume ideas to help compete your Queen of Hearts costume. See how to transform yourself with all of the following products:
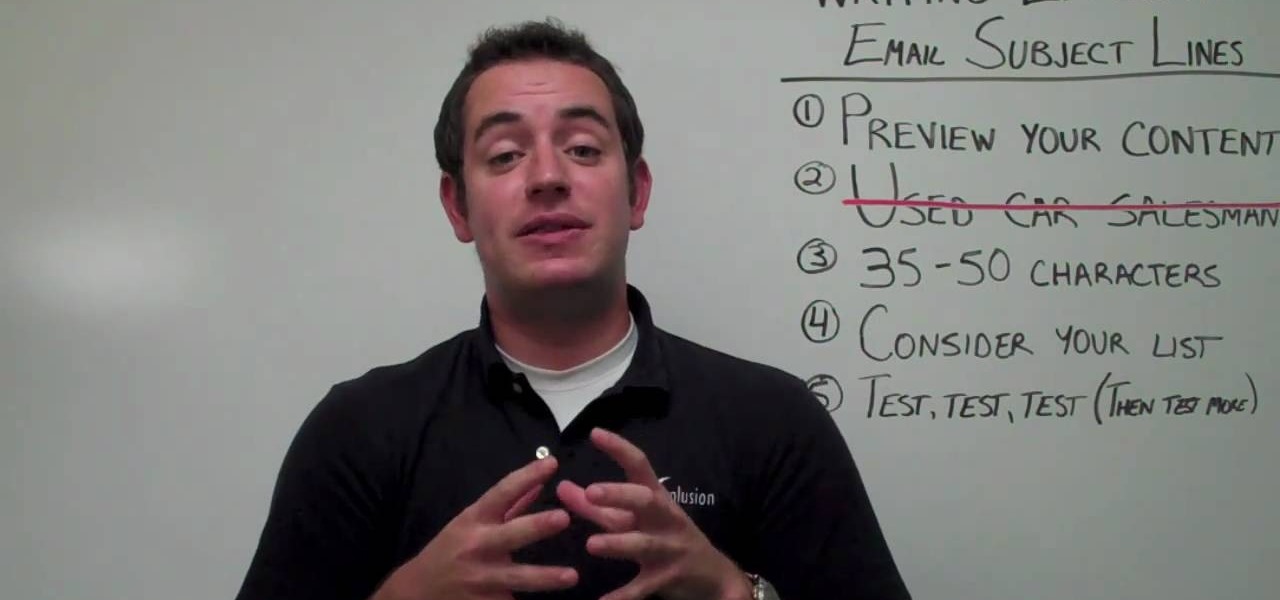
No matter what kind of business you have, small or big, online-based or not, when you're dealing with email marketing, the number one things your targets will see is the subject line, and if your subject line looks spammy or uninteresting, it's not going to help you one bit.
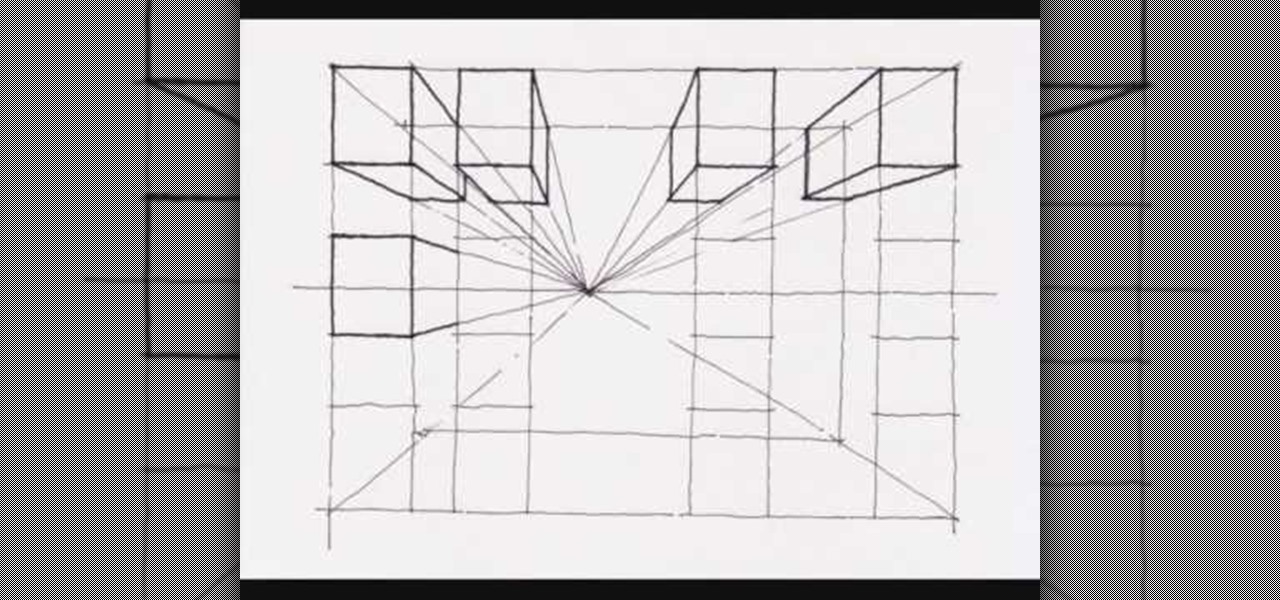
This video demonstrates how to create a one point perspective drawing. You begin by making a horizon line across your paper and adding diagonal lines from the corners which will all converge at a single point along your horizon line. You can then create boxes by creating squares or rectangles around the lines extending from the central point. The outer edges of your rectangle can further be connected to your single point in order to create a 3-dimensional shape for the boxes and cubes which y...

Simon Leach teaches us how to do spiral fluting in this video. Start on the side of the bowl with a sharp edge. Then, push the edge down from the top until you reach the bottom half of the bowl. Create line next to line very close to each other, not overlapping them. Continue to do this slowly until you have reached all the way around the bowl. Make sure your lines are all equal to each other, they don't have to be perfect though. After you have made lines all the way around, your bowl will b...

In this video, we learn how to draw and color a city with art markers. First, draw a horizontal line as your reference point to where the city buildings are going to go. Make a point in the middle as the background line. Now, start to draw in the buildings around the middle line, making diagonal straight lines, then drawing in the details of the buildings. Draw in taller buildings in the back, then start to draw the larger details in the front of the drawing. Add in shading and details as nee...
New students of palmistry might get thrown in a reading when they encounter a broken line, or one that changes. Peter John demonstrates how to give a good palm reading even when the head, heart or life lines change or break on the hand. He also shows how to detect a change in your subject's future
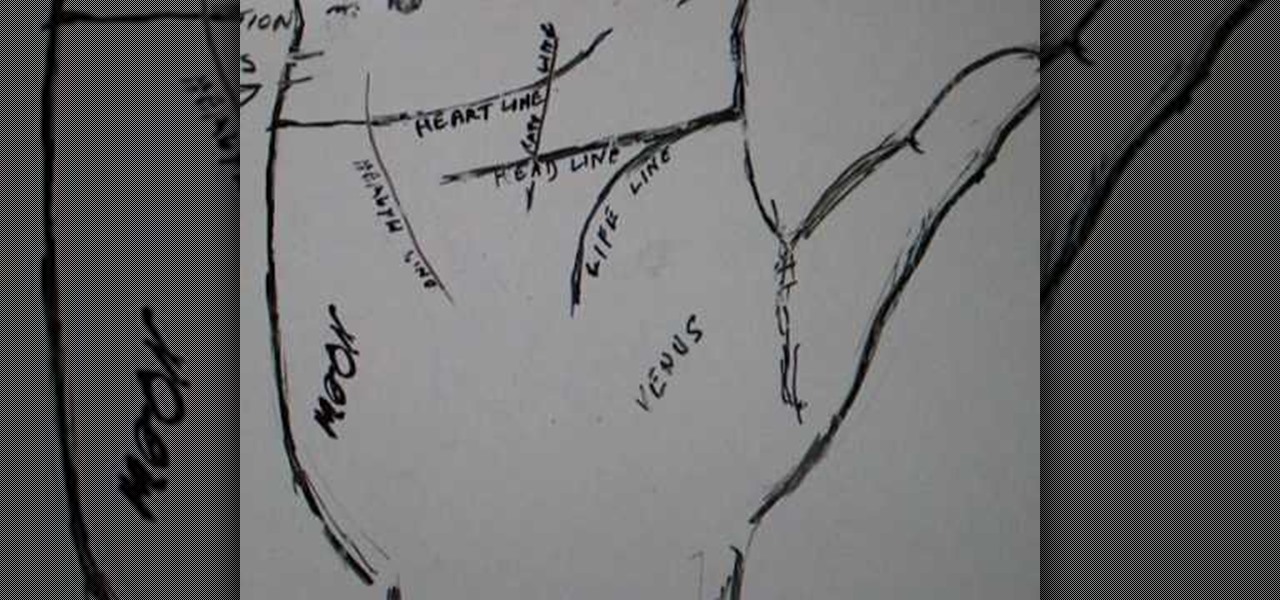
A short life line on someone's palm doesn't necessarily mean your subject is going to have a short life. Palmistry guru Peter John explains the relationship between a short life line and the mount of Venus when giving a palm reading.
Peter John, an expert in palmistry, walks you through a sample reading of someone's hand. He explains how to interpret the various parts of the palm, such as the life line, head line and heart line, to give a full and accurate palm reading.
Just in case you've been living under a rock (AKA without internet) for the past couple of days, here's a quick update: "Gossip Girl" star Taylor Momsen has officially become the new face of Madonna and her daughter Lourdes' new fashion line, Material Girl.
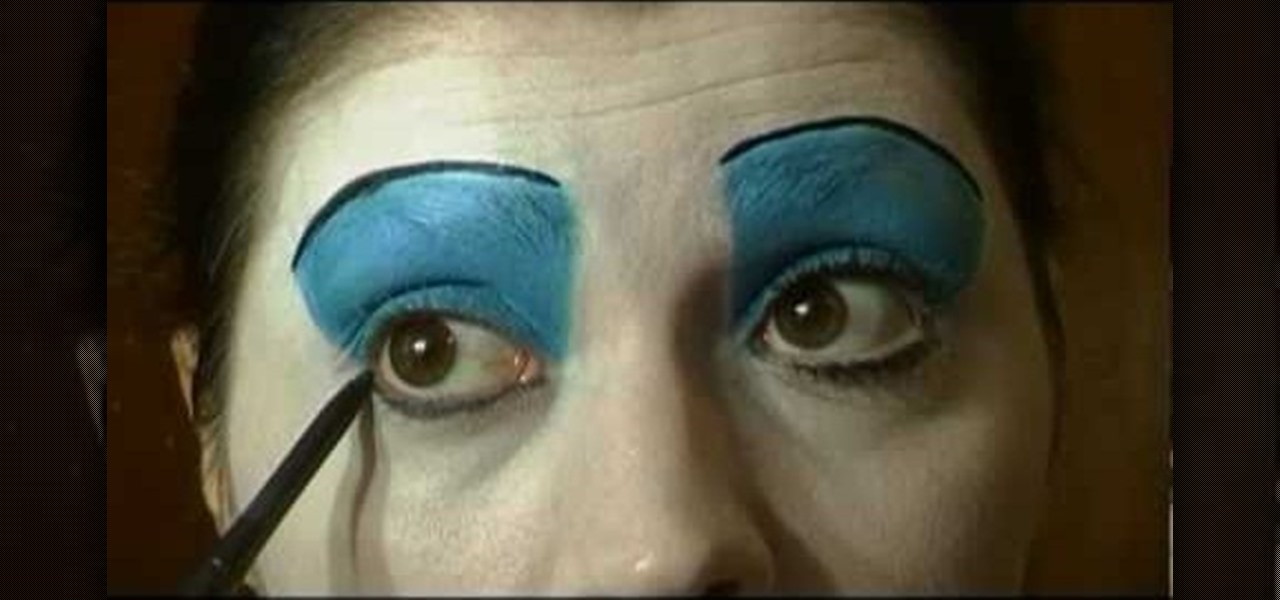
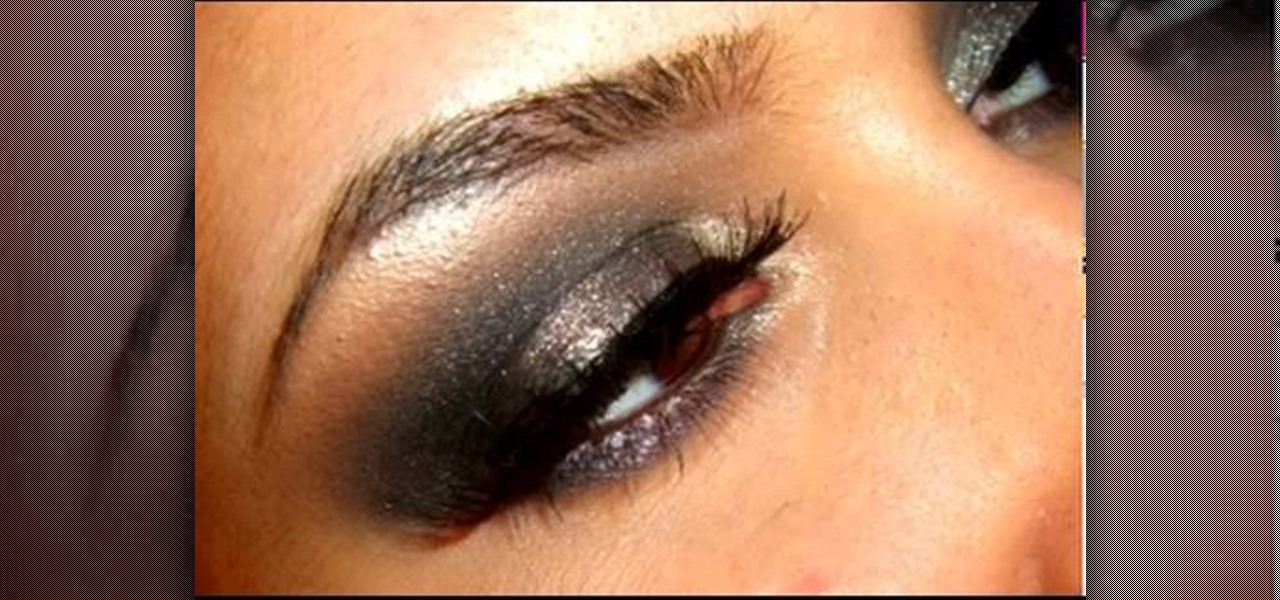
In this tutorial, we learn how to create a burnt burgundy contoured face and eye look. First, apply a primer to the entire eyelid as a base. Next, apply a shimmer pink eyeshadow with an eyeshadow brush. Next, line the lash line with black eyeliner, and then blend a burnt burgundy eyeshadow onto the outside corner of the eyelids. Circle the brush so the colors all blend into one but will still have the darker color on the outside. Next, take the same burnt burgundy color and pant it onto the b...
Is all that sunbathing you did as a college freshman finally catching up with you? Around your 30s and 40s all the sun damage you have accumulated over your lifetime finally starts taking its toll, resulting in a sudden influx of fine and deep lines, sagging skin, and mottled texture.

First of all you have to draw the two big eyes and a curved line supporting them. Now draw and darken the two eyeballs. Draw the top portion of the head and make some curves of hair at the top. Draw the round cheeks on both sides. Now you have to draw the round beak and the mouth as shown. Then draw the narrow neck and then draw two lines around it. Draw two nostrils over the beak and then also draw the two eyebrows. Now color the drawing as shown. Fill in black color in the face and neck. Le...
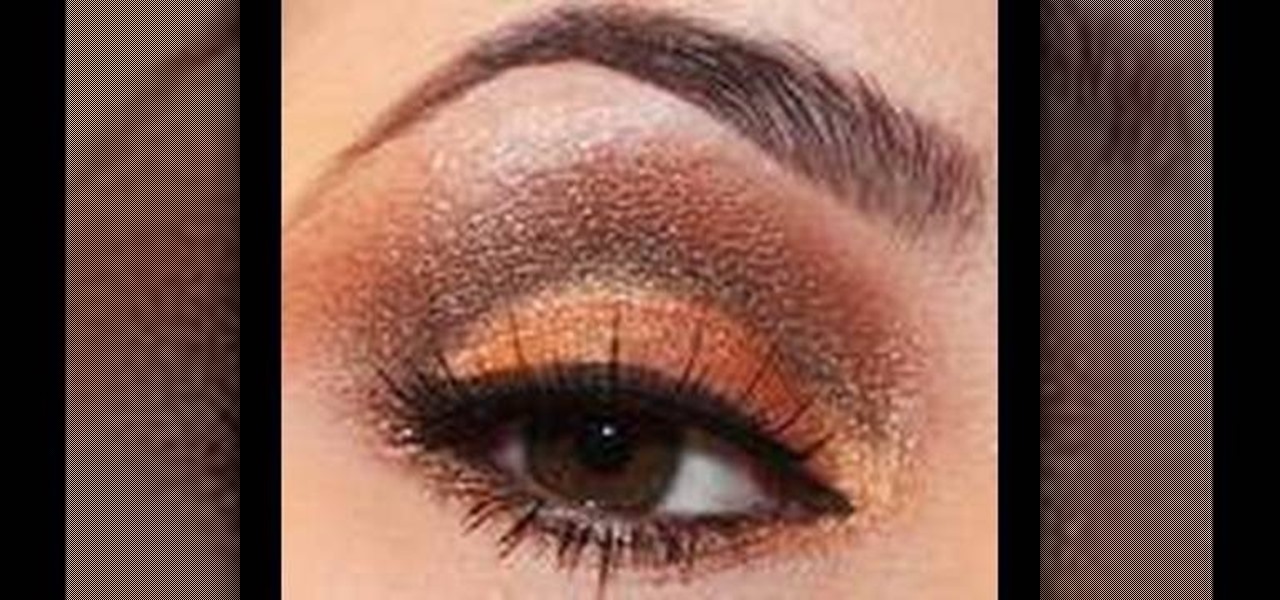
This video illustrate us how to create a cut crease golden brown eye look. Here are the following steps.Step 1: Apply a primer on the upper eyelid and the lower eyelid.Step 2: Take a mat brown eyeliner and draw and outer round smooth line which folds inward to the inner eye.Step 3: Now take a brown eyeshadow and apply it on the upper lid above the line. Smudge it well.Step 4: Now take a golden eyeshadow and apply it on the upper lid below the line and smudge well .Apply the eyeshadow on one t...
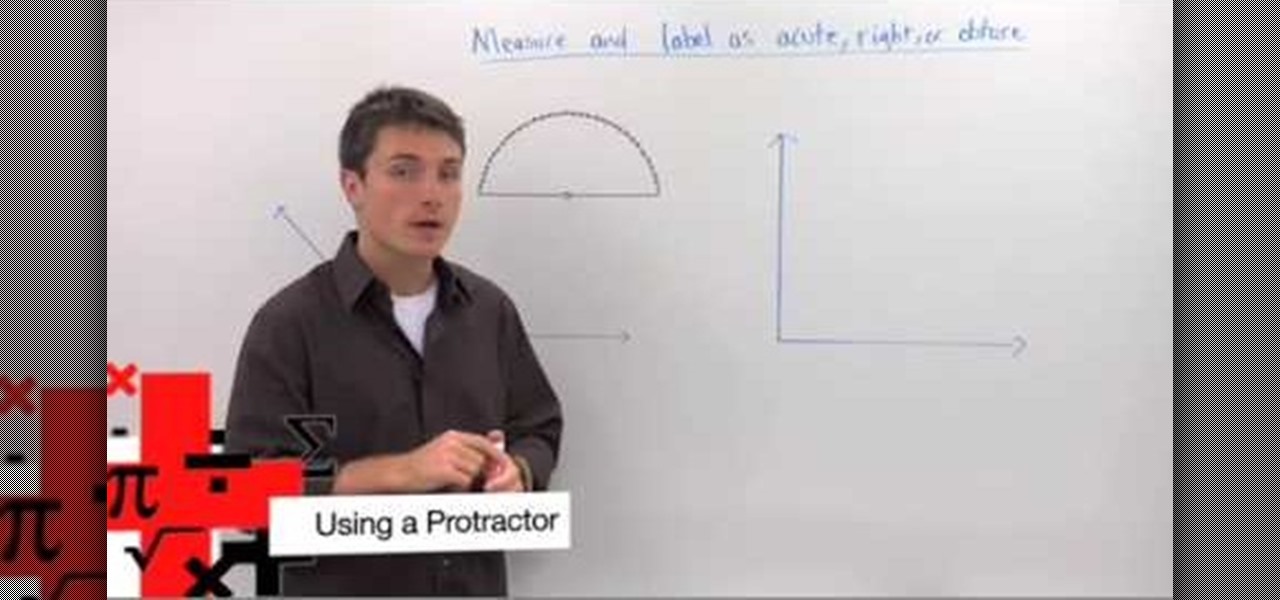
This video in the Education category will show you how to use a protractor to measure an angle. This video is from Brightstorm. In Geometry it is important to know how to measure an angle. This is a very simple and easy process. In order to measure an angle, you will need a protractor. Every protractor has a base and a center point marked on the base. You will put the center point on the vertex of the angle. Then align the base line of the protractor perfectly on one side of the angle. Now ch...

If you have ever wanted to learn Japanese or even just a few words in the language then this video is perfect for you to begin with. This video will show you how to write the word "tree" in Japanese in a fun creative way. The video takes a picture of an actual tree and redesigns it to become the word tree, but if you want to just learn how to write the word on it's own then a grab a piece of paper, pen and begin with making a horizontal stroke. Next, make a vertical line through the horizonta...
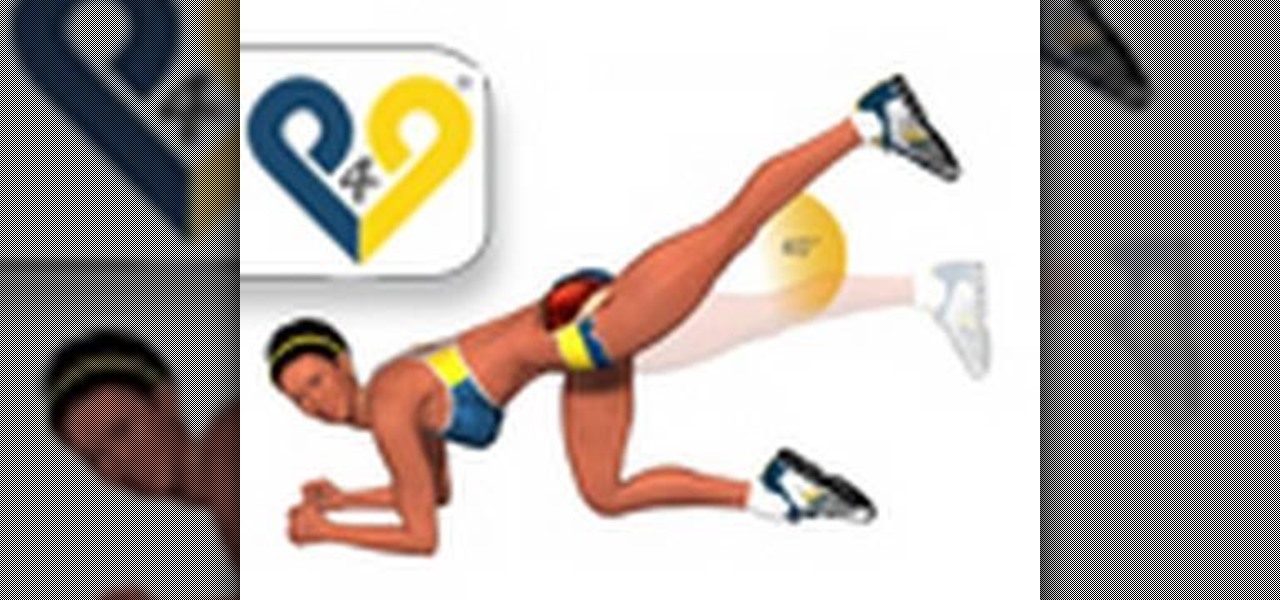
In this video, you are shown, you are shown how to properly do a concentrated hip extension. You are instructed to lay on the floor, supported on your elbows. With one knee on the floor, you are then told to life the opposite leg off the floor, completely extended, to form a horizontal line from the floor. While lifting the leg to about 40 degrees, you are to contract the muscles of the same glutes at the same time. After, return to the starting position, bringing your leg to form the horizon...
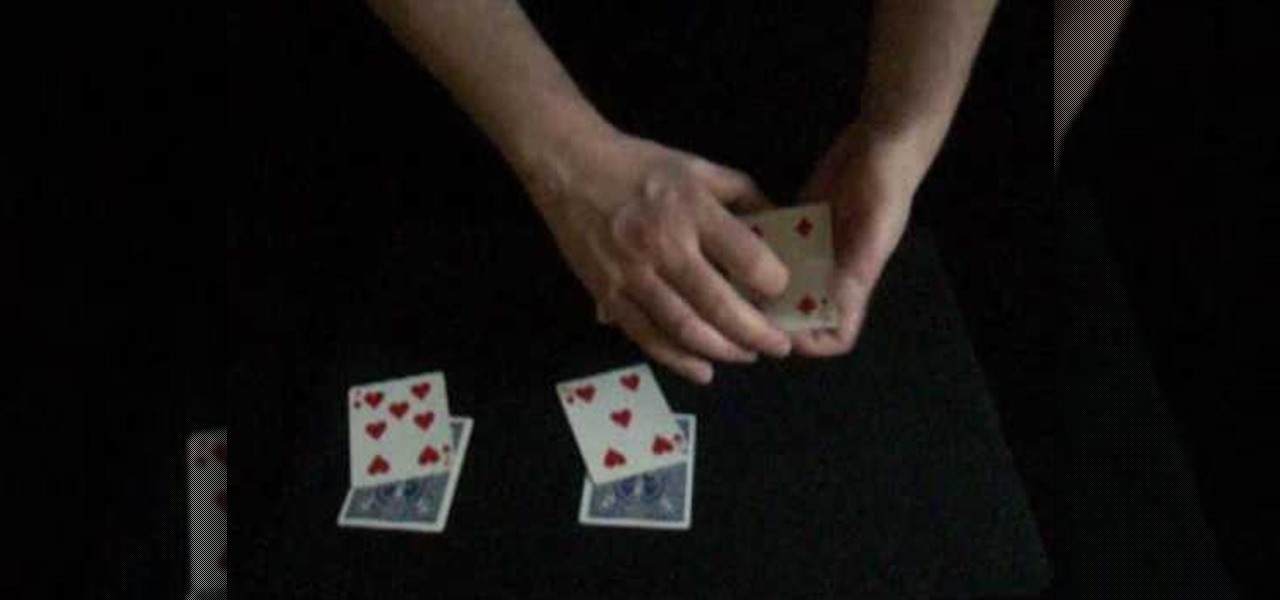
In this Magic & Parlor Tricks video tutorial you will see the "dyslexic queens" card trick. The 4 queens are laid out on the table face down; three in one line and the 4th below the top line. To each queen 3 red cards are added. These cards are between 1 to 10; no jacks or kings. Now the top 3 stacks are picked up one by one shuffled and when turned over, the queen has vanished. All the 4 queens are found in the 4th stack. Then the 4 stacks are put face down with 4 queens in the 4th stack. On...