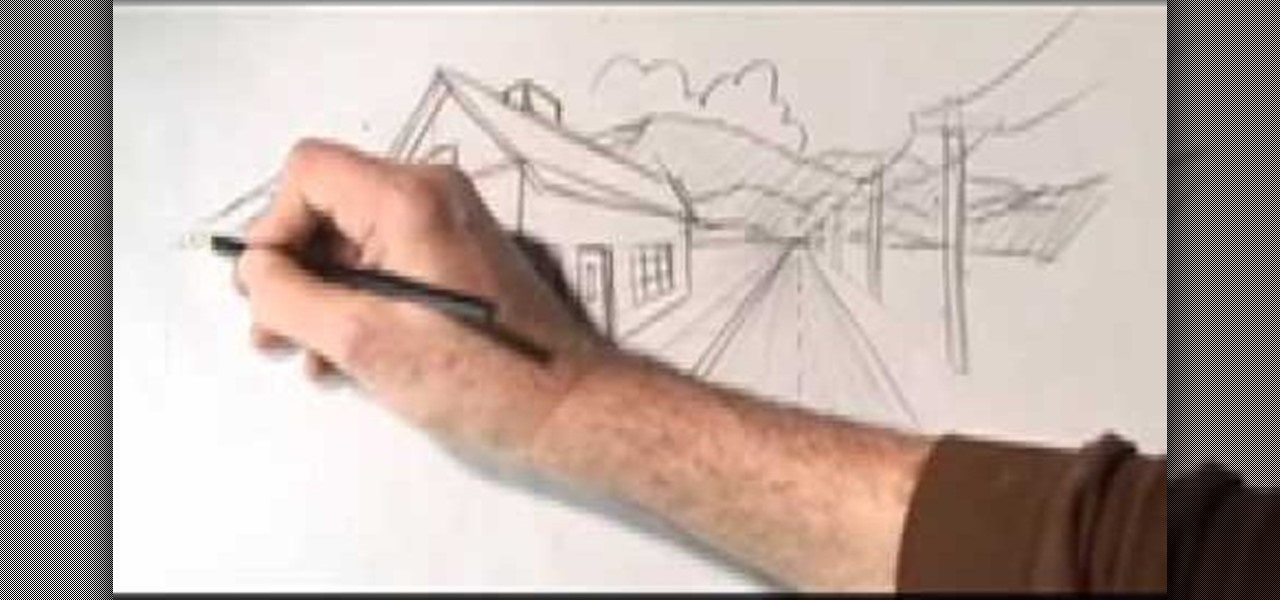
Once you've learned to draw sculptural forms in perspective you will naturally want to begin placing several objects within a common space. You would like to draw a background. The trouble is, when drawing in perspective, there is no flat background. It helps to map out the space using halfway points to make note of significant objects. Watch this four part instructional video to draw several objects against a single background.
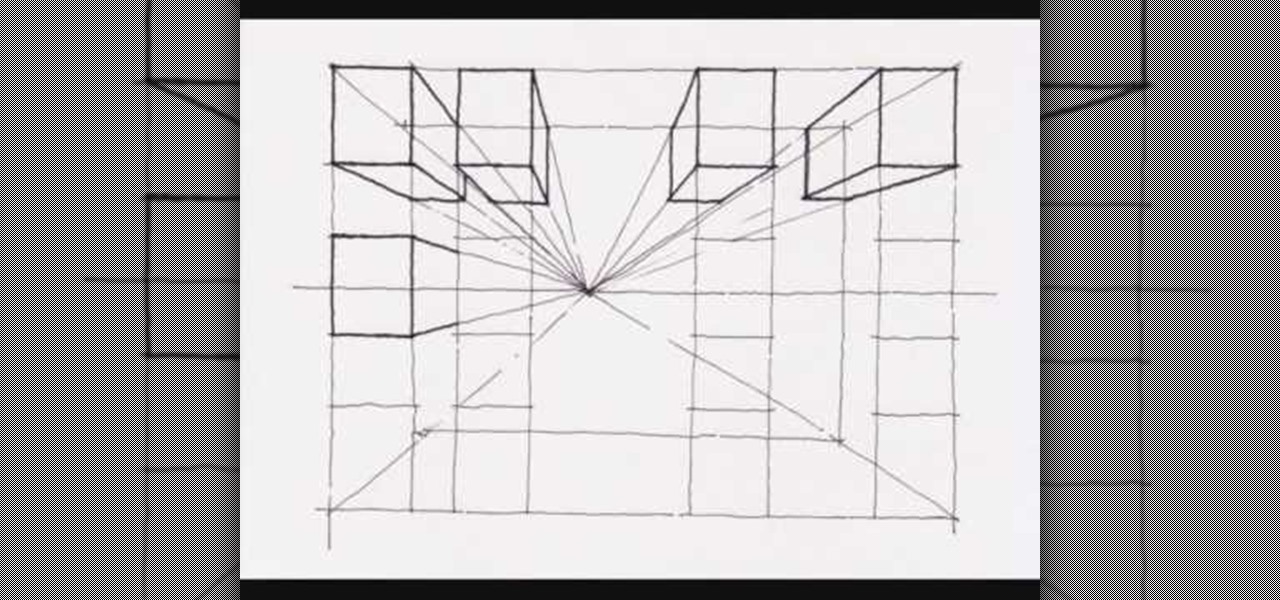
This video demonstrates how to create a one point perspective drawing. You begin by making a horizon line across your paper and adding diagonal lines from the corners which will all converge at a single point along your horizon line. You can then create boxes by creating squares or rectangles around the lines extending from the central point. The outer edges of your rectangle can further be connected to your single point in order to create a 3-dimensional shape for the boxes and cubes which y...

In this tutorial, we learn how to draw an interior perspective of a room. First, draw a horizontal line, then start to draw squares around it, then add in the back doors and the shelves, counters, windows, and more. Add in details using vortex lines as your focal point. You can use this technique to draw several different perspectives of different rooms. You can draw kitchens, mudrooms, living rooms, bedrooms, and more. You can also add in the little details, including couches, artwork, thing...

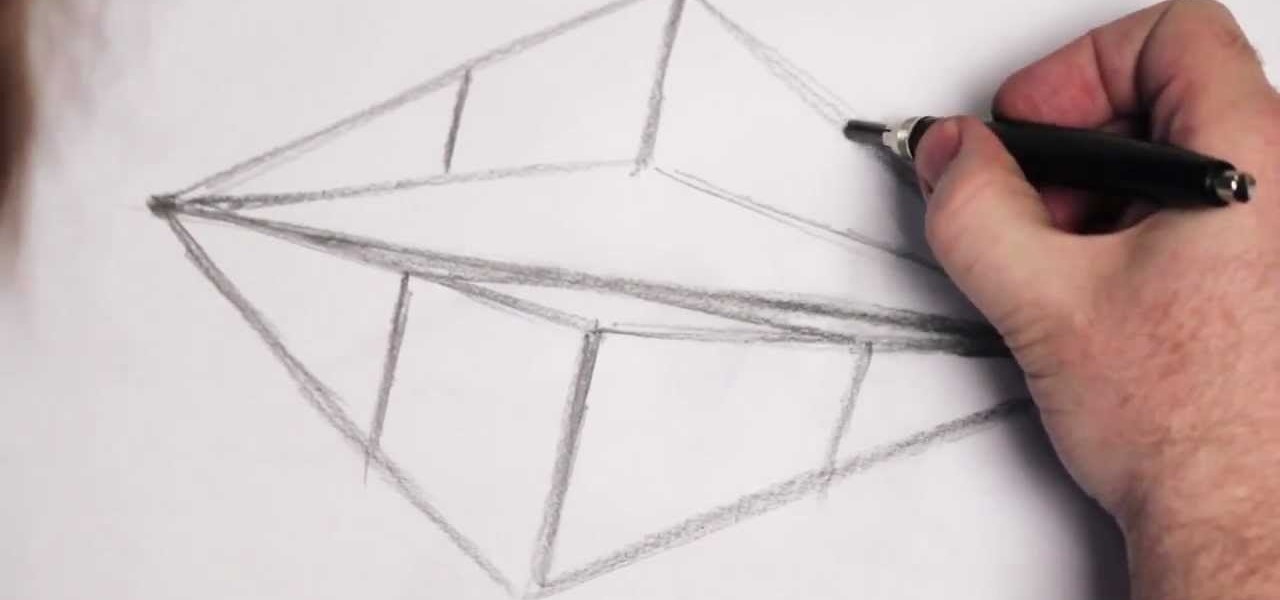
Miandza teaches you how to draw a two point perspective concept. You start with a horizontal line. Draw a vertical line in the middle and starting from that, create a rhombus. Add more vertical lines at equal distance from one another. Also create a smaller rhombus in the middle and add parallel lines to the diagonal ones. Start creating boxes when the lines intersect and use a darker color to make them visible. Continue to add parallel boxes in all directions, using the lines as help. In the...
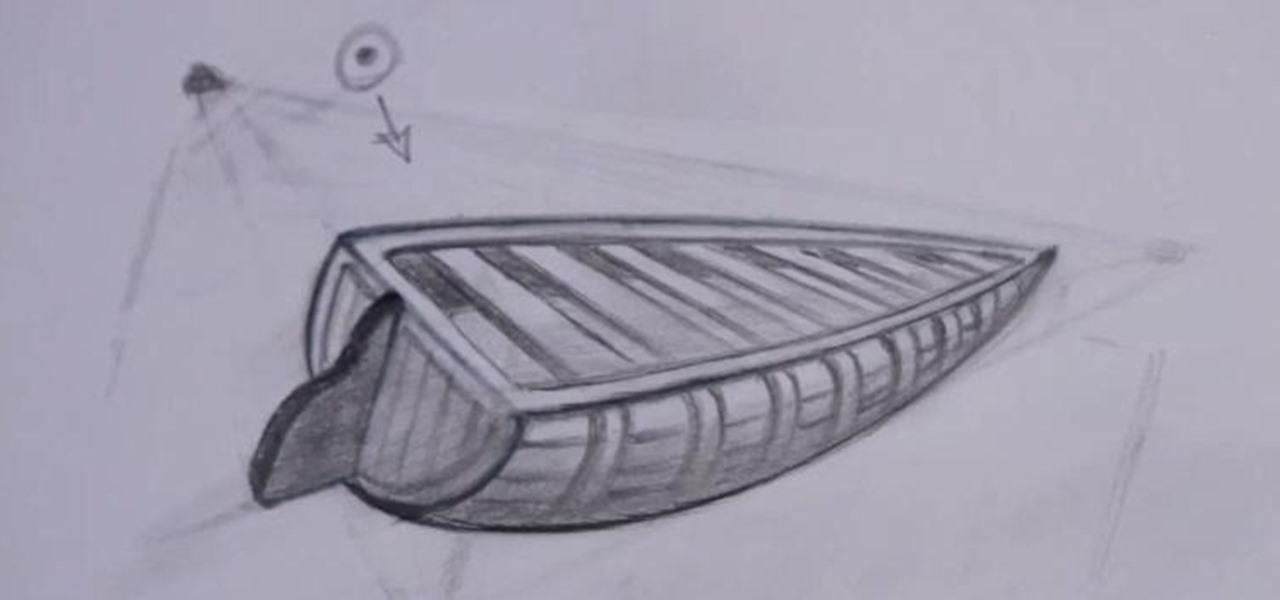
VCAD instructor Glen Kennedy, who has worked for several large studios throughout his career, including Disney, Universal Studios and Marvel Productions, introduces fundamental drawing techniques to encourage young artists to develop and hone their drawing skills. In this five-part drawing series, viewers can follow along with Glen to learn how to sketch a boat in two-point perspective.
It takes a special kind of mind to look at an M.C. Escher drawing and see a blueprint. And yet, looking at this working 3D model of Escher's Waterfall, one gets the impression that YouTube's mcwolles may have done just that! One thing's clear: like Escher's famous lithograph, the video employs some manner of trickery. But what kind? Good, old-fashioned forced perspective? CGI? Do the shadows provide a clue? Let's hear it in the comments.

When the first version of iOS 7 was released, there was a wealth of awesome new features, but there was also a lot to complain about. The biggest issue by far was, and still is, how custom home and lock screen wallpapers work on iPads and iPhones.
Use the Xara Web Designer 7 Premium Mould tool to mould, re-shape and change perspectives of objects. The Xara Web Designer Mould tool will allow you to create some very interesting effects to make your website stand-out and have depth. Even the thumbnail shown for this web design video tutorial was created with the envelope tool. If you have ever seen the software boxes shown on various those are usually created with an envelope tool to give the box its perspective.
In this video, we learn how to draw two point perspective. Start off with a horizontal line on your paper. After this, draw a small point on the line where your drawing will focus to. From here, you will start to draw lines coming out of this. Next, you will design the rest of the picture around the main focal point you started out with. Add in lines to create lots of detail and make sure to use shading to show depth. Erase any background lines you don't need. Then when you are finished, you ...
Watch this instructional video to learn how to use periscopes and borescopes to maximize the performance of the P+S Technik SKATER Mini dolly. Working with periscopes and borescopes can add interesting perspective to the shots you do with the SKATER. View final footage of the Skater used on actual professional film sets.
In this video, John Heaney gives advice on how to answer a simple but difficult question during a job interview. If interviewers ask job seekers to tell them about themselves, they can be put on the spot and be unable to even begin to answer the question. Heaney puts this question into perspective from the employer's perspective. For instance, he reminds you to remember that you are applying for a job and your answer should be related to your technical abilities rather than your personal inte...
This interactive tutorial series shows you how to make a basic double crochet stitch, and then expands on this technique to show you seven different variations. Learn how to make a turned cuff, ribbed cuff, slouch, beanie, wiggie, kippah and child's hat.
Start with a faint outline of the leopards head which is an oval shape and is body which is connected to the head, then add the outlines of the legs ears and tail. In the oval draw the proper perspective lines for the face of the leopard. Now draw the outline of the tree or branch the leopard is laying on. Begin to darken the outlines, drawing with proper perspective, while adding the outlines for facial features. Add your shading depending on your light source then begin to erase the faint l...
If you can successfully and convincingly draw complex levels on a sheet of paper, then you can draw just about anything. Despite having been around for thousands of years, representative art only approaches reality and reflects it, rather than depicts a believable replica of it.
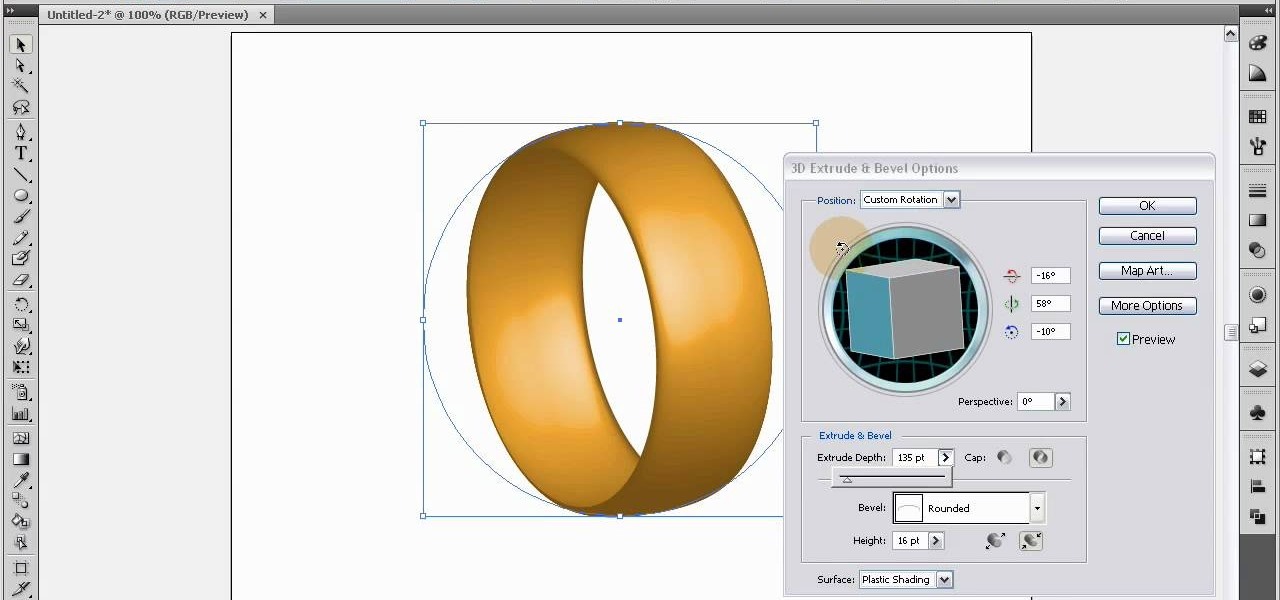
Learn how to interlace custom shapes in Adobe Illustrator CS4, an effect that's especially attractive when working with 3d perspective objects and shapes. Whether you're new to Adobe's popular vector graphics editor program or a seasoned graphic arts professional looking to better acquaint yourself with the new features and functions of this particular iteration of the application, you're sure to benefit from this free software tutorial. For more information, watch this designer's guide.
Nick from Greyscale Gorilla demonstrates how to do the effect from "The Matrix" in which time stands still and the camera whips around, continuing the action from another perspective. Go here for Nick's blog entry:
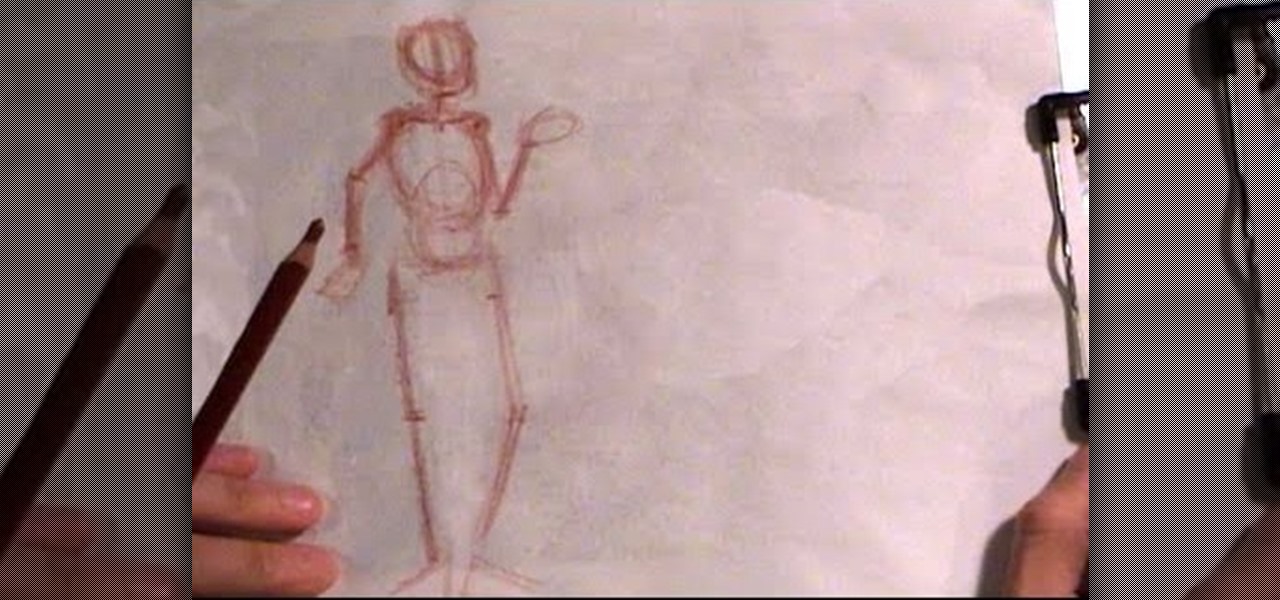
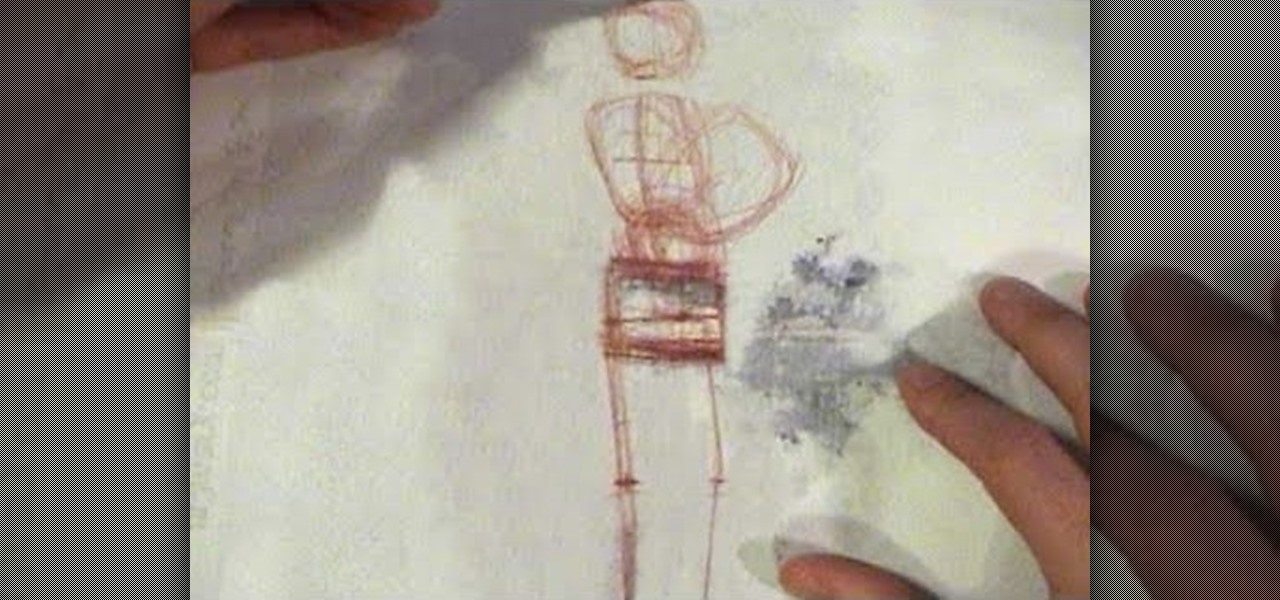
In this tutorial Cy starts out a human figure from above in 3/4 view. Some tips for putting the horizon line on the page.
The foundation of most fine arts educations begins with the drawing of the human figure. These human figure drawing tutorials are brought to you by Cy Porter of solomation.com. Search WonderHowTo for more figure drawing tutorials by Cy.
The foundation of most fine arts educations begins with the drawing of the human figure. These human figure drawing tutorials are brought to you by Cy Porter of solomation.com. Search WonderHowTo for more figure drawing tutorials by Cy.
Walter Johnson and the Denver Optic Company are proud to present a short film documenting the eye-making process as "seen" through the perspective of the patient, as well as the ocularist.
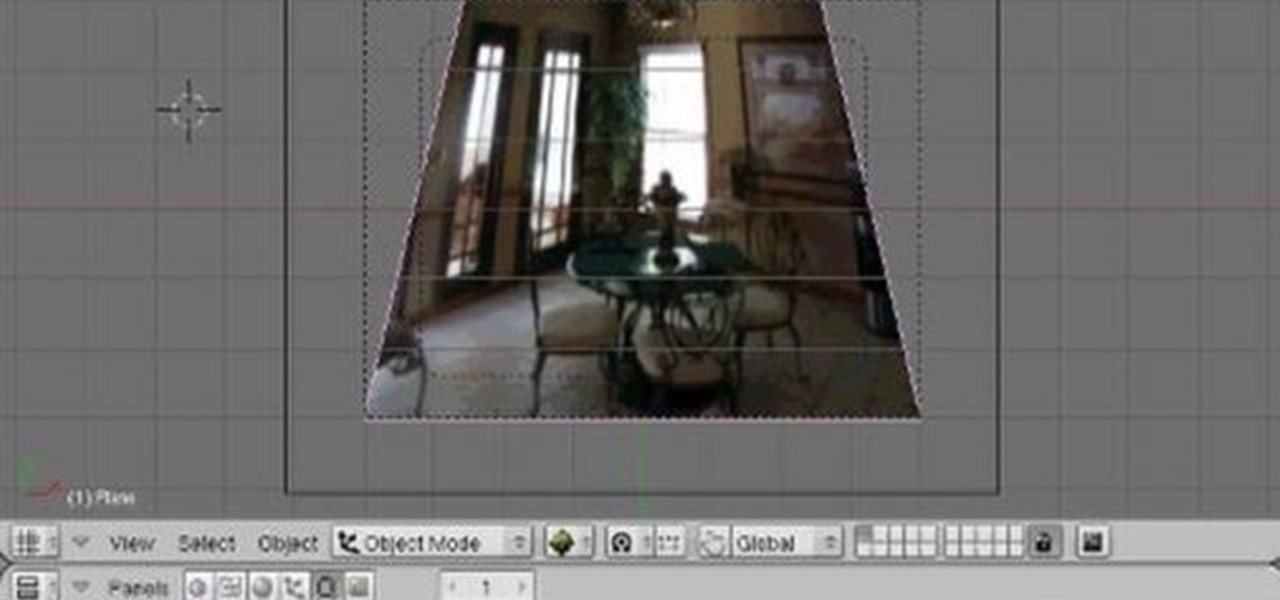
In this tutorial, you'll see how to do perspective correction for an image or video clip within Blender. Whether you're new to the Blender Foundation's popular 3D modeling program or a seasoned graphic artist just interested in better acquainting yourself with the application, you're sure to be well served by this free video tutorial. For more information, including detailed instructions, take a look!
Want to know how to play "Hey There Delilah" by on the guitar as a beginner? Learn how with this free video guitar lesson, which presents an easy-to-follow overview of the popular song. For more information, and to get started playing this aughties folk pop ballad on your own guitar, watch this how-to!
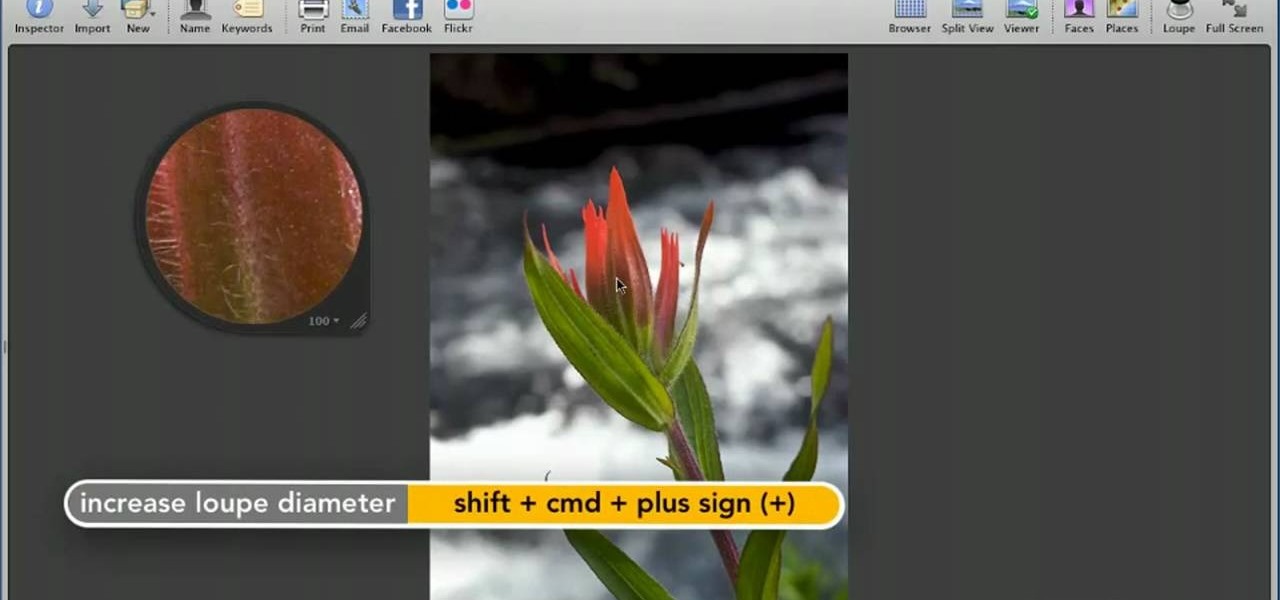
Want to zoom in on a particular part of a digital image in Aperture while maintaining the overall perspective? Try the Loupe tool. Whether you're new to digital photography or merely unfamiliar with Apple's Aperture 3, you're sure to benefit from this free video software tutorial from Lynda, which presents a thorough, step-by-step overview on how to use the digital Loupe feature within Aperture 3.
This is a fantastic video that walks you through a simple drawing of a face in the manga style. Drawn from a 3/4 perspective, this is great manga and anime portrait technique.
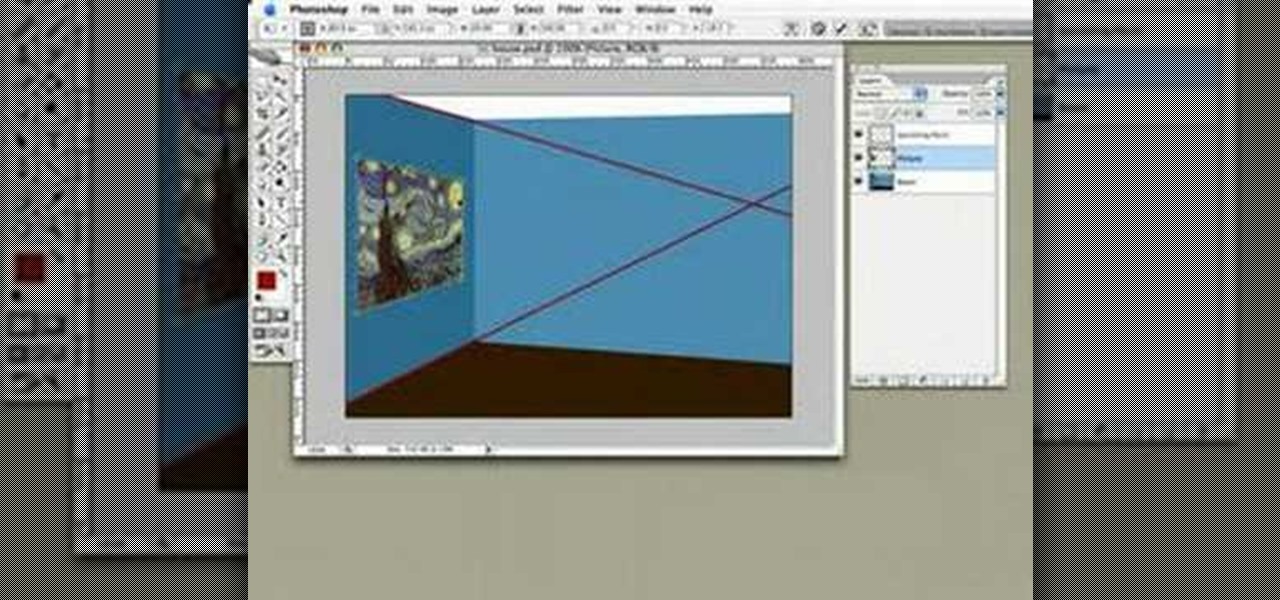
This is a tutorial video from Sessions Online Schools of Art & Design's "Photoshop Basics" course. This video is part of Sessions' Graphic, Web, Multimedia Arts, Digital Arts, and Marketing Design certificate programs. You are distorting layers using the transform tool. Use the line tool to check the work. GO Edit: Transform - Distort.
Shane Battier teaches you how to take a charge, and how it can help to stop superstars like Dwyane Wade and Lebron James. This inside skill drill from Shane Battier gives you the right perspective from an NBA star. Get basketball advice from the pros on how to improve your basketball game. Shane Battier is the authority on defense!
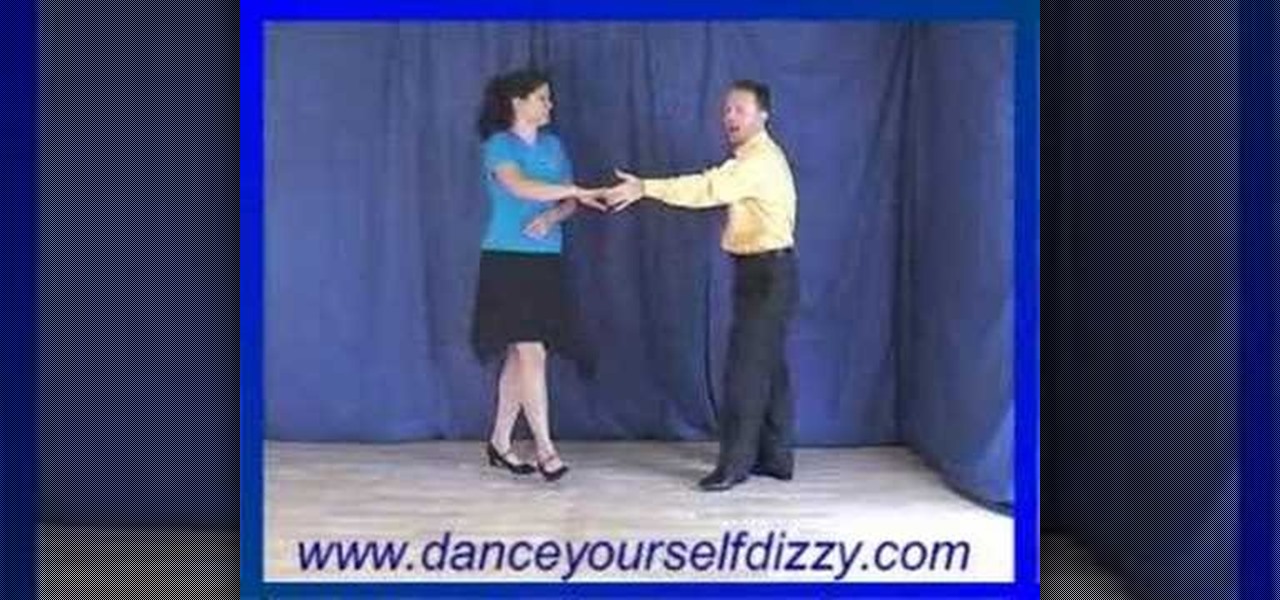
Here's a weekly on-line Modern Jive dance lesson from Dance Yourself Dizzy. This is a two part step by step from the man's perspective showing the steps in lead during basic modern jive dancing. Jive is a style of swing.
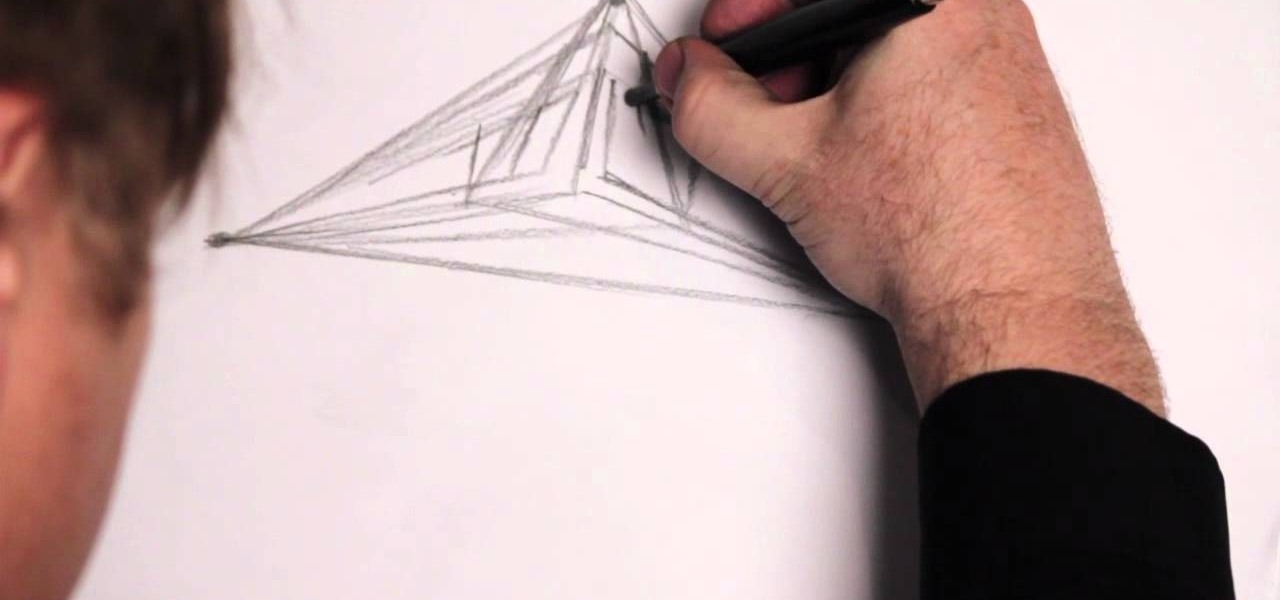
Use everything you know about drawing with perspective and line efficiency to draw a sculpted form. This instructional drawing video demonstrates how to flesh out the map of a drawing into an almost mobile being. When drawing with this technique, line drawing becomes a way of carving a figure out of boxes.
Bert transforms a city's skyline using Illustrator, Photoshop and the concept of perspective. See how to create 3D objects in a 2D plane all to create one image from Photoshop and Illustrator.
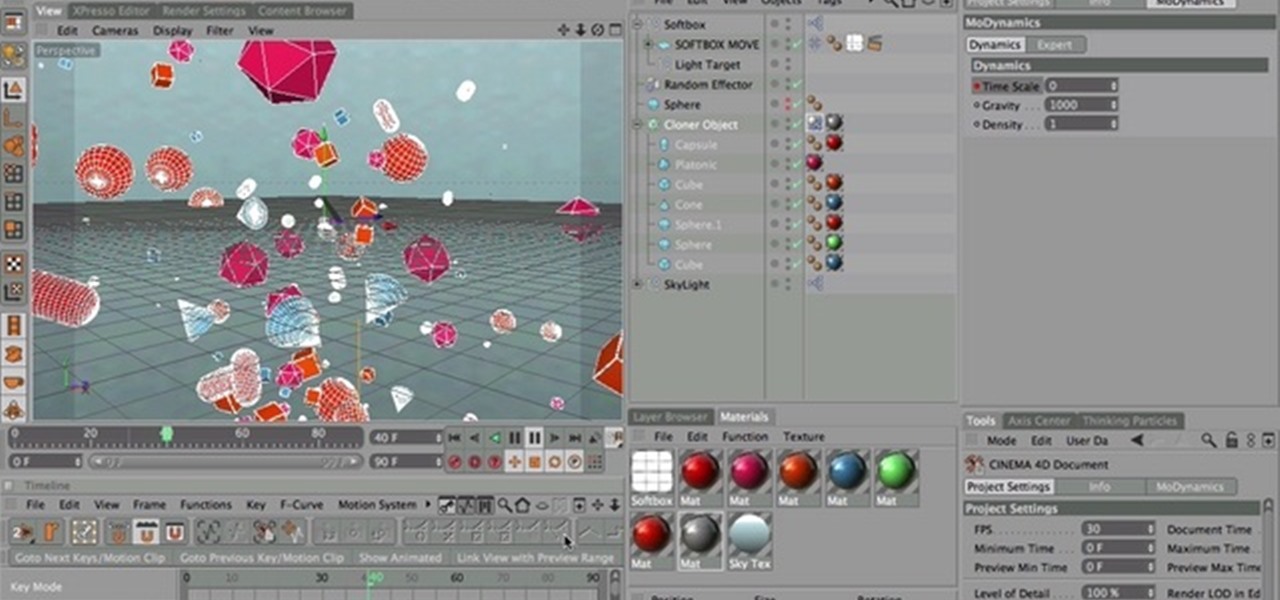
In this tutorial; it has a 3D, vanishing point, perspective look to it. It's similar but not quite what Superman uses. This tutorial is for Cinema 4D.
In this tutorial, we learn how to draw steps in perspective. Start off by drawing a dot in the middle of the paper. From here, draw lines using a ruler coming from the middle diagonally on the top middle and sides. Now, you will be able to draw your pictures using these as a reference point. The lines at the top will show the steps that are at the top and farthest away the closer they get to the dot in the middle. After this, fill in the details of the picture making different items around th...
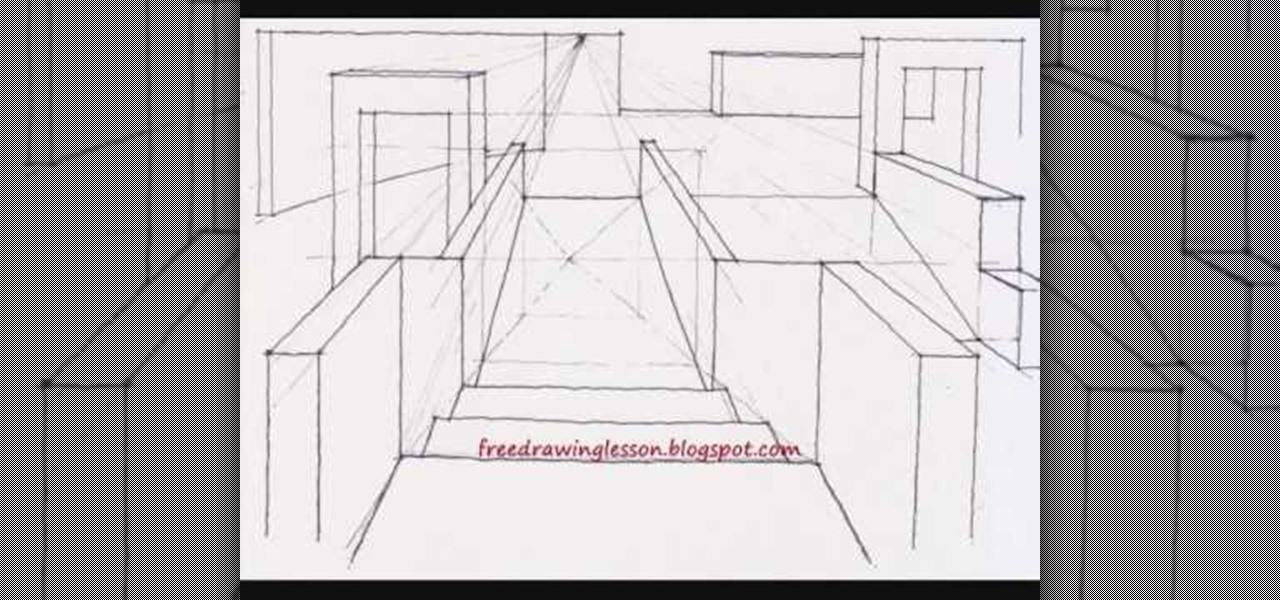
Miandza teaches you how to draw a complex room. You will start with two rectangles, one smaller than the other. Also draw 3 perspective lines - one horizontal and two diagonal, meeting in the middle. After that, start creating objects and pieces of furniture. Also add walls, doors and windows, according to the perspective lines. Use a darker pencil when you're sure of the things you are drawing. Now you start working on details. Don't forget about the floor and ceiling and add details and obj...
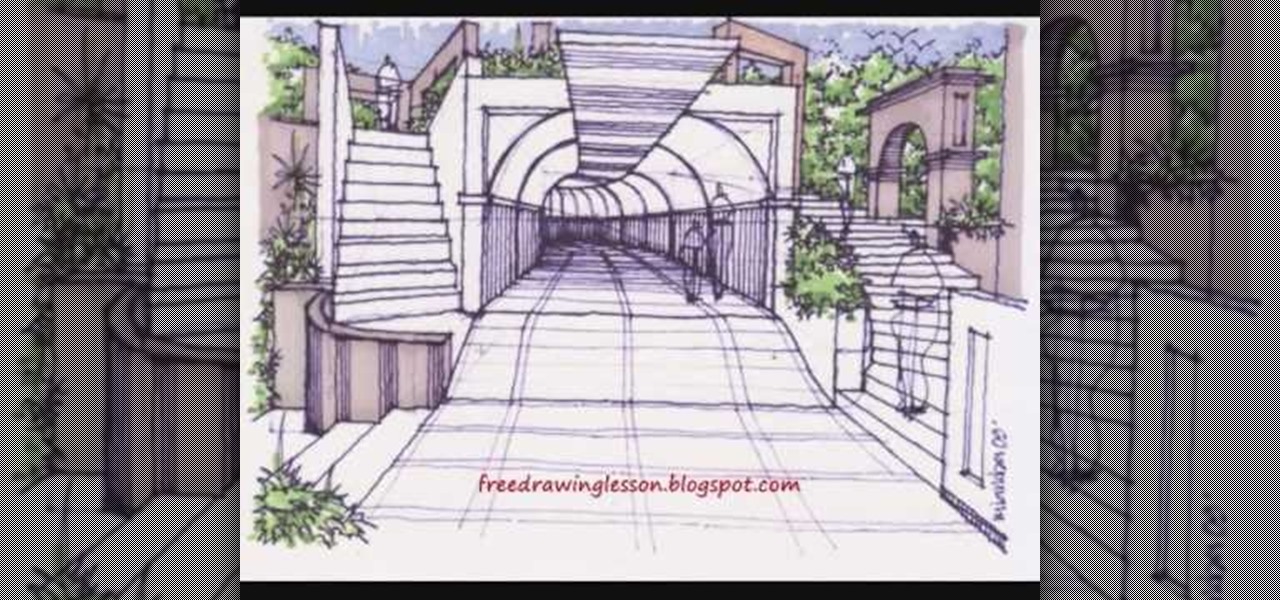
This video is a drawing lesson on how to draw and color a tunnel. It starts with rectangles and an arch, and more lines are added to show the perspective of the tunnel. Stairs, structures, and more architectural detail is added all around the tunnel and then inside. Next the coloring is demonstrated. First the bushes are colored green, and the different architectural elements made of cement or stone are colored in shades of brown and beige. The inside the tunnel is done in shades of blue, and...
Miandza teaches us how to sketch a street. You start with a horizontal line and two diagonal lines, all intersecting in the middle. You then start to add parts of buildings, in perspective. You continue to use the lines as reference and add more buildings. Then start doing trees and people. Also add pavements and start doing details on all objects. You finish by drawing the sky and the birds. The final scene is still a sketch, but has lots of details and uses the perspective to look natural.
This video demonstrates perspective and how to use it to make your drawings more realistic. In this time lapse video, the pencil drawing slowing completes itself. The artist uses many different vanishing points to create the drawing. The drawing consists of several different rooms, along with several different stair cases. The stair cases lead from a bottom floor, up to a main floor, and then finally on to the top floor. The artist has many other videos on YouTube that demonstrate other drawi...
This video shows you how to use the latest version of Vanishing Point in Photoshop. You learn how to edit perspective, define a linked plane at an arbitrary angle, wrap images around multiple planes, and measure in a perspective view. Check out this video created by John Nack now! Use vanishing points in Photoshop CS3.
Jordon Schranz brings you this tutorial on drawing. Search WonderHowTo for Sessions Online School of Fine Arts for more drawing tutorials. The technique & craft of drawing isn't necessarily about inherent talent, it is something that comes with lots of practice. It is all about being able to accurately record what you see.
The Power of One is one of those books that I really should have read years ago. I’ve certainly meant to read it for a long time so this was a satisfying title to cross off my list. It’s stunning that this was Bryce Courtenay’s first novel. I look forward to reading his others because if this is where he started, he’s a talented writer.