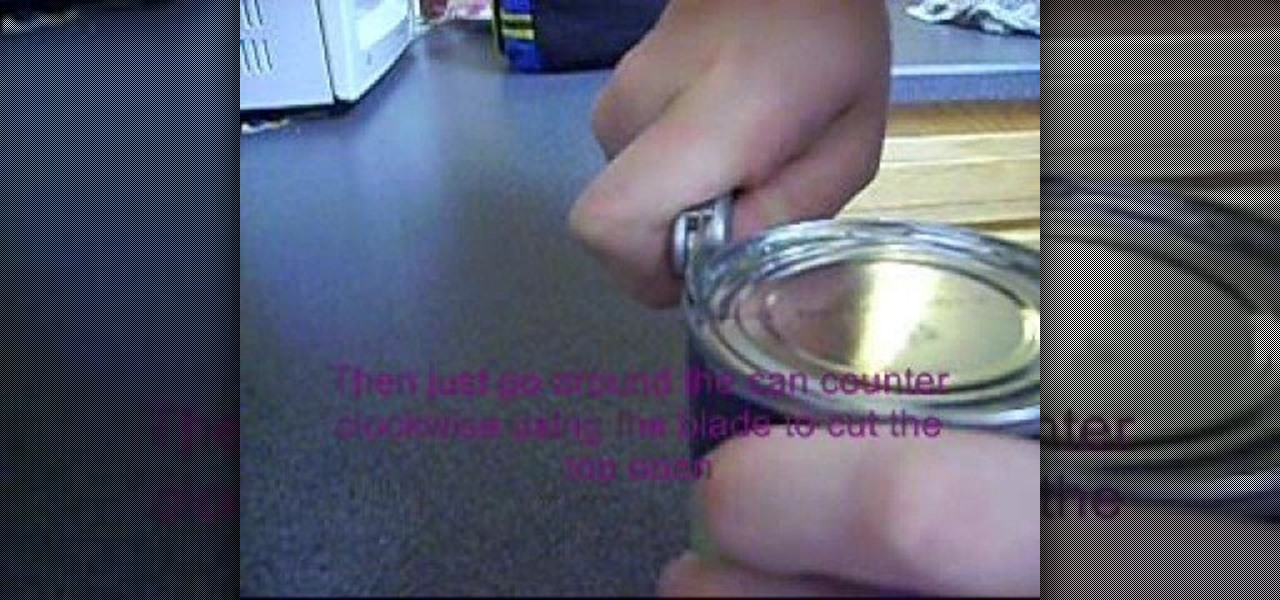
This is a video demonstrating how to open a can with a Swiss Army Knife can opener. To begin, place the can on a flat surface. Open the can opener on the Swiss Army Knife. Make sure that the hook of the can opener is on the outer ring of the can and that the cutting part is on the inside. Use the blade to puncture a hole in the can, pulling up on the handle and pushing the blade along the can. Move the can in a counter clockwise motion cutting along the way. Use the tip of the can opener to p...

A combination of red and gold eyeshadow is great for emphasizing green eyes - this is because red and gold are complementary colors to green. For the base, apply a clear or skin-colored base to the entire eye area. Use a highlight base just beneath your eyebrows. Blend it in. Use a black liquid base on the upper eyelid. For eyeshadow, start off with a shimmery gold by putting it in the inner corners of the upper lid. Take your red and start off slightly in the middle of your eye, where you le...
The Na'vi don't have eyebrows. While you could just paint your makeup on over your brows if you don't have prosthetic appliances to cover them, a neat trick is to take a giant glue stick (or the spirit gum) and go over your eyebrows with it, rubbing the stick in the opposite direction of eyebrow growth. Let it dry and then do it one or two more times (depending on how thick your brows are). With your brows flat against your skin with a layer of "glue skin" over them, you can have a nice, flat...
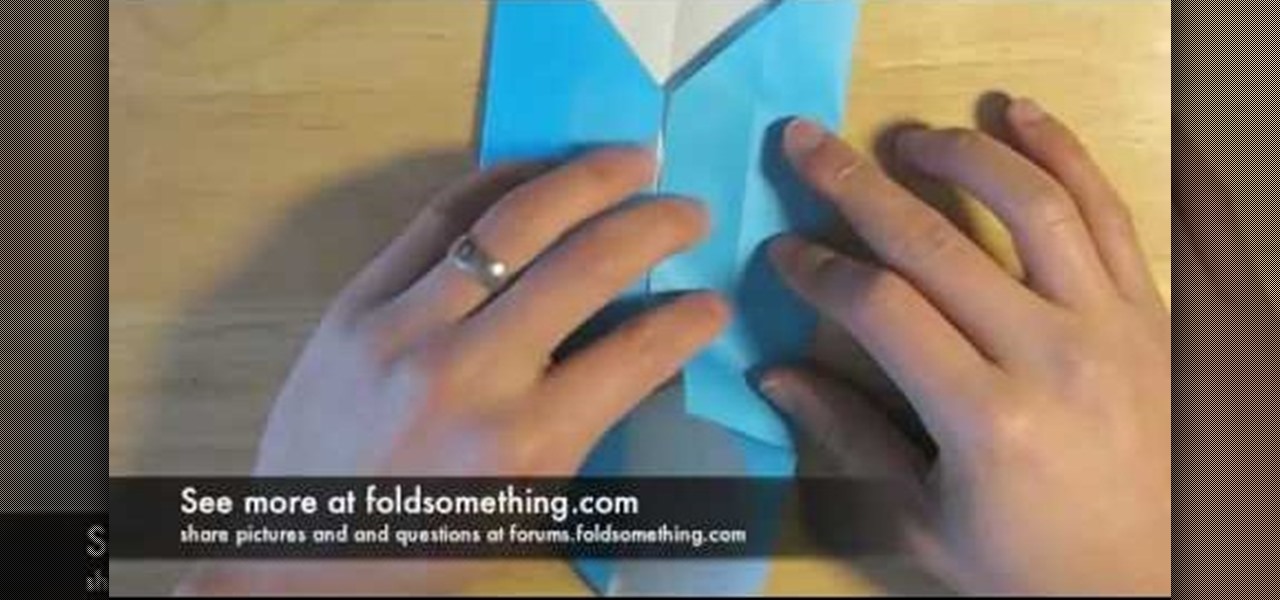
Links of Love is showing you how to make origami heart shaped cuff-links. Start with a 20.5 cm square of paper. If you want to make a cuff link you can wear you should use a square the size of 4 to 5 cm. Fold a good crease and then unfold. Fold two corners in toward the middle and then unfold. Fold one side in toward the middle crease. Only crease up to the crease of the corner fold. Unfold and fold the side into the new crease just made. The creases are guidelines that will be used later on ...
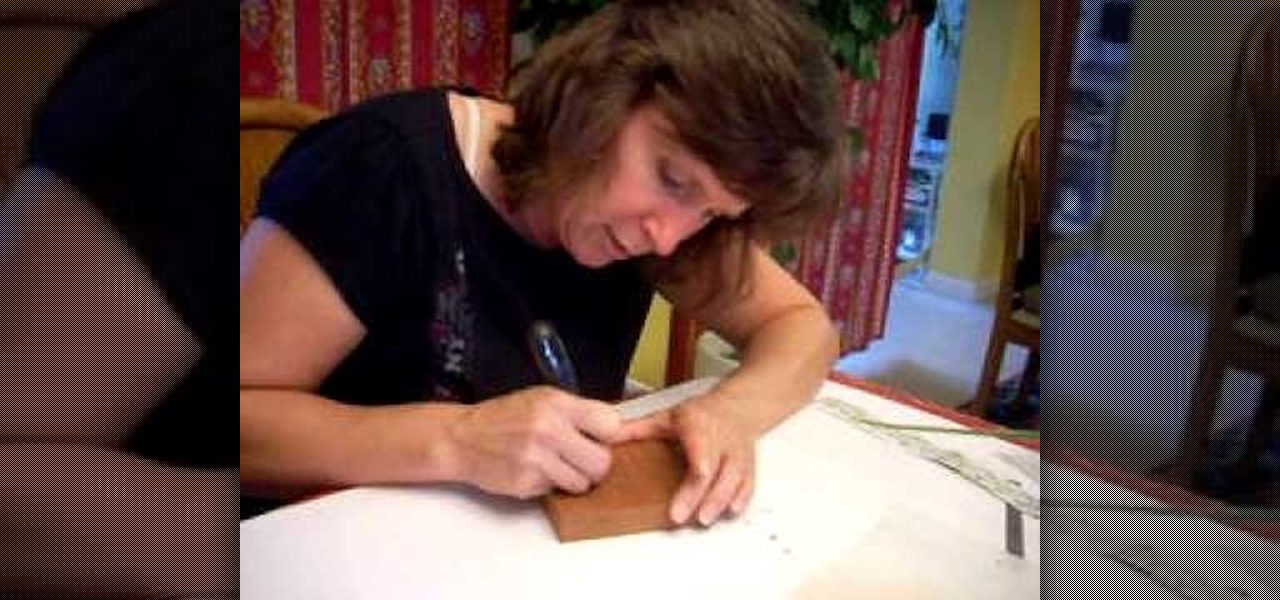
In this three-part carving tutorial, Valerie Jones demonstrates her chip-carving techniques on Mahogany wood. Using an X-acto knife, she carves the wood by hand & describes how to carve German-style, geometric patterns into the wood after stenciling the pattern on the outer wood surface. Later, Valerie talks about her methods when chip carving wood: how to hold the knife, how to guide the blade, finishing the final product, how to follow a stencil pattern & goes over more useful information.

Heat the pot and put in the cooking oil. sauté the onion until the layers separate. Add the pork belly and cook until the outer part turns light brown. Put in the fish sauce and mix it with the ingredients. Pour in the water and bring it to a boil. Add the taro and tomatoes, then simmer for 40 minutes or until pork is tender. Put in the sinigang mix and chili. Add the string beans (and other vegetables if there are any) and simmer for 5 to 8 minutes. Put in the spinach, turn off the heat, and...

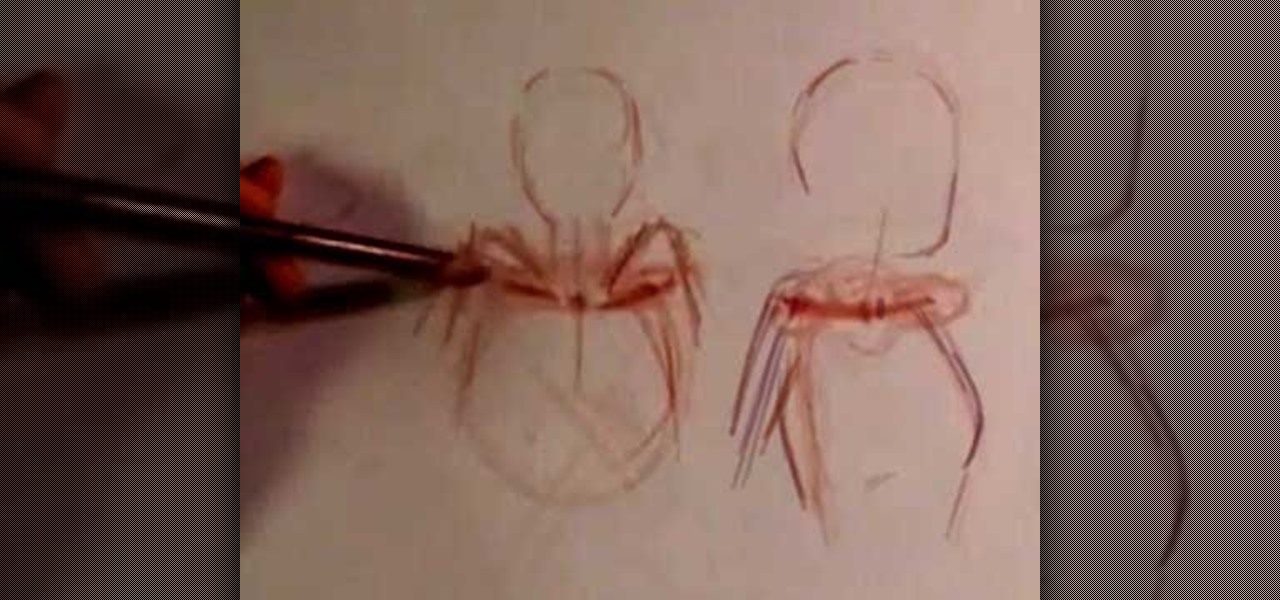
The foundation of most fine arts educations begins with the drawing of the human figure. These human figure drawing tutorials are brought to you by Cy Porter of solomation.com. Search WonderHowTo for more figure drawing tutorials by Cy.
Want to look like a superhero? Check out this very helpful beauty video for all of you who have troubles with makeup every now and then. Xsparkage shows you how to create the yellow and red Iron Man makeup look. Don't be afraid, it will be awesome! Iron Man in no time!
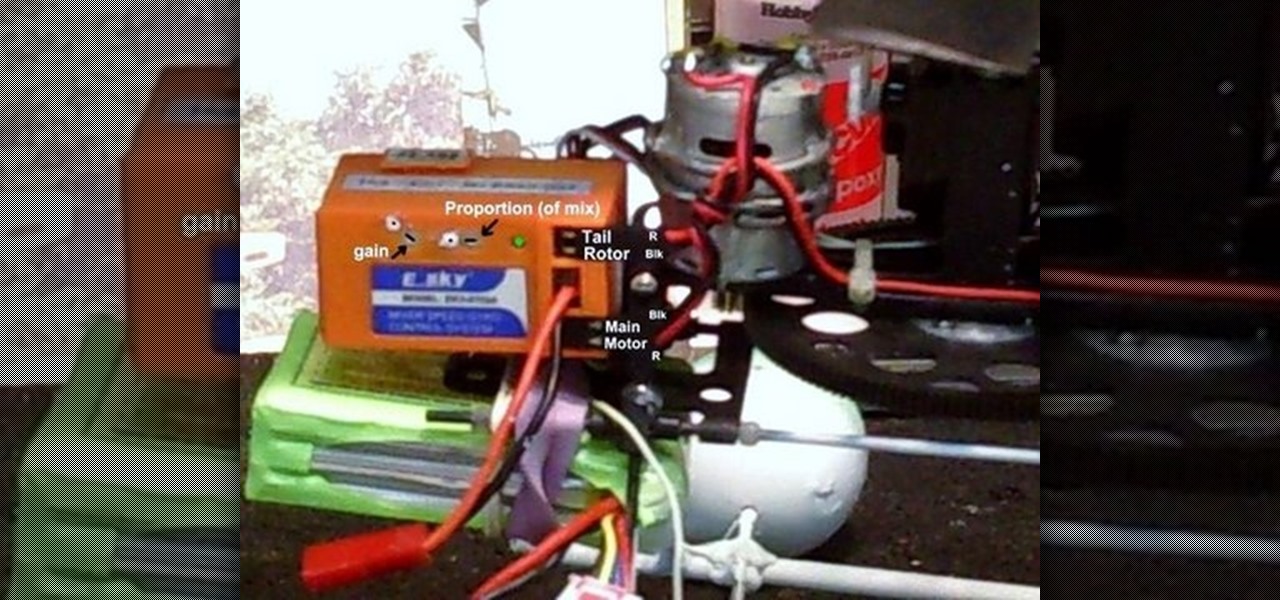
Watch this instructional hobby video to properly set up and fly a remote control helicopter. Transmitter switches and servo wires should all be set up this way. Charge the flight pack and you are ready. If you are a beginner, leaving the flybar weights at the outer position will dampen the controls and make the helicopter easier to fly. As you improve, move the weights in for quicker response. The swashplate has a metal ball for reduced wear and precise control. The servos are screwed to the ...
The orbit. No, we're not talking about outer space here, were talking about the cavity in the skull containing the eye-ball; formed from seven bones: frontal, maxillary, sphenoid, lacrimal, zygomatic, ethmoid, and palatine.
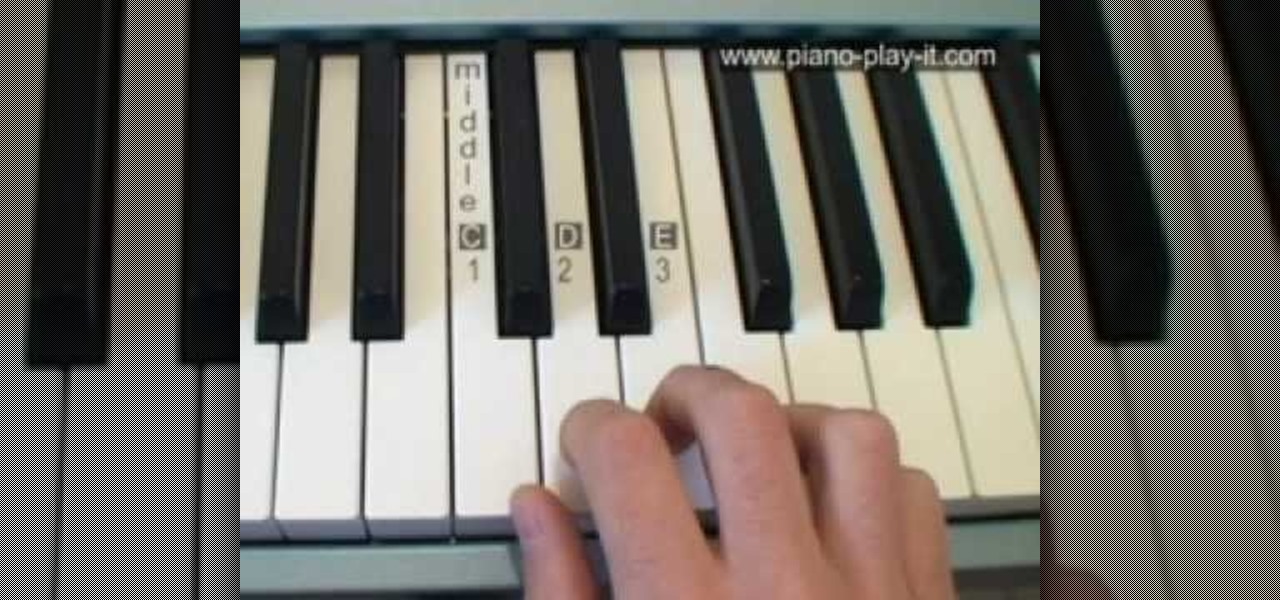
When you're a piano player, showing off book learning is nice, but have you ever noticed that the most renown piano stars can improvise like nobody's business? Though their melodic tunes seem to emerge from the top of their heads, piano experts have spent years training their ears to be able to play piano by ear.
In this video tutorial, viewers learn how to draw Homer Simpson from the animated shot, The Simpson's. Begin by making a light outline of where the top of the head, sides of the head, ear and neck will be. Then do a light sketch of where the mouth, nose and eyes will go. Make the eyes large and make one eye overlap the other. Also make the nose into a sausage shape and mouth into a lemon shape. The eyes should be overlapped by the nose. Make the top of the ear line up with the bottom of the m...
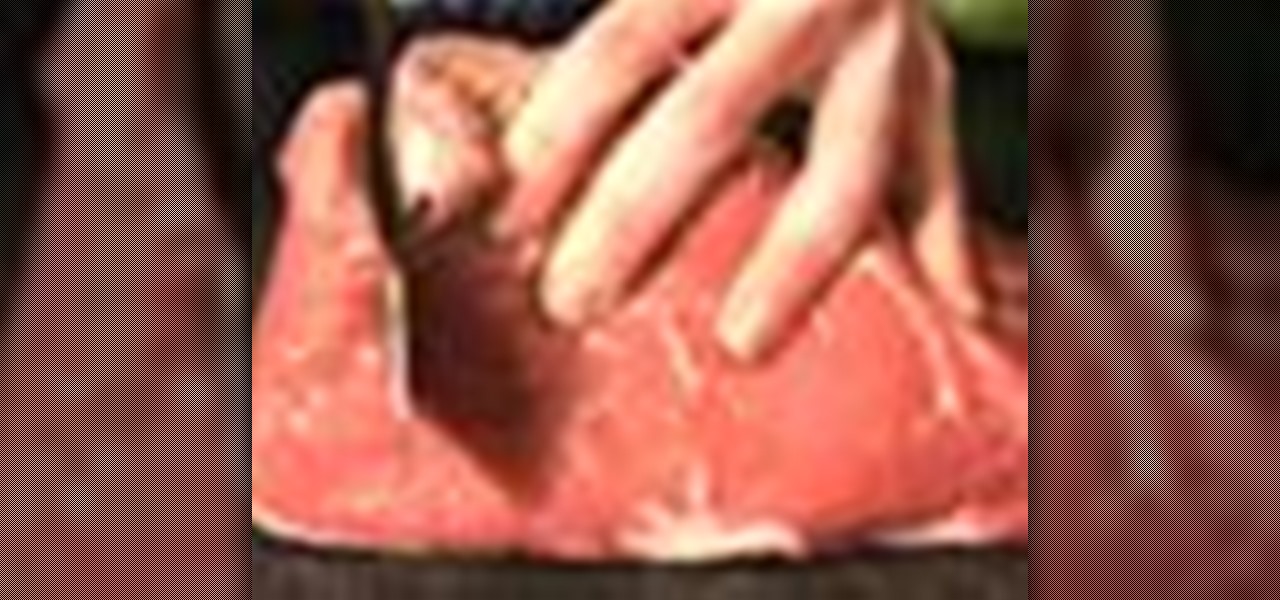
Dry aged steak is a chophouse specialty; but you don't have to go to a fancy restaurant to get this yummy meal. This video will show you how to recreate the superior flavor of real dry-aged steak at home.
Learn how to care for your pet with help from VetVid. See how to care for ear infections (otitis externa) in dogs and cats with this video tutorial.
Two out of three children will have an ear infection. But when is it time to take your child to the doctor's office? Dr. Alan Greene is in the Parents TV studio to show you how to eliminate some unnecessary doctor's visits. Watch and learn.
Adam shows you how to make an eye scanner and an ear piece on a low budget, for your filmmaking, low or high budget. You'll need scissors, thick cardboard, glass lens, metal, metal snips, screwdriver, duct tape, and a remote control.
Here is a great massage video explaining the basics of how to perform an ear drain.
These elephant-shaped towels are so cute and easy to create that you’ll never want to use them for drying.
Google Trends says that "unicorn" costumes are among the Top 5 searches for 2017, holding steady onto the no. 4 spot, trailing only Wonder Woman, Harley Quinn, and clowns. Seeing as how this year, unicorns made the full leap back into our lives, its popularity when it comes to Halloween costumes is not surprising.
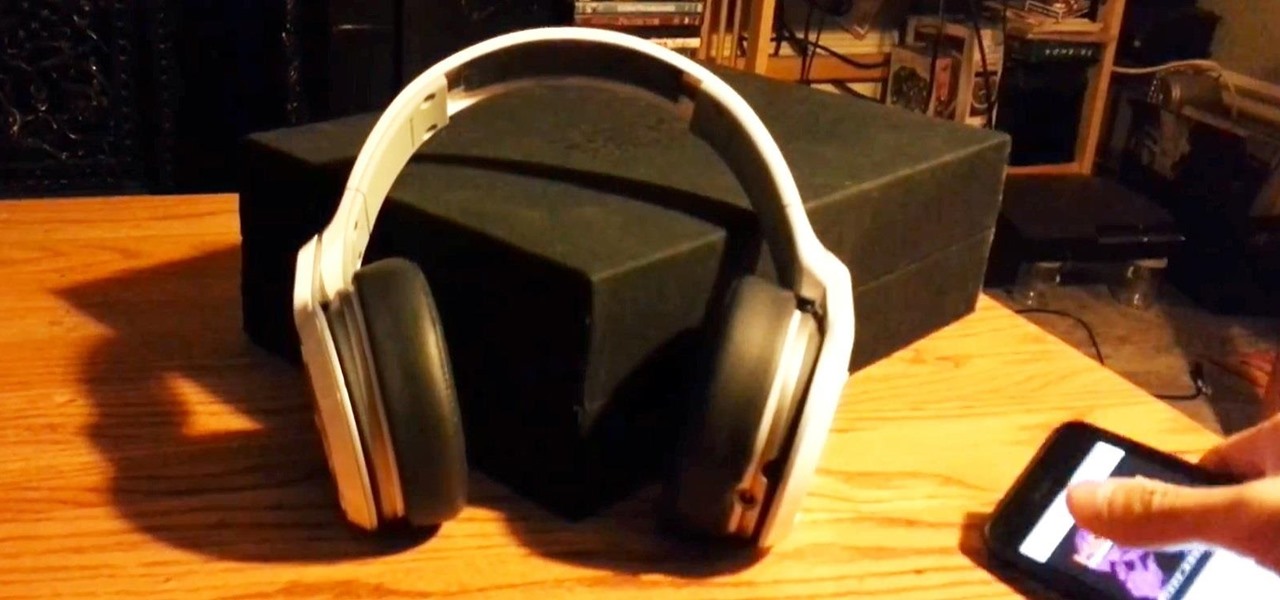
Headphone cords are one of those things we all deal with because it beats the alternative (no music). But they can be so obnoxious—they're always getting caught on things, and they seem to be perpetually tangled. If you have ear buds, you can make a simple a cord container to keep them organized, but over-ear headphones are a little more tricky.
Given that megastar internet search engine Google became its own verb a few years ago, we've all come to acknowledge that the wide and ever-expanding engine is becoming more powerful than ever before. You can take a look at your own house from outer space via Google Earth, you can look at famous paintings - down to the very last grizzly brushstroke - via Google Art Project, and you can look at what's hot and what's not in Spain - or anywhere in the world - with Google Trends.
In this video, we learn how to apply bold eye makeup during chemotherapy. First, take a light silver shadow and brush it all over your eyes, including below the brow bone. From here, take a dark brown and brush it into the crease of the eye and blend to the outer corner with a fluffy blending brush. After this, apply black eyeliner on the top and the bottom of the eye. Then, apply mascara to the top and bottom eyelashes and curl if you would like as well. When finished, you will have a bold m...
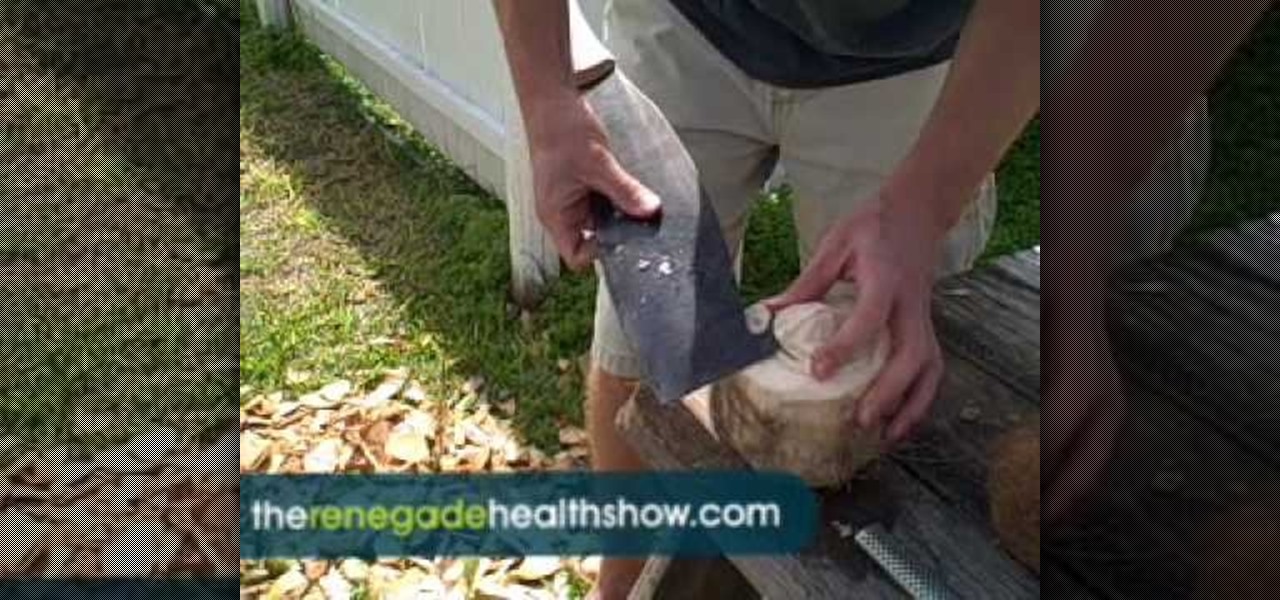
In this tutorial, we learn how to open a variety of coconuts. These fruits can be extremely difficult to open up, but it can be done. First, you will need to have a very large and sharp knife and all of your types of coconuts. To open them up, you will need to first crack the skin of the coconut with the sharp knife. On other coconuts, you can simply use the knife to cut the outer skin off to get to the milk that is in the middle. Whichever way you choose, just make sure you have a very sharp...
In this tutorial, we learn how to decoupage a picture frame. This is the art of gluing paper onto a smooth surface, then applying lacquer over it. First, gather all of your tools, including foam brushes. Next, stick the papers you want onto the smooth surface, using glue. Then, smooth out the surface using a roller and a credit card to press down onto it. Do one last run through with the roller, then apply the lacquer onto the top of it. Once finished, let this dry 15-20 minutes. When dried, ...
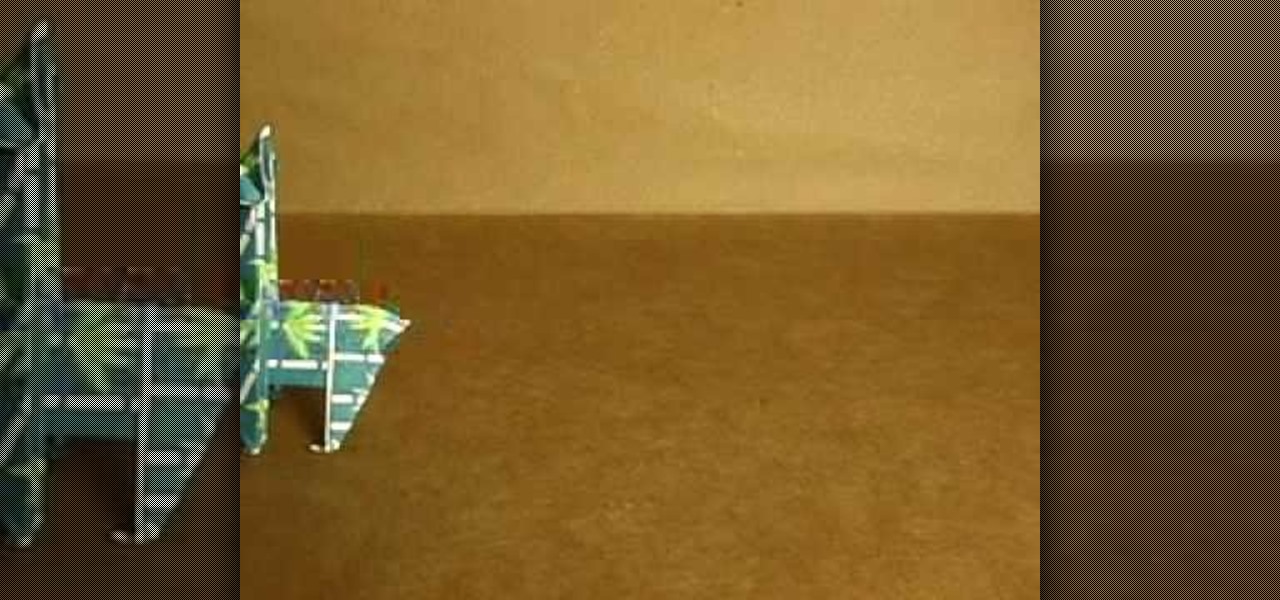
This is a video tutorial in the Arts & Crafts category where you are going to learn how to make origami llamas. Take a square sheet of paper and fold it in half. Open the fold and then fold each half further in halves. The sheet is now divided in to 4 parts. Next fold the outer flaps inwards so that they meet at the center. Flip the folded sheet and fold it in half to make it a square size. Next you fold the top back over itself in a triangular shape. Open up the last fold and watch the video...
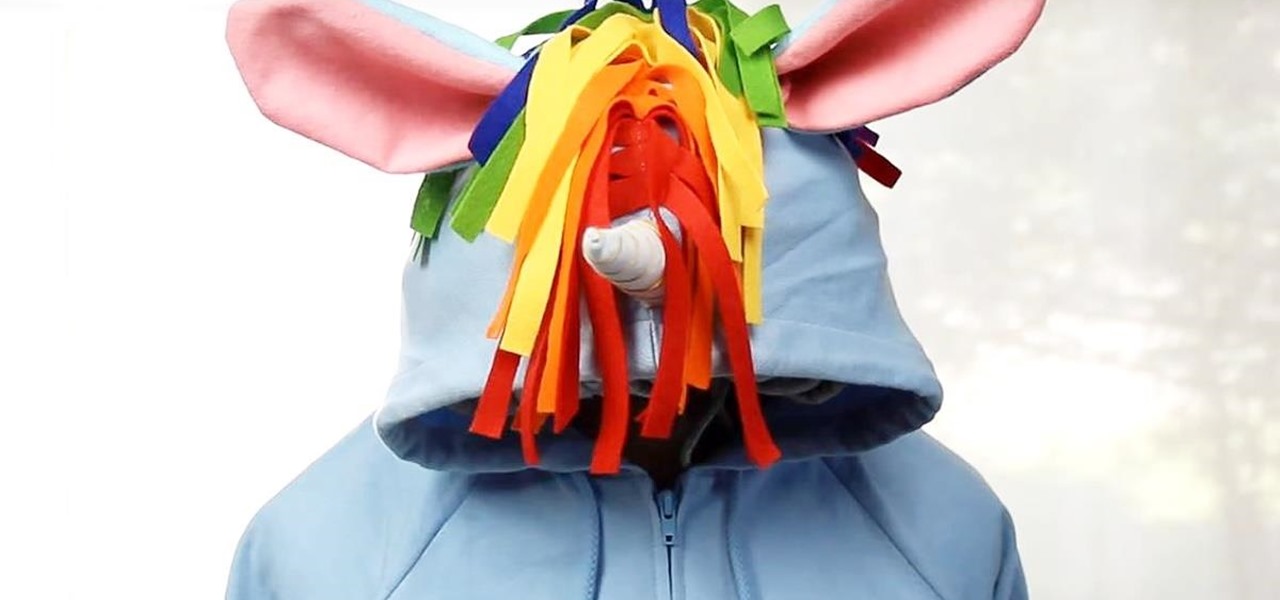
In this tutorial, we learn how to make a Max from Where the Wild Things Are. First, you will make the ears and the tail for the costume. Use felt for the ears and a furry type of fabric for the tail and the body. Cut out all of the different materials, then sew them onto a large off white colored hoodie. Once you have finished sewing these on, put the hoodie onto your body to make sure everything is secure in place. After this, put on shorts and sew the tail to those, then you will be able to...
If you're a pizza lover, then you already know by now that there is no one pizza dough. Just like pizza toppings, pizza dough comes in many different varieties, from crispy to tender to crunchy to puffy. And the type of dough - as well as how you knead it - infinitely affects the resulting pizza creation.
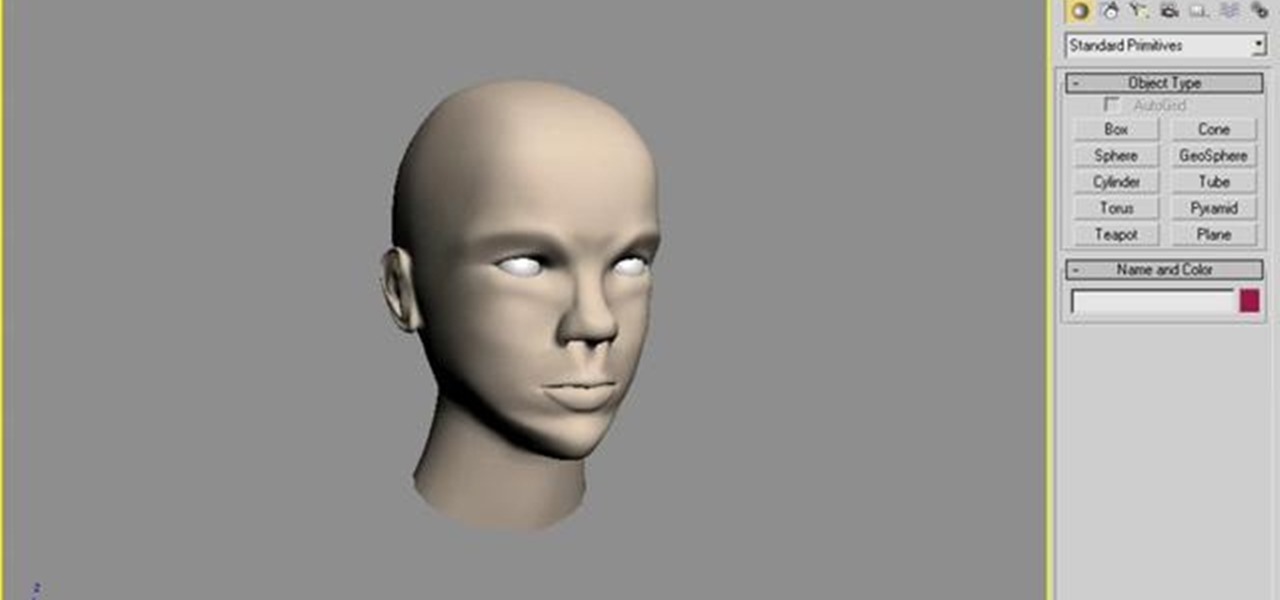
A polymodel head is being mapped. Keep the turbo smooth active to smooth out edges and seams. Use the relax tool to help even out the mesh and areas around the mouth, the ears and the neck as work proceeds. Use the stitch modifier to attach and combine the top and bottom of the head. To get all the seams and areas to match they must be moved, rotated and scaled. Use the weld tool on all the vertices and use the relax tool to get all the seams to match. Use the pelt map for the ears. Use the s...
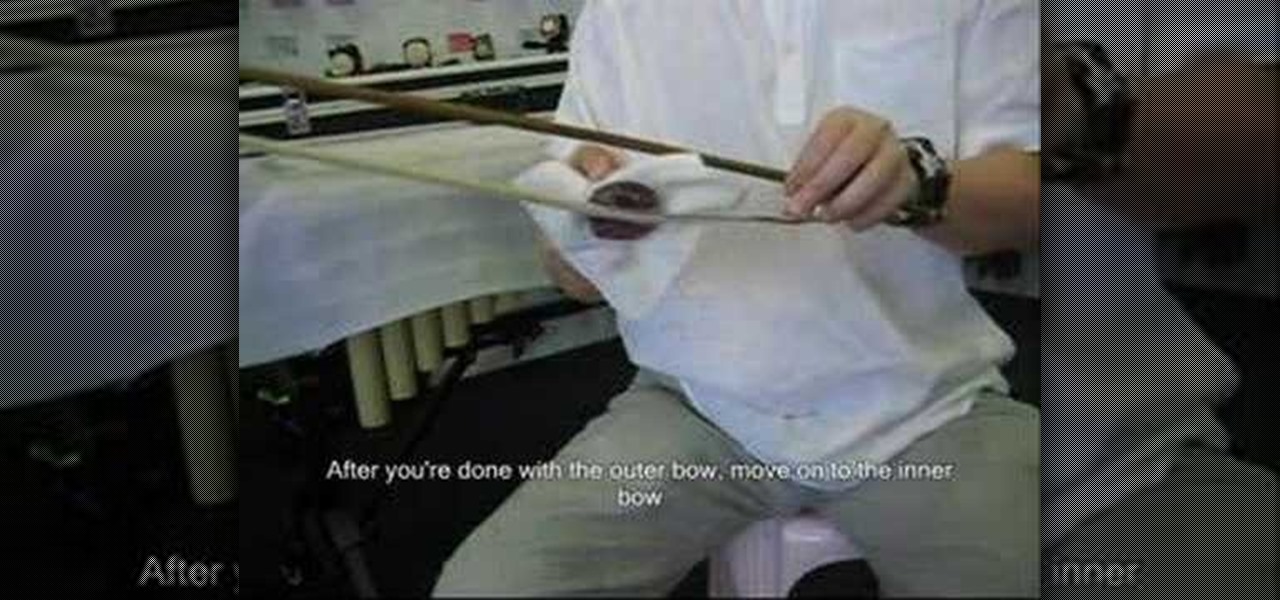
You can easily rosin your erhu bow. To do this first take the cake of rosin and rub it back and forth on the one part of the bow until you get rosin powder on the hair of the bow. Now go the next part of the bow and do
With Fall almost here, it's time to change the colors. And this makeup tutorial will hopefully help you change with the seasons, or at least inspire you in greater ways! Watch and learn how to recreate (and add or modify) this smokey muted purples look for eyes. You can use whatever colors you have to create something similar. Use your imagination!
In this video tutorial, viewers learn how to do the Around the World soccer trick. When doing this trick, users are able to do an inner rotation known as Inside Around the World or an outer rotation known as Outside Around the World. Begin by hitting the ball with your toe and start rotating you leg. The ball needs to go up with the foot, but the foot should still be above the ball. Now end the rotation by landing the ball on the tip of your toe and continue to juggle. This video will benefit...
In this video, we learn how to make a mosaic jewelry ring. First, put the glue into a container, then place the stones into the glue and then place them onto the ring. Start by making the outer ring of the circle, then continue to go around the inside and the middle. Once you have all the stones placed inside, let the ring and stones dry for a full two hours. Next, take your powder and add a small amount of water. Mix together until you have a toothpaste like consistency, then rub it on the r...
In this video, we learn how to write the letter "S" in calligraphy copperplate. First, dab your calligraphy into ink, then start to writ on a your paper. Make a large half bowl shaped curved line, then make a loop and go down, creating a curved line with a dot at the end. To make the lowercase letter, make a thin line, followed by a thick outer line that curves into the large line making a lower case s. When you are finished with both of these, you will have beautiful letters that look great ...
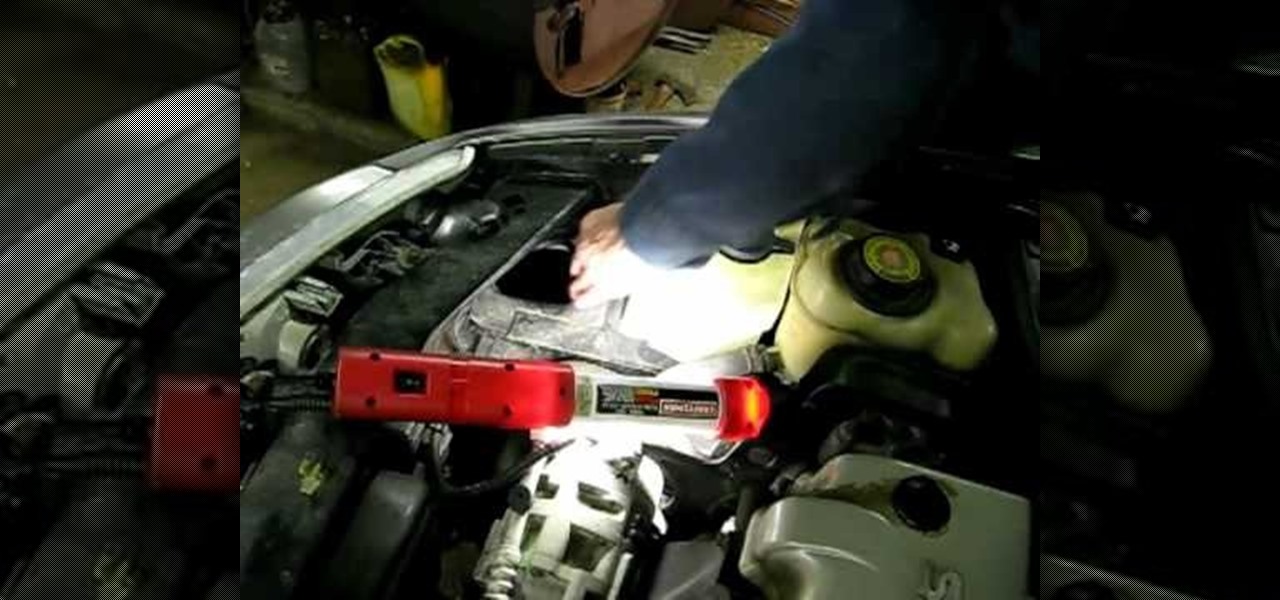
In this video, we learn how to remove your windshield washer tank. First, lift up the hood of the car. After you have done this, you will need to remove the outer light on the front of the vehicle with a screwdriver. Next, find the tank on the inside of the hook where the windshield wiper fluid is located at. After you have done this, make sure to disconnect any tubes and parts that go to this, then set them aside. If you are replacing this, you will need to put your new one in and then repla...
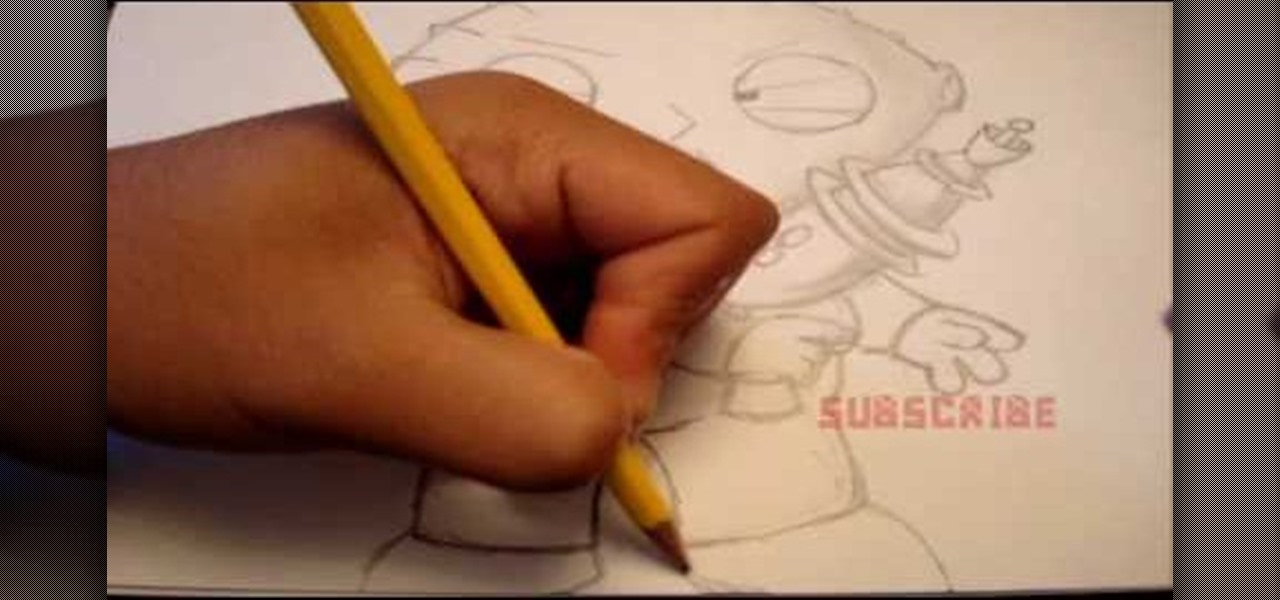
In this tutorial, we learn how to draw Stewie Griffin from Family Guy with a pencil. Start off by drawing the ears, then the football shaped head around the ears. next, draw the arms with the shirt on it, and make the hands. Also, draw a rocket with Stewie holding it. Keep drawing downwards, making the arms around the rocket and the body with pants and a bib on top. Draw in the details of the face, giving the character large eyes and a triangle shaped nose. Give the character narrow eyebrows ...
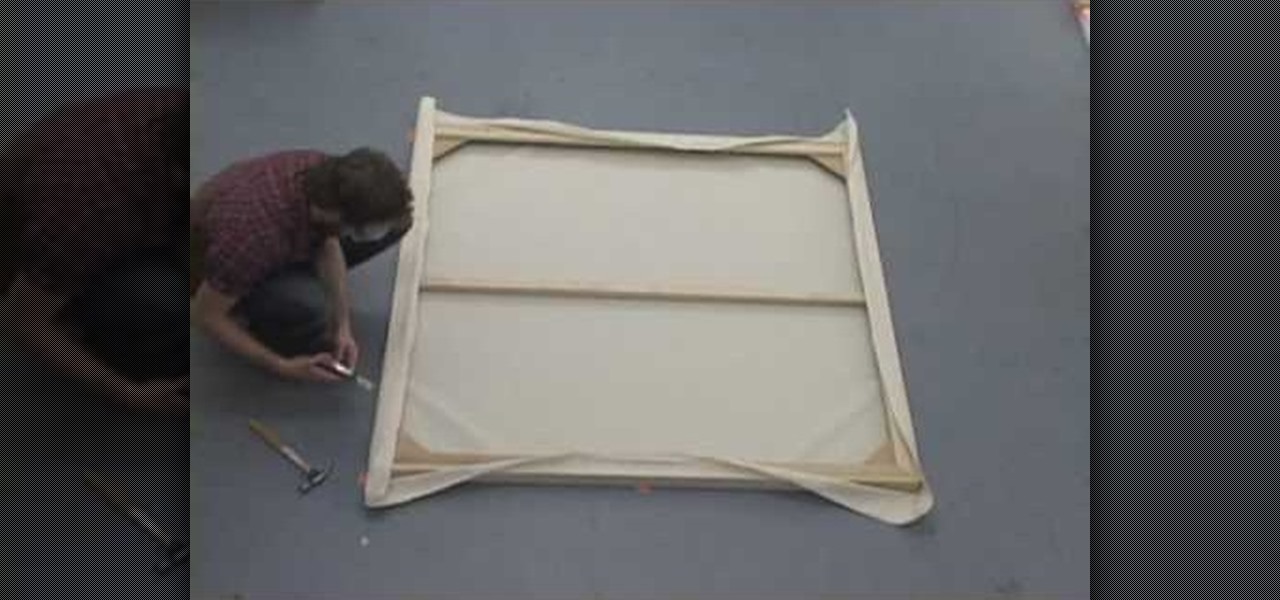
In this tutorial, we learn how to stretch the perfect canvas. First, measure the canvas. After this, center the canvas and make sure there are no wrinkles. Then cut the canvas and staple it to the frame. This will take several minutes, and you will work your way from the inside to the outer corners. After you are finished stapling hide the folds on all of the corners with the stapler gun. When you are finished with this step, you will be done and ready to paint on your new canvas! These steps...
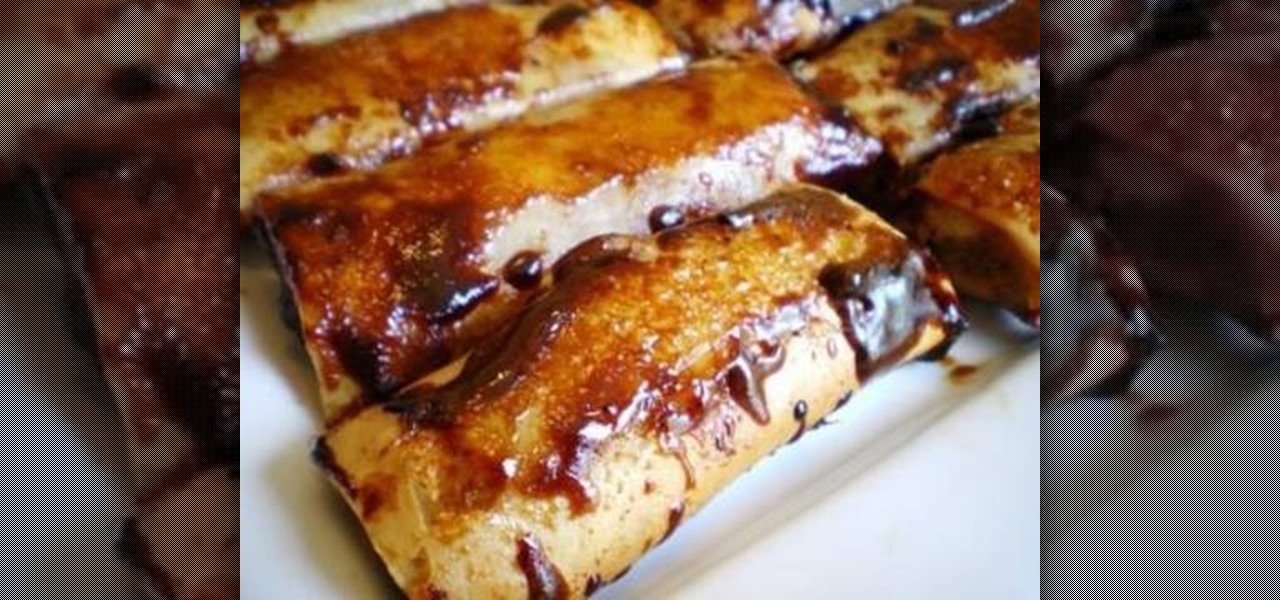
In this tutorial, we learn how to make Filipino turon. Ingredients you will need include: A bag of whole steamed Saba bananas, spring roll pastry, and brown sugar. First, take your bananas and cover them completely with brown sugar and place onto a plate. After this, roll the banana into the spring roll tightly so nothing falls out. Place water on the outer edge of the spring roll before finishing, to make it stick together. Repeat this step for all of the bananas, then fry them in a skillet ...
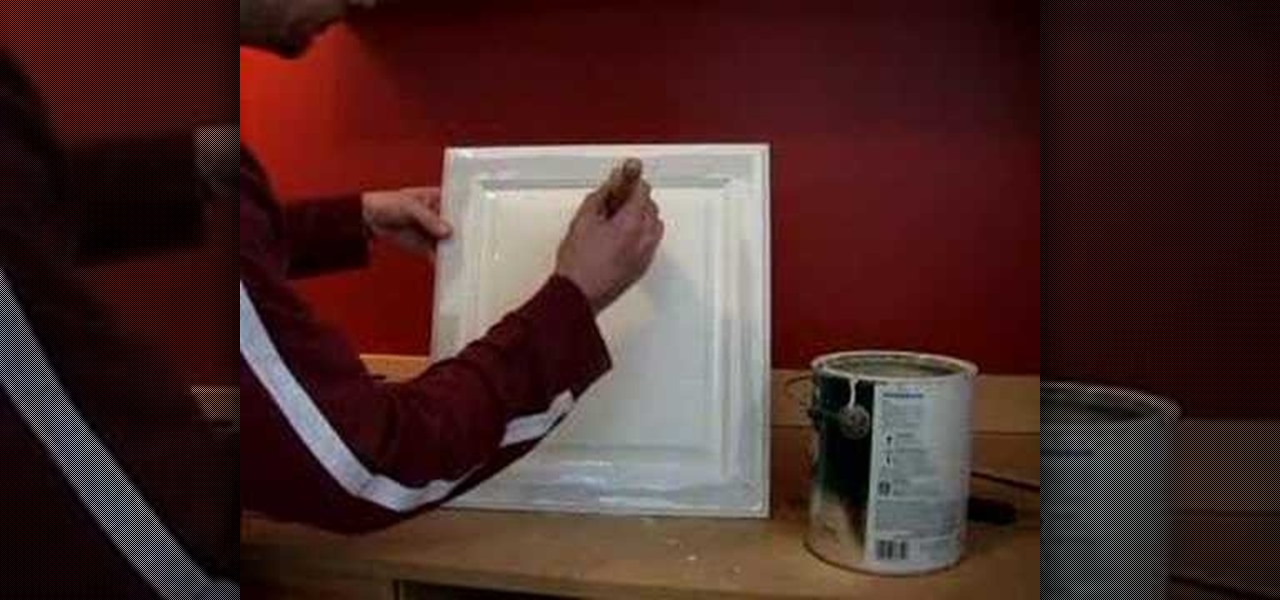
In this tutorial, we learn how to refinish and paint cabinets. Start off by grabbing a fresh brush and dipping it into your favorite color of paint. Next, brush the outer edge of the cabinets, brushing off the corner instead of in the corner, which will create a mess. Now, paint the entire outside of the cabinet, making sure to paint more heavily in the parts of the cabinet that has gaps and creases in it. Next, apply a new layer but paint very smoothly so you don't get any bubbles or brush m...
The skin on a butternut squash is not the easiest to remove. But there are a few tricks to hacking off the outer skins of the squash. This video will show you the trick to peeling and cutting the butternut squash the easiest way. You could use a knife to peel, but the best option is a serrated vegetable peeler. Once peeled, it's a matter of slicing and dicing the squash to perfection, in the best manner. See all the details within the video.
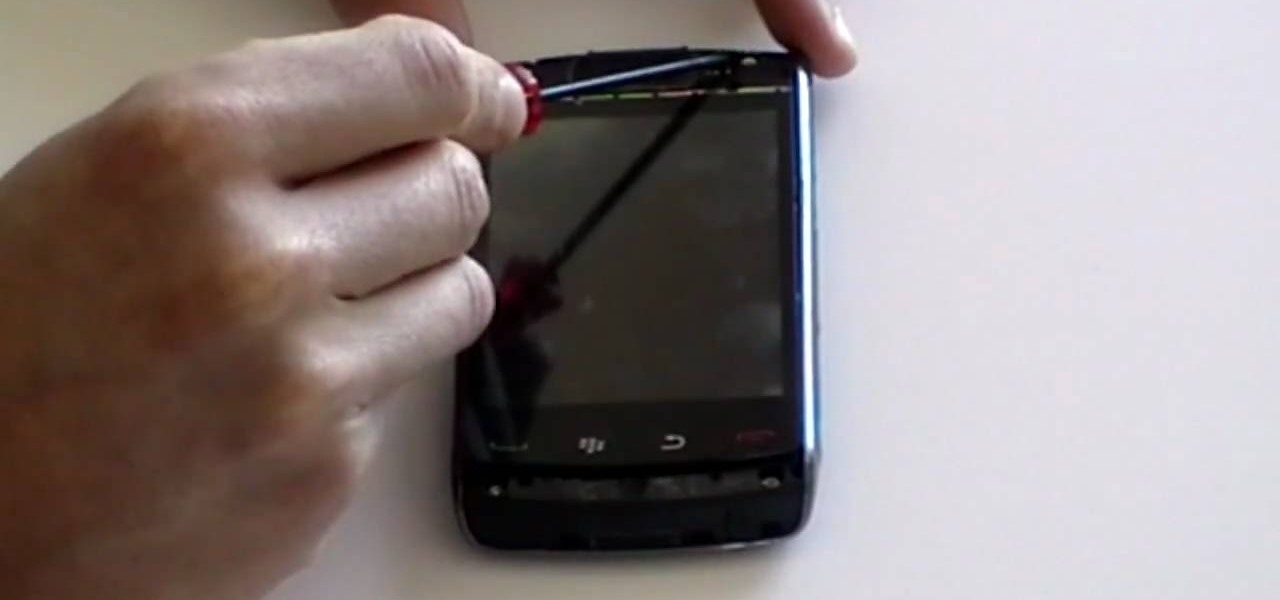
Repairs Universe demonstrates how to take apart the BlackBerry Storm 2 to replace the LCD. First, flip the phone over and take out the battery, SIM card and memory card. Then, use a safe pry tool to pry off the top and bottom covers which are held on by adhesive and clips. Next, use a T-6 screwdriver, remove the size screws on the front of the device. Flip the phone over and remove two more screws. Use the pry tool to release the clips and remove the outer casing. Flip the phone over and usin...