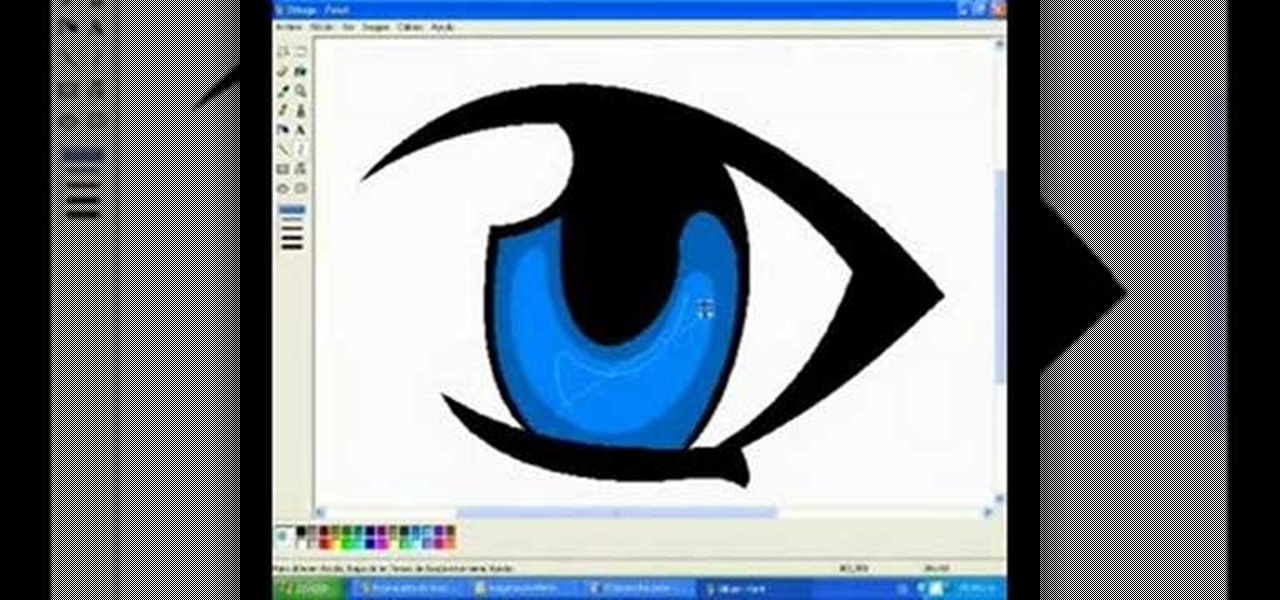
In this video, we learn how to draw a manga eye in MS Pain and make it blink. Start out in Paint and draw the outline of the eye. After this, color the outside area in black and then fill in the pupil area of it. Color the eye blue or any color that you desire, then add in lines to the middle of the eye to make it look more realistic. Leave white around the edge of the eye. Create an eyebrow over this, then add it to a flesh-toned background. Once you have done this, you will be finished with...
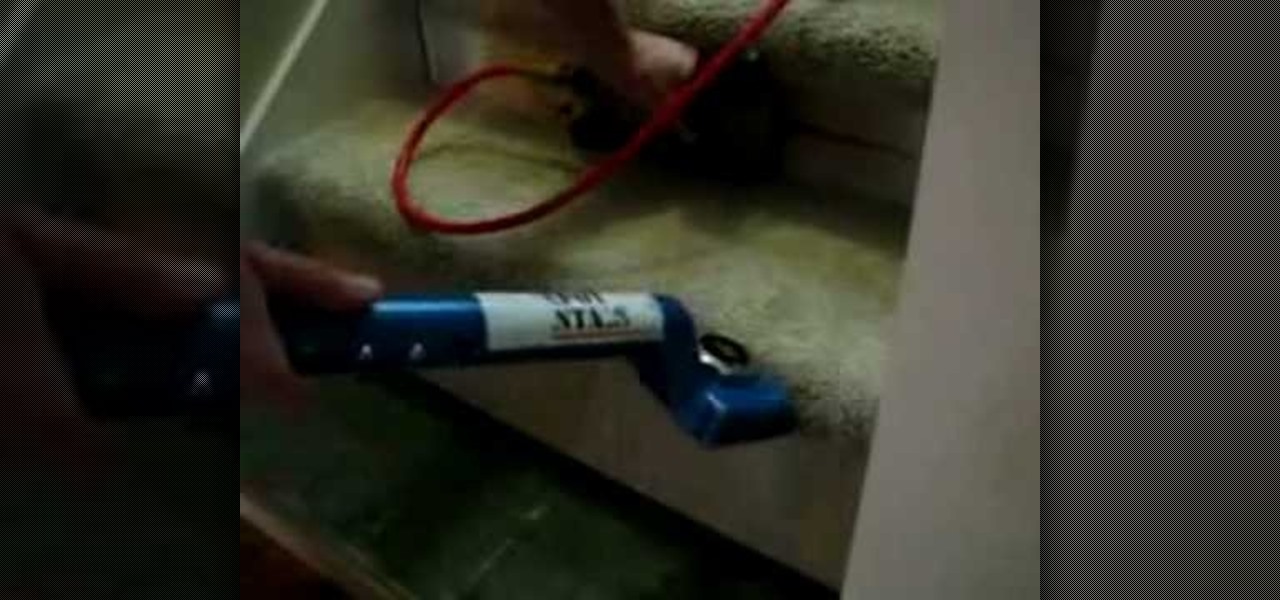
In this video, we learn how to install carpets on stairs. First, install a tack strip along the back edge with a distance between the riser and where you place it. Then, you will place the pad down on the stairs, and then you will place the carpet down. Use trim to cover up the backs of the stairs and the underside of the bull nose. Use a nail gun with staple brads to fasten the carpet to the stairs. This is the easy way to do it, and you must make sure you have the right measurements to fit ...

In this video, we learn how to make an easy paper rose. First, punch out three flowers with a paper punch from your favorite color of paper. Then, add contact ink to the edges of the flowers along the petals. Next, you will cut out two of the petals from the flowers and then glue half of the leftover scraps. Make this into a cone and then do this on the other pieces of flowers. Bend out the petals and curl them, then glue all of the petals together. Once finished, add on a green stem and then...
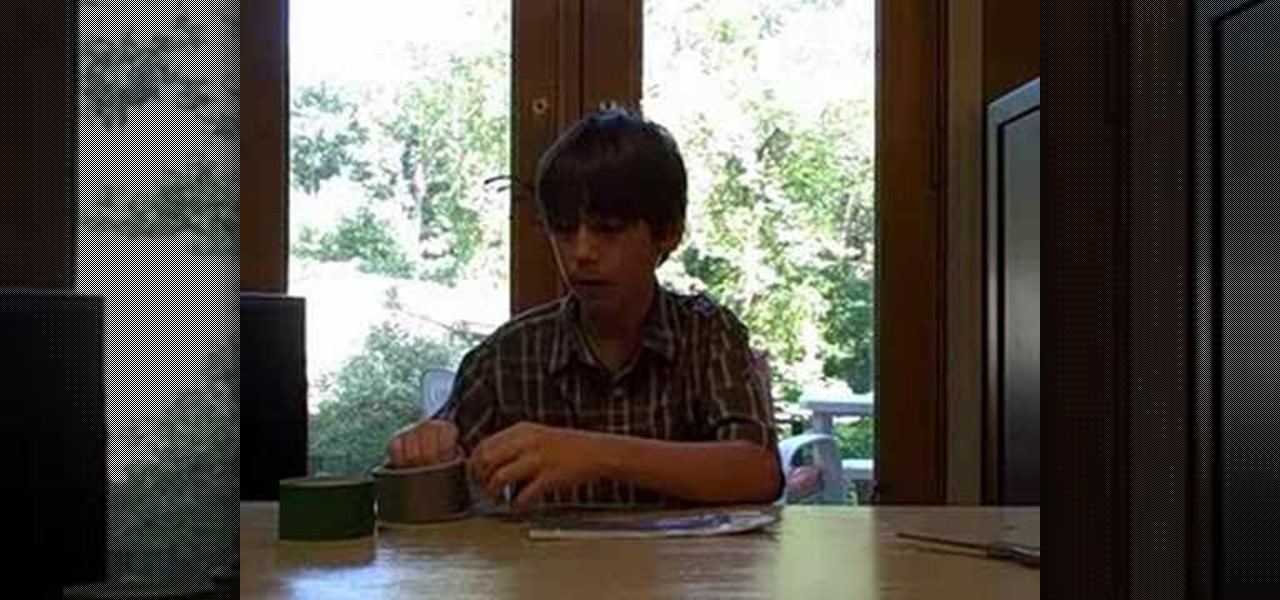
In this video, we learn how to make a duct tape wallet with a change pocket. First, grab your favorite color of duct tape and then place some down on a flat surface with the sticky side up. Overlap these until you have the desire size you want, then fold the edges over. After this, apply the sticky side down to this and you will have a nice little wallet that is made between them connecting to each other. Make the change pocket by doing the same process, just use a smaller piece and connect w...
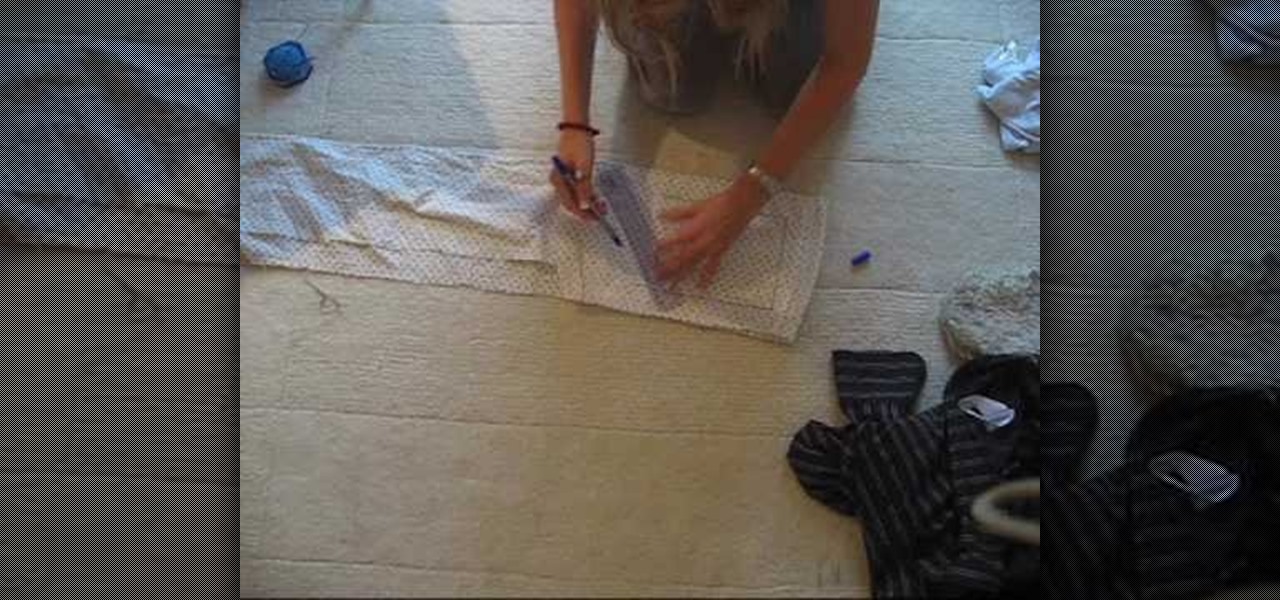
In this tutorial, we learn how to make an over-sized fashion bow fashion accessory. First, take your fabric and cut it to the desired size you want the bow to be. Cut this in a square shape at first, then sew the sides of the square. Then, fold this in half and pull in the middle of the square. Cut this in the middle to make a hole. Then, turn this inside out and push out the edges. Put an additional square of fabric around the square in the middle, then shape it out to be a cute bow to wear ...
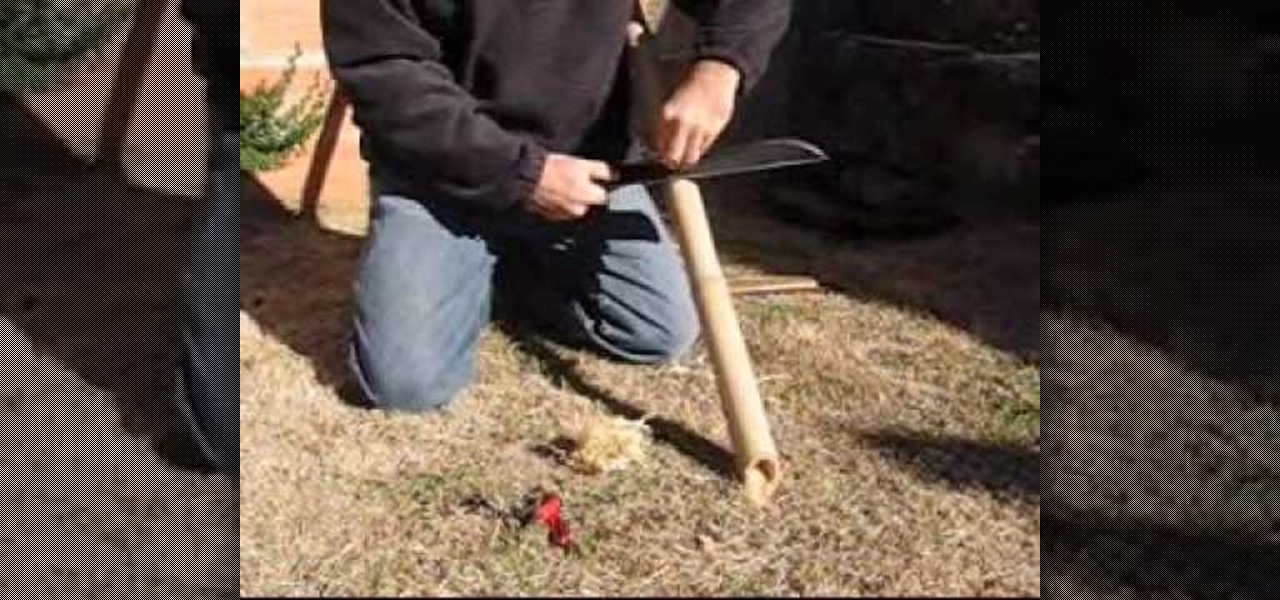
In this video, we learn how to modify your machete for the bush. First, you can sharpen your blade on a piece of wood. You will produce wood shavings that will produce fire as well. Push down on the sides of the knife as well as base and on the tip and middle. Make sure you slightly sharpen the back as well so you can use it to open up coconuts. Once you do this, you will have five useful edges on your machete that you can use for many different purposes while you are out traveling. You can a...

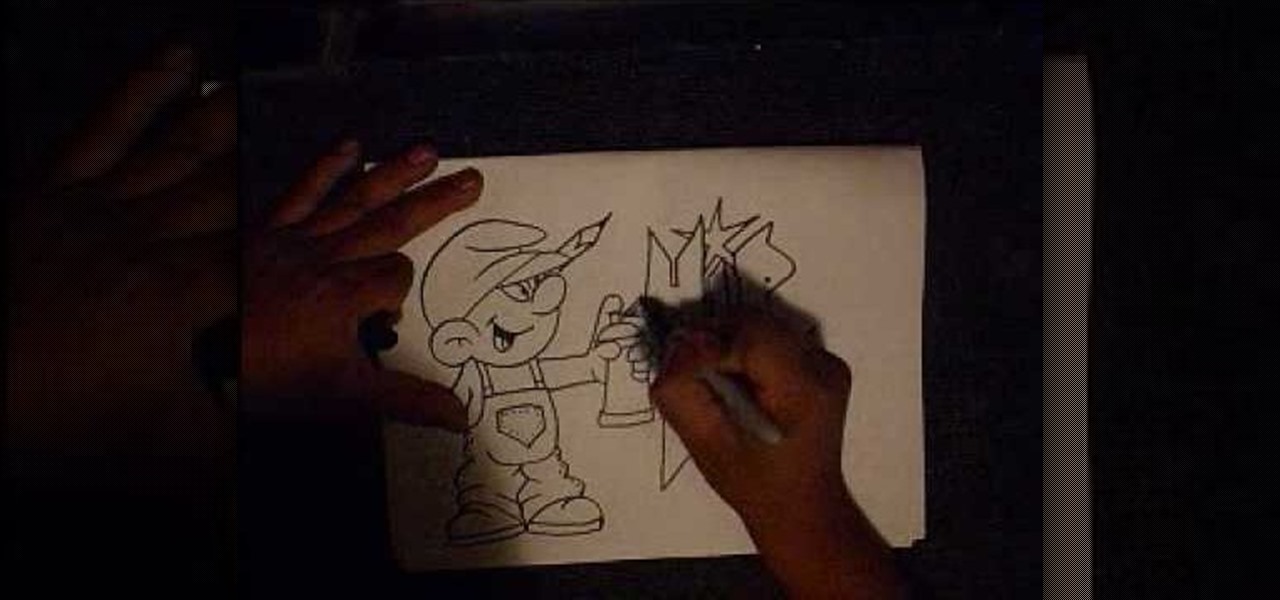
In this tutorial, we learn how to draw a graffiti Smurf character. Start off by drawing the hat for the Smurf, then draw in the ear on the side of the head. Then, draw in the face and start to add in the details. Draw in the mouth, nose, and eyes. After this, draw in the upper body and the clothing that the Smurf is wearing. Add crinkled lines on the edges to make it look like the pants are too big, then draw in the feet, arms, and hands. Draw a spray paint can in the hand of the Smurf, then ...
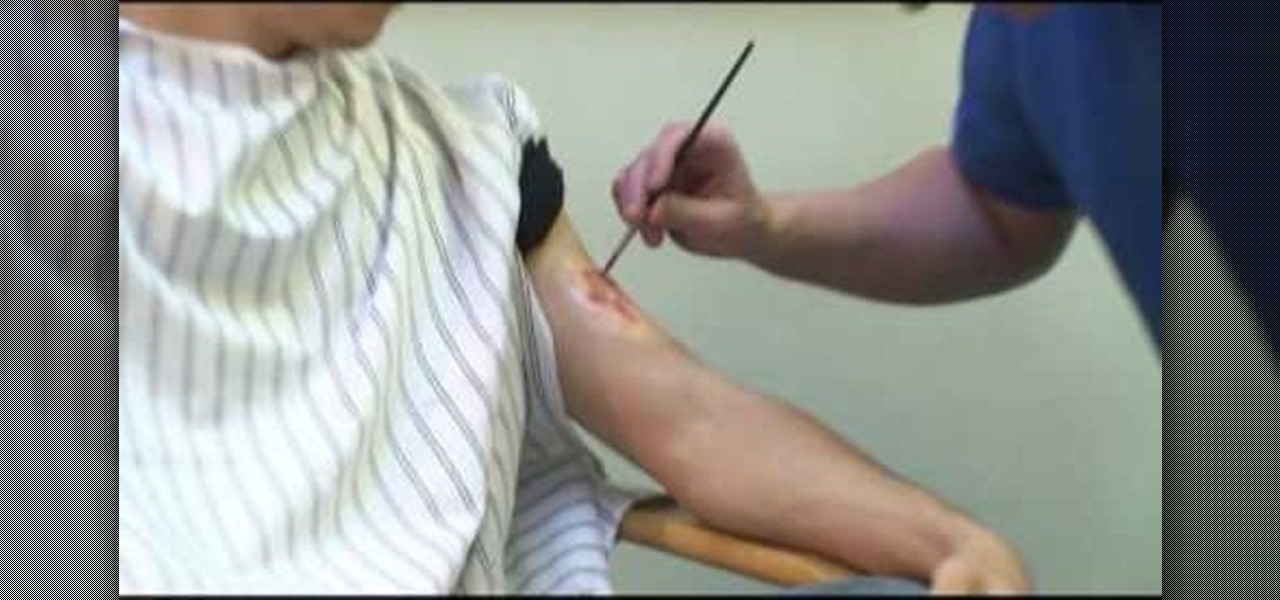
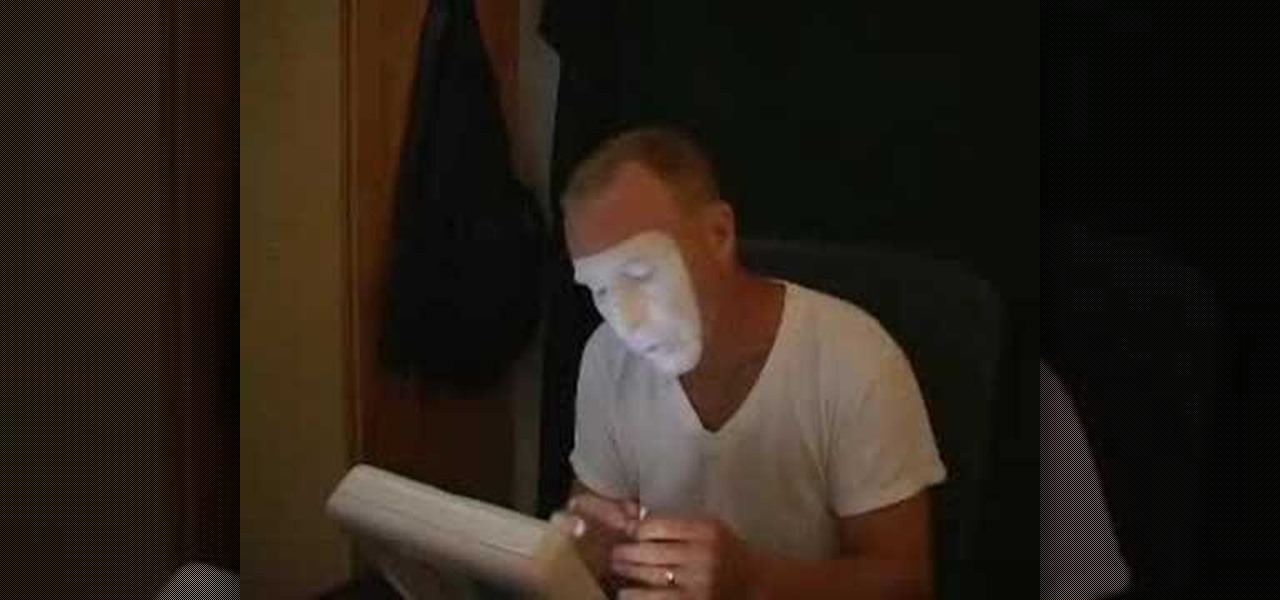
In this tutorial, we learn how to apply injury makeup with Emmy winner Brad Look. First, clean the area with water, then use glue and powder to apply the surface of the injury. After this, use more makeup to cover up the piece on the skin and blend the edges into the skin so they mix in completely. In the middle, add in some reds, purples, and blacks to create a realistic looking injury. Make sure there are textures and highlights on the would to make it look more real. Make the injury radiat...
In this tutorial, we learn how to draw PokŽmon heads. Start out by drawing a circle for the head, then drawing intersecting lines in it to create a reference point for the features of the face. Next, draw the ears coming out of the head and then draw the eyes, nose, and mouth. Once finished, you will need to fill in the eyes so they have the correct look, then add in further details along the face. Make sure to add lines to the edge of the head to make it look like it has fur, then add in any...
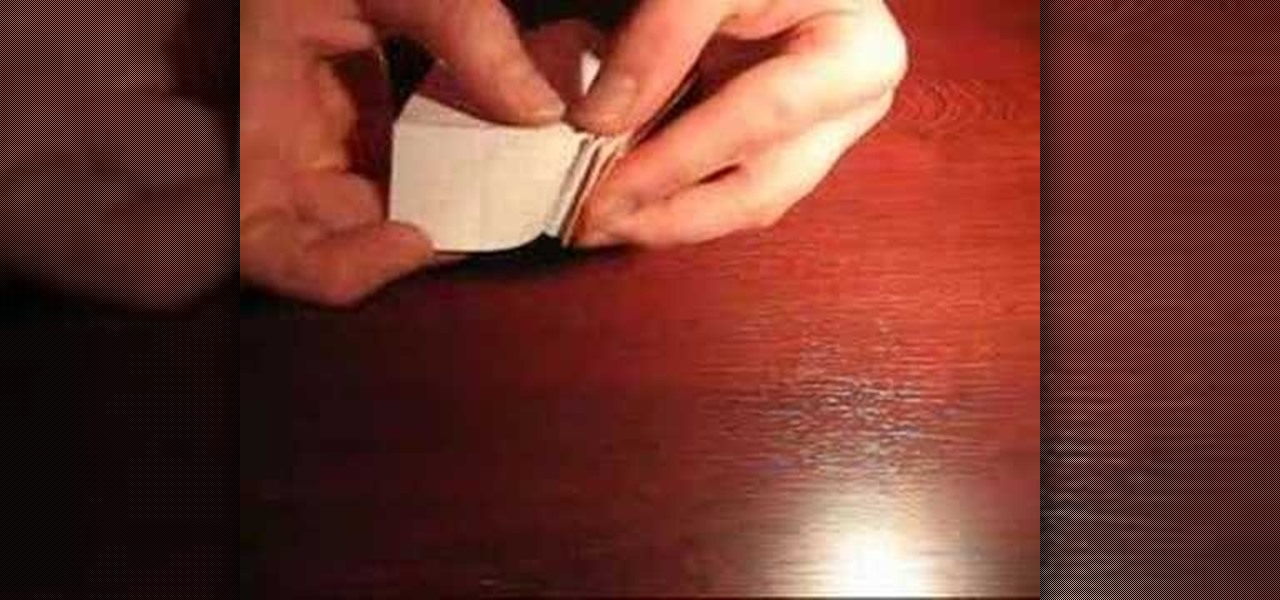
In this tutorial, we learn how to make a paper snowflake from scratch. First, take a CD and trace around it on a piece of paper so you have a perfect circle shape. After this, take your scissors and cut out the circle. Next, take the circle and fold it in half, then fold it from the right to the left in half again. Then, take it and flip it so the "v" is pointing towards you, then take it from the right to the left and fold it again. After this, face the point away from you, then use your pen...
In this tutorial, we learn how to know the pros & cons of laminate flooring. The difference between laminate floor and wood floor is mainly the cost and quality. Laminate flooring will withstand damage better than regular oak flooring can take. But, laminate flooring does not do well if you spill water on top of it. Once the water gets on the edges and stays there for a while it will end up swelling the floor up so it becomes larger than the rest of the flooring. Other than that, laminate is ...
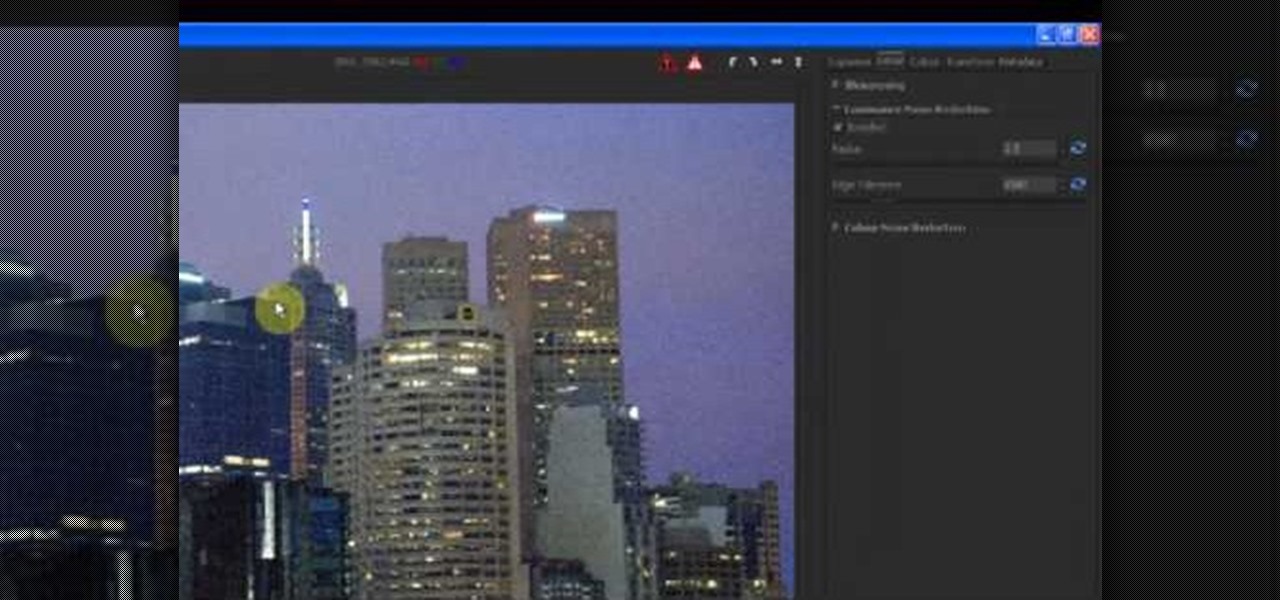
In this tutorial, we learn how to reduce noise in RAW Therapee. First, open up your photo in the software that you want to reduce the noise on. Then, open up the detailed view of the photo and click on then click on the detail button. Through here, you can sharpen the image or you can change the noise reduction for the color and luminance. Click on the drop down menu for the luminance and then enable to checked section. Then, move the edge tolerance to its maximum to see the full effect on th...
This is a video tutorial in the Arts & Crafts category where you are going to learn how to make mini album pockets. Take a 6 x 6 piece of card stock and cut it at 3 1/2. Now score it at the halfway mark and fold it backwards. Next score it at 1/2 from both longitudinal edges. Then you cut out along the 1/2 score line on one half of the card. Take a 2 1/2 " circle punch and punch a circle out of scrap paper. With this draw a semi-circle on the wider half of the card and watch the video for fur...
In this video, we learn how to make a tutu for Halloween. First, take your pink fabric and lay it out flat. Next, use your scissors to cut down a folded edge on the top of the fabric. Now you will have two pieces. Next you will roll the fabric down until you reach the end, then you will cut strips out of the fabric. Now, take your elastic piece and tie the strips of fabric onto it. You can use any colors you would like to make this. You can use pinks, oranges, blacks, whites, and any other co...
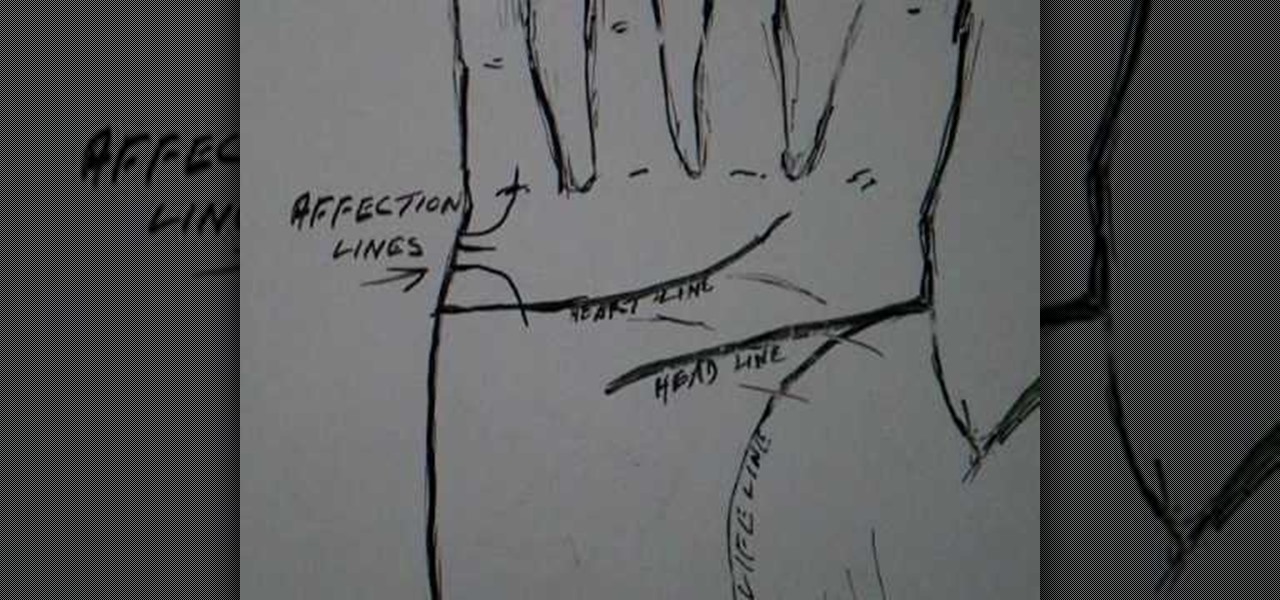
This video tutorial is in the Spirituality category which will show you how to read affection lines in palmistry with Peter John. The affection lines are at the edge of the palm under the little finger. These are also referred to as marriage lines. When it curves downwards and crosses the heart line, it implies an emotional upset in the marriage. But, you got to look at the heart line also to determine how the person will feel towards the event. When it curves upwards and crosses the flange o...
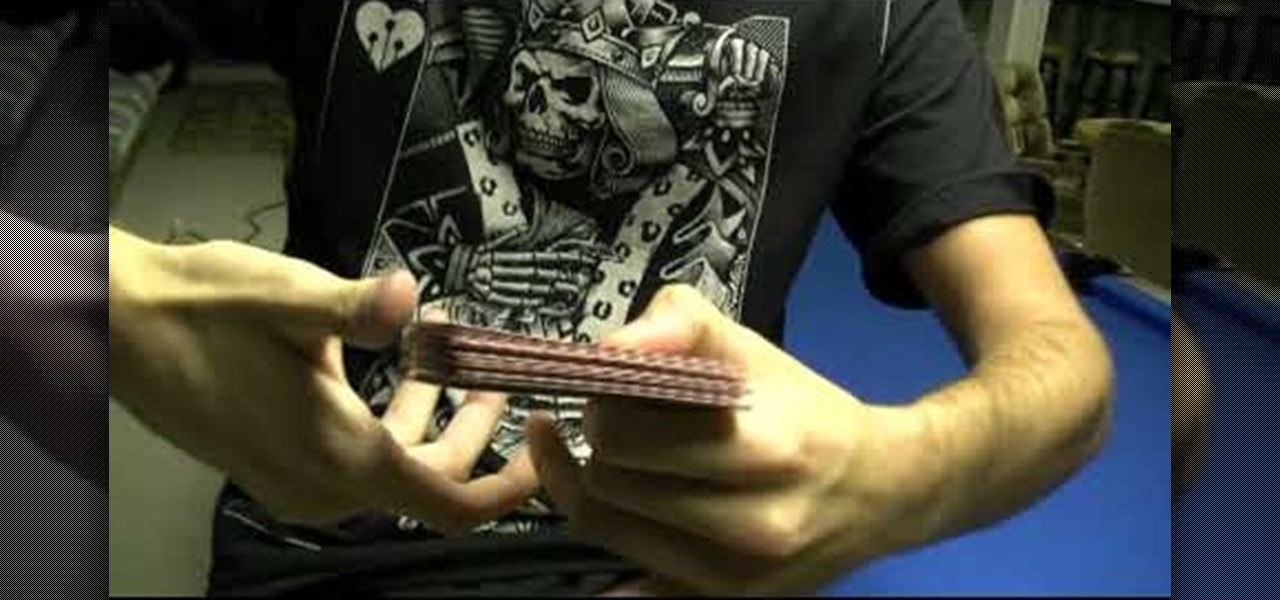
In this video, we learn how to perform a convincing false riffle shuffle. Start off with one deck of cards. After this, riffle the cards off half way and do a standard shuffle. Bend the cards up after this, then use your pinkie and pointer finger to touch each other. When you release, the cards are naturally going to separate from each other. They will push off in opposite directions because of the way you are working the cards. Square it up on the edges, then square on the back and use your ...
In this video, we learn how to set up the mast on the Open 570 single-handedly. First, look to see where the mast is going to fit on the boat. Pick the mast up in the middle so it balances out on each side, it's very long. Turn the mast around and place the edge facing the foyer. Put the base of the mast into the mast step, then let it rest on a step ladder. From here, get into the boat and add the safety pin into the base of the mast to keep it locked. Now take the mast and push it up into t...
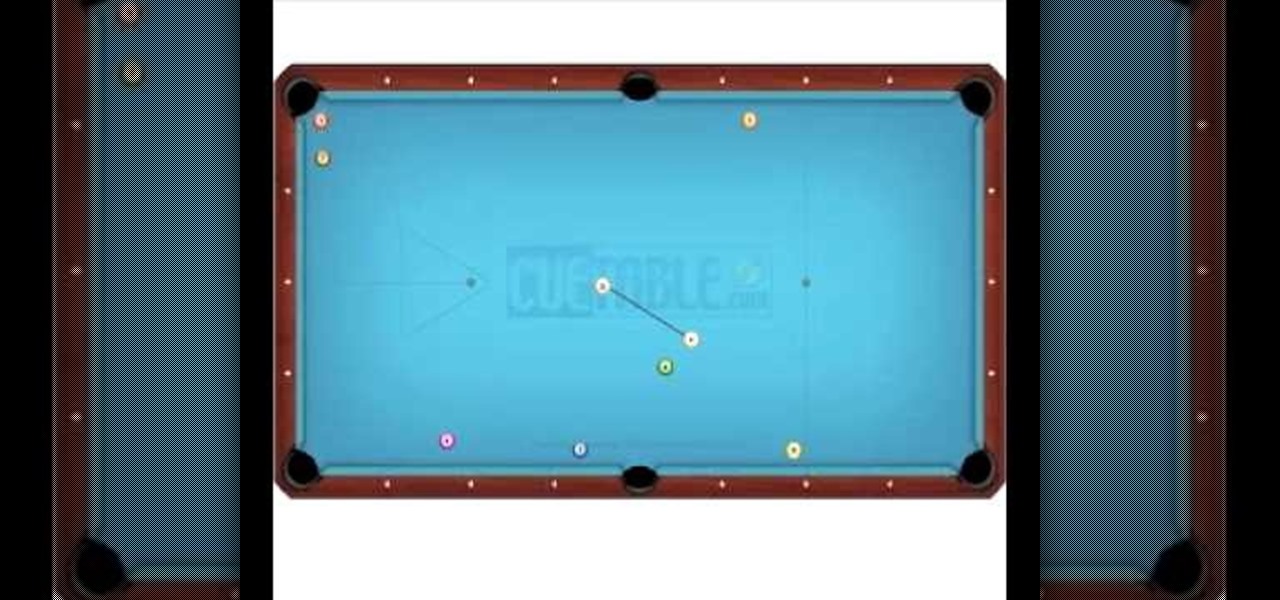
In this video, we learn how to push in pool. The push shot was designed to reduce the impact of the element of chance while playing pool. It's about creating a higher percentage shot or safety. The object is to turn a certain loss into a coin toss. Observe your opponent and be honest about yourself while you are playing. Practice playing a game by yourself with balls on the edge of the different sides of the pool table. As you shoot into the different pockets, avoid hitting the other balls th...
This video will show viewers how to fold a small book out of origami paper. You will need a square piece of paper for this project. First, fold the paper downwards in half, then fold it into quarters by folding down both edges of the paper to meet in the middle. Unfold and fold the two top sections down to make eighths on your paper. Then turn the paper around and repeat. Mountain fold both sides of the paper until you reach the middle, after which you should have a strip of folded paper. At ...
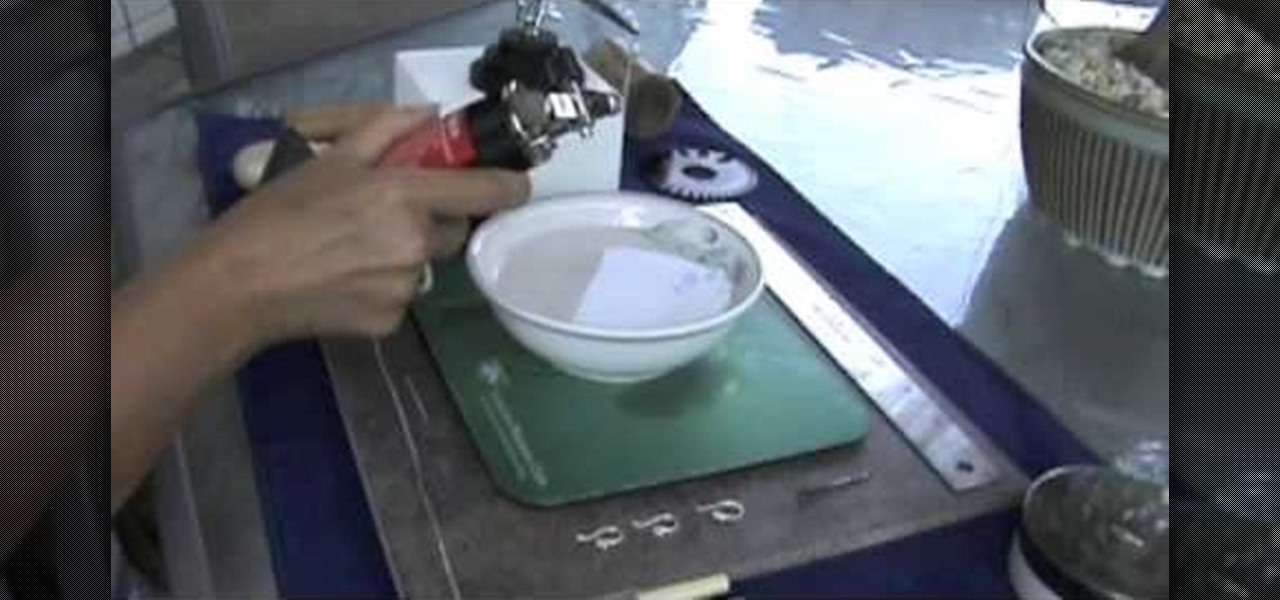
Make fine silver ball earring wires
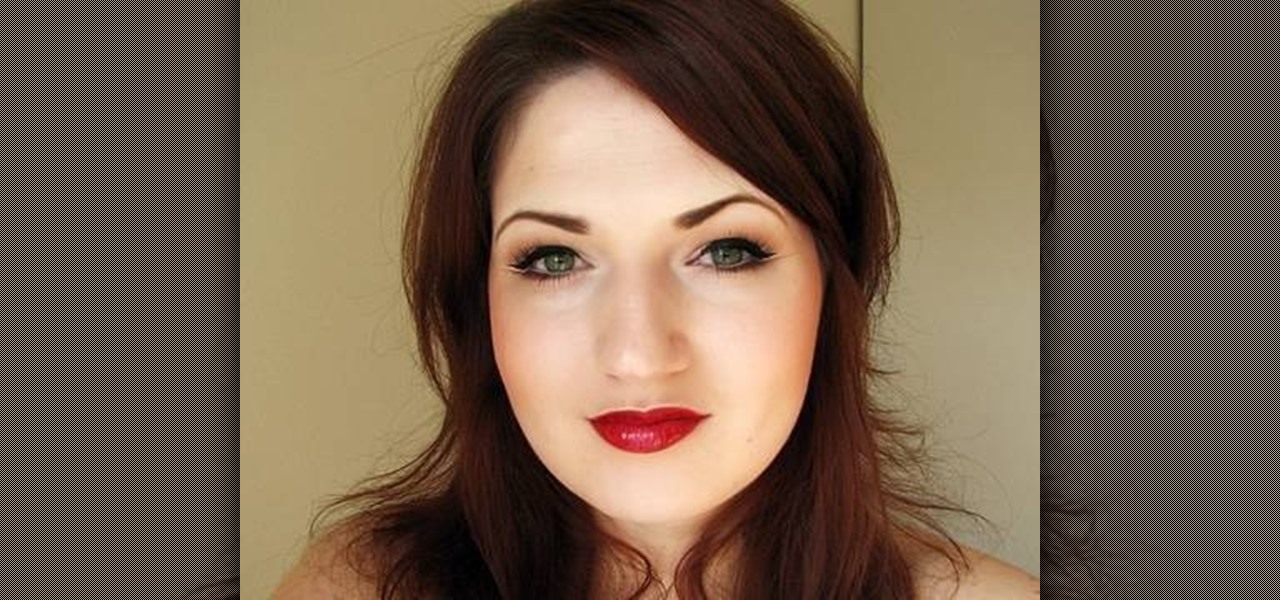
In this tutorial, we learn how to do an Evan Rachel Wood True Blood inspired makeup look. First, apply white shadow onto the lid on the inner corner and on the lower lash line. Next, apply a light pale color to the rest of the lid, then apply a brown shadow onto the eye in the crease. Brush a light white color underneath the brow to create a highlight, then line the eyes with a brown pencil on the lower lash line. Liquid eyeliner will now be applied to the top of the eyes, making it wing out ...
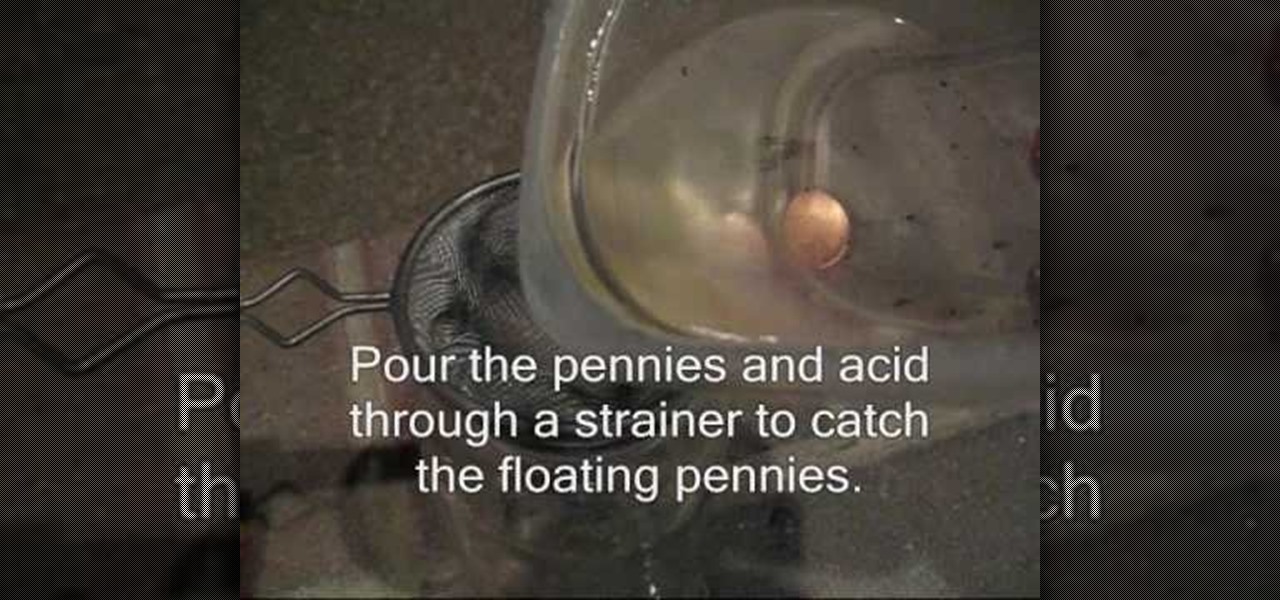
In this video, we learn how to hollow out a penny. First, you need pennies that are dated after 1982, muriatic acid, a plastic container, and sandpaper. First, rub the edge of the penny on sandpaper until the silver color is exposed. Do this on two pennies, then place them in the plastic container. Now, while wearing gloves, pour the acid into the container so the pennies are completely covered. Now the pennies will start to bubble, leaves these in the acid for around six hours. Next, pour th...
In this video, we learn how to make a beaded 7 petal faerie flower pendant. First, string 14 beads on an 18 inch piece of string. Next, create a circle in the beads, then tie it off. After this, add three blue beads to your first pico stitch, then go through two more beads after this. Continue to do this all the way around the bracelet until you reach the other side. After this, go through the first pico stitch and add one red bead, followed by blue and red beads to make petals. Continue this...
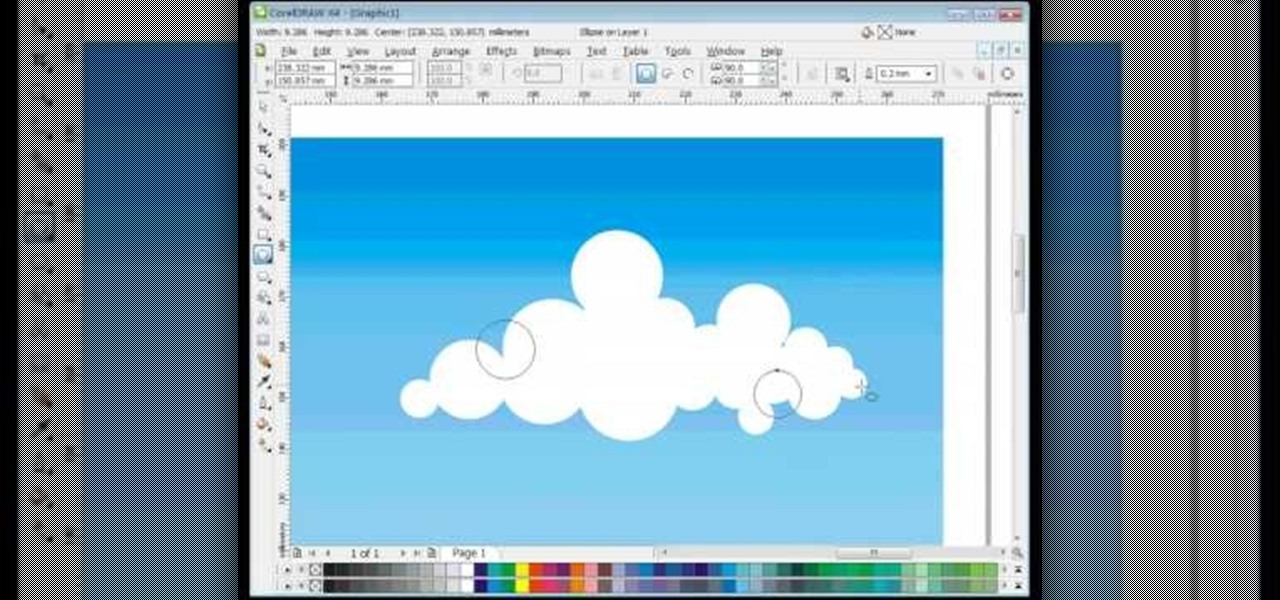
In this video, we learn how to draw vector clouds in CorelDraw X4. First, open the program and make a circle using "ctrl+shift". Make these circles touching and overlapping each other on the top of the page. After this, select all and then weld it. Next, press "ctrl+k" to break the curves apart, then erase the parts inside of the clouds. When this is done, select all, then copy and paste for additional clouds. Trim the bottom to make the clouds sit on a mountain or straight edge, then you are...
In order to make a pocket card out of an envelope, you will need the following: a used envelope, printed paper, adhesive, card stock, paper cutter, cuddle bug, an ink pad, stamps, markers, and crystals.
In this video, we learn how to transform into a witch doctor for Halloween. Start by using a white foundation all over the face, avoiding the eye and eyebrow areas. After this, apply bronzer to the cheekbones. Next, apply a black or dark brown color on the entire eyes, smudging it on the edges. Next, apply brown lipstick on the lips and mark lines with black paint on it. When done with this, start to draw a tribal design on the chi, then underneath the nose. Define the cheekbones further with...
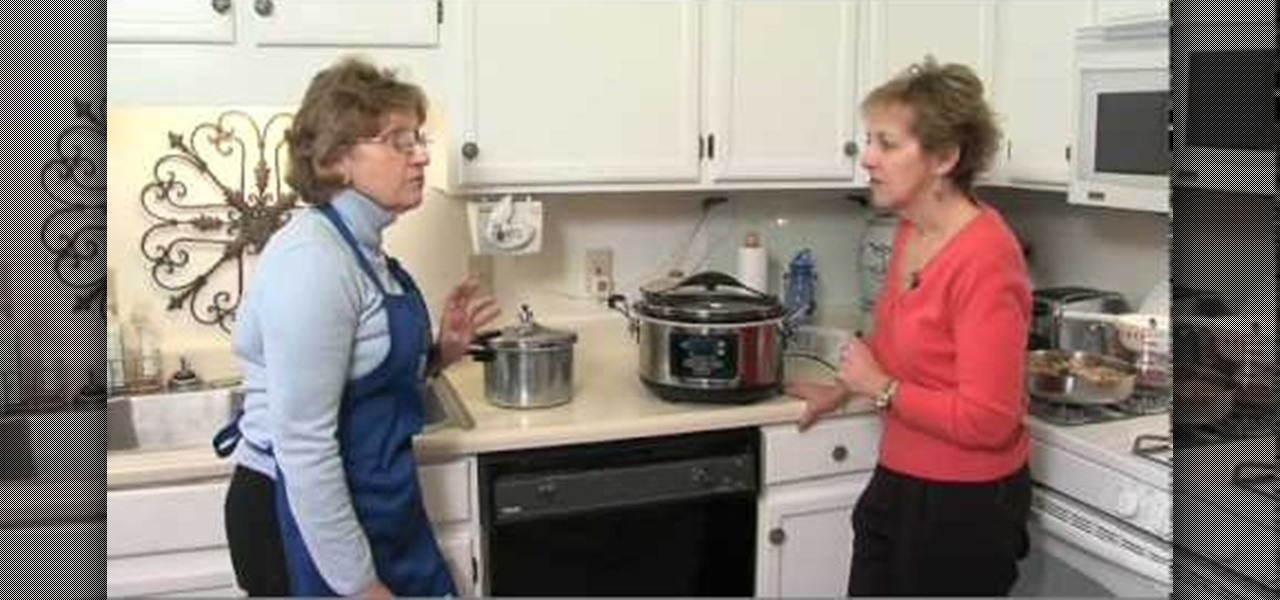
After a long, grueling day at work and a grueling commute home, the last thing you want to be doing is prying yourself away from the couch to start an hour-long dinner prep session. While we totally get that, it actually doesn't take much to make a meal at home.
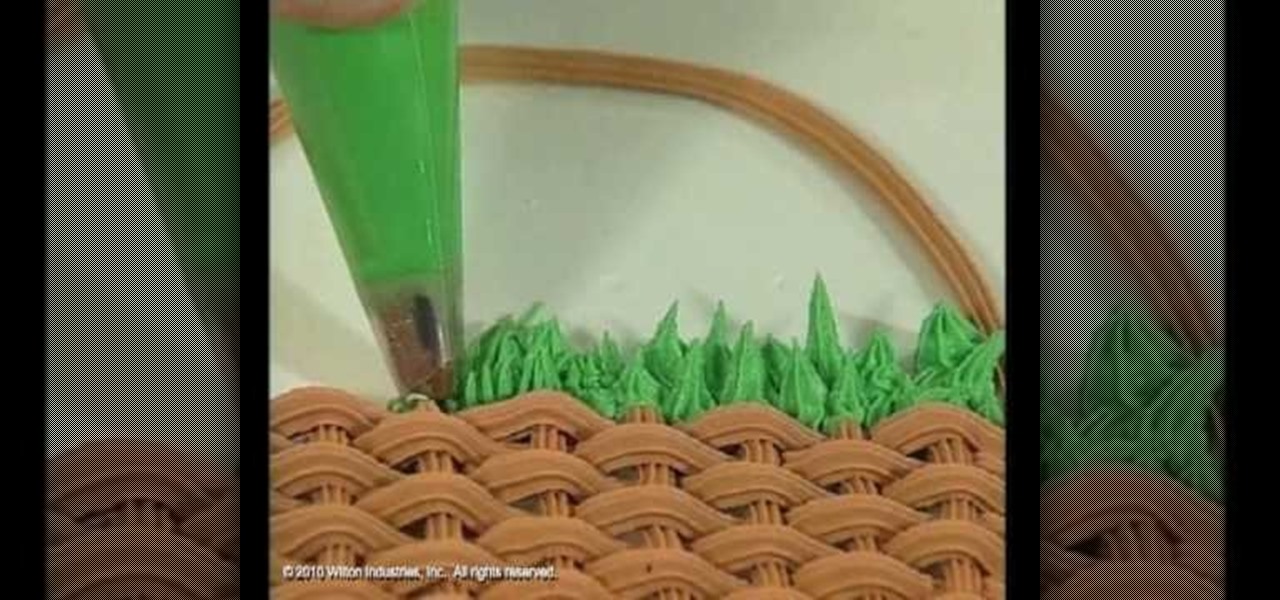
Grass is one of those things you'd think would be easy to replicate in icing, but actually end up becoming your worst nightmare. The problem that most cake enthusiasts have is that they think grass can be made from just about any piping tip, which is not the case as the result is usually a tangled, uneven mess.
In order to make a hook for an earring, you will need the following: round nose pliers, a wire cutter, a nail file or sand paper, an ink pen, 20-22 gauge wire. With your round nose pliers, make little hook, in the end of the wire. Bend it, until it makes a little loop.
In this video, we learn how to distress old wallpaper. First, cover your chip board and then take the piece of paper and tear the edges. Tear all the way around, or how you prefer it to look. Next, rub quick dry adhesive onto the back of the paper, then brush it to the ends of the paper. Now, push the paper onto the chip board and start to roll and crinkle it up. Distress the paper first if you want to, then continue pushing the paper until it looks how you like it. Make sure you work quickly...
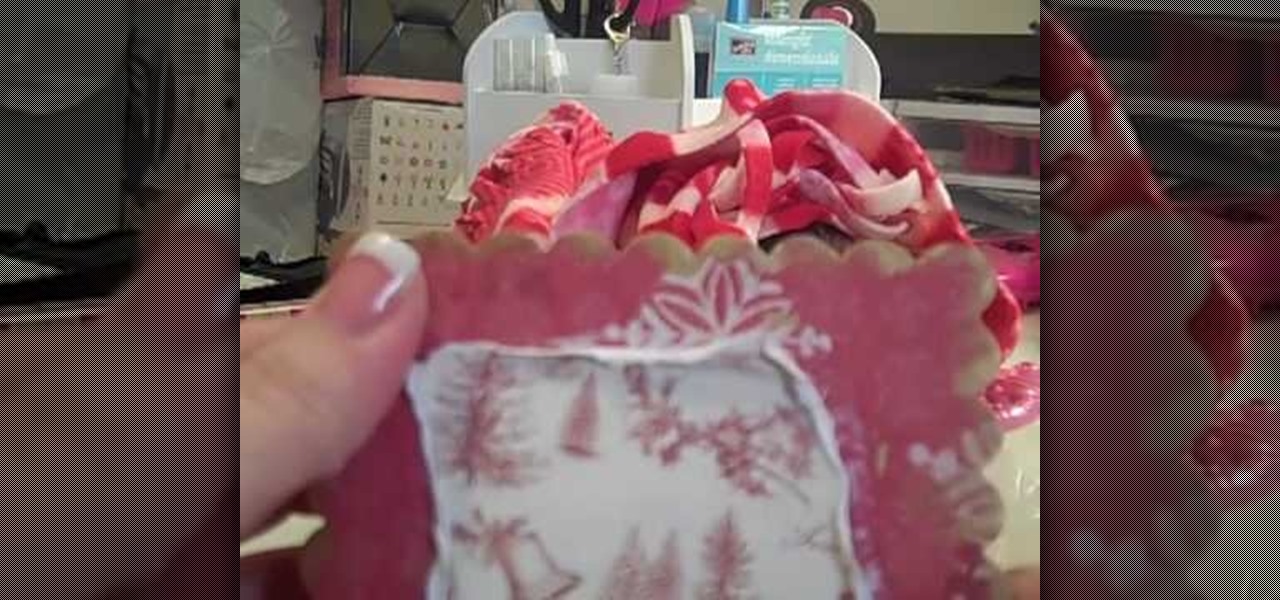
Fondant is one of a pastry chef's favorite substances because it's so versatile. You can use fondant to coat a cake with an even, smooth surface, you can shape fondant into little adornments like fish and ladybugs, and you can even employ fondant to decorate cookies.
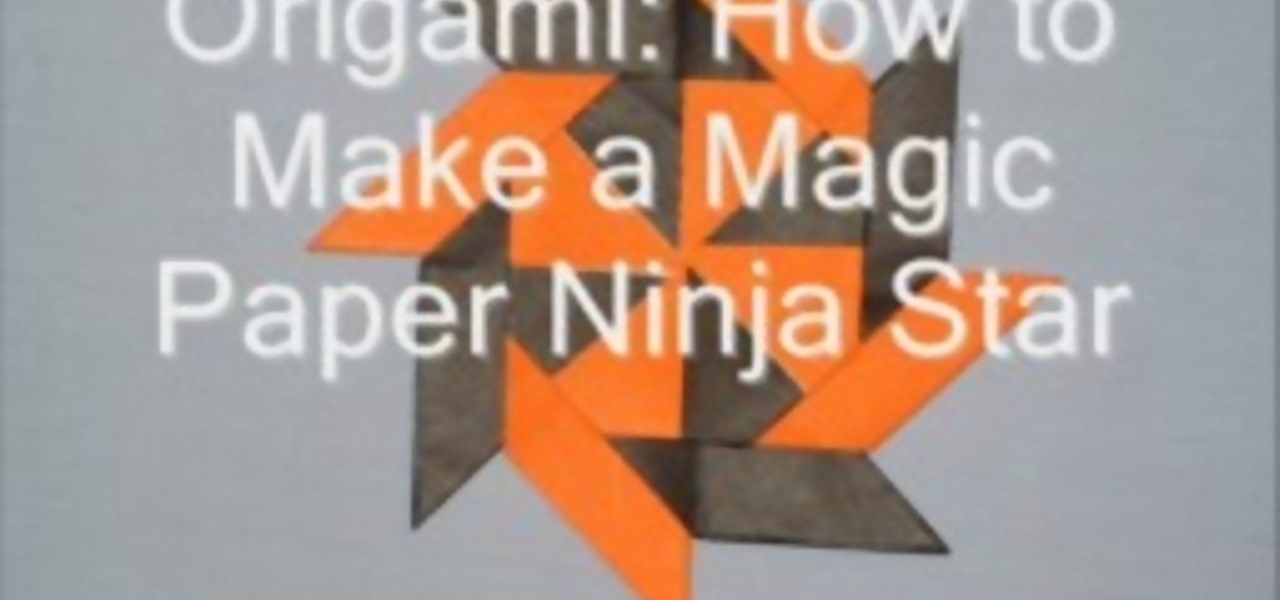
This video tutorial is in the Arts & Crafts category where you will learn how to make a magic paper ninja star. For this you will need 8 sheets of square paper, all of the same size. Fold one sheet in half, open it up and fold both corners of one edge inwards along the centerline. Now fold the whole sheet in half inwards. Then fold the lower part in a triangular pattern, make a crease and open up the sheet. Fold the lower part inwards from the center and collapse the sheet over the fold. Do t...
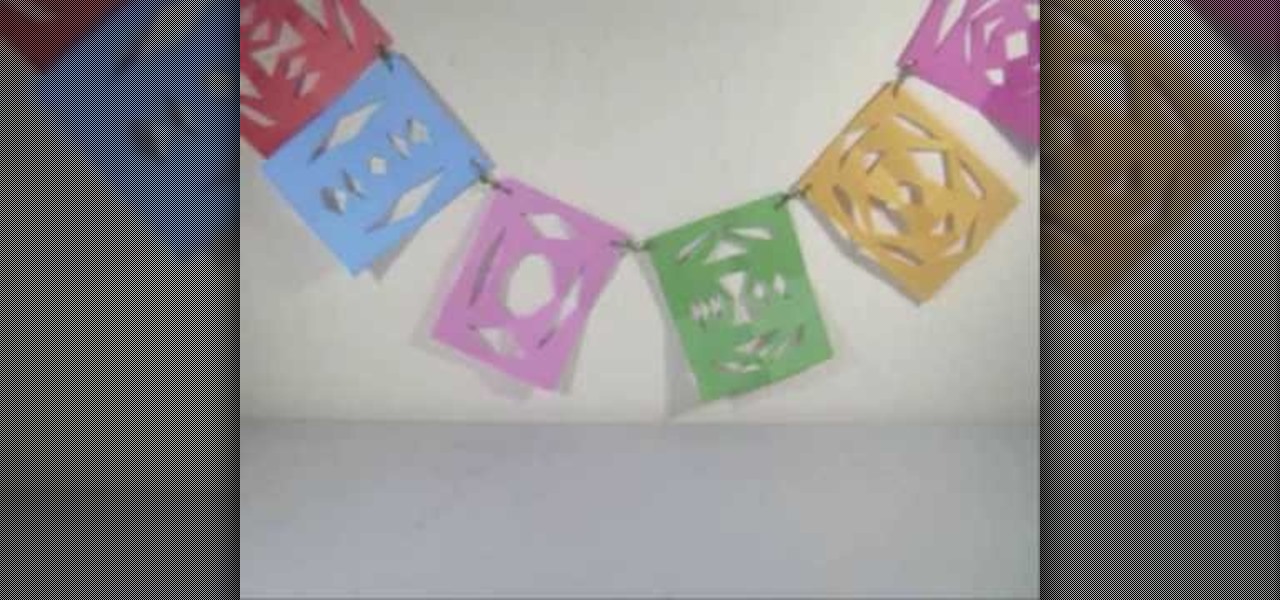
In this video tutorial, viewers learn how to make a colorful paper banner. This task is very easy, fast and simple to do. The materials required for this project are: construction paper, yarn, scissors and a hole puncher. Begin by folding the construction in half. Then fold it in half on again. Now cut pattern on the side edge of the paper and repeat this process for additional paper. Open the paper to reveal the symmetrical cut out pattern. This video will benefit those viewers who are inter...
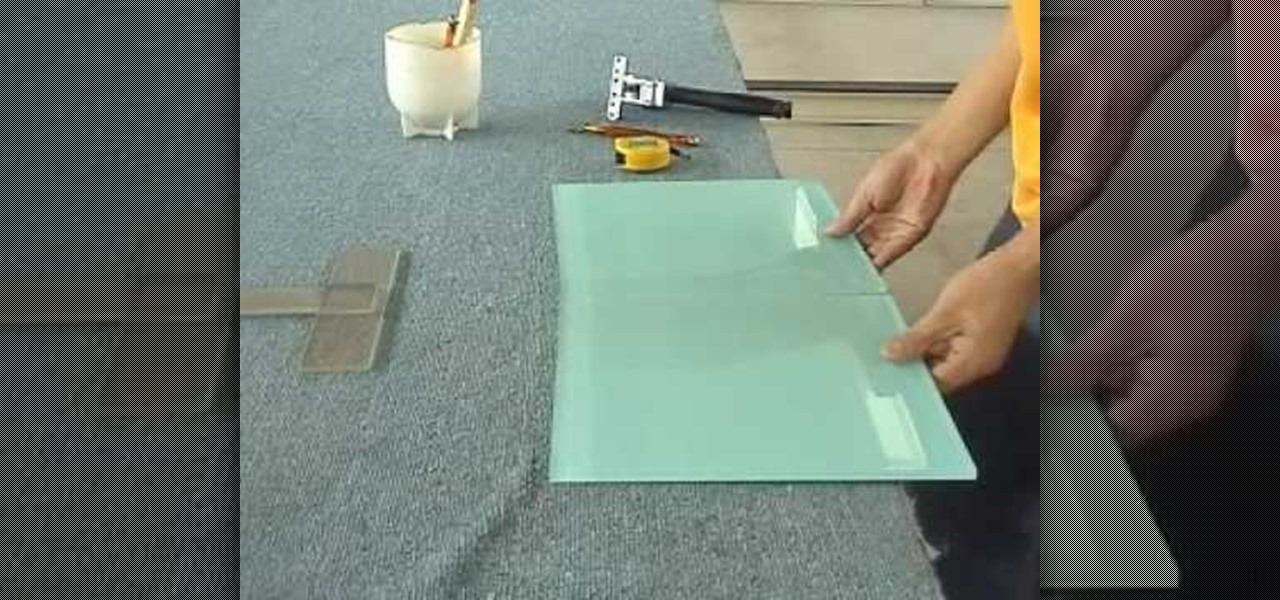
In this video, we learn how to cut large format glass tiles. First, measure out where you want the cut to be on the glass, then cut it with a sharp X-acto knife. After this, use a glass cutter to cut the bottom of the glass and create a crack what will go down to the cut that you just made. After this, break the two sections apart and you will have two piece of tile out of your large one. You can do this on any kind of tile and it takes just a few short steps. When you're done, sand down the ...
In this video, we learn how to apply mime and clown makeup. To start, outline your face in a mask shape. When you are done with this, apply white paint to the face until it's on thick and you can't see your skin color any longer. If you make mistakes, use a q-tip to clean up, then run it around the edges to make it a clean line. After this, use a q-tip to remove some paint from the eyebrows. Now, take black paint and paint it onto where the eyebrows are at. When you're done with this paint th...
In this video, we learn how to measure your space when drawing a landscape. First you want to draw a line in the middle and measure out the line to the top of the building, and create another line there. Measure the length and then measure the edge of the outside of the building. After this, find the end point for the building and measure from the top down or from the second line to the roof, then draw the line across. Measure in from the end to get the angle, then find the layout for the tre...
In this video, we learn how to make a "puppy love" box for Valentine's Day. To key to creating this box is a thin strip of paper that has teeth (pointy spikes) at the end of this. Turn this into a heart shape, then tape it around the heart to make a perfect box. It will be easier to find your center and cold it in half, then place it on the box. Glue the heart onto a black card stock to situate it, then tie a cute ribbon along the edge of the heart. This is very cute and a great idea for Vale...
In order to make your own envelopes, you will need a piece of paper, glue, scissors, and optional decorating tools/stickers.
Drawing cylinders, like drawing circles, is easy stuff. But drawing perfect cylinders, minutely calibrated edges and angles and all, is often impossible unless you have the right method and the right tools. Rather than lazily sketching your way to a mediocre cylinder, why not improve your drawing and drafting ability by crafting a perfect one?
Hard edged cast-ons in knitting are difficult to remove, so it's important to also know how to complete loose cast-ons that easily remove themselves from your knitting project. Loose cast-ons allow you to hold a knit in place so you can return to it later (so, for instance, you want to knit the sleeve of a sweater first and want the chest area, which you are currently knitting, to stay in place).