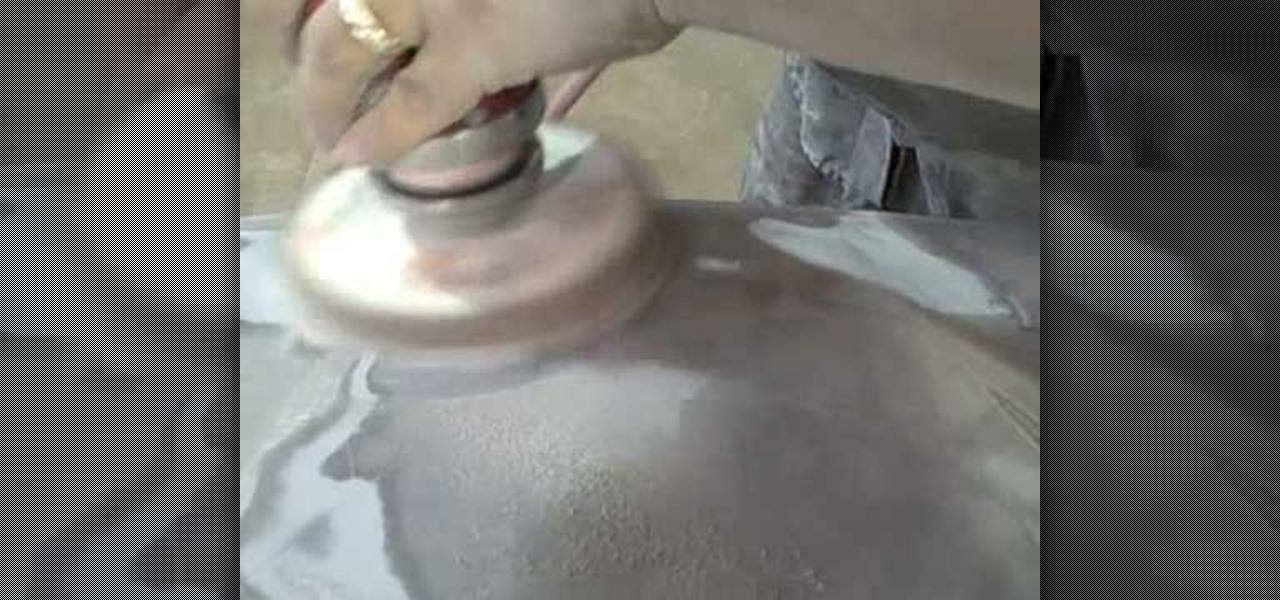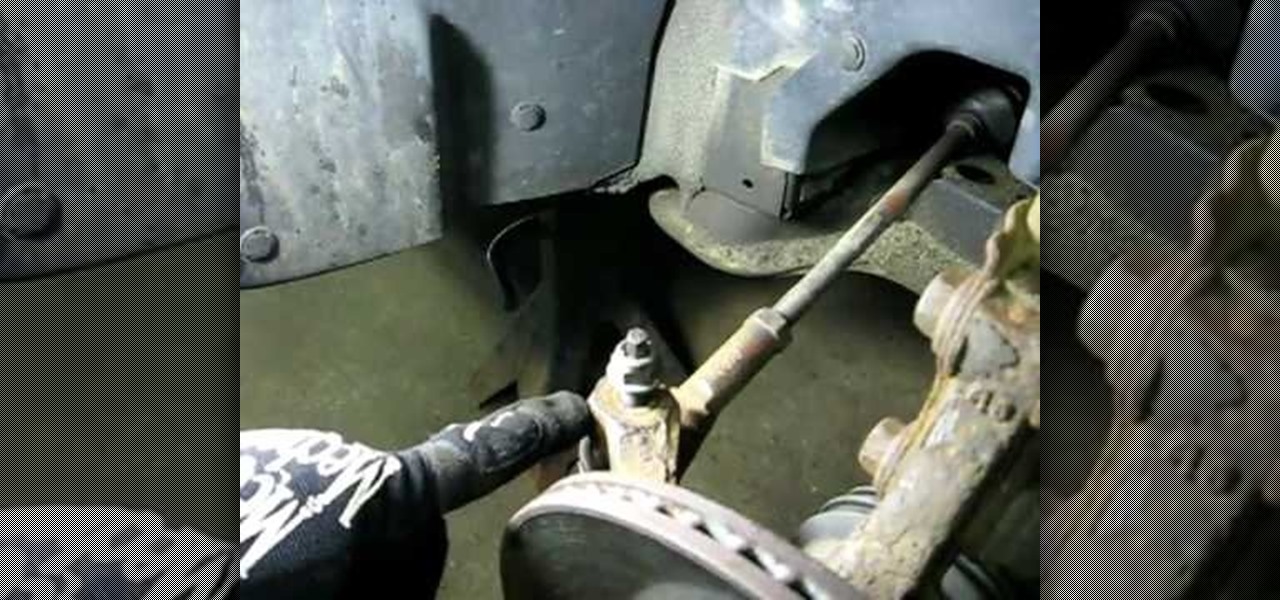
In this video, Rich Pin teaches us how to replace an outer tie rod end on a vehicle. First, get the vehicle in the air supported on jack stands, and remove the tire wheel assembly. Next, put a mark on the top of the tie rod shaft so you know where to line it up when you replace it. Next, loosen the jam nut from the rod, remove that and the nut. Remove the tie rod end after this by shocking it with a hammer. When it is removed, replace it with a new part and then attach all the bolts and nuts ...

In this clip, you'll learn how to target your inner and outer thighs using a Pilates Reformer machine. With Pilates, as with any physical fitness system, a basic mastery of proper technique is essential for both maximizing the effectiveness of your workouts and avoiding accidental injury. Whether you're looking to slim down or merely tighten up your core, you're sure to be well served by this home fitness how-to from the folks at Balanced Body Pilates. For complete instructions, give this fre...
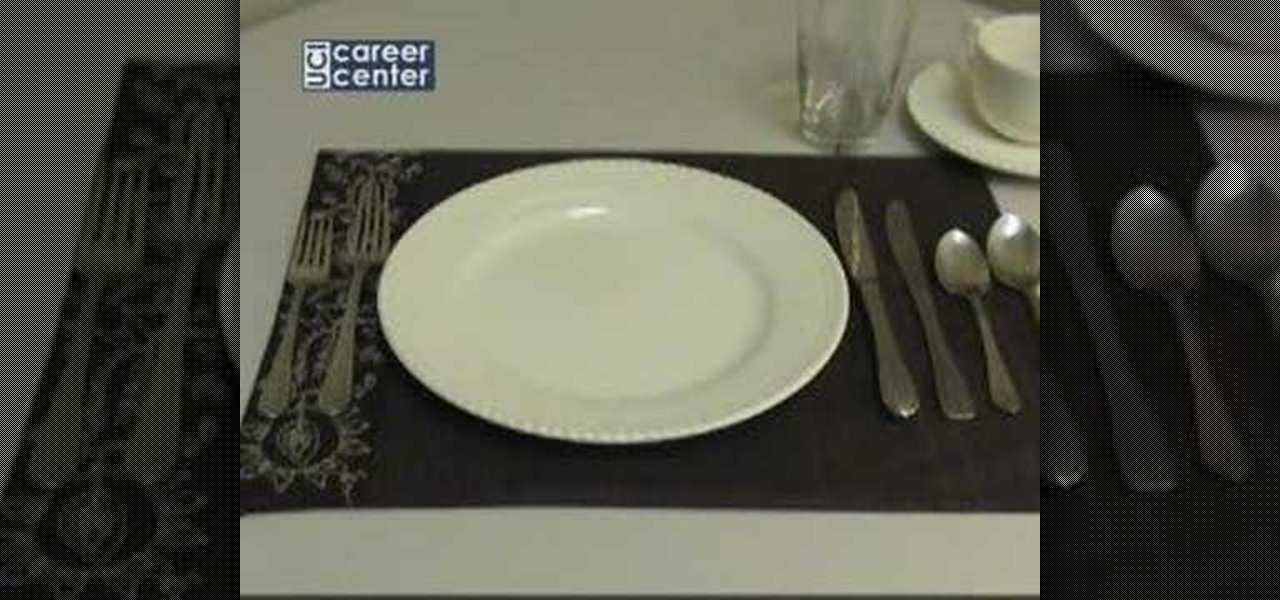
To set the table for a formal dinner, place a plate a little bit to the left of the center of the meal sheet. Place two forks to the left of the plate, The smaller fork is for the salad, and should be placed on the outer side. The inner fork is for the dinner. Place two knives to the immediate right side of the plate. The outer knife is for the salad, and the inner knife is for the dinner. Place two forks to the right side of the knives, the outermost spoon is for the soup, and the inner spoo...

Need a way to keep the kids busy on a rainy day? Making a pop-up card is quick, easy, and will entertain them for hours! Watch this video to learn how to make a pop-up card.
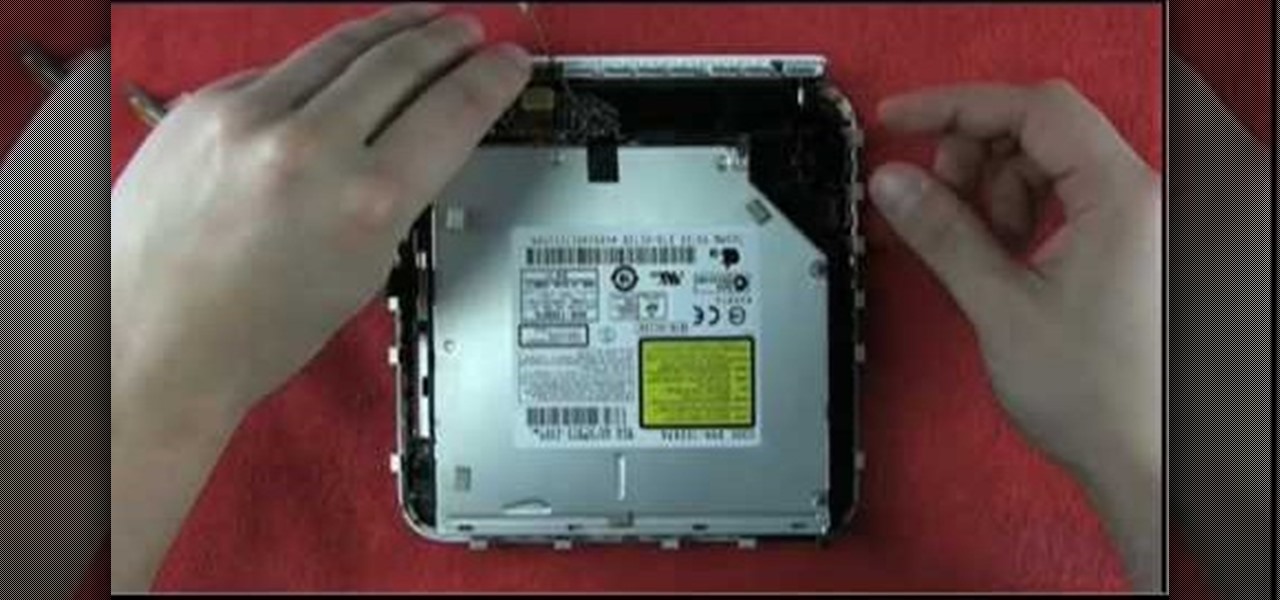
This video demonstrates how to install memory step by step in a Mac mini (2009), as it is a complicated method; it is advisable to watch through the process then attempt to do the same. First step is to remove the old memory from the Mac Mini. Shut down and unplug the Mac mini and place it on a soft cloth to prevent any scratch. Turn-over the mini to get into it using a small buddy knife. Carefully place the buddy knife between the inner and the outer case. Try to detach the inner clips using...

Have a big family dinner and not much time to prepare for it? Betty shows us how to make a traditional spaghetti dish with a Southern flair that is incredibly easy and equally tasty. You will impress your guests and they will think you slaved all day, when you really cooked it in less than an hour!

Feeling a little Bollywood? Misschievous shows you how to do a look inspired by Bollywood artists and brides. You can achieve the look by following these simple steps! 1. Apply a copper tone eyeshadow on your lid. Sharpen the edge and go light as you bring it inwards. 2. Define the edge by applying a Cranberry tone eyeshadow following the shape of the edge and buffing it out as you go up to the crease. 3. Using a darker shade like Mac's Beauty Mark, draw a semi-V shape following your crease. ...
In this Autos, Motorcycles & Planes video tutorial you will learn how to feather edge paint to prepare a damaged car for primer. Feather edging is the process of feathering or layering each layer of coating in order to prevent a rough edge. Use a 6 inch DA and 150 - 220 grit sandpaper to feather edge the paint edge. Apply the sandpaper all along the edge of the paint till the edges are smooth. Feel it with your hand to ensure that all the edges are smooth. Feather each layer of paint at least...
On this video from Bushcraft Machete, he explains the purpose of a scandi edge and how to use it. He uses the machete as a planer, stripping the bark from a log by holding the machete almost flat against the log and tapping the back of the blade with a stick. He explains that a scandi edge is sharpened all the way down to a point and has a very low angle. This type of edge makes the machete useful for carving off thin strips of wood. He has sharpened his machete with a scandi edge near the ha...
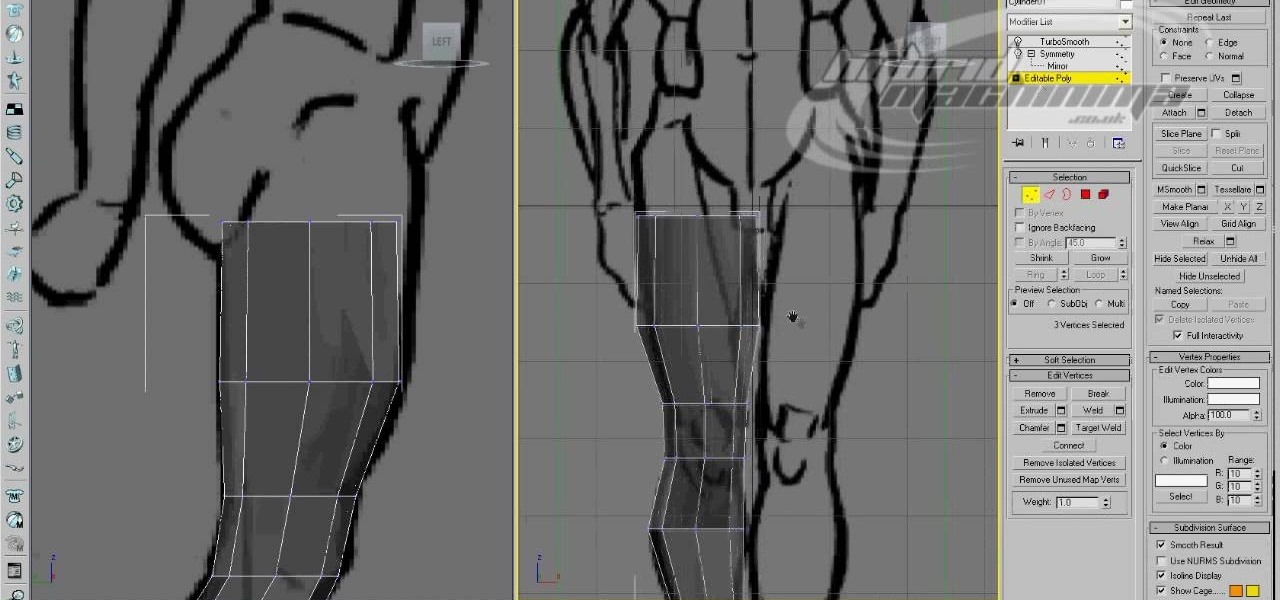
Edge loop character modeling in 3D Studio MAX allows you to create smooth, natural-looking characters. This video will introduce you to using edge loop modeling to model a character from a blueprint (get it here). This is one of the most fundamental techniques in 3D modeling, so get used to doing it!
Video: . Whether you are gardening, cooking, riding a motorcycle or just want to cover up on a bad hair day, doo rags are easy to make and fun to personalize to suit to your style. If you would rather just download the durag pattern click here.
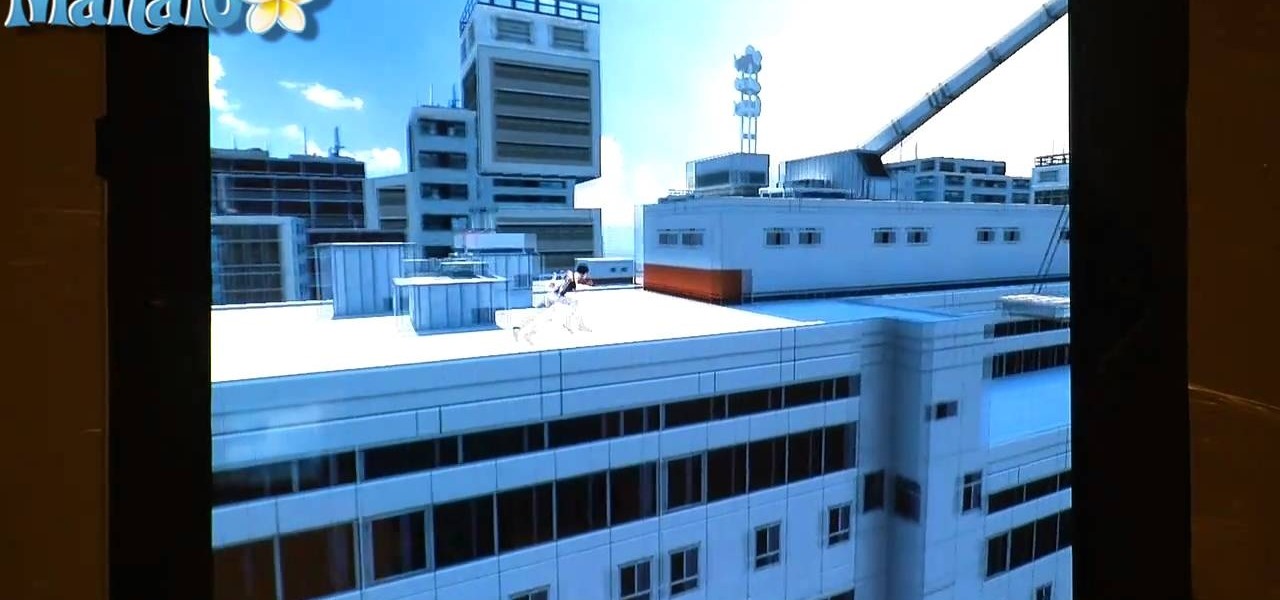
Check out this video guide for Mirror's Edge on the iPad! Mirror's Edge is a single-player, first-person, action-adventure video game available for the PlayStation 3 and Xbox 360, but there's also a side-scroller version for iOS (Apple's iPad and iPhone), and that's what you're going to see the gameplay for here. Watch the complete walkthrough of all the missions and see if you can get more "Bags" than Mahalo.
White is the traditional American wedding gown color, so why not match your makeup with your dress? Many brides go with a natural, flatteringly neutral makeup look when walking down the aisle, but silvery white eyeshadow is a steely yet gorgeous alternative.
First of all open the box and take out the kit, different parts and the instruction manual. You also need glue, epoxy adhesives, sand paper, 2 mm drill and a 4 mm drill. Start with assembling the outer frame of the camera by fixing in the slots. Use a screw driver to screw the bolts. Now use the glue and fix the inner parts of the camera. Now make the front portion of the camera. Fix it exactly as shown in the instruction Manual. Now drill in the holes on the sides of the camera's outer frame...
1: Place paper sideways. Place the paper on the flat surface with the long edges at the top and bottom. 2: Fold long edge to opposite edge and unfold. Fold one long edge to the opposite long edge, crease, then unfold. 3: Fold longs edge to center and unfold. Fold one long edge to meet the center crease you just made. Now do the same with the other long edge, so they both meet in the center. Unfold completely. 4: Fold short edge to opposite edge and unfold Rotate your paper and fold one short ...
Michael Weiner (2D Illustrator) explains that before drawing an elf ear, one should have a clean white sheet and a drawing utensil (HB Pencil). Especially a light graded pencil helps to save time. While drawing an elf ear one needs to draw the outer line of the ear i.e. to draw a small base of the ear. In the step, you would need to draw the point which connects the outer line of the ear for example, the outer line of a leaf. In the step, after completing the base of the ear, you would need t...
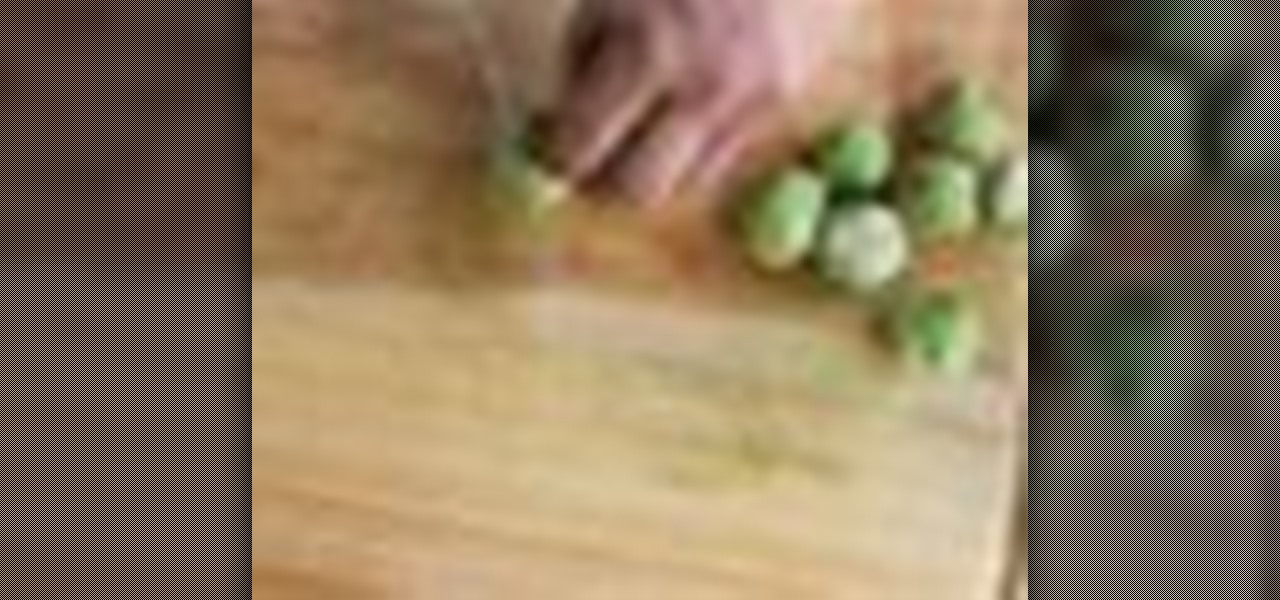
Brussels sprouts get a bad rep (mostly from picky kids), but they're actually super delicious if you prepare them right. Caramelized brussels sprouts bring out the best flavor because doing so exposes more of brussel sprouts' surface area to the pan.
Want to know how to create your very own outer-space nebula in PS CS5? This clip will teach you to do just that. Whether you're new to Adobe's popular raster graphics editor or a seasoned designer looking to better acquaint yourself with the new features and functions of the latest iteration of the application, you're sure to benefit from this free software tutorial. For more information, watch this video guide.
In this clip, learn how to take advantage of Adobe After Effects built-in noise plug-ins to create an outer space environment. Whether you're new to Adobe's popular motion graphics and compositing software or a seasoned video professional just looking to better acquaint yourself with the program and its various features and filters, you're sure to be well served by this video tutorial. For more information, including detailed, step-by-step instructions, watch this free video guide.
Pixel Perfect is the "perfect" show to help you with your Photoshop skills. Be amazed and learn as master digital artist Bert Monroy takes a stylus and a digital pad and treats it as Monet and Picasso do with oil and canvas. Learn the tips and tricks you need to whip those digital pictures into shape with Adobe Photoshop and Illustrator. In this episode, Ben shows you how to apply light sources to 3D projects in Photoshop.
This science video tutorial includes step-by-step instructions for extracting DNA from wheat germ, the embryonic plant attached to the wheat seed. Individual wheat seeds, or kernels, separate readily from the plant. This kernels have a tough outer coating called bran. If you want to know more, just watch this science experiment.
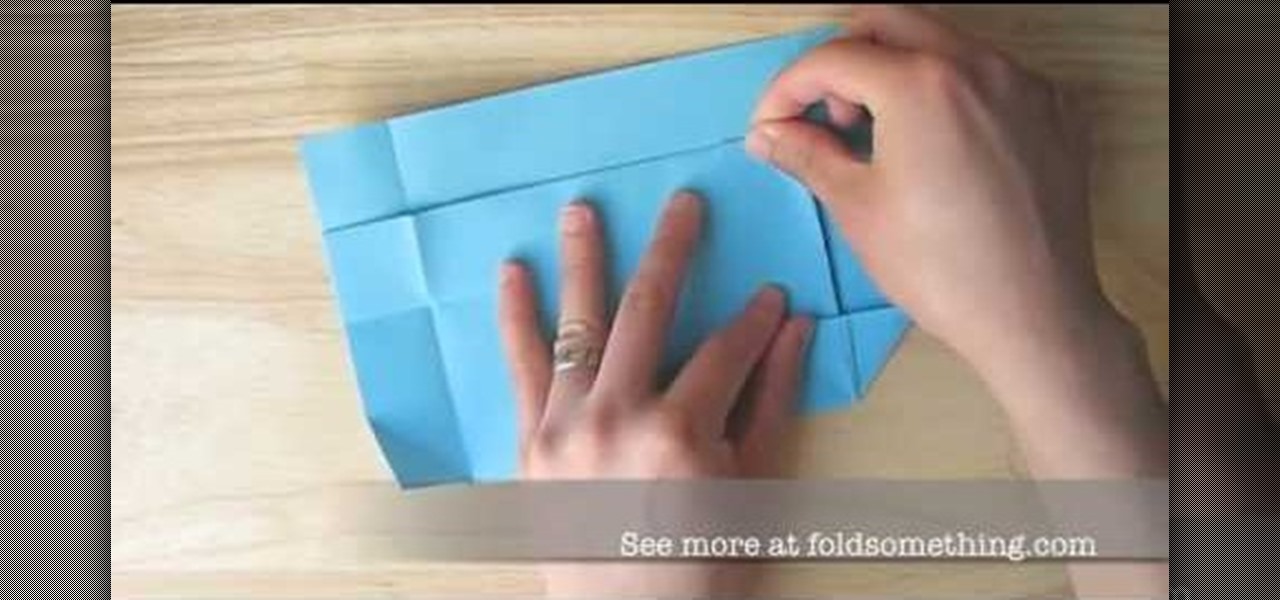
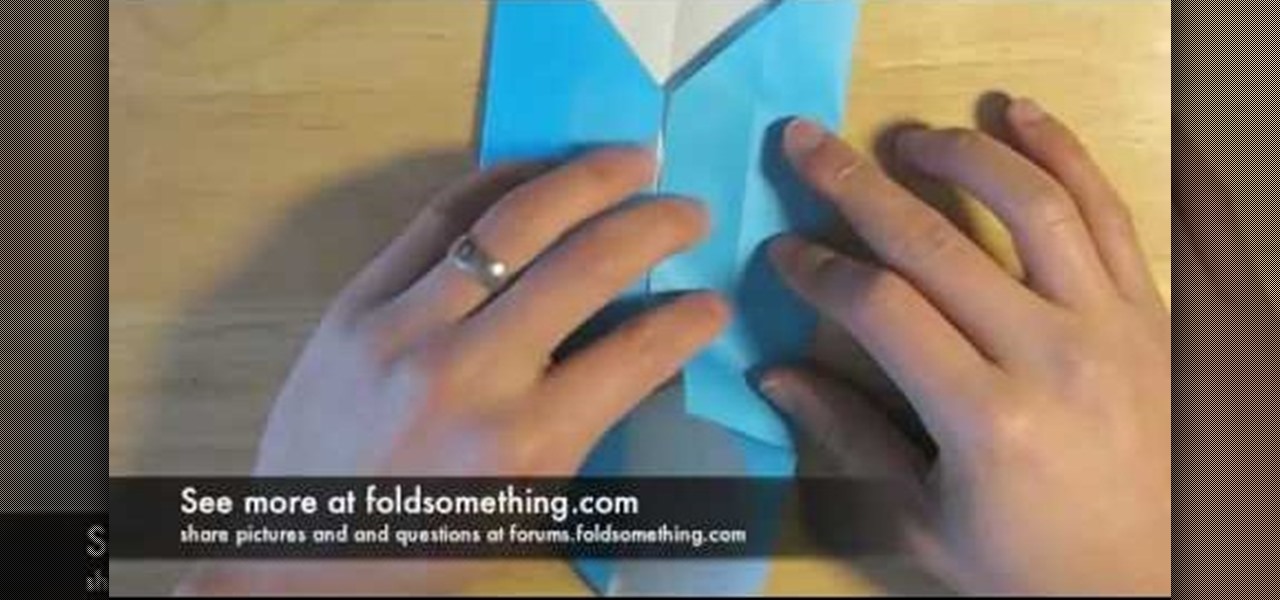
In this Arts & Crafts video tutorial you will learn how to Origami a paper envelope without glue or tape. Take a piece of paper and fold it in half hamburger style. Fold the open edge of the top sheet of paper back on itself so it reaches the closed edge. Repeat this step again. Give it a good crease, open it up and fold the open edge back to the middle crease and fold it back along the middle crease. This becomes the bar of the bar envelope. Now fold the other open edge of the paper so that ...
Try out some parkour… or maybe some freerunning… but it's dangerous, so how? By never letting "your" feet touch the ground (because they're resting on your ottoman). With Mirror's Edge, you never have to leave the house to get that free running and parkour feel.
The last thing you want is for your animated avatar to accidentally 'flash' your user by letting the flesh peek through the clothing mesh. This tutorial shows you how you can animate the clothing and avoid this situation when working with Autodesk 3ds Max.
To create an origami buckyball, you must start with a piece of paper cut into a triangle with each side about two inches long. Fold the corner of each side into the middle of the opposite side and then unfold to create creases that will be your guide. Next, fold a side up to the midpoint of the creases and repeat on all sides. This will create a star-like shape. Now, fold two sides in and pinch out the extreme, outer corner and repeat on all sides. This will create a small star inside your pa...
This is a video that demonstrates how to make a homemade birthday cake. He uses a springform pan and brushes the entire inside with butter and dusts it with flour. He mixes flour and corn flour and puts them through a sieve. Using a mixer, he mixes eggs and then adds sugar, whisking it for about two minutes until it's light and airy. He adds flour and uses his bare hand to fold the flour into the batter. He pours the batter into the cake pan and puts it into the oven, along with another pan o...
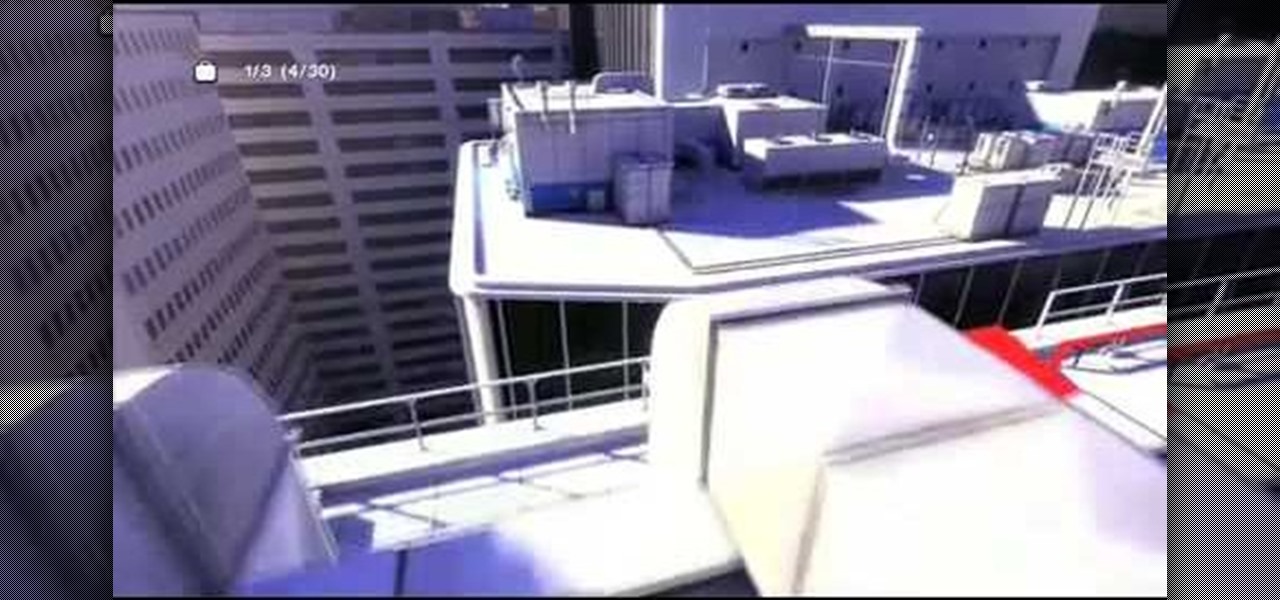
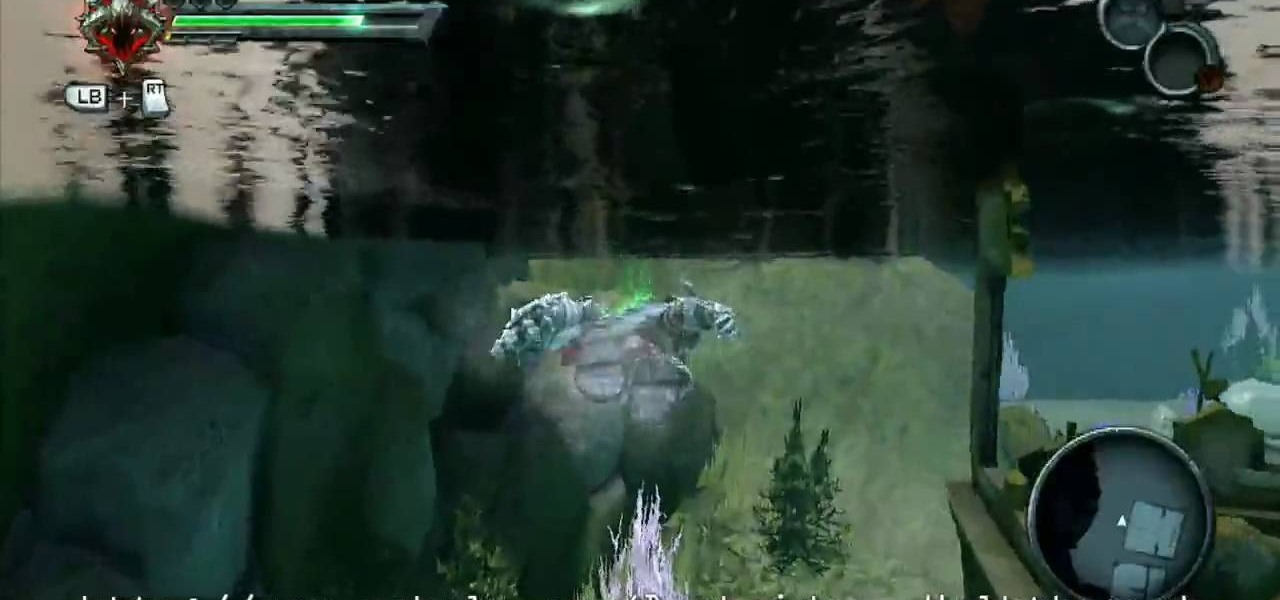
There's four shadow arena fights in this level of the Xbox 360 game Darksiders. In the Drowned Pass, there's the Counter Killer, Wrath of War, World of Pain, and Defender. The Drowned Pass features a deep lake in the middle of the area, a path that runs about the outer edge, and various hidden nooks and caves (some which can only be reached by swimming under water). Follow the path to the left. As you proceed along this path, keep an eye out for an opening along the right side. This will lead...
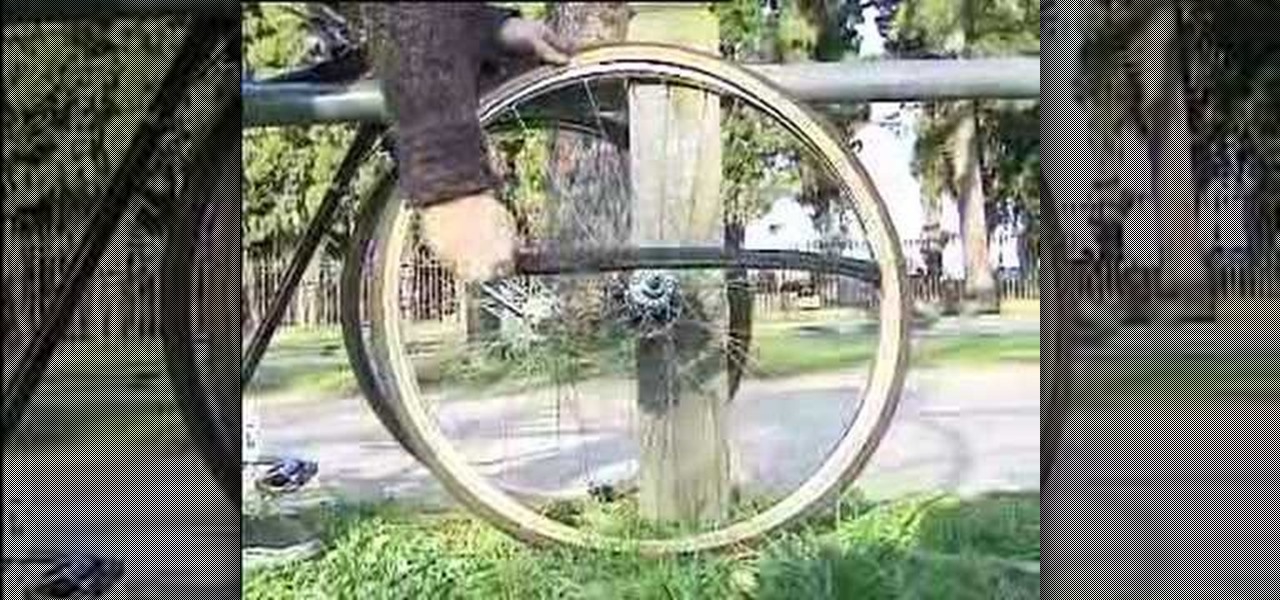
Lear how to replace your bike's inner tube! Remove wheel from bike. Quick release on front is easier. If you have wheel nuts you'll need some tools. Shift derailler to slack chain, then it's easy. Use a tire lever to take the outer tire. Feel along the tire to locate the puncture site.
Melissa Watson from DIY Style shows how to finish seam edges in this how-to video. Edges can fray, so sewing off seam allowances will keep fabric from unraveling. As an extra preventative measure, trim the edge with pinking shears. Watch this video sewing tutorial and learn how to finish seam edges.
This 3D software modeling tutorial shows you how to use the edge bevel tool in modo 101. The Edge Bevel has the nifty "Round" option to quickly round off the hard edges of your polygonal mesh in modo.
This software tutorial shows you how to design a really graphical splash page in Photoshop. You will learn how to use the gradient tool, outer glow tool, paintbrush tool, and layer blend modes within Photoshop to create this graphical splash page.
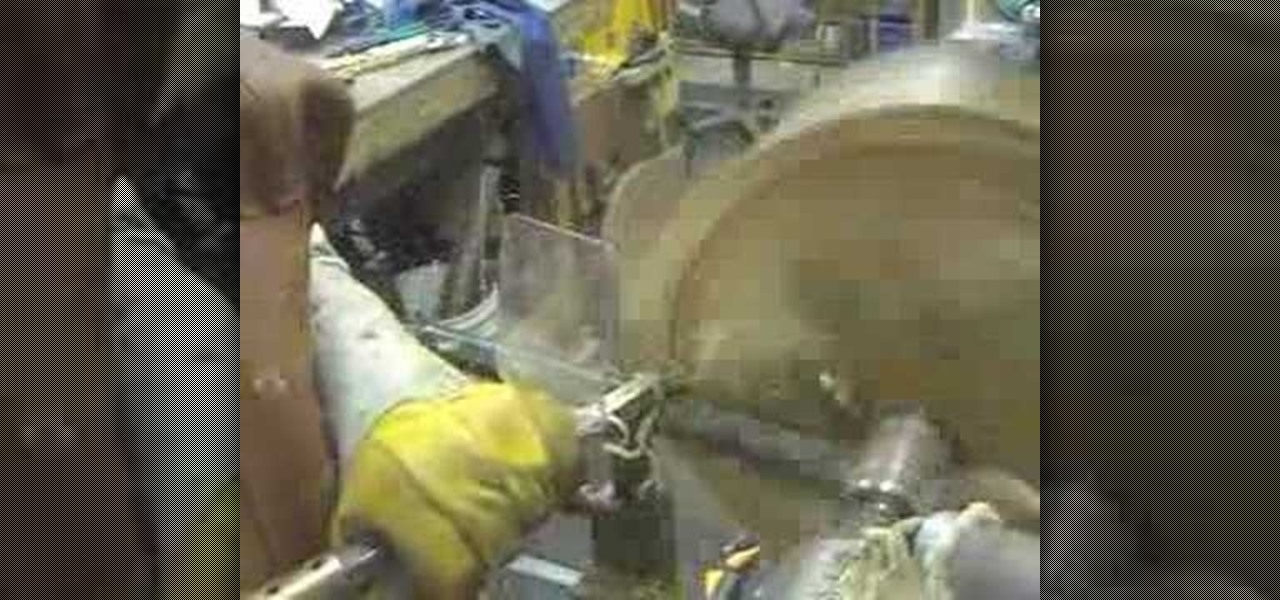
In this tutorial, you'll see how to rough out a natural edge bowl with a Ci1 Easy Rougher (using a suboptimal piece of wood). The wood used in the tutorial is "shinoki," which is a kind of oak, and the lathe is a Nova DVR 3000 wired for 200V. Watch this video to get started roughing out your own natural edge bowl.
This crocheting how-to video shows you how to add a scalloped crocheted edge to your next dishcloth, loomed or knitted project. This scalloped edge is worked in two rows, the first row all around is just single crochet. The next row will be your pattern that makes the scalloped edges. Watch and learn how to crochet scalloped edges.
Franklin Crow teaches you about edge bevelling. Depending on the terrain where you snowboard, you want to bevel your edges to provide the best riding experience.
Learn how to take detailed photographs of outer space using a modified webcam. These are some really cool hacks & mods from a guy on youtube. Avoid the high costs of telescope cameras and supplement with an inexpensive webcam.
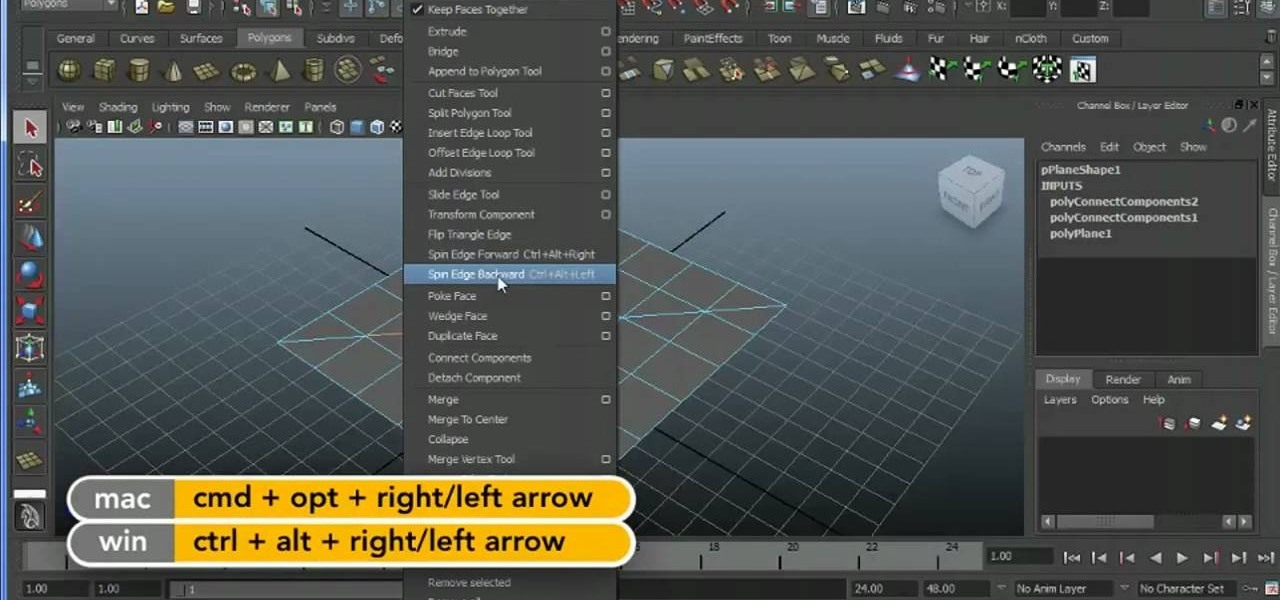
Learn how to take an edge and spin it around a model using Maya 2011's Spin Edge tool. Whether you're new to Autodesk's popular modeling software or a seasoned 3D artist just looking to better acquaint yourself with the Maya 2011 workflow, you're sure to be well served by this video tutorial. For more information, and to get started using the Spin Edge tool in your own Maya 2011 projects, watch this free video guide.
Links of Love is showing you how to make origami heart shaped cuff-links. Start with a 20.5 cm square of paper. If you want to make a cuff link you can wear you should use a square the size of 4 to 5 cm. Fold a good crease and then unfold. Fold two corners in toward the middle and then unfold. Fold one side in toward the middle crease. Only crease up to the crease of the corner fold. Unfold and fold the side into the new crease just made. The creases are guidelines that will be used later on ...
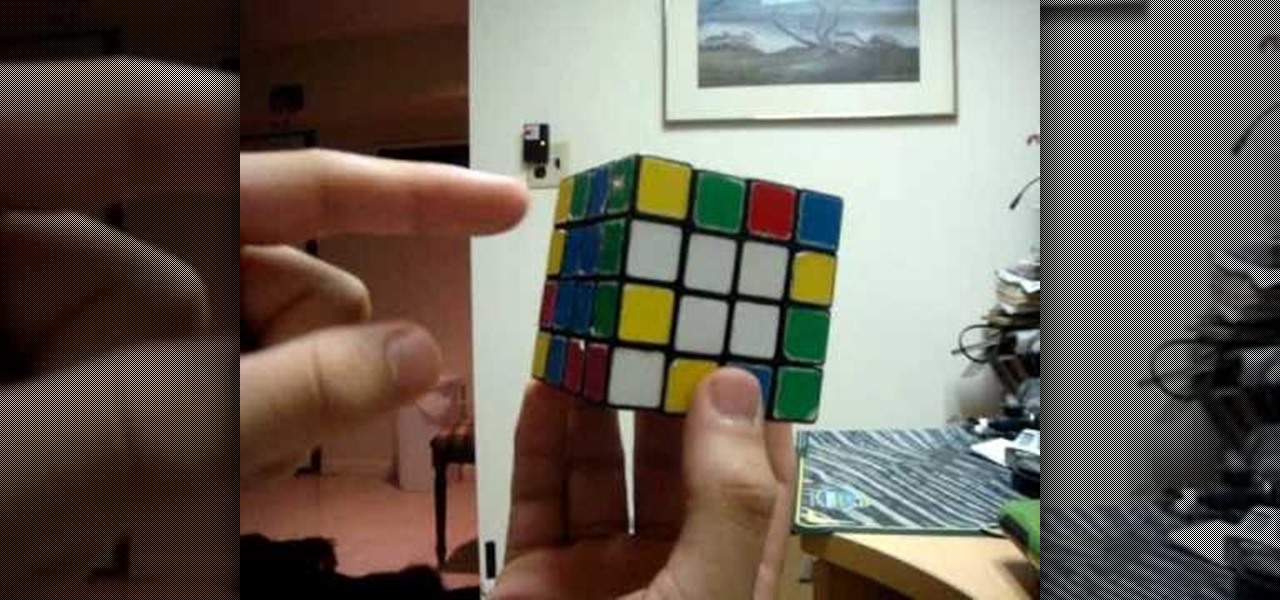
Check out this puzzle video tutorial on how to solve a 4x4 Rubik's Cube by advanced edge pairing. This video goes over how to match up multiple edges at a time, allowing you to eventually become faster with practice. This will also allow you to understand the technique necessary for multiple edge pairing in bigger cubes as well, where it really becomes necessary in solving quickly.
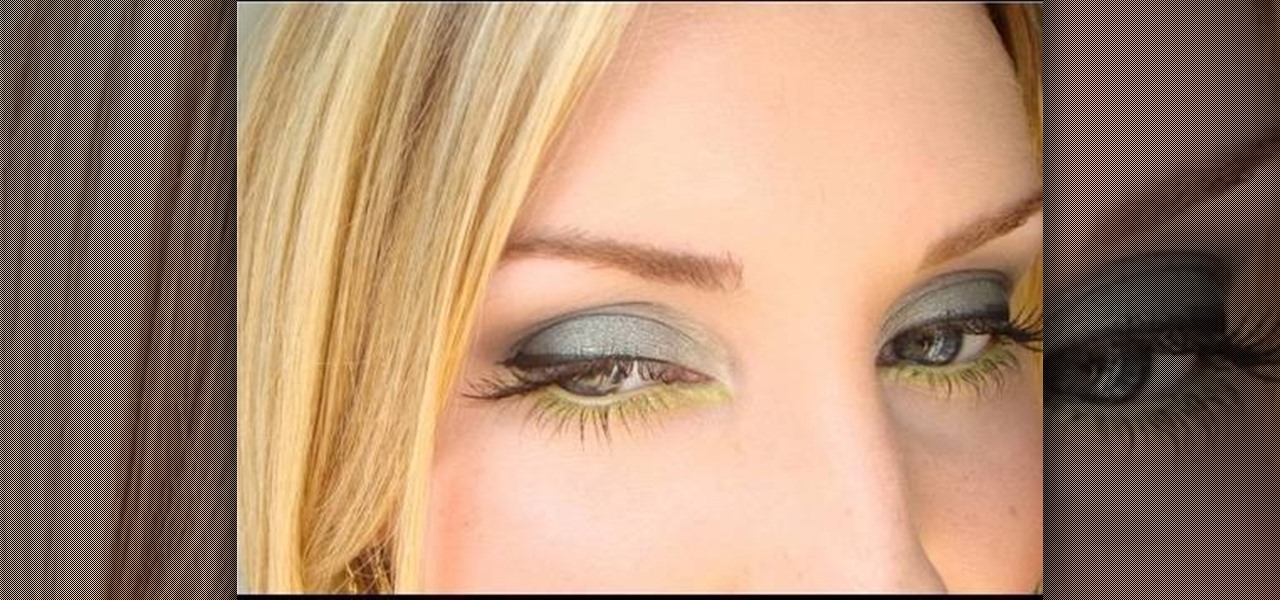
In this video, we learn how to apply green emerald eyeshadow. First, you will need to apply a light green eyeshadow to the entire lid. Brush this on so the color is bright and noticeable. After this, brush on a darker green in the outer crease of the eye and the outer v of the eye. Next, brush on a sparkly green shadow over both the colors and blend them together. Now, apply black eyeliner to the top and bottom of the eye. After this, apply black mascara to the top and bottom lashes, then cur...
Tiffany D from Makeup by Tiffany D as seen on YouTube teaches how to apply a smoky fall green eyeshadow look to eyes. Apply a creasing product to the eyelid, and a black eyeshadow base then blend with a blending brush. Apply the first shade of green eyeshadow to lower middle and center of eyelid. (Can apply second green eyeshadow color if desired to outer corner eyelid). Apply the third lighter green eyeshadow color in the tear duct area, sweeping upward. Apply the fourth eyeshadow color in t...