Second Class Boy Scouts work on building their outdoor survival and camping skills. Compass work, nature observation, camp tools, and swimming are areas where new skills are mastered and demonstrated. A second class scout, having completed all the requirements, should be able to lead a hike, care for his own equipment, set up a campsite, and perform basic first aid.

This Houdini 9 software video series focuses on examples of when and how to use Attribute Transfer. Part 1 covers Attribute Transfer One Point:

Learn how to do proper push ups. Presented by Real Jock Gay Fitness Health & Life. Benefits

Drawing is easy for some, harder for others, but drawing letters is pretty simple for both the pro and novice artist. There's all kind of text styles you could conjure up, and they don't have to be boring fonts. Fire up your imagination to create different styles for drawing numbers and letters of the alphabet, adding individuality and pizzazz to names, messages, greeting cards and decorated items.
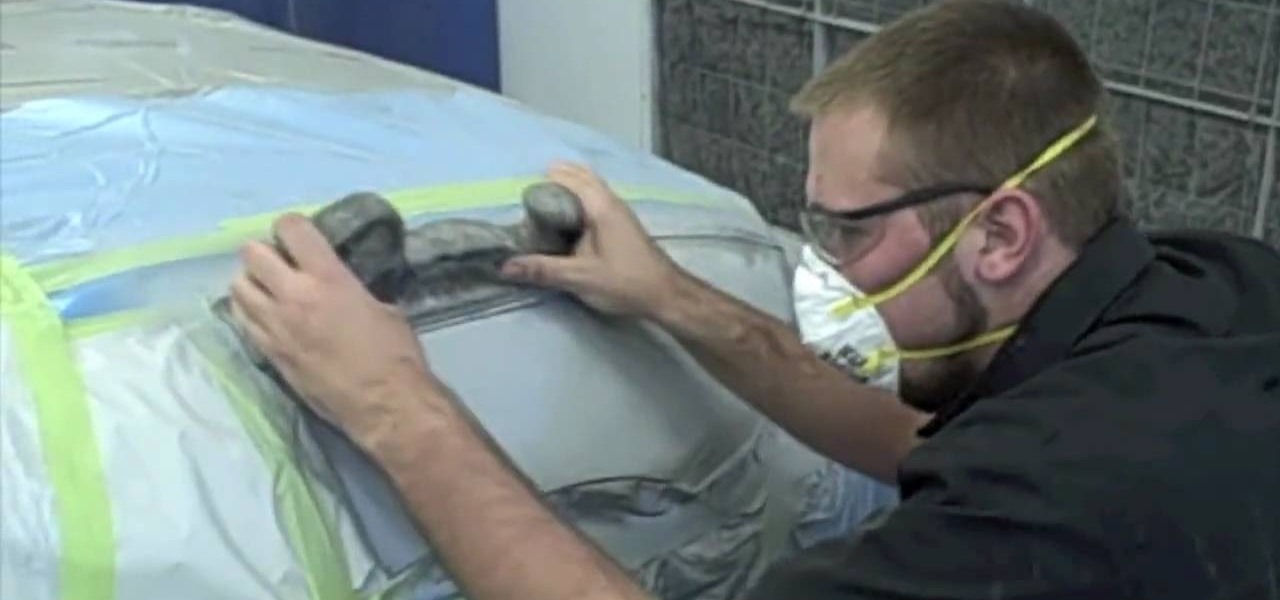
Before painting your vehicle, you'll want to sand down the primer coat. This automotive video will show you how to block-sand the primer to prepare you for the actual paint job. It's actually a pretty simple step in auto painting.
In order to prepare Crab-Filled Ravioli, you will need the following: lemon, crab, Mascarpone cheese, pepper, parsley, and pasta dough.

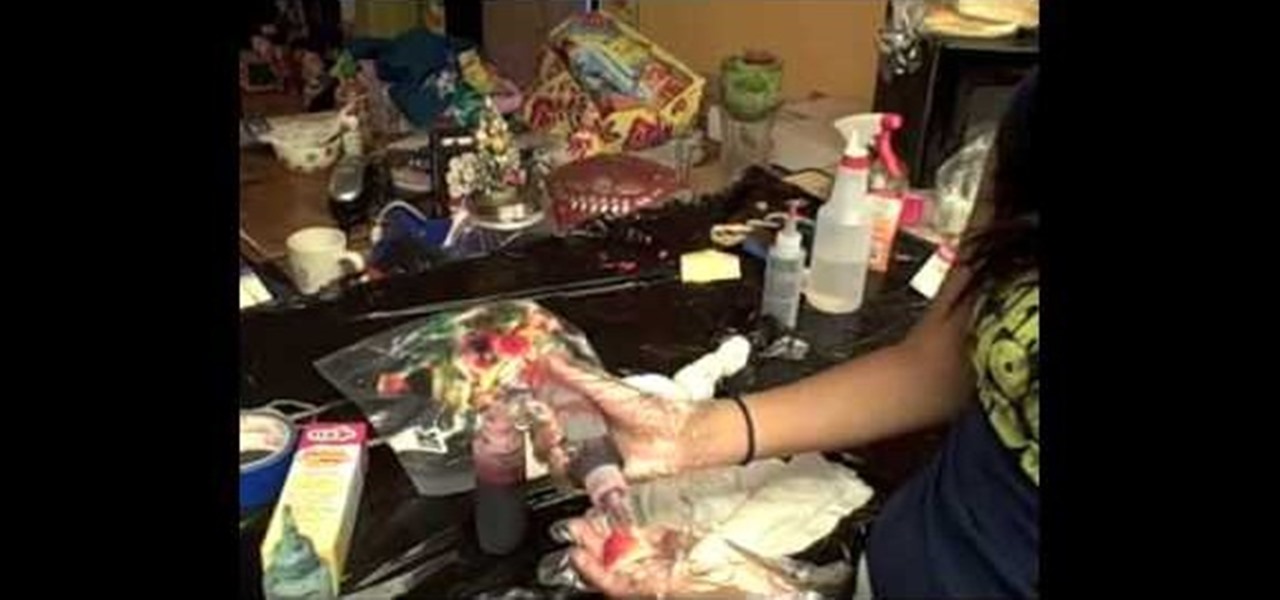
In order to make a homemade tie dyed T-shirt, you will need the following: a 100% cotton T-shirt, large freezer bags, trash bags, and Tulip fashion dye.
In some places, it's illegal to ride your bike at night without lights or reflectors, so if you plan on going for a joyride on your street bike, then you need to be prepared to share the road with vehicles and be seen. Appropriate gear and lighting are essential for safety when riding a bike at night.
In order to make a Pork Pie/Buster Keaton Hat, you will need the following: a felt hat, water, scissors, and a ribbon.
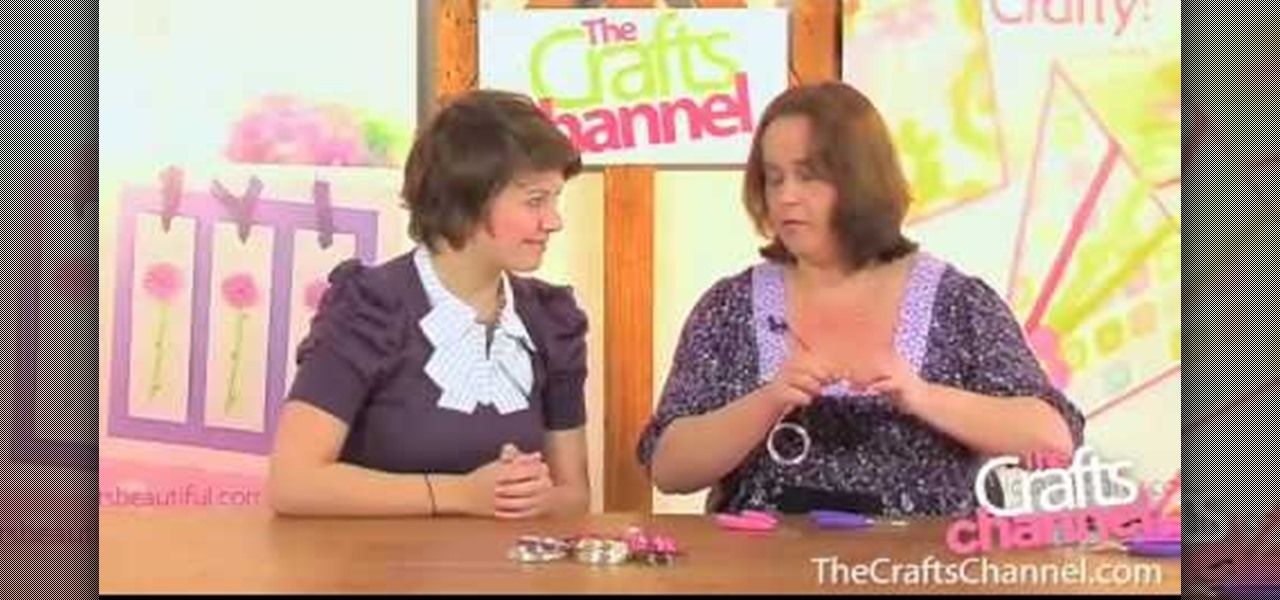
To perform the color burst technique using Adirondack paint, you'll need to shake a new dabber really well. Then, you will need to turn it upside down onto a craft sheet, until the paint starts to come out evenly. Once if comes out evenly, you are ready to use. Make sure you recap it, whenever it isn't in use.
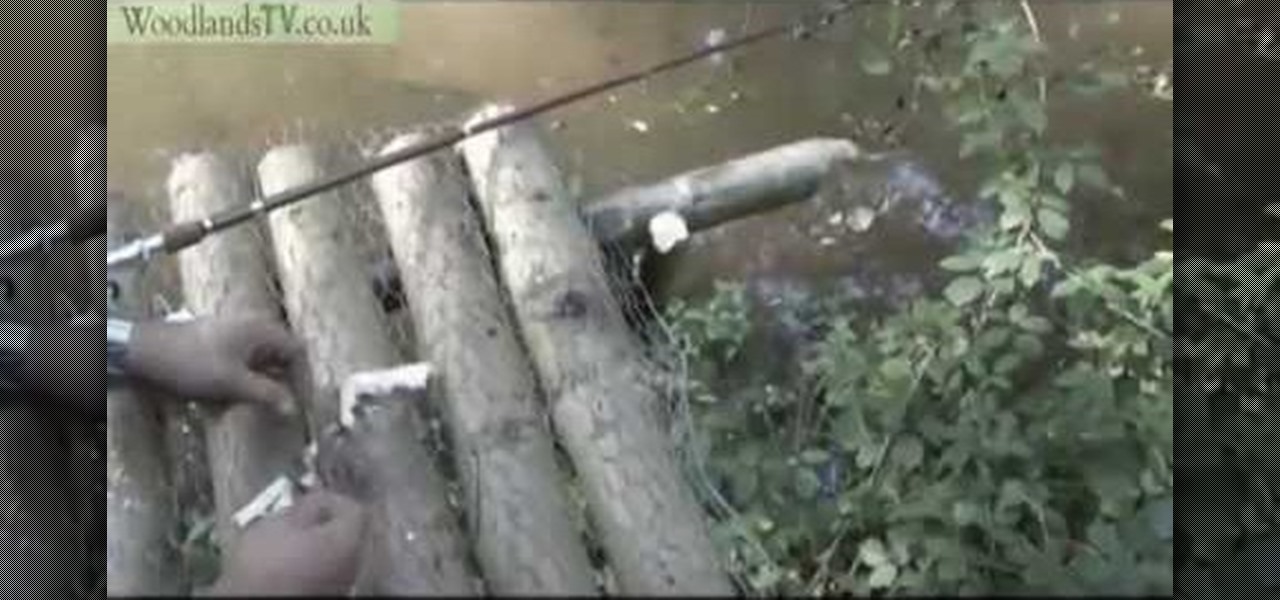
In order to catch and gut a fish, you will need the following: a fishing pole, bait, a knife, and Begin by tossing bait into the water, in order to attract the fish to you. When a fish begins to tug on your line, slowly pull him in. Remove the hook from his mouth. Be careful. Bang the fish against a hard surface to kill it. Place the knife at the base of the tail. Run the knife up to his neck. When you reach in, you'll feel a cord. Pull it out. All of the guts will be attached.
In order to make a piecrust from scratch, you will need the following ingredients: flour, cold butter, cold water, salt, sugar, and a pie plate.
Every one knows what ivy is, but most think of it as the poisonous ivy that gives a horrible itchy rash, but poison ivy isn't the only kind out there. There's beautiful ivy that can make your home more elegant than ever. Growing the prolific ivy plant will convince you that you have a green thumb while adding fresh beauty around your house, indoors and outdoors.
In order to build a backyard swing arbor, you will need the following: 2x4s, 1x6s, a bench swing, 4x8' sheet, a drill, carriage bolts, galvanized nails, and screws.
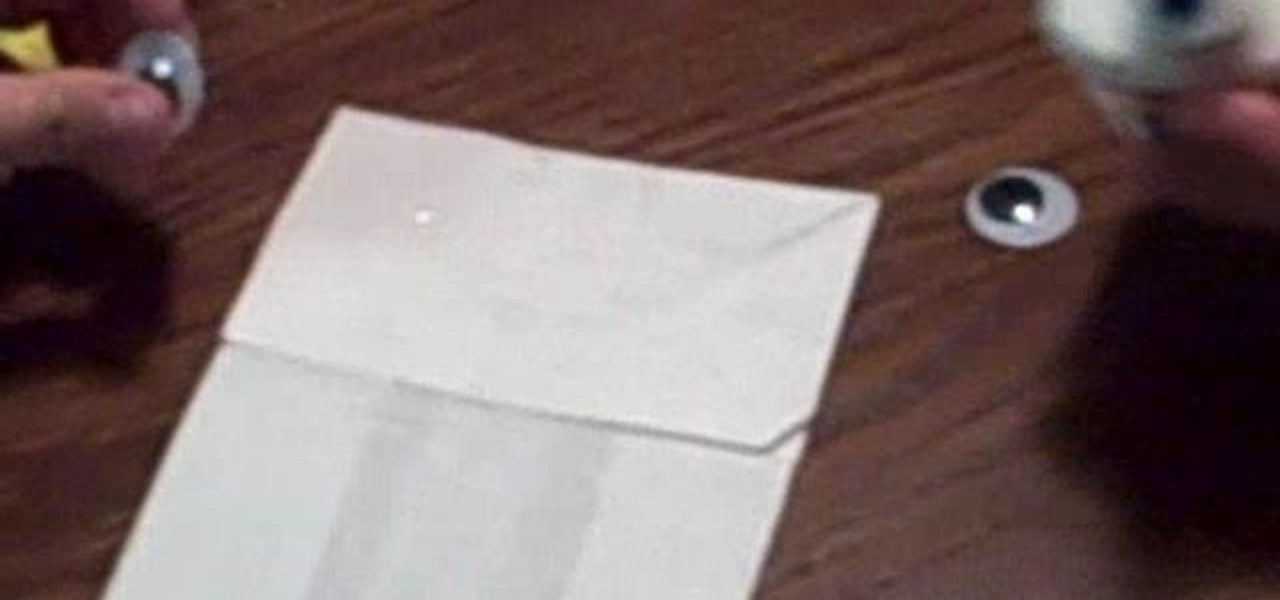
In order to make a puppet out of a paper, you will need the following: a paper bag, glue, eyes, markers, cotton balls, sock, and yarn.
Sandra Lee from Every Day Homemade demonstrates making lemon cream squares. She starts with a whole stick of butter, softened to room temperature. Add a box of yellow cake mix to the butter, and also one egg. Mix the batter with a hand mixer. It will be very thick. Clean off the beaters with a spatula. Spray a baking dish with non stick spray. To save on cleaning time, the pan can also be lined with aluminum foil. Put the batter into the baking dish and spread it evenly. Then take two bricks ...
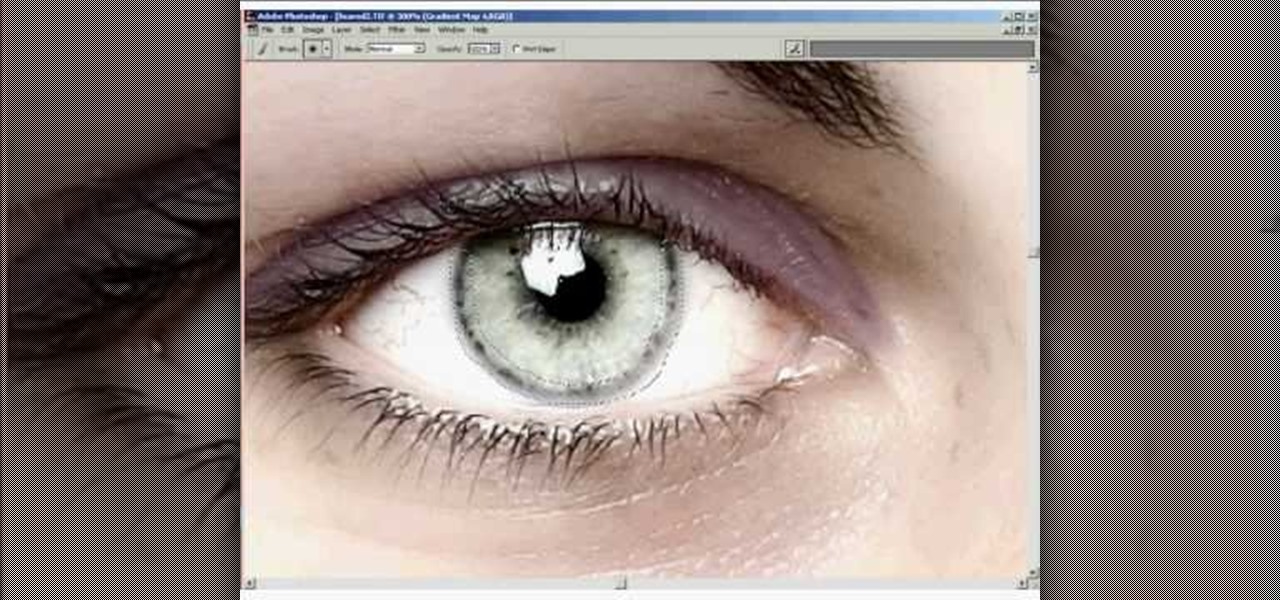
If you want to retouch or add digital make up using Photoshop you should first erase and cover up any blemishes you see on the surface of the skin. This can be bruises, blemishes, or even acne marks and bumps. Do this anywhere you feel necessary such as the face or on the body. Using the lighten tool, you can also lighten the eye color as well as the whites of the eyes. Next, you can also adjust the texture and color of the lips. You can also shift the color saturation of the picture to add r...
In this Food video tutorial you will learn how to knead bread dough by hand. Kneading is the key to creating a perfect dough. This allows the dough to stretch and rise as the yeast grows. Kneading determines how your bread will turn out. If you have a mixer with a dough hook, use it for kneading. But, it more traditional to knead the dough by hand. To start, put some flour on your hand and sprinkle a little on the kneading surface to prevent the dough from sticking. Next, pat the dough in to ...
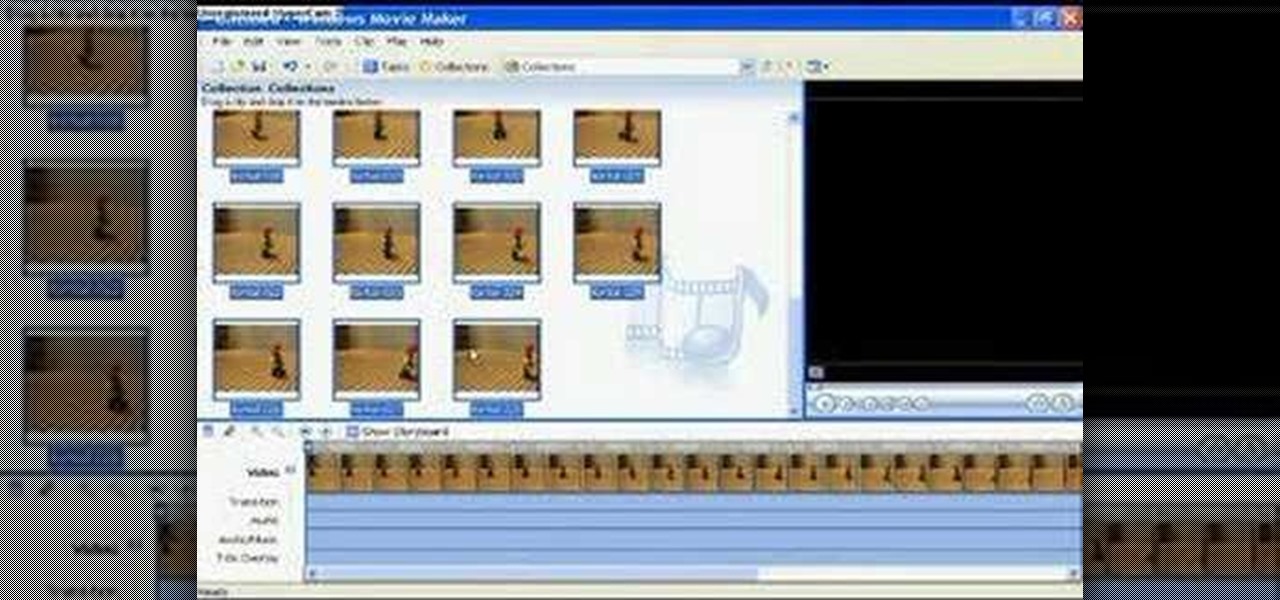
In this how to video, you will learn how to make a LEGO stop motion movie. First, you must create your set. The base plate must be taped down to the table or a hard surface. To create the animation, move the LEGO man's leg and take a picture. Move it again and take another picture. Keep on doing this until he reaches the destination you want. The more pictures you take the smoother the video will be. To edit the animation, import it to your computer and open up your movie editing program of c...
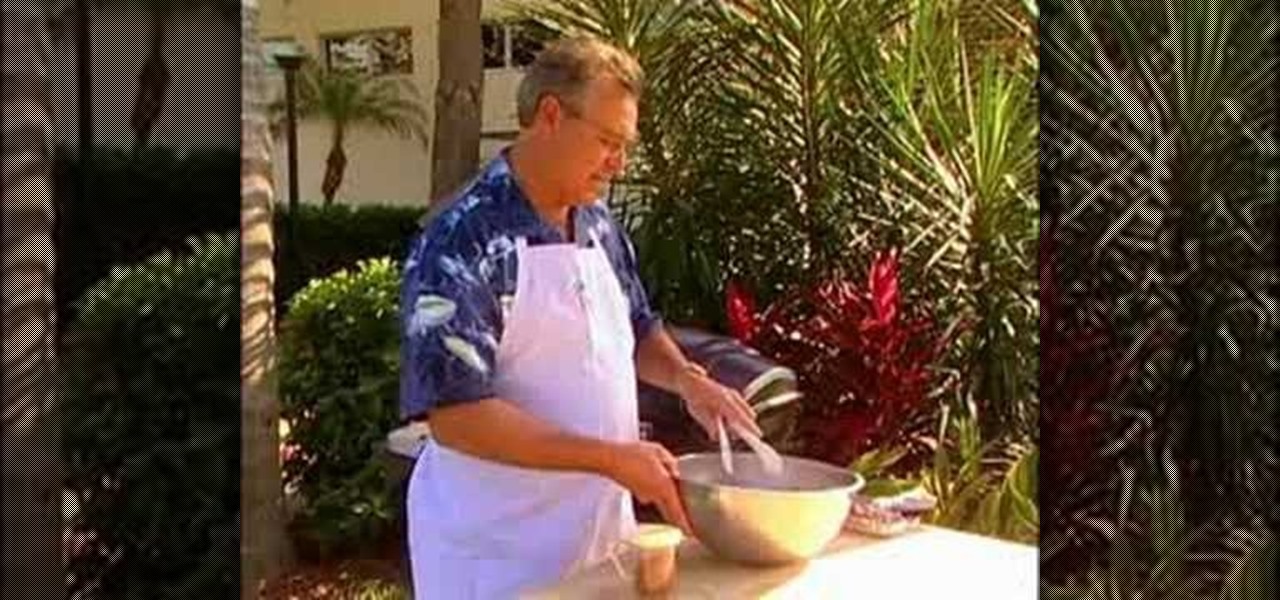
This video is brought to us by Rick Crossland, Executive Chef, and he shows us how to make Jamaican Jerk Chicken Wings.
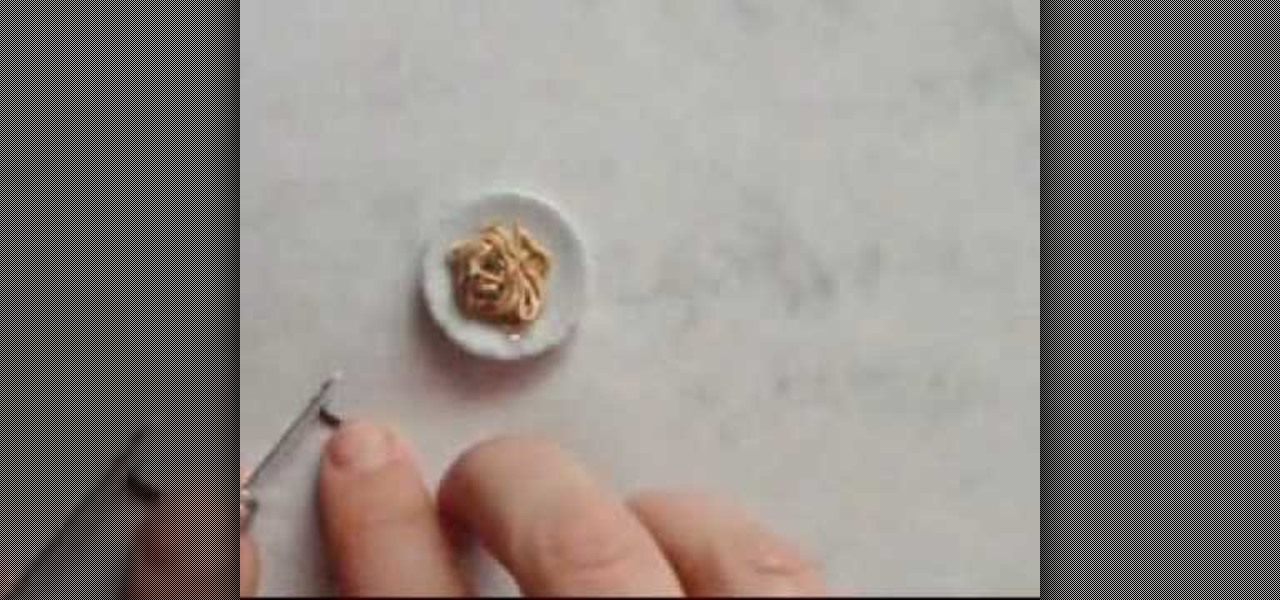
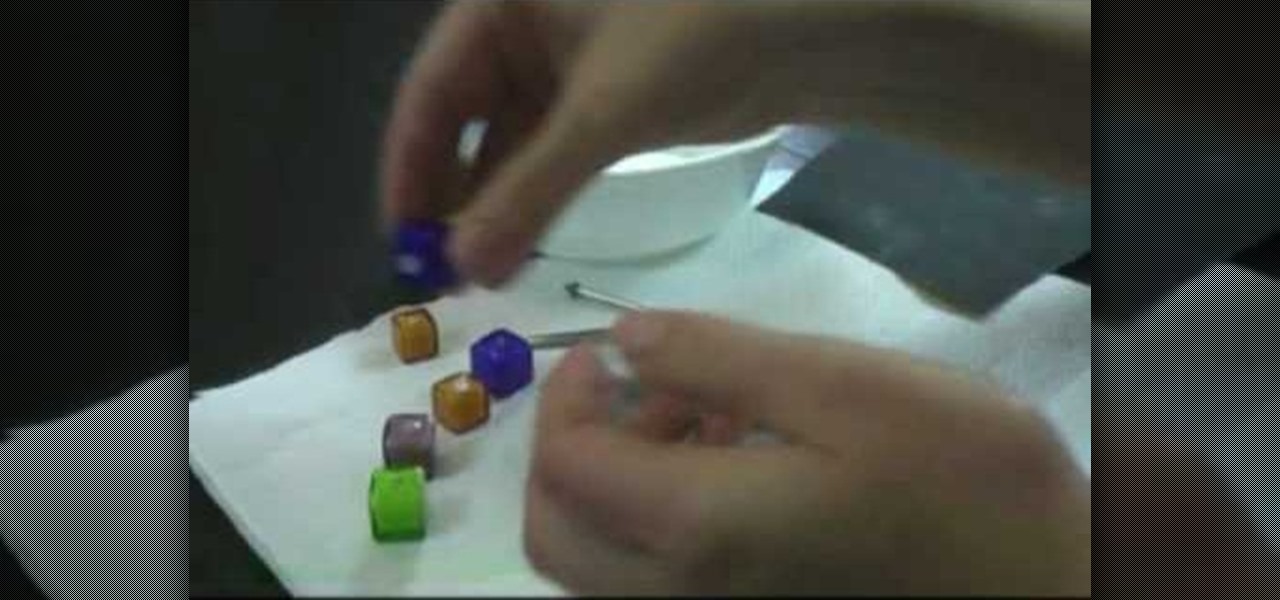
1. Collect all the materials need to create the ramen noodles clay. These are the polymer clay (color light yellow for noodles and green for green onion) ,FIMO Deko Gel, the mini plate, mini metal stick or needle, cutter, scissor, and toothpick.
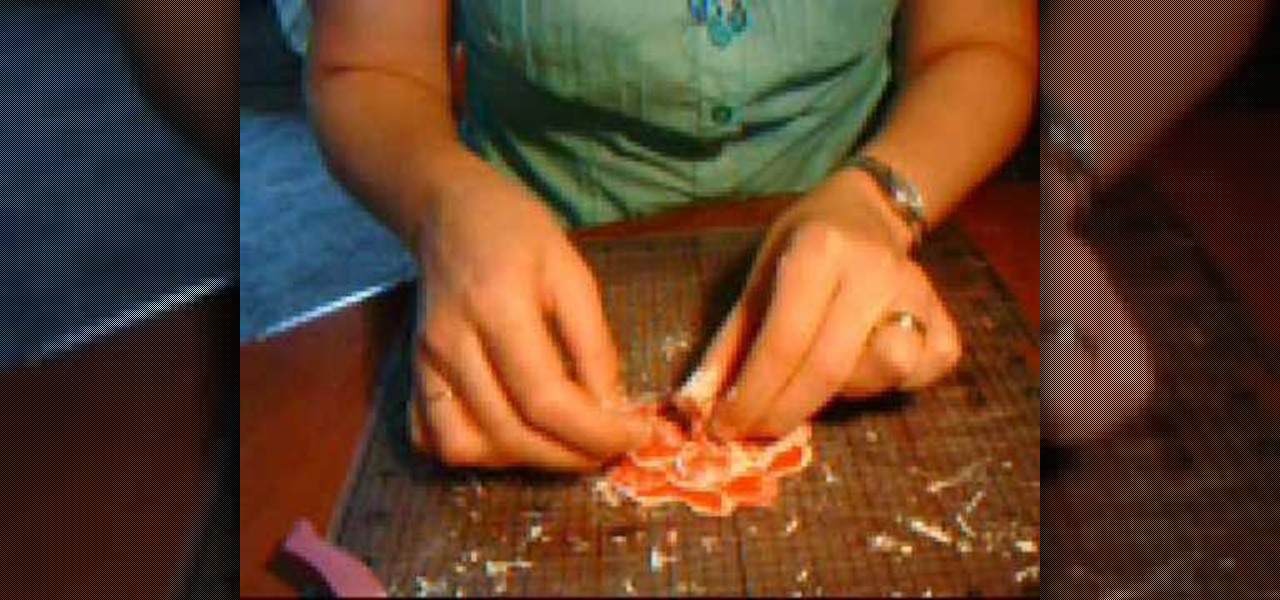
In order to make Cardstock roses, you will need the following: cardstock, stencils, scissors or cutting utensil, a cutting mat, color glimmer, a hole puncher, and acrylic paint.
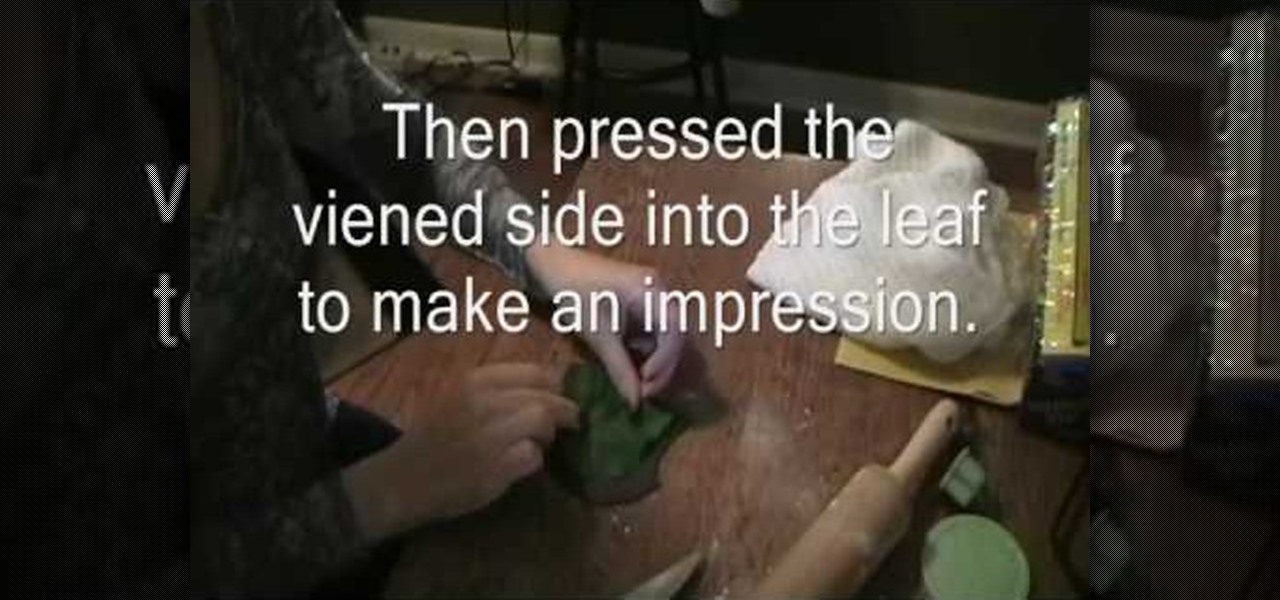
This video shows how to make wine-themed cake decorations.We can see Courtney and Ceasey's birthday cake in this video. The bottles, apples and the grapes are made of fondant. The leaves are made of modeling chocolate. We can make decorations. First take a piece of modelling chocolate. Roll it out. Dust the surface with confectioners sugar or cocoa. Use plastic leaf as a model. Then press the viened side into the leaf to make an impression. We nead 8 leaves to cover the sides of a 9 inch thre...
In this how to video, you will learn how to work with standard materials in 3D Studio Max. The material editor is found by clicking the multicolored button to the right. You can see sample spheres where you can see examples of materials. Below, you can see surface properties such as shaders and ambient colors. You can select the type of material to be applied here. You can select the standard material to get familiar with it. First, decide the shaders. Blend is the default shader, although th...
This video describes the steps on how to make Origami claws. These paper claws are very sturdy and don't break easily.
In this video Steve Ricci shows us how to make a superior tuna sandwich. It uses vegetables in the nicoise style. Put some oil in a hot frying pan. When the oil is hot, sear the tuna in the hot oil. It takes just under a minute and a half on each side. Put two anchovies, some Dijon mustard, and some red wine vinegar into a bowl. Whisk this all together. This will give the sandwich some lubrication. Let the tuna rest on a cold surface. Cut a sour dough baguette lengthwise. Toast it on the gril...
In this how to video, you will how to create clay coils. You will need clay about the size of your fist, water, and a knife. Pound the clay 200 times to get all the air out. Cut a slice from the clay and roll it in your hands. It should be a log shape. Now place it on a surface. Roll it back and forth until it is to the thickness you want. Water the clay coils and score the ends of it. Push the ends together and rub all the cracks out with water so that it sticks. Wet the sides of the two coi...
In this how to video, you will learn how to tell the difference between a tunable and non-tunable bodhran. A tunable bodhran has a tuning mechanism to allow you to adjust the skin tension. A non-tunable bodhran is actually tunable, but it just needs more time to do so. A tunable drum has the tuning mechanism in the inside. They are lugs pressing on an inner hoop. When the key is turned clockwise, this will make it tighter. Make sure to go crisscross rather than around the circle when tuning. ...
How to Sculpt a Sitting Body out of Clay
This video is about making a marble greeting card. The materials required for making them are marabu marble starter kit which consists of six marble paints,a marabu konturf paste, a polyester ball, a bowl, kebab sticks, a pencil, a cutting knife, a glue, sweat pieces of card, three cards of different colors and a bucket of water. The video starts by folding one piece of card into half and then cutting the ball into two pieces. Keeping the piece of ball as the center draw a flower around it on...
First of all you need roll of wire around 1 or 1.25 millimeter thick. Now take the roll of wire and using a round nose pliers bend the wire about 5 cm. now take a flat nose pliers and the hold the ends and bend it round to make a hook. Now taper off the end and then straighten the wire. This shall be the top portion of your pin. Now take round nose pliers and then wrap it in a complete circle and then repeat it two more times. This shall produce three loops and you can also adjust the length ...
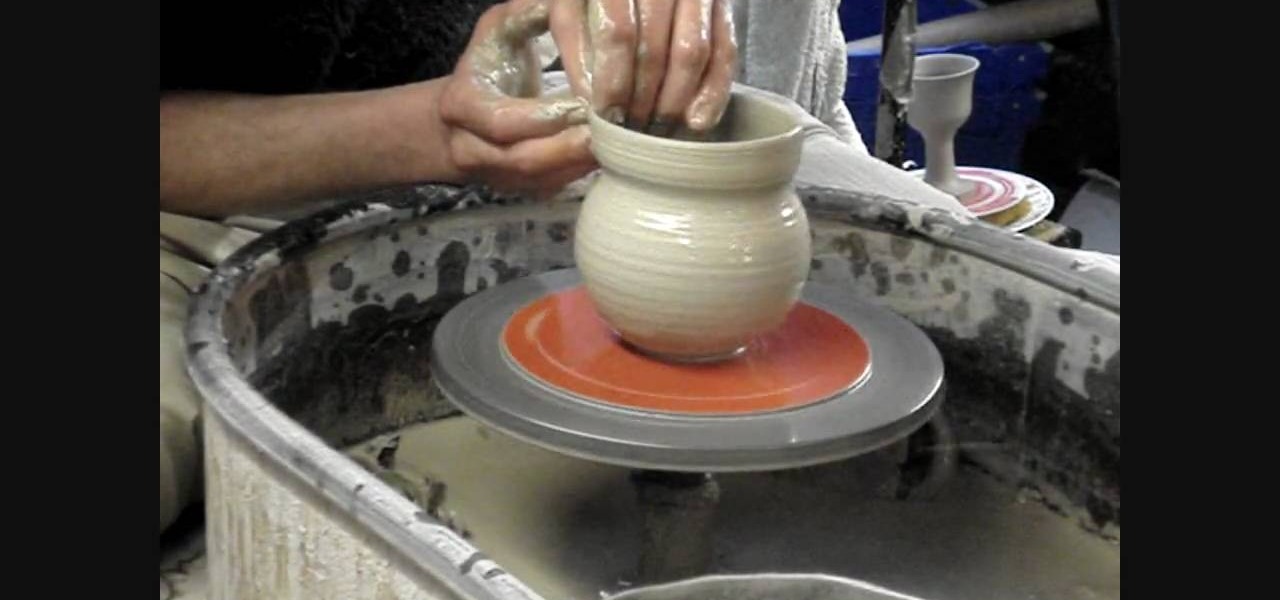
This video demonstrates how to throw a simple clay pot: a flattened salt holder. In order to throw this simple clay pottery piece, you will need: clay, a pottery wheel, and water.
This video teaches us to use a bead reamer to smoothen sharp edges on a bead. You need a reamer, some water and the reaming tips. We need the large tip for enlarging and smoothening the holes and a 45 degree edging point for smoothening the edges of the hole. Twist the handle of the reamer and insert the tip in it. Take the bead and the reamer with the large tip & dip it into water periodically during the procedure so that the water acts as a lubricant. Begin filing the inside of the bead hol...
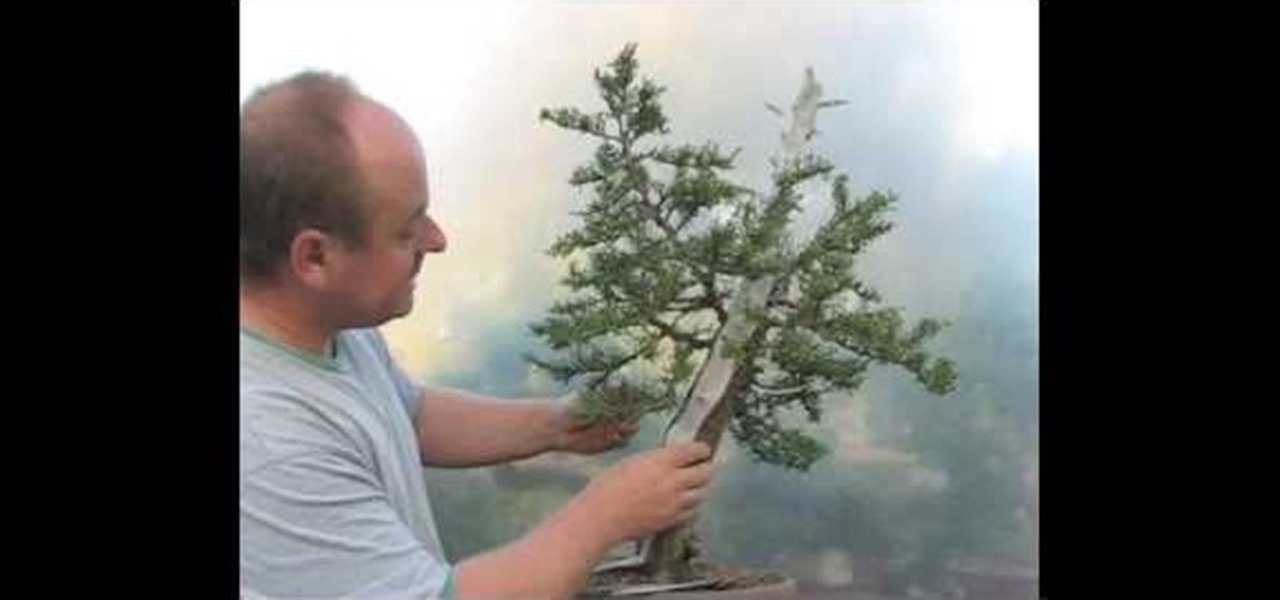
Graham Potter of Kaizen Bonsai shows Bonsai beginners how to make interesting trees from relatively available materials. He first details the history of the specific tree he will be working on. He points out that this specific specimen has small, compact foliage, branches that support itself, craggy bark, and a nice taper in the trunk. He begins to shape the tree by cutting the small amounts of foliage that are dead or weak as well as the foliage grows beneath the branches. He then uses hand ...
First of all take two pieces of FIMO- one white and the other red color. Now roll them flat on the table into rectangles. Now cut triangles out of them and then join together to form a rectangle which has more white than blue color. Now use a rolling pin to flatten their surfaces. Use a ruler to lift them off the table top. Now fold it in half and roll it again in the same direction. Don’t roll it too hard. Now keep rolling and folding in the same way. Now when you go thinner while rolling it...
In this how-to video, you will learn how to paint on your ceramic dinner plates. You will need a ceramic paint kit, a soft pencil, masking tape, a porcelain painter pen, scrap paper, scissors, scrap paper, tracing paper, Celtic patterns, and a jar of water. Place the tracing paper over the copy of the Celtic patterns. Tape both down to the surface with the tape. Trace the pattern onto the tracing paper using the pencil. Clean the plate and stick tracing paper over the plate. Trace over the pa...
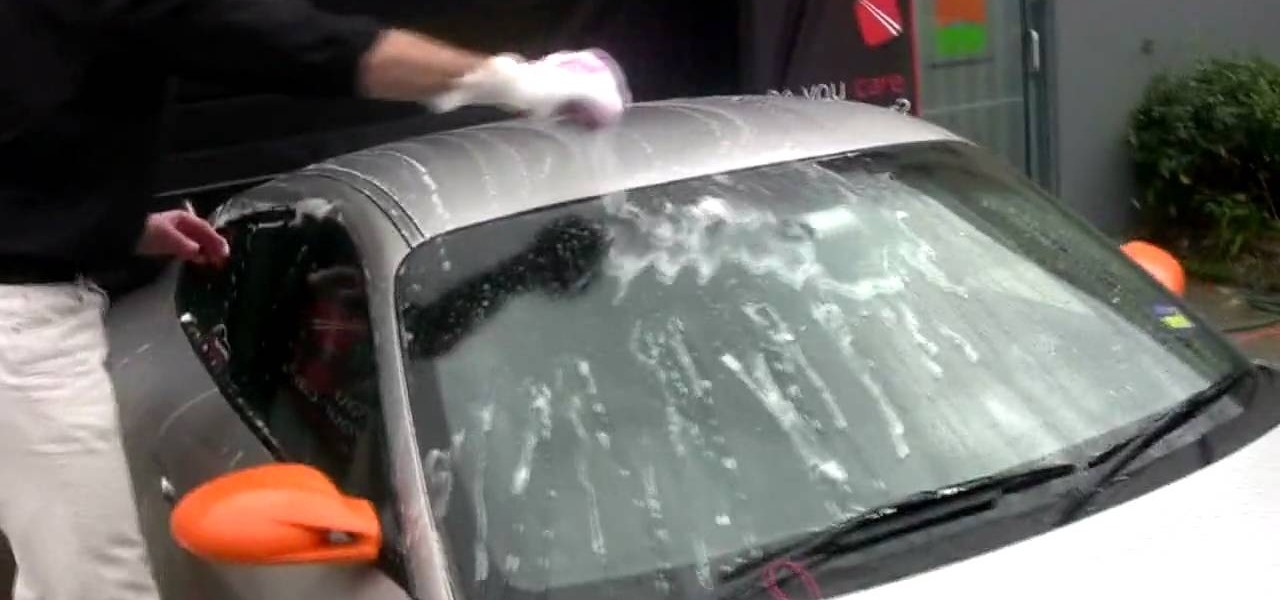
Every time people wash their car paint can easily be scratched off on accident. To avoid that CarCareProducts (CCP) demonstrates how to clean your car in a safe and efficient way using the two bucket method. In the first bucket add a small amount of PH Neutral wash shampoo and in the second bucket should be filled with clean, clear water to refresh your mitt as you wash your car that way all the dirt is collected into that bucket and not the one with shampoo. The first step to cleaning your c...
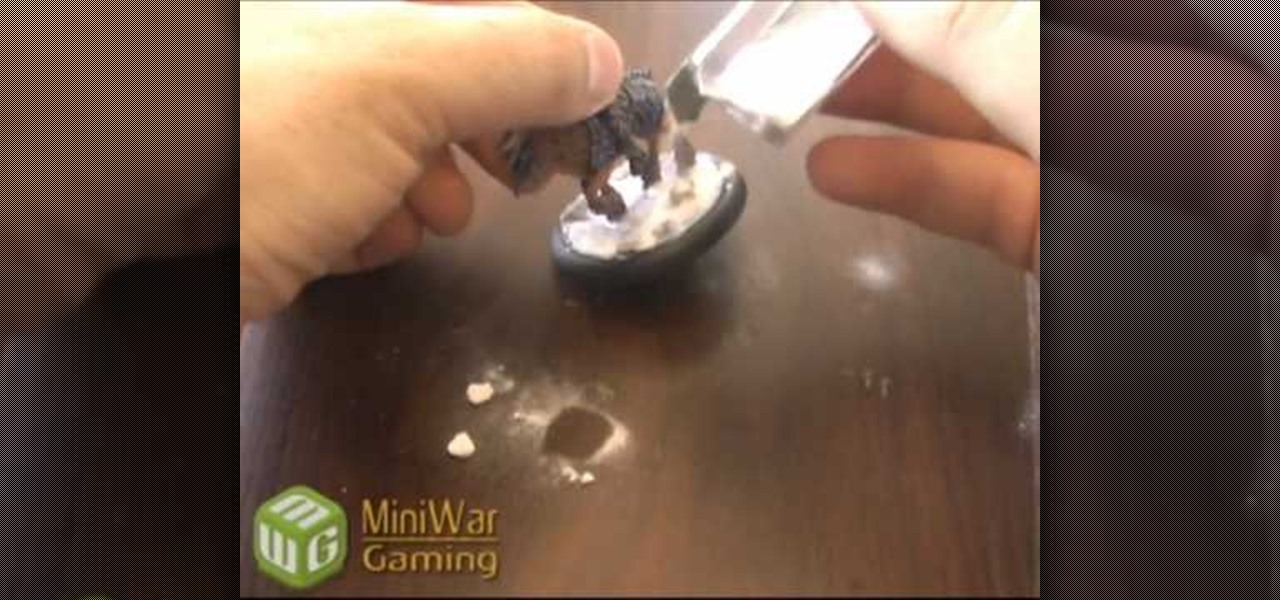
The materials you will need to add snow and other details to the base of your miniature game figure are white tacky or craft glue, super glue, a few small rocks or pebbles, coarse turf, a small paint brush, and baking soda. Begin by using the super glue to apply a few rocks to your base. You don't want to apply too many as the main focus will be on the snow. Add white glue to the base being careful not to get any on the figure itself. Use your paint brush to spread the white glue around until...
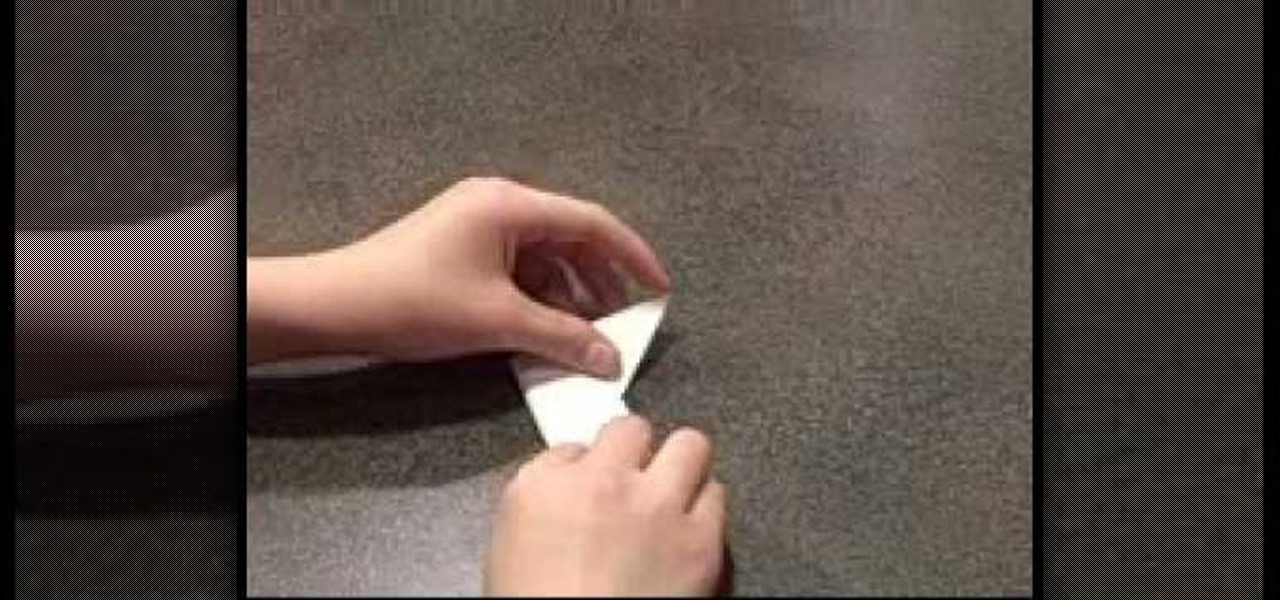
This video demonstrates how to create an origami ninja star. Prepare a square shaped piece of paper. Lay it down on a table or on a flat surface. Fold the paper right across the middle in a vertical orientation. Fold it once more in the same manner as the first fold, now creating a more slender vertically standing rectangle. Fold the upper portion of the origami diagonally forming a small triangle on top of the rectangle. Do the same on the bottom portion of the origami. Fold the upper portio...
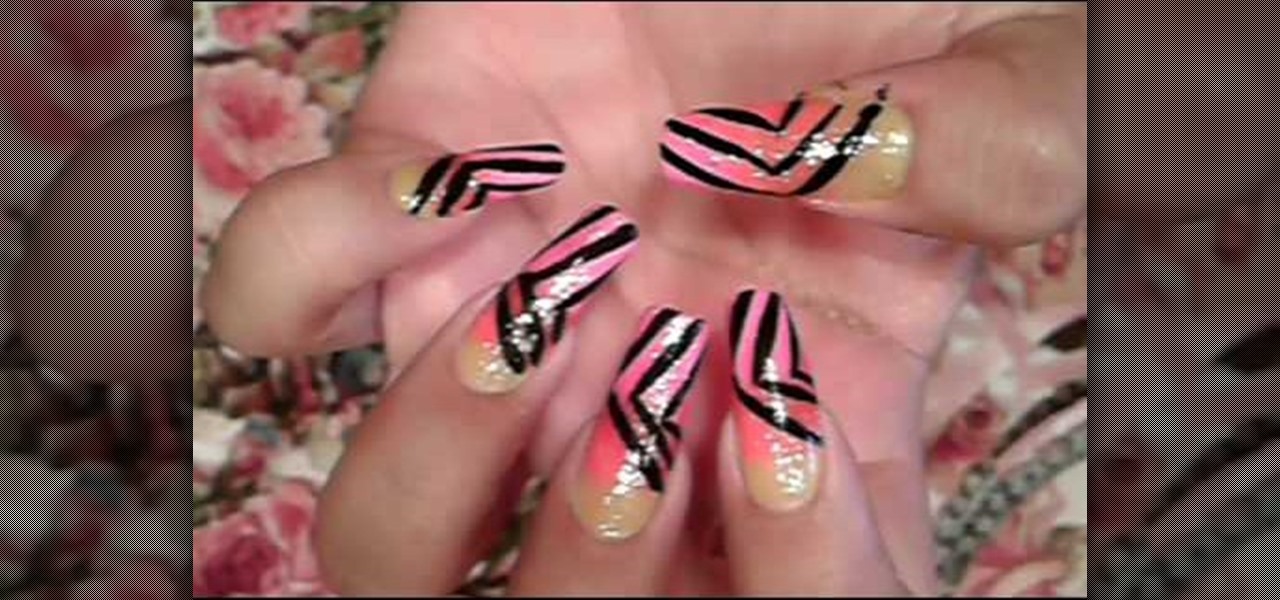
This video on nail art shows how to paint your nails with a summer rainbow stripe design. The nail colors needed for this design are yellow, orange and pink, a glittery color, a transparent clear polish and a black thin nail polish. The first step is to color only the bottom of the bare nail with yellow, here neon colors are used. Next the middle portion with orange and the tip with the pink color. Quick drying polishes can be applied one after the other or else the colors are applied after d...