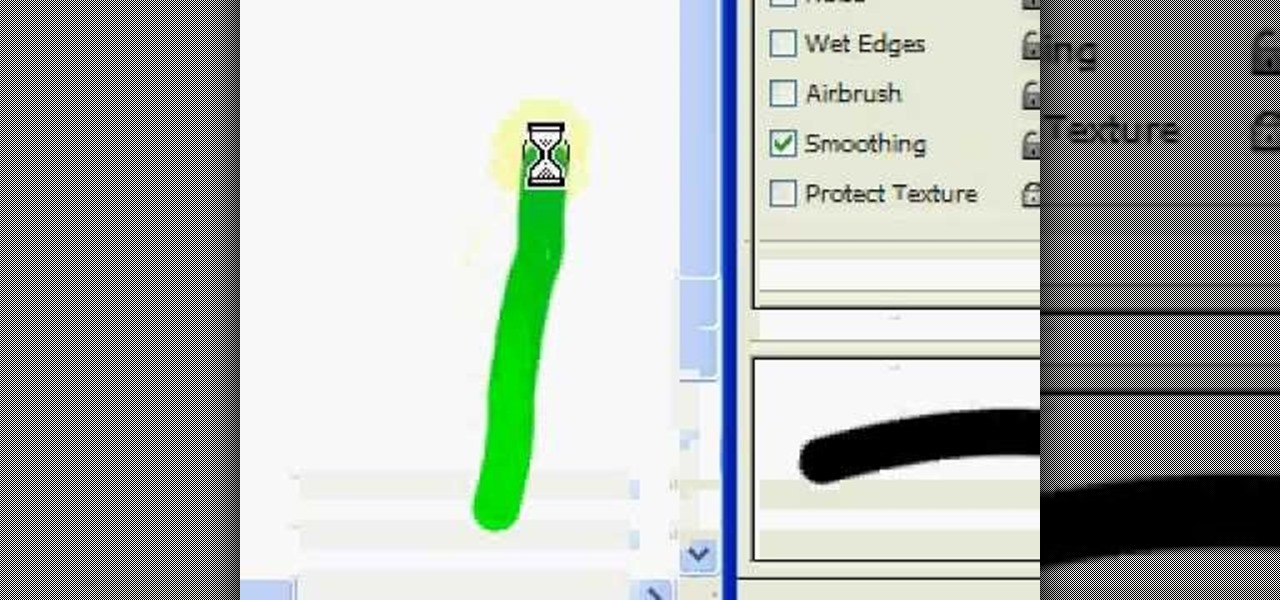
In this video we learn how to create advanced shadows in GIMP. First, create a new image that's 500x400. After this, create different layers on the page and use the shadow and gradient to create different colors. As you do this, you can you can add in a layer mask to create a deeper shadow inside the image. Use a larger brush to make the shadowing fuzzy and then use the shape tool to drag it out and make it larger. Practice playing with the different brushes and gradients and have fun creatin...
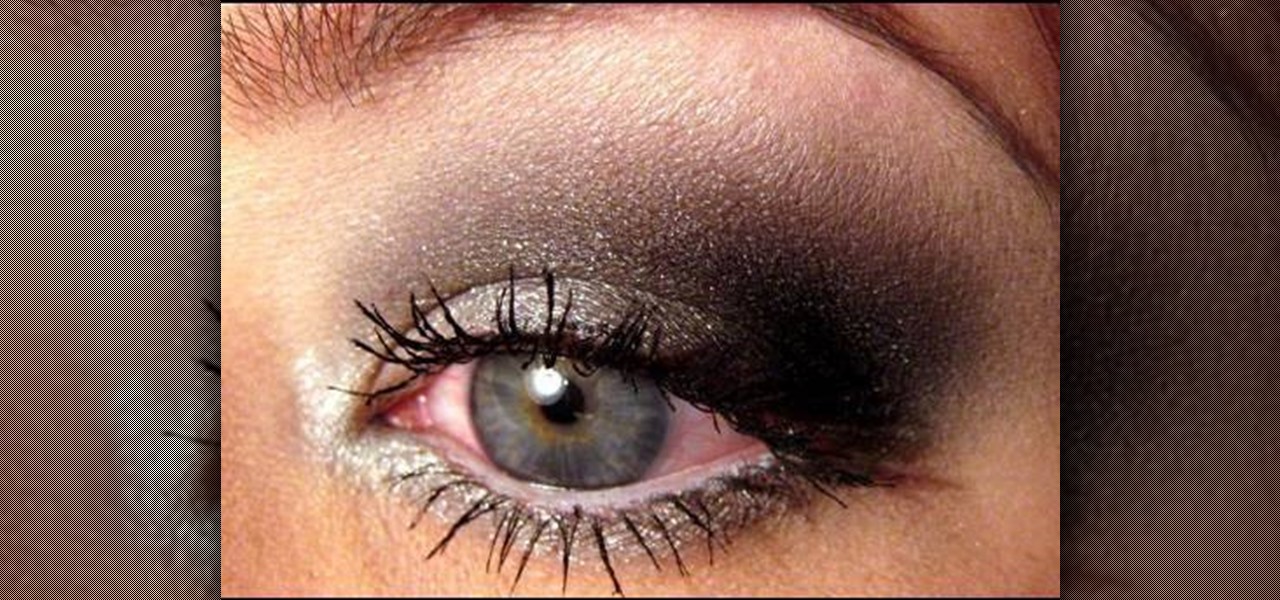
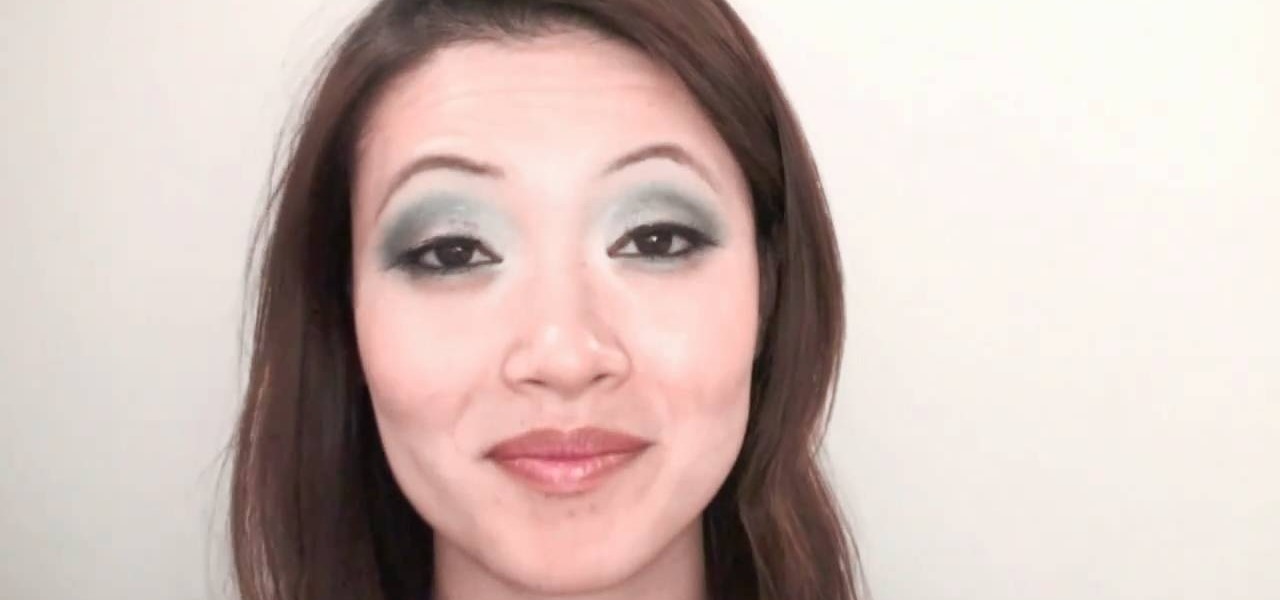
In this tutorial, we learn how to apply a silver smoky makeup look for a hooded eye. Start out with a silver color brushed all over the eyelid. After this, brush a darker color in the crease of the eye, blending in the outer corner of the eye. From here, blend this up towards the brow bone. Place black on the outer corner of the eye to deepen the area, then blend out. After this, apply a light shimmer underneath the brow for a highlight and blend with the bottom colors. Apply the silver color...
In this video, we learn how to make marinated grilled king crab legs. First, heat up 1/4 c butter in a pan, then add in some lemon juice and dried parsley. Mix all of these together in the pan until it's all combined then add in some Dijon mustard to taste. Now, pour this into a bowl and then brush it over your king crab meat. Grill the meat over high heat and then let it grill for a few minutes. When it's finished, brush the marinade over the meat once more and then serve with your favorite ...
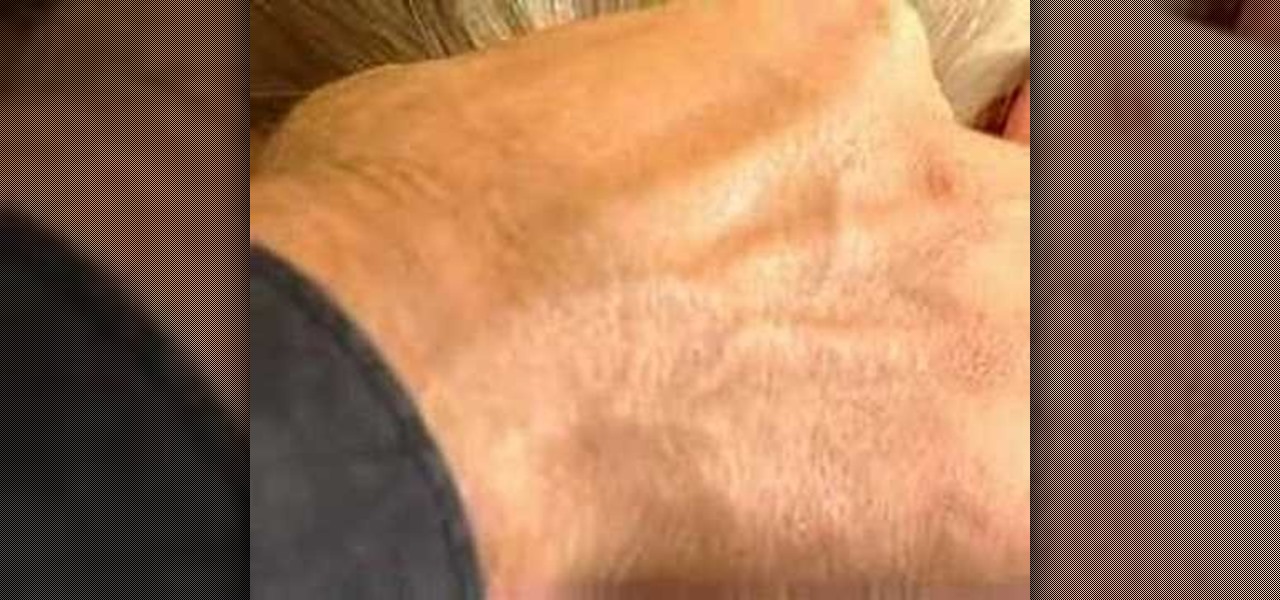
Olive oil isn't only good for tossing up a Caesar salad; in fact, olive oil has a bunch of uses for your skin as well. And the best part about using olive oil as a skin problem remedy is that it's inexpensive: You either already have it lying around or can purchase it anywhere for about $5.
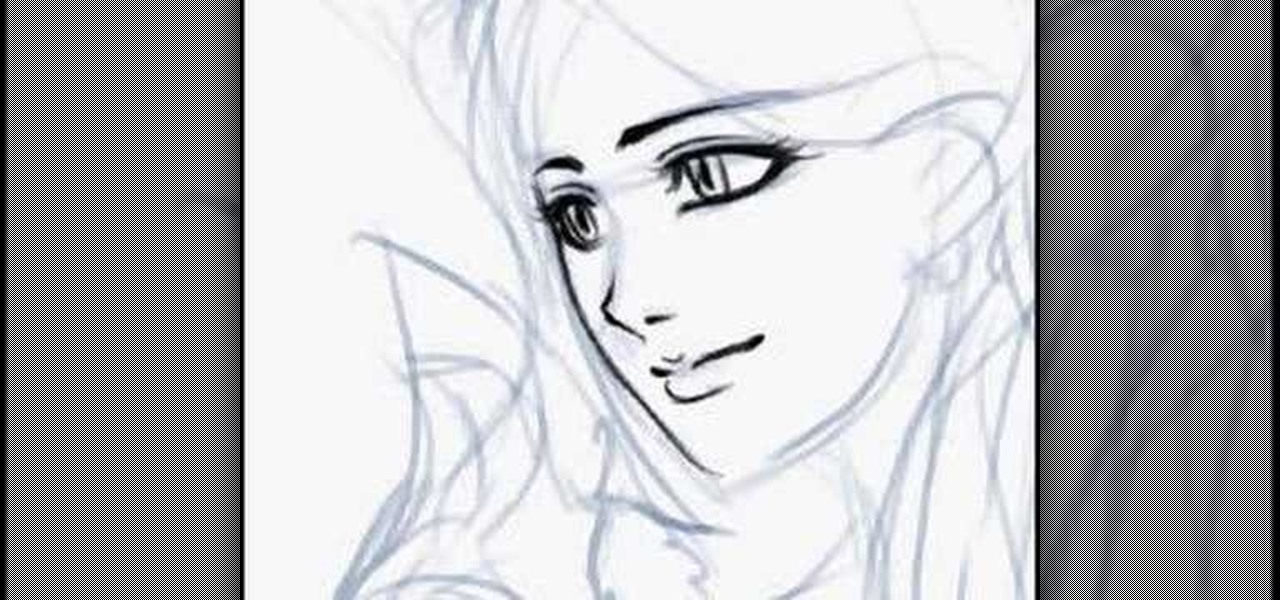
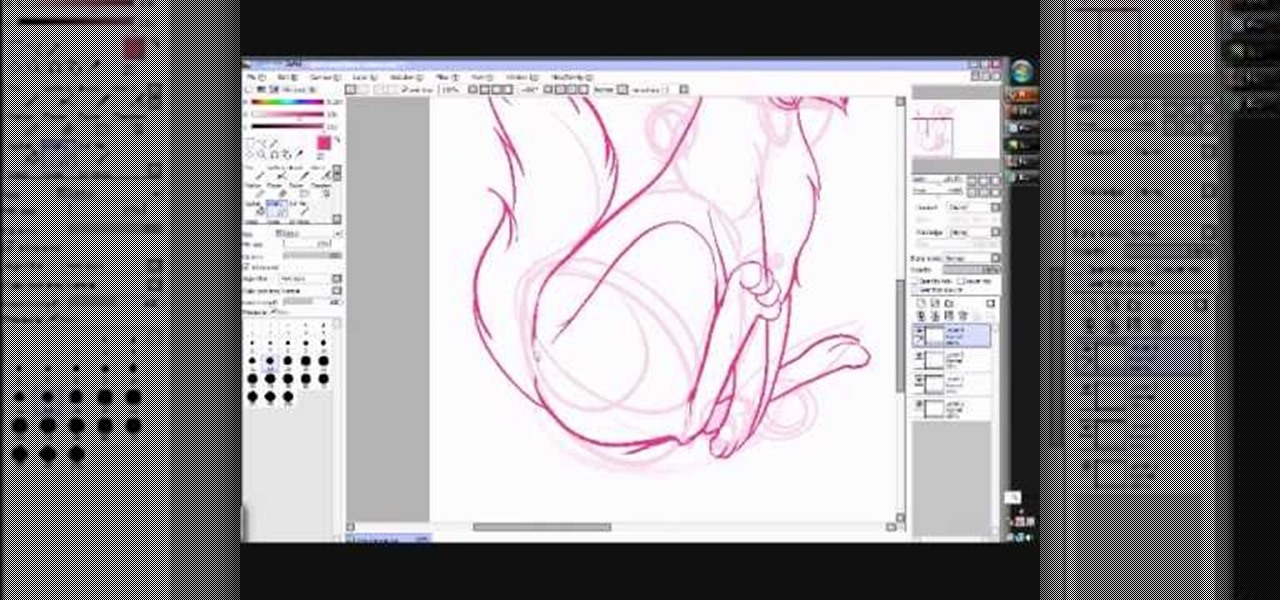
In this video, we learn how to draw an anime girl in Photoshop. First, draw the outline of the face, shoulders, and neck using a light touch of the brush. Next, draw in the details of the face and then start drawing in the hair. Use different shapes and swirls for the hair, to make it thick and long around her face and body. Next, draw in her hand and arm. Use a darker brush to fill in the details and draw over the outline, to create the final sketch. Add in eyelashes and feminine details to ...
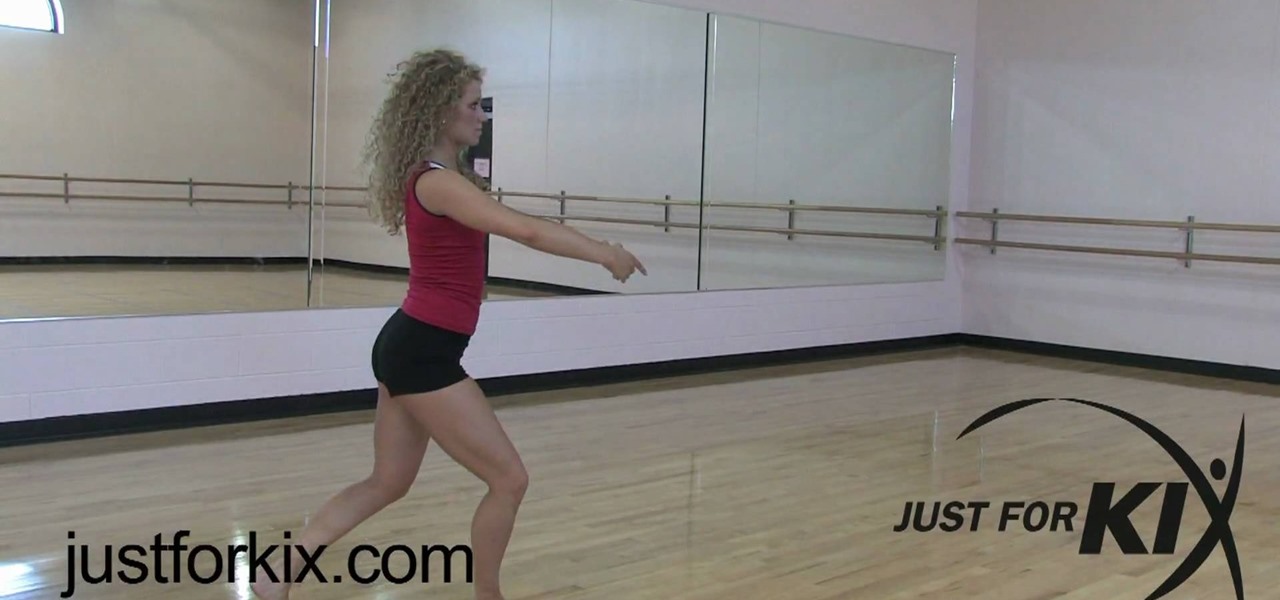
In this video, we learn how to do the switch firebird. Start with a chasse on the left foot, taking three steps. From there, take one more step with the right foot, then brush the left foot forward. Take a nice big plea in the right leg, then brush it back and jump off the ground jumping into attitude and hitting the top of the head. Get as high as you can turned out. Use the plea to help you jump off the ground. Practice these in individual counts, then practice in one fluid movement in fron...

If you're anything like us, then you try to take the easiest route possible when styling your hair in the morning before work. You know: Wake up, brush your teeth, and then wearily comb through your hair a few times with your eyes closed.
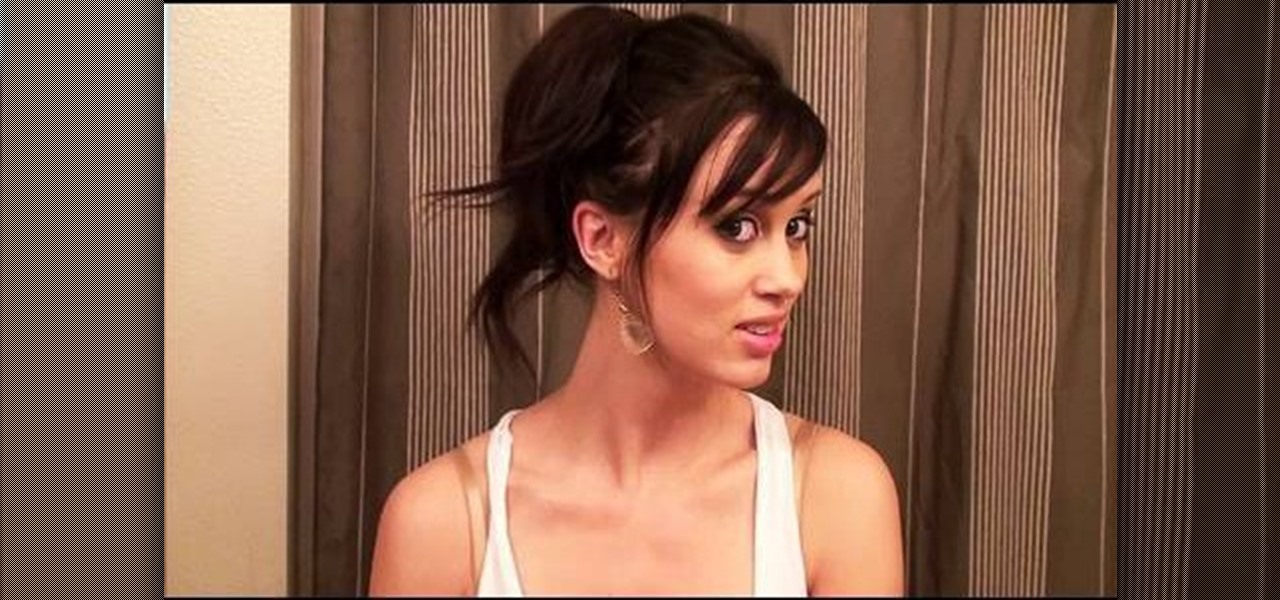
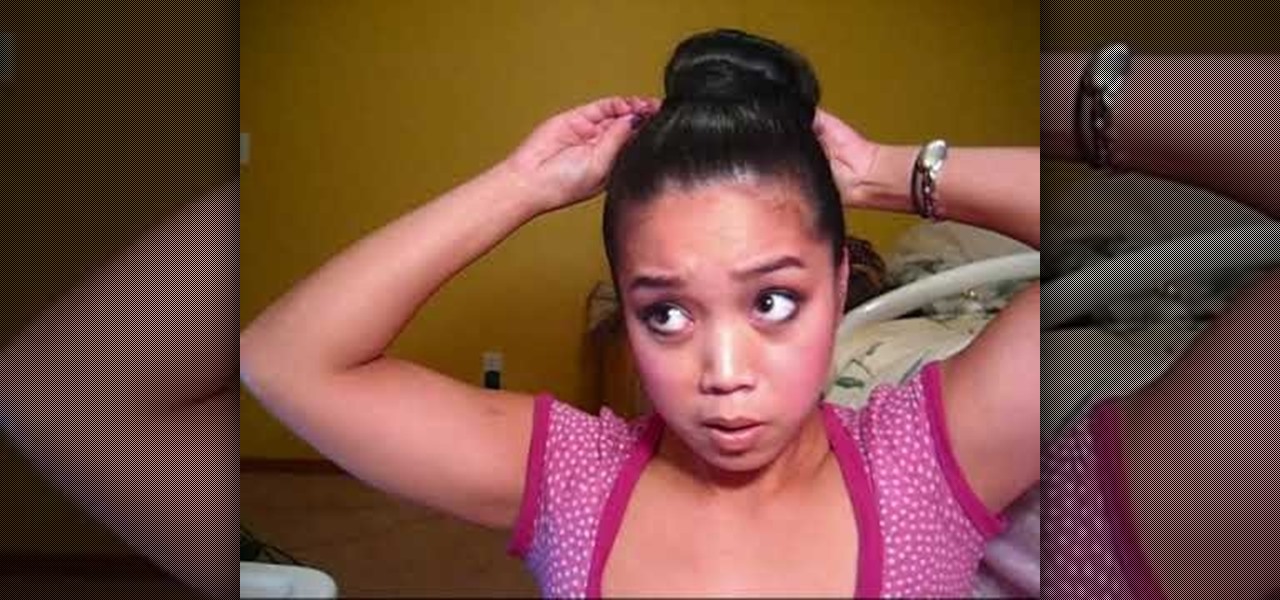
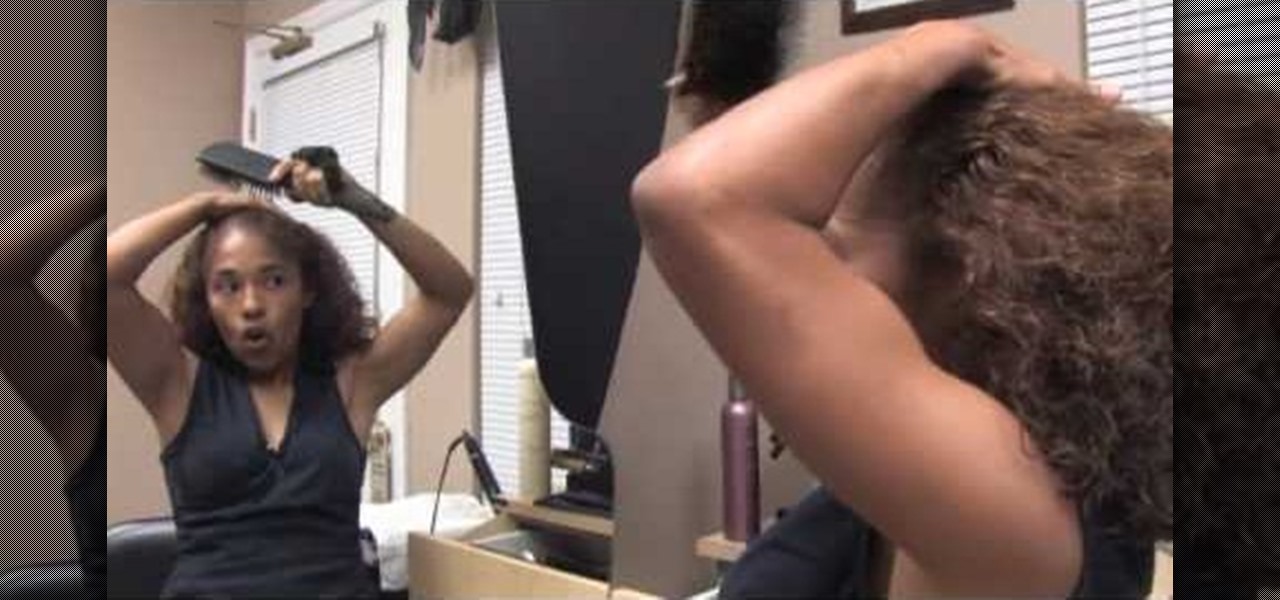
In this video, we learn how to make a large fancy hair bun. First, you want to have your hair brushed and straightened. You will need: brush, hair ties, bobby pins, rolled up sock, and hair spray. Start off bringing your hair up into a pony tail, then tie it with an elastic. Next, grab a hair roll and bring it under the base of the pony tail around to the font. Now, let your hair fall evenly, while pushing your head down. Grab you elastic, and wrap it around the base of the hair bun. Next, ta...
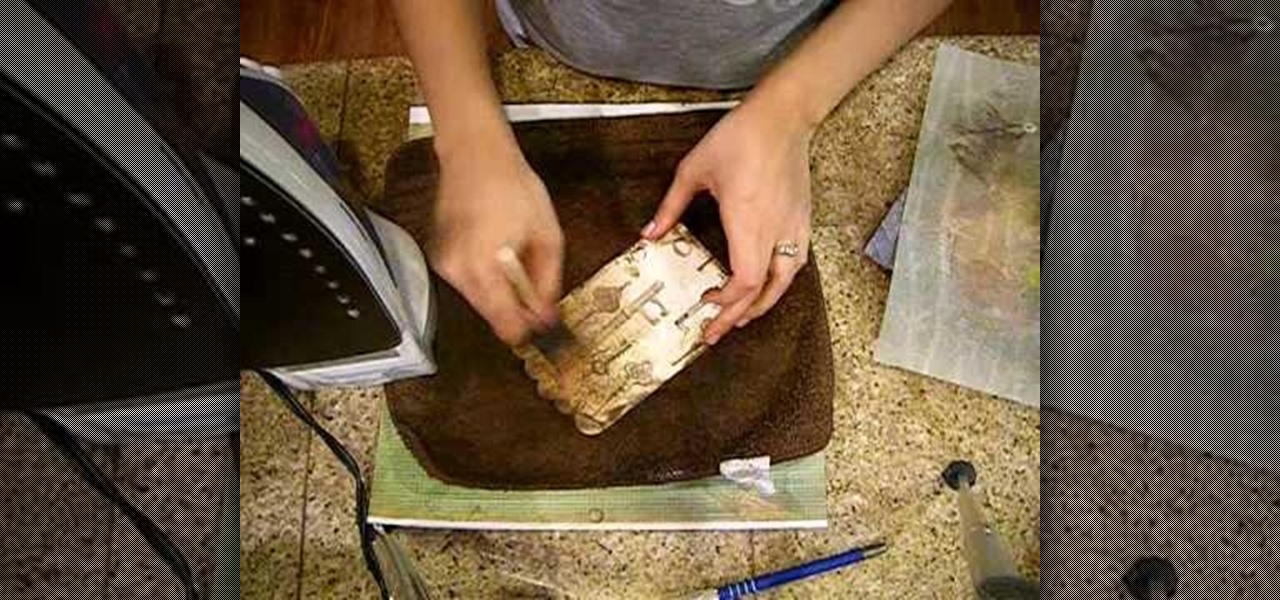
Crinkle top part and go over it with distress ink. Do edges front and back. Put extra ink on scallops. Spray with mustard seed and tattered jewels, olive vine and pine cone to add color. Place paper on pocket and iron on both sides. Spray with iridescent gold. Use brush to spread out. Iron again on both sides. This process makes it look aged. Take a film strip and spray with tattered leather. You want to use an iron when spraying grunge board with tattered jewels because it will make it seep ...
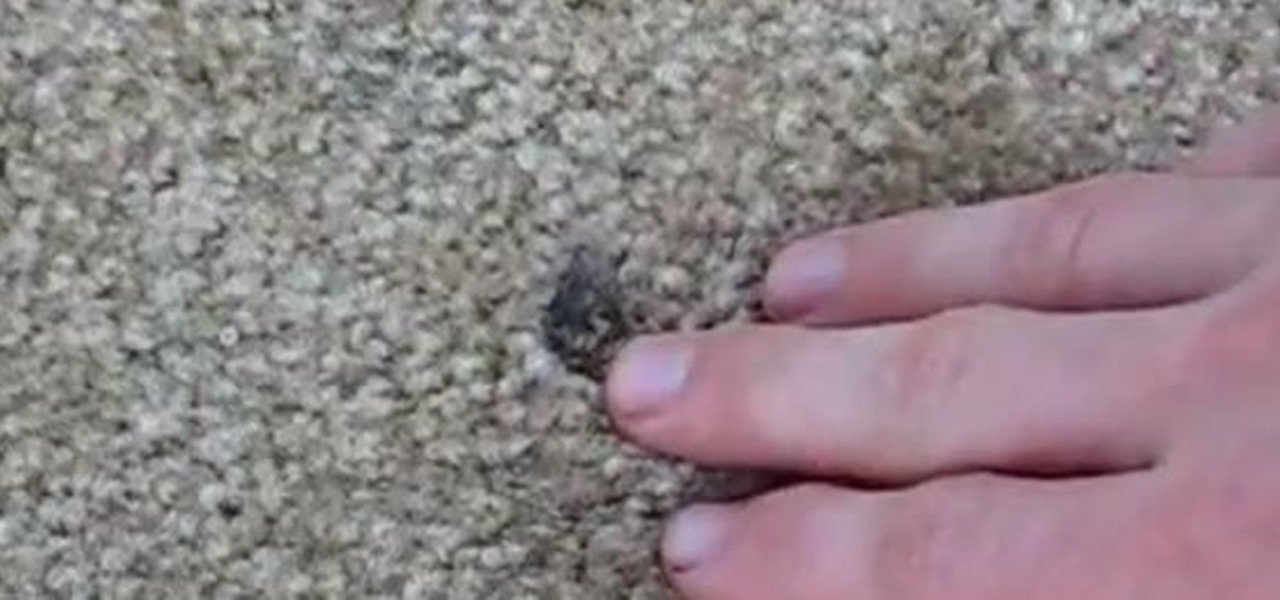
In this tutorial, we learn how to repair carpet burns. First, take some tongues and ruff up the surface to break up the burnt pieces that are inside the carpet. Next, take some Resolve and spray it onto the spot, then brush it with a handheld brush. After this, blot the area with a towel until it's nice and dry. Next, cut out a small piece of spare carpeting and then open up the area that was burnt. Cut it out with scissors, then replace this with the new carpet.
In this tutorial, we learn how to fake side swept bangs. First, straighten and brush your hair. After this, you will take the hair from one side of the head and use a comb and brush it to the opposite side. After this, grab hair spray and spray it onto the bangs. After this, comb the hair again and then work the bangs with your fingers. Next, use more hair spray to make the bangs more firm and stay in place. Continue to do this process until your bangs are completely to the side and they are ...
In this tutorial, we learn how to draw Neopet cartoon cats. First, use a small brush to create the outline of each of the cats. Use light strokes to make the outline, then start to add in the details onto the cat with a darker colored brush. Add in the details of the face, including the whiskers, mouth, and eyes. Don't forget to add on the ears as well. Erase and lines that are on the back of the drawing, so all you see is the darker and more exact lines. Continue on drawing the body, making ...
In this video, we learn how to create a fresh pink spring makeup look. Start off by applying a pink eyeshadow to the eye, then brush a purple color on the inner corner of the eye. Next, take a dark purple and gray, then blend them into the outer crease of the eye. Now, blend together all of the colors. Next, apply a layer of black eyeliner, then brush on mascara to your upper lashes. Next, apply black eyeliner to the bottom of the eye followed by mascara on the bottom of the eyes. When finish...
In this tutorial, we learn how to make a cool neon text effect using Photoshop. First, type your text using a big and simple font. After this, right click on the text layer and click on "rasterize type". Now, press the control button while you click the thumbnail of the text layer. After this, grab the lasso tool and click "select inverse". Then, set it on 12 pixels in the toolbar. Now, use the magic wand too and select each of the letters by holding shift. Next, create a new layer and click ...
In this video, we learn how to use Diatomaceous Earth the stop bed bugs. First, place this in a tray and then use a brush to brush the powder around the base of the bed. This will last for 6 months and will need to be reapplied whenever you vacuum the floor. When the bug touches it, it will kill the bug within twenty four hours. This is a great way to create an oasis in your bed, just make sure you don't have any sheets touching the ground, or the bugs will be able to crawl up them and go in ...
In this tutorial, we learn how to do a quick J-rock hairstyle. To start, you will want to start off by brushing out your hair and straightening all of your layers. After this, do your makeup with thick black eyeliner all around your eyes. Next, hairspray the hair while holding it up, then tease it so it has extra volume, but don't brush it back down. Do this throughout the entire head, leaving the bottom of the hair flat and straight. Next, apply wax and gel to the hair and finish styling it ...
In this tutorial, we learn how to get a baby doll inspired makeup look. First, apply primer to the eyes, then outline your eyes with white eyeliner in the shape you want your eyes to be. Next, use black liner to outline around the white that you just applied, then a brush to blend it out. After this, use a shimmery white color to highlight underneath the brows, then brush a purple over the black liner to make it a softer color. Next, apply more white to the areas that you originally drew the ...
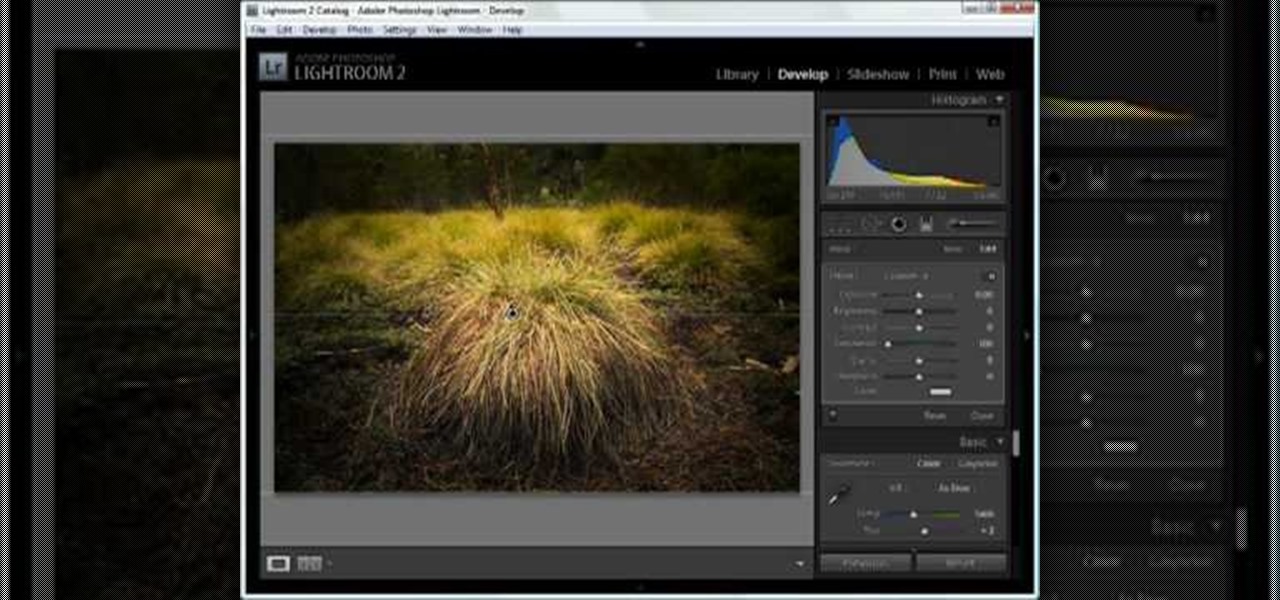
In this tutorial, we learn how to dodge and burn in Lightroom 2. First, open up your image in Lightroom 2 and use the brushes to change the saturation and the colors in the image. You can also use the graduated filter which you can use to apply effects across the image itself. Next, you can add a tint onto the picture and apply a second filter to make the top of the image darker, then make the middle of it brighter. Change the exposure and saturation to make the picture look more realistic. U...
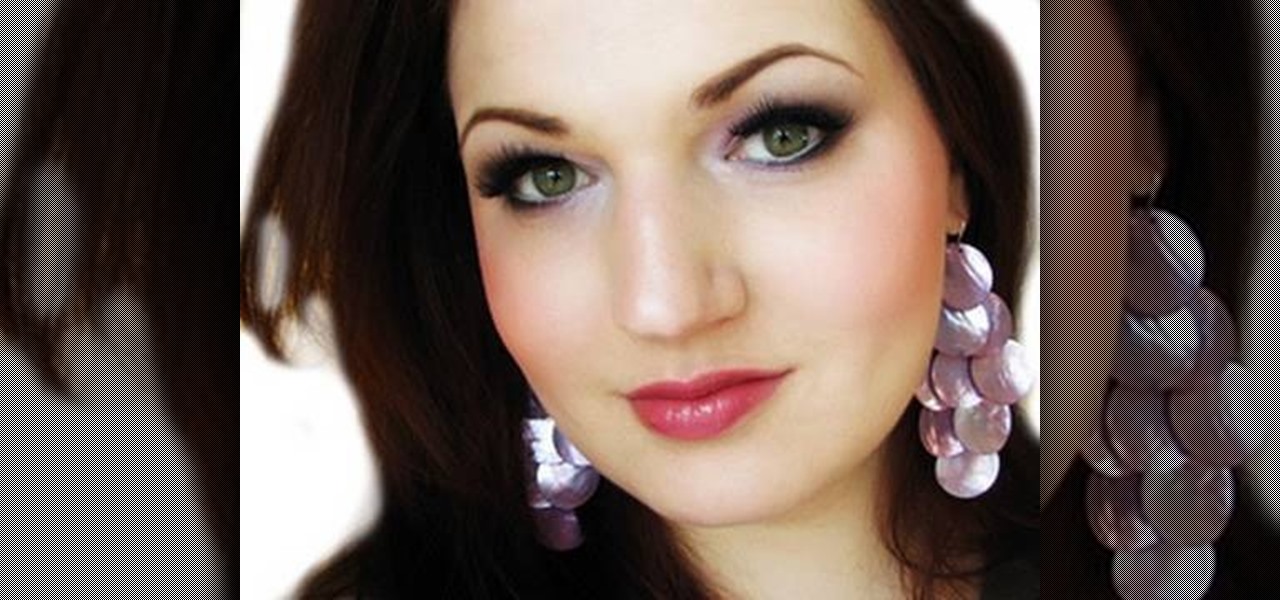
In this tutorial, we learn how to apply general face makeup. First, apply lotion and primer to your face before you place anything else on your face. To apply your foundation, use a foundation brush and blend together different colors of foundation. Start by applying the foundation to your face in any way that you prefer. After this, apply concealer underneath your eyes that is the same color as your skin. Use a shadow brush to blend eyeshadow onto your eyes and make sure you groom your eyebr...
In this video, we learn how to create an elegant band look for curly hair with Liz Muller. To start, you will take a comb and brush the front of your hair to flatten it out and make it straight. Push your hair to the back of your head, then take pins to pin the hair back on the head. Make sure it's tight so the hair doesn't become loose. Continue to pin the hair on the bottom, then bring your hair to the front. Do this on the other side of your head, again brushing the bangs back to make them...
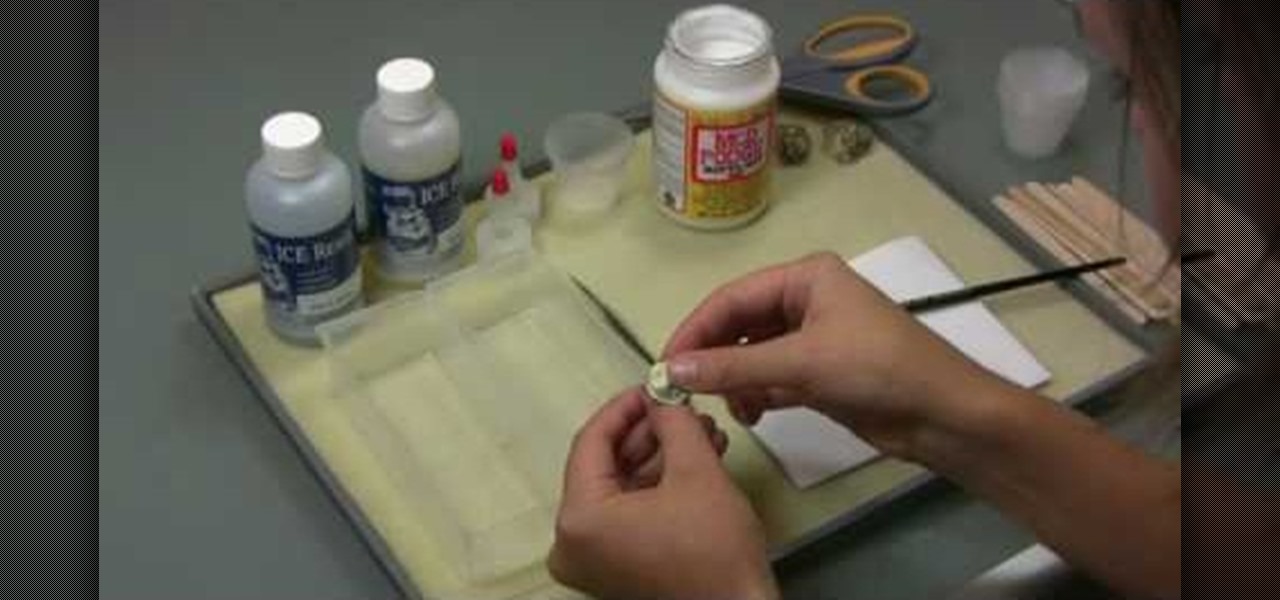
In this Arts & Crafts video tutorial you will learn how to use ICE Resin to make resin jewelry. ICE resin should be used in a well ventilated room and be sure to follow manufacturer's recommendations. The kit comes with mixing cups and sticks. Additionally you will need a paint brush, scissors, sponge and needles. Once you mix the resin and the hardener, you got to use it within 30 minutes. Curing time is 24 hours at 72 degrees Fahrenheit, which is the room temperature. You can make it faster...
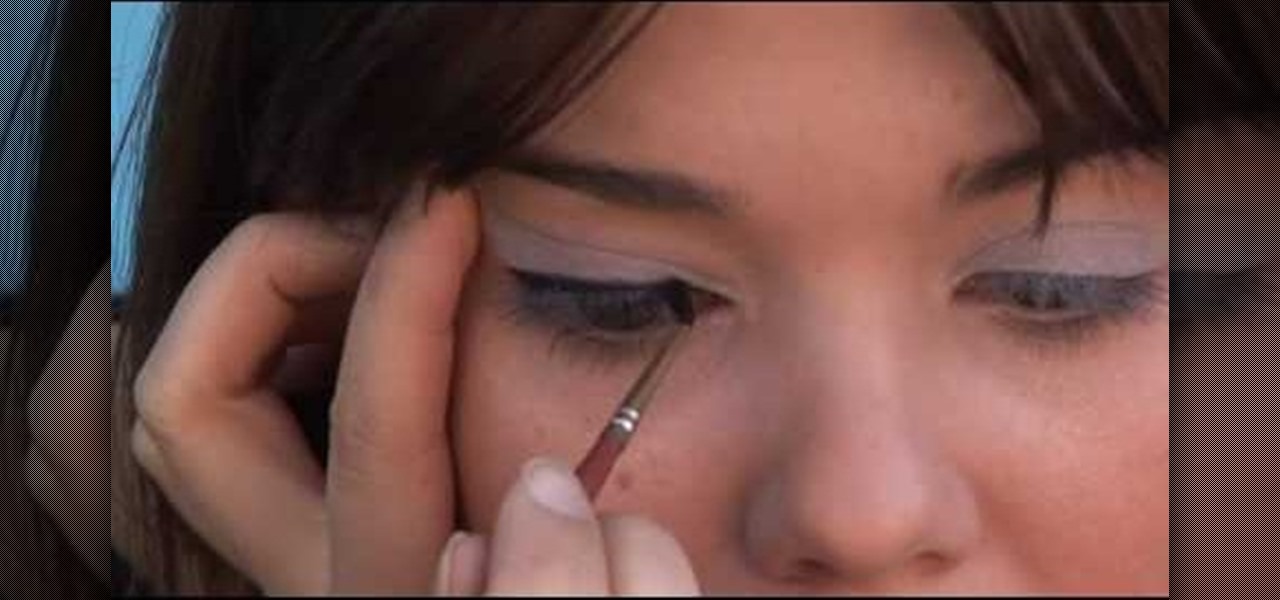
In this tutorial, we learn how to do hair and makeup for going out. Begin by applying your favorite foundation, along with bronzer and blush. Next, apply eyeliner to both the top and bottom lashes. After this, brush on a layer of dark eyeshadow onto your eyelid, going up to the crease. Next, use a white eyeshadow to brush on the inside crease of the eyelid. When finished with this, use a black eyeshadow on the outer edge of the eye, then blend all the colors together. To finish the makeup, ap...
In this video, Carsen Labella teaches us how to achieve a 1960's 'Mad Men' look. First, you will need to apply foundation to your entire face. Next, you will need to use a peach blush to the apples of your cheeks, then blend together with foundation. Next, apply a pearly white eyeshadow to the entire eyelid. Now, pick out a soft baby blue and paint it on the eyelid on top of the pink eyeshadow. Next, apply a thick black eyeliner to the eye, making a thicker line on the outside of the top of t...
In this video, we learn how to groom men's eyebrows with Aaron Marino. You will need: high quality tweezers, small scissors, fine tooth comb, and a pencil. First, use the pencil and place along the inside and outside of your eye to know where your eyebrow should start and stop. Now, take your tweezers and pluck the middle of your eyebrows, as well as the outside and underneath of the eyebrow. Next, take the comb and brush against the grain. Trim the hairs that come up at the top, making sure ...
In this tutorial, we learn how to get a Kidsongs inspired makeup look. First, you will take a yellow pigment and brush it onto the inner crease of the eye. Now add a green pigment next to the yellow and blend together. Now apply blue pigment to the outer eye and blend it into the crease with the other colors. Apply a pink and red eyeshadow to the bottom of the eye line with a small eyeliner brush. Finish with a purple color on the end of the eye. Line your eyes with black eyeliner and use fak...
A laptop keyboard can collect a lot of dust, dirt, and breadcrumbs. In this tutorial, we learn how to clean out your laptop keyboard. Start off by removing the casing from around your laptop, making sure not to unplug any wires. You will need a screwdriver to remove the screw. Next, you will want to use a soft brush or tooth brush to clean where the keys were, and the inside underneath the screen. Next, replace the keyboard where it was and any screws. Also, plug in anything that may have com...
In this video, we learn how to prepare a fresh artichoke for cooking. The first step is to decide how many artichokes you want to cook. Take them and cook them well under cold water, and brush with a kitchen brush if you have one nearby. Now, top and tail your artichoke with a sharp knife. You can also rub the top of the vegetable with lemon to stop the artichoke from browning. Now, you can bake, steam, microwave, or boil your artichoke any way you would like. After cooking, you can store in ...
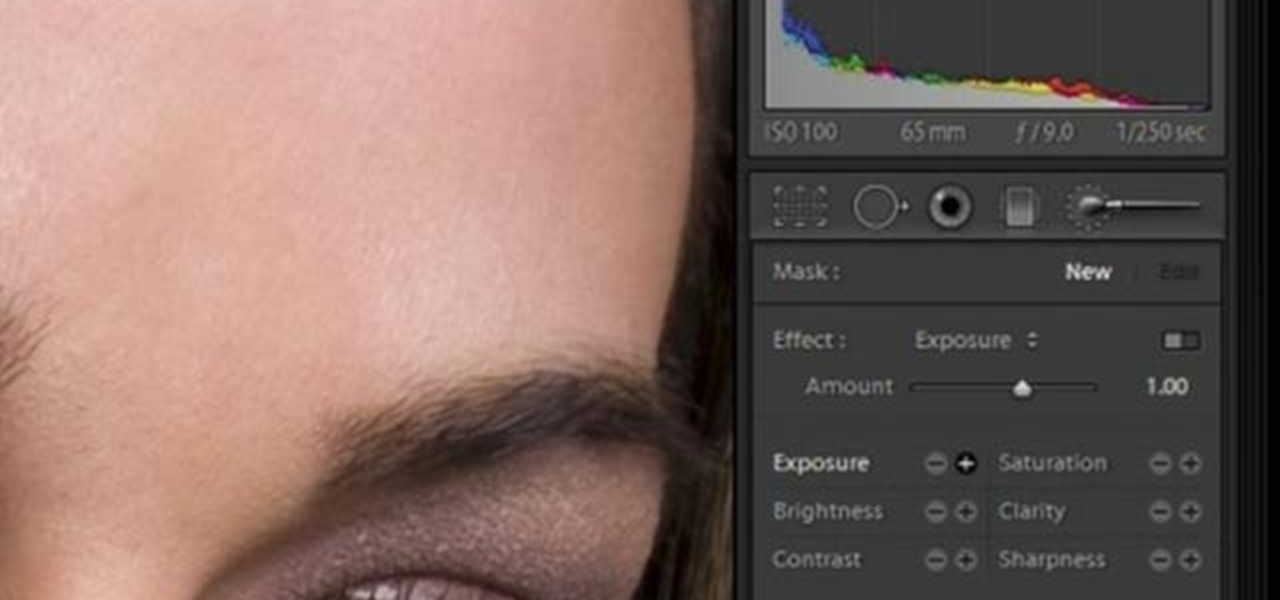
In this software video tutorial you will learn how to soften skin feature in Lightroom 2 in Yanik's Photo School. Select a photo and zoom in to the skin area. Click on the adjustment brush, or ctrl K. Here you can adjust 7 features; exposure, brightness, contrast, saturation, clarity, sharpness and color. But, if you click on the other 'exposure' dropdown menu, you will get these 7 options and additionally a 'soften skin' option. Click on 'soften skin' and it gives you the options to add nega...
In this tutorial, we learn how to make a high pony tail for curly hair with Liz Muller. First, wet both sides of the hair and put gel into it. Now, push the front of the hair back with a brush, avoiding brushing a lot so you don't have frizz. Make sure it's straight, then push the back of the hair up. Combine all of your hair together until you have it high on your head. If your hair starts to get curly in the front again, just release your hair and try again. You can always add more gel if y...
Shading, whether it's for eyeshadow, blush, or bronzer, is one of the indispensible makeup skills you'll be using for the rest of your makeup doing career.
See how to set up the brushes in Photoshop to take full advantage of the pressure sensitivity of a Wacom Tablet – the Graphire, Intuos and the new Bamboo. It's an easy thing to do. It's so easy, in fact, that this guide can present a complete, step-by-step overview of the process in just over two minutes' time. For more information, and to get started taking full advantage of your own Wacom tablet, take a look!
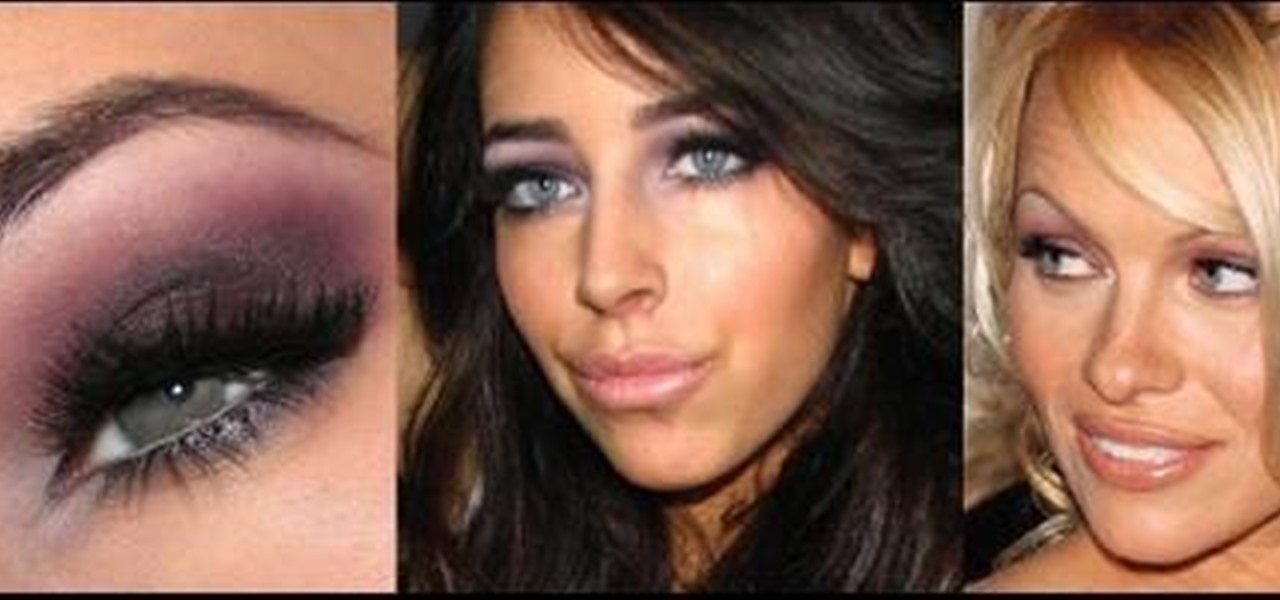
"Baywatch" babe Pamela Anderson is famous for big, sultry smokey eyes and plush, nude lips. In this tutorial you'll learn how to achieve an utterly gorgeous purple-based smokey eye that's perfect for a night out club hopping with your posse. It's a beautiful makeup look that'll get you noticed even if, like Pamela Anderson, you live in a town full of A-listers.
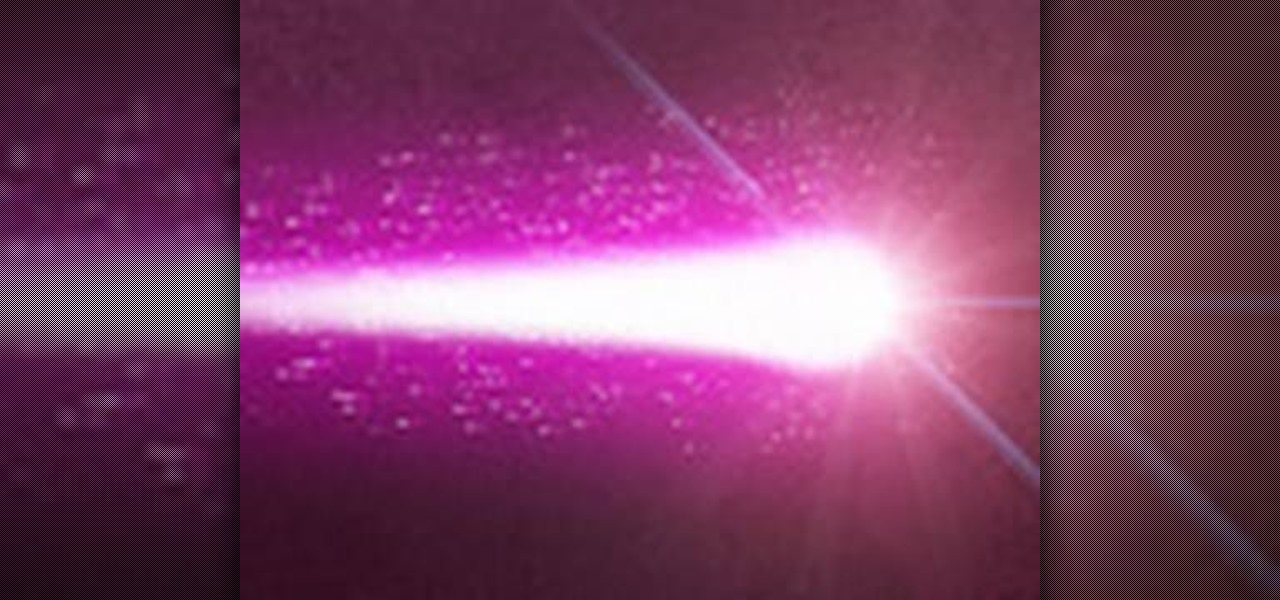
There aren't any words in the silent instructional tutorial video, but if you watch carefully, you'll learn the exact steps necessary to create a phenomenal looking shooting star or comment with nice looking special effects that are achievable in Photoshop. First you'll select a circular region with the selection tool, then you fill it with white. Next you'll use brush settings to create a brush stroke that straight and fades over time to create the comet's tail. Then you'll use Photoshop's l...
In this video, we learn how to cover up dark circles and blemishes using foundation. Start off by applying an eye cream underneath your eyes, which will make a base and remove puffy-ness. Next, you will need to apply your favorite concealer in your color over where you applied your eye cream. Go ahead and apply this foundation wherever you have blemishes, using a makeup tool. Now grab your favorite foundation and brush, and brush the foundation on your face making an even coat to cover and re...
In this video, we learn how to put eyeshadow onto a picture using PhotoShop. First, open up the program and open your picture. Click on layer then new the click layer again.On the new layer put as blend mode "multiply". Make the opacity 50% and choose a color. Then select the brush that is the right size for your picture. Next, you will be able to brush the mouse over the eyelid and put eyeshadow onto the lid of the eye. You can change the intensity of the eyeshadow by changing the opacity hi...
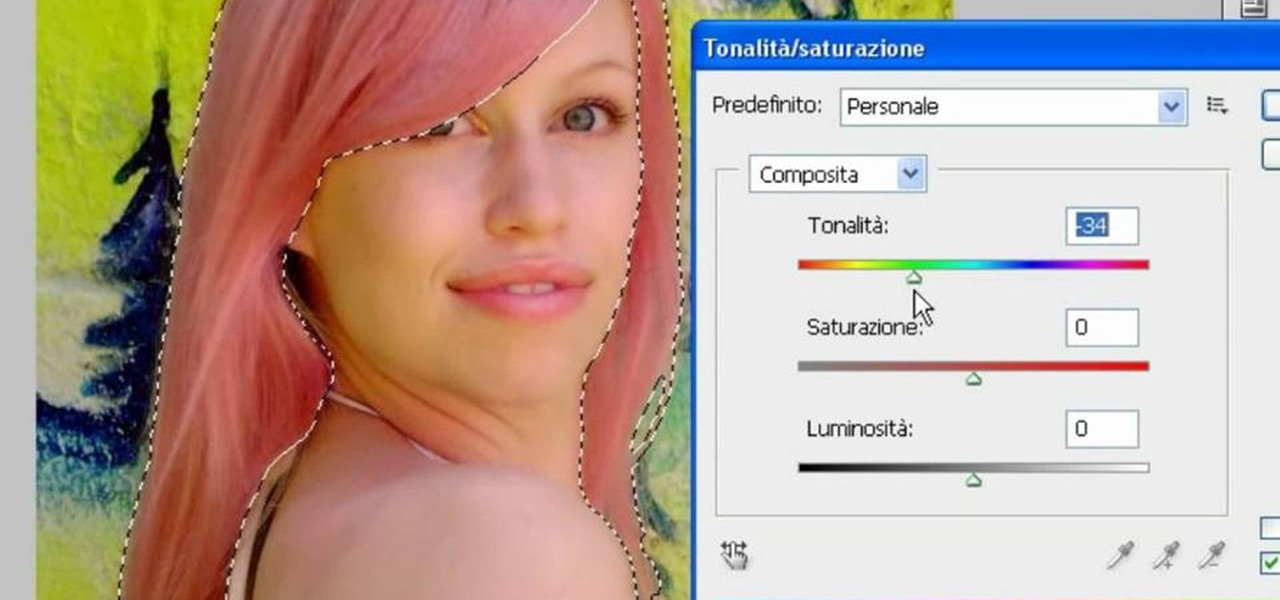
In this video, we learn how to use PhotoShop to change hair color.. First, select the mask tool inside PhotoShop. Now, zoom in on your picture and brush the hair that you want to change the color of. Zooming in and using smaller or bigger brushes will help you be more precise. After this, zoom out and press on the mask tool to create your selection. Then, select the marquee tool and right click and choose "inverse selects". Now, click on "image", "regulations", then "tonality/saturation". Now...
In this how to video, you will learn how to remove acne with Photoshop. First, open the image you want to edit in Photoshop. Go to the left column and select the healing brush. Next, set the brush size and find a part of the image that is clear. Hold alt and click. Next, start clicking on the areas that you want to remove. As you can see, the spots are replaced with the color that you chose earlier. Keep on doing this until the image has been completely healed. This video shows you just how e...
Hayley P. shows her viewers how to apply makeup with a foundation brush to reduce the appearance of dark circles around the eyes. If you follow her instructions, you will reduce the appearance of dark circles and you will look more awake.
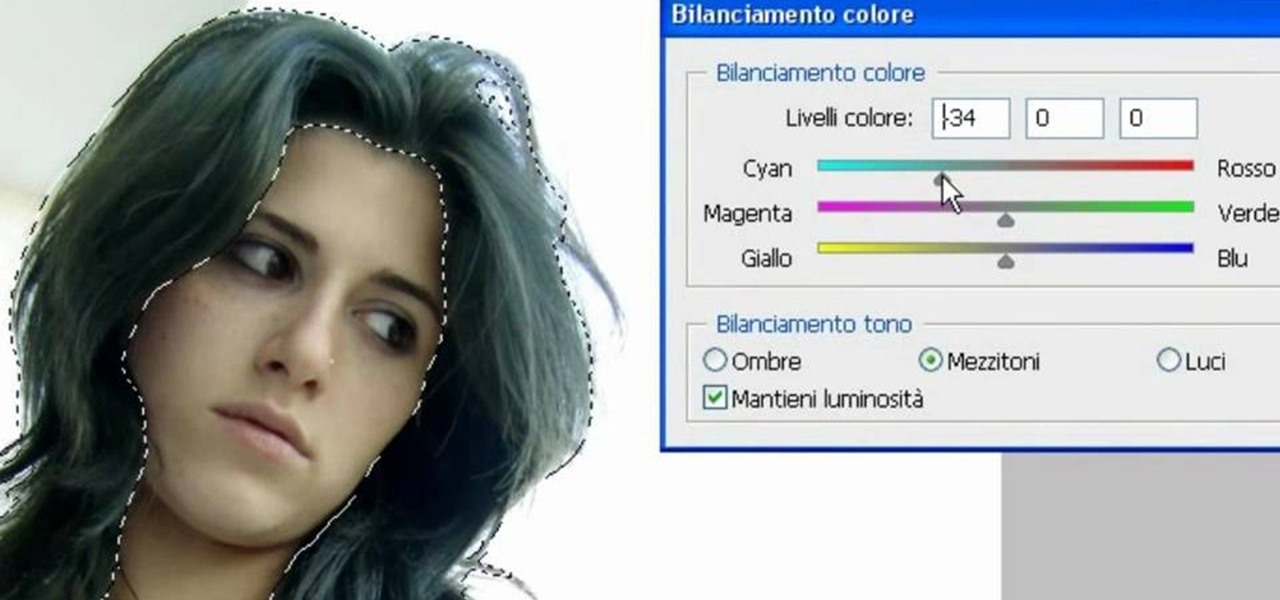
In this video, we learn how to change the color of dark hair in PhotoShop. First you will want to open up PhotoShop and open up the picture you want to change, zooming in so you can see the hair up close. Next, open up the mask tool, then use the brush to color the hair. This will only highlight the hair to change the color in the future. Use different sized brushes when you need to. Once you've done this, click on the mask tool to create the selection. Now, select the marquee tool and click ...
Use three tools to create a simple ponytail. Use a hairbrush, a bobby pin, and a bungee band holder for this look. Using a bungee band instead of a standard ponytail holder eliminates some of the issues typically caused by pulling hair through ponytail holders. Start by using a bristled brush to brush the hair to one location on the head. Secure one hook of the bungee band in the ponytail and wrap the tail around the rest of the hair. Wrap it around again, and secure the other bungee band hoo...