Trevor4Ever595 teaches you how to hack the game Space Attack using Cheat Engine. You start the game, select a level and pause it using P. Open up Cheat Engine, open the process list, select Firefox or whatever internet browser you are using. Then you will want to use the search box to search for the amount of money you have in the game. A lot of values will come up to the left of the search box. Go back to the game, earn more money and then search for that new amount. Cheat Engine will only r...
In this video tutorial by Task Tutorial we learn how to create a YouTube subscribe button using Adobe Illustrator. The first step to creating a button is to select the rectangle tool and draw a bar and then select a gradient fill. Next create the first color in the gradient and then the second color in the gradient. After that you'll want to change the gradient angle and also change the stroke width. Then you'll want to edit the stroke color to 9.6%. Then select the text tool and create your ...

If you aren't familiar with Illustrator software it is very similar to the photo-editing software Photo Shop. This video is a guide on how you can make a paper scroll by using Illustrator. You can follow along with the video and make the basic shapes and then re-size the pieces to look almost exactly like an ancient paper scroll. This would be something really neat to make if you needed a background for an old-timey looking photo or if you needed to make up invitations for a church function.
Converting bitmap images to vector in Adobe Flash sometimes can come as a nuisance. This video will give you a step by step tutorial on how to convert bitmap images to vector images in Adobe Flash.

This how-to video is about how to enable the commenting tools in the free Adobe Reader using Acrobat 9 Pro and Acrobat 9 Pro Extended.

In this video tutorial, viewers learn how to create a cartoon cloud using Adobe Photoshop. Adobe Photoshop is a graphics editing program. In this video, viewers will learn how to use multiple layers, layer options, how to create a lighting effect and use of gradient options. This video provides voice narration and a visual demonstration for viewers to easily understand and follow along. This video will benefit those viewers who enjoy designing and creating cartoon or animation images on the c...

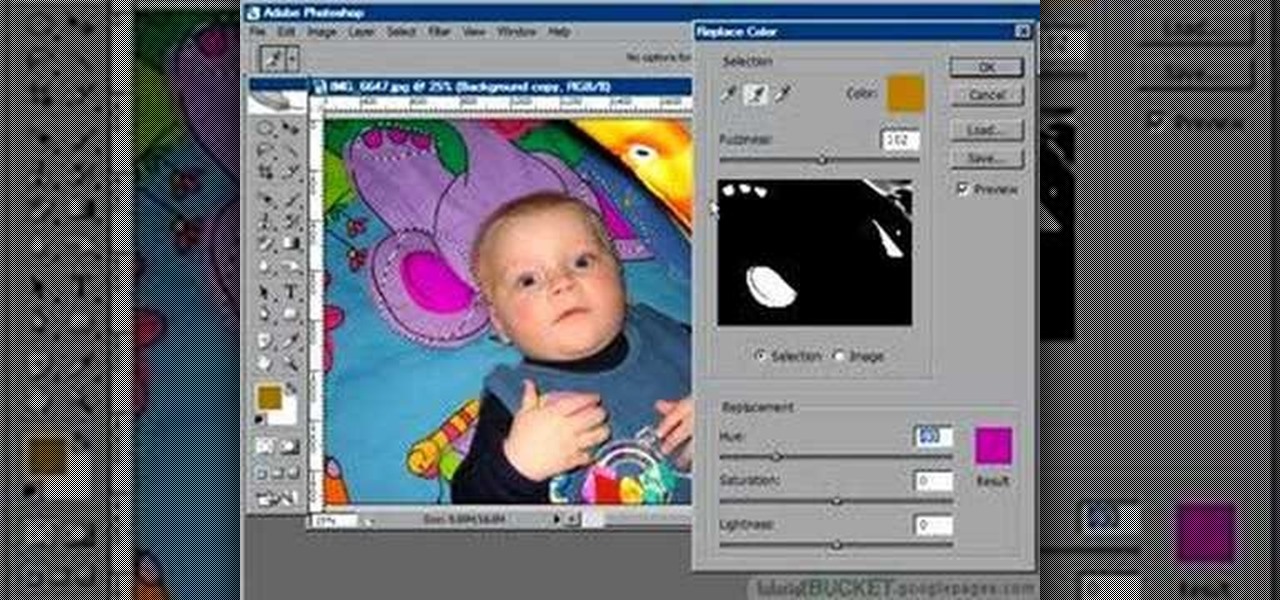
The replace color command is a nifty tool in Photoshop that enables you to change a color in an imagine very quickly and effectively. The tool requires that you make a copy of the original layer, as the replace color command is a destructive function. It requires parts that you want replacing to be selected first, to change the color of the desired areas. The result is a very realistically edited image, that is extremely fast and easy to accomplish.
Open a document and change the background to black. Make sure the foreground color is white, now simple use the text tool and write whatever you need to.
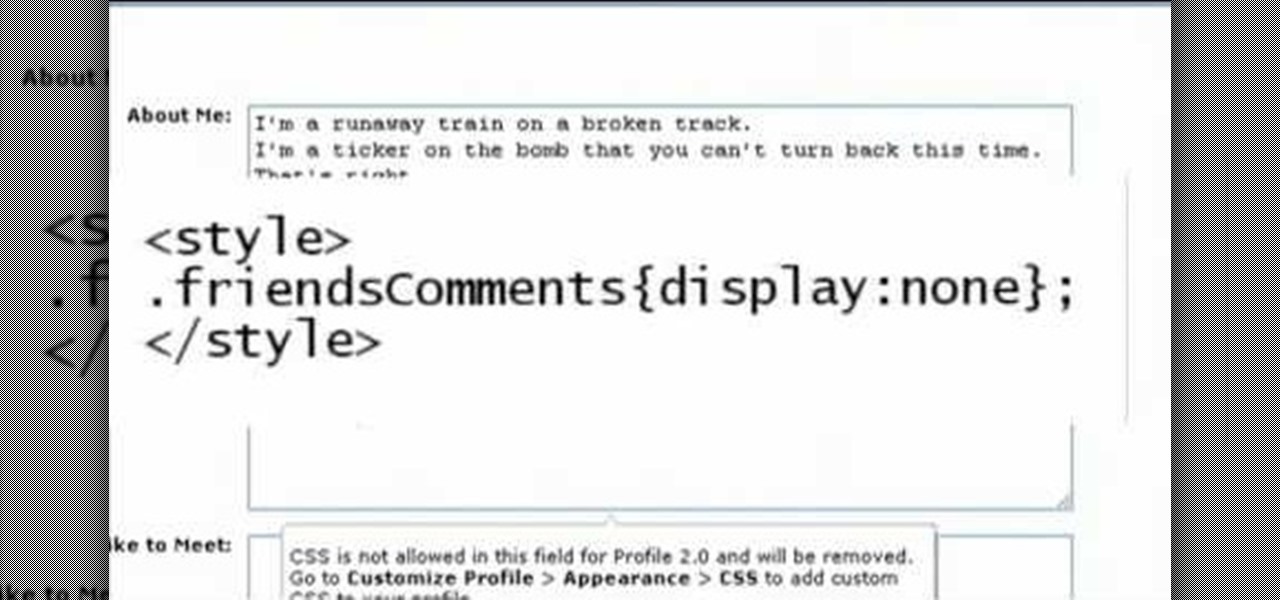
Want a bit more privacy in your MySpace account? Here's how to hide comments in MySpace. After you login, you should see a button that says 'edit profile' near the top. If you have a MySpace 1.0 profile you have to go to the 'About Me' section and at the bottom of it type this exactly like you see it here
From task tutorial.com that how to create an envelope icon on illustrator. First draw a rectangle change the angle to 90 degrees then select gray color, select pen tool draw a shape and then go to layer select duplicate then rotate the shape using left mouse button by selecting the rotate tool. Now using down arrow key move the shape to down ,choose select tool and resize the shape then select the path go to gradient and change it angle to 90 degrees. Finally select the layer and go to effect...
Step 1: Film yourself in the first position which you want your audience to see. Step 2: Film yourself in the second position you want your audience to see.
In this four-part video, learn how to create a CMS with PHP and MYSQL. The basics of a simple CMS are split up in the following four parts:
New to Apple's Aperture 2? Aperture 2 offers photographers a streamlined way to speed through edits, make essential adjustments, and deliver photos online and in print.
Creating curves with the pen tool in Adobe Illustrator is a good challenge. Check out this video on both drawing and editing with the pen tool. Click once in a place and then drag. This pulls out the direction handles.
This image editing software tutorial shows you how to redo levels settings in Photoshop CS3. You've spent time working on adjusting the RGB levels of an image, or ANY levels settings and you make a mistake and accidentally lose those changes. The history panel doesn't have them so what do you do? Think you lost the last settings you used while using levels and you have to start over? Think again and watch this Photoshop tutorial to get them back!
This audio editing software tutorial will show you how to create, setup, and use instrument tracks in Logic Pro. First, Connor Smith shows you how to pick instruments from the library browser in Logic Pro. Then, learn two different ways to create instruments in the Mixer window (first with manually inserting instruments, and then by using the channel strip settings). If you want to learn how to use instrument tracks in Logic Pro, this tutorial is a great place to start.
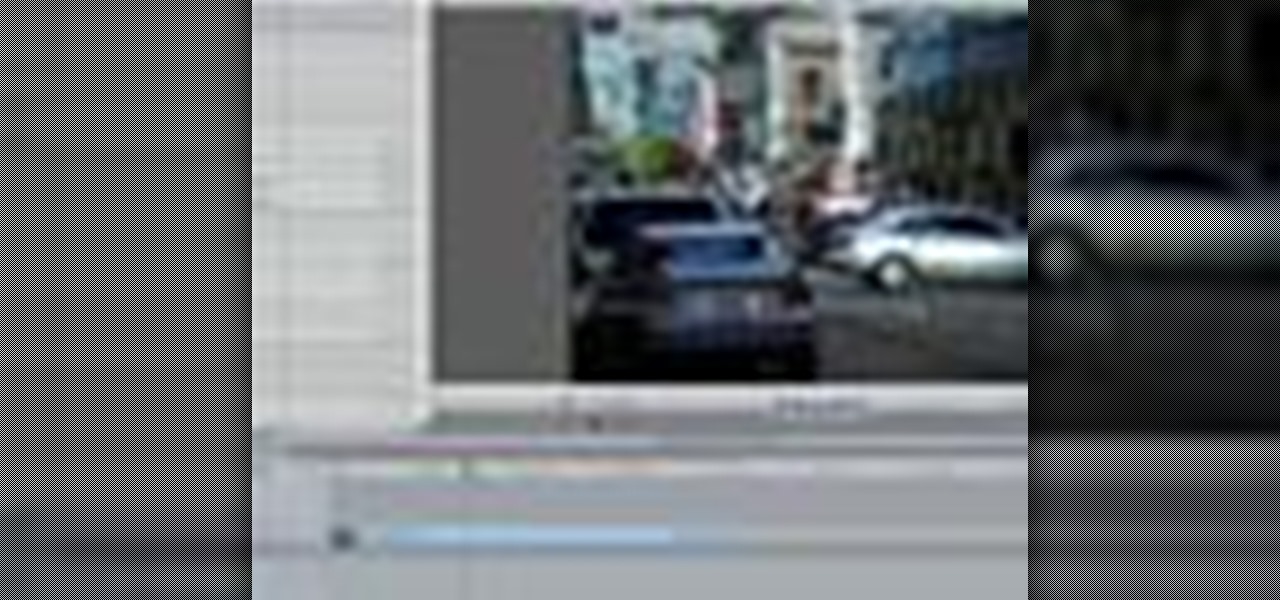
Ever needed to fix a clip where an unwanted or unexpected object appears in the scene? A car is suddenly passing across or a stage hand got in the shot by accident? And re-shooting is expensive or impossible? You would be facing hours of tedious frame-by-frame rotoscoping to get rid of the pesky element in your video...
Don't waste time at the store looking for the perfect photo album to put your vacation photos in. If you have iPhoto, you can do everything right from your computer. This Apple iLife tutorial shows you how to choose, organize and edit your photos, add them to a collection and turn them into a full color photo book. You do the work in iPhoto, then send it off to Apple to be professionally printed and bound - no cheesy Hallmark photo album necessary!
This tutorial shows you how to install Audacity and install the LAME mp3 encoder to make Audacity ready to export mp3s. Part two goes over editing basics using the free recording software Audacity. By the end of this tutorial, you will be able to create mp3 podcasts in Audacity.
Like most of us, you probably recorded some of your favorite memories onto a VHS tape. Preserve the good times by transferring the tape to a DVD.
Create and edit favorites with the Faves Gallery widget on your myTouch 4G! This clip will teach you everything you'll need to know to shoot high-quality, high-definition video. Whether you're the proud owner of a T-Mobile myTouch 4G Google Android smartphone or are merely toying with the idea of picking one up sometime in the near future, you're sure to be well served by this brief, official video tutorial from the folks at T-Mobile. For complete instructions, watch the video!
When you're searching for a contact to message, sometimes it's a little better to see a face than a name. But it's even better to have both! With the Android OS on the new Samsung Galaxy Tab, adding photos to your contacts is a breeze. Select APPLICATIONS < CONTACTS and select your preferred contact. Choose EDIT and tap the blank photo space in the upper left corner. Press TAKE PHOTO or ALBUM to add the picture. See how in this video.
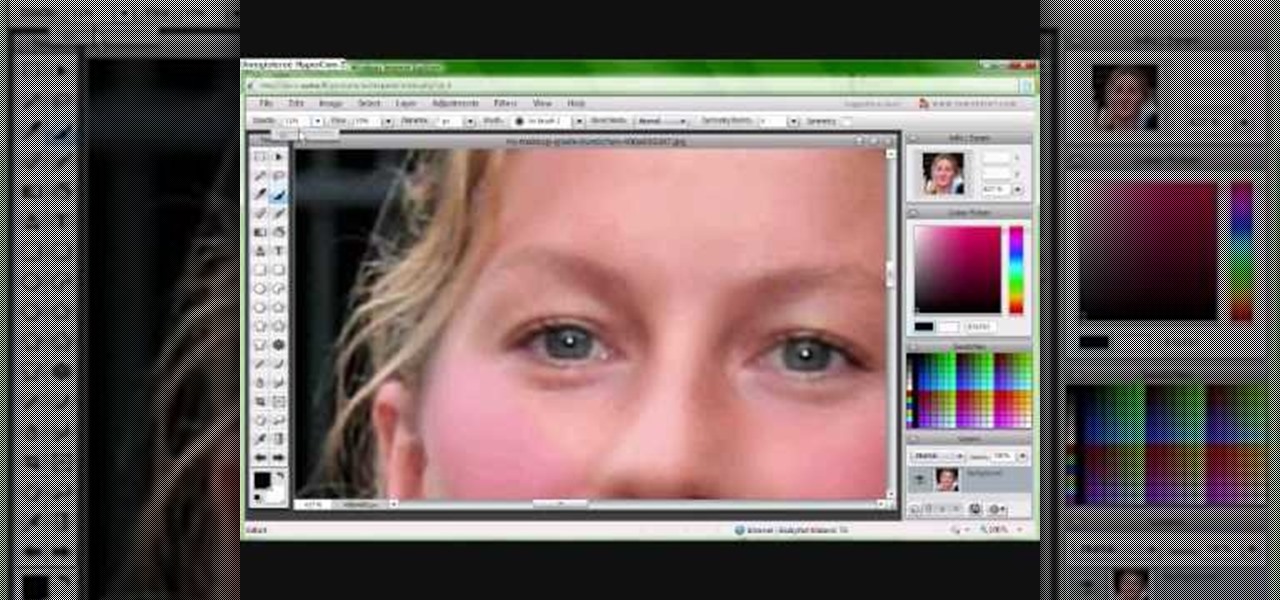
In this tutorial, we learn how to put makeup on photos with Sumo Paint. First, load your photo to this website and then open up the editing options. You will see a display of different colors on the right hand side that you can use to color the photo. On the left hand side are the tools you can use to do different effects to the pictures. Use the smaller drawing tools to apply makeup to the eyes on the photo and make different things appear. When you have finished the photo and adding on diff...
This video is basically a detailed round-up of the Samsung Omnia II i920 camera. All its features as well as the overall picture quality of the camera is shown in the video.
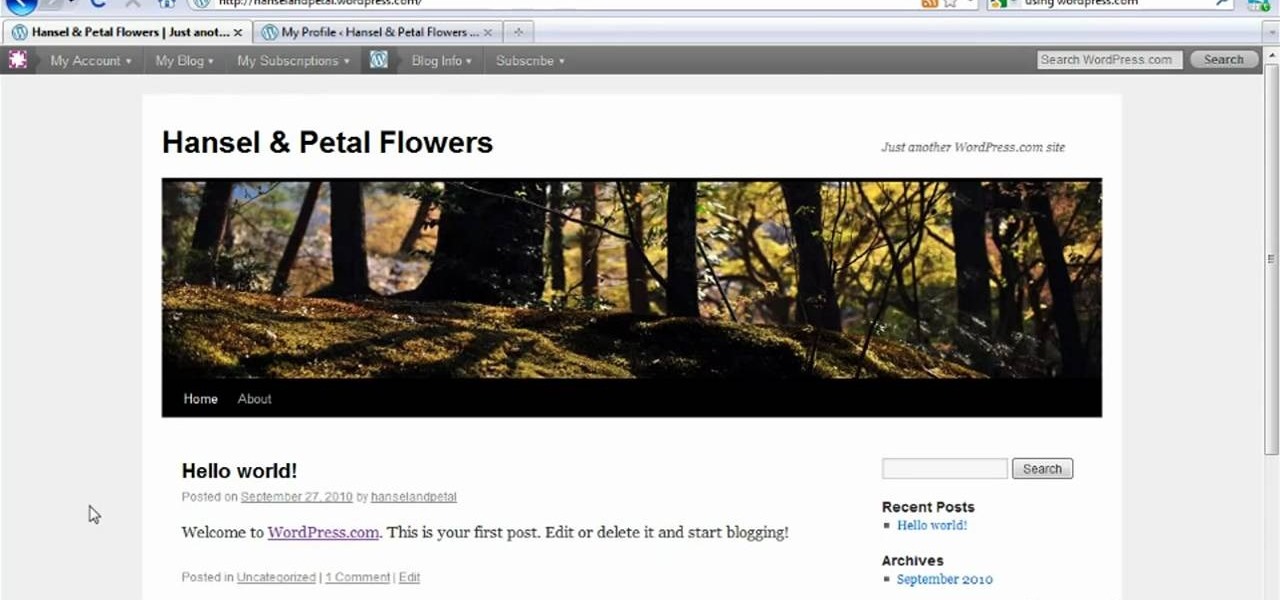
Learn how to make changes to your public profile on WordPress.com. Every version of WordPress brings with it new features, new functions and new ways of doing things. Fortunately, the very same technology that allows an open-source blog publishing application like WordPress to exist in the first place also makes it easy for its users to share information about the abovesaid things through videos like this one. Take a look.
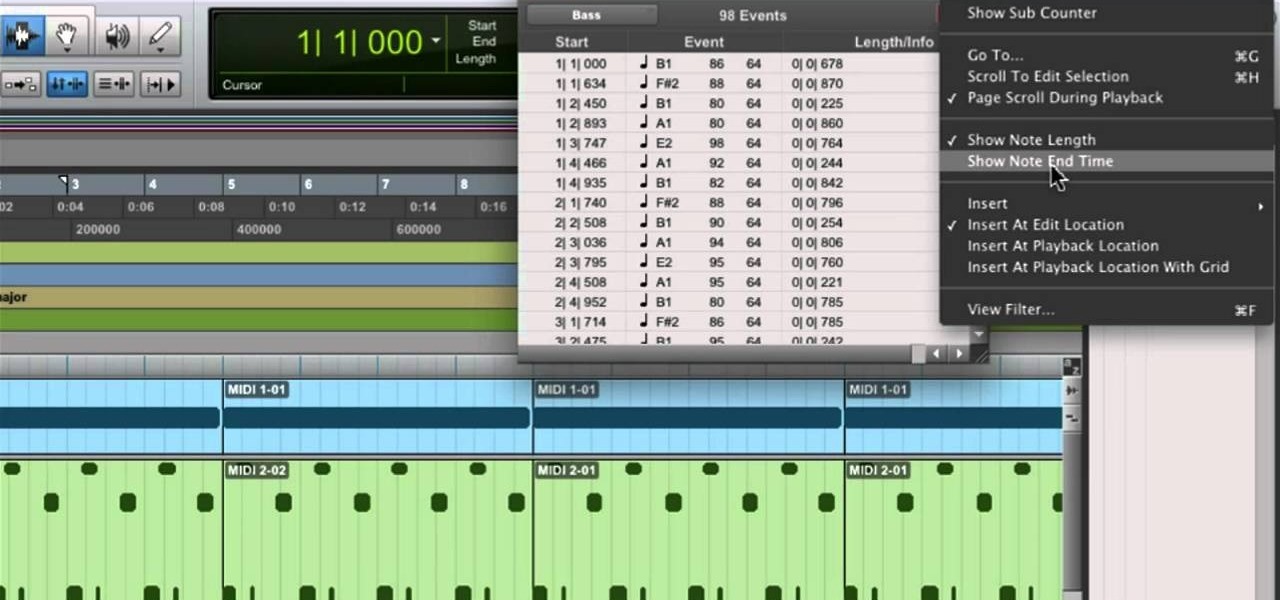
In need of a quick guide on how to use and make edits with the MIDI event list within Pro Tools 9? This free video software tutorial from Lynda presents a complete and thorough overview of the process. Whether you're new to Pro Tools or just new to Pro Tools 9, Avid's first native, software-only version of their popular Pro Tools DAW, you're sure to find much of value in this brief view.
In this tutorial, we learn how to use the world clock feature in Ubuntu. First, you will go to the upper right hand side of the screen and click on the calendar. From here, click where it says "locations". Then, click on where it says "edit and then click from the preferences where it asks for a location name. Then you can click on the time zone drop down menu and see the times of a ton of different places. Add these to your clock and then when you're finished, you can have the weather displa...
In this tutorial, we learn how to draw substitutions in Toon Boom Animate. When you are inside of the program, you will see the 'drawing substitution' preview window on the side of the screen. Create the animation how you like it, using different shapes, colors, etc. You can use the high camera map to see how it looks an make a mat to put around the stage. Once you're finished, save this to your computer and then extend out the timeline. To animate him, hit F5 and then drag out the length of ...
In this tutorial, we learn how to create music with JamStudio. First, open up JamStudio and then open up some beats onto the screen. After you do this, you can add in loops and then change the sound of the tempo. From here, you can add in chords and also change in the bass or piano sounds. There are a ton of different things you can edit and change in here. Play the audio as you make it to test out how it sounds. Once you get the right combination put together, save it! Have fun creating musi...
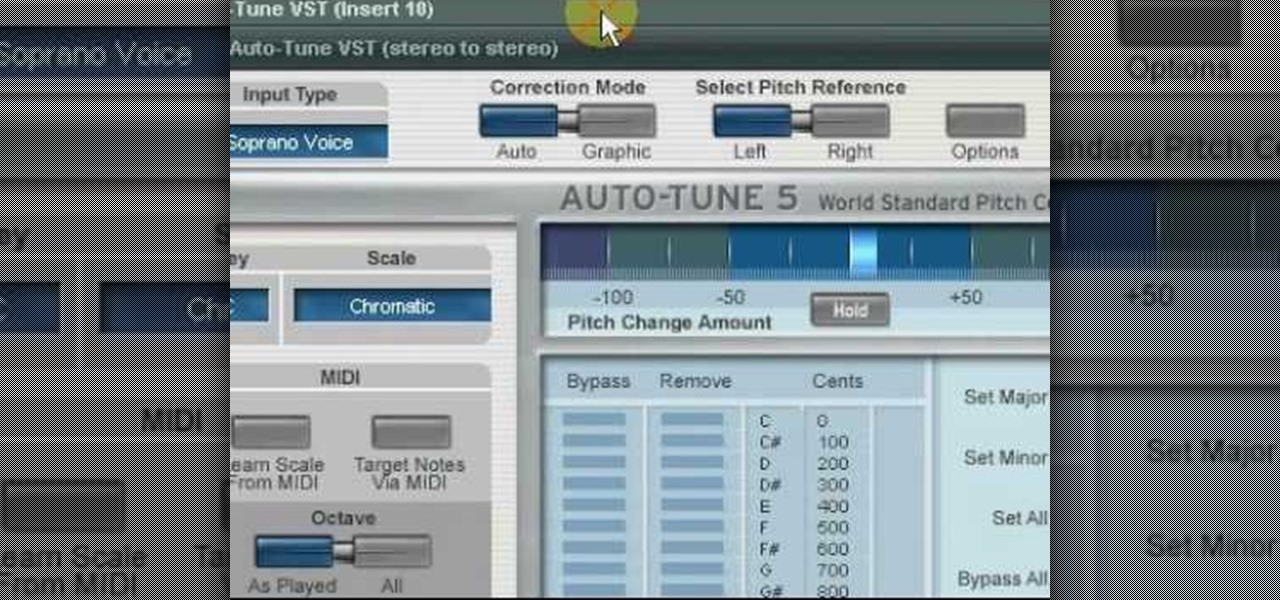
In this tutorial, we learn how to use vocal effects and Auto-Tune in Fruity Loops. First, load on your audio and then set it to a channel FX. Add in the effects that you want and then drag them into the right hand side column for the different effects. From here, you can use the mixer to add in different beats and tunes. Then, you can add reeverb to the audio and then change the settings for it how you would like it. Continue to edit the different effects as you continue to scroll through the...
In this tutorial, we learn how to create a progressive house synth in Reason 4.0. Start with the mixer and add use the combinator. Right click, then create a polysonic synthesizer. Bring it down to four and then click the "show programmer" button. Select one, two, and three and then make sure your octave is four. Bring up the octave on the second so it's five. For the third oscilator, make it analog and make it a sign wave. This octave will go down one so you get some bass. Go to the mixer an...
In this video, we learn how to make day into night & create giants with film tricks. When doing this, make sure you don't show the sky because it will be a dead give away. First, set the correct exposure and make it indoors so it's blue. Then, the shutter should be set around four and there should be clouds in the sun. Add some blue and saturate as much as you can. When you shoot, you will get the darkness that you need. If you want to show that it's still daytime and almost night, then make ...
This video tutorial is in the Education category which will show you how to calculate standard deviation with TI graphing calculator. First you got to enter the data in to the calculator. Go to stat and click on enter. This will edit a list. Now you type in these numbers: 50, 20, 33, 40 and 55. Then press stat and click on enter. This will bring up the 1-var stats page. Press the "2nd" button and L1, because all our data is in L1. Click on enter and you will get all the data that you will nee...
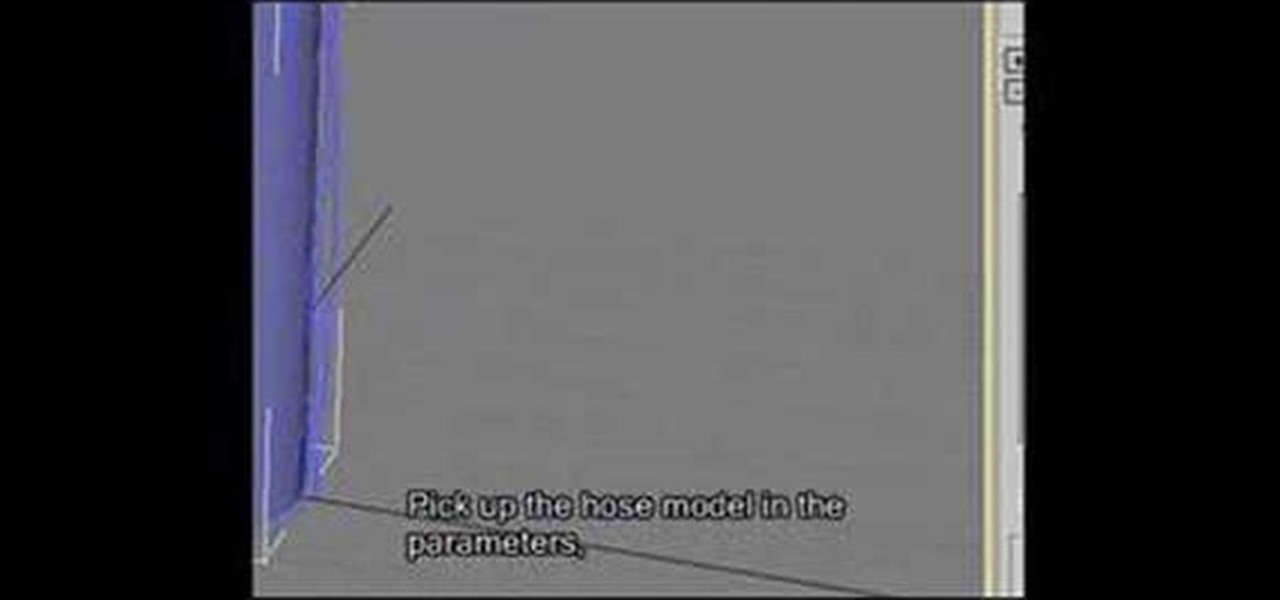
In this video, we learn how to apply normal maps in 3D Studio Max. First, go to the cylinder button and name it. Then, change the radius and height how you would like them. After this, select "extended primitives" from the drop down menu on the top. From here, enter in the diameter and sides for the round hose and then select the diameter of the cylinder. This will create a cylinder but with the look of a hose instead. Use the bottom toolbar to edit the sizes of the map and then save this whe...
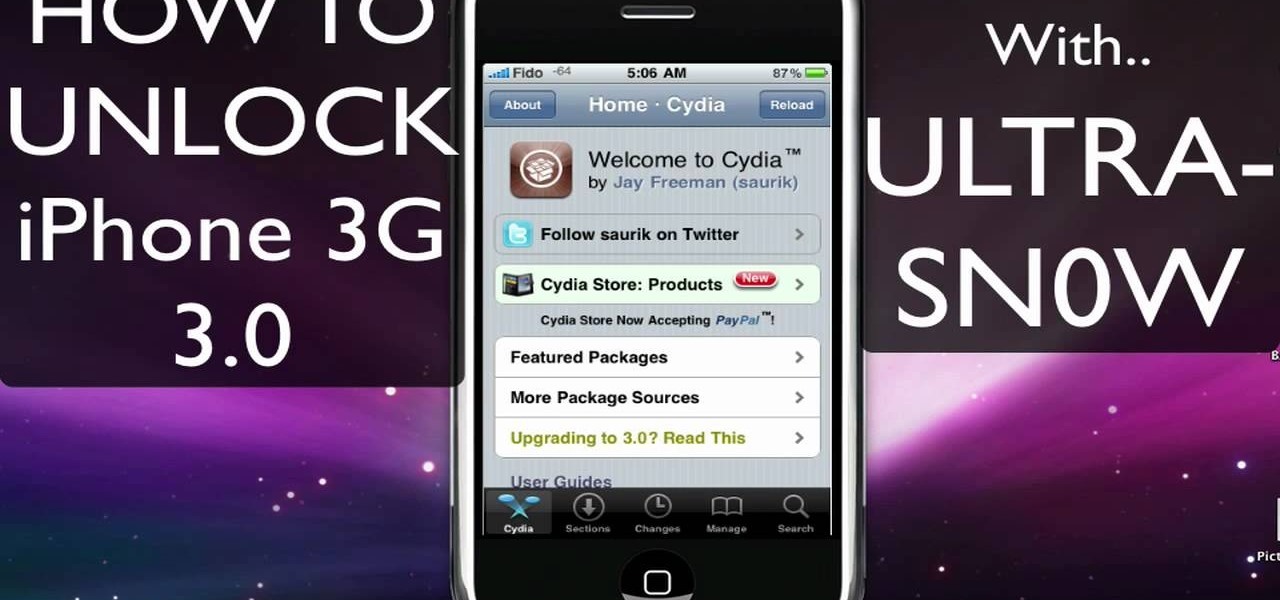
This video tutorial is in the Electronics category which will show you how to unlock your iPhone 3G on jailbroken firmware 3.0. By unlocking your iPhone you can use any GSM Sim carrier in your phone. For example, if you have an AT&T iPhone and you put a ROGERS Sim card from Canada, your iPhone will not accept it because it is LOCKED at AT&T. This is a software to unlock iPhones. Before you can unlock, your iPhone must be jailbroken. Open Cydia and hit manage. Then hit sources. Now select edit...
In this tutorial, we learn how to do a side by side video effect in Sony Vegas. First, open up Sony Vegas and open up a couple of clips to your time line. After this, make the two clips the same length by pressing down on the control key and moving them with the mouse. From here, return the videos to the start and then right click the track motion button. Reduce the width and the height to half of what they were before. Then, move the X position of one to -180 and the other to 180. Now both w...
In this tutorial, we learn how to optimize a PDF document in Adobe Acrobat 9 Pro. This will adjust the size of the PDF to better adjust your need and work flow. Fire, go to file and then go to properties, then you will be able to see what size the file is. If you would like to change this, go to the PDF Optimizer, which has an "audit space usage" button. From here, you can change the compatibility level and also change the compression and the color bitmap resolution. After you are done editin...
In this video, we learn how to use automation in Studio One. Controlling is a system you use to control the devices that control the software. Control link has a window on the song interface in the upper left hand corner. You can quickly move parameters as you edit the automation. Make sure you change it if it's for an instrument or an audio track. Add an automation track to the window, by clicking the "A" button that will give you sounds for the same instrument. This will avoid automation en...
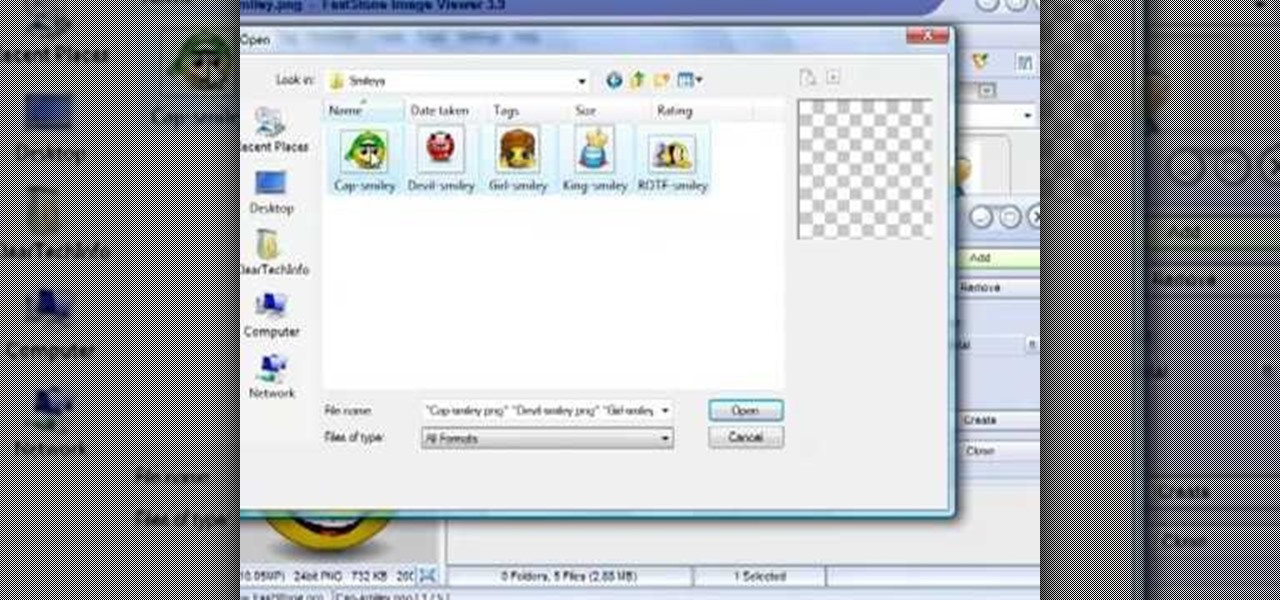
In this tutorial, we learn how to make an image strip using FastStone Image Viewer. First, open up the images that you want to have inside the strip. Then, open up Fastone Image viewer and find the location of the images. From here, go to "create", then "image strip builder". This will bring up the builder window where you can add in the images you want to see on the strip. When finished, click on the "create" button. Now, the strip will come up on your computer in a new image and you will be...
The Western film, once the end all be all of great American filmmaking, is now rare to behold at all at the movie theaters. Whereas in the old days directors made the films about true American gung-ho spirit and handsome, stoic John Wayne cowboys championing the greater good, these days the genre gets ruined by CGI and other absurd additions.