If you need to decorate your house fast for the holidays, then supersized decor is the way to go. Yeah, you could buy those tacky big Christmas ornament balls fastened with big red ribbons at the store, but if you're looking for elegant Christmas decor then making it is the way to go.

All you need is some stiff paper, like craft paper or card stock. Then follow this video to fold two pieces (make sure they are roughly the same size) into a lovely and easy gift box. Then wrap it and stick it under the tree!
By using the Sweet Treat cups, cardstock and a few extra crafting supplies, you can incorproate delicious jelly beans (or any other small, autumn-colored candy) into a crafted paper turkey. This is a great little decoration to put on the kids' table this Thanksigving season!

This video explains how to make Vincent Valentine's arm guards in under 20mins. The supplies needed to complete this task include card paper, tape, gold spray, pencil and scissors. A ruler must be used to measure the length of your hand and fingers so you can correctly size the arm guards. Card paper is the cut into many small circles and placed around all of the fingers and then painted with gold spray. The hand portion is created by wrapping your hand with card paper and pulling tight befor...
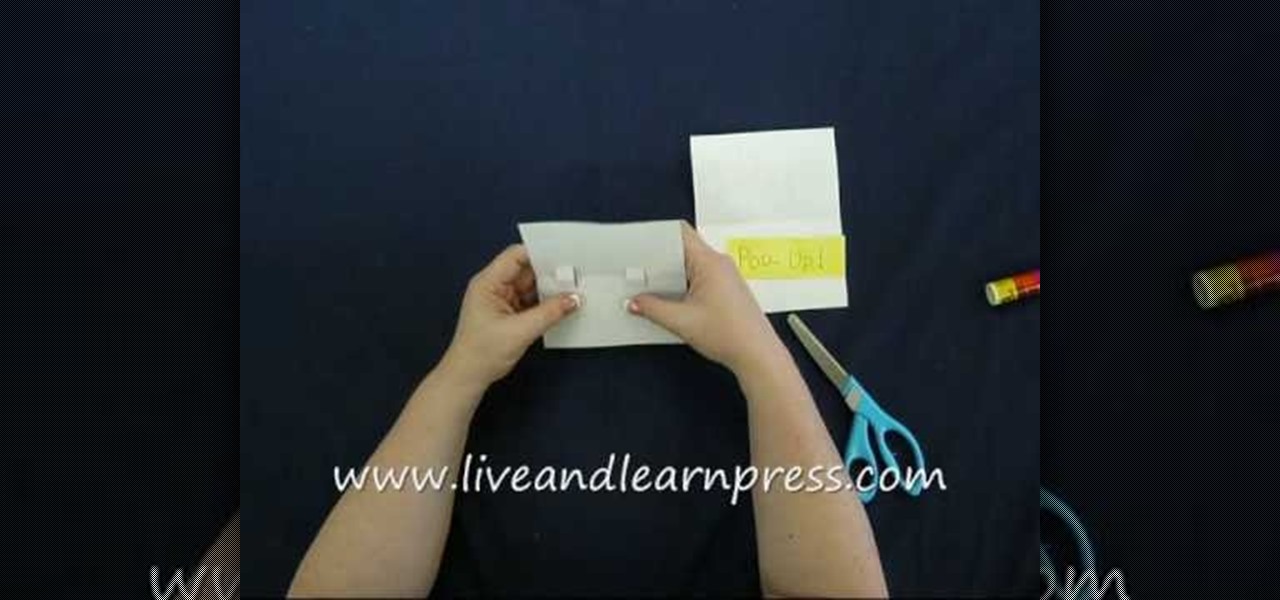
In this tutorial, we learn how to make a pop-up book. First, take a piece of paper and fold it in half. From here, take another piece of paper that is the same size and fold it in half. Then, cut small slits in the middle where you folded it. Then, fold these slits into the middle and pop them out from it. Then, fold the paper again and it will be a stand for the middle. Add glue to the middle and then place what you want to pop up onto this. Let it dry and then fold it down. Then, glue the m...

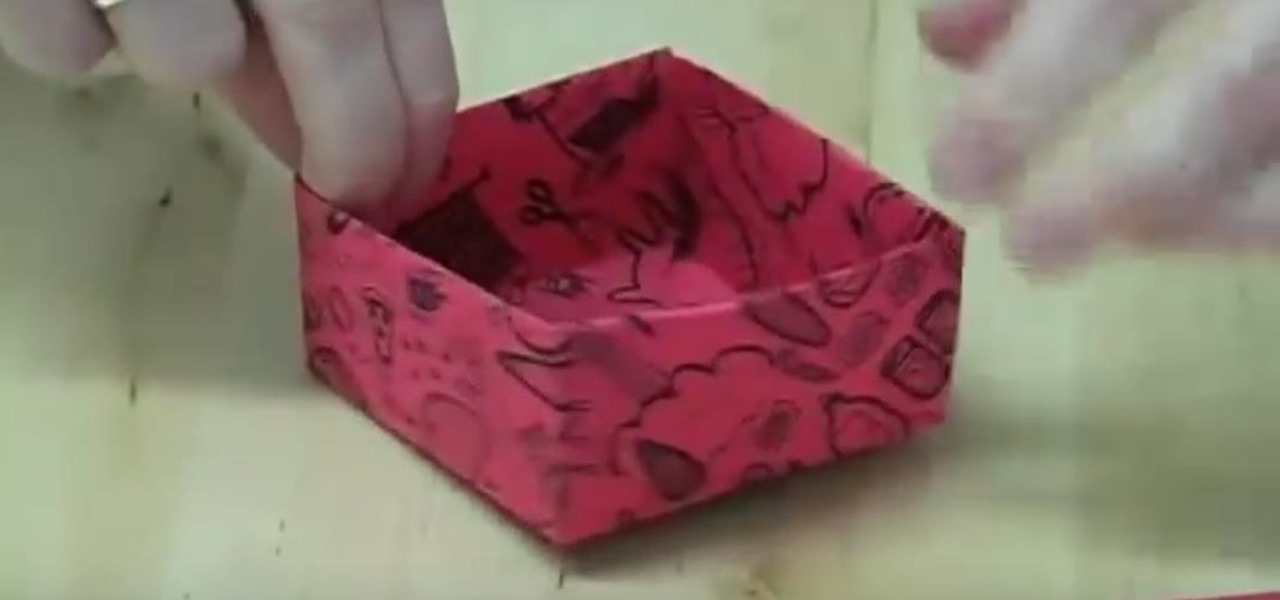
Looking for your next craft project? Why not a bright and festive paper box? This video guide from Dawn of Dawn's Stamping Thoughts will teach you everything you need to know. For all of the details, and step-by-step instructions, take a look.

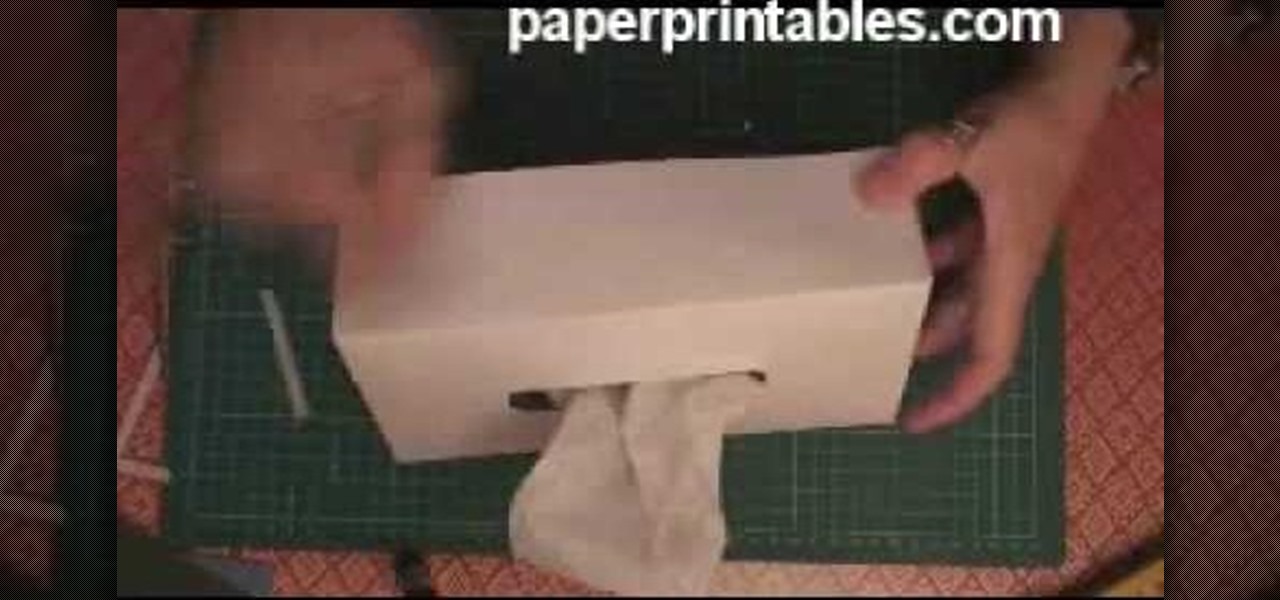
In this video, we learn how to make a decorative tissue box cover. First, you will need to get a piece of paper in your choice of color and set your tissue box on top of it. Use different colors of paper to trace out the edges of the box and then you will tape them all together. Make edges off the paper when you trace them so they fold over. When finished, you will put this onto the tissue box. You can also decorate this with any accessories that you would like to add a personal touch to the ...
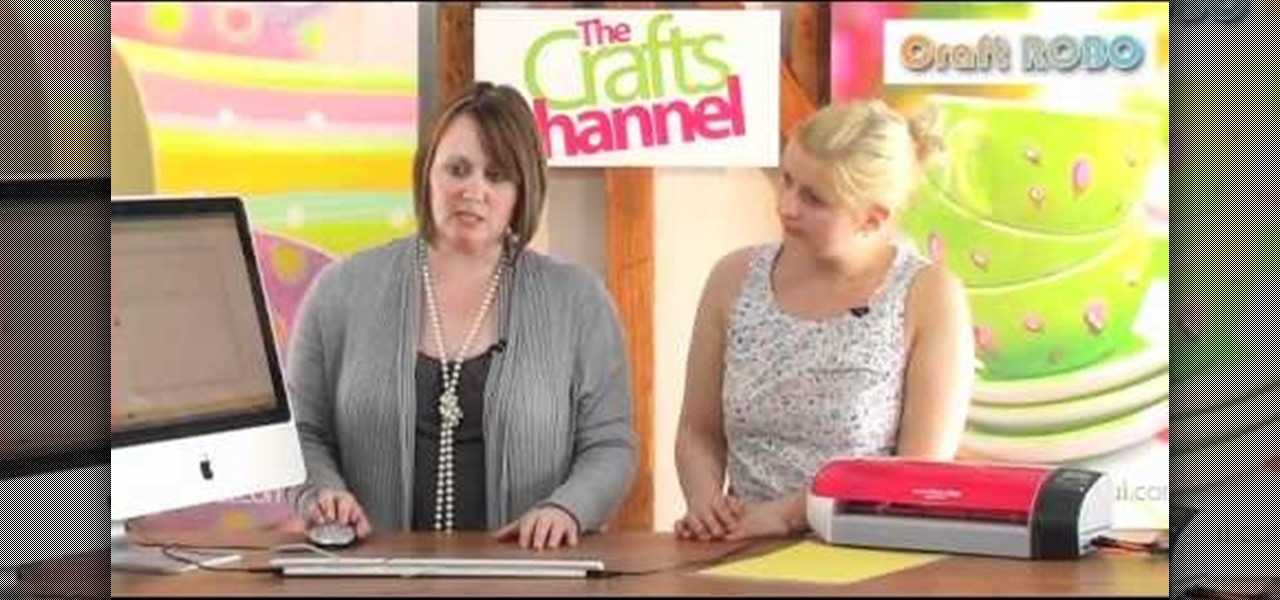
Want to create complex paper cut outs that a die cut machine just can't handle? One option is to use the Craft Robo, which will let you create your own welded shapes and patterns on your computer and then cut them out on your paper.
In this video, we learn how to make a great 3D paper snowflake. First, fold a square blue piece of paper into a triangle. Then, draw lines from the middle to the top going in the triangle shape. Cut these lines on both sides, avoiding the middle and the very top. Make sure you don't cut in the middle either. After this, open up the folder and take the inside. Roll it up and then tape it together so there's a ring on the inside. Flip it over, then make another ring on the top side and tape it....
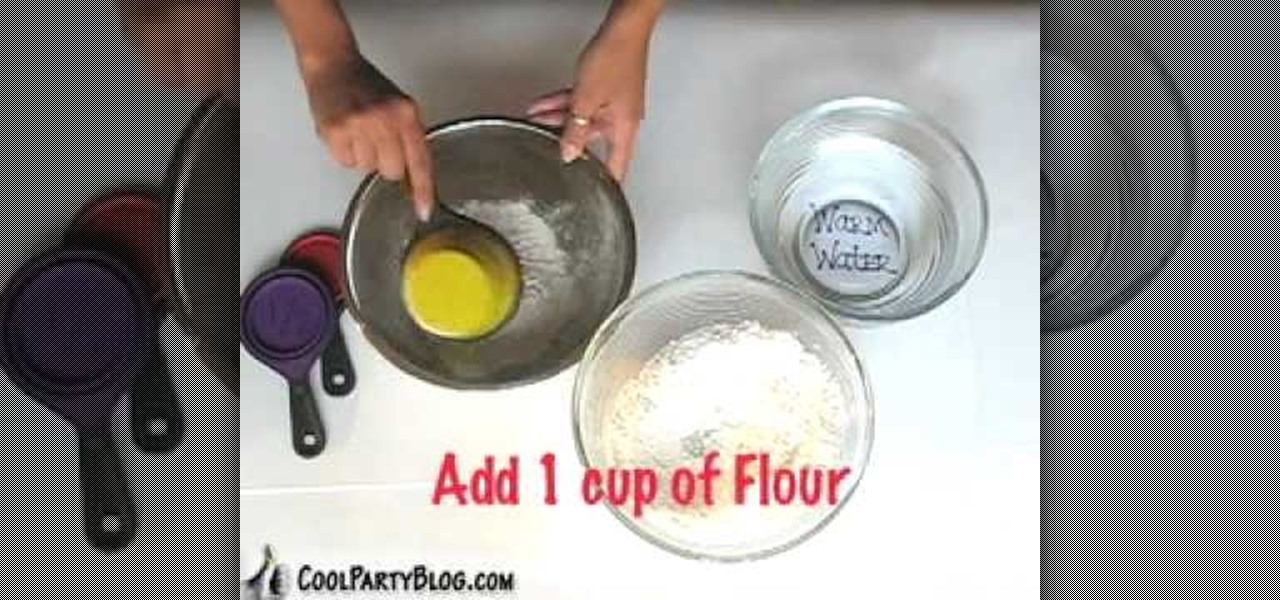
In this tutorial, we learn how to mix and make paper mache. To do this, you will need: flour, water, and a large mixing bowl. Start off by pouring the flour into the mixing bowl, then adding in warm water in the same amount as the flour. After this, mix it together until you have a thick consistency. It should not be like water, more like a thick soup. Add more of the ingredients until you have this consistency. After this, dip your strips of paper into the mixture. Use them to place on your ...
In this video, we learn how to prepare the mixture for paper mache. First, take a cup of flour and a cup of warm water and mix it together until well combined and a paste is made. Add in more water or flour if needed to make the right consistency. After you have done this, continue to mix until there are no flour lumps left in the mixture. Once you are finished, use this to dip your newspaper into so you can correctly make your paper mache. Make sure it's not too thick or too thin so you have...
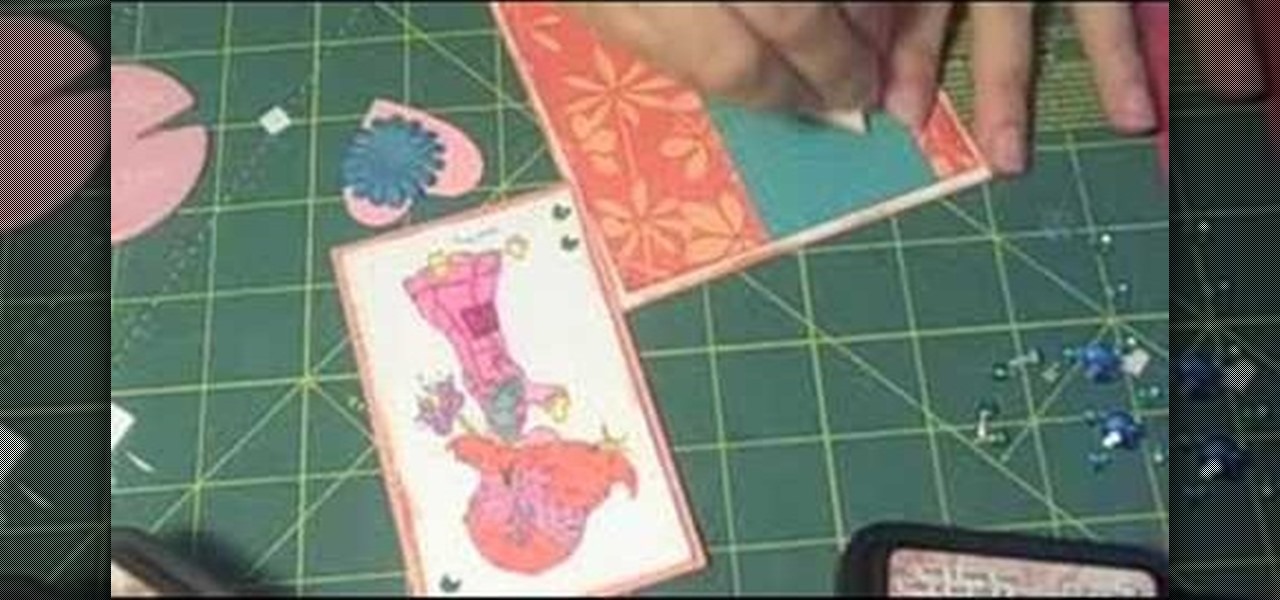
In this video, we learn how to make a jingle bell card using Cricut Storybook. you will need the Cricut Storybook cartridge and Cuttlebug Music Notes folder to do this card. First, you will take a cut out of the word "jingle" that has a bell attached to the bottom of it. You can find this in your Cricut crafting books. Next, apply a checkered green paper over a forest green card stock. Next, grab a holiday embossed white paper and apply a ribbon to it, then glue this onto the checkered paper....
In this tutorial, we learn how to create an annotated bibliography. Make sure to highlight all your citation information, then type it into your bibliography page. After you have it written down, type it out again in the proper citation format, making sure you use the proper type. Make sure you have all the proper information, and you don't forget any of the crucial information. An annotated bibliography is different because it will give a summary underneath the citation. This is only about f...
In order to make a pocket card out of an envelope, you will need the following: a used envelope, printed paper, adhesive, card stock, paper cutter, cuddle bug, an ink pad, stamps, markers, and crystals.
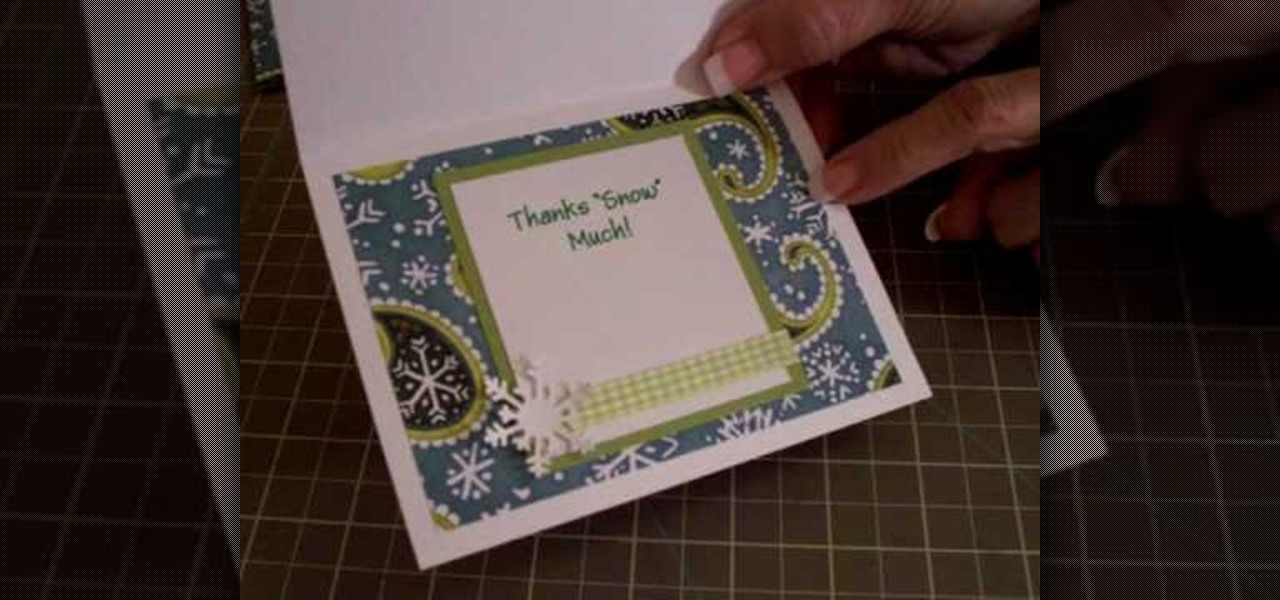
In order to make a thank you card for Christmas gifts, you will need the following: Winter Woodland cartridge, glimmer misty, pop dots, adhesive, gingham ribbon, and pattern paper.
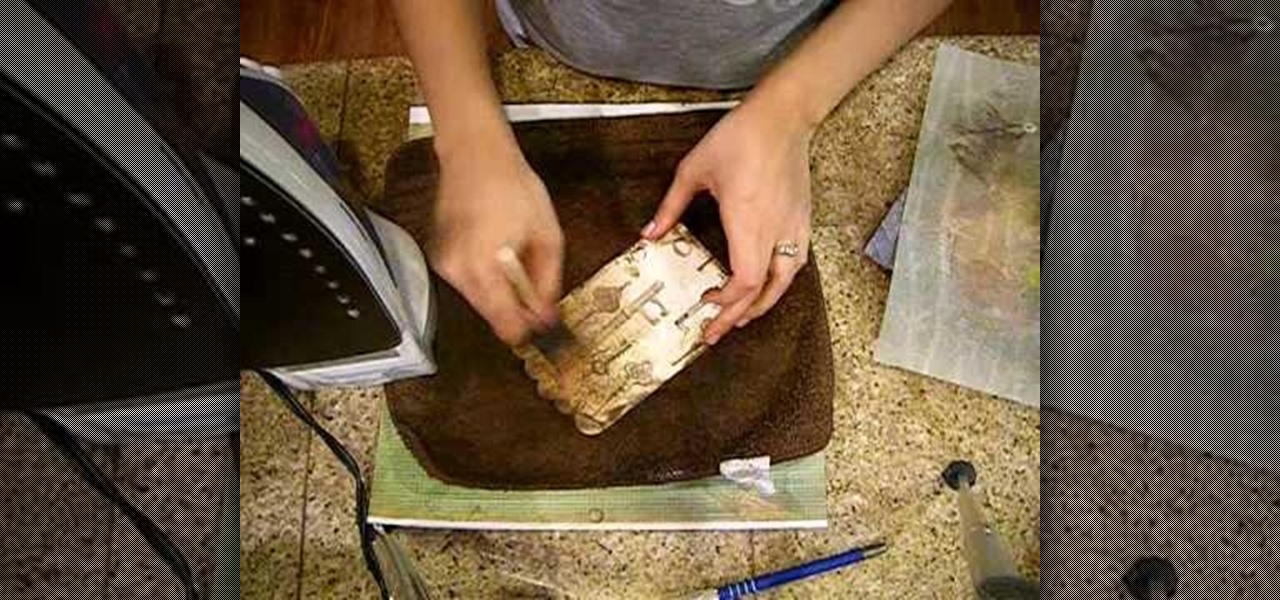
Crinkle top part and go over it with distress ink. Do edges front and back. Put extra ink on scallops. Spray with mustard seed and tattered jewels, olive vine and pine cone to add color. Place paper on pocket and iron on both sides. Spray with iridescent gold. Use brush to spread out. Iron again on both sides. This process makes it look aged. Take a film strip and spray with tattered leather. You want to use an iron when spraying grunge board with tattered jewels because it will make it seep ...
In order to make your own envelopes, you will need a piece of paper, glue, scissors, and optional decorating tools/stickers.
Make homemade trading cards of your family! These won't look exactly like baseball cards, or even feel like them, but they're cute and somewhat artsy depictions of your favorite photographs. You only need a few items (listed below), but make sure you have a nice photograph to transfer over. It won't look exactly like the picture, but it will look roughly hand drawn, but not quite. Definitely an interesting paper craft. Try it out. Experiment.
In this tutorial, we learn how to make a file folder organizer. First, you will need to apply double sided tape to paper, then apply a thicker cardboard paper over it. Now, cut most of the excess paper off, except around 1/2". After you have this cover made, apply tacky glue to some manila folders, and stick them into the cover you just made. After you complete this, you will be able to apply the backing to the folder as well. When you are finished, you can add different decorations to your f...
In this tutorial, we learn how to make mini paper square boxes. First, grab a piece of paper and fold two ends in so they touch in the middle. After this, fold the bottom up so it covers the triangles and they meet at the middle. Crease the edges, then cut down the edges on both sides where the crease is. Next, fold the sides in so you have a shape that looks like a sword. After this, fold the sides up, then fold the other sides in. When finished, push the creases in and you will form a box, ...
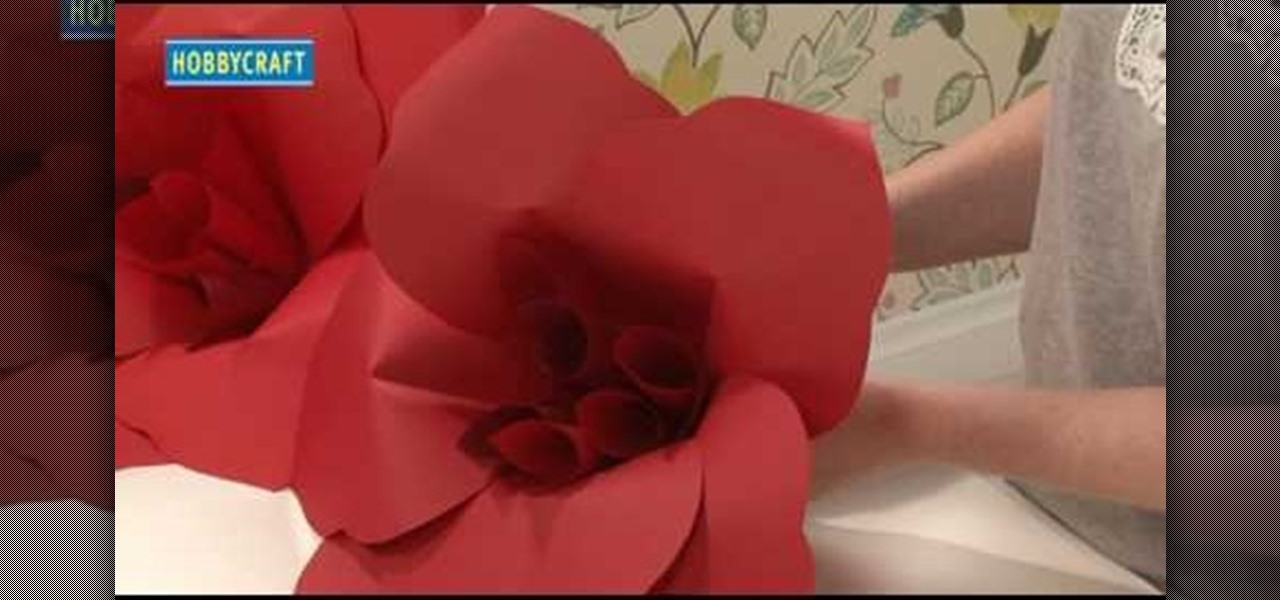
This video tutorial is in the Arts & Crafts category where you will learn how to make a multi-layered embossed floral gift card. Take a piece of 11 x 8 1/2 inch Stampin' Up card stock and fold it in half. Next you punch out layers of colored paper of rose red, very vanilla, regal rose and blush blossom colors of different sizes as stated in the video using the Boho Blossom Paper Punch. Now you take a Sizzix Big Shot Die and cut out a craft paper and set the cut outs aside. Now you got to stam...
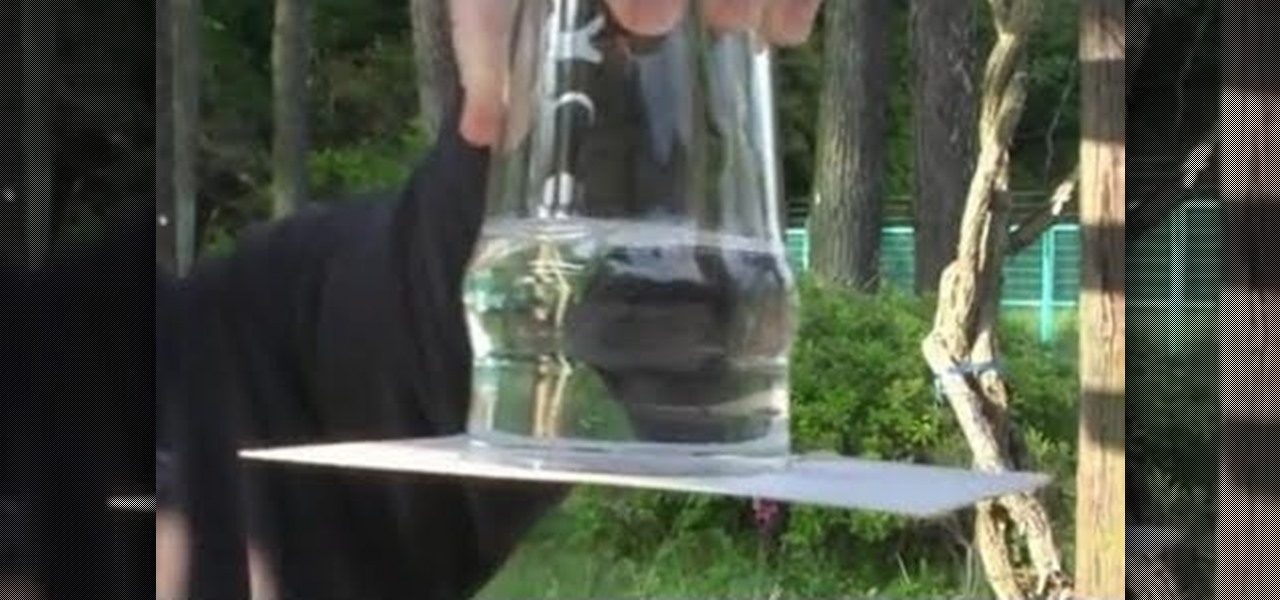
Paper is not known for it's strength as a building material. It is really amazing what paper can do in the right circumstance though. This video will show you how to use a piece of paper to hold the water in an upside-down glass. It's easy, the effect is very cool and sure to impress, and all you need are a glass of water and a piece of copy paper.
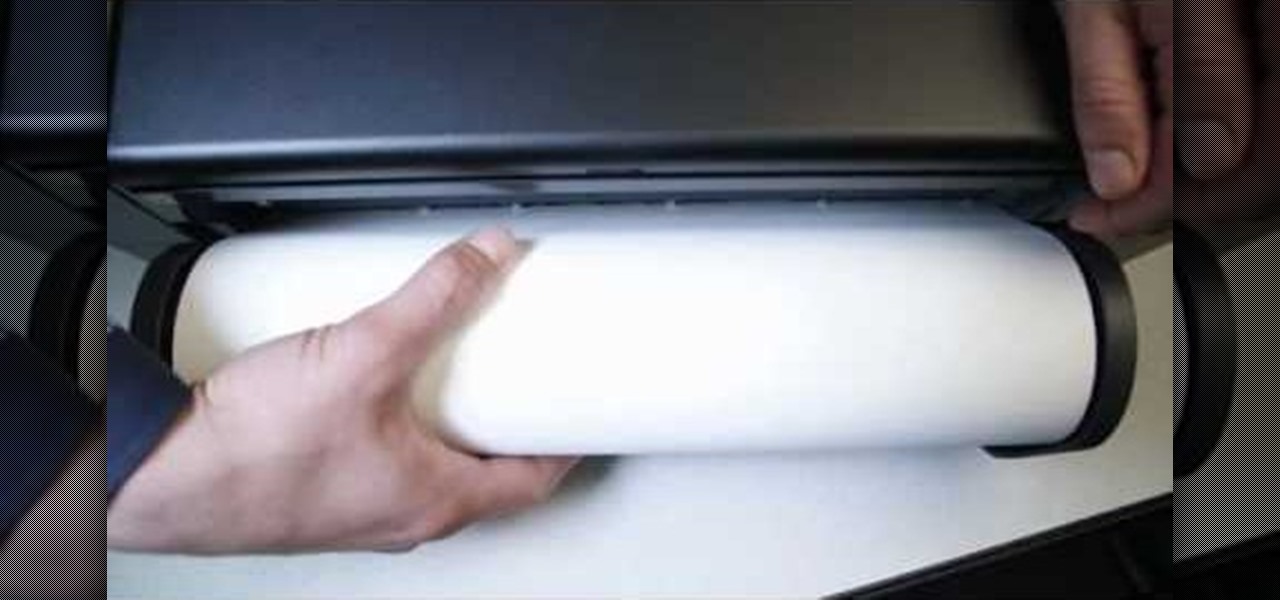
The Epson Stylus Photo R1900 printer can not only print on paper, but it can print from roll paper, too! No more single sheets of paper are needed, which is especially nice when printing banners or larger documents. Epson shows you how to load roll papers such as Premium Canvas Matte and Satin into the Epson Stylus Photo R1900 using the roll paper holders that are mounted on the back of the printer.
This video tutorial is in the Arts & Crafts category which will show you how to make a box out of scrap paper. Take a piece of square paper and fold it across both the diagonals to get an intersecting crease. Now fold all the points to the middle of the sheet and unfold them. Now take any point and fold it to the furthest away intersection point. Repeat with the other three sides. Then fold all the four points to the closest intersection point. Now you will see a square in the middle of the s...
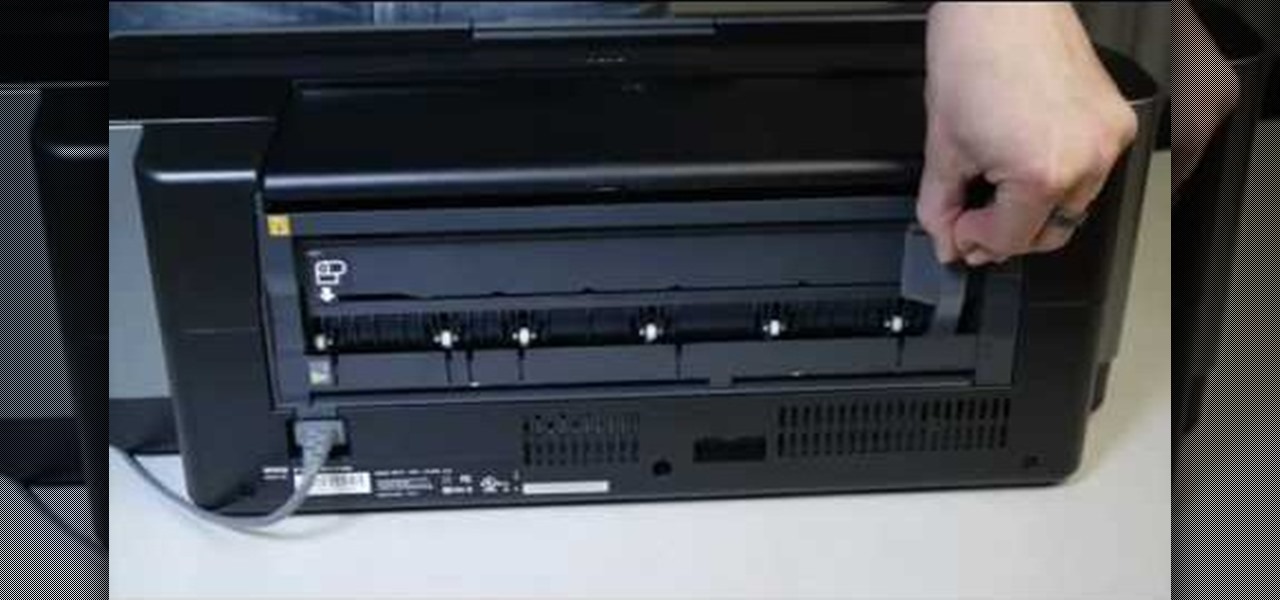
If you have the Stylus Photo Printer (R2880) from Epson at home, you probably figured out how easy it is to load paper into the printer. But what about fine art paper? Paper such as Velvet Fine Art and Hot Press and Cold Press loads into the printer slightly different. This video, straight from Epson, will show you how to load these kinds of papers using the rear single sheet guide.
Looking for something to toss at your teacher but don't have much time while her back is turned? No problem! You can assemble this paper airplane in the time it takes for her to write her name on the chalkboard. In 30 seconds or less you will have a totally flyable airplane to send flying through your chemistry class.
Not only is origami useful for making things that appear like they should be able to float (like paper swans), it's actually good for producing things that do — like paper boats. With this guide, you'll learn how to make a paper catamaran with origami, the traditional art of Japanese paper folding. For more information, including a step-by-step overview of the folding process, as well as to get started making your own floating paper boats, watch this free origami lesson.
Want to make a tough-guy paper swan in the manner of Prison Break protag Michael Scofield? This video tutorial presents a complete, step-by-step overview of how to make a paper crane using origami, the traditional Japanese folk art of paper folding. For more information, and to get started making your own paper birds, watch this arts-and-crafts guide.
Interested in adding a feline specimen to your paper menagerie? Perhaps a housecat? Have extra paper and time to match? This video tutorial presents a complete, step-by-step overview of how to make a paper cat (neko) using origami, the traditional Japanese folk art of paper folding. For more information, and to get started making your own paper kitties, watch this arts-and-crafts guide.
Interested in adding an avian specimen to your paper menagerie? Maybe some sort of waterfowl? Have extra paper and time to match? This video tutorial presents a complete, step-by-step overview of how to make a paper swan using origami, the traditional Japanese folk art of paper folding. For more information, and to get started making your own paper birds, watch this arts-and-crafts guide.
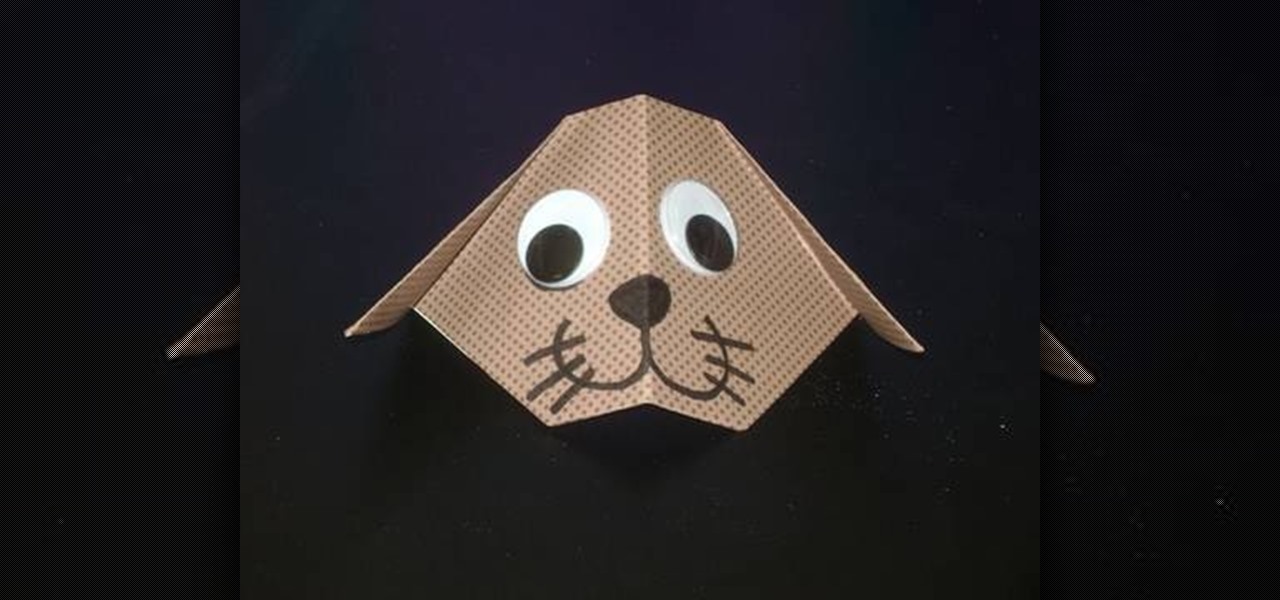
Looking for a fun kids' activity? Have a little bit of spare time and paper to match? Make a paper dog with origami, the traditional Japanese folk art of paper folding. This free origami video lesson presents complete instructions on how to make your own canine from folded paper. For more information, and to get started making paper puppies yourself, take a look!
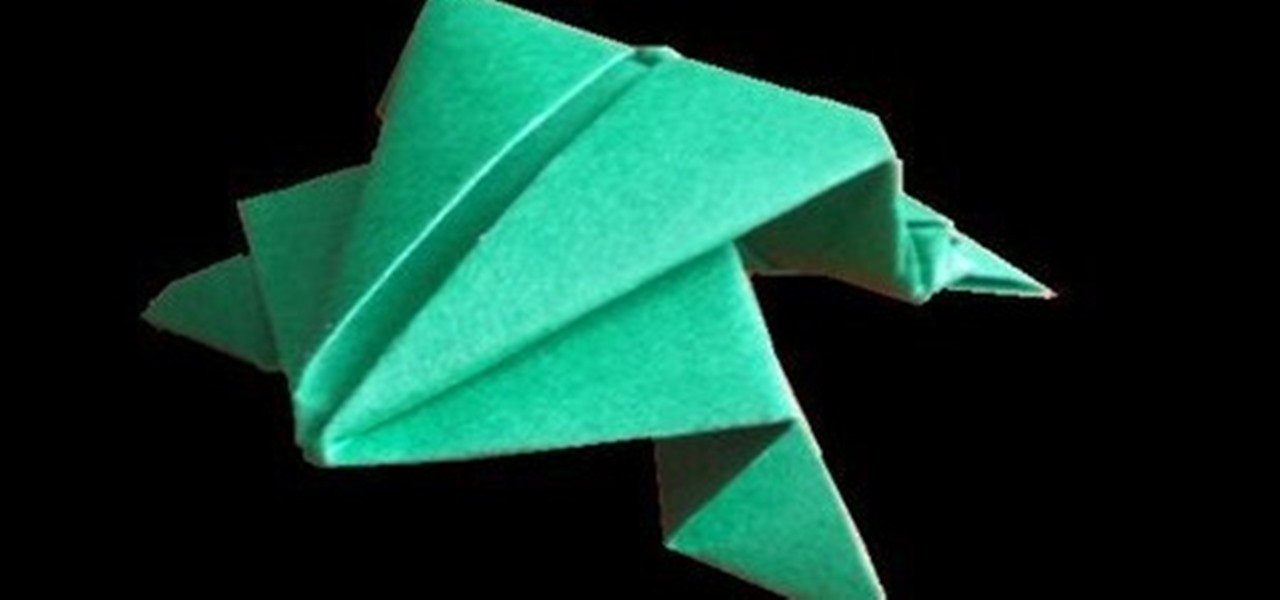
Looking to add specimens to your paper menagerie? Make a jumping paper frog with origami, the traditional Japanese art of paper folding. This free origami video lesson presents complete instructions for making your own leaping amphibian from a sheet of folded paper. For more information, and to get started making your own jumping paper frogs, take a look!
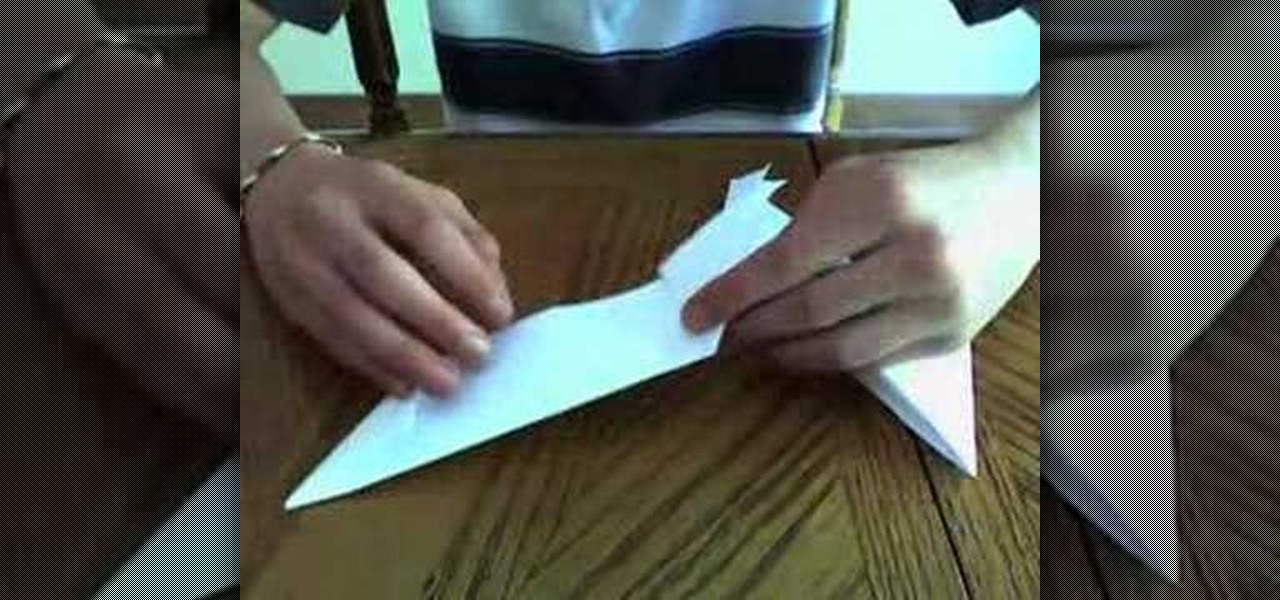
Attention aspiring ninjas! Before you report for duty be sure to arm yourself with enough ninja stars to last you for days. In this video, learn how to make a ninja star (for throwing) out of paper.
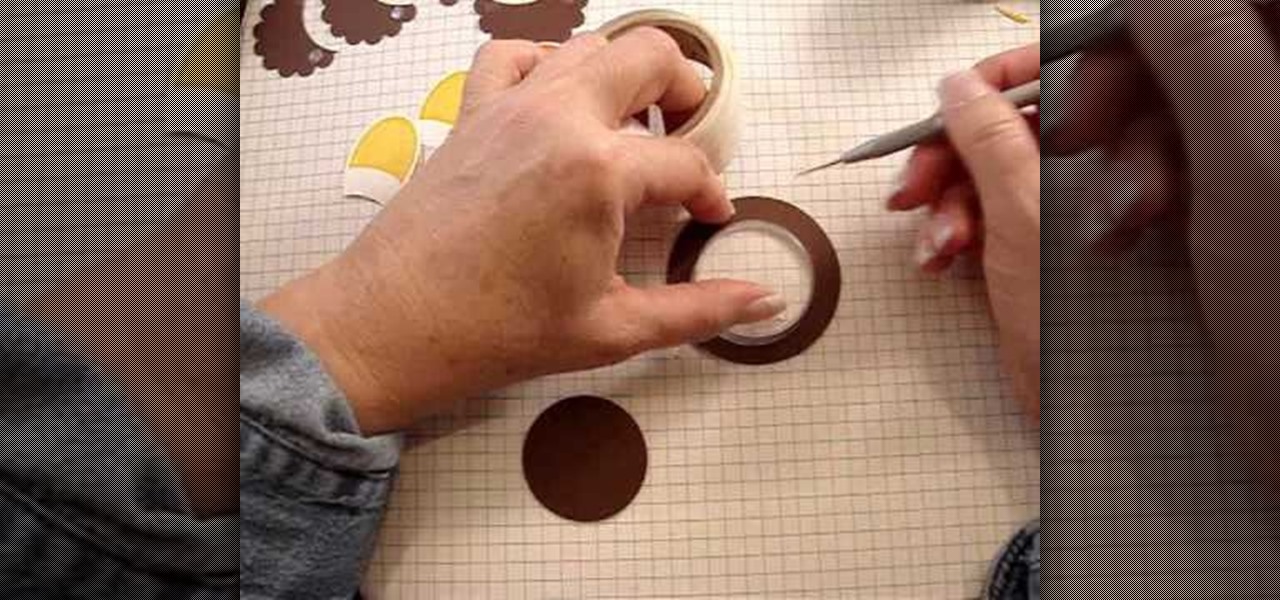
In this Arts & Crafts video tutorial you will learn how to stamp & heat emboss on a card. First you rub in a powder on the paper on which you are going to emboss, because embossing powder is really sticky. Then you select the stamp that you want to emboss and apply sticky transparent ink on the stamp. Make sure you do a through job of this. This will make the embossing powder stick to it. Now stamp the card and press it evenly to ensure that the impression is complete. Then pour embossing pow...
In this video, we learn how to stamp your own customized X-mas patterned cardstock. You will need: green/red stamp pads, Christmas stamps, light yellow plain cardstock and a stamp foam mat. First, stamp your yellow paper as you wish with the green and red stamp pads, you can make any pattern you'd like. Then, place on your stamps on the paper and press the clear stamp press down onto them. Now, apply your stamp color and press back onto the paper. This will make the different stamp shapes pre...
This is a video about how to make a greeting card in circle shape. First take the card and fold it into half. Next take the colluzle and place it on the card. Mark a circle using colluzle on the card. Cut the card on the marking and leave some space at the folding of card. Take the design paper to place on the card. Next cut the design paper in round shape. Make sure that the shape should smaller than the card you have already prepared. Next stick the design paper to card. Next take one ribbo...
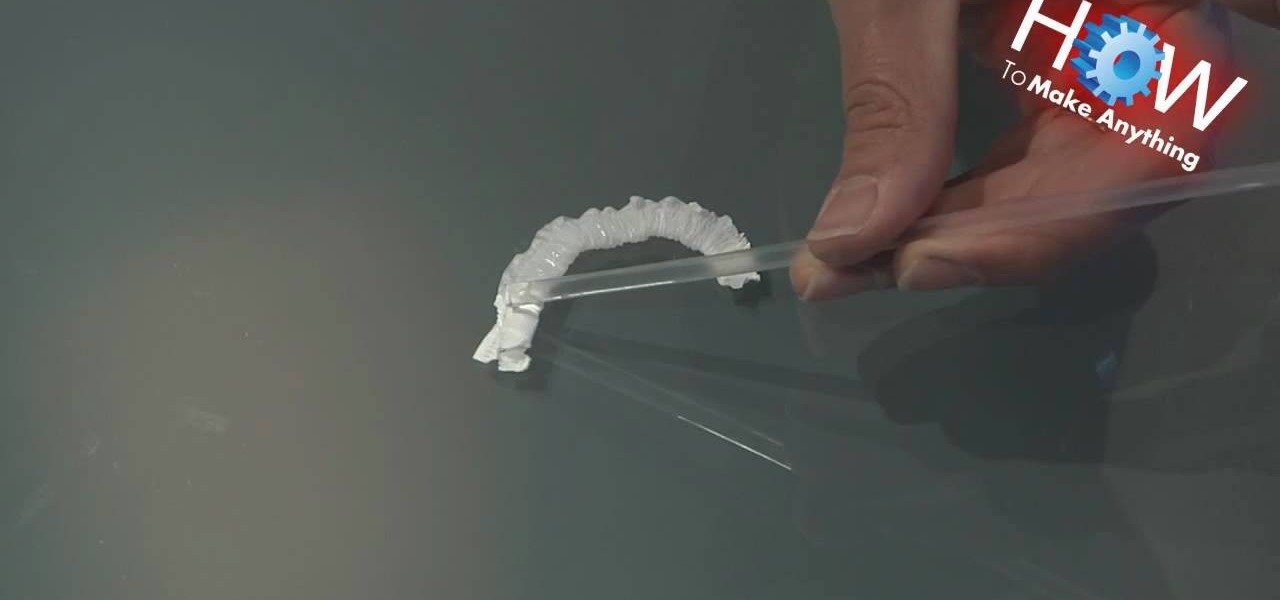
Sure, individually wrapped straws of the sort found at your favorite café, diner or fast-food joint might seem like a colossal waste — and actually be a colossal waste, for that matter — but there's no denying that there's a lot of fun to be had with the straw wrappers themselves. With this tutorial, for instance, you'll learn how to make a cinchy paper inchworm.
In this Weapons video tutorial you are going to learn how to make a paper shuriken (or ninja star). Take a square size paper and cut it into half. Then fold each piece in half lengthwise. Fold one end to make a triangle and fold the other end in the opposite direction to make a triangle. Now fold the ends again to make a bigger triangle. Then each sheet will form a ‘Z’ shape. Now place one sheet on top of the other forming a cross. Then fold in the protruding triangles of one over the other p...
This video shows how to weave paper. This paper can then be used to make crafts such as origami. You may want some supplies: a cutting board, a paper cutter, scotch tape, and square origami paper (6"x6"). Start with two sheets of paper. Cut the paper into thin strips, 1/2" each. Reassemble one of the squares. Carefully align the pieces close together. Place a piece of tape on the top, and tape it to the cutting board. Take a strip of the other color paper, and weave it through every other str...
This video shows us how to make a paper ninja star easily. Firstly you need is 2 sheets of paper, tape and scissors. Firstly take the first piece of paper and fold it into half and then fold it in half the same way. And then fold it in half in the opposite way and then do the same with the other piece of paper. Now using a scissor cut the closed end of the paper and make sure you don’t cut off too much and then in the second cut you have to make a one sided pointed and go diagonally to the ot...