In this video, we learn how to make a mouse hat with construction paper. You will need: 2 small pompoms, 1 large pompom, poster board in blue, black, white, and yellow, lace, scissors, and glue to make this. First, cut the blue piece of construction paper on once side, then twist into a cone shape and tape it together. After this, take the rest of the blue paper and cut it into half circle shapes for the ears. Now, take the yellow paper and cut it into a smaller half circle and place inside t...

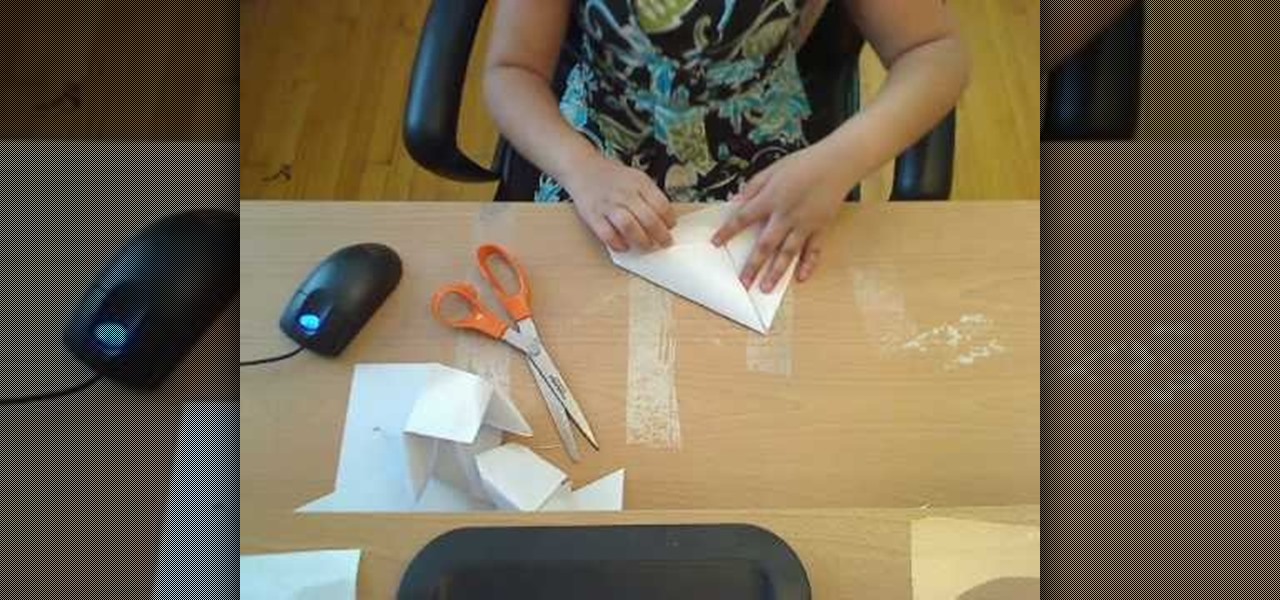
In this video, we learn how to make a box. First, fold the piece of paper into a triangle, then another triangle. Now, unfold the paper and fold all the sides into each other, making a square. After this, fold in the sides once more, making sharp creases on the edges. Now, open up the paper and do this again on the other sides, opening up again when finished. Now, fold the sides of the paper and turn it upside down. Follow the creases that you just made to fold the box up into a secure box. M...

In this tutorial, we learn how to make a paper turkey. You will need: a pen, tape, scissors, and papers. First, outline your hand on all the pieces of paper, then cut them out. After this, stack them together and then tape them. Next, cut out and apply the wattle of the turkey. Next, draw in eyes and feather details on to the turkey. When you are finished, you will have a cut turkey made in just a few minutes. This is a great project to do with children and only takes a few short minutes. Whe...
In this tutorial, we learn how to fold a Christmas tree. First, start with a square paper and fold it in half, then open it and fold it corner to corner. Open the paper again, the turn it over and fold it side to side. Open it once more and fold again side to side. The paper will not automatically fall into the shaped creases and you will have four flaps. Take your finger inside and flatten all the flaps. You should have four flaps on each side and then you can cut the bottom to form a trunk ...

In this video tutorial, viewers learn how to make a stencil. The materials needed for this project are: contact paper, scissors and a pencil. Begin by drawing the design, shape letter or number on the contact paper. Make sure to draw the stencil on the back of the paper and make it reversed. When finished drawing, carefully cut out the design. To use it, simply peel off the invisible paper and place it onto the surface of the artwork. Then trace over it. This video will benefit those viewers ...
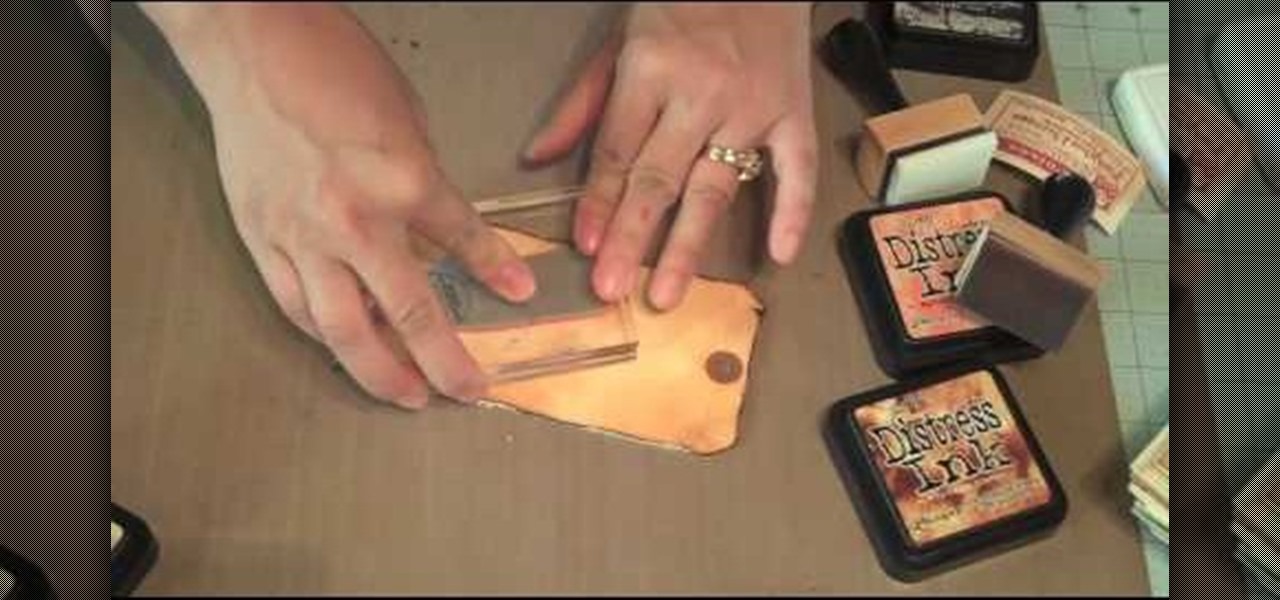
This video describes how to use distress ink. First we have to take a paper that we want to work on. Next take the distress ink colors. Spread the lighter colors first on the paper. Take the first color and spread it on throughout the paper. Next take the vintage photo and work on the edges with it. Next take the spiced marmalade ink and spread it on the edges again. Next take the paper and apply the paper edges directly to black soot ink pad. Next wait for sometime until it dry. Next take th...

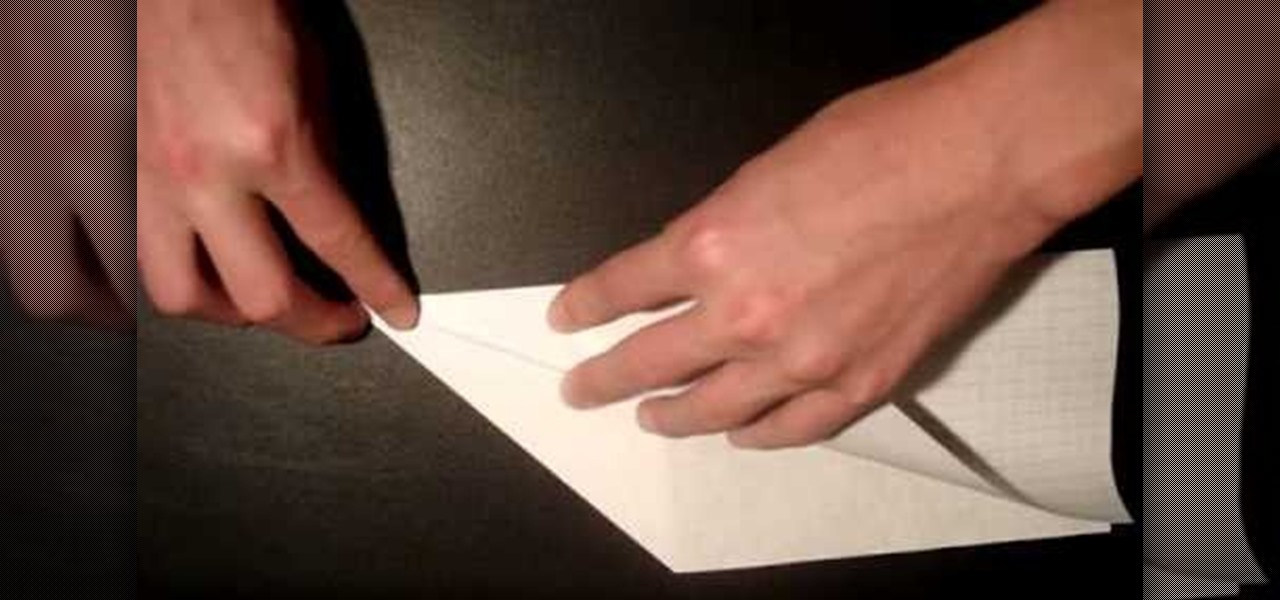
That Paper Guy shows you how to make a simple paper airplane. First, get a piece of paper 8 1/2" x 11" and fold it in half lengthwise. Then fold on one side a triangle. Flip to the other side and fold a triangle as well. Fold the corners down in the same direction on both sides, making sure the edges meet the center fold. Fold the corners down one more time on both sides, again in the same direction. Open up the finished airplane so that you're able to grab the center with your thumb and inde...
This is an instructive guide to making a trigger operated paper gun. You will need an A4 sheet of paper. Start by rolling the sheet of paper horizontally (breadthways) and as tightly as possible, . Once the roll is completed, attach 3 lengths of sticky tape at each end and the middle, so it doesn't unravel. Then proceed to wrap another sheet of A4 paper around your existing roll, making sure that is as tight as can be so it is strong and sturdy. Again, attach sticky tape at each end and the m...
For anyone looking to dress up a card, learn how to make a paper pumpkin using punches in this video tutorial. Take a white piece of paper and distress it with Memory Mist (with the pale ale color). Use a box to distress the paper, while avoiding getting the mist all over your work space. To actually make the pumpkin use a store-bought punch (either round or oval). Make the punches with orange cardstock. For each pumpkin, you will need either three ovals or circles. Using a chalk ink to distr...
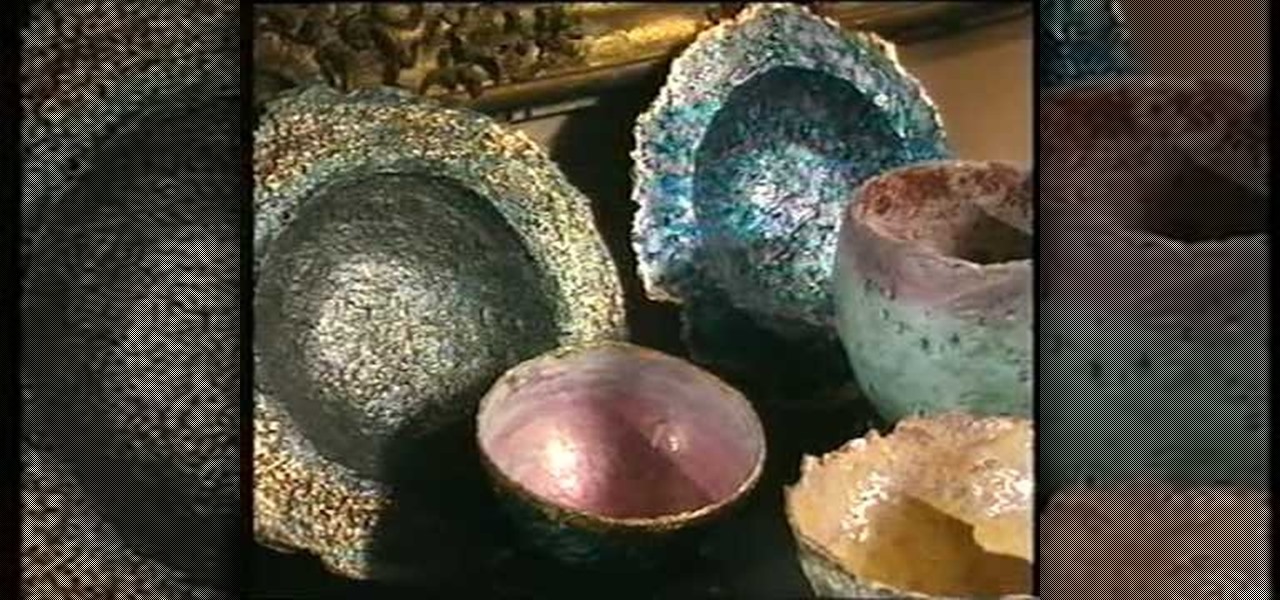
This video will show those who are interested how to make paper mache and how to use it in artwork as well. A quick and simple way to make paper mache starts with nothing but common newspaper. After soaking your newspaper in water for a while, place the newspaper in a blender with some more warm water and blend it into a fine paste. After this, you should strain out the excess water and then mix this solution with some whiting powder, or chalk, in order to get your finished paper mache, which...
Learn to make a beautiful spiral rose of paper, by watching this video. Things you will need to make this rose are: Red colored paper (or any color of your choice for the rose), a toothpick or small stick, glue, scissors. Begin by drawing a spiral on a square piece of red colored paper. With the help of scissors, cut along the lines of the spiral till the centre. Next, begin winding the spiral strip onto one end of a toothpick, from the outer end. Keep winding till you reach the other end of ...
Take one large newspaper sheet that consists of two pages on each side. Fold in half lengthwise (the way it comes in the newspaper). Fold in half again (bringing the top of the paper to the bottom). Fold corners (on folded side) to middle. This will make a pointed top to paper. Fold one piece of bottom of paper up to the bottom of the pointed fold. Fold bottom again until it overlaps a little of the pointed part. Turn hat over. Fold sides in about 1 1/2 to 2 inches (it will look like a house)...
1) Create a rectangular sheet of paper by folding the left side in, like a book, about 1-inch and remove this excess paper. 2) Fold the rectangle in half, bottom to top like a newspaper, and then unfold and lay flat. Now take the bottom edge and fold it up (again like a newspaper) to meet the center crease that you made with your first fold. Unfold again. You will now have two creases in the bottom half of your paper. 3) Lift the bottom fold (bottom forth of the rectangle) up and line it up w...
This video is about how to make a paper floating boat by using only a single paper. These boats are really liked by the children in rainy season and they play with them where water gets collected or some kind of lakes or ponds. It can be made by just folding the paper in three folds and opening it to make a boat. This boat is easy to make and can be used as toys ,decoration material etc. boats are just childhood memories.
Need some affordable Christmas decorations? This is an instructional video that gives step by step instructions on how to make a paper snowflake. Viewers will learn how to make easy to make decorations for the holidays. You will need scissors, plain white paper, a stapler and tape to complete this projects. These are three dimensional paper snow flakes, not the typical two dimensional ones you probably made when you were in elementary school. Directions are easy to follow, and the video is cl...
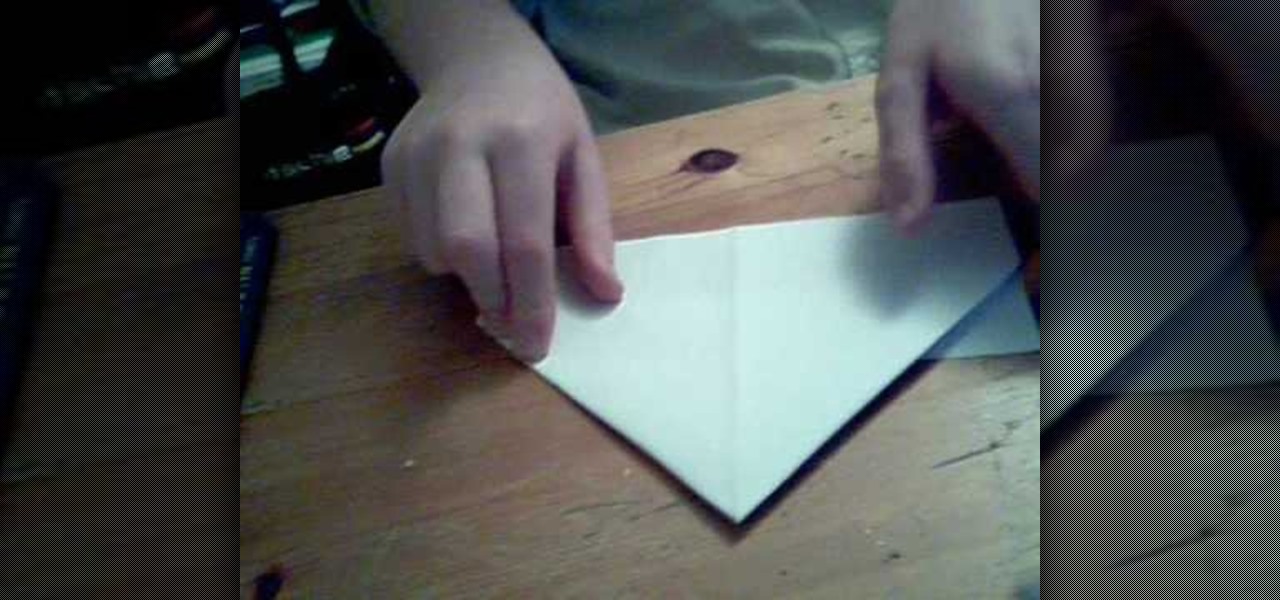
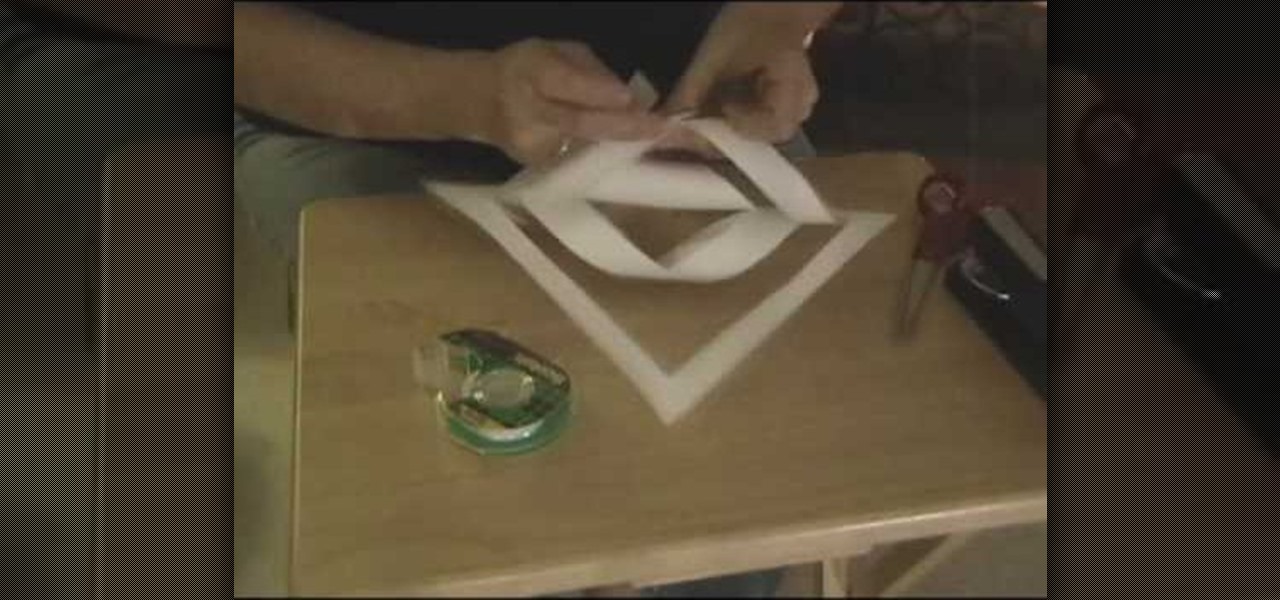
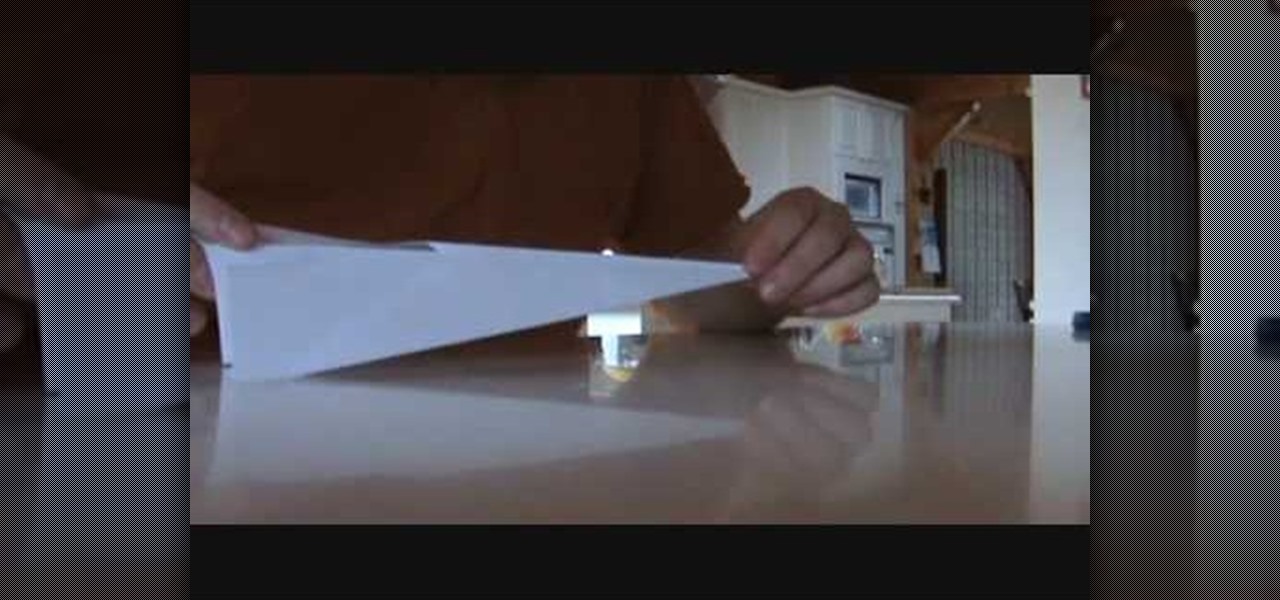
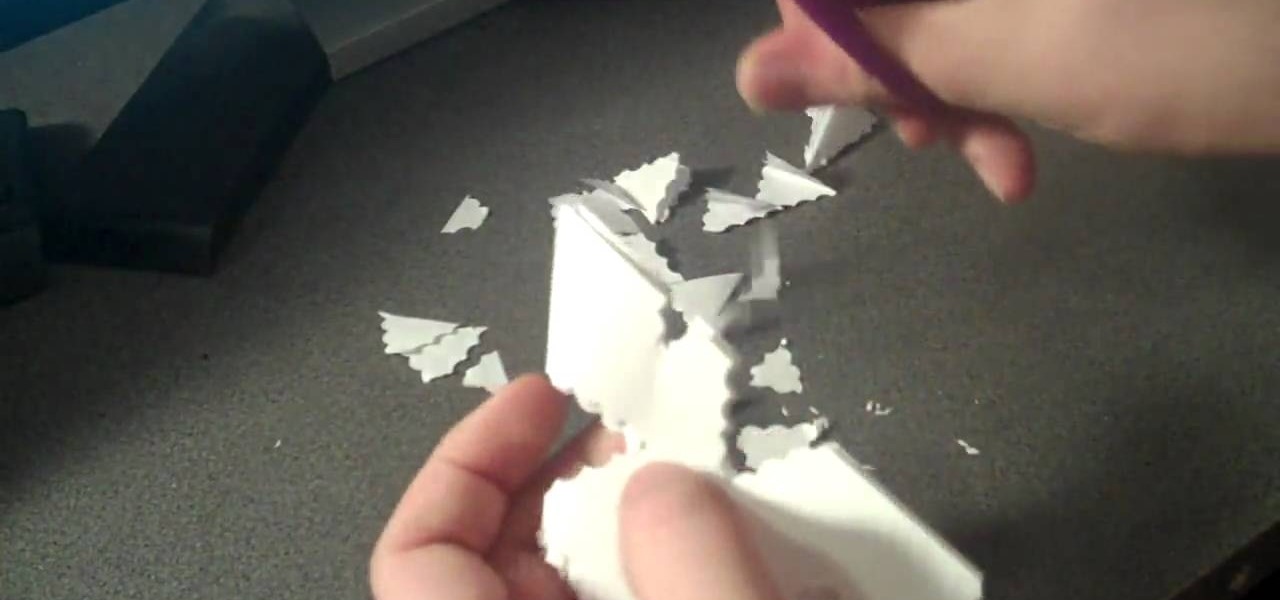
A detailed and easy-to-follow video on how to create snowflakes from any square sheet of paper, quickly and inexpensively. Using the technique shown in the video, you will be transforming any plain square sheet of paper into a finished snowflake, with a custom and unique design using just scissors. You can make hundreds of different designs with this technique; just like in real life, no two snowflakes you create will be the same! Get into the holiday spirit yourself, or spread some holiday c...
In this video, you are shown how to create a paper airplane and most importantly, how to make it fly farther. You will need a paper airplane, a stapler, and some tape and scissors. You staple the paper airplane all the way to the back without hitting either wing. You create three rows of these staples. This will make the airplane "closed" so it will glide farther. To get even balanced weight which will make it glide further, first tape along the entire top ridge, then you use scissors and mak...
This video is about how to make a snowflake using only scissors and paper. For this you have to go through a few simple steps: (1) Take two plain sheets of paper. (2)Fold them into the shape of triangle. (3) Fold them again up to three triangles. After making a small fold of triangle (4) cut the triangle using scissors. Make any shape of your choice and cut carefully and neatly. Now just open the shape and the snowflake is ready. You can use colorful paper also.
Don't waste a bunch of money on new wrapping paper and bows. Recycle your old wrapping paper and use it to make decorative bows for your presents following these steps.
Need a way to keep the kids busy on a rainy day? Making a pop-up card is quick, easy, and will entertain them for hours! Watch this video to learn how to make a pop-up card.
In this video, you'll be shown how to make Christmas crackers for the holidays. It's a cheap, easy and fun art project you can make with the kids. All you need is wrapping paper, some toilet paper tubes and glue and you're good to go!
Called a "crazy paper thing" by the owner, the description is perhaps a little too vague to describe the sheer genius of this transforming paper module of cubes.
This how to video is by a young girl Rida Sharief and teaches you how to construct a hat from simple construction paper. First step, you fold the paper in half and crease the paper with your fingers. Next step, you fold it again in half and crease with your fingers. Next open back up so that the paper is only folded in half. Then, fold triangles inward almost all the way down, but leave space for flaps. Finally, fold the flaps up and you have your own self-constructed paper hat. To wear it si...
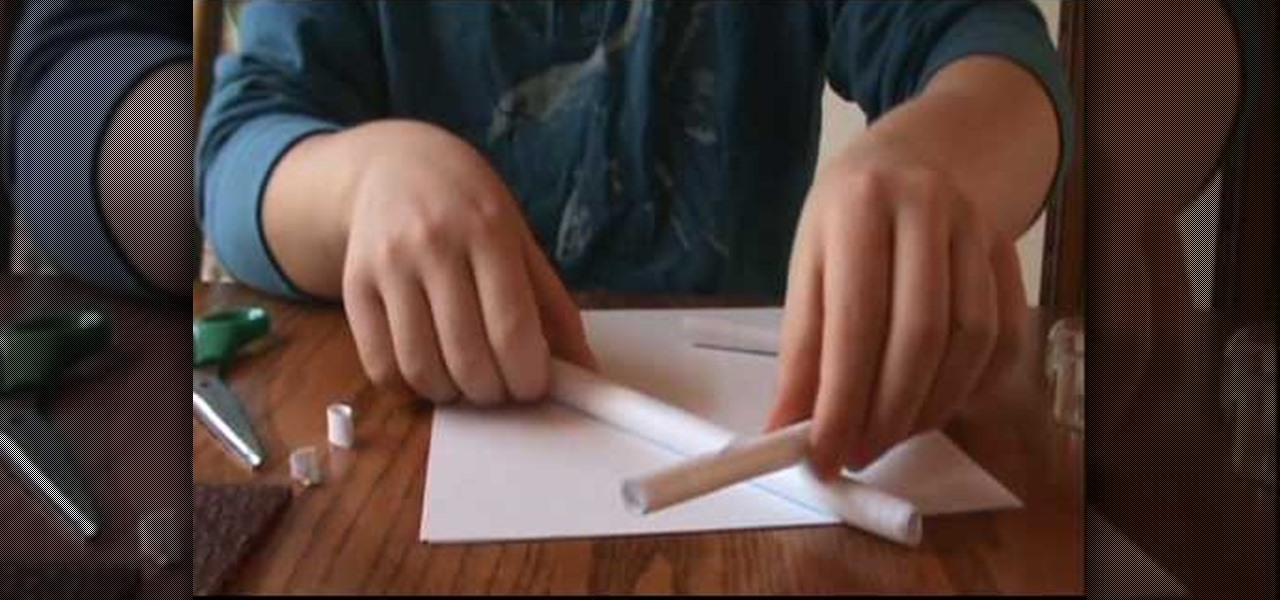
Learn to make this easy mini paper Uzi gun for gaming with your friends! Supplies: Scissors, Scotch tape (Note: DO NOT USE MASKING TAPE OR DUCT TAPE; IT WILL NOT TURN OUT WELL), lots of paper. 1. Take one piece of paper and roll it up from top to bottom to make a short tube. Tape it. 2. Take another sheet of paper and do the exact same thing that you did to the first one and tape it as well. 3. Take a sheet of paper and roll it up from side to side (long ways). Make the hole in the middle abo...
Paper embossing stamps a design into the paper, but doesn't allot for any color. Ink and chalk can both be applied to an embossed design for color and to bring out the shape of the embossing. Ink can add vibrant color, while chalk adds a soft finish to the embossed design. Watch this video tutorial and learn how to use ink and chalk on embossed paper.
This handy tutorial video will teach you how to make a wallet out of paper using: (1 sheet if cardstock, 2 sheets if printer paper), scissors, tape, and something to write with.
This how-to video tutorial demonstrates how to weave paper strips together to create a braid like shape. Learn how to fold a paper braid for craft, paper, and even scrapbooking projects.
Watch this how to video to learn to make polyhedra using hanger tape paper and zip ties. This step by step tutorial will teach you to make a cuboctahedron.
This video demonstrates the fun and easy way to make a paper tortoise. Best of all, it is made with any normal piece of paper, so you don't need origami paper!
There are several different techniques you can use to transfer a pattern onto the fabric you want to embroider, depending on the color and type of the fabric you want to embellish. This video shows you three separate techniques, such as chalk pencils or tracing paper.
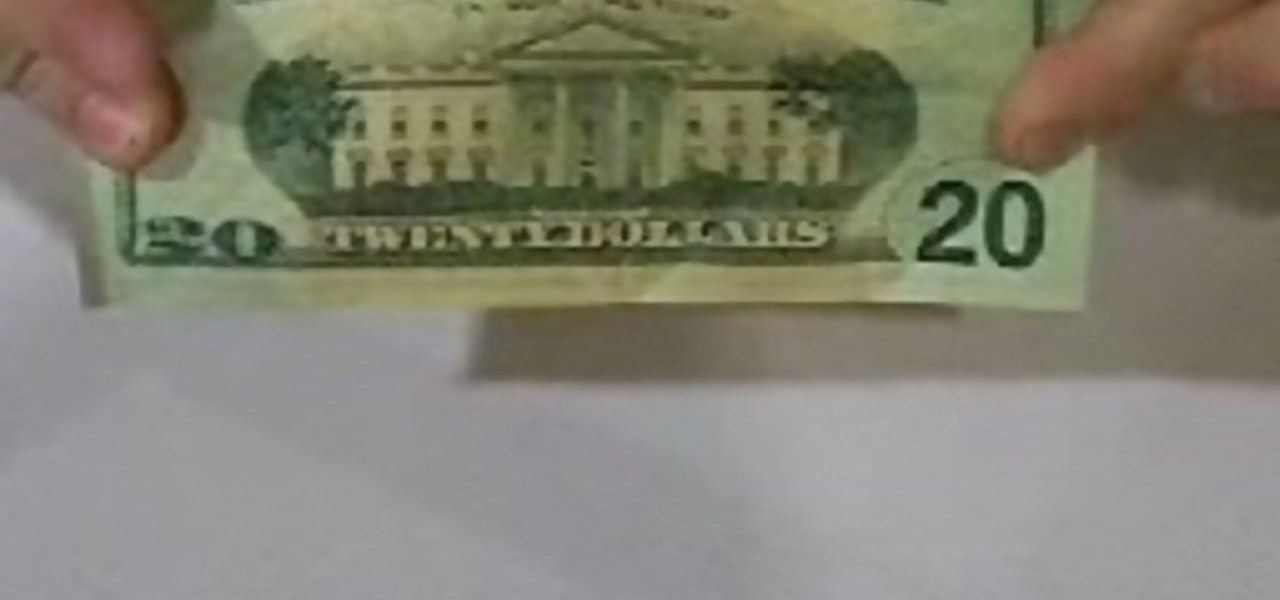
In this tutorial, we learn how to make a paper football with a $20 bill. First, take the bill and fold it in half length wise. Next, take the bill and fold one of the ends into a triangular shape. After this, fold the triangle over and keep doing this until you get to the end. When you reach the end, and tuck the flap on the end into the pocket you created. After this, you can hold the bill up with your fingers, and flick it with your other fingers. You can use any type of bill to make this, ...
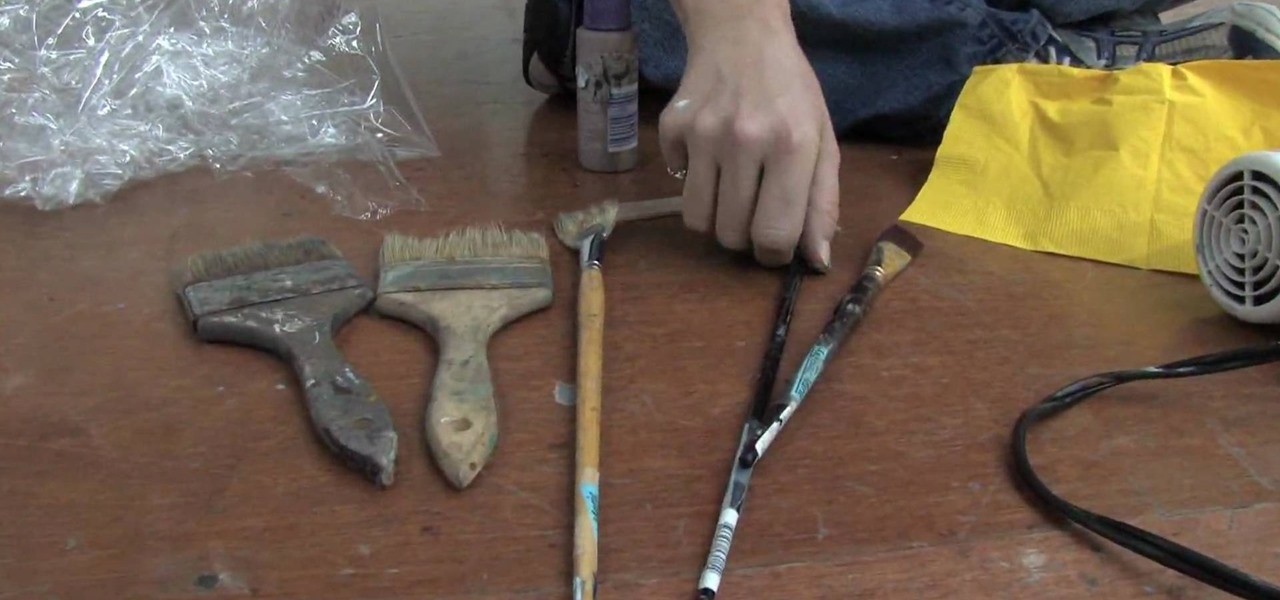
In this tutorial, we learn how to understand artist tools for painting. The first tool is plastic, which can be use for great textures on the painting. Cheap brushes are great for painting in big spaces and fan brushes are great for painting wider widths. A badger hair brush will be best for painting tails on canvas and different types of papers. A synthetic brush is very easy to clean and perfect for oil or acrylic paint. A hair dryer is a tool that is great to speed up the drying time of pa...
This instructional fine arts video demonstrates how to collage with sand paper, paint and other mixed media. The term collage derives from the French "coller" meaning "glue". Before you throw anything away, consider its potential for patterned or textured collage material. Almost any type of material can add new textures and layers to an assemblage piece.
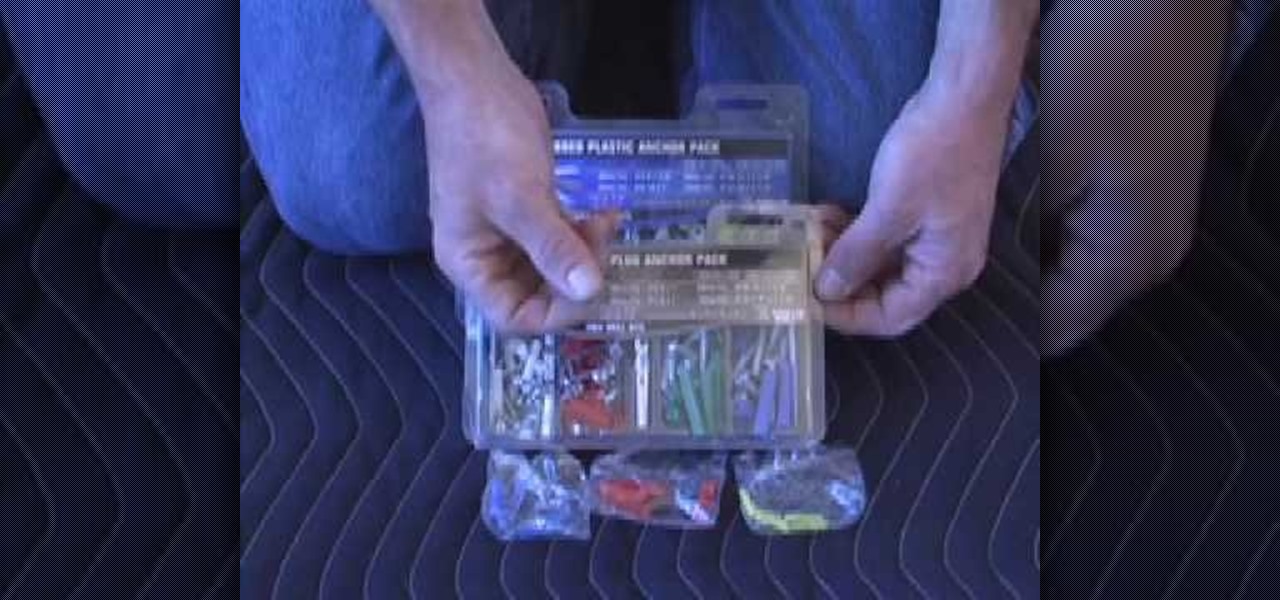
In this video Bob Schmidt shows you how to use his favorite drywall anchors to install all types of accessories such as smoke detectors, paper towel bars, and decorations.
In this tutorial, we learn how to make your own board game for 99 cents. First, trace out a name onto the board spelling out each letter. After this, break the letters down into different spaces, and color code them for different moves on the board. Write down the key for the colors underneath the name so you know what the colors mean. After this, draw the name onto a piece of paper, measuring out everything so all the spaces are the same size. Then, color in the spots on the board. Next, use...
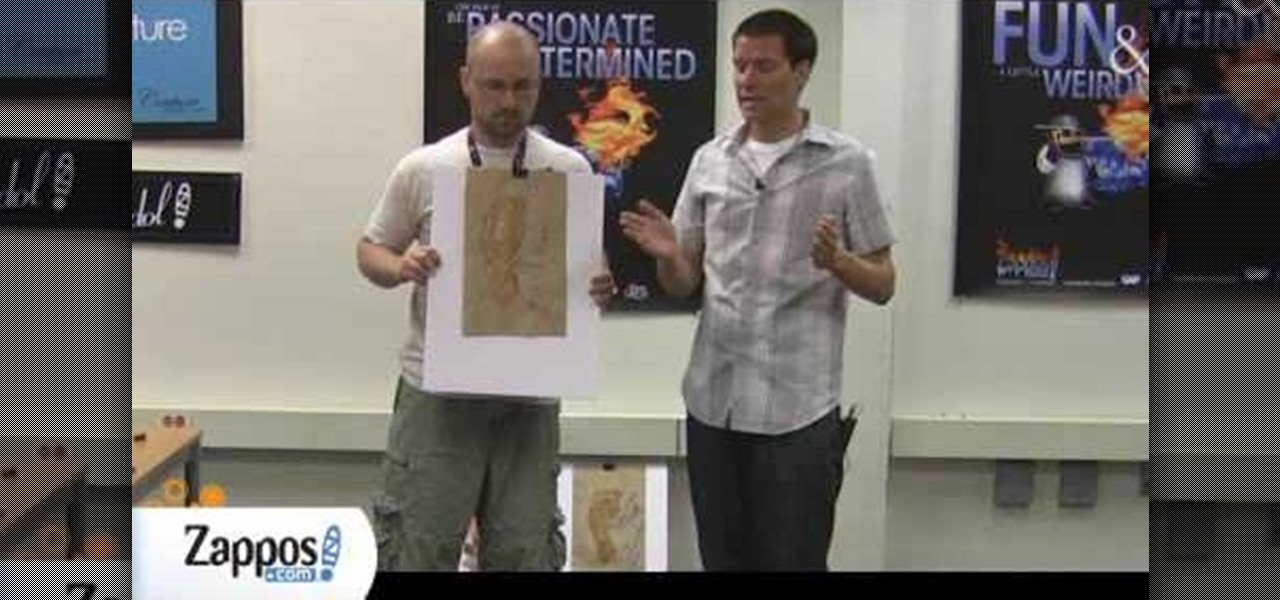
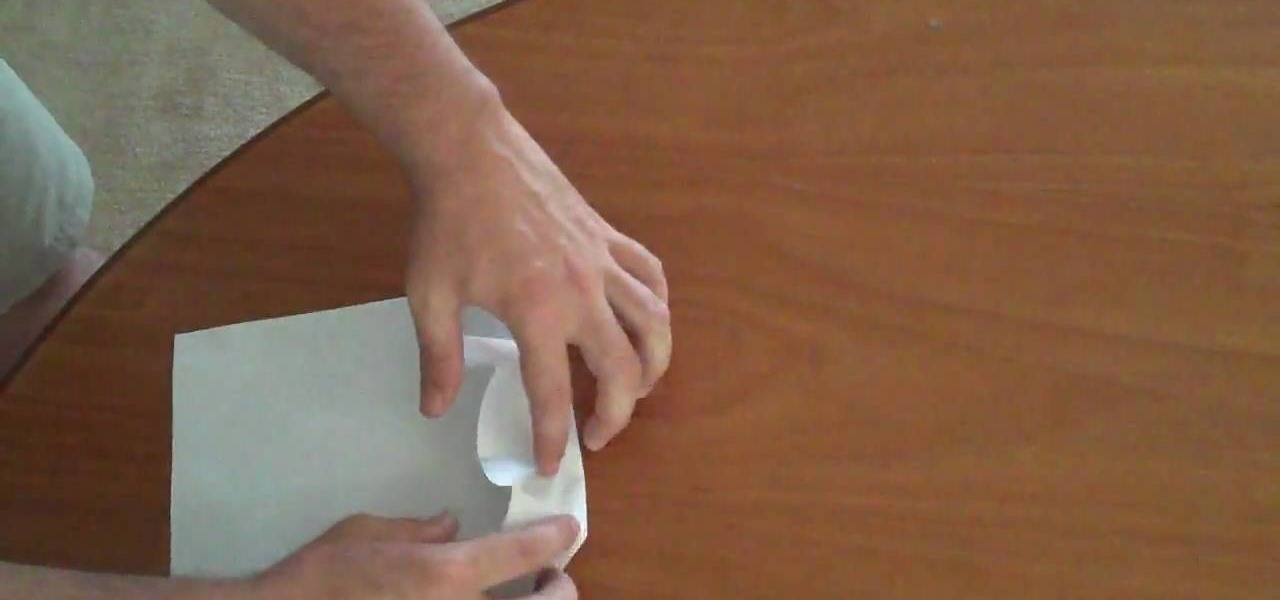
This video demonstrates how to do a wet foot test and how to choose running shoes with the results of a wet foot test. The wet foot test is simple. Get your foot wet and place it on a piece of heavy duty paper which will create a foot print. The foot print shows what type of arch you have. There are three types of arches: high, medium and low. High arches require a lot of cushion for running. Medium arches require a reasonable amount of cushion for running. Individuals with low arches or flat...
Love roses and complicated craft projects? Make a beautiful decorative paper rose using origami, the traditional Japanese folk art of paper folding. This 26-minute free origami video lesson presents complete instructions on how to make your own roses from folded paper. For more information, and to get started making paper flowers yourself, take a look!
In this how-to video, you will learn how to make Cobra-style paper airplane. All you need is a regular piece of paper. This style is useful for hitting targets or flying straight. Fold the paper in half vertically and unfold. Take the top corner of the paper and fold it to the edge of the middle crease. Repeat with the other corner. Take the tip of the center and fold it to the horizontal line created by the folded corners. Make sure you make tight folds. Open it up and make a fold horizontal...
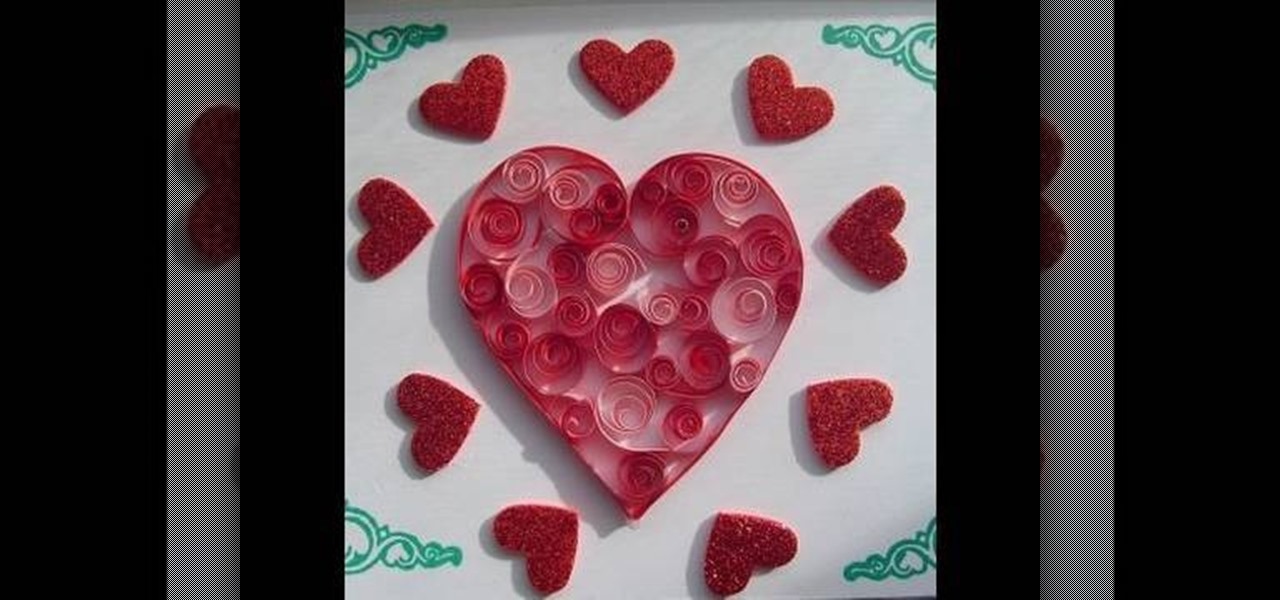
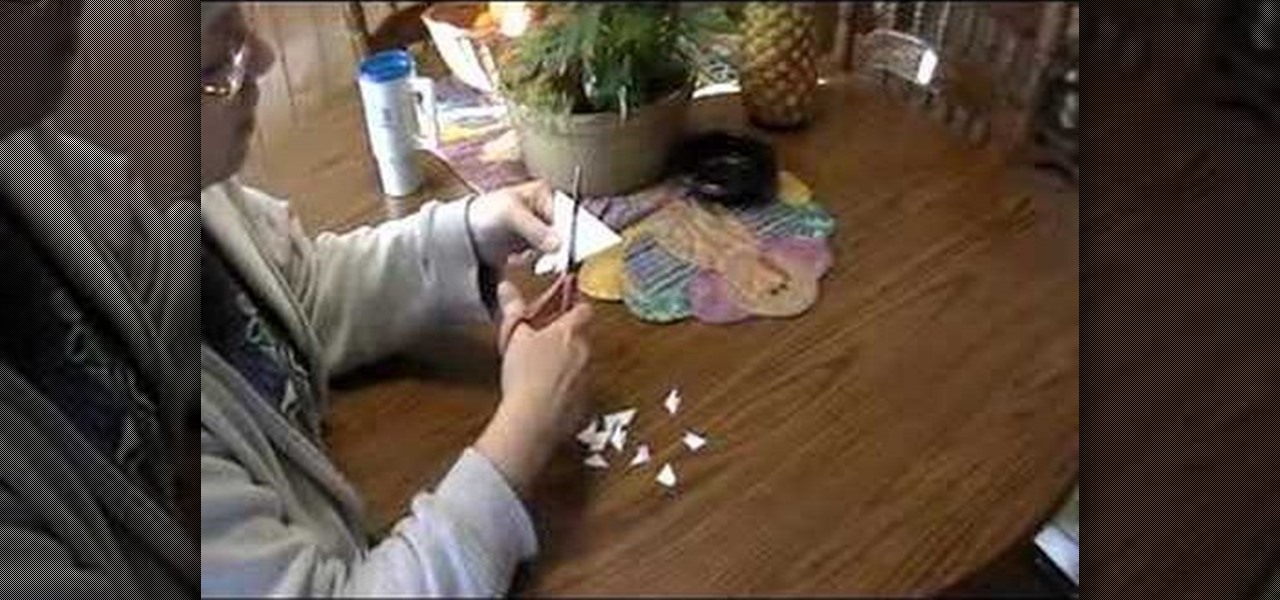
We know you probably haven't quilled anything since fifth grade, but that doesn't mean you should leave this paper curling skill to your tender elementary school years. In fact, quilling adds quite a lovely feminine touch to any project.
Remember those gold old days when you would craft bunches of red and pink valentines at home with your mom from construction paper and then tote them to school, bursting with excitement to see what pretty cards you'd receive in your Valentine's Day mailbox?