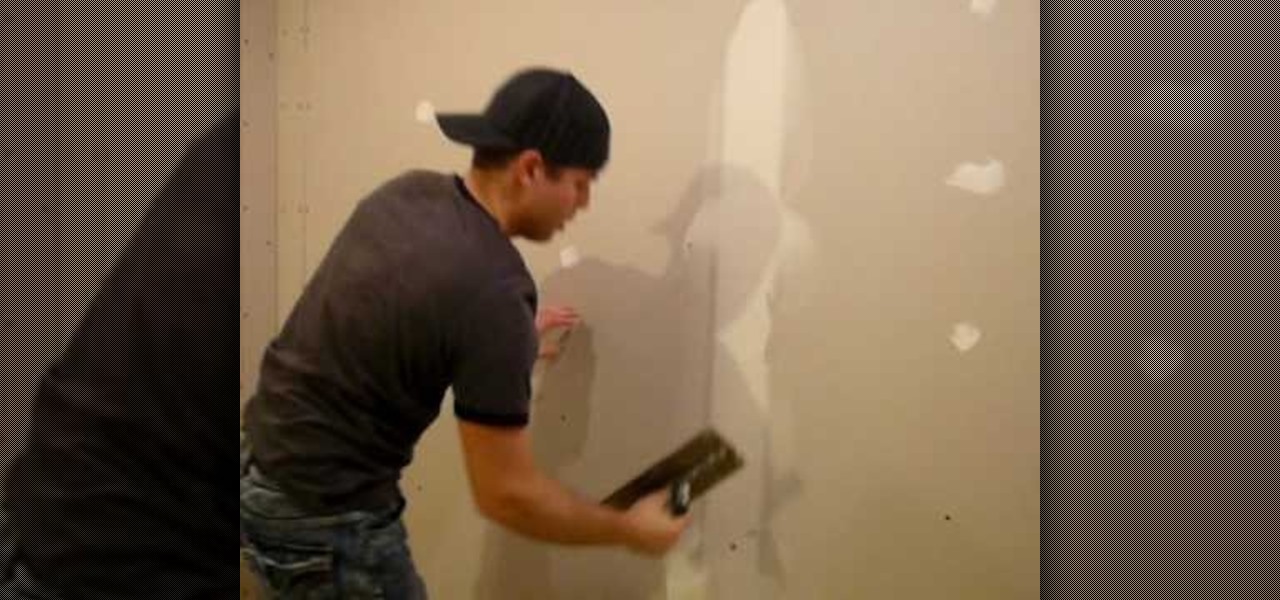
Taping drywall requires a spreader or a spatula, compound and drywall tape. Spread the compound over the nails and the seams smoothly to apply tape over later. Next, the tape is applied to the wet compound on the wall directly over where the seams were. Then, another layer of compound is placed on top of the tape. After it is dry, a second layer of compound is placed on top of this layer. This process will continue until all the seams are covered with the compound, taped over the seams on top...

In this brief instructional video, you'll watch as a nail expert shows you one of her best custom designs finished by using foil wrapping paper. This is great for people looking for something new and trendy that will add a little bit of pop to their already polished look. Be sure to pay attention to the many tips and tricks that this nail designer drops, otherwise you'll be headed for disaster! Remember, to make this nail-art work, your foil wrapping paper will have to be cut into very thin s...

In this video, we learn how to navigate an HP TouchSmart computer homepage (Windows 7). First, double tap the HP TouchSmart house icon. You will now see several different applications. On the top are applications that are running, on the bottom are applications that are not running at the moment. You can run your finger to scroll along the different windows that you have open. You can use Paint, internet, photos, videos and much more all at the same time! To scroll between pages, grab the top...
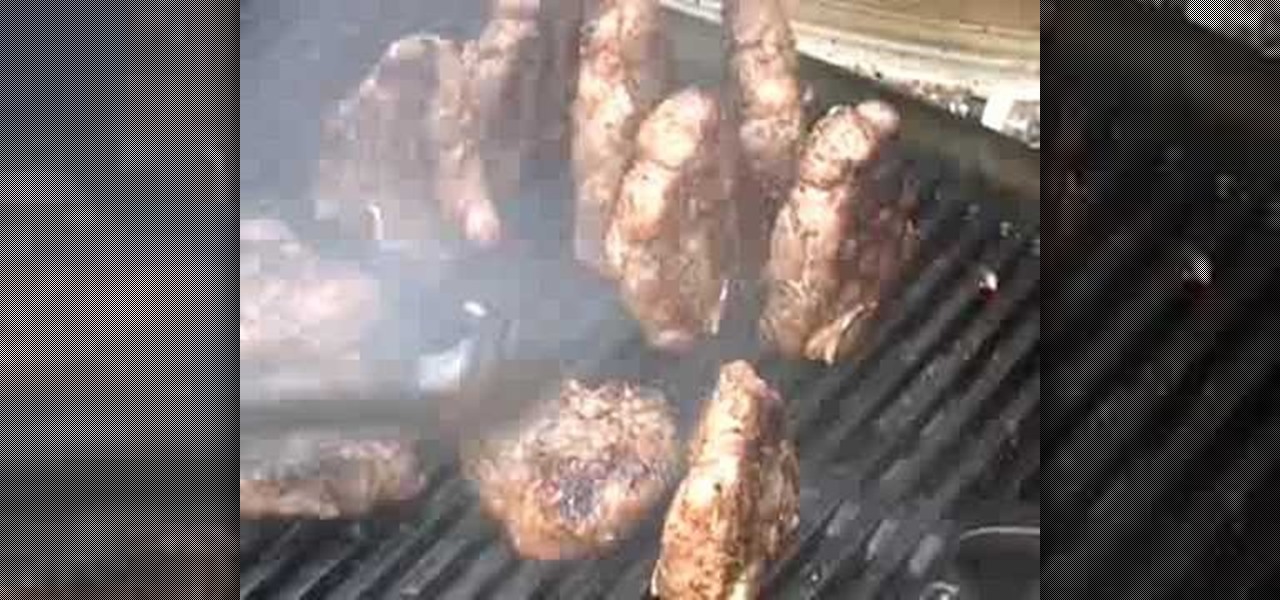
This video demonstrates how to prepare Grilled Lamb Chops with Homemade Mint Orange Jelly. For this recipe, you will need the following ingredients: 2 lbs of lamb, garlic, olive oil, pepper, coriander, cumin, cayenne, Herb du Provence, and cinnamon.
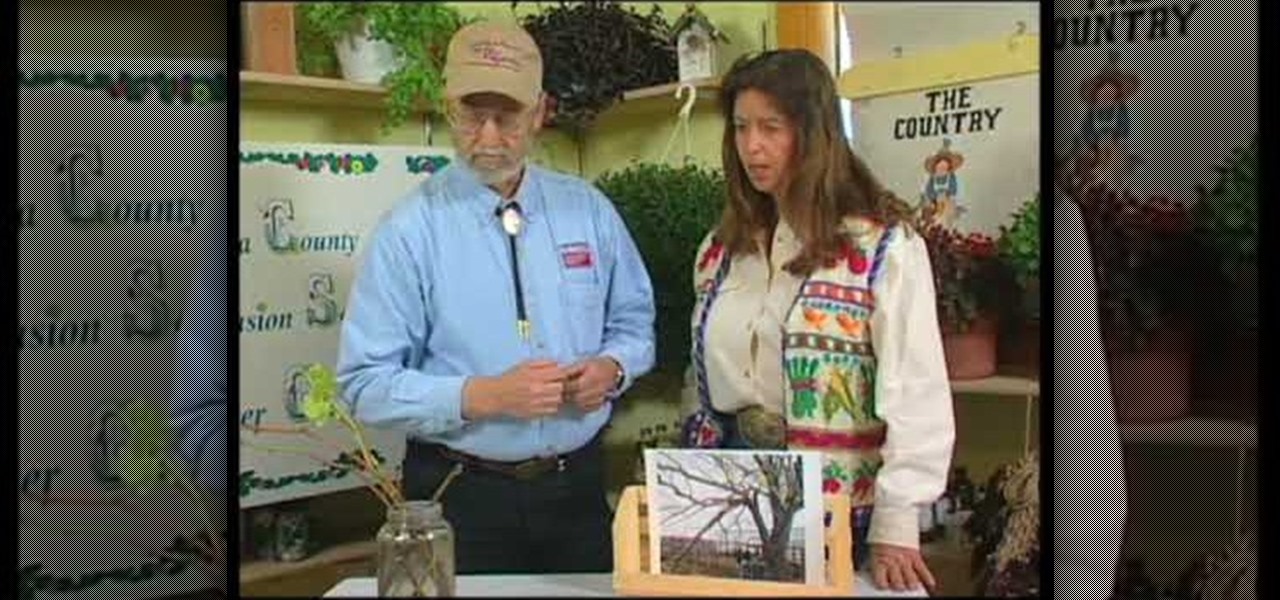
This video illustrate us how to deal with broken tree branches and problems with grapes. Here are the following steps:Step 1: First of all clean the broken branch with water.Step 2; Now apply some tree primer or tree paint on the exposed area for quick healing and to prevent any infection.Step 3: To deal with problems in grapes first of all look for any infection on the leaf, stalk or the fruit.Step 4: If in case there is some infection ,identify the problem and sprinkle the pesticide for tha...
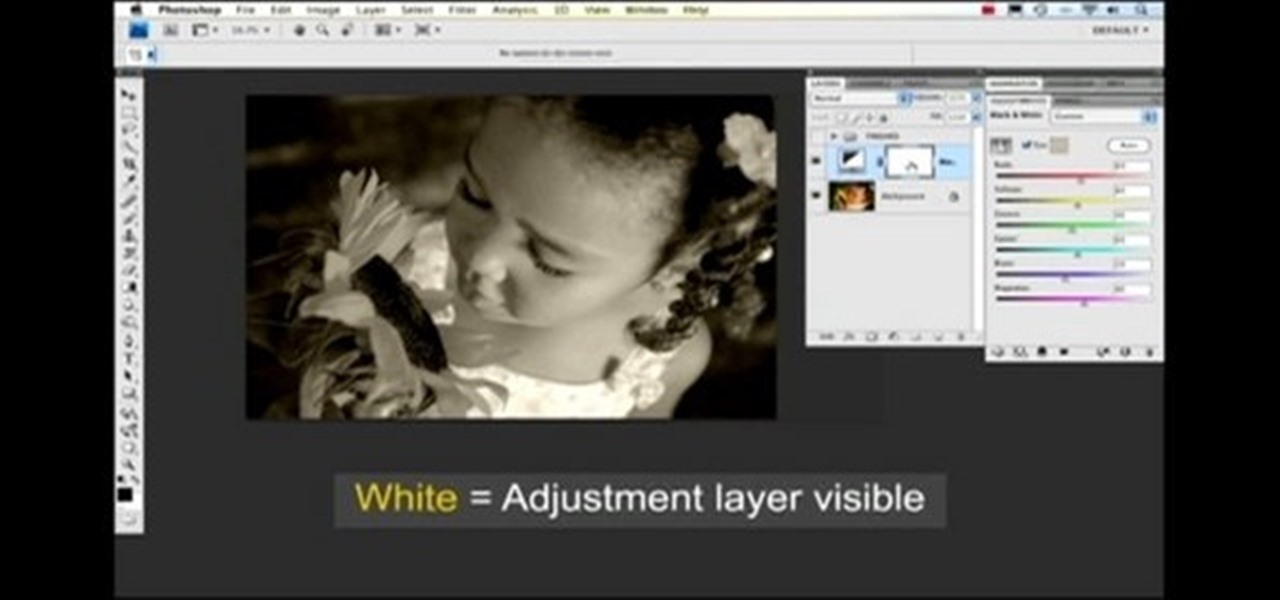
Nichole Young demonstrates how to hand color using layer masks in Photoshop CS4, which also works in Photoshop CS3. The procedure can be summarized in two stages: turning the picture you would like to edit black and white and then bringing color back into it to give it a hand-colored look. The black-and-white effect is achieved by creating a new layer over the background layer. The next step is to give the picture a warm look by adjusting the layer’s respective color balance. Then bring the c...

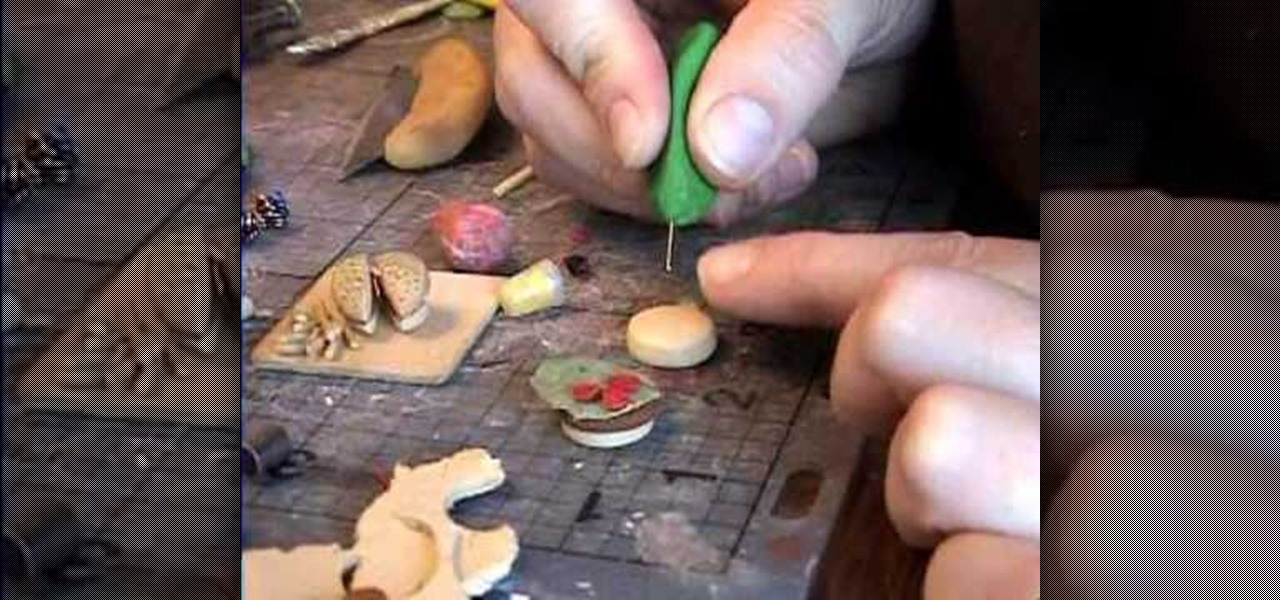
Using multiple layers of clay, garden of imagination shows how to make a hamburger and fries out of polymer clay. This decorative item would then be placed into a miniature dollhouse being displayed as a food item. She rolls a peppercorn on brown clay to give it the texture of meat. She mixes together green and whit clay for lettuce, and uses another piece of clay to ruffle the edges of the lettuce. She uses small round cuts of clay for tomatoes. Using an embroidery needle with a clay handle ...
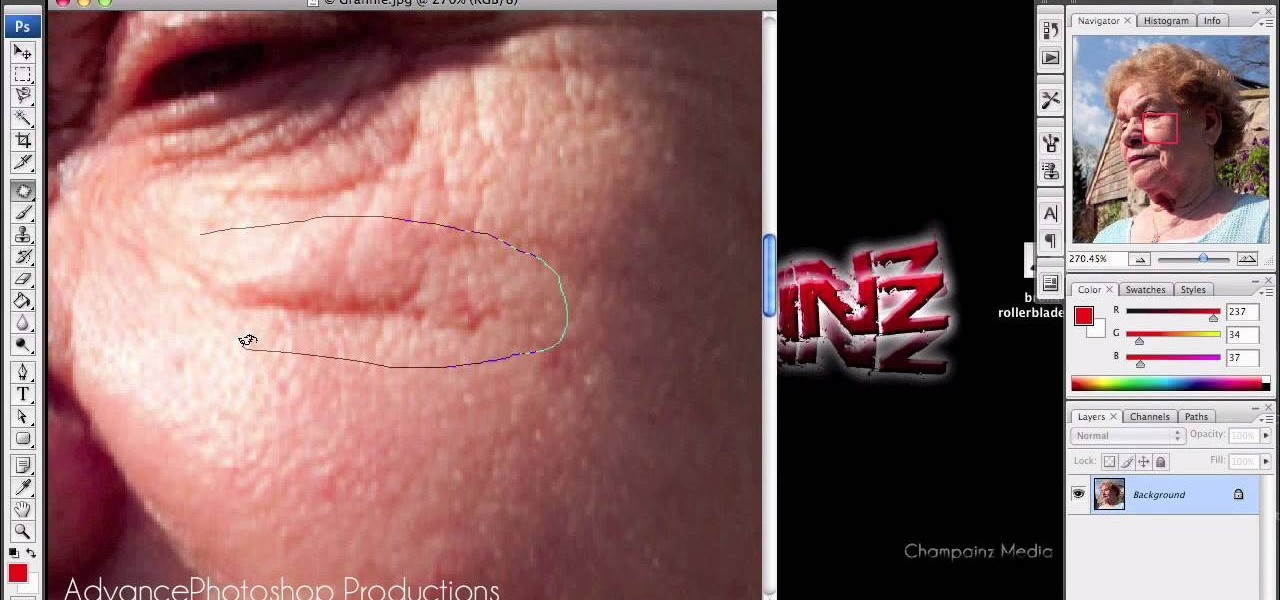
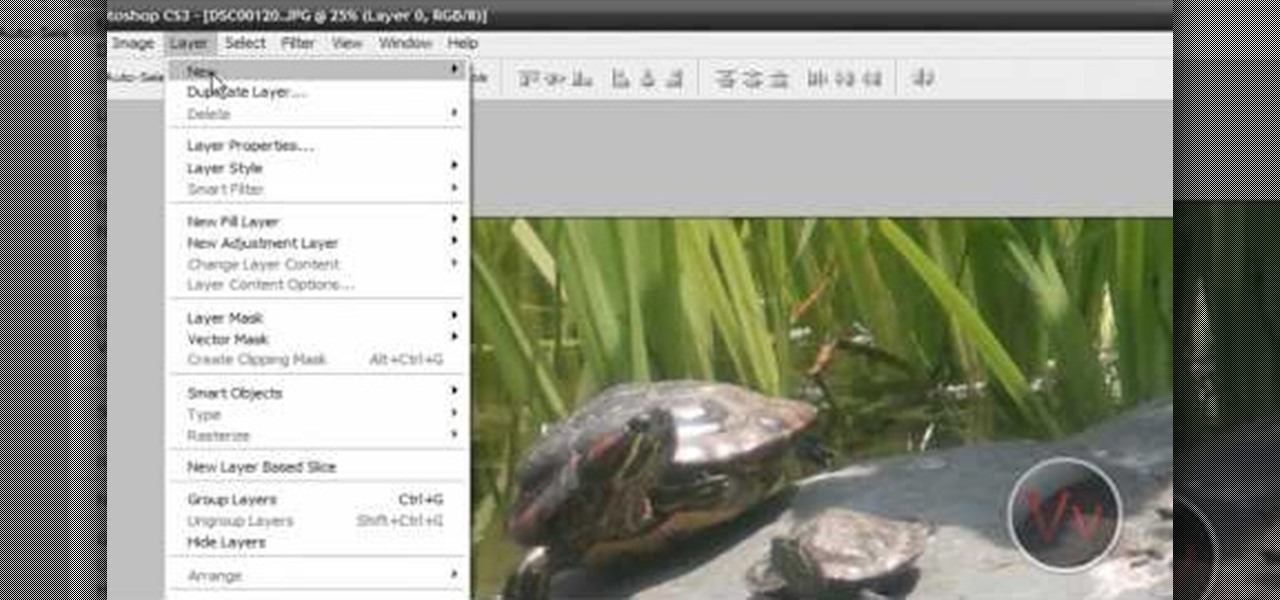
In this video, we are given ways to clean up an image, or remove unwanted objects in an image using Adobe Photoshop. The first tool that we are shown is the clone stamp tool. It allows you to clone a certain sample of an image, for you to use to paint over the object in the image you don't want anymore. In the video, the narrator shows us how to seamlessly take a man out of an outdoor setting. The next tool that we are shown is called the patch tool. In the video, the narrator uses the patch ...
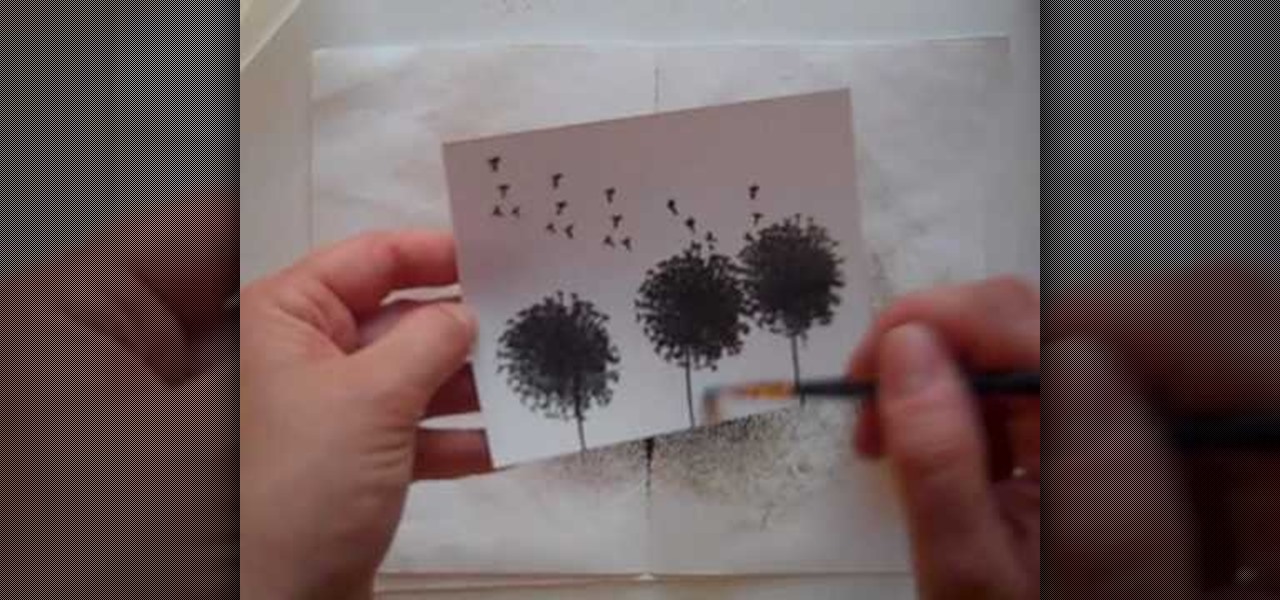
Anyone interested in scrapbooking can learn how to do the Brayer technique with ink refills for cards with this video tutorial. You will need a piece of glossy cardstock as well as stamps. Make sure to keep your fingers off the paper to avoid smudging. You will need the dandelion stamp to stamp the cardstock. Add a stem stamp to your flowers followed by the dandelion fluff along the top of your paper. Then, emboss your stamps with black embossing powder making sure to use a separate piece of ...
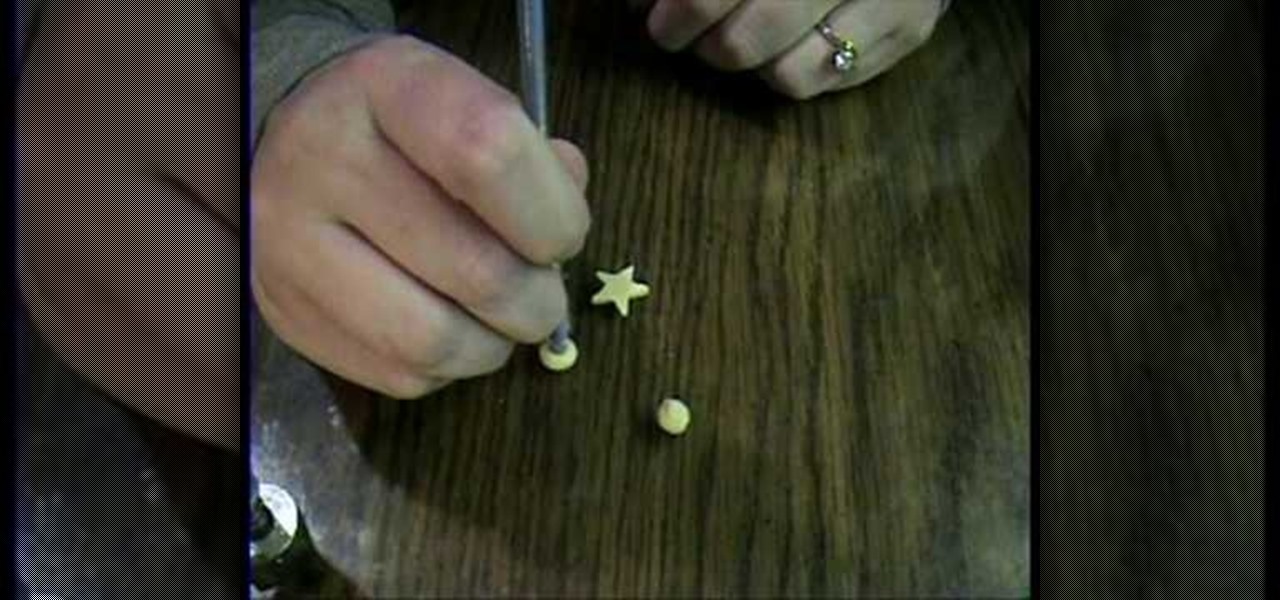
Garden of imagination show you how to make all your donut beads the same size without a clay measurer. Roll out your clay to desired thickness. Use any shape cutter and cut out the desired number of beads. Using your fingers, roll the cut-outs into balls. Press the balls to flatten slightly. Use the end of a thin paint-brush or similar object to puncture a hole in the middle of the bead.
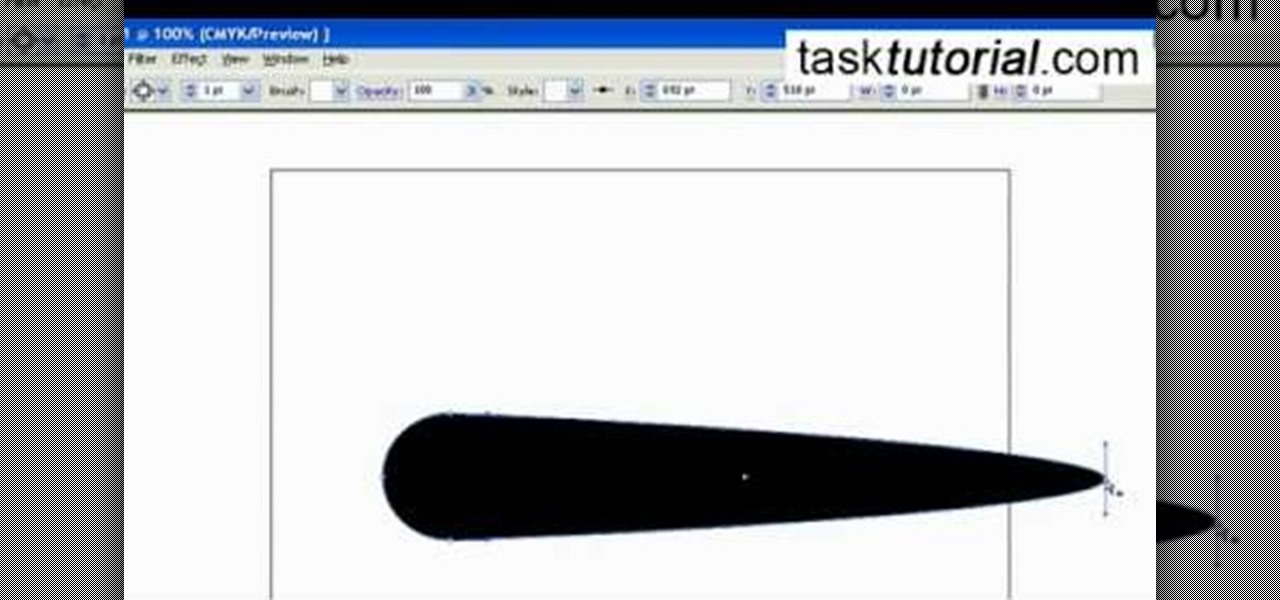
Let's get creative! In this video learn how to transform that boring old paintbrush in Illustrator into a totally new shape and size. You can turn your art brush into an arrow to a paint stroke to charcoal or even a fire truck or another fun shape! This tutorial will show you how to change your brush, step by step, and get the most out of Illustrator's drawing capabilities. Follow along with the video and soon you will be making unique designs with ease.
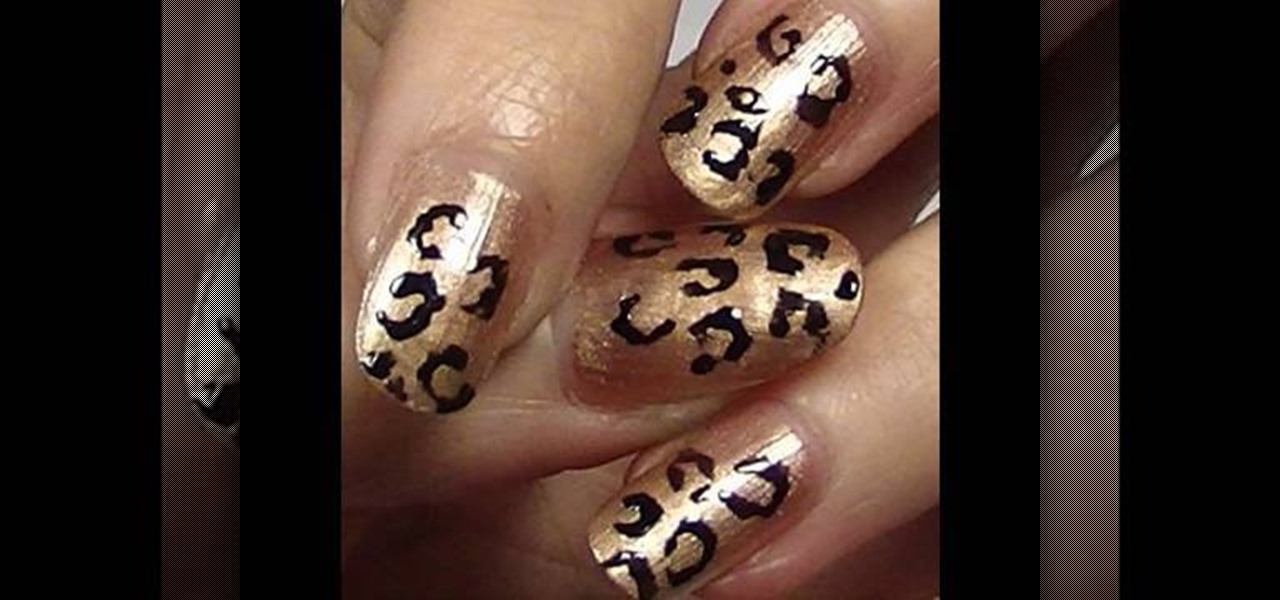
Pixie Litt, from Mama Do Nails helps us learn how to get a leopard printed nails. Firstly, using a E.L.F nail varnish in 'Blush', give a gentle coat on the nails starting from the tip of the nails go down to as close to the cuticle as possible leaving some edge space. Now, for the second coat use the brush in the same way but here you will be going down just half way so that it gives a more prominent look for the nails. Now for the leopard print, just use an ordinary black color nail polish f...
This video tutorial by VvCompHelpvV gives you two methods to achieve the Sin City effect in your photos using Photoshop. The Sin City effect is making the main subject of the photo appear colored while the rest of the photo looks black and white. In the first method the subject should be selected using a pen-tool using the settings mentioned. After that right click on the selected areas and make the feather radius 3, inverse the selection and go to image > adjustments and de-saturate and your...
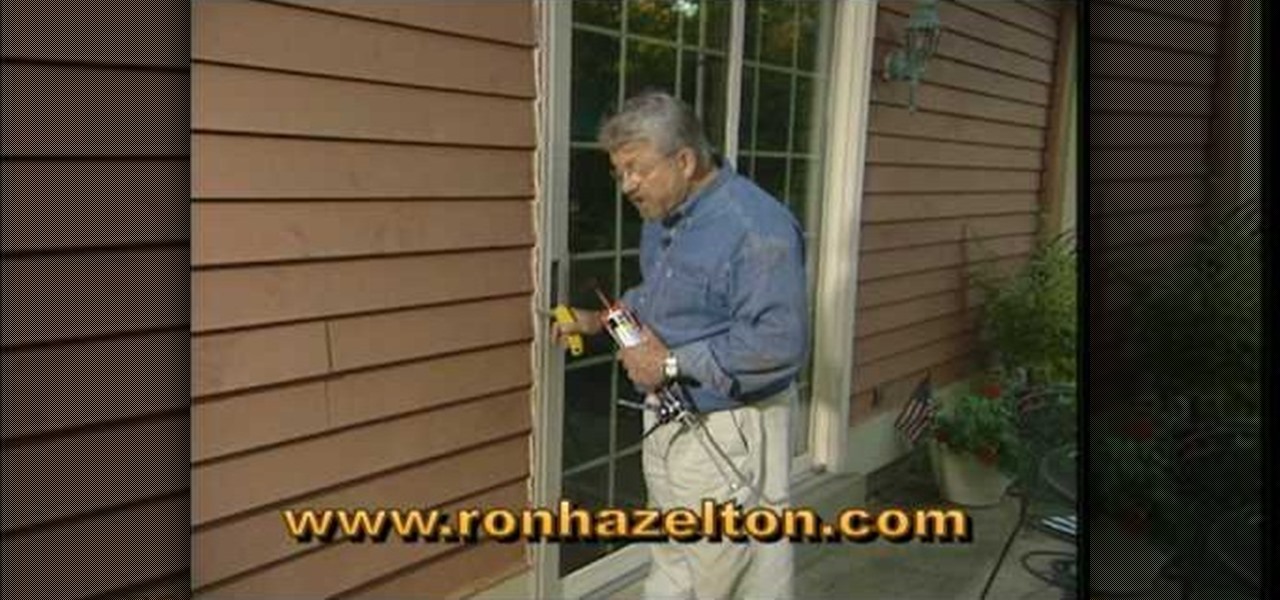
In this how to video you learn how to remove and replace exterior caulk that has failed. The video suggests a putty knife and/or a utility knife. Once the caulk is removed the video suggests you use a dry clean paint brush to clear any left over. You then simply apply new caulk where needed and the job is complete. This video is about a minute and a half and is great for people learning how to maintain their homes.
The people at Garden of Imagination demonstrate how to make a miniature cream puff. Using a mixture of polymer clay, clay icing, pastel paints and a variety of tools, including a paintbrush, a scalpel, and tweezers, a miniature cream puff is born. This mini item is perfect for any number of occasions. When used in combination with other mini foods and pieces, it makes a cute and cheap decorative item. Creating a tiny and affordable State Fair has never been easier!
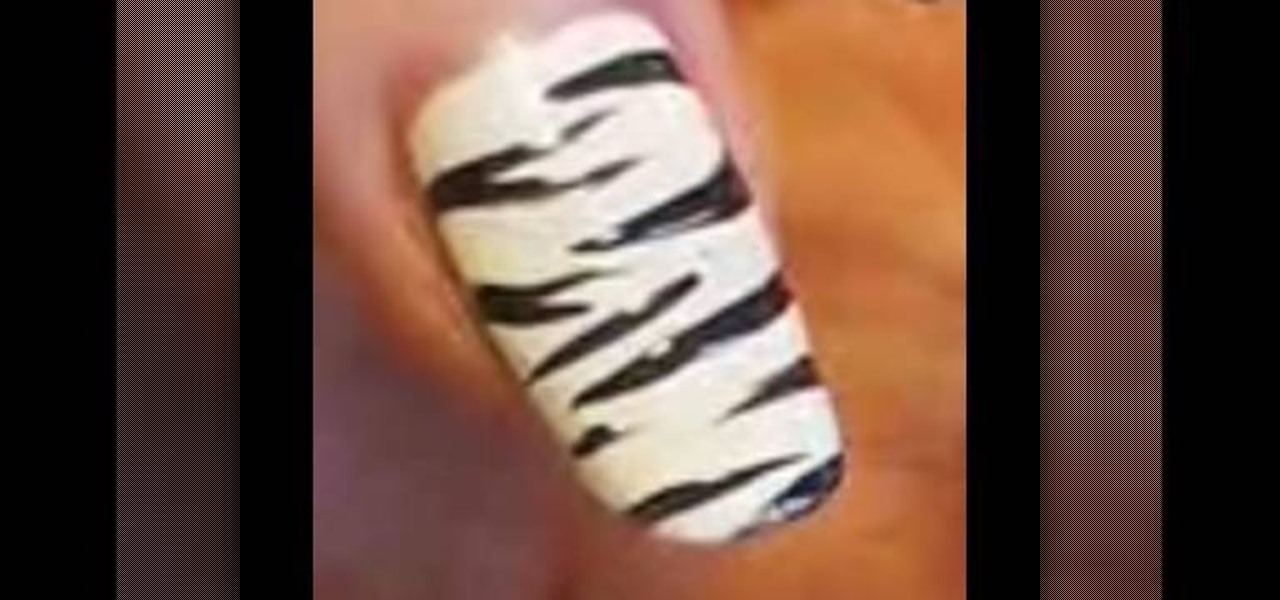
For nails that always look unique, stylish, and are simple to make, you should take some advice from this video. After cleaning and shaping your nails, you should apply two coats of a white or slightly off-white nail polish. After allowing these layers to dry, get some black nail polish and make the zebra print by carefully swiping the brush over your nail. Alternate sides from which you start the lines and you should soon have a very stylish and interesting nail pattern.
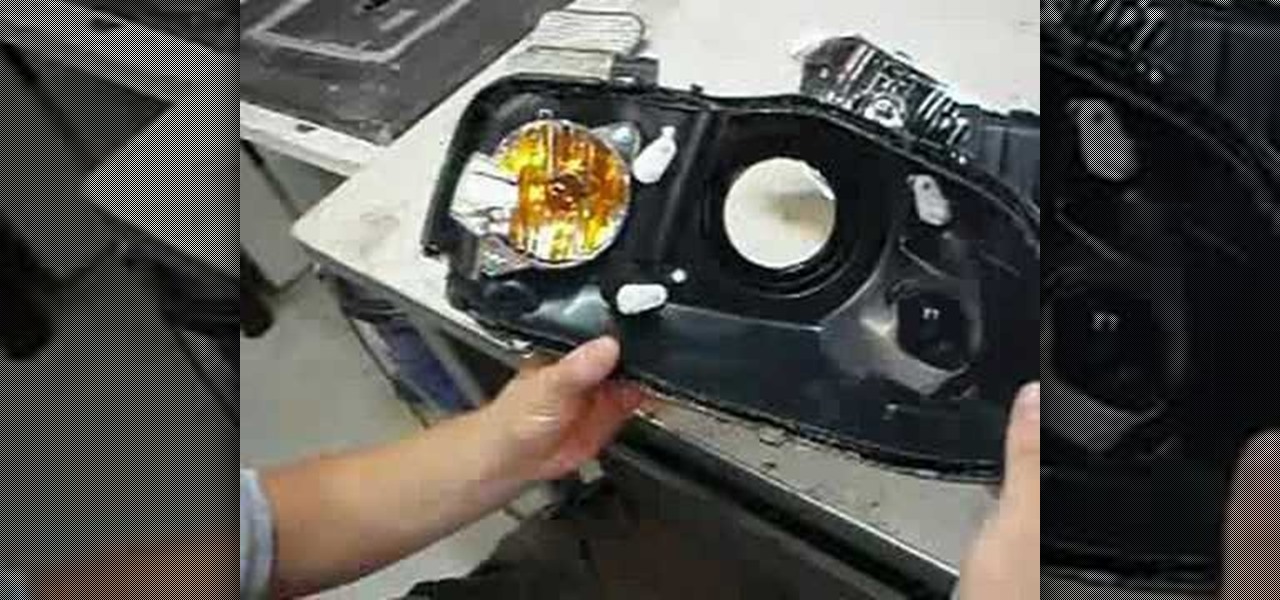
In this four part video demonstration, learn how to build your own HID projector headlights. The four parts cover the following:
Learn all there is to learn about yarn from Naztazia... watch this video tutorial to learn how to crochet spiral scrubbies with a pattern.
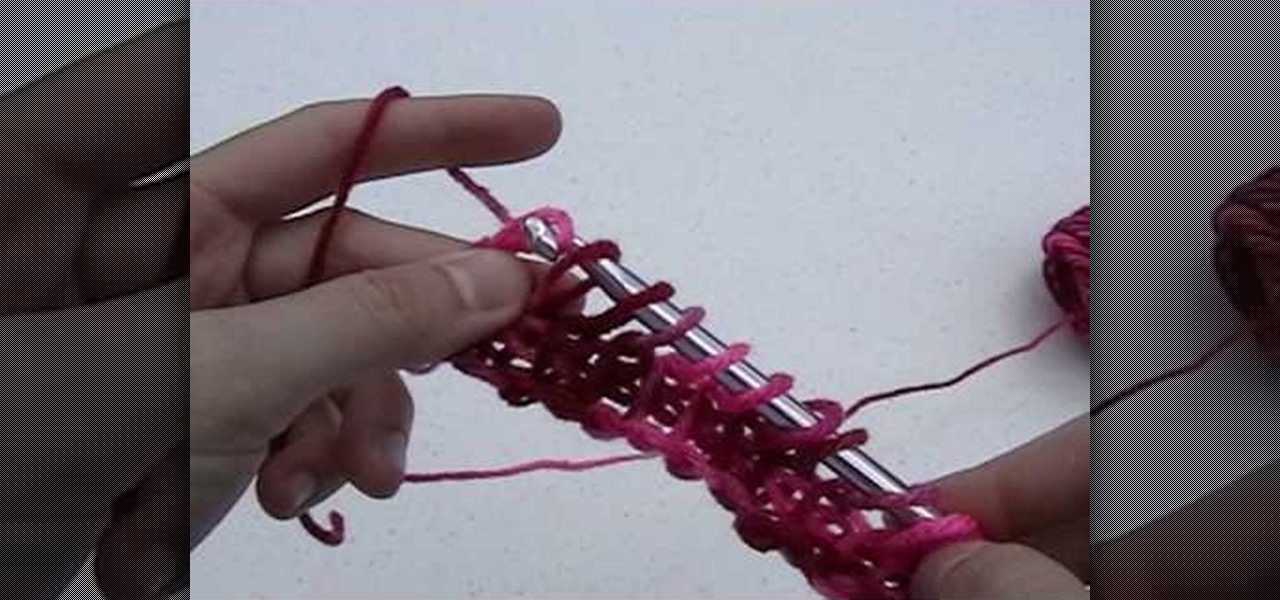
Learn all there is to learn about yarn from Naztazia... watch this video tutorial to learn how to crochet a Tunisian stitch or Afghan stitch.
Lauren, AKA QueenofBlendingMUA has joined the ranks with the other YouTube beauty gurus. Lauren is a makeup artist with a large collection of eye makeup & nail art video tutorials. Her eye makeup look span from everyday makeup to creative, more expressive party looks. Her nail art/ manicure looks are also lots of fun. Check out this nail art tutorial video to learn how to create a neon orange and dark blue nail art design. Search QueenofBlendingMUA on WonderHowTo for more beauty videos.
Never be frustrated by a rusted nut and bolt again with this foolproof removal method. Loosen as much rust as possible off the nut with a wire brush. Tap the sides of the nut with a hammer to help the rust separate and fall off. Apply heat to the side of the nut for about a minute. When the bolt is cool enough to touch, spray WD-40 on and around the nut and bolt. Tap the end of the bolt with a hammer to loosen the threads and allow the oil to penetrate. Wait another minute or so for the oil t...
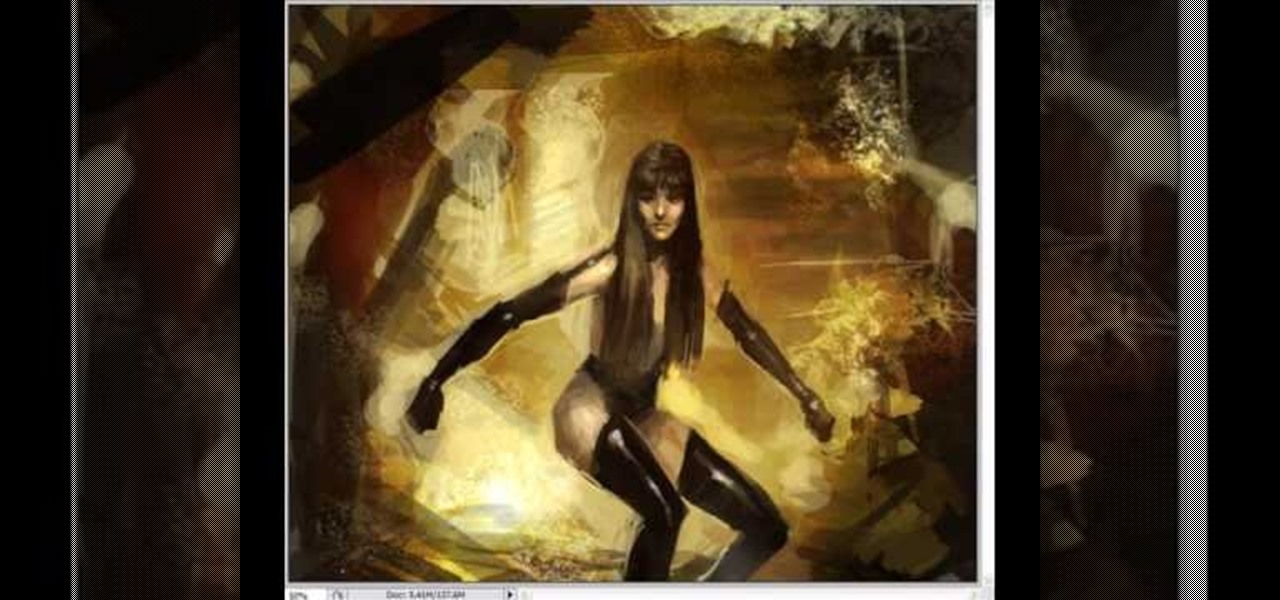
Learn how to draw Watchmen superhero character Silk Spectre in this lesson tutorial for quick concept illustration, cartoon and comics. Learn from basic sketching to finish drawing quick color concept painting for illustration. Learn how to draw and sketch this Watchmen character using values. This tutorial video focuses on drawing and sketching step by step: female character design for manga, video game, and comics basic. Silk Spectre is a character in the new Watchmen movie.
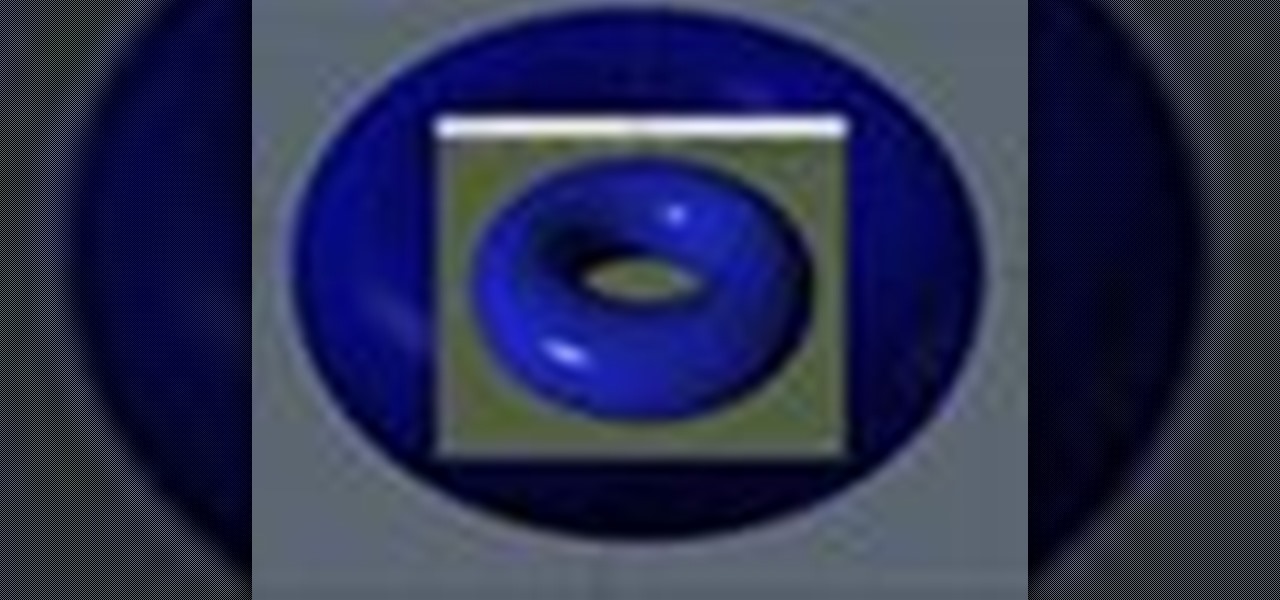
Go beyond the traditional 3D workflow to an immersive creative experience with the software Modo, created by Luxology. Modo is the next evolution of 3D modeling, painting and rendering for Mac and PC. Modo includes 3D sculpting tools, animation and network rendering, and advanced features such as n-gons and edge weighting.
Go beyond the traditional 3D workflow to an immersive creative experience with the software Modo, created by Luxology. Modo is the next evolution of 3D modeling, painting and rendering for Mac and PC. Modo includes 3D sculpting tools, animation and network rendering, and advanced features such as n-gons and edge weighting.
Go beyond the traditional 3D workflow to an immersive creative experience with the software Modo, created by Luxology. Modo is the next evolution of 3D modeling, painting and rendering for Mac and PC. Modo includes 3D sculpting tools, animation and network rendering, and advanced features such as n-gons and edge weighting.
Go beyond the traditional 3D workflow to an immersive creative experience with the software Modo, created by Luxology. Modo is the next evolution of 3D modeling, painting and rendering for Mac and PC. Modo includes 3D sculpting tools, animation and network rendering, and advanced features such as n-gons and edge weighting.
Go for a bug theme this Halloween! This Halloween makeup tutorial demonstrates how to apply a fun bumblebee costume makeup look. Be a queen be this Halloween. Enjoy!
Developed by the same team of engineers responsible for LightWave 3D, modo, lowercase, delivers the next evolution of 3D modeling, painting and rendering in a single integrated and accelerated package for the Mac and PC. And now, modo is a true end-to-end solution that includes true 3D sculpting tools, animation and network rendering! More than just features, modo is a truly elegant integration of technology, raw horsepower and refined workflow. With such a wealth of inbuilt features, however...
Devolped by the same team of engineers responsible for LightWave 3D, modo, lowercase, delivers the next evolution of 3D modeling, painting and rendering in a single integrated and accelerated package for the Mac and PC. And now, modo is a true end-to-end solution that includes true 3D sculpting tools, animation and network rendering! More than just features, modo is a truly elegant integration of technology, raw horsepower and refined workflow. With such a wealth of inbuilt features, however,...
Devolped by the same team of engineers responsible for LightWave 3D, modo, lowercase, delivers the next evolution of 3D modeling, painting and rendering in a single integrated and accelerated package for the Mac and PC. And now, modo is a true end-to-end solution that includes true 3D sculpting tools, animation and network rendering! More than just features, modo is a truly elegant integration of technology, raw horsepower and refined workflow. With such a wealth of inbuilt features, however,...
Devolped by the same team of engineers responsible for LightWave 3D, modo, lowercase, delivers the next evolution of 3D modeling, painting and rendering in a single integrated and accelerated package for the Mac and PC. And now, modo is a true end-to-end solution that includes true 3D sculpting tools, animation and network rendering! More than just features, modo is a truly elegant integration of technology, raw horsepower and refined workflow. With such a wealth of inbuilt features, however,...
Devolped by the same team of engineers responsible for LightWave 3D, modo, lowercase, delivers the next evolution of 3D modeling, painting and rendering in a single integrated and accelerated package for the Mac and PC. And now, modo is a true end-to-end solution that includes true 3D sculpting tools, animation and network rendering! More than just features, modo is a truly elegant integration of technology, raw horsepower and refined workflow. With such a wealth of inbuilt features, however,...
Devolped by the same team of engineers responsible for LightWave 3D, modo, lowercase, delivers the next evolution of 3D modeling, painting and rendering in a single integrated and accelerated package for the Mac and PC. And now, modo is a true end-to-end solution that includes true 3D sculpting tools, animation and network rendering! More than just features, modo is a truly elegant integration of technology, raw horsepower and refined workflow. With such a wealth of inbuilt features, however,...
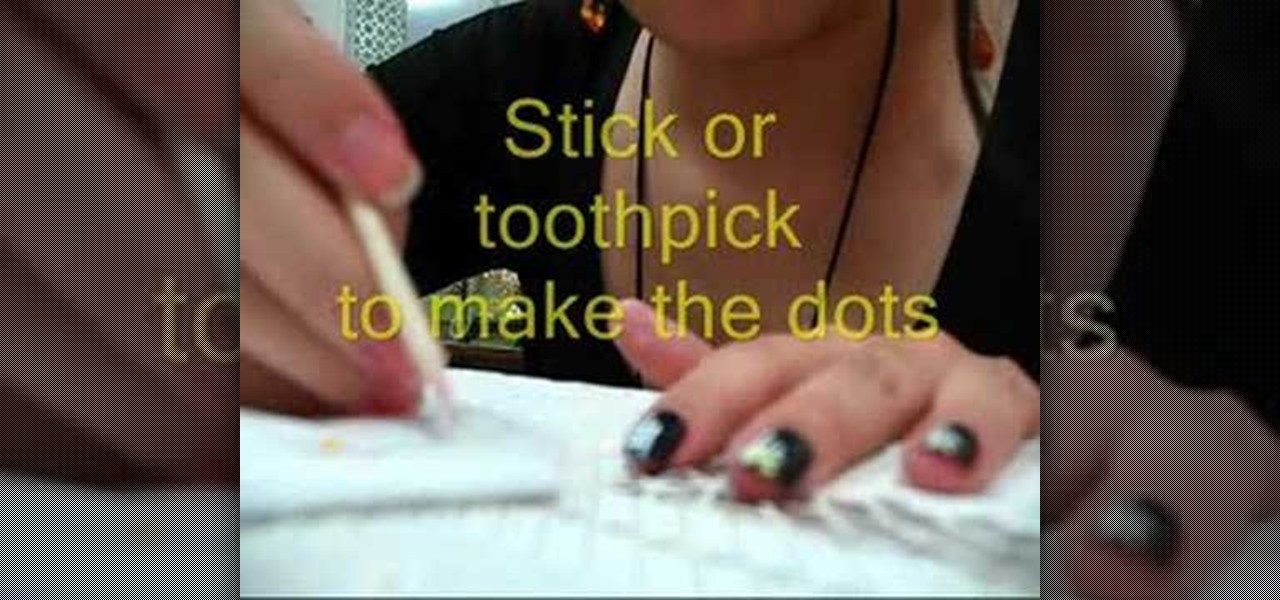
Want a change from your boring manicure? Learn how to apply dark blue nail polish with white stripes and yellow dots with this tutorial. You will need a base coat, a blue black nail polish, white nail polish, yellow nail polish, and a clear top coat. This fun look takes a steady hand and a bit of practice. With this how to video you will be able to create these pretty dark blue nails with white stripes and yellow dot nail art.
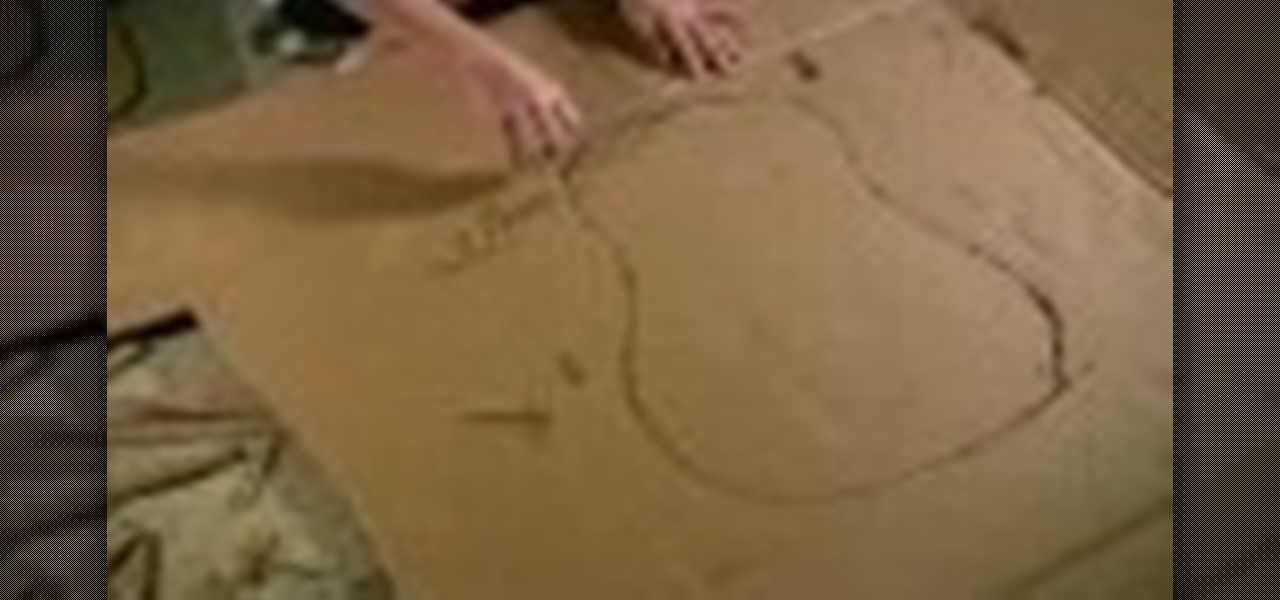
You're not really going to smash that guitar are you? It's a piece of art. Parker put together this tutorial to show how to build a prop guitar you can smash and let out all that rock and roll angst. You will need a glue gun, chess pawns, cardboard, duct tape, a gift box, glue, a garbage can, paper, paint, string, and a ruler. Watch this video prop-making tutorial and learn how to build a prop guitar for smashing.
This video shows you how to assign textures to uv's on models in Maya. This is a traditional method but fundamental to understand. You'll be painting the textures on UVs using Photoshop.
Build stones & cinder blocks for a diorama. Papa Tom teaches viewers how to make a building look like it is made of stone or cinder blocks using the Building and Structure Kit from Scene-A-Rama. This is super easy and tons of fun for all ages. It's great for school or class projects. Use a ruler, a fine point marker, a hobby knife, and a paint brush.
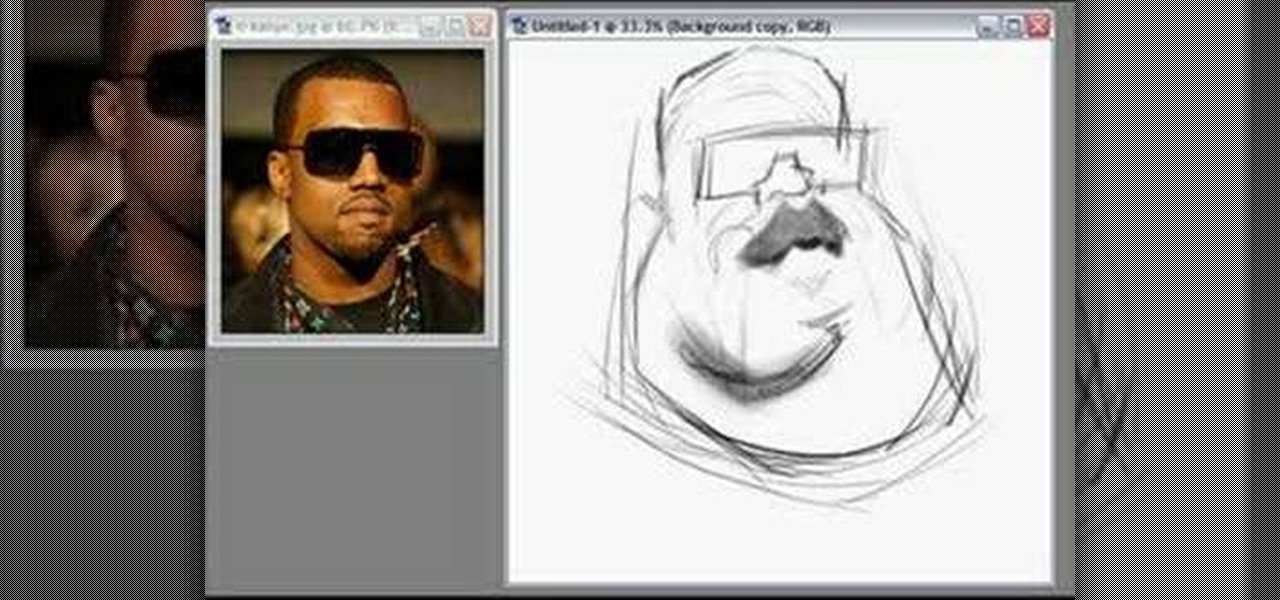
Joe Bluhm shows you how to draw a caricatures of Kanye West in Illustrator. The principles he covers are not related to illustrator but can be applied to other drawing softwares or traditional drawing and painting methods.
In this great, short video, you'll learn how to make plastic cup Christmas ornaments that are great for children! All you need is some plastic cups, an oven, and some permanent markers! Just don't leave those cups in the oven for too long!
In order to make your own icons for free, you will use any bitmap program. You can use Paint, in Windows. Open paint. Click on Images. Then, go to Attributes. Change the width to 32 by 32 pixels. Click OK. You can enlarge the image, if you like, in order to make it easier to work on it. Draw the image that you like. Click on File and Save. Next, you will need to save the image. Click on File and Save As. Change it to a 24 Bitmap image. Name it New.ico. Save it to your desktop. You should see ...