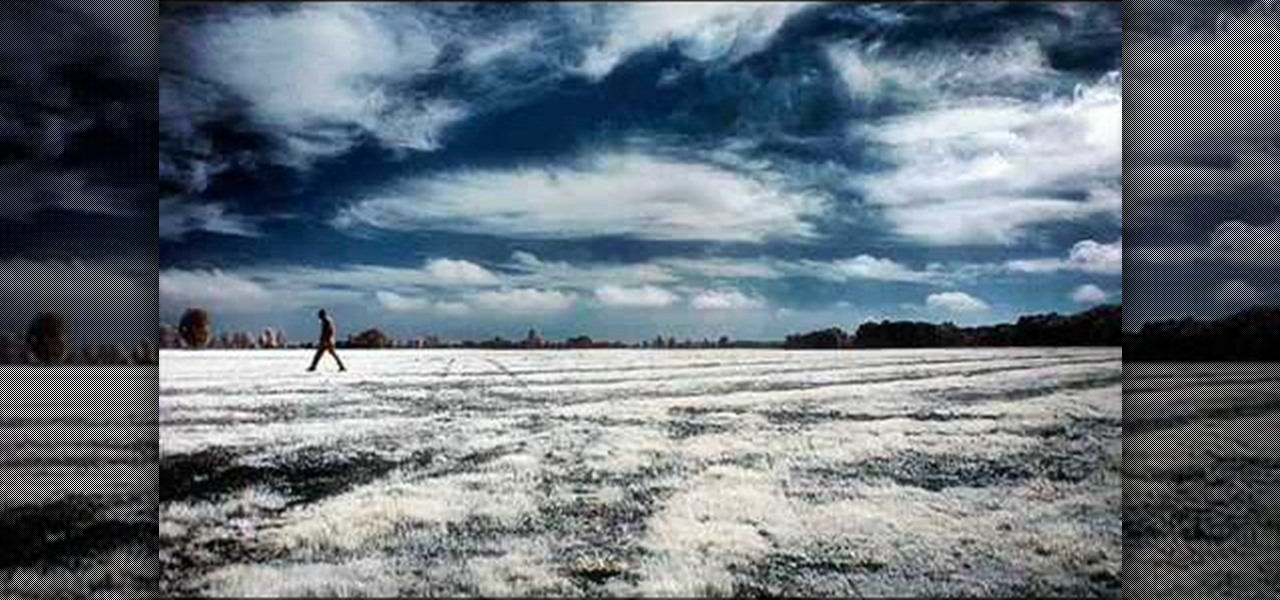
With the ever-evolving technology that imbues photography, we are never short of fantastic awe-inspiring shots. Digital cameras can capture things that the naked eye only wishes it could see, like streaking lights, rapid movements, and faraway objects, and it's fairly easy to capture these things if you know the basics.
Robert Templeman from the Naval Surface Warfare Center in Crane, Indiana and several of his friends from Indiana University recently developed an Android application that is capable of gathering pictures and videos from mobile devices in order to reconstruct a user's environment in 3D. The malware would come coded inside of a camera application that the user would download. The malware, called PlaceRaider, would then randomly take pictures throughout the day and carefully piece them together ...
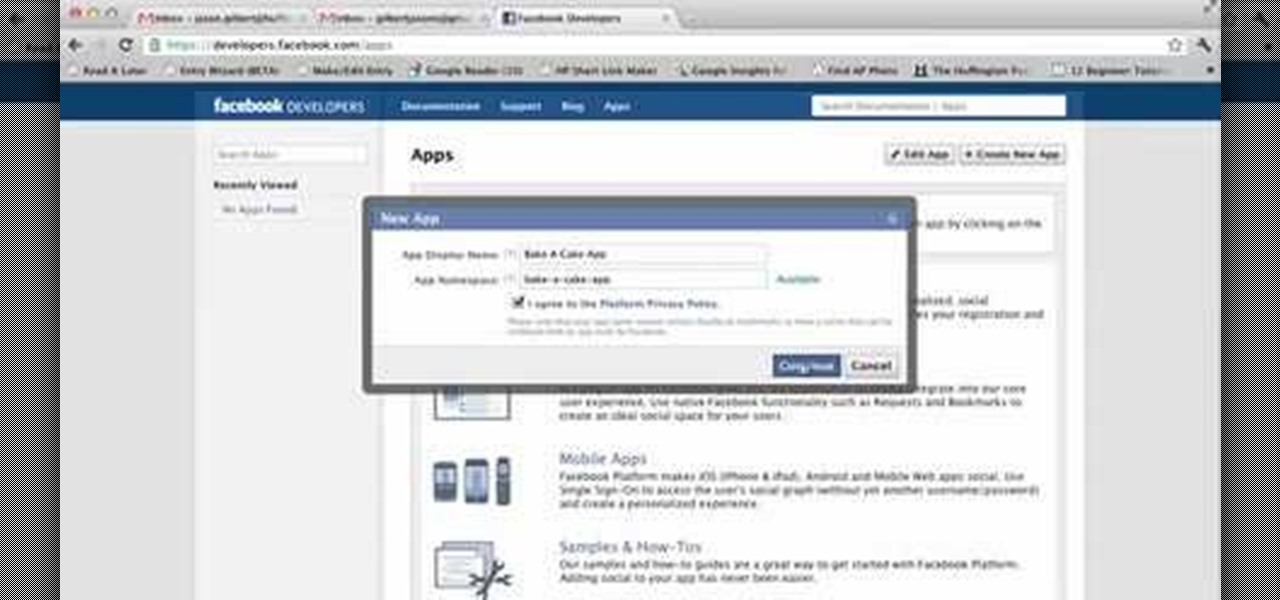
Facebook recently unveiled its latest set of upgrades for Facebook profiles. If you want to get the new Facebook profile looks early, this trick will help you turn on the new features so that you can showcase that big picture front and center.
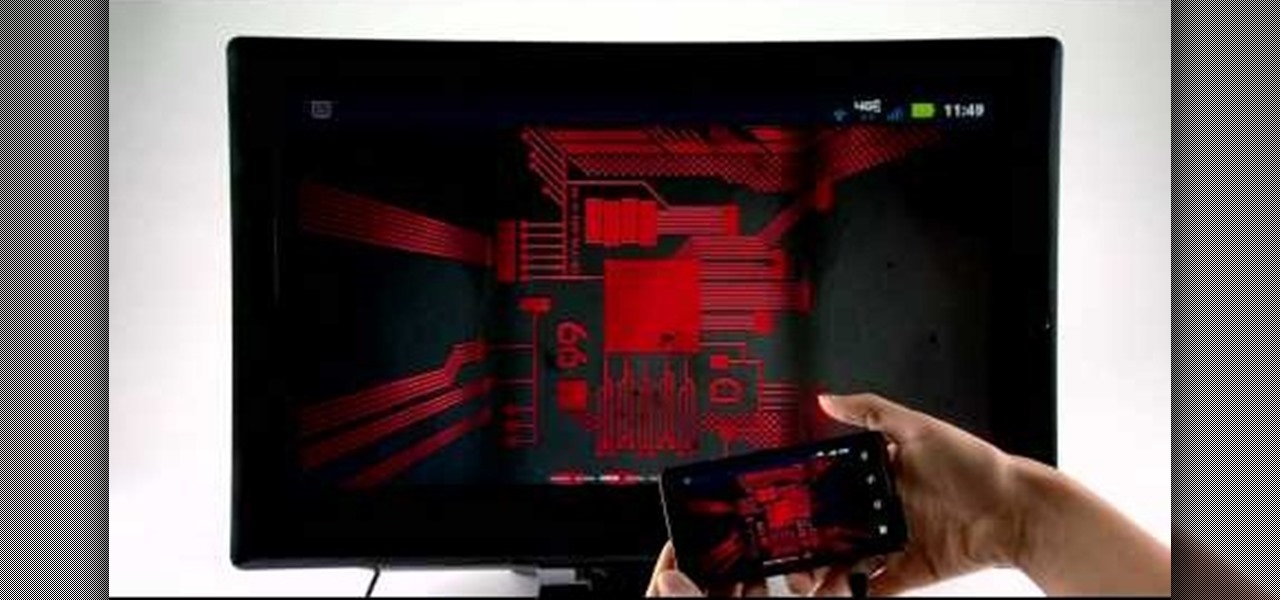
Mirror Mode is a feature provided with the Motorola Droid Bionic that allows you to connect the Android smartphone to an HD TV or computer monitor via an optional HDMI cable. Then, you can watch HD videos and look at pictures you've taken with your Bionic on your TV or computer. This guide will walk you through the process of hooking up the phone to an HD device.
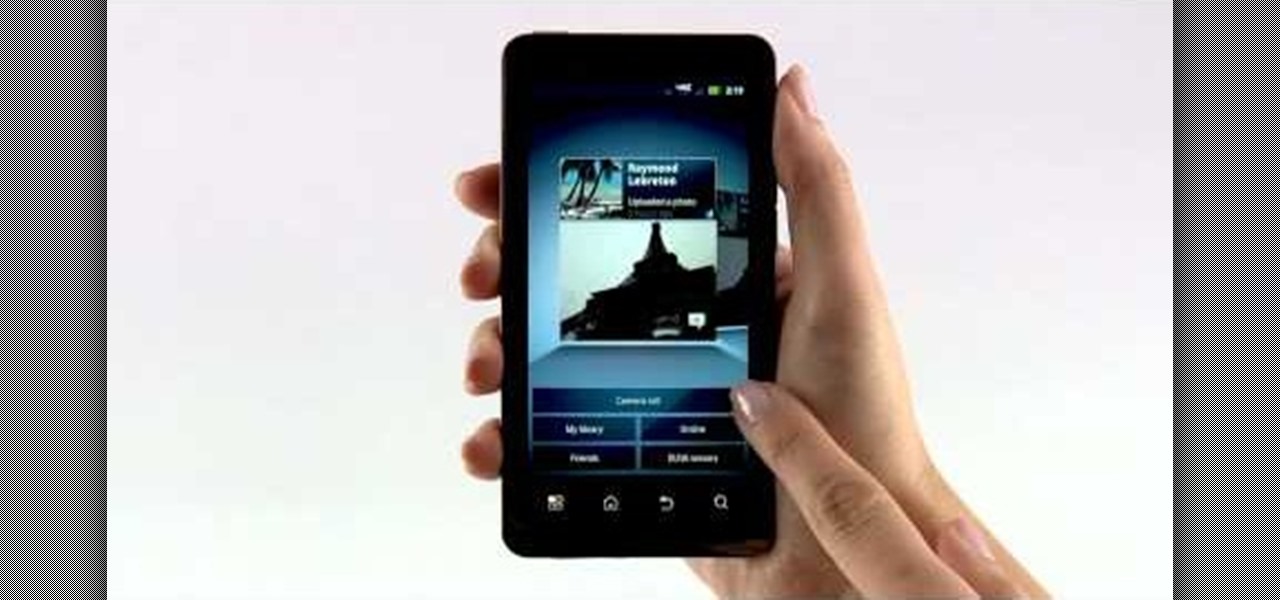
The Gallery app attached to the Android OS is a great way to view your photos, as well as friend's photos, on the Motorola Droid Bionic smartphone sold by Verizon Wireless. It serves to aggregate pictures from Flickr, Picasa, Facebook, and other photo hosting services. This Motorola support tutorial will show you how to manage the photos in the Gallery application.
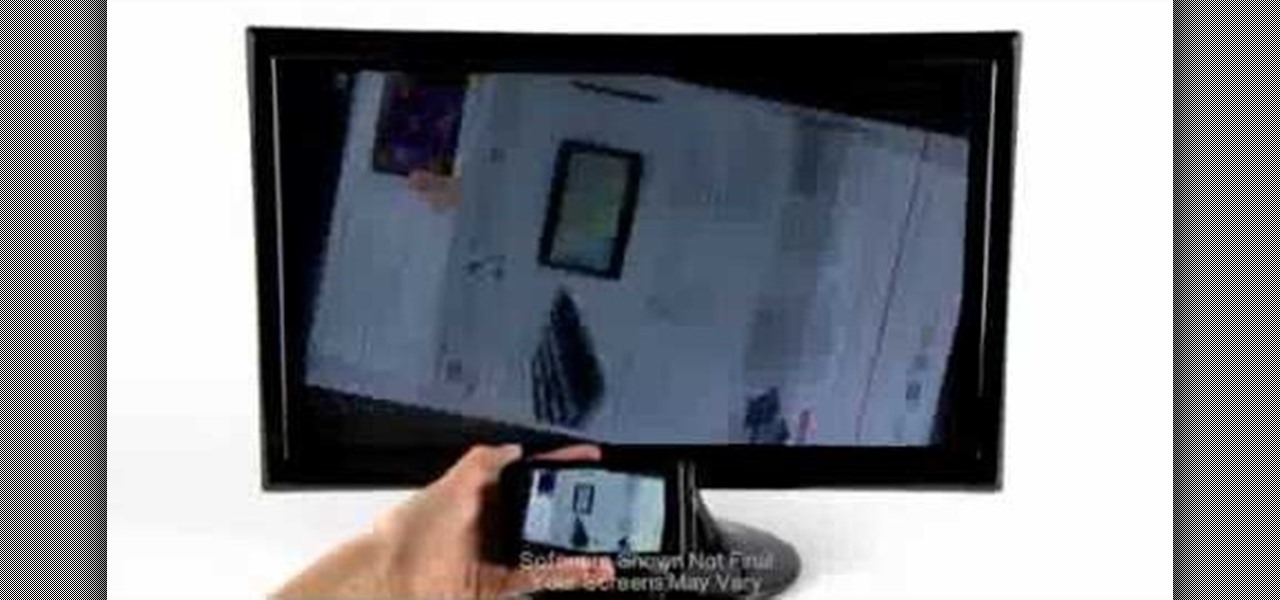
The Motorola Droid 3 smartphone is capable of recording 1080p video, and while the screen on the Verizon Android phone is large, wouldn't it be nice to look at all the pictures, games, and videos on a bigger screen? If you have the right kind of HDMI cable nearby, you can connect your Droid to an HD device using the Mirror Mode feature.

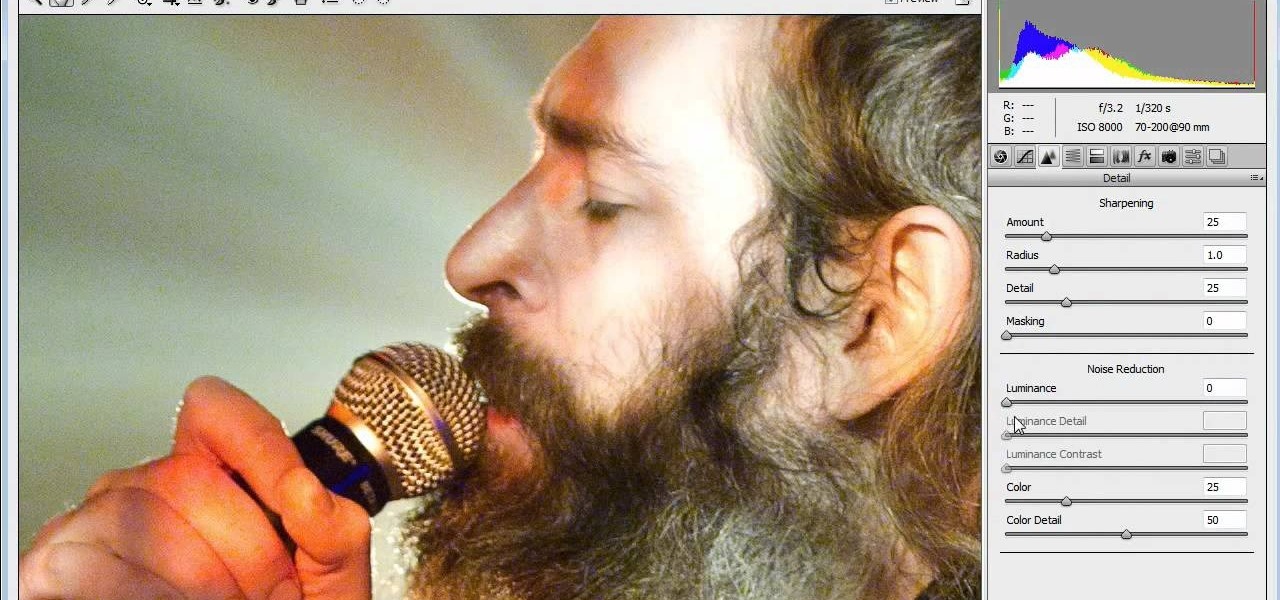
If you're new to Adobe Photoshop, editing photos can be a bit intimidating, especially when dealing with raw file formats. But with the help of this Photoshop tutorial, you'll be able to fix up your raw photos without any problems. Gavin Hoey walks you through his steps of Camera Raw in CS5, using an awesome picture of Matisyahu as an example, tweaking and fixing the pic using the crop, white balance, temperature and noise tools.
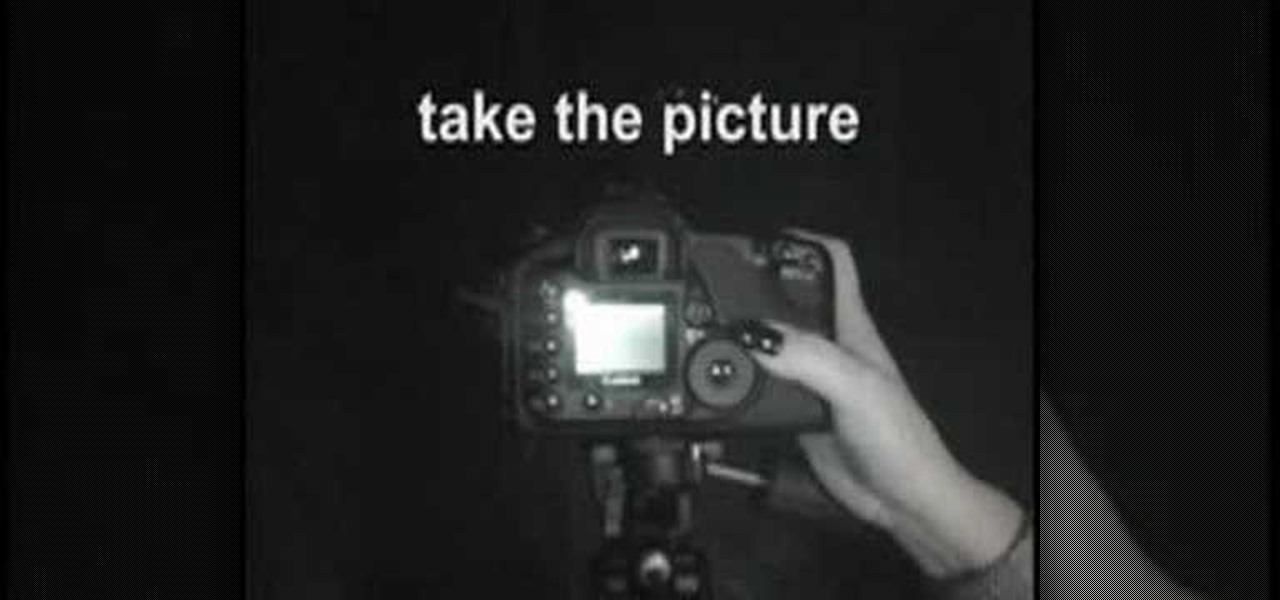
The autofocus functions showing up on new DSLR cameras are quite useful if you know how to use them. The Nikon D3100 is no exception, and this video will teach you about the different auto-focus modes and which ones you should use to make your pictures look as good as easily as possible.
The flash is one of the most useful camera accessories you can have, but they also have a tendency to ruin perfectly good pictures, especially with digital cameras. This video will show you how to take shots with great depth and dimension even with a digital camera and flash by setting the flash length manually.
When making your film, you want to make sure that the cameras that you're using, and the pictures and footage that you're taking, have the right exposure. Exposure can make or break your film as far as quality of the footage being presented! In this video you will get a tutorial on how to get the perfect exposure for your footage!
This tutorial goes over a few of the advanced features offered in the special effects and video editing software WAX 2.0. Specifically, you'll learn how to add particle effects (like snow) and create a picture warp for transitions to add to your films and projects.
Drywall is all over America, and that means wall anchors are also pretty ubiquitous as a means of keeping our pictures and shelves from destroying these fragile walls. This video explains the different types of wall anchors you have to choose from and how to install them yourself.
Doing a full 100% completion playthrough is always a pain, especially when hidden collectibles come into the picture, and in Scorpions level, not only is he also kind of a pain, but finding some of the hidden spiders are difficult. In this great video you will get a walkthrough of each location, how to get into some of the tricker locations, and some great commentary explaining each section.
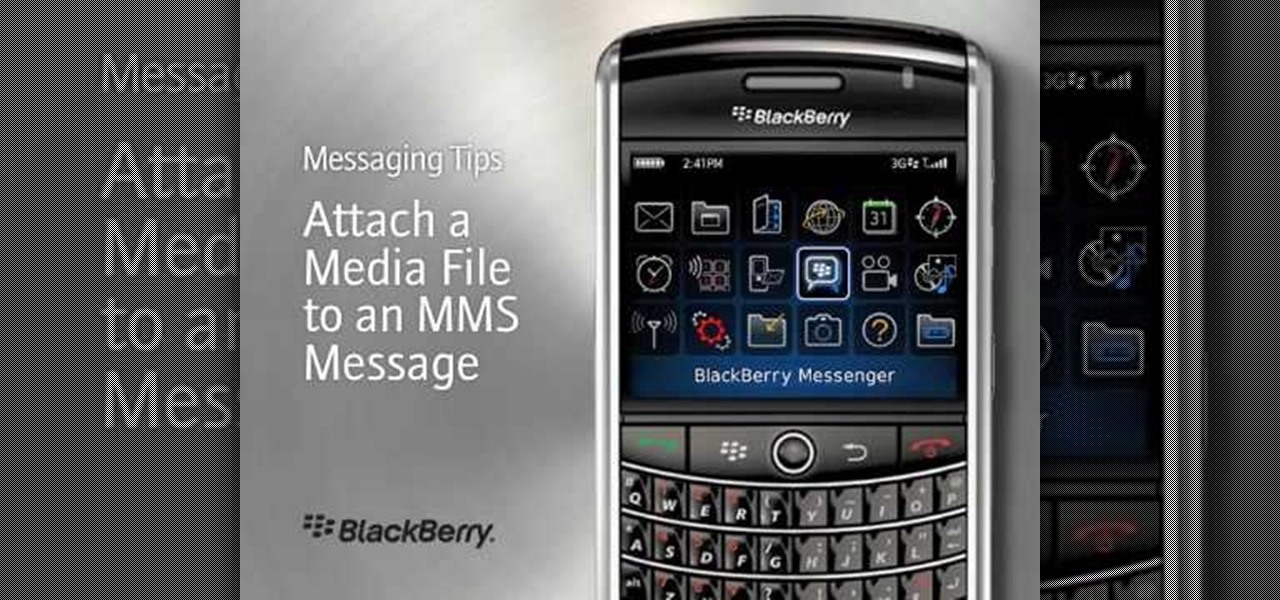
Learn how to attach media to an MMS message on your BlackBerry. This clip will show you how it's done. Whether you're the proud owner of a BlackBerry smartphone or are merely considering picking one up, you're sure to be well served by this video guide. For detailed information, including step-by-step instructions, take a look.
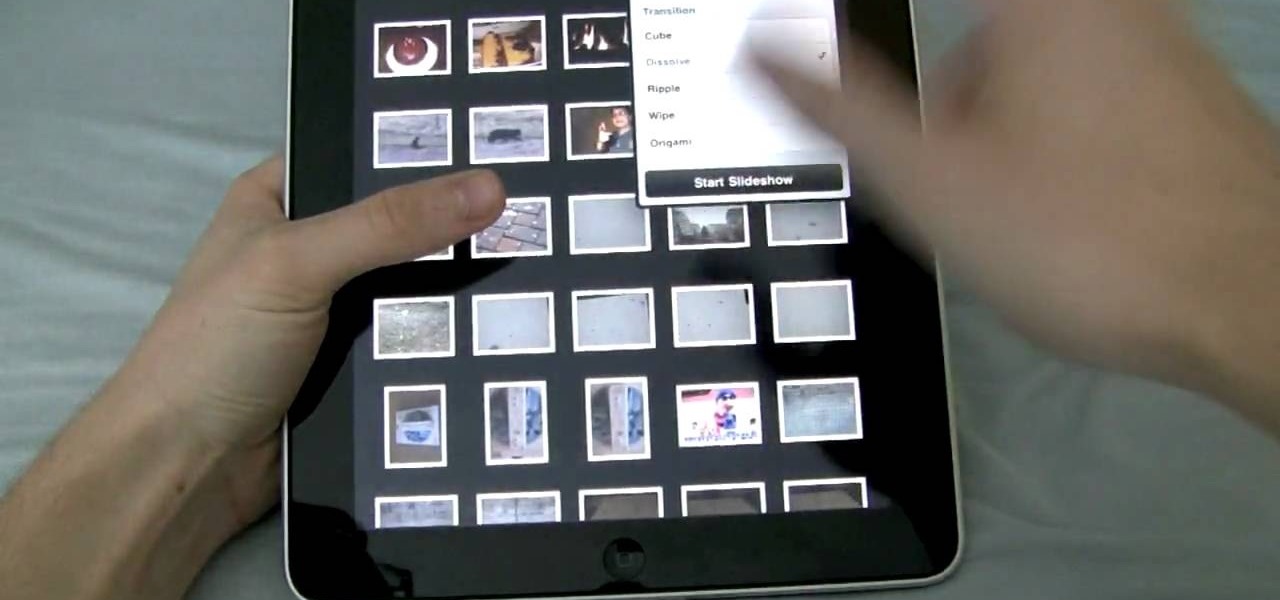
The iPad is the reigning king of the tablet PC's (although it isn't one, strictly speaking) and allows users to do things that they never thought possible with a computer. One of it's coolest and most applicable Apps is the Photo app, which allow you to view high-fidelity photos in a fun and portable way. This video will show you how this App works and how to use it to impress your friends with your awesome photos.
Infrared photos are photos that are taken in such a way that they absorb light from beyond the visual spectrum, giving your pictures a cool, surreal effect. This video will teach you everything you need to know to take them yourself. You'll learn how to determine if you have a camera that will work, get the proper filter, and take the photo. It's pretty quick and easy if you have the right equipment, and looks really, really cool.
Most people refer to "long press" as "touch and hold", but no matter which way you say it, it's an awesome feature for Android cell phones. Long pressing lets you get more information, download photos from the web, edit pictures and more! Watch as Google teaches you about long pressing, a nifty feature that reveals additional functionality on your Android-powered phone.
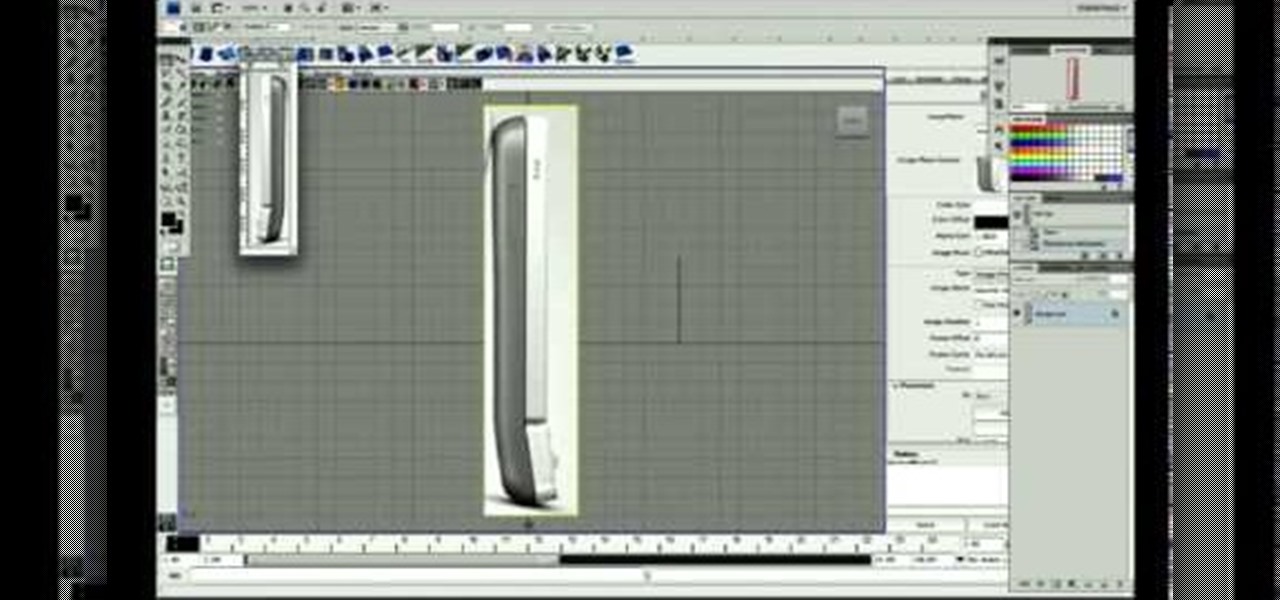
This video from accredited Maya 3D instructor Andrew Klein is a part of his wonderful series of videos covering different aspects of 3D digital art. It covers how to use Photoshop and Maya together to create, align, and sync image planes properly. Take some pictures of your cell phone and get started!
The nose, the prow of the face, is the part of the human body that the most people seem to dislike about themselves. Especially if their noses are big. This video tutorial teaches you how to touch up a nose in Adobe Photoshop CS4, specifically by using the liquefy tool to make a model's nose smaller. If you can't afford plastic surgery, now you can look like you got it in your pictures.
Everyone remembers the beloved transvestite Frank-n-Furter from the 1975 cult classic, "Rocky Horror Picture Show". Played by the brilliant Tim Curry he will remain an influence on fashion, makeup & hair. "Give yourself over to absolute pleasure," Frank-N-Furter famously said, so why not give yourself a pleasurable makeup makeover? In this makeup tutorial, learn how to apply Frank-n-Furter makeup & hair - perfect for Halloween or any masquerade ball.
This is a simple Photoshop Elements tutorial on how to make rounded photo corners for quick and tidy effect. See how to make photos with one, two, or opposing rounded corners. This could be turned into an overlay, too! This is a great, detailed Photoshop tutorial on rounding your picture corners. Easy to learn.
There's a lot more to the new iPhone MMS than simply taking a picture and sending it to someone. This video blogger shows you how to make the most of the new MMS feature. If you haven't updated your iPhone yet to get MMS, you can do so simply by plugging your iPhone into iTunes and downloading the update.
All you science and astronomy nuts out there, pay attention, this detailed video tutorial series will tell you everything you need to know about using the Meade EQ Series Telescope to ogle the universe.
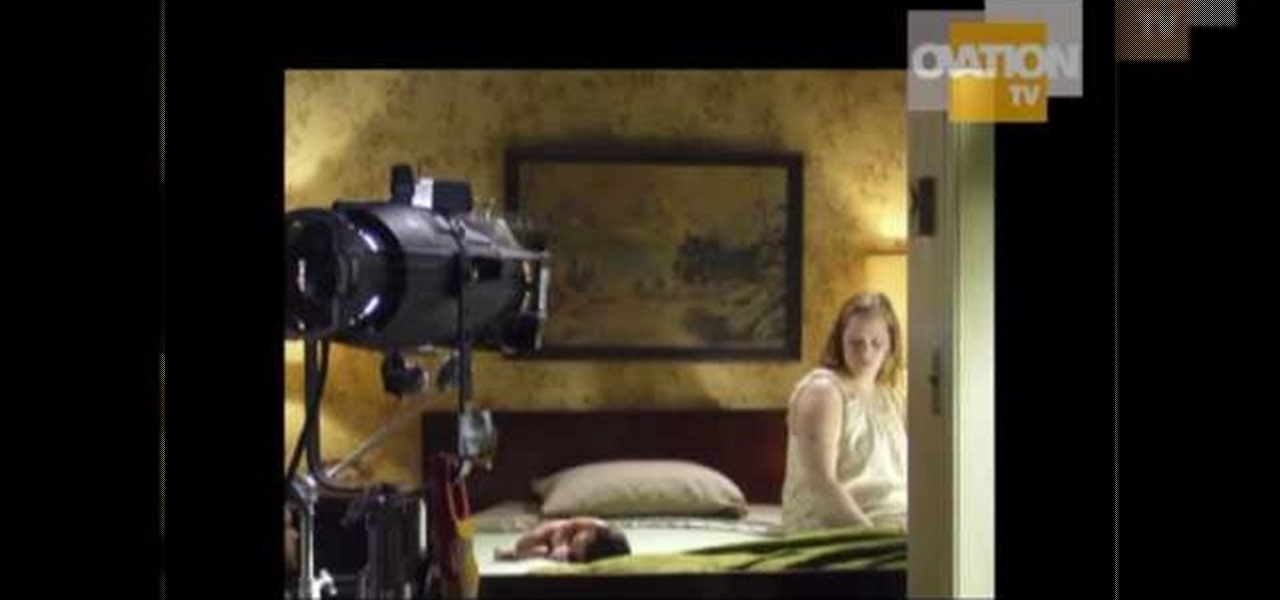
In this Ovation TV original special, acclaimed photographer Gregory Crewdson shares with us his insight into his photographic techniques. Like a film, he uses a lot of production, a lot of lighting, a lot of set design. He is an American photographer best known for elaborately staged, surreal scenes of American homes and neighborhoods. Learn how to take pictures like this master artist.
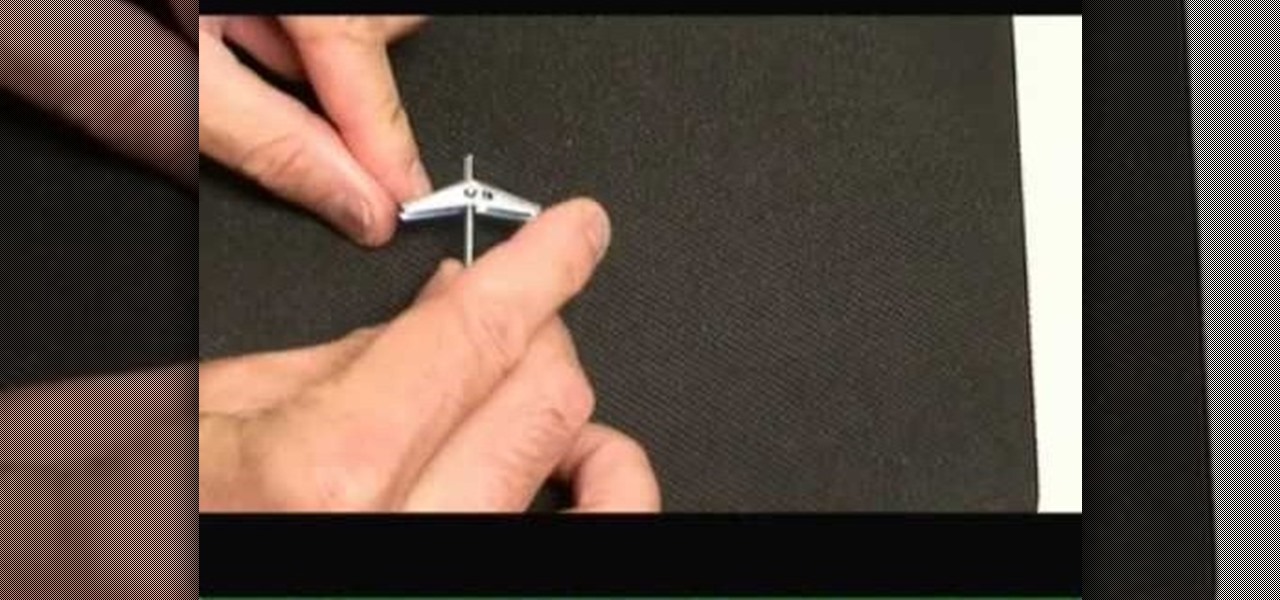
The demonstrator used a picture of a real panda to make the motif for this origami creature.
In this tutorial, we learn how to use the camera on the Samsung Galaxy I7500. First, press and hold the camera key on the side of your phone. Next, you will see the camera appear on your screen. To take a picture, press and hold the camera icon. You can review your picture by tapping the gallery icon on the top left. Here you can zoom in and zoom out, view other photos, set it, share it, and delete it. When you are finished, simply go back to your menu and then you are done, enjoy using your ...
In this tutorial we learn how to make a Christmas wreath card holder. To do this, you can use a Styrofoam wreath, feather boa, glue gun, and pictures. First, glue the feather boa around the Styrofoam wreath in any color that you would like. After this, attach your favorite color of ribbons to the boa and then attach some wire to the back of it with the glue. After this, you can place the pictures on the frame and then attach anything else you would like! This is a fun craft that looks great i...
In this tutorial, we learn how to do light graffiti with an ISO-100 camera setting. First, you will need lights in an array of different colors. After you have all of these lights, you will need to take a picture. Then, grab the lights and write in the air with them. After this, you can turn the camera on and then use the light source from the camera to create light graffiti on your pictures! You can do a ton of different things, there is no limit! This is fun and creative, so get out there a...
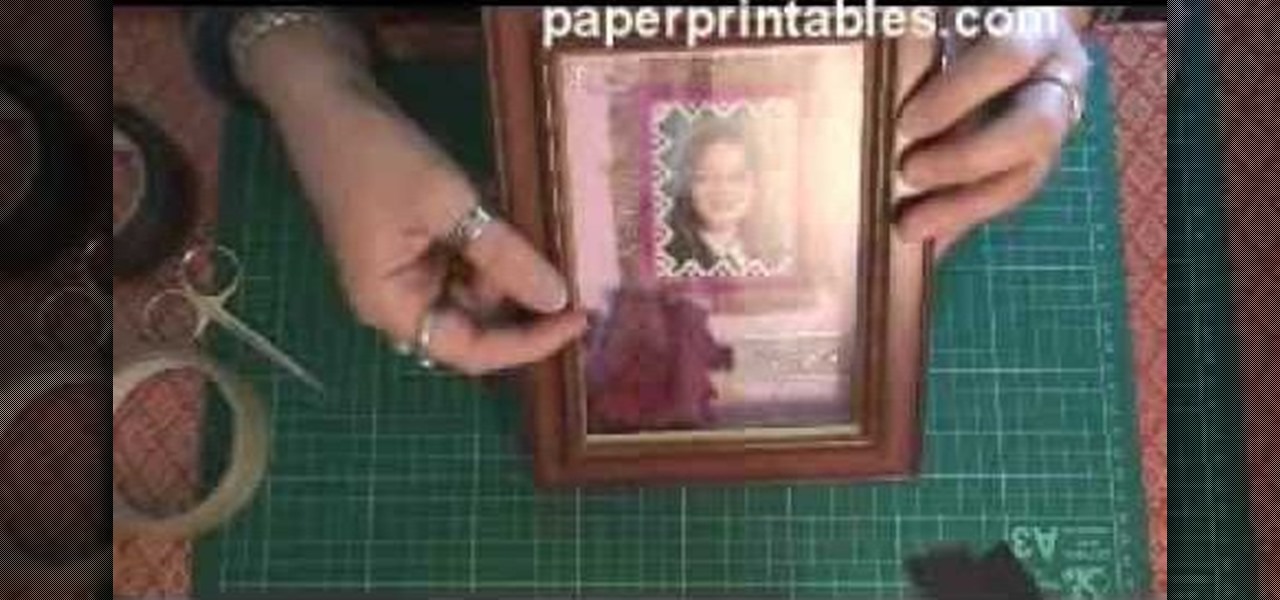
In this tutorial, we learn how to make a shadow box frame. First, grab a regular picture frame and remove everything from the frame. Next, remove the metal pegs that are around the sides. From here, grab a piece of card stock and draw the outline of the glass onto it with a pencil. Then, extend the edges of the box out on the paper. From here, you will cut it out and then bend it into a box. From here, add the picture and anything else you want inside of the box. Stick double sided tape insid...
In this video, we learn how to resize an image in MS Paint without losing resolution. First, you will go to the file menu and then open. From here, open up the photo you want to resize. After this, go the 'image' section on the toolbar and then click 'stretch and skew'. From here, change the vertical and horizontal stretches until you have the size of picture that you want! Continue to play with it until it's right and then save this over again. This should only take a few minutes and will ke...
In this video, we learn how to take better pictures for eBay. If you're selling something on eBay, you want your item to look good so it will sell quickly. People are more likely to buy from you if you have good pictures which showcase the product you're selling. The first thing you can do is to clean the product thoroughly and then set it on a sheet with a green background and green all around it. From here, take different shots with your camera and then load it onto your computer. After it'...
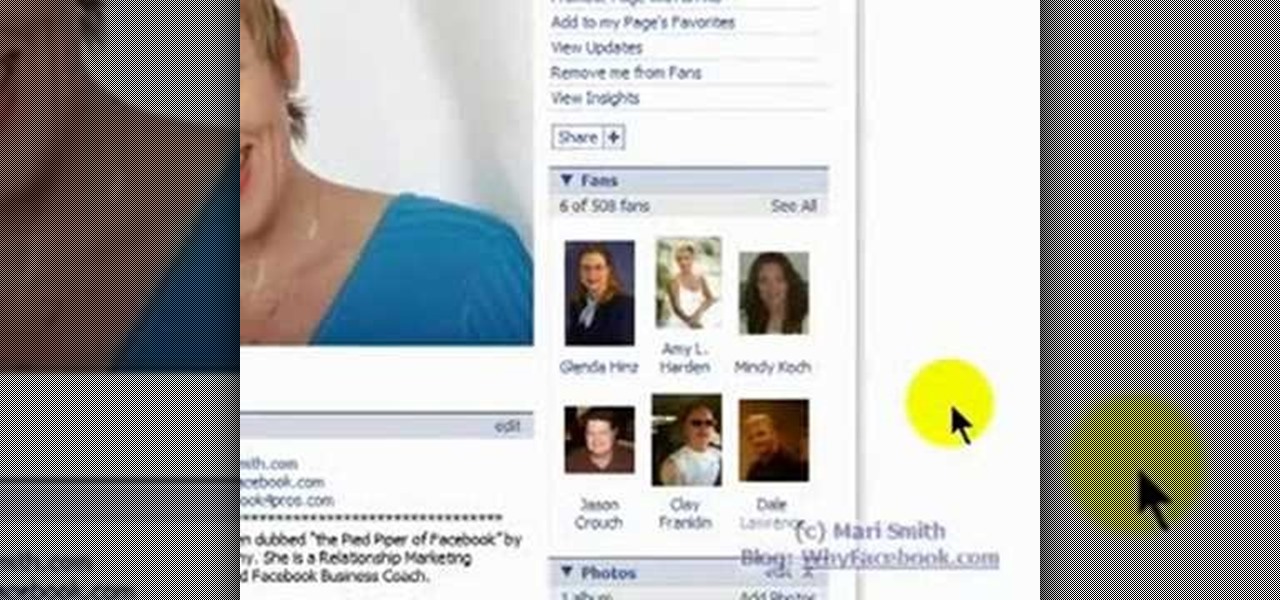
In this tutorial, we learn how to create and promote a fan page on Facebook. First, you will need to go to the Facebook website and create a fan page. Once you have the page created, you will need to add on your picture, along with many other pictures to the page. Go to the bottom of the page where it says "advertising", and click on this. Then, you will get started by advertising your Facebook page to the millions of users that are around the world! When you're finished, grow this by having ...
Learn. Evolve. Operate. That's the basis of Leo from Kryon Systems. It's a new application that runs on top of any program you have open (web and desktop applications), providing you with instant help. Leo can actually perform your duties for you! Like in Microsoft Word 2007. In this video demo, you'll learn how you can use Leo to help you insert a picture into Word 2007, making Office a whole lot easier. See it in action!
In this tutorial, we learn how to cut your friends in half with film effects. To do this, you will need an actor, a still frame of blood, and some gory looking meat. Have your wounded actor lay on the floor with another actor laying next to him. Then, have them all leave the frame. Next, bring all the footage in After Effects and bring in the meat picture as well. Add blood and the meat in the pictures and remove the lower half of the body. Play with the colors to make it look more realistic,...
In this video, we learn how to draw a Pikachu PokŽmon. First, you should have a picture of the character in front of you so you can better draw it. Start out by drawing the eyes and filling them in with marker. Next, draw in the rest of the face, including the nose and the mouth. After this, draw the ears at the top of the head, then connect in the middle to create the head shape. Draw the sides and bottom of the head, then draw the body. Add in circles for the cheeks, then continue to draw u...
In this tutorial, we learn how to use fill flash to get blue skies. If you take a picture of someone in front of a blue sky, they will most likely have shadows on their face, making the sky look good and them look bad. If you change your flash, the sky will look pure white and the person will look good. To change this, put a flash onto the camera, then use the exposure compensation to -1. Then, adjust your flash exposure to 2 2/3 and take the picture of the subject again. Now, you will have a...
In this video, we learn how to shoot wedding photography like a pro. Start off by having the wedding party in front of a clear background. Try taking their picture outside with trees and a clear sky in the background behind them. Use the surroundings to add a special touch to the pictures and use the correct flash so that the wedding party shows more than the background does. Accentuate the background and use white flash absorbers around the wedding party so their faces have more color that s...
In this video, we learn how to remove acne spots with Photoshop. First, open up the picture and zoom in on the acne you want to remove. Now, unlock the layer by right clicking and unlocking it. Next, use the clone stamp tool while pressing alt to clear the skin where the blemishes are at. Click constantly on the acne until all of it is done. You want to click as many times as possible to get the best effect in removing this. When you are finished with this, duplicate the layer, then change th...
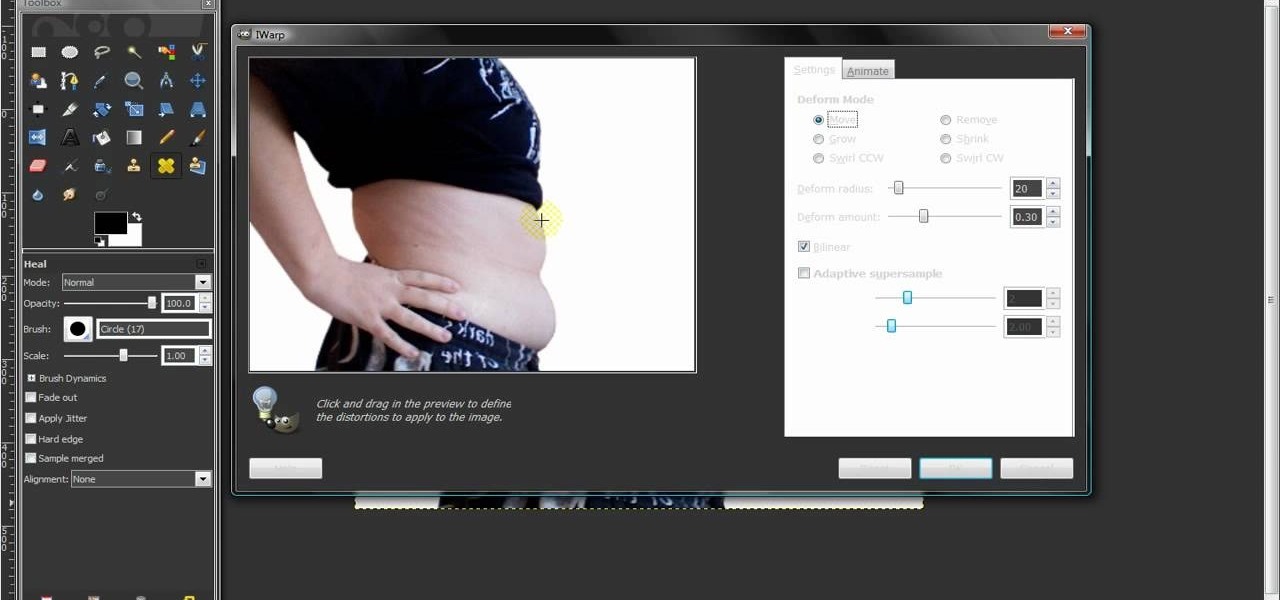
In this video, we learn how to remove body fat or stretch marks in GIMP. First, go to filters, then distort, then warp. When you are in this window, you will be able to see all the different distortions that you can do. To help you remove the fat, use the "move" tool and a proper sized brush. Now, press on the stomach and slowly press down on it until you see the part of the body start to become smaller. Don't do it too quickly, or the picture will look fake. When finished, save your new pict...