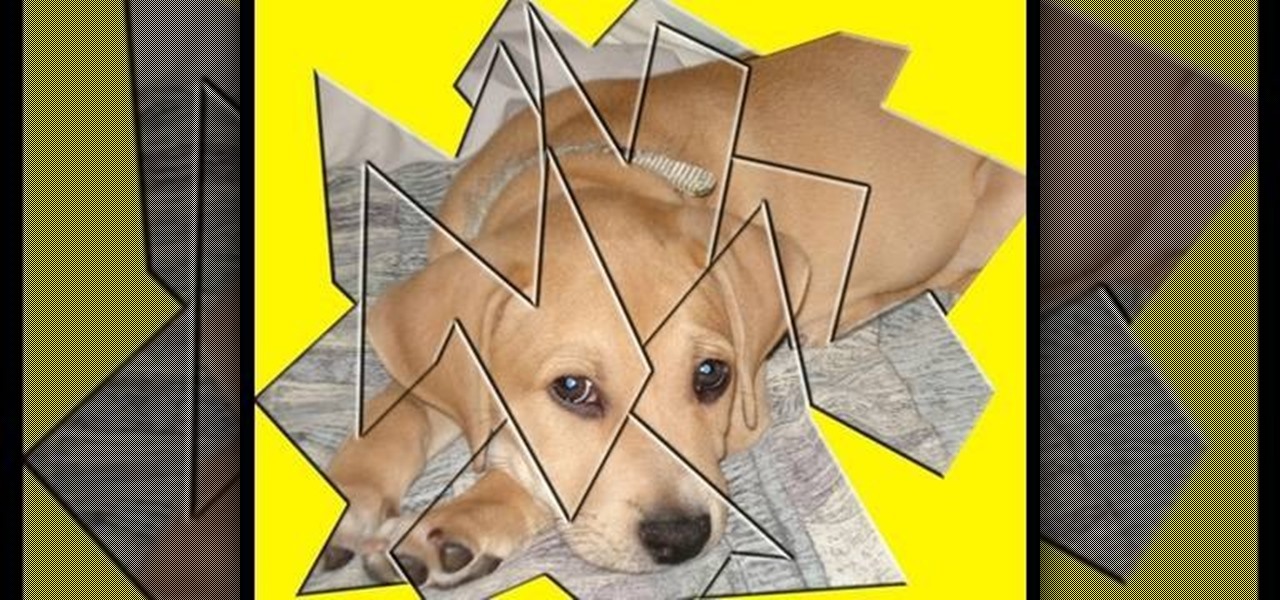
In this Software video tutorial you will learn how to sharpen blurry images using Photoshop. Open the image and duplicate the original layer. Then go to filter > other > high pass. In the window that pops up, enter a value of 4 – 6 pixels. Now simply change the blending mode of that layer to overlay by clicking on ‘layers’ and selecting ‘overlay’ from the dropdown menu. You will notice that you have a much clearer picture. Then go to filters > sharpen > ‘unsharp mask’ to add som...

In this video, we learn how to sketch a photo in PhotoShop. First, open up PhotoShop and open up the picture you want to convert. Then, click "image", "adjustments" and "desaturate". You will now copy this layer by dragging it down to the "new layer" button. Now click on your copied layer and go to "image", "adjustments" then "invert". Now click the "blend" option which will change your layer to completely white. Now, click "filter" then "other" then "minimum". You will now see your image sho...
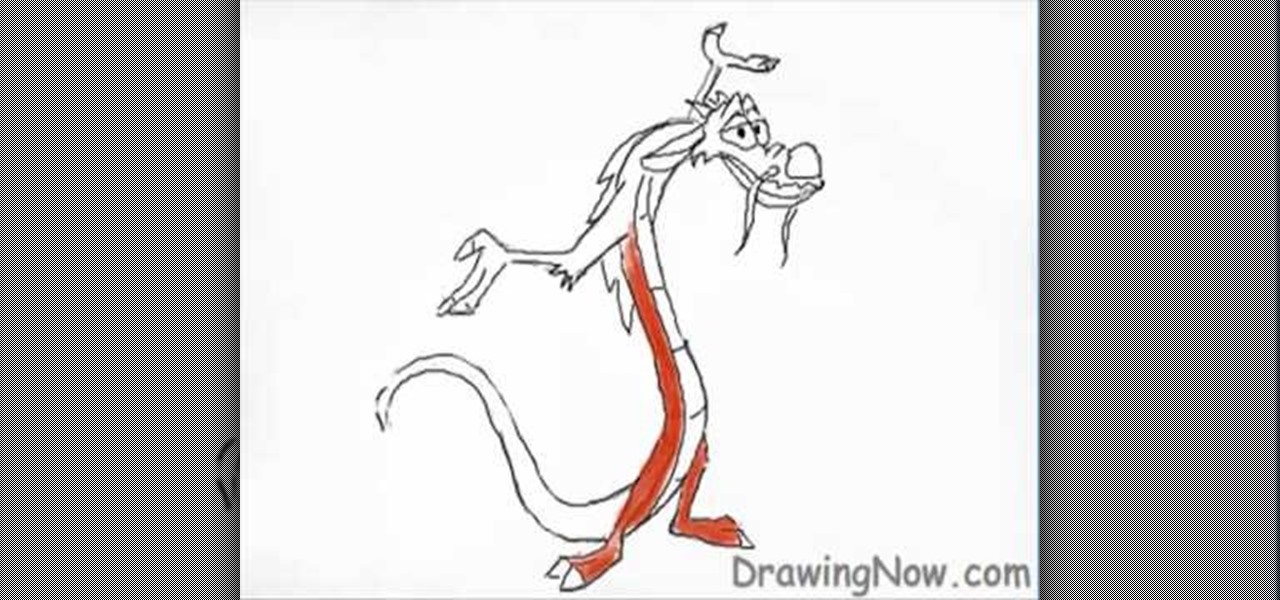
This video illustrate us how to draw Disney's Mushu from Mulan. Here are the following steps: Step 1:first of all draw a oval representing the face and then from the face raw double "S" to form the body.
This video demonstrates how to make a broken mirror effect using Photoshop.
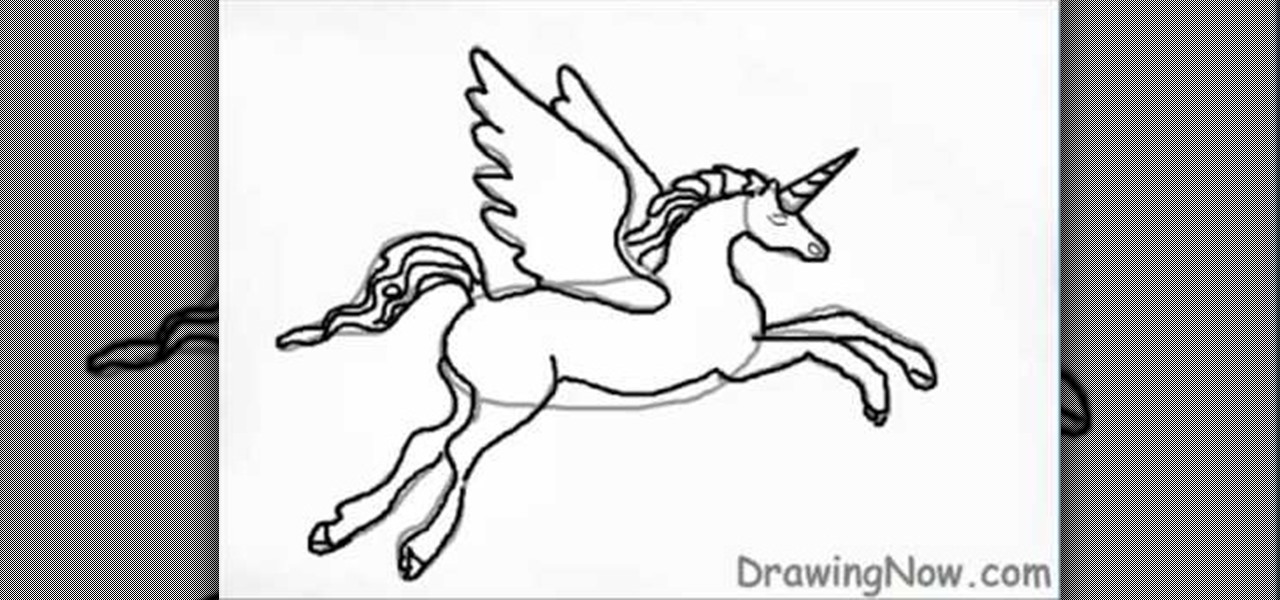
This video illustrates how to draw a fantasy unicorn. Here are the following steps: Step 1: First of all take a sheet of paper and pencil and start drawing the head in a cone shape with the cone having round edge ,this cone represents the head.

In this Huskermania video, it is demonstrated how the IPAD can play movies, tv shows or any type of video from online, directly on to your television or any monitor. What's needed is the VGA adaptor from IPAD. All you simply do is tap your IPAD screen on your "Videos" folder or perhaps tapping a link to a video storage site like Youtube. Then tap the screen for the specific video you want to play. And when it loads and plays on your IPAD, it will play on your television and monitor too! The p...

In this video, we learn how to turn a photo partially black and white using PhotoShop. First, open up the program and open up the picture you'd like to change. Now, click with the right key above the layer and choose duplicate "layer". Now click above the eye icon to hide the layer, then select the layer. Now you can go to image, adjustments, then black and white. Now make the second layer visible and select the eraser tool. Wave your brush over everything but what you want to keep colorful. ...
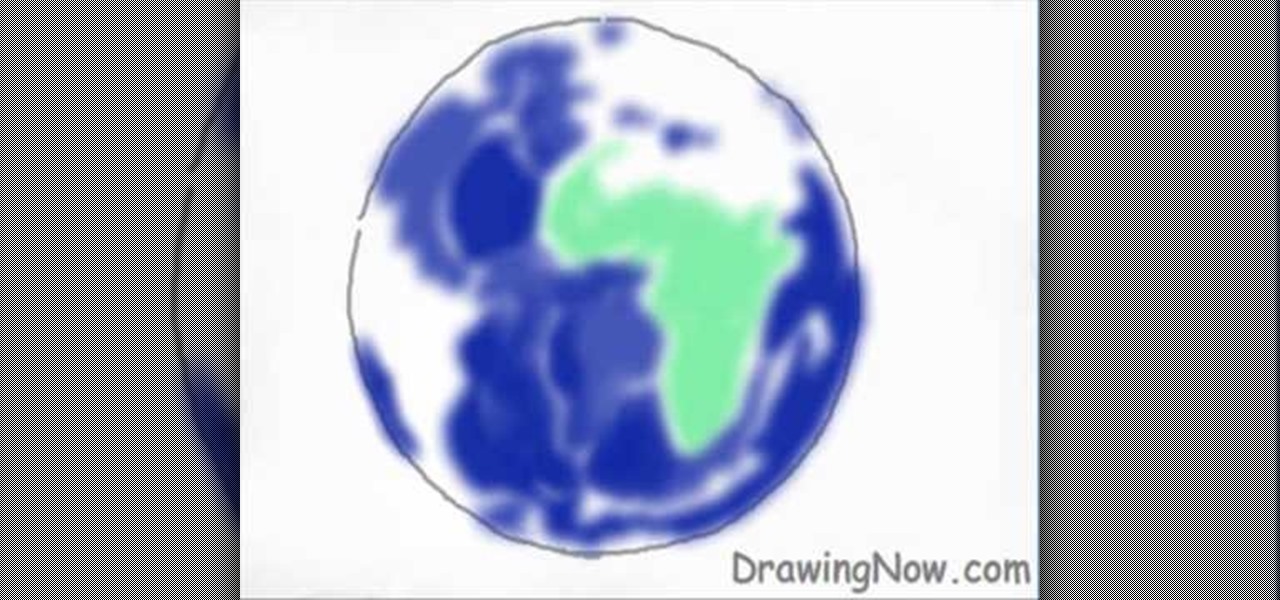
This video shows how to draw a picture of the Earth. First draw a rough circle in black. Add blue sea areas inside the circle but leave a white space in the shape of Africa and a white space for Europe above it. On the left leave a white space for a part of America. Fill all the land areas in green. Draw an outline in turquoise round all the land areas. Add some lighter blue smudges on the sea and some yellow on the land. Add a few small brown touches at the poles and on some of the land area...
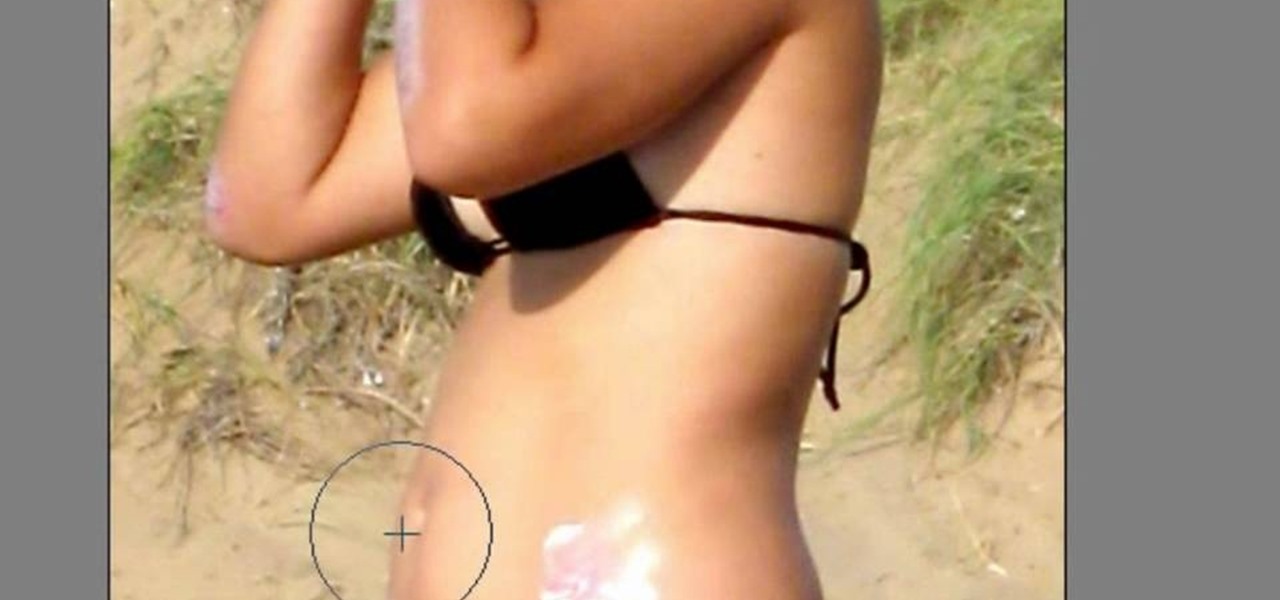
In this how to video, you will learn how to get rid of shine using Photoshop. This is useful if you took a picture using too much flash, causing shine to appear on the faces of those in the photo. First, open the image in Photoshop. Duplicate the background layer. Select the clone stamp tool on the left and select a brush with no hardness. From here, change the opacity to 80 percent. Click the option key on an area of cheek. Now, click on the dots of shine on the faces. This can be used on wr...
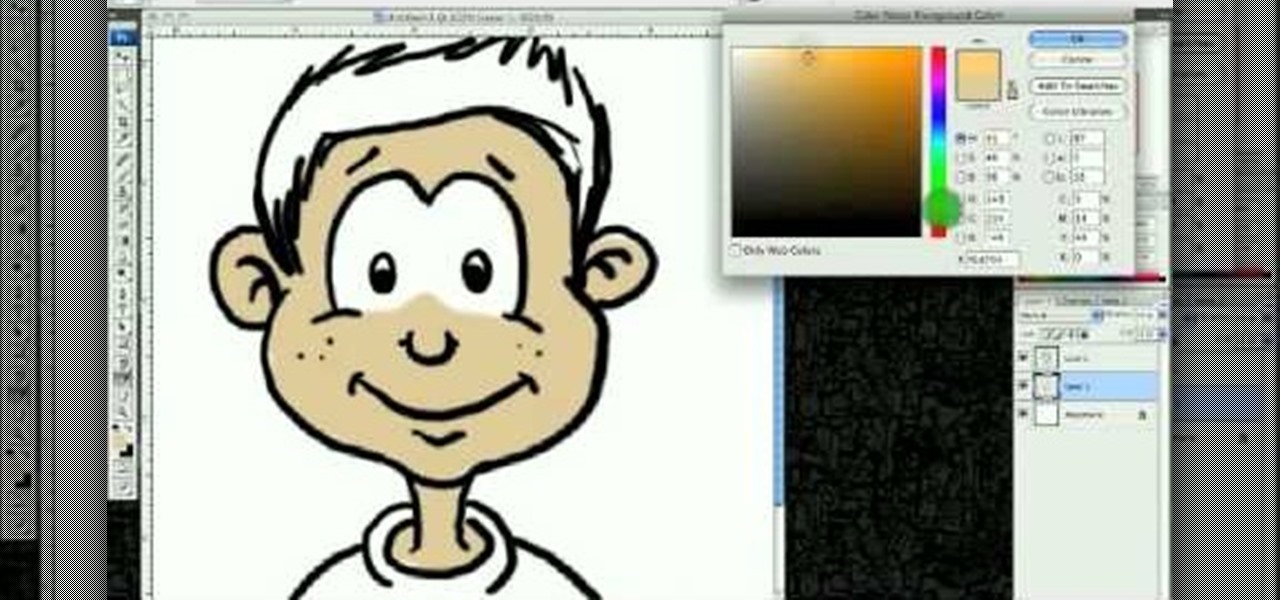
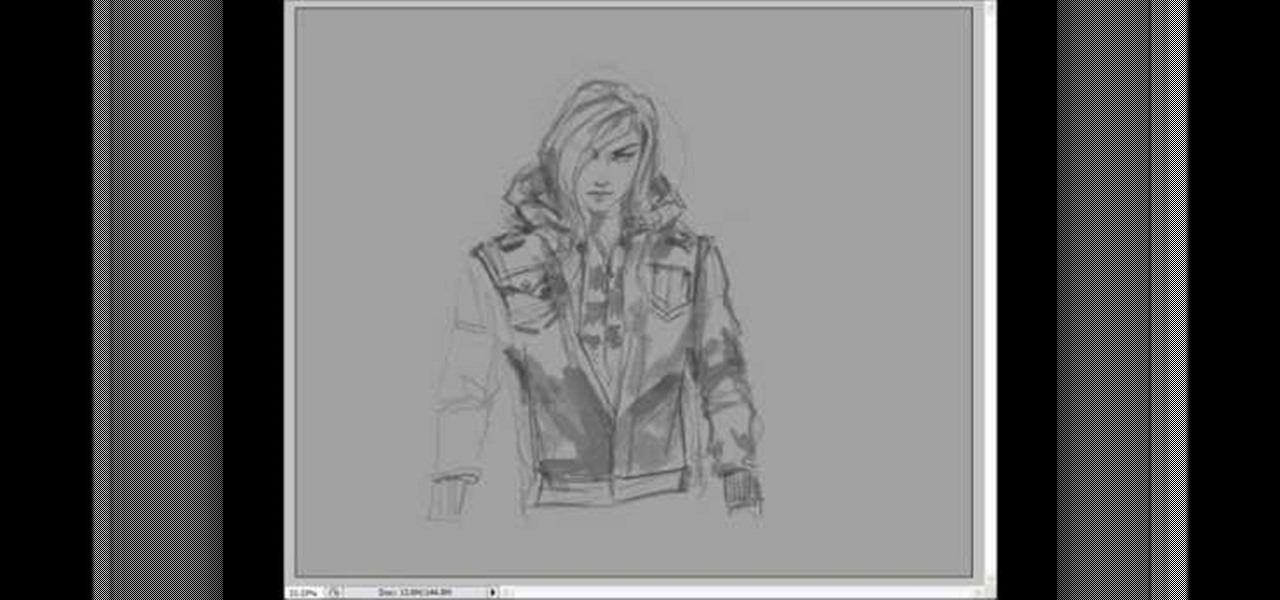
This video illustrates how to draw a cartoon boys face in Adobe Photoshop.Here are the following steps:
This videos is a tutorial for using custom FBML coding on facebook fan page.The video begins by logging into facebook account.Then go to the search bar at the upper right hand corner and tpe "static fbml" and hit enter.This takes to the application page and click on "add to my page" below the default fbml picture.A window opens up showing a list of user pages and after selecting the page click on "add to page".Close the window and go to your fan page and click on "edit page".This shows a list...
In this video, we learn how to lose weight using the liquify filter on PhotoShop. Before beginning, open up PhotoShop and the image you want to adjust. First, click on "filter" then "liquify". Next, use the forward warp tool and adjust the size of the brush to the body part you want to change. click on the body parts to make them smaller. Push in the body parts you want to be smaller, pushing in small parts one at a time. If you do too much, the picture will become blurry and it will not look...
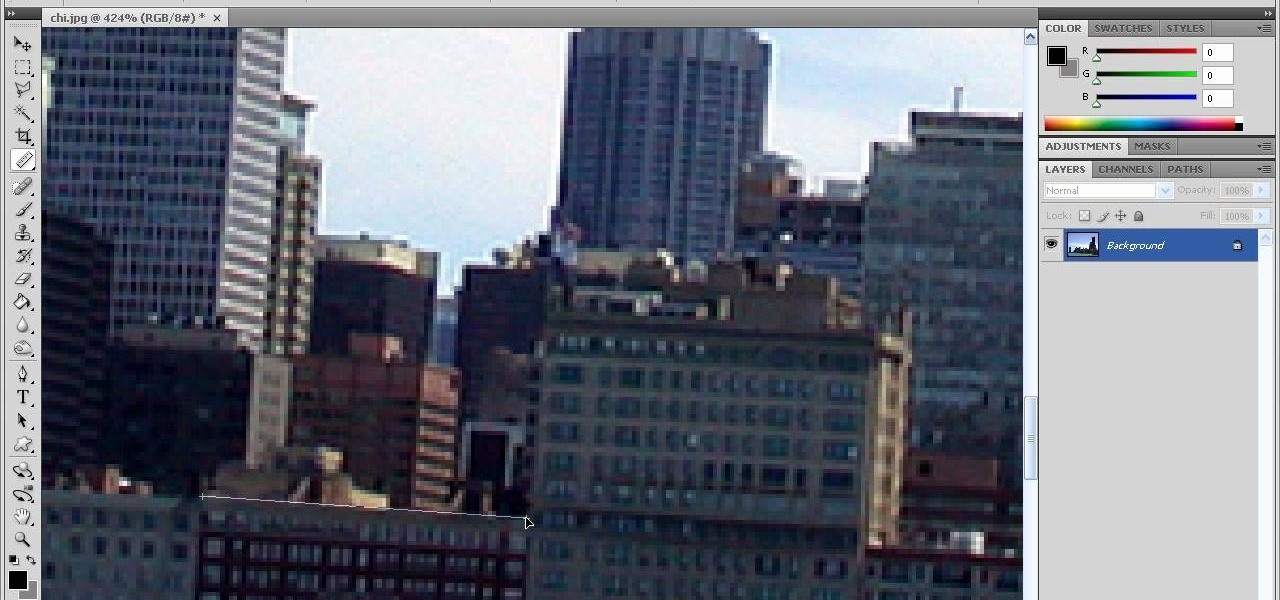
In this how-to video, you will learn how to straighten crooked photos in Photoshop. First, open the photo you want to straighten in Photoshop. Next, use the ruler tool under the eye dropper tool. Select it and zoom in to an area. Find a crooked line to straighten, such as a building rooftop or ground line of some sort. Click, hold, and drag. Next, zoom out. Go to image, image rotation, and arbitrary. Click okay and your image will be adjusted. Go to the crop tool and crop out the spaces. Hit ...
This video illustrates how to draw Bowser from Bowser's inside story. Here are the following steps: Step 1: First of all take a sheet of paper and pencil and start drawing the character.
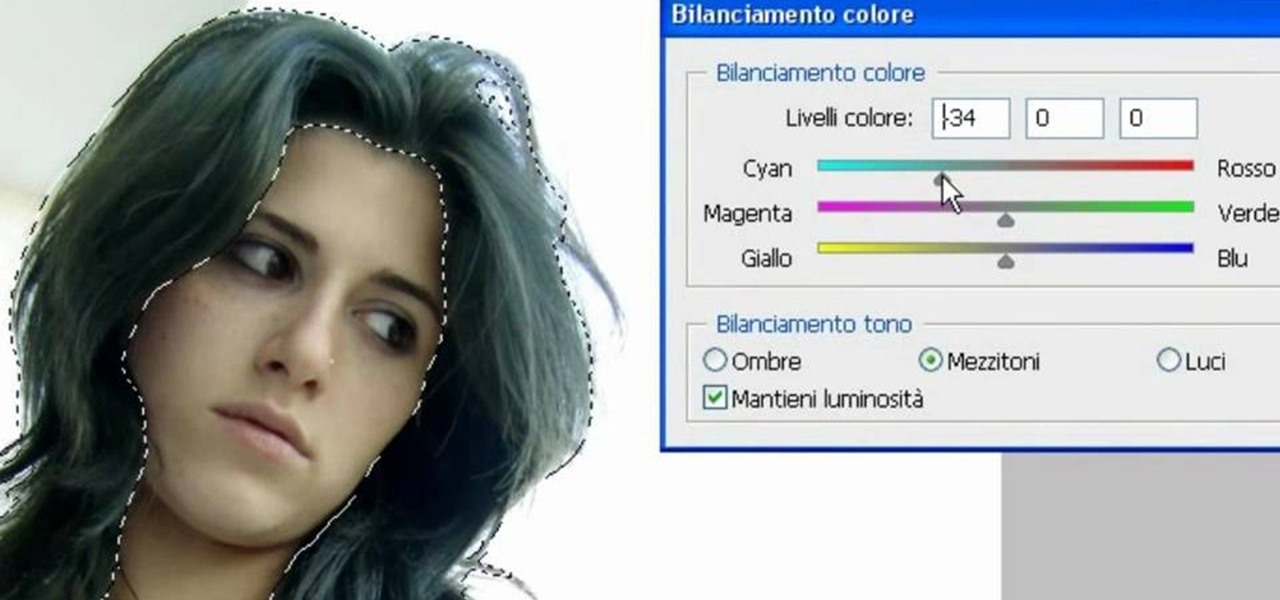
In this video, we learn how to change the color of dark hair in PhotoShop. First you will want to open up PhotoShop and open up the picture you want to change, zooming in so you can see the hair up close. Next, open up the mask tool, then use the brush to color the hair. This will only highlight the hair to change the color in the future. Use different sized brushes when you need to. Once you've done this, click on the mask tool to create the selection. Now, select the marquee tool and click ...
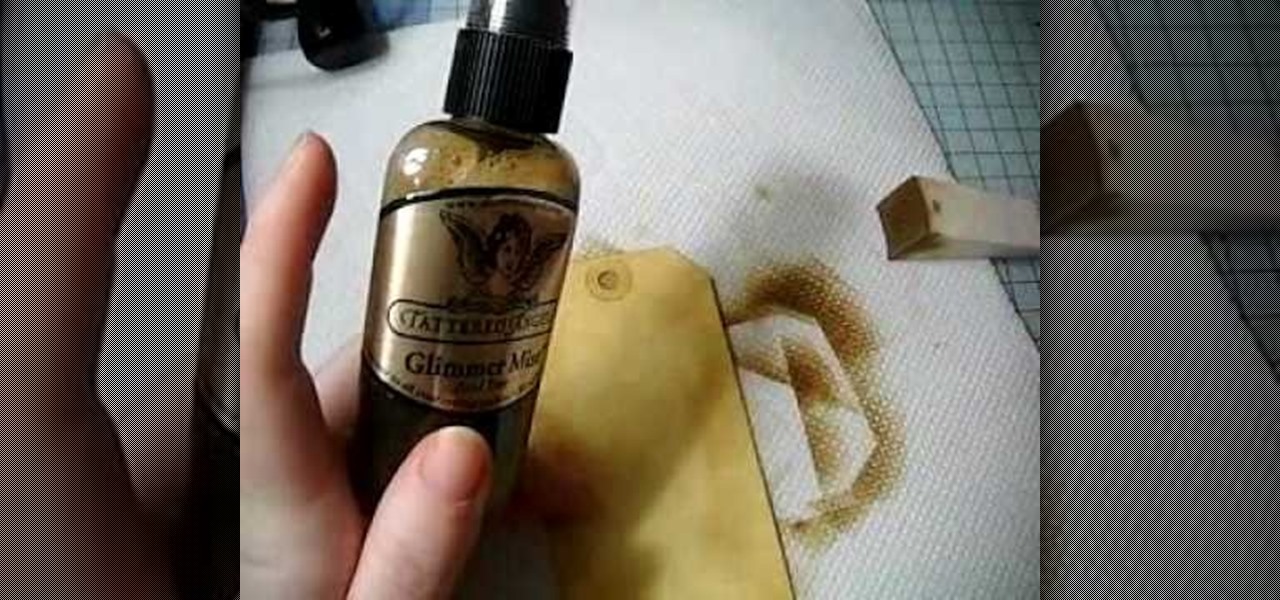
In this Arts & Crafts video tutorial you will learn how to make a distressed scarpbook tag. Take two tags, one red color and one yellow color and strip the threads off. Take a light color ‘Distress’ ink on a sponge and dab one side of the yellow tag with it to give it a light rough look. Now take little darker brown ink on another sponge and dab the edges of the tag with it. Then place the tag in a box and spray Glimmer mist on the tag. Dry the tag with a dryer. Now dab some more brown in...
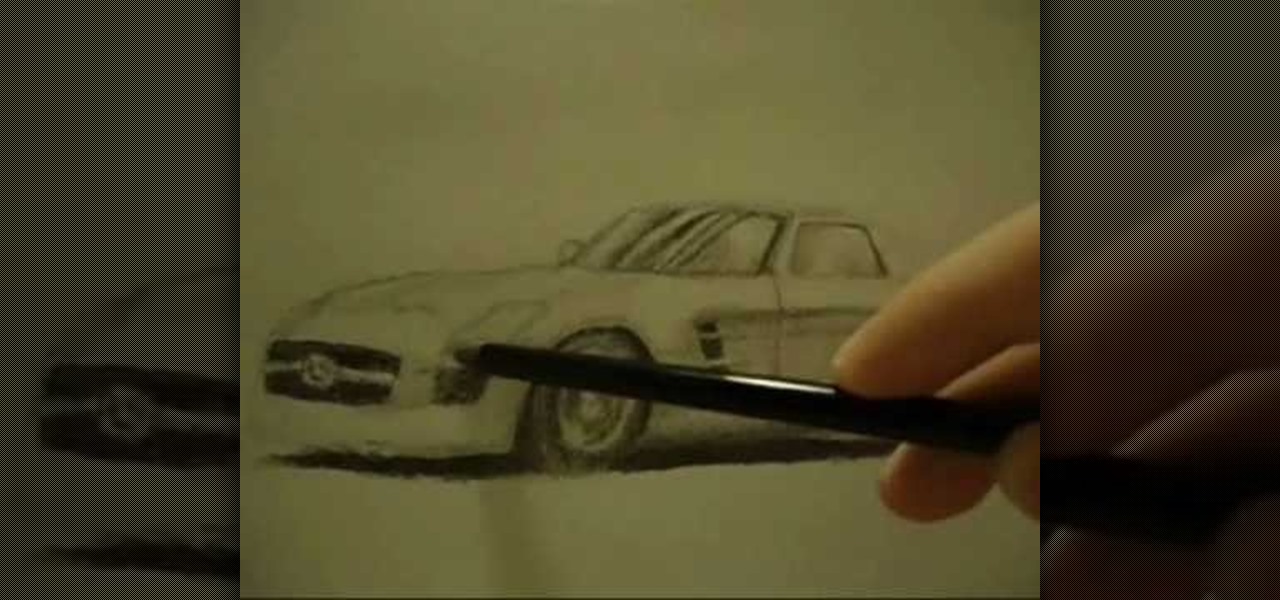
This video illustrate us how to draw a realistic car on paper. Here are the following steps: Step 1: First of all take a sheet of paper and pencil.
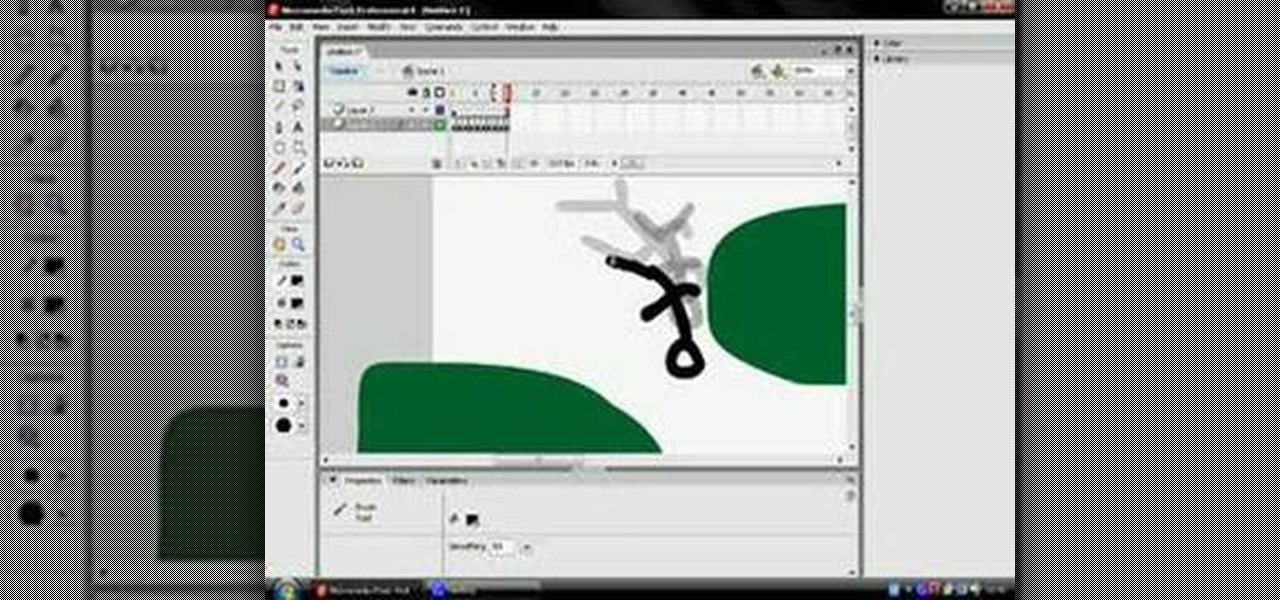
This how to video shows you how to use the program Macromedia Flash 8. First, open the program and click Flash Document. Next, select show frame in the drop down menu. Next, right click and select insert layer. Select the pen tool and choose a size. Next, select a color and then draw a picture. Click the other layer and zoom in. Click the onion skin. Continue to draw and then press F7. Keep on doing this for each new animation. Click control and test the movie. Go to file and save the file. Y...
New to Microsoft Excel? Looking for a tip? How about a tip so mind-blowingly useful as to qualify as a magic trick? You're in luck. In this MS Excel tutorial from ExcelIsFun, the 22nd installment in their series of digital spreadsheet magic tricks, you'll learn how to use the NORMDIST function to calculate probabilities for a population with a normal (bell) distribution! You even get to see the four types of situations that you most commonly encounter -- plus visual pictures of each situation...
In this how-to video, you will learn how to remove tattoos using Photoshop. First, open the image in Photoshop. The patch tool is the easiest for removing these type of tattoos. If the tattoo is very ornate and complicated, it will take longer to remove. First, select the patch tool, which looks like a band-aid. Hold it down and select patch tool. Zoom in on the tattoo and draw a selection around it. Once it is selected, click the left mouse and hold it down. Drag the selection to an area sim...
In this video tutorial, viewers learn how to change an icon in My Computer. Users will need to already have a picture of the icon that they want to change to. Begin by opening the drive. Right-click anywhere, select New and click on Text Document. Name the document "autorun.inf". Right-click the text document and open it with Notepad. In the document, type in:
Tut Teacher shows that if you're going to edit alot of pictures, learning to change your eye color in Photoshop is helpful.Go to Photoshop and open "human eye", zoom in and it gives more room to work with. First, go to your lasso tool, hold down and click. You can click and drag or click along the outside edge. Set to 6 pixels, more or less depending on the image. Make sure you don't click on scanner..it'll make the image go crazy. Keep clicking along the edge there'll be a symbol on the circ...
This video illustrate us how to draw a female assassin. Here are the following steps: Step 1: First of all take a sheet of paper and pencil.
How annoying is a skipping DVD? Picture it: you're in the middle of your favorite flick, and suddenly the characters freeze and seemingly melt away right before your eyes. Sure, you can skip ahead and start watching again at another point in the film, but that's no fun. And it always seems like the disc skips at the best part, doesn't it? Well, this tutorial will show you how to do a quick fix with a tube of toothpaste. It's not just for your pearly whites anymore!
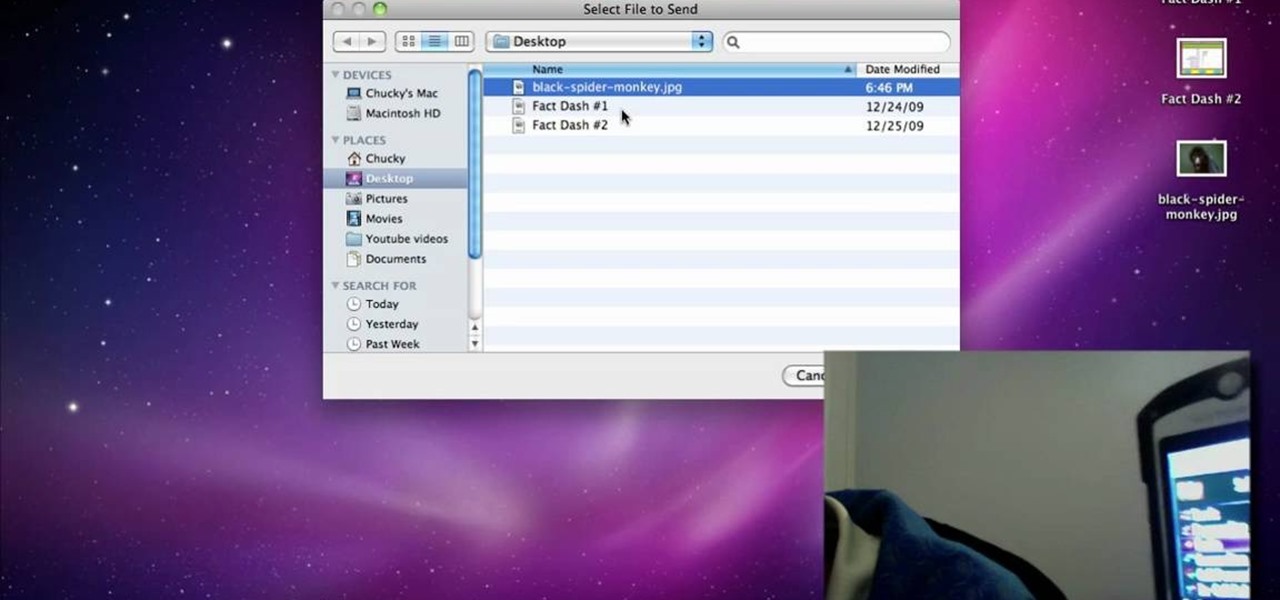
This video demonstrates how to connect your phone to your Mac computer via Bluetooth. First, make sure that you have Bluetooth enabled. On your Mac computer, begin by searching 'Bluetooth'. When the search results appear, click on Bluetooth File Exchange. A new window will appear where you can get to select a certain picture that you want to send to your phone.On your mobile phone, go to the settings where you can choose to enable the Bluetooth. In the Bluetooth settings of your phone, select...
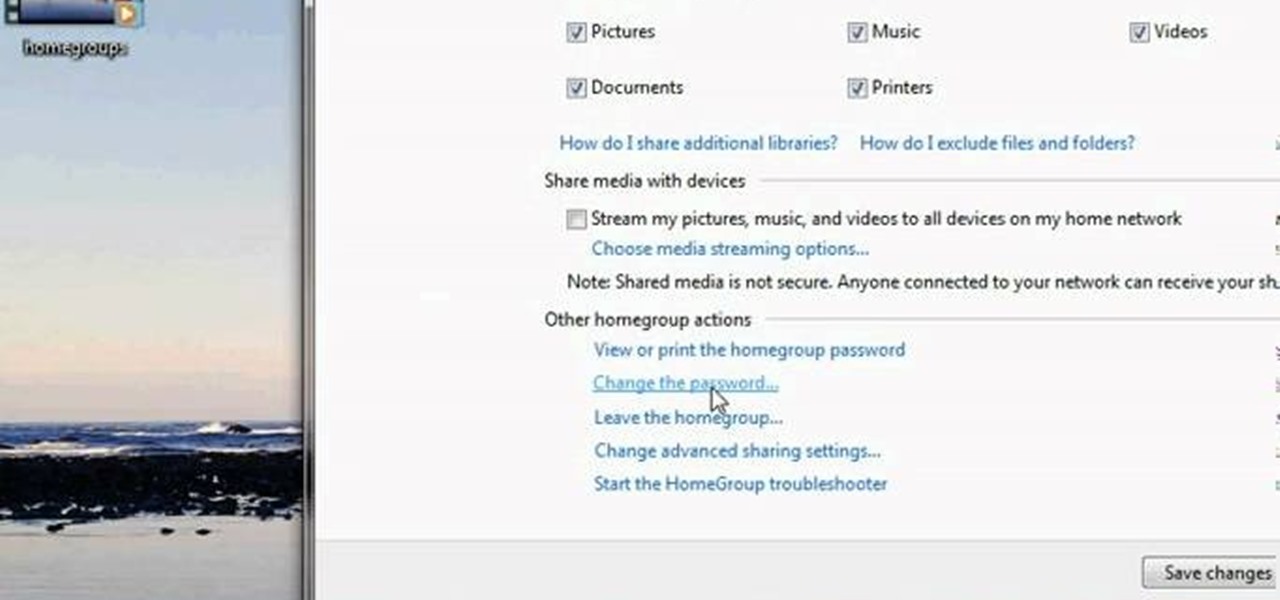
This video tutorial from pctechbytes presents how to quickly set up Homegroups in Microsoft Windows 7.This feature allows to easily share files between computers with Windows 7 operating system.Press Start button, select My Computer option. In the newly opened window select Homegroup from the list to the left. Select View Homegroup Settings link.In this window you can choose what types of documents you want to share with other Windows 7 operating system users.You can share pictures, documents...
Why use a regular wall clock when you can have an awesome clock make out of spoons that you make yourself? Let your character show through or make a cheeky gift with this clock. You will have to buy a basic boring wall clock. Use the battery of the clock and attach it to a great metal strainer as the mount. Then use cut out a picture for the front ant but the hands back on. Glue some spoons on the back to complete the look, add a mount and your ready to enjoy telling time in a whole new way. ...
Layers are very important component of Photoshop. Without knowing how to use the layers correctly, one can not utilize the maximum what Photoshop offers to designers and digital artists. For a beginner, this video provides a good basic knowledge about Photoshop layers. Layers enable you to arrange different parts of a picture and manipulate them without effecting the content of other layers. Layers are added by using layers panel. Each layer is named accordingly. We can change the order of la...
TooSmartGuys teach viewers how to hack their iPhone using Black Ra1n and Sn0w. First, if you have a jail broken iPhone you should back up your apps by downloading a program called App Back Up. Now, plug your iPhone in and let iTunes load. Allow it to update and you should see the iTunes icon on your phone and the cord picture. Open up Blackra1n and click the button that says make it rain. Your phone reboots and there will be a new app on there called blackra1n. Launch this app and you can put...
This video illustrate us how to draw a furry cartoon fox. Here are the following steps.Step 1: First of all take a sheet of paper and pencil and start by drawing a oval shape representing the face of the fox.Step 2: Now draw a nose and two oval shape eyes in the face.Now from the bottom of the face draw an oval structure representing the belly of the fox.Step 3: Now from the lower belly draw two small legs with feet.Step 4: Now draw a tail from the back of the mid lower portion representing t...
This video demonstrates how to turn your favorite songs into ringtones for your Blackberry Curve. You will need a USB cable to connect your Blackberry to your computer. After connecting your Blackberry, a message will ask you if you would like to turn on "Mass Storage Mode". Select yes. On your computer, open the Blackberry in a window, and then open "music". Then click-and-drag songs from your computer onto your Blackberry. You can transfer files to either music or ringtones (as long as its ...
David Shrein provides a video recording with step-by-step instructions on how to utilize the DVD ripping software 'Handbrake' on a computer running Mac OS X. He shows how to deal with an initial error message, and then moves onto selecting the DVD. You have to be careful as to what you choose, as different DVDs will have different numbers of chapters and features, which use different settings in Handbrake. He shows how to select the right settings for a movie, and preview a chapter using pict...
In this video tutorial, viewers learn how to make an animated GIF file using Adobe Photoshop. Begin by opening the program. Then click on File and select New. Choose the size of your image and click OK. Now create your picture or text image. Once finished creating your image, click on Window and select Animation. Now click on the button on the right side of lower window and select Make Frames from Layers. change the time of each frame to 0.5 sec. Now edit it and save it. This video will benef...
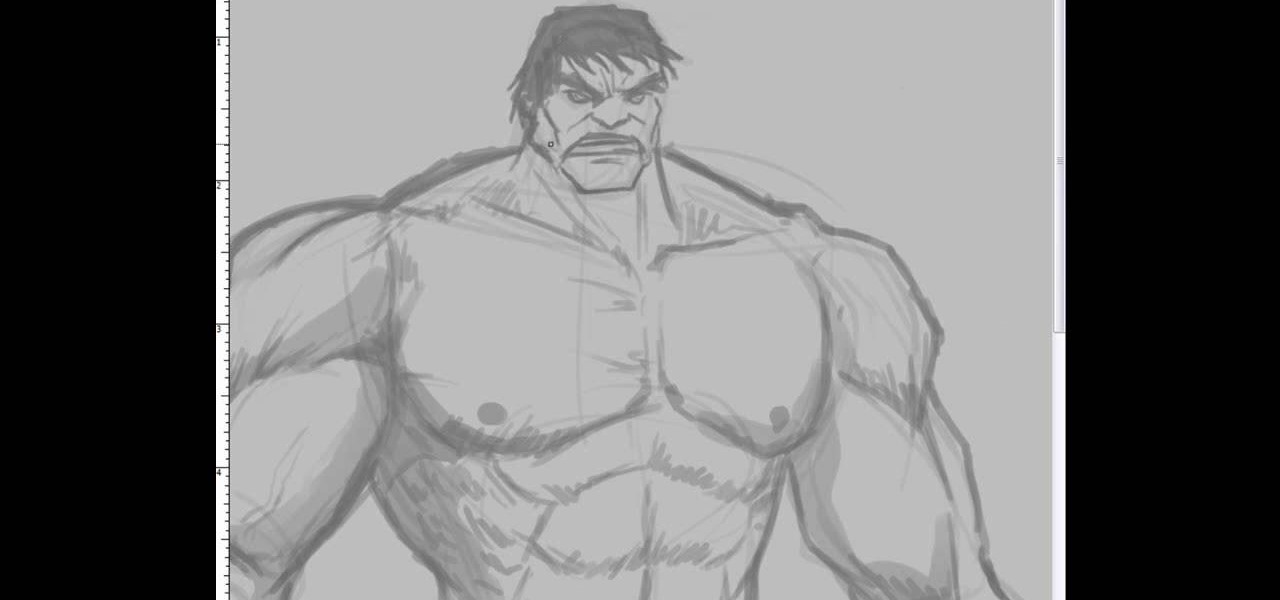
This video illustrate us how to draw the incredible hulk. Here are the following steps:Step 1: First of all take a sheet of paper, pencil and pencil color.Step 2: Now draw a square with round edges representing the face of the hulk. Within the face draw eyes and a big mouth and hairy eyebrows.Step 3: Now from the bottom of the circle draw an oval with wavy structure on it showing the six-pack abs of the hulk.Step 4: Now from the down side of the abdomen extend two legs with muscular legs and ...
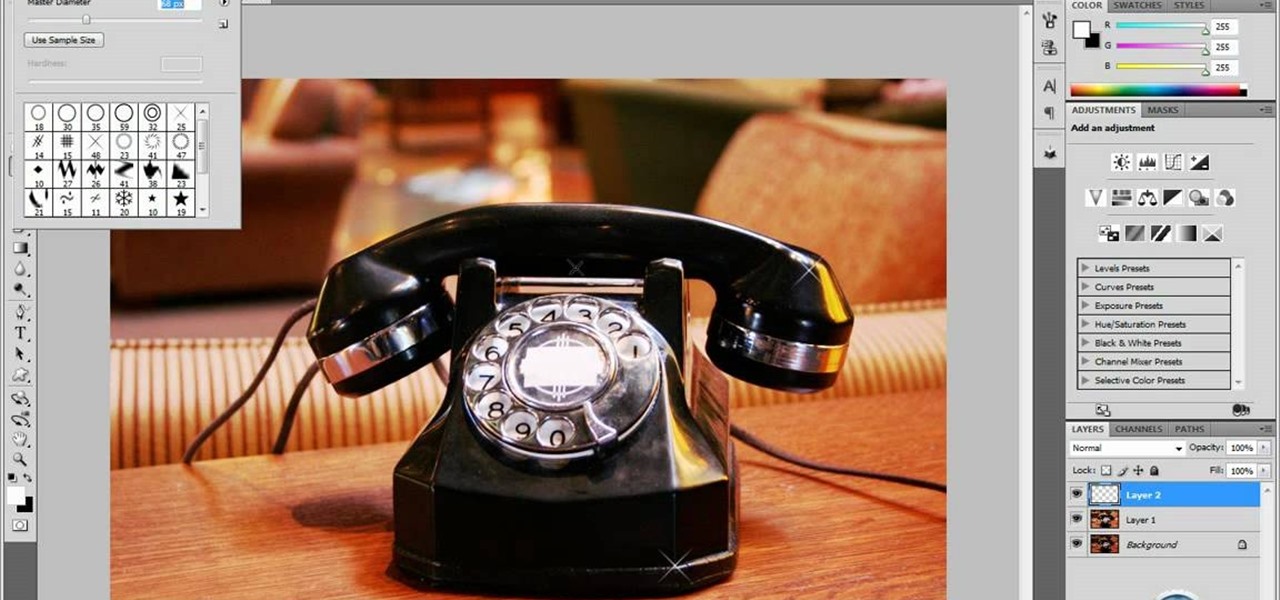
In this tutorial video, YouTube user "inteltuts" discusses ways to use Photoshop CS4 to help make better looking product pictures, as a way to attract costumers to your online products. Using a black telephone as an example, he first shows how the opacity, linear dodge, and brush tools can help make a product image look shiner, sleeker and brighter. He goes onto create what he calls "glints", which are subtle reflections and areas of sparkling light that he places across the image. Lastly, he...
Maria from [www.stamininspirations.blogspot.com stampininspirations.blogspot.com] shows us how to make a 4x4 mini double accordion picture album. You will need a 4 x 9 in. piece of designer paper, a 4 x 9 in. piece of card stock, a 3.5 x 8.5 piece of designer paper, two 3.5 x 12 in pieces of card stock and two 4 x 4 in pieces of chipboard as well as some smaller pieces of designer paper and card stock and some ribbon. Rubber cement, a scorer and some double sided tape are also needed. Maria s...
You will be using a picture of a Nintendo character and perler beads to make the necklace. Start by making an outline of the character using black perler beads. Then begin using colored beads to fill in the character. The color beads allow you to fill in the character and they also allow you to create all the detail on the character. You can shade and use multiple colors in making the characters. After you have put all the beads on the card put a sheet of waxy paper over the character and iro...
Learn how to create an automator workload that will upload pictures to your Flickr account in this video tutorial. Simply Google "automator Flickr." Upload it to Flickr to allow access to your Flickr account. This means you will have to sign into Flickr and allow for the application to have access to your account. Every time you use the application, you will have to give the photo a title as well as tags. You will then save the photo as an application with whatever title you want. Anytime you...
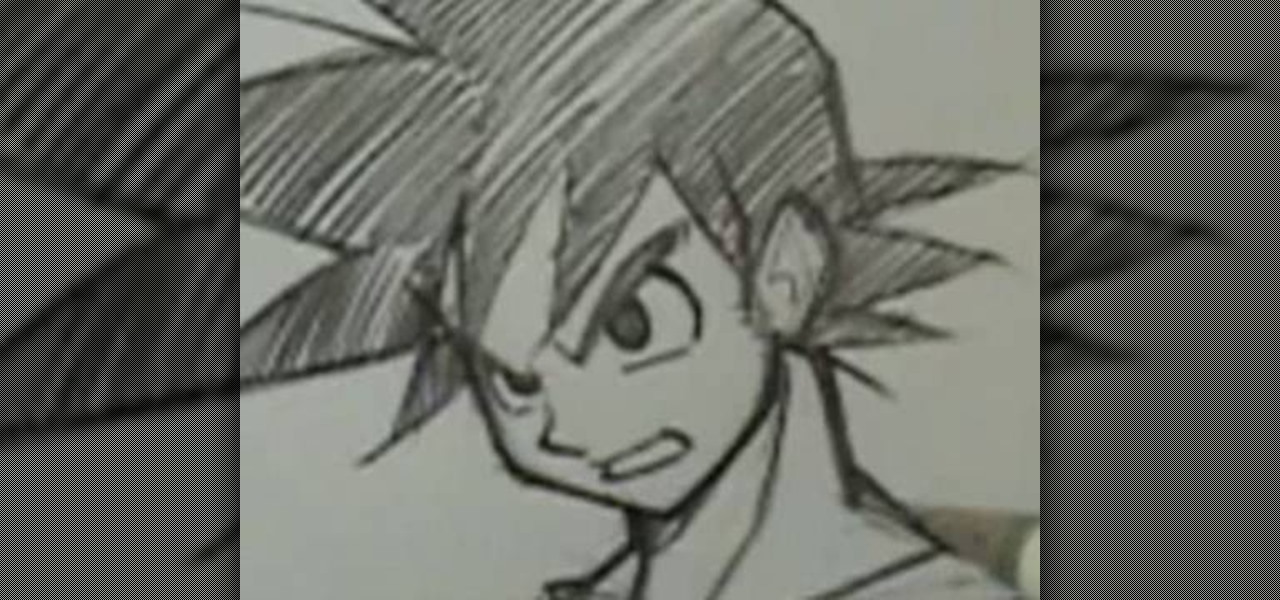
Robert Dejesus demonstrates how to easily draw the picture of Goku in (Dragonball Z) by simply using a pencil This demonstration is created with beginners in mind and also to inspire children to take up drawing. First of all, a thinner, rough profile of the figure is drawn and then followed by thicker shade. The head is drawn from a circle and mended to its real profile as the face begin to appear and the hair is drawn and followed by the neck and torso and the shading is given to highlight t...
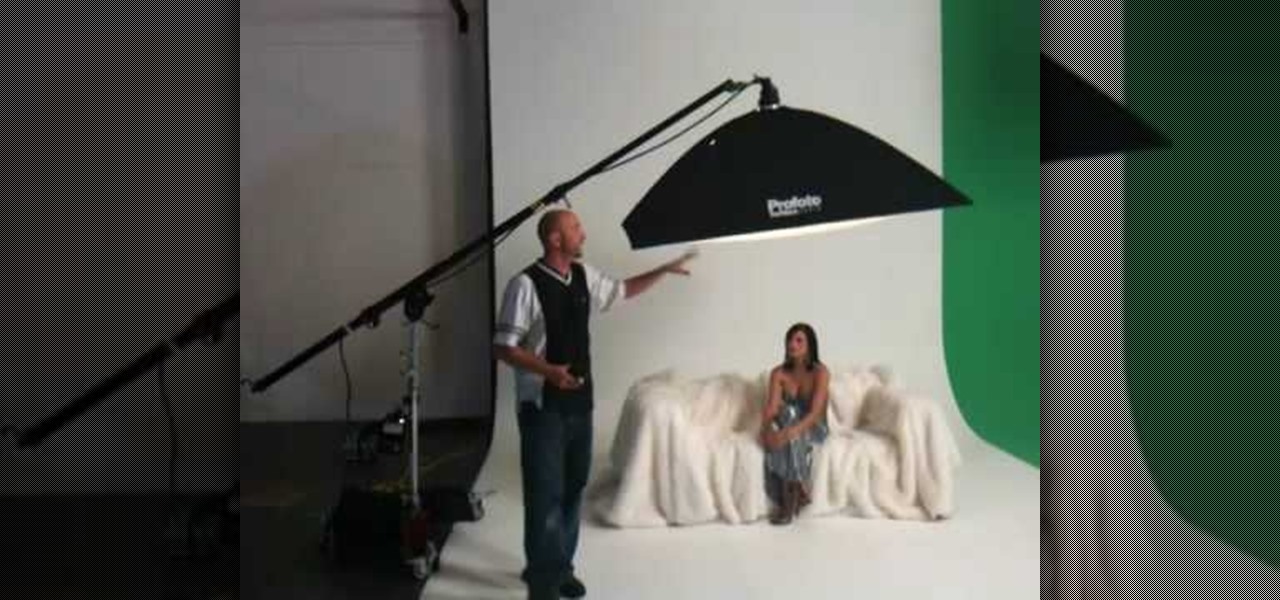
Mike Wallace is going to show you how to set up a softbox in order for a photo shoot. First, you are going to need an 1200 watt generation and with the Profoto one it comes with a pocket wizard built into it so it allows the photographer to meter and trigger with a pocket wizard TT1 on the mini camera. Also, you want to use a Manfrotto Megaboom softbox, and this is much easier then using a ladder because on the ladder you'd need to climb it whenever you wanted to reposition it. With the Megab...