This instructional photography video explains the basics on how to use all three different types of metering systems on Nikon D-SLR photo cameras: 3D Matrix Metering, Center-Weight Metering, and Spot Metering. Watch this tutorial and start taking better, more professional photographs now that you understand how to use the metering system.

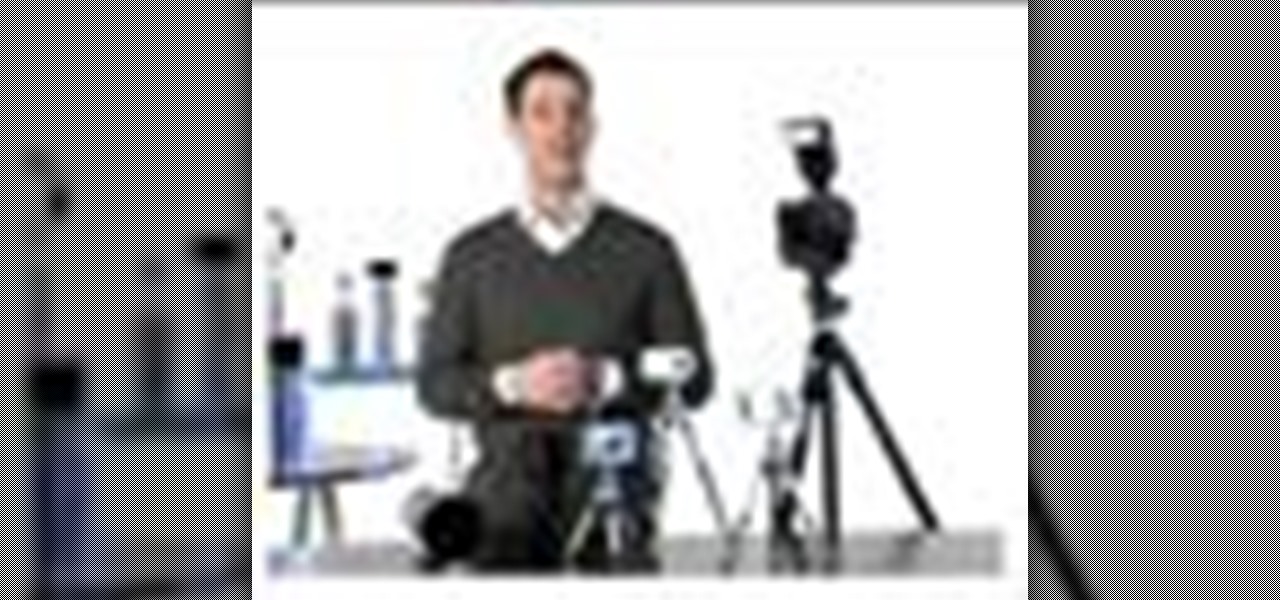
This instructional photography video guides you in a step-by-step process with the most basic information on Nikon's flagship speedlight of the SB-800 photo camera. Watch this photography demonstration to better utilize your camera's settings and control your results. This video is great for photography enthusiasts.

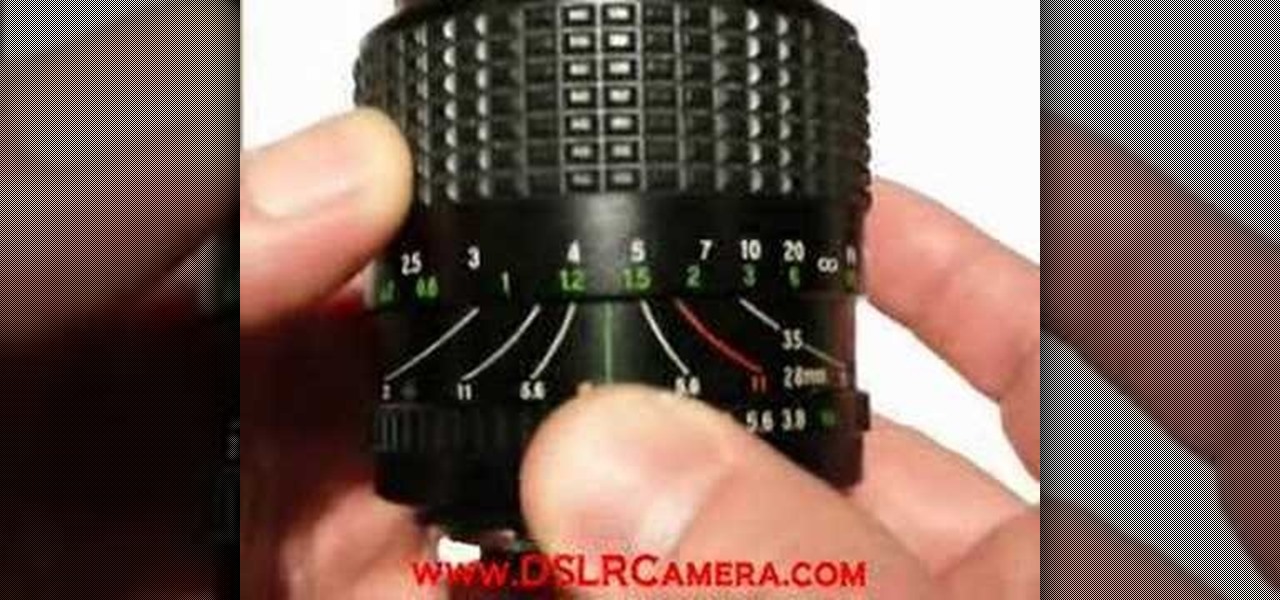
This instructional photography video explains and shows the difference in zoom lenses' focal lengths. This basic demonstration uses a Nikon professional photo camera to exhibit the various zoom lenses, and provides examples of its photographic capabilities. Watch this video and improve your photography skills.
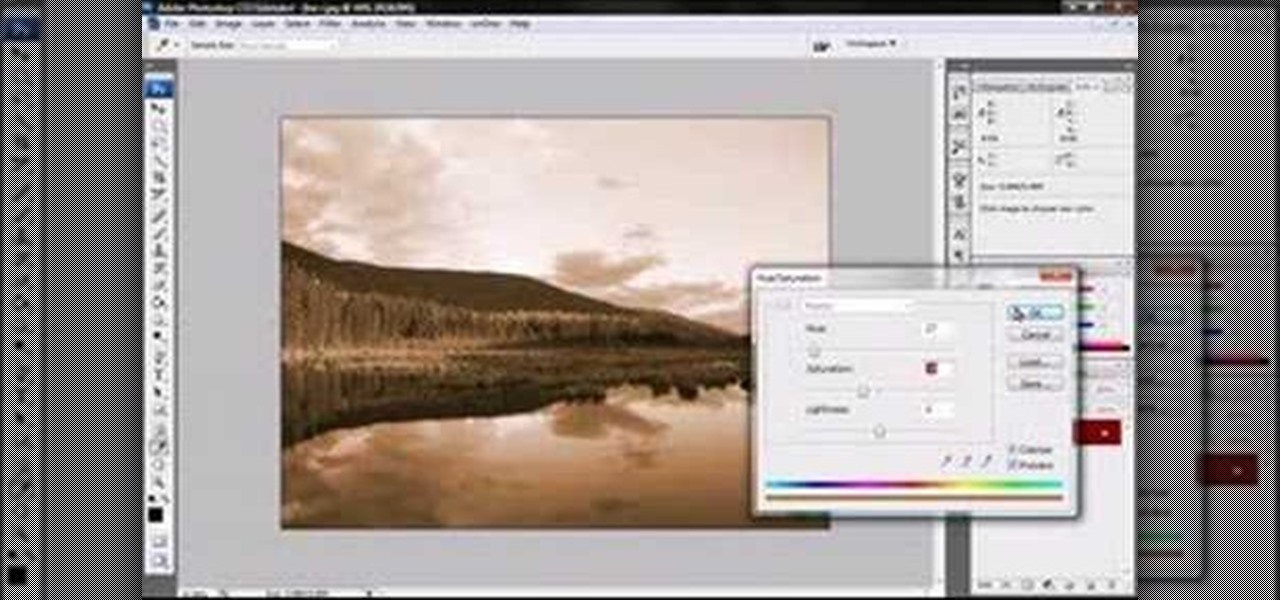
Jordan explains how to turn a photo to sepia toned colors using Photoshop. Sepia toned images are great for creating an old photo or monochromatic artistic look. Learn how to convert your images to sepia images in this Photoshop tutorial.
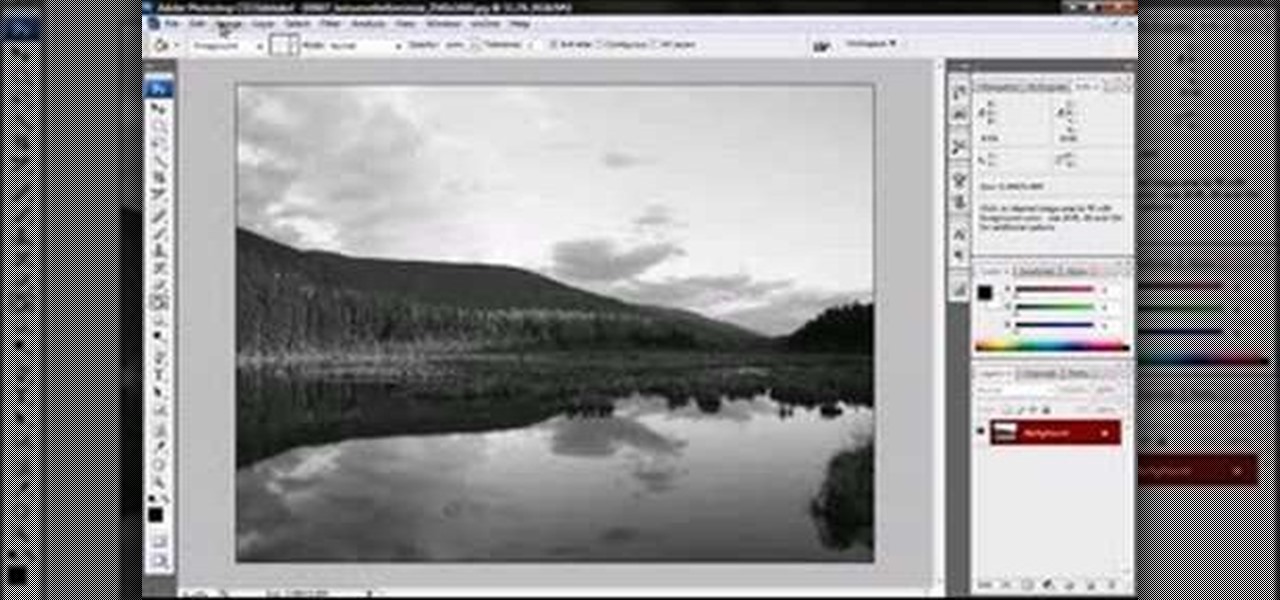
Jordan shows us how to take a normal color image and convert it to black and white or grayscale in Photoshop CS3. This is a simple effect that can be done in many different ways with different Photoshop tools. Check out the method for creating black and white photos in this tutorial.
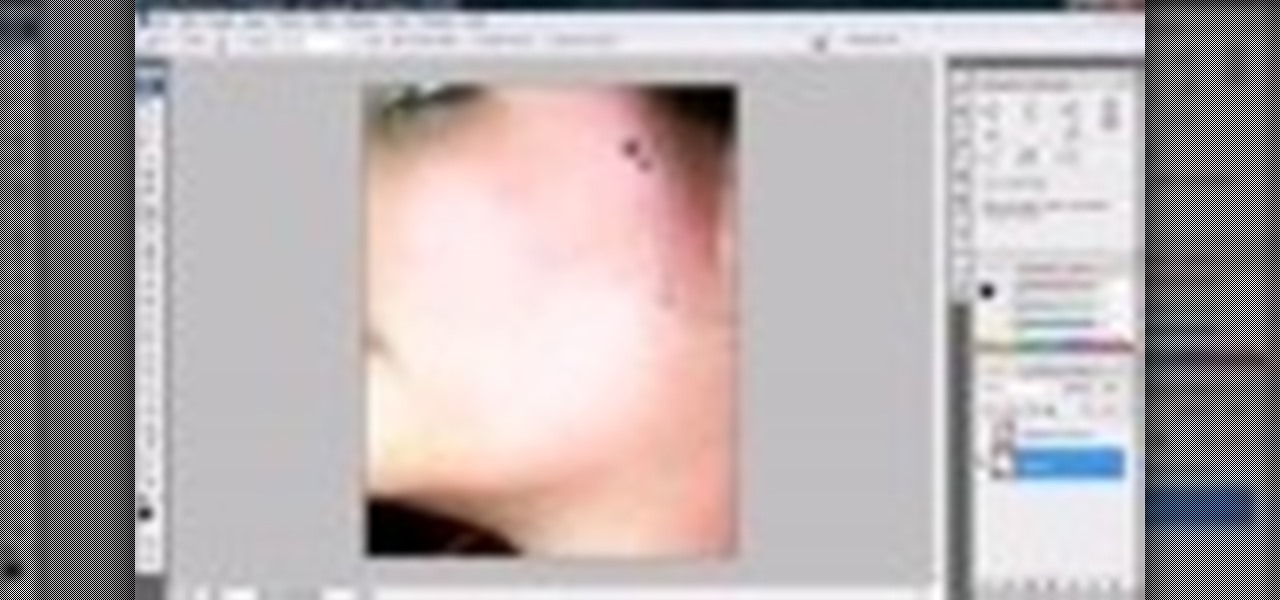
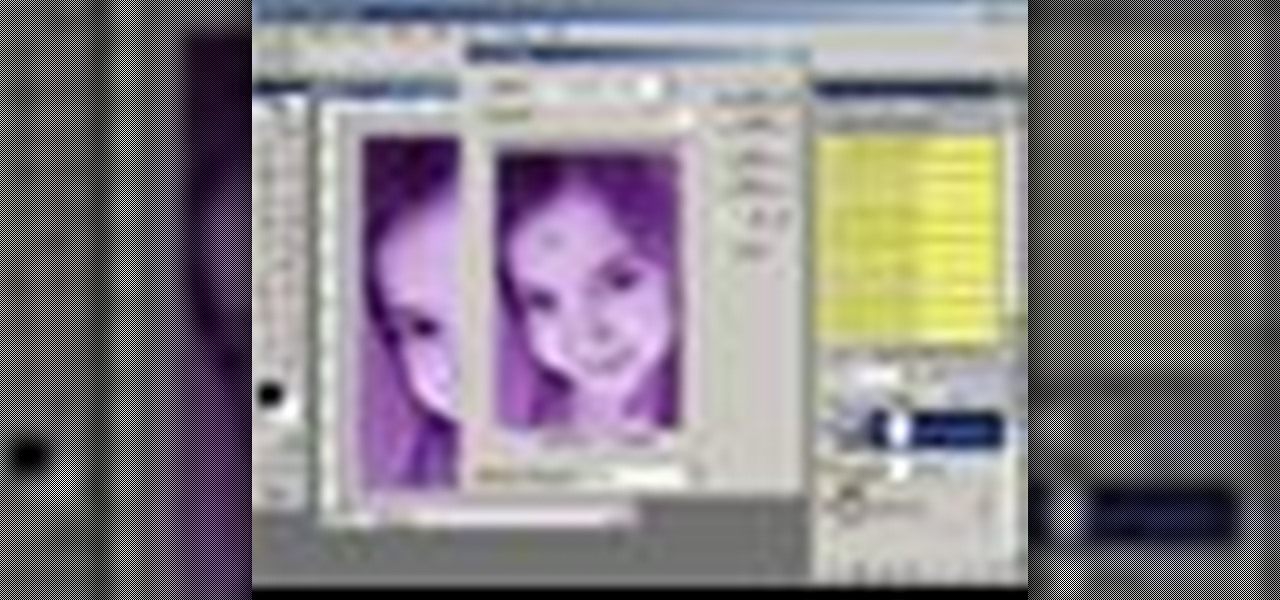
Jordan shows us his own technique to remove even the most serious cases of acne from a photo using Photoshop. This tutorial takes photo retouching one step further to really remove acne without ruining the person's skin texture and color.

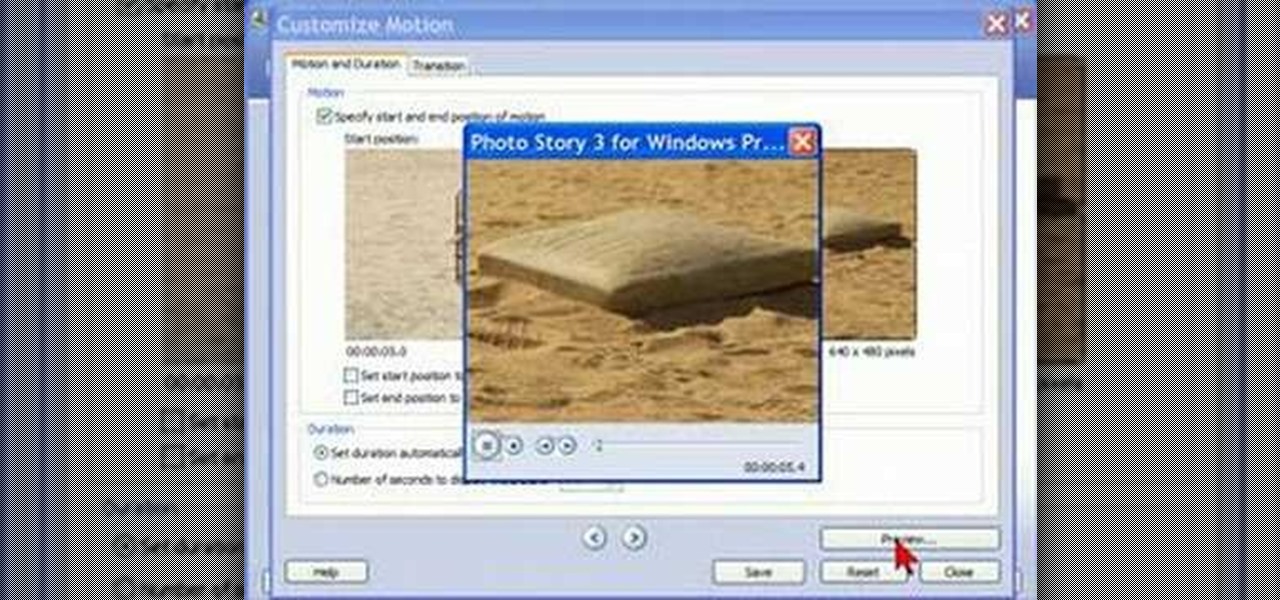
Bill Myers shows how to use Microsoft Photo Story 3 for Windows to quickly create videos from your photographs. Great for quick YouTube videos, viral videos, and more.
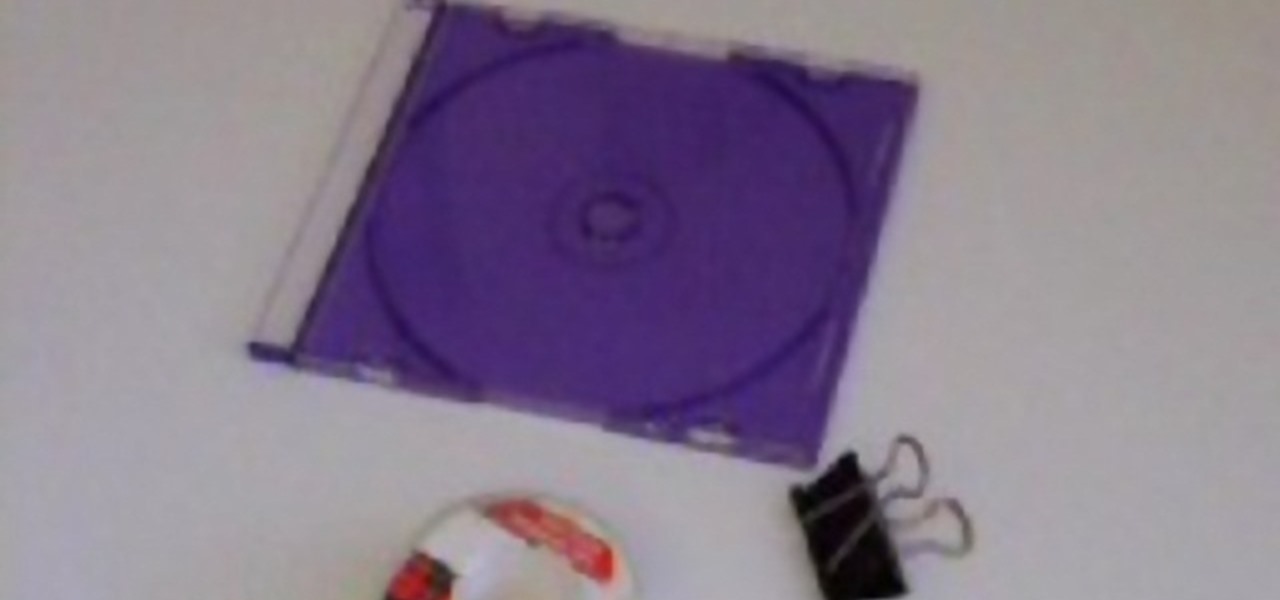
Are your photographs stashed away because you do not have frames to put them in? Watch this video tutorial to learn how to make a desk top photo frame using common office supplies. You will need a CD case, a binder clip and scotch tape.
This is a video tutorial showing how to wrap text in Photoshop to put text on photos or on objects in photos using Photoshop.
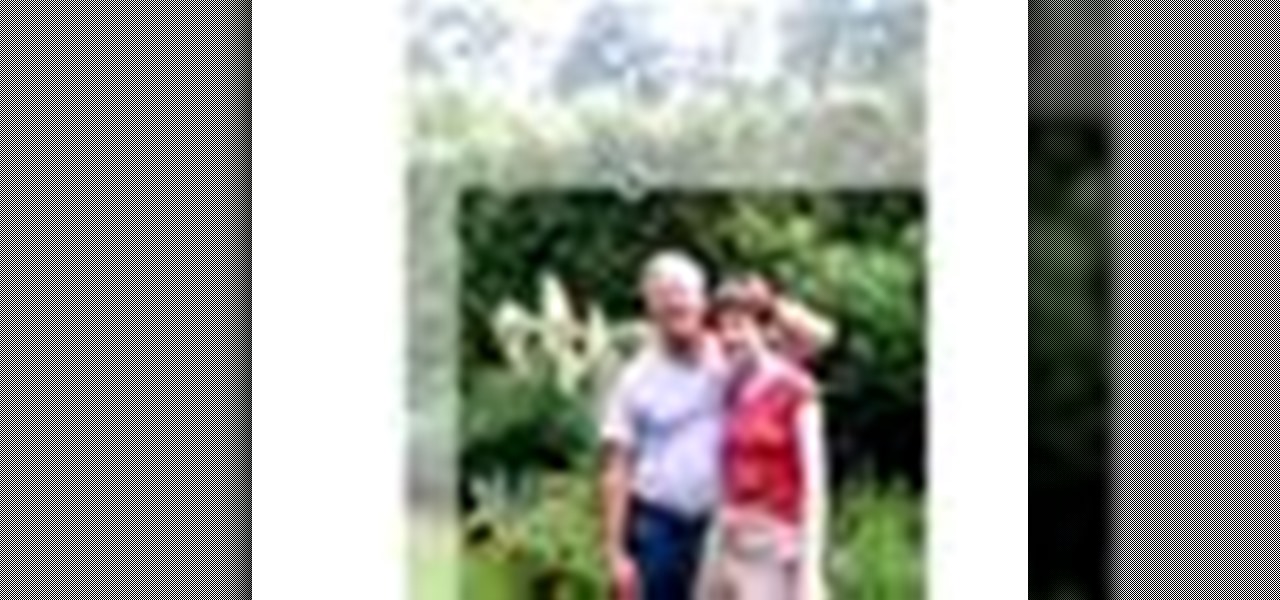
Are some of your memorable pictures in need of shaping up? Keep your scrapbook photos clean and centered by cropping them.
This demo shows how to quickly and easily create watermarks for your photos using Xara Xtreme.
This video covers how to stitch consecutive photos together to make one large panoramic shot using a free program called Autostitch ( http://www.cs.ubc.ca/~mbrown/ autostitch/autostitch.html)
This video will help you understand the three main parts of a DSLR lens that can change the depth of field in photographs. We will explain how the aperture, zoom and focus all effect the depth of field in a photo.
Don't waste $5 at those touristy photo booths, wait til you get home and make your own in Photoshop! This tutorial starts with a template you can buy online, but we're sure you could just as easily make your own.
Turn something BIG, small! miniaturize it! Using photoshop, make a photo seem as though it is a miniature scale model.
This video describes how to geotag Picasa photos in Google Earth.
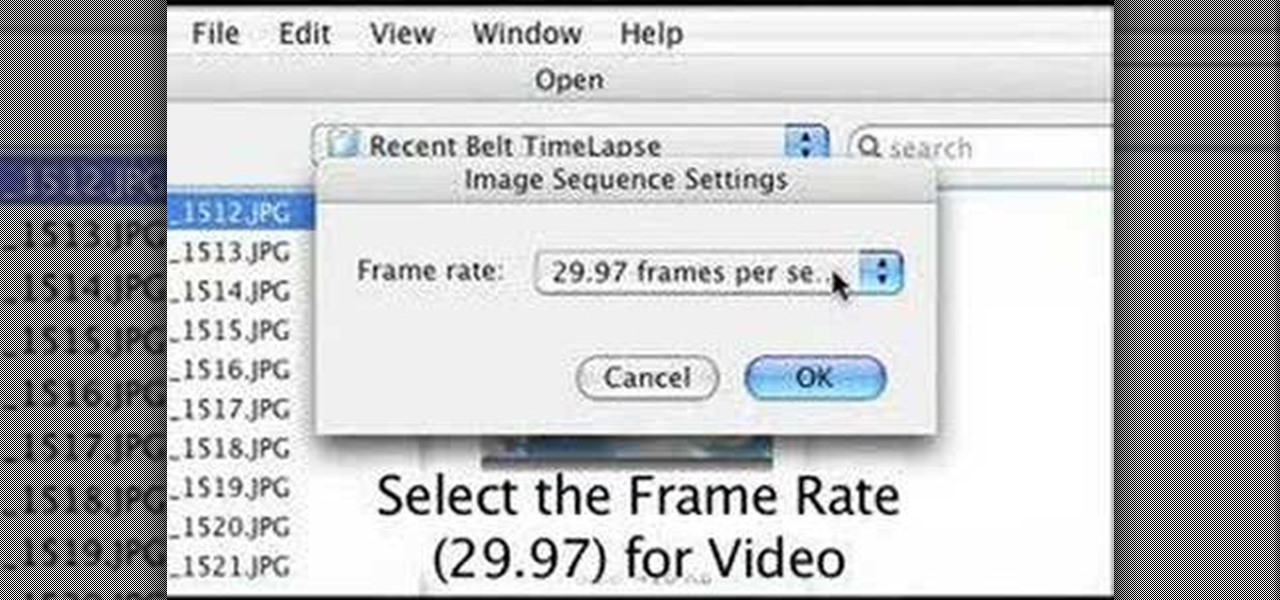
There are several ways to do time lapse photography, my favorite involves using a digital still camera and a controller. Once the photos are taken, I demonstrate how to to stitch the photos together into a finished movie. You could also use a digital video camera with controlling software to do time lapse.
Watch to learn how to say the names of the types of things you find in an antique store or at a flea market in French.
Uploading photos to Photobucket and embedding an image onto your Myspace profile.
This tutorial shows you two examples of how to improve a dark or low-light photo. This video covers the auto Enhance feature, retouch brush tool, Effects menu (Edge Blur) and the Adjust menu (Reduce Noise).
This video shows you how to color a black and white photo using Photoshop. To get a good result you need to have patience and pay attention to details - this video will help you out.
This is a tutorial of how to "Draganize" your pictures. Use Photoshop to give your photos the same style as Polish artist Andrzej Dragan.
This week, Bert shows off his new Wacom Cintiq tablet and learn how to create a photo realistic ice cream bar.
How to resize photos from your digital camera the easy way, using either online or offline method using a program called GIMP.
Have a look at something that will allow you to do more with your photos than you are doing today. Rob McDonald will take a photo and make it look hand painted.
Convert your old and unused CD cases into these awesome photo frames.
Want to create unusual effects on your photos? In this video tutorial you will learn to create a stylized portrait using a two-tone rendering. Learn to mask by color range and to blend with control. This video will give you a good grasp of the manipulation tools available so make sure you experiment with them for yourself.
Are you tired of the auto settings on your digital camera? Break out of the norm with some of the advanced features and take your photos to a whole new level. Learn about shutter speed, aperture, and wide angle lenses and how you can manually adjust these to take better photos.
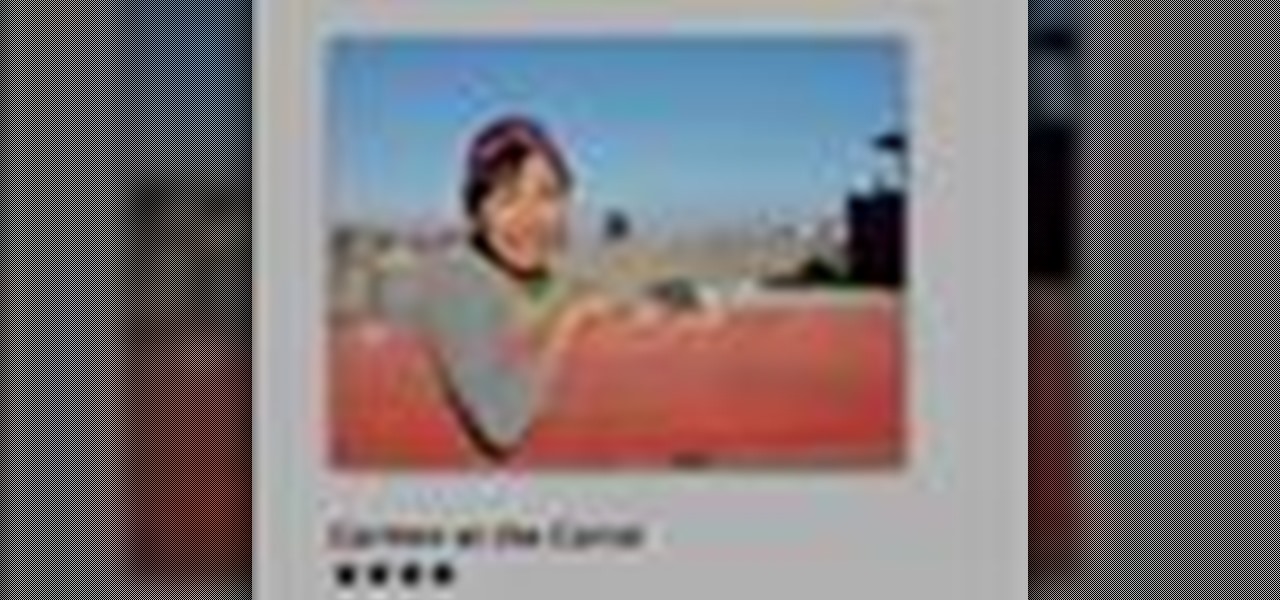
This iPhoto '08 tutorial shows you how to add titles, descriptions, keywords for searching and ratings to your photos. This helps with finding and organizing your photos.
Mimicking reality in Photoshop is a pain, but it's certainly achievable and quite laudable if you do a fine job. If you would like to create lifelike water reflections using Photoshop, this tutorial is the place to go. Check out the video to learn how to create photo-realistic light reflections in water.
We all know how great Photoshop CS2’s Photomerge feature can be for creating large panoramic scenes. However, in this video you’ll learn how you can take advantage of this feature to scan photos larger than what your scanner can handle. In this tutorial Terry White will put together an old 16"x20" high school class composite with my 8.5"x11" scanner!
Terry White found an old faded, torn, scratched dusty photo in my grandmother’s house and while most would have just pitched it, he decided to see if he could resurrect it in Adobe Photoshop CS2. While the end result was not perfect (still a work in progress), it’s a million times better than it was and is now in a presentable condition.
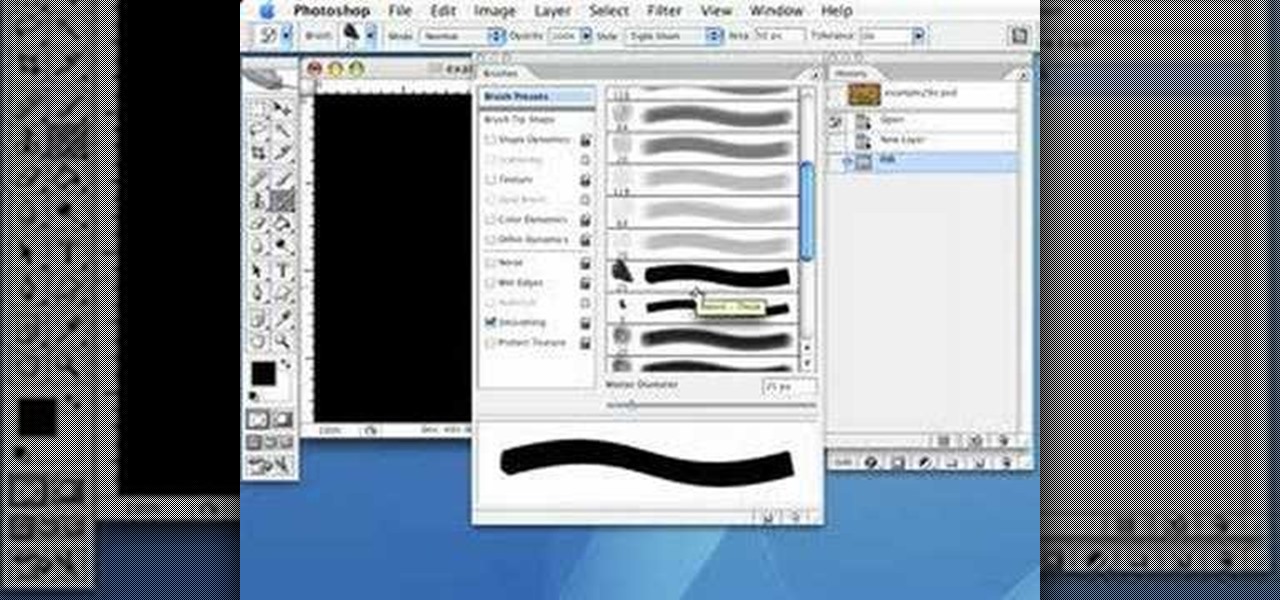
Use the Photoshop art history tool to transform photos into paintings. This tip includes learning about creating filled layers, selecting custom brush sets, and changing advanced brush settings.
In photography, creating a double or multiple exposure photo involves combining two different images to make one single image. This technique has been used in film photography by exposing a piece of film twice to two different images. The second image becomes superimposed onto the first image, creating various effects that may mirror one another or seem ghostly.
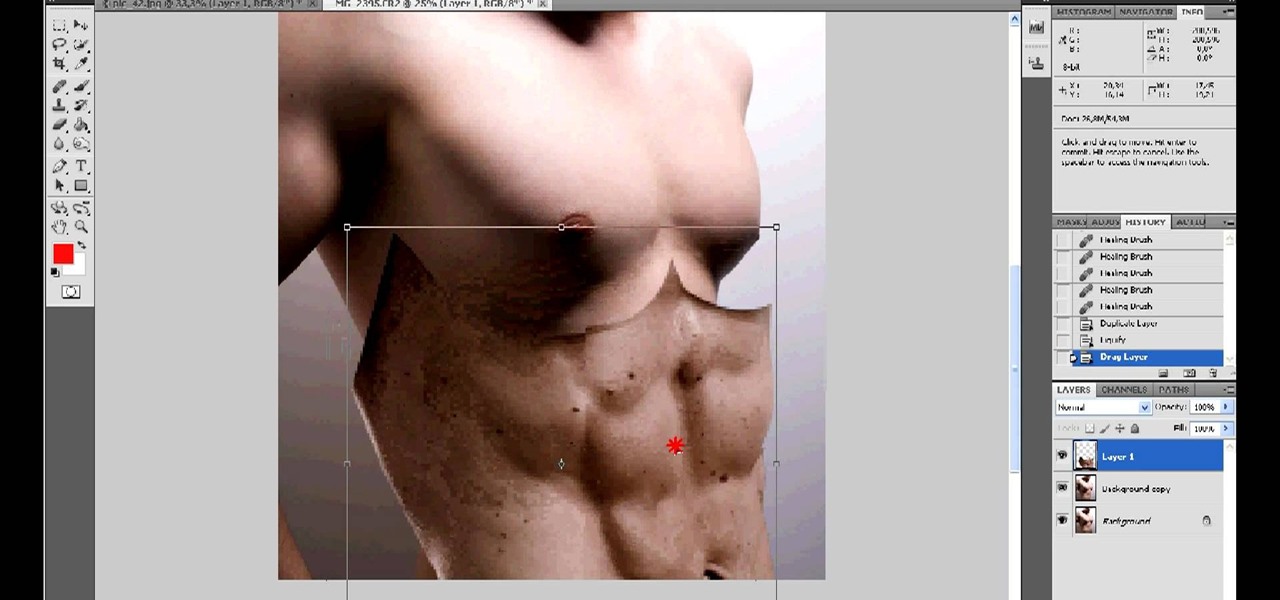
I want to pump. You up. OK, even better, why not pump yourself up. No, not through hard work and dilligence, what fun would that be!? No, do it the simple way, by firing up your Photoshop and touching up the photo. What you'll do in this process is "grab" the abs from someone who actually DID work out, and you'll 'borrow' them for your photo. Then, you'll simply graph them onto your own pathetic frame. Voila! Body builder.
Photoshop remains one of the coolest digital editing tools of all time, and if you're a user, you're likely discovering new tricks every day. One of the most helpful tricks is removing a shadow from an object, such as a face, a car, a cat, a dog or like this tutorial, a child. This excellent tutorial walks you through each and every step to show you how to use Adobe Photoshop to make those shadows vanish. Check it out and clean up your photos today!
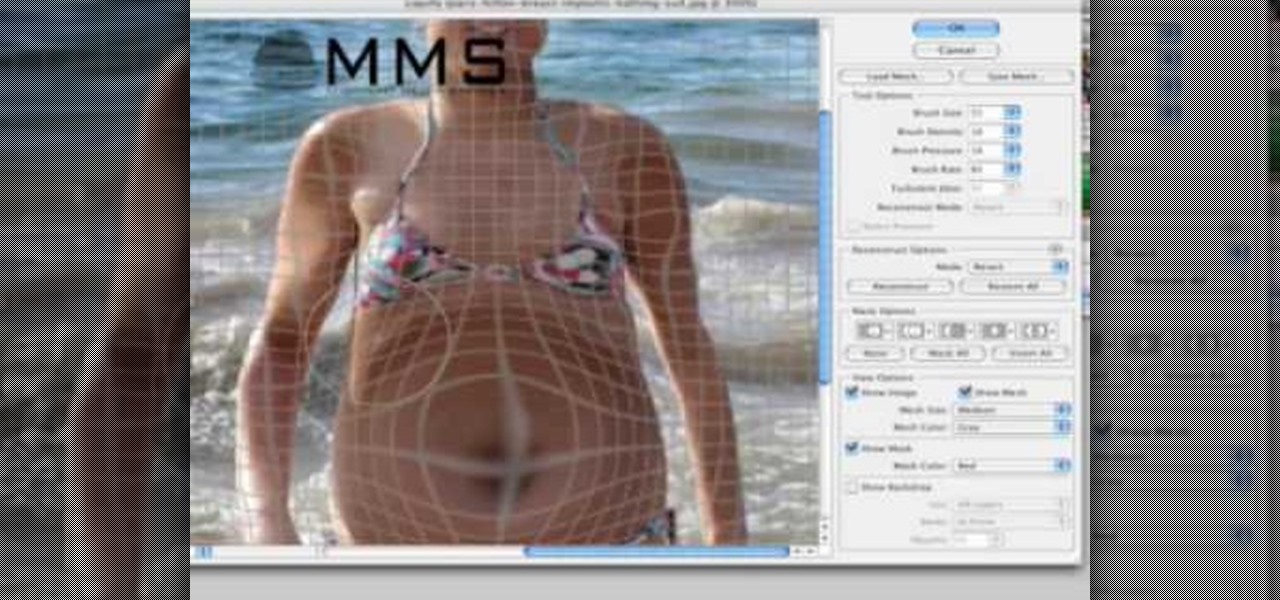
Everyone wants to be thinner, BUT, what if you'd like to put on a little weight? Or, how about a LOT of weight? Even in a photo? Well this video shows how to use Photoshop and its liquify tool to expand someone from their svelt self to a bigger, beautiful person.
Well, usually people are looking to go from fat to thin, but sometimes it's fun to see what a person would look like if they were on a full Twinkie diet. Well, this tutorial shows how to use the liquify tool in Adobe Photoshop to add weight to someone to make them look pudgey, overyweight, fat or even downright obese. The tool is easy to use and the video shows clearly how to turn that beach babe into a Jenny Craig "before" photo! Check it out and YOU can make people look fat in photos.
If you haven't made your own PCB (printed circuit board) yet, perhaps you we're just missing the proper instructions. But now, watch and learn from AP Digital light! They show you a fast and easy prototyping technique using a laster printer, photo paper, and a regular household iron. It's the heat toner transfer method of making PCBs.
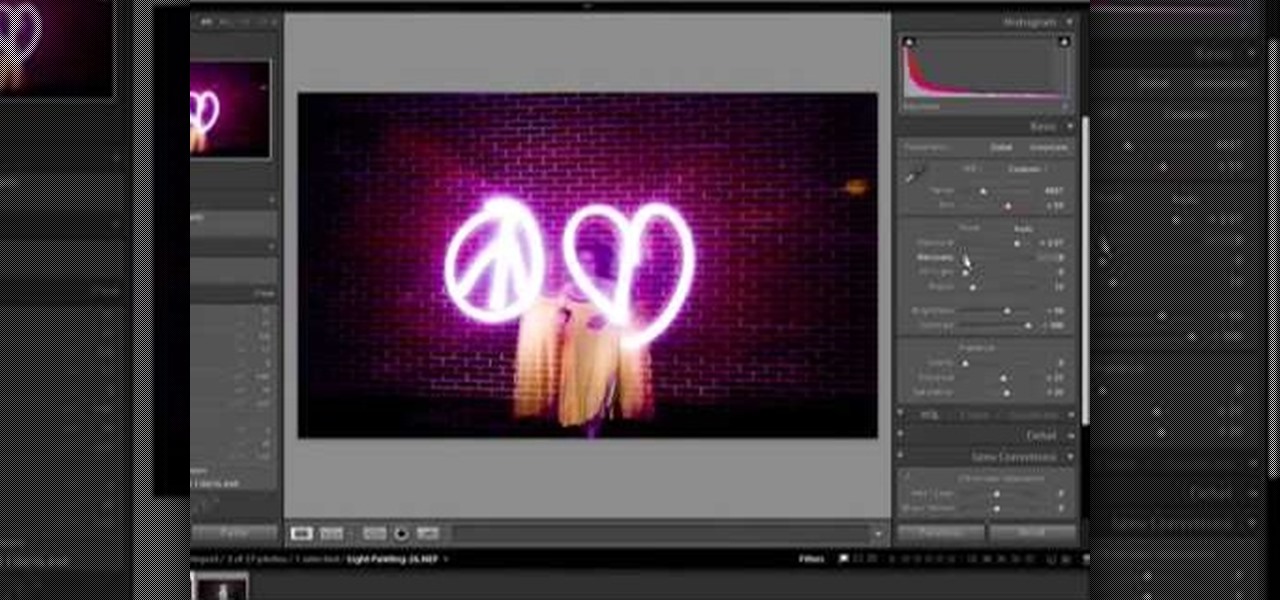
Light painting or light writing is one of the coolest of the coolest multimedia arts. It consists of setting a camera for a very long exposure in a dark area, then moving light sources around in front of the camera. When the aperture finally closes, you will have a photo where the light is preserved everywhere it was. Basically, you've drawn on a photo with light. How cool is that? This video will show you how to do it quickly and easily, allowing you and your friends to enjoy this exciting n...