Want to digitally preserve an old photograph without also preserving the imperfections of the physical photo paper? With Adobe Photoshpo, it's easy. Whether you're new to Adobe's popular image editing software or simply looking to pick up a few new tips and tricks, you're sure to benefit from this free video tutorial from the folks at Britec Computer Systems. This video offers a step-by-step guide on how to remove unwanted physical textures from your digital images.
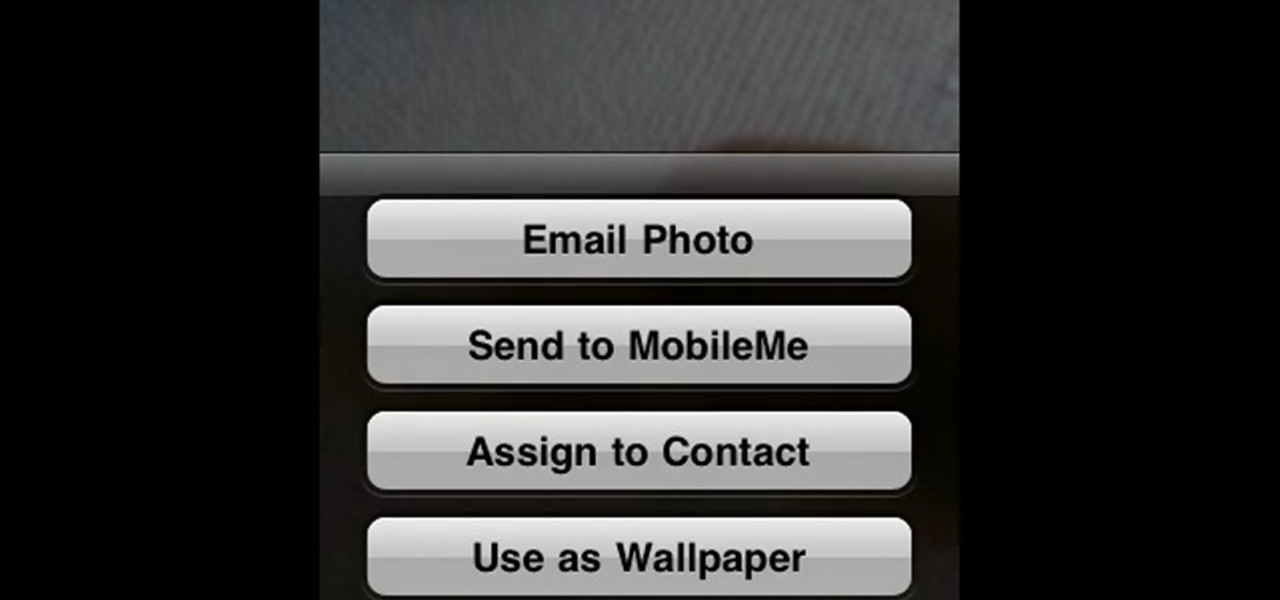
In this Electronics video tutorial you will learn how to Email photos from your iPhone. This is really very easy and simple to do and takes practically no time. On your iPhone go to the camera icon and tap on it. Then find a picture that you want to email. Then tap on the little icon on the lower left of the screen as shown in the video and then select email photo. Then you put in you want to send the photo to, type in a subject and add some text if you want. And the final step is to tap ‘s...
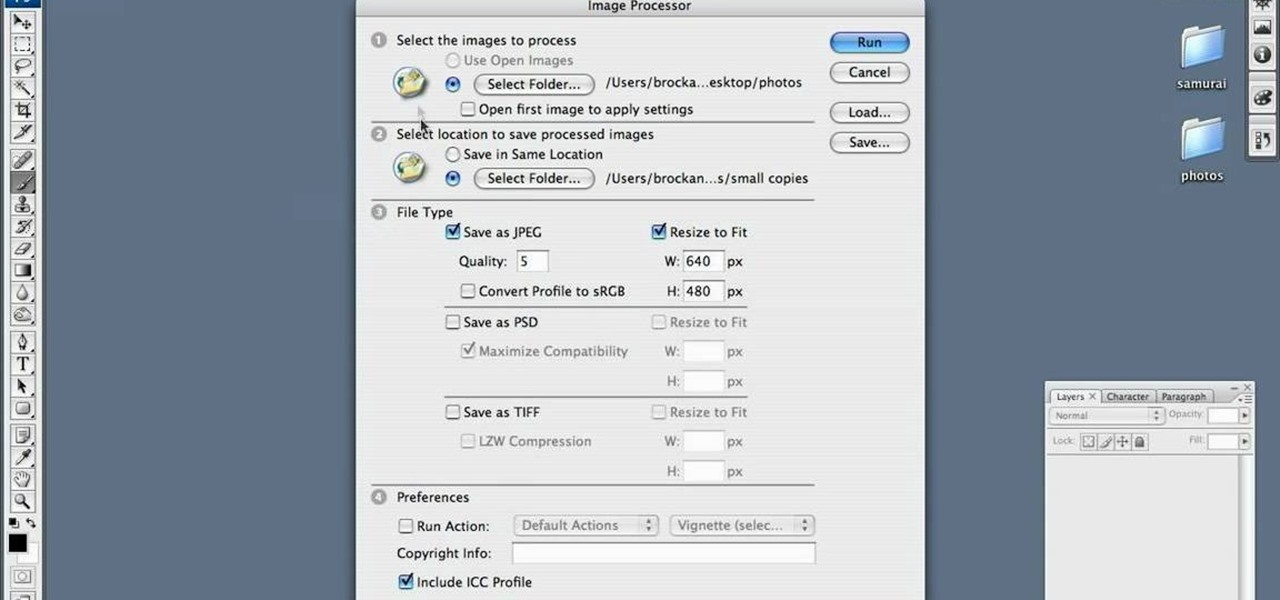
Are your high resolution photos taking too much space on your hard drive? Tired of getting file too large error when emailing photos? Don't worry Photoshop Samurai will help you batch resize your photos as fast as a ninja! You will need: Photoshop (Not Elements version), photos that need to be resized Go to file, then scripts and select image processor. Select the source folder (where your pictures are stored on your computer). Then select a destination location (where you would like the proc...
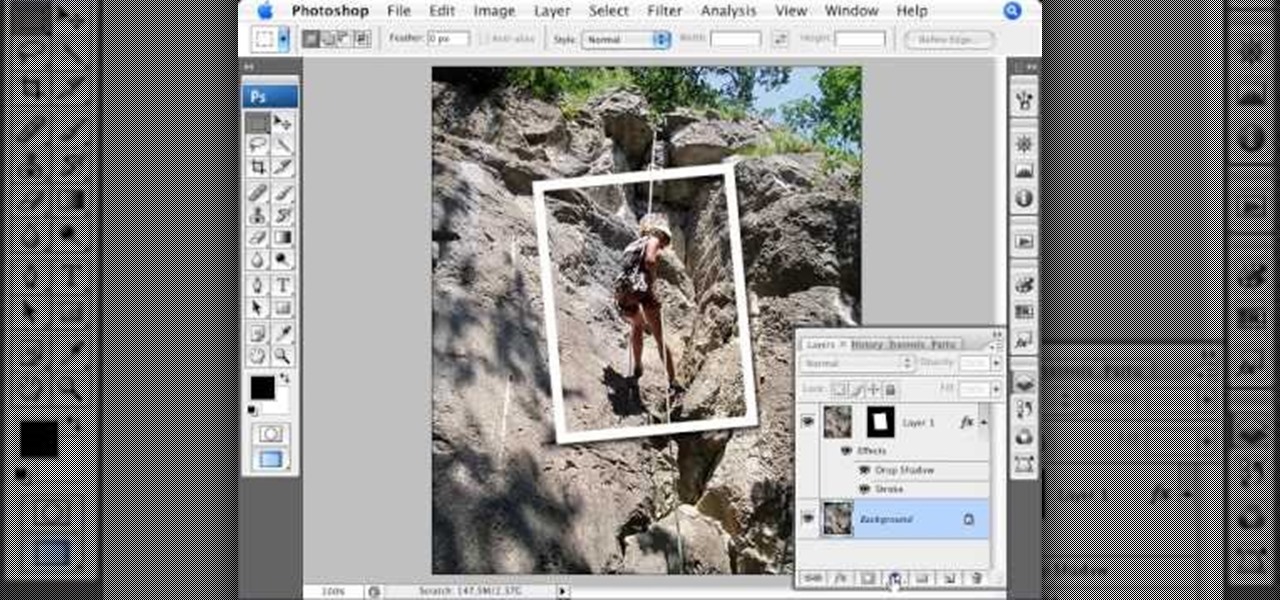
This video shows you how to form an eye-catching border around any photograph by placing a photo within (or on top of) itself using Photoshop. The process includes duplicating the image, adding a layer mask, adding an inside layer stroke and drop shadow, changing hue or saturation, and using a blur effect. If your vacation photos or family pictures are putting your visitors to sleep, try this easy and fascinating technique that will be sure to draw attention.
This Adobe Photoshop CS3 tutorial teaches you how perform slight photo retouching to supersaturate a photo without the distortion and bleeding. This adds a slight but noticeable saturated look of a photo which enhances the color quality. First the graphic artist adjusts the saturation. Then he creates a version copy using the lab mode versus the RGB mode. He then adjusts the contrast of the Lab mode image. Once you return the photo back to the RGB mode, you can continue altering the photo.
Tetiana from Best Buy Tips and Tricks shows you how to upload a photo on your mobile phone to your Facebook account directly from your mobile phone. For this you need to select the photo from your media, choose the option "upload to Facebook" and insert a suitable caption as shown in the video. The photo will be uploaded to your Facebook account for all your friends to see. Now you can share photos with your friends via Facebook on the go, using your mobile phone.

If you have a MobileMe account, use your MobileMe gallery to share your favorite photos with others online. This Apple iLife tutorial shows you how to load your photos into iPhoto and organize them and prepare them to put them in a web gallery. Once you have your photos ready in iPhoto, you will learn how to create a web gallery with MobileMe and upload everything to your MobileMe gallery.
Photo albums and cards can get to be a boring way to display or share photos. This tutorial shows you how to create a calendar out of your photos using iPhoto '08. Hang it on your own wall at work or home, or send it to grandparents and family members. You will have to pay for Apple to print and ship your finished product.
iWeb '08 introduces my albums templates. My album templates is a fast way to create and navigate web photo galleries. This tutorial shows you how to use the my albums templates and create a photo album page for your website in iWeb.
Commenting on Facebook pictures is a commonality. But you may not want to share your private and personal pictures on Facebook. Maybe you just want a select few to comment on your photos. Fear no more, you can send your pics and get private comments using Google Photos.
Live Photos capture the seconds before and after you take a photo, creating a fuller and also unique moment to share with friends and family. Unfortunately, it has been nearly impossible to share Live Photos with non-iPhone users — until now. Thanks to iOS 13, you can easily convert a Live Photo into a video, and even stitch multiple Live Photos together to create one long video.
Google has started to release a Go line of Android apps. These apps offer a minimalistic version of their major app counterpart. So far, we have Go versions of Maps, Photos, Gmail, and more. Who are these apps for and why would you want to use them? Here's a quick overview of Google Photos and Gallery Go.
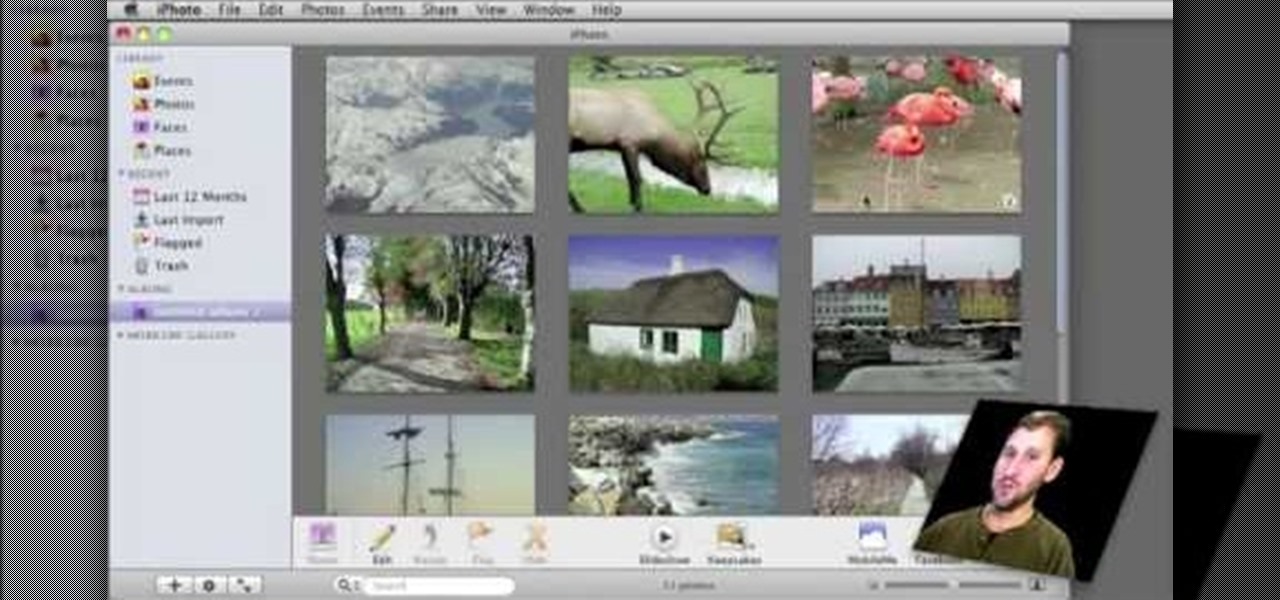
In this video, we learn how to use iPhoto Smart Albums. These are useful for organizing your photos to see what you have. First, create a smart album on the file menu, then name it and go through the drop down menus to choose how you want to categorize your pictures. Choose the type of camera model you used, then you can see what photos you have that are taken with the type of camera that you used. This is very easy if you have a lot of photos and want to go through them easily. It also separ...
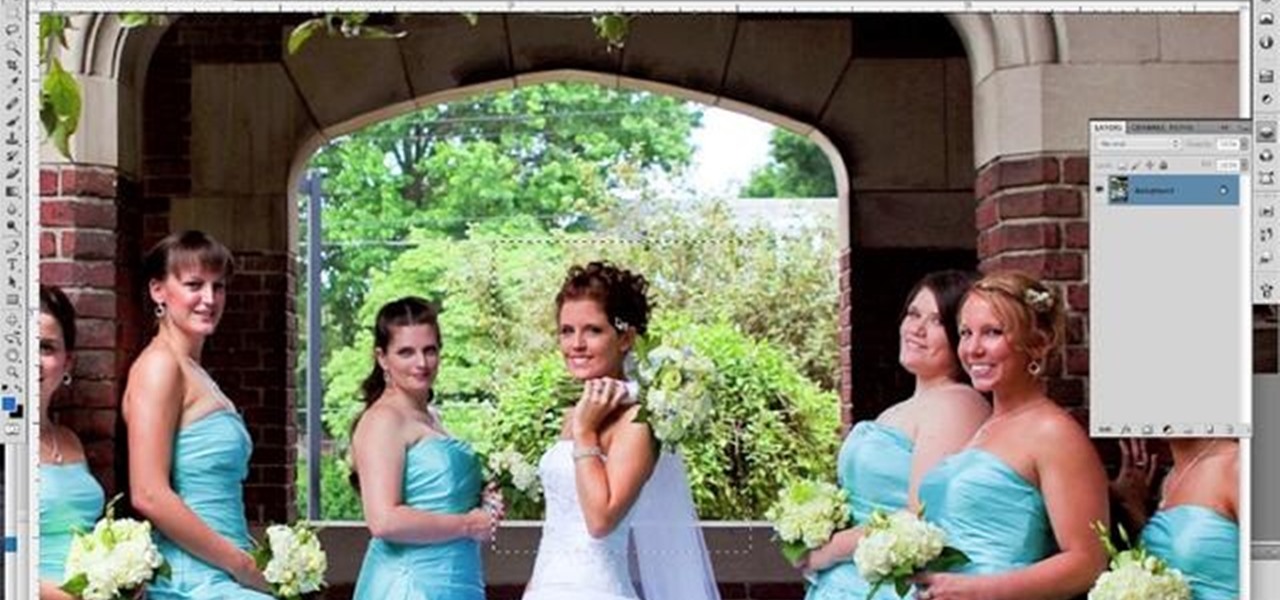
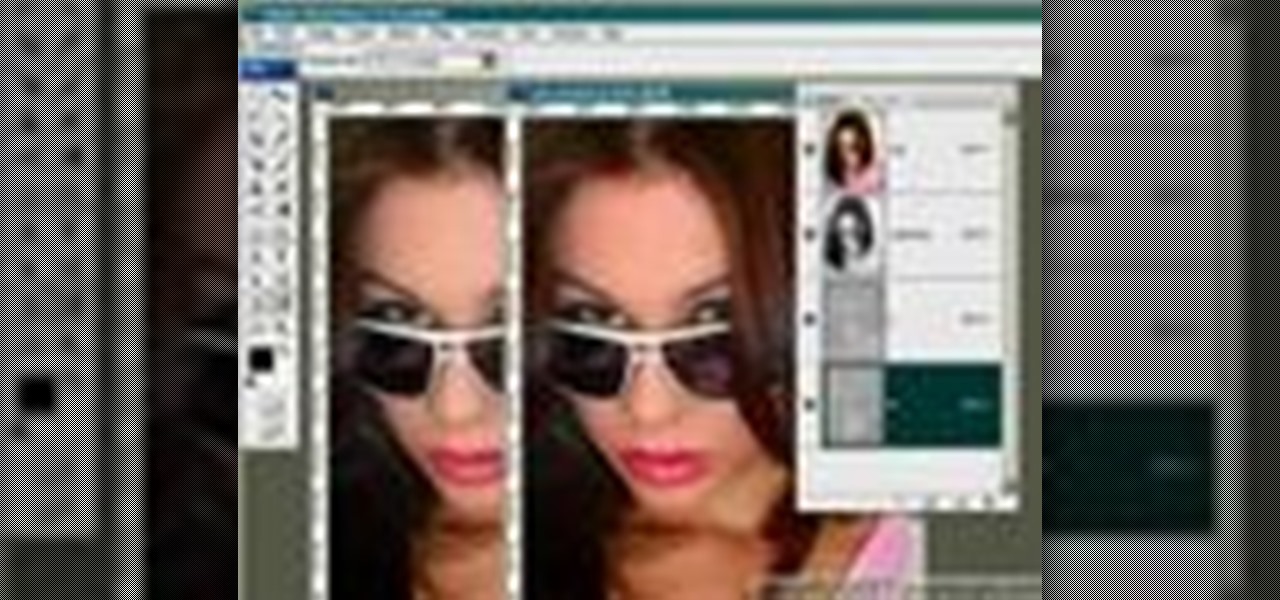
There's one in every group - the friend who closes her eyes as soon as the photo is snapped. If you're lucky, there is only one culprit in a group photo and through the magic of Photoshop, it is relatively easy to fix.
You can take high resolution photos with just about any digital SLR, but whether these high resolution photos turn out impressive depends on setting, lighting, and the compliance of your subjects to pose. While photographing your friends and family in everyday life has these aforementioned conditions already set for you, if you take photos in the studio many factors can be adjusted to your liking.
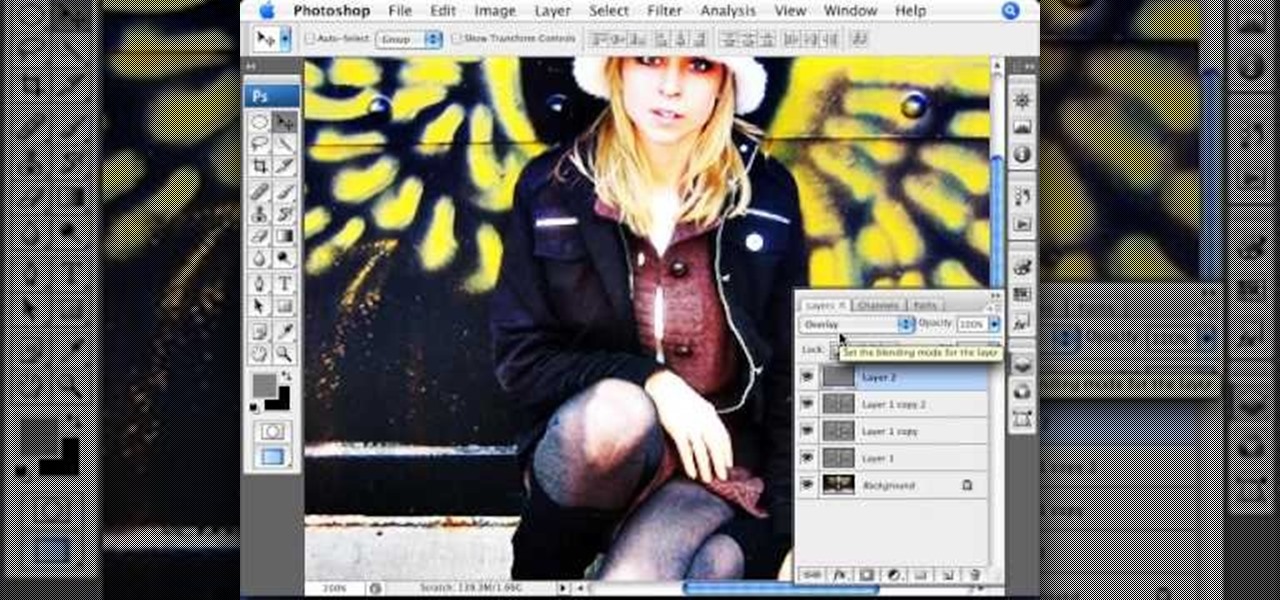
This step-by-step instructional video shows how Photoshop can be used to purposely over-process a photo and give it a more gritty effect. First, a High Pass filter is applied to give the photo a gray buzz. Next, hard light blend layers are applied to give the photo more contrast. A few approaches for applying noise filters are described next. Finally, de-saturation is applied to produce an amazing finished product. A must-see video for anybody looking to add a fantastic grunge effect to a photo!
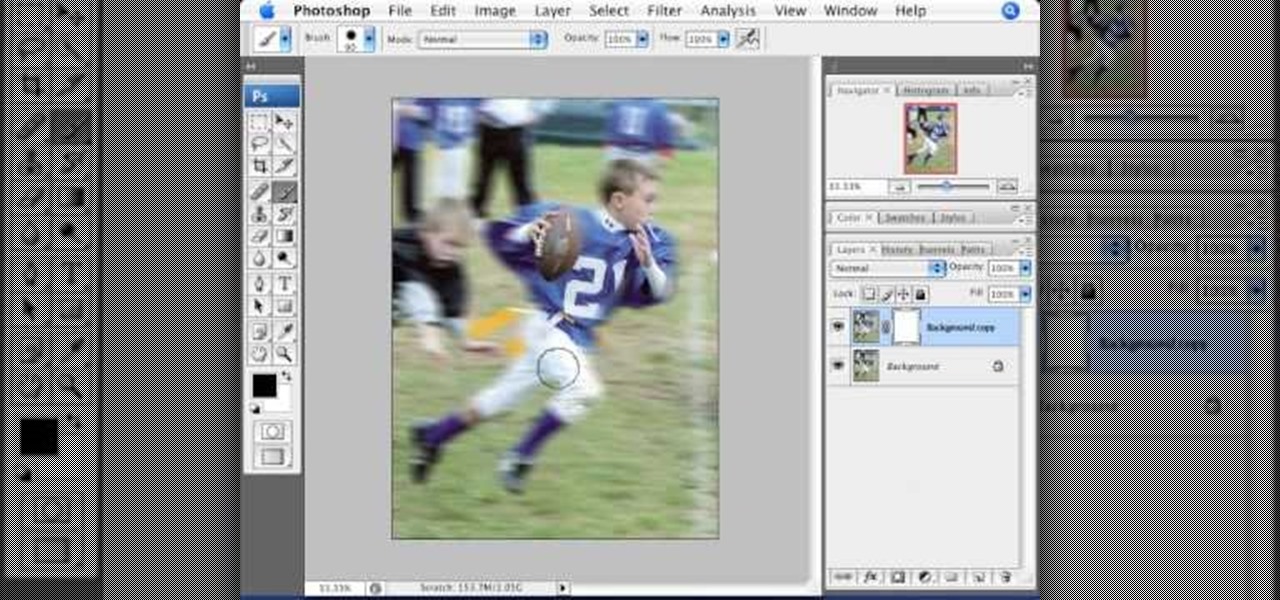
This video is about adding motion to photos with the help of Photoshop. The video has clear picture with good audio. In a few minutes the video gave easy step by step instructions about adding motion to a particular object in the photo and it also gave an easy tip to get it gelled with the background. The instructor was good but needs to modify his pace for better clarity. The video surely gives the basic steps to be followed to add motion to a photo and will also be very useful in the field ...
Photoshopuniverse shows you how to quickly add rounded corners to photos using Photoshop. He talks about vector masks which he is going to use to give the photo in the video a rounded corner. He uses layers inside of Photoshop to complete this task and also use the Crop tool. He also adds a border around the image then makes it green. IF you watch this video, you will learn how to add rounded corners to photos and how to add boarders and color them.
In this video the author takes us through how to simulate a curved photo in Photoshop. One can learn how to make it seem like your photo is slightly curved and popping up from the screen. The audio quality for this video is good and the explanation was very clear that even a beginner could understand the steps shown in the video. If you follow these steps in Photoshop, you can add a great look to your photo portraits with ease.
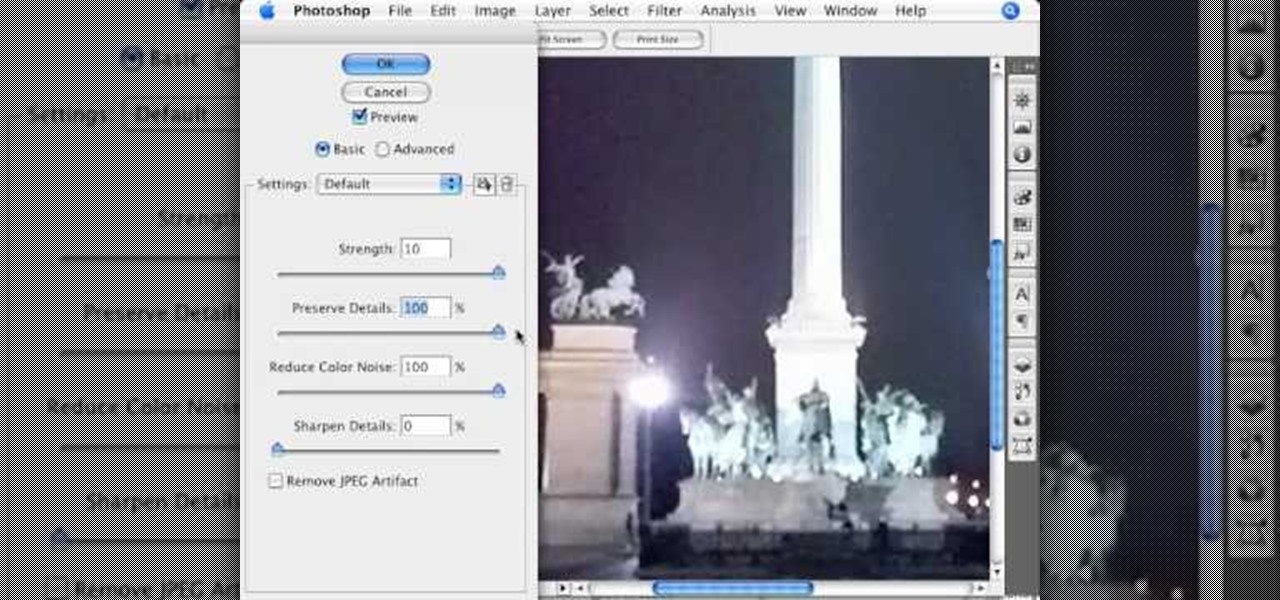
In this video by Photoshop Universe we learn how to reduce noise in a photo in Adobe Photoshop. First we learn that there are two types of noise in a photo, luminance and color noise. Next we learn that reducing noise is balancing act, as we take away noise we also lose some detail of the image. Finally the author goes over the 3 steps it takes to reduce the color noise that can be present in photos. Using these methods we learn that we can quickly clean up images that have noise in them in P...
Instead of using Photoshop, why not give Apple's Aperture a try? Aperture is designed more for post-production work for professional photographers, letting you cull through shoots, enhance images, manage massive libraries, and deliver stunning photos.
Instead of using Photoshop, why not give Apple's Aperture a try? Aperture is designed more for post-production work for professional photographers, letting you cull through shoots, enhance images, manage massive libraries, and deliver stunning photos.
Get your dose of the coolest Adobe Lightroom tutorials, tips, time-saving shortcuts, photographic inspiration, and undocumented tricks with Matt Kloskowski from Photoshop User TV. Photoshop Lightroom is the leading photo management software solution. See what leading photographers use to manage their photos, and how.
Annoyed by being taken to theater mode when viewing photos on Facebook? There's a way to get out of that lightbox that keeps you from interacting with photos. Watch this video to learn 4 techniques for avoiding Facebook theater mode.
Bring out the details in your photos with one simple photoshop filter. Using the high pass filter will increase the sharpness of your photos, and allows you to focus on the specific areas that you would like to see in greater detail.
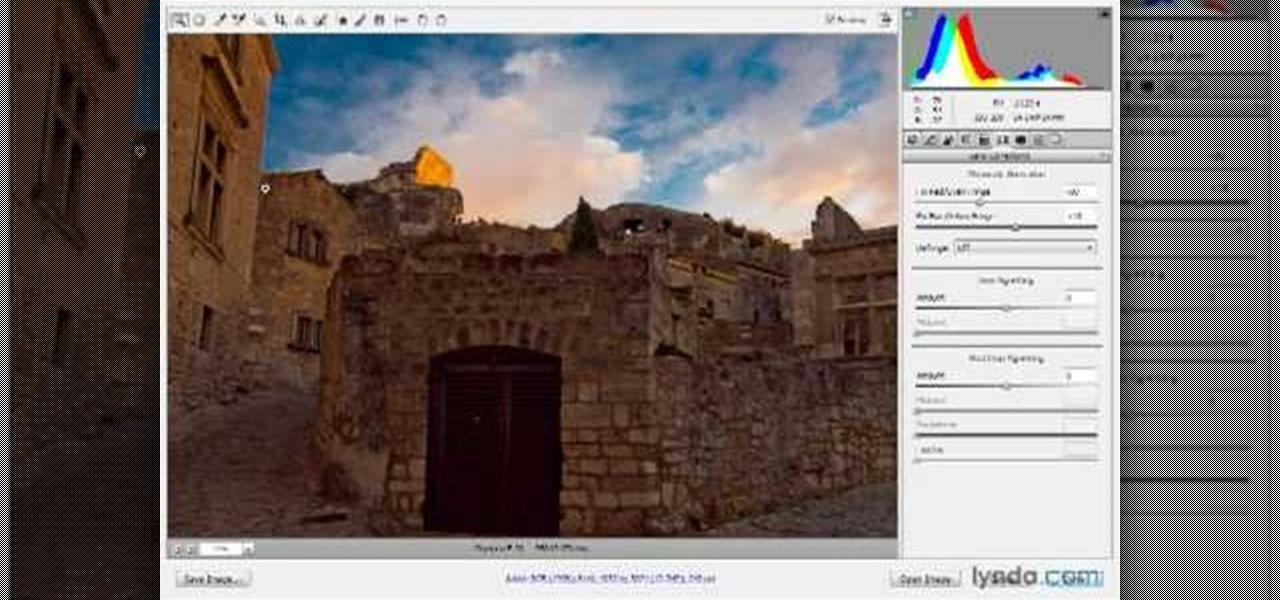
In this video, we learn how to use Camera Raw in Photoshop. This is a great program to use with your SLR digital camera that will make your photos come through more clear than ever before. After you have downloaded this application, you will load your photos to it and open up your desired on to edit. On the right hand side you will see a toolbar allowing you to edit and change different effects on the photo. Move the bars from left to right to edit how the photo looks to your liking. On the t...
In this video tutorial, viewers learn how to make a red-cyan anaglyphic 3D photo, using Adobe Photo-shop. Begin by taking two pictures of the same image. The second picture should be 6,5 cm to the right of the first picture. Now load both images onto Photo-shop and drag the second picture over the first one. Select Layer, click on Blending Option and uncheck Channel R. Place the red on the left side and cyan on the right side. This video will benefit those viewers who photo editing and would ...
Have some last minute edits to make to your photos before you publish them online? Don't have time to download and install software to your computer? This video guide has five free online photo editing services to share. For detailed instructions, and to get started editing your own digital images online, watch this free video tutorial.
In this helpful video, Yanik Chauvin will show you exactly how to use speed boxes with studio softboxes. You will learn how to hook up an SB-800 camera flash inside a studio soft box to get great light and photos. The best part is, you most likely already have these supplies in your photo studio so it's cheap! Have fun and good luck with your photo taking!
Sick of transferring megabytes and megabytes worth of photos into your computer, only to send them to your hard drive? Skip the middle step and learn how to shoot directly from your camera to your hard drive with help from this video by Pro Photo Life. Get your photos to your hard drive quicker and easier with the tips and tricks given here.
With photos and video being readily available for anyone to grab and steal off the Internet, it's important for aspiring and veteran photographers to makr their property with what is called a watermark. A watermark is a sympol that will show an image has a rightful owner. In this tutorial presented by Yanik Photo School, learn how to add watermarks to your photos in Adobe Photoshop and mark what's yours!
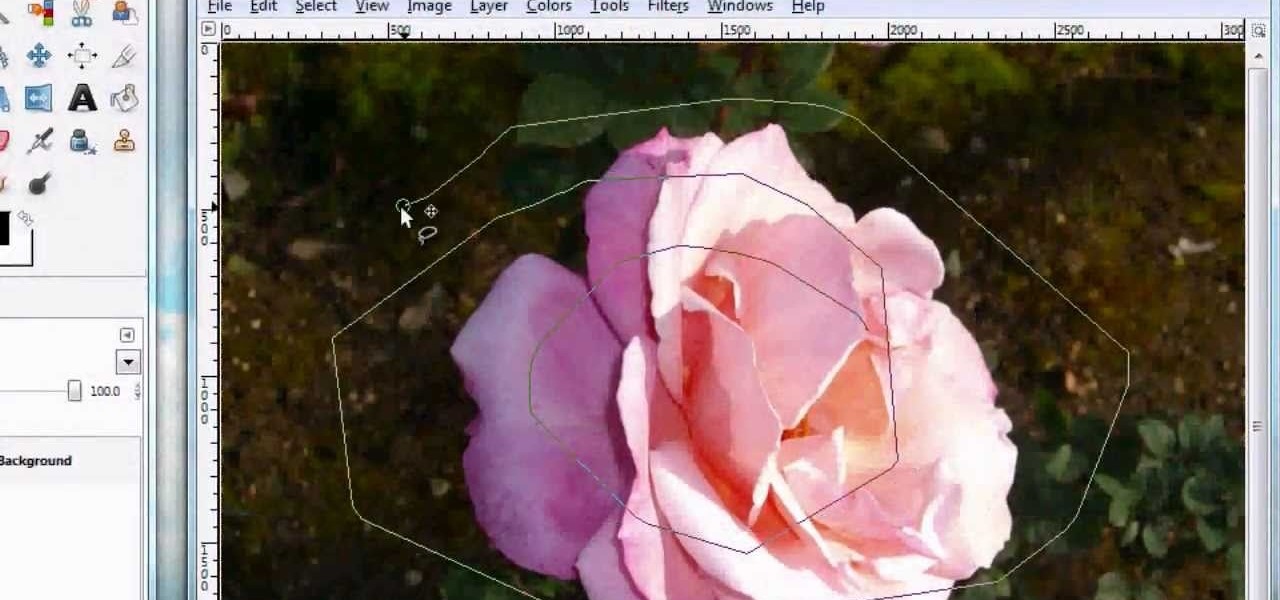
For anyone looking to edit a picture with one or more persons down to just a single person in the picture, you can use GIMP. This video tutorial goes over how to utilize the paths (or pen) tool and foreground select tool. The paths tool allows a person to select a part of an image to create a series of lines, or paths, that allow you to create a path around whatever you want to select in a picture. This item can then be moved and copied to a completely different photo. The foreground select t...
So now that you've read your Wired cover to cover (And back again) what are you going to do? You're going to turn it into a photo frame for your favorite geek! Just follow the steps in this video and you'll have your very own unique photo finish.
Ryan instructs you how to post pictures on Facebook. 1. Go to groups and choose which groups you want to post pictures.
To upload pictures to your Facebook account, this video instructs, you'll want to start by knowing where the exact picture or pictures you're wanting to upload are located on your computer. Then, from your main Facebook account page, click on "photos". From here, you decide how private to make the photo. Then, remembering the location of the photo you wish to upload, you must go there and click on it. That done, you can choose a caption for the photo, and click confirm. The biggest social sit...
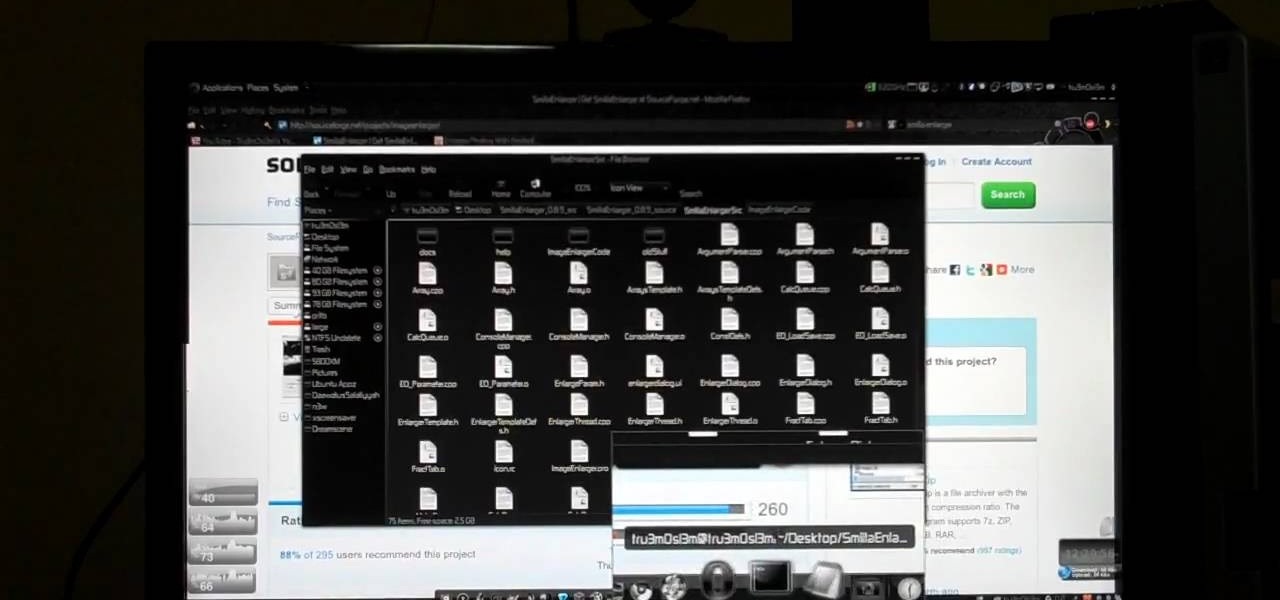
Ever hear of SmillaEnlarger? It's a small graphical tool (based on QT) to resize, especially magnify bitmaps in high quality. Check out this video tutorial on how to back up and restore data easily on Ubuntu Linux.
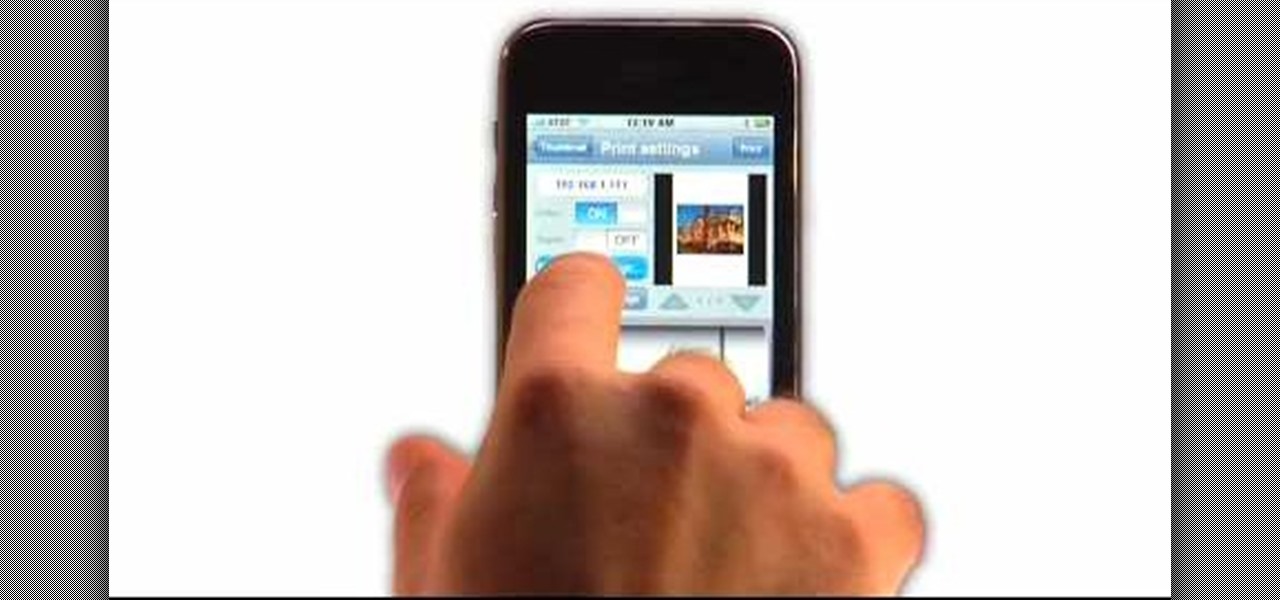
If you have an iPhone, you've probably taken tons of photos with the built-in camera. Sharing photos online is really great, but you can do so much more! ePrint is an app that lets you print photos directly from your iPhone or iTouch using a Wi-Fi enabled printer and no computer at all.
A tutorial from the folks at Loaded Boards, demonstrating color correction tips for your photos. The wrong colors can ruin even the best photos. In this clip, we're introduced to a technique to keep your pictures looking both natural and dynamic
Are you a scrap booking nut? Why not add some flare to your page with a three-dimensional looking photo collage? 3D photos are the best way to jazz up a page and take it from boring to popping! In this step-by-step tutorial, learn how to make your photographs from Fourth of July a three dimensional fireworks experience using a Fiskars' Fingertip Craft Knife, as well as a self healing matt, a 5x7" background photo, a 4x6" focal point photo, and some Ranger's Pop It! Shapes. Before beginning yo...
Watch this informative video tutorial on how to create shaped photo collages with Shape Collage. Shape Collage is an automatic photo collage maker that creates collages in different shapes in just a couple seconds. You can create picture collages in the shape of a rectangle, heart, text, or logo, with just a few clicks of the mouse.