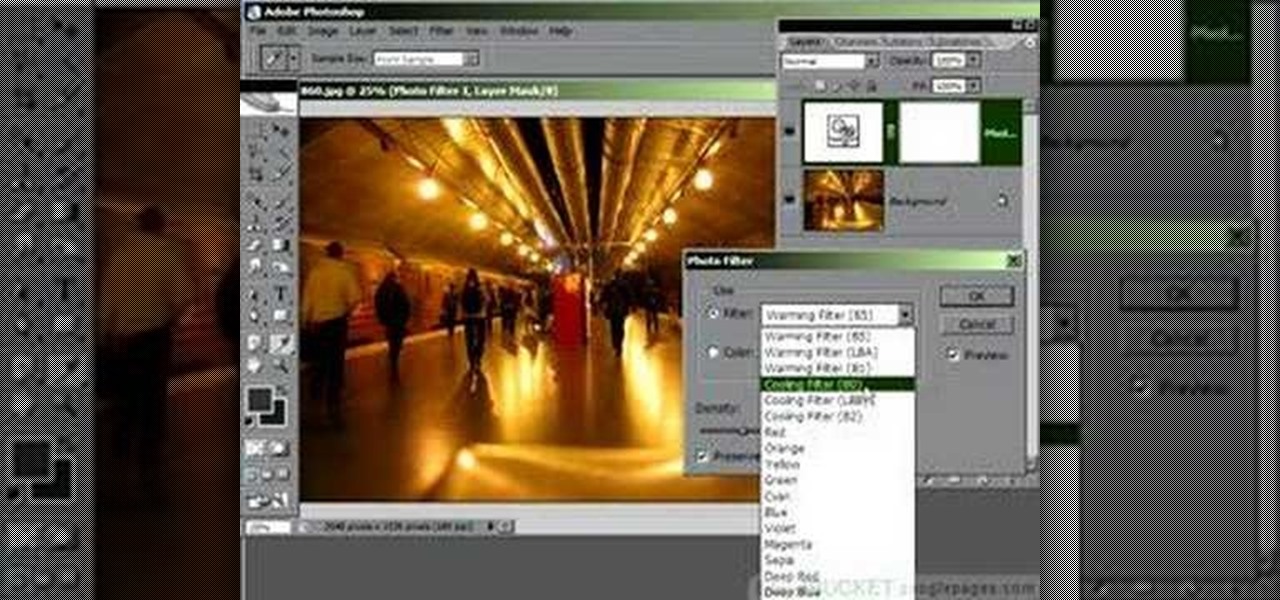
Photoshop is a place where we can edit the image in different styles. One of the features is adjustment layer of a photo that is also called as filter correction. It is an easy step to color filtering of a photo. Open a picture in a Photoshop, and select add layer option that present at the right bottom of the screen, then a pop up menu appears. Select filters from the options available, then dialogue box appears consisting of sub options filters and colors. then select the main color from fi...
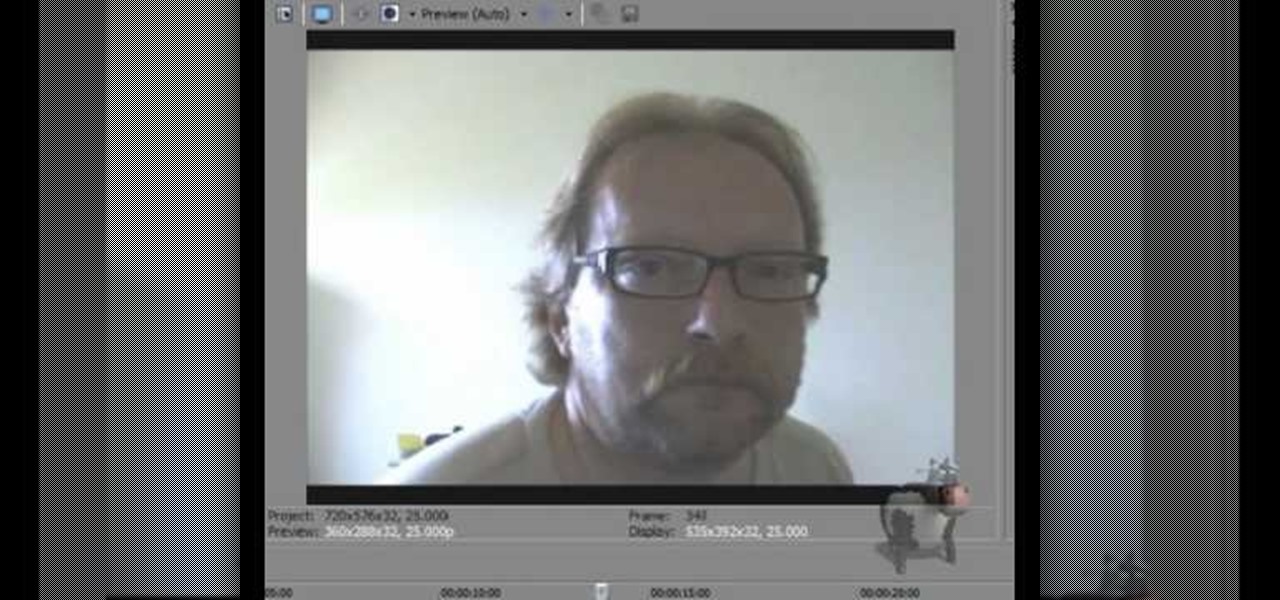
Photoshop can be a confusing program, especially with all the different settings and effects you can tinker with. Learn to master the vanishing point filter in this fun, easy to follow tutorial with the Pixel Perfect team. Clean up your pictures and smooth over any unwanted imperfections as he takes you how to make them "vanish" with the program. Alter the perspective of an image and add it on to another and change that cloudy day into a snowy background. Each step is carefully explained with...
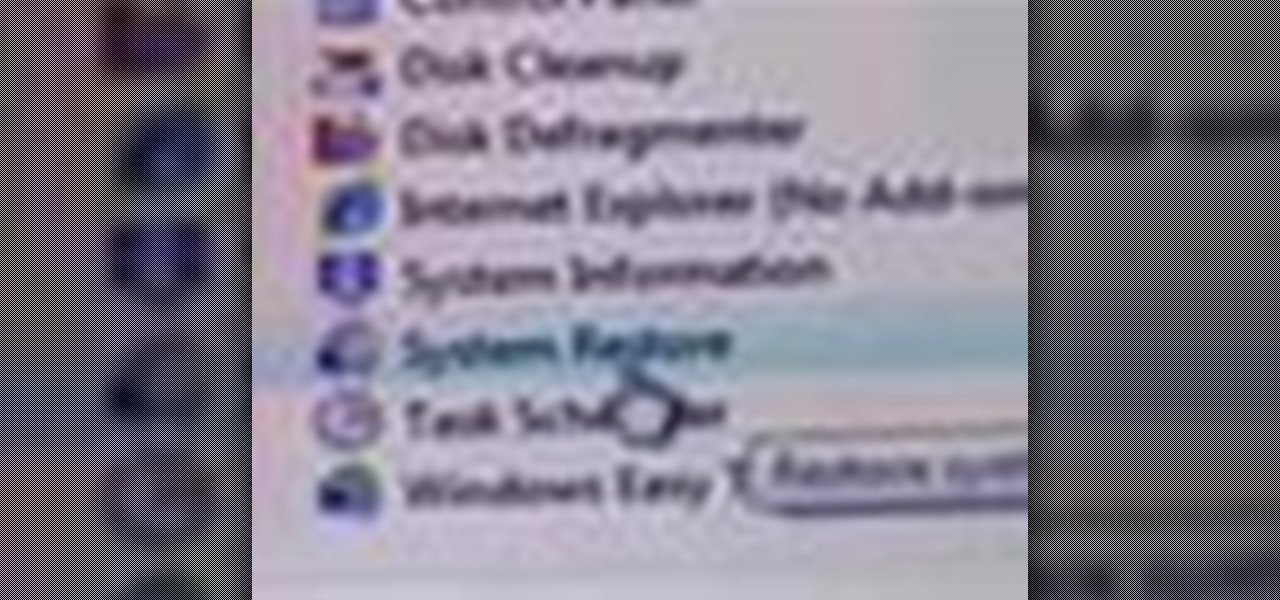
This video shows you how easy it is to use system restore on Windows XP and Vista to bring your computer back to life. System restore takes your computer back in time to a point before it had errors or problems. Go to the start menu, all programs, accessories folder, system tools, and system restore.

You can use starburst to make stars in photos stand out or you can use that feature to make reflections and glares on cars, mirrors and other shiny things. You use different layers in Photoshop to create the starbursts then add it to the photograph that you select. You can choose the pixel, size and color. The tutorial also teaches you other buttons to use in conjunction with the starburst feature, which teaches you other things so you can work on other pictures.
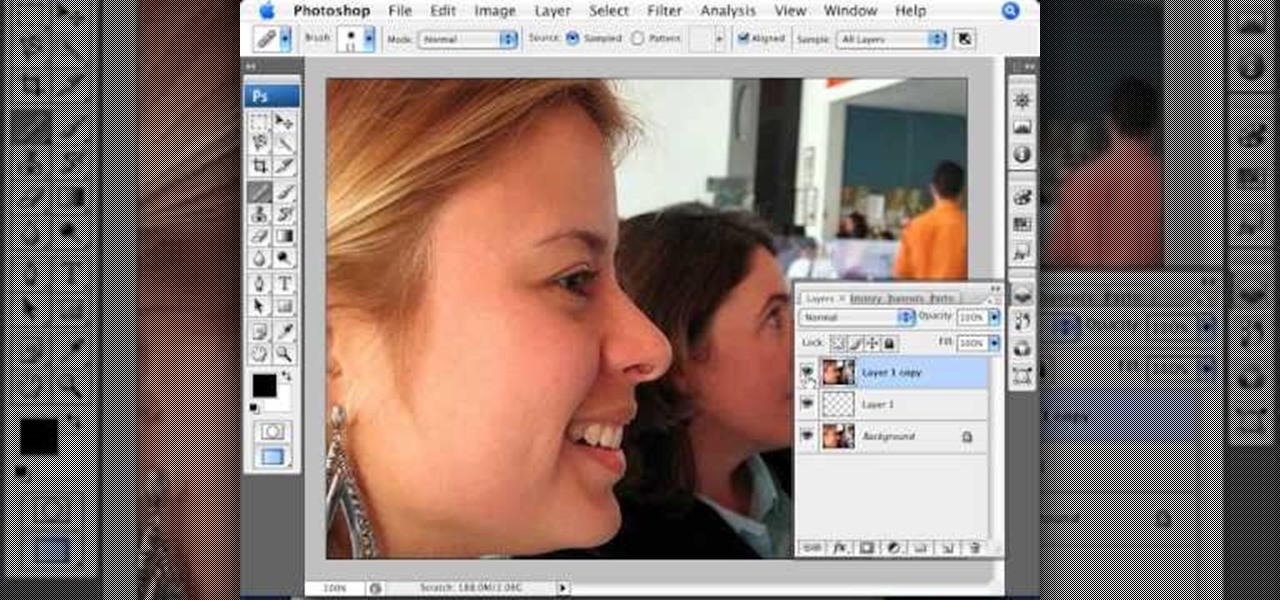
This video explains how we can have a smooth skin in the pictures using Photoshop tools. The healing brush tool is used to delete all blemishes, red spots or black marks from the skin in the photo. While doing this it is important to select smaller portions and then go ahead instead of selecting bigger portions of the skin. Later the median filter is used so that the smoothing is just optimum. This actually helps in getting the right image specially for close up photos.
The Wedge ROP is a render output driver, which can be used to change variables on the fly while rendering. This can be very useful when simulating, in that you can test out different parameters to see the different results. It's a relatively new feature in Houdini 9.5.

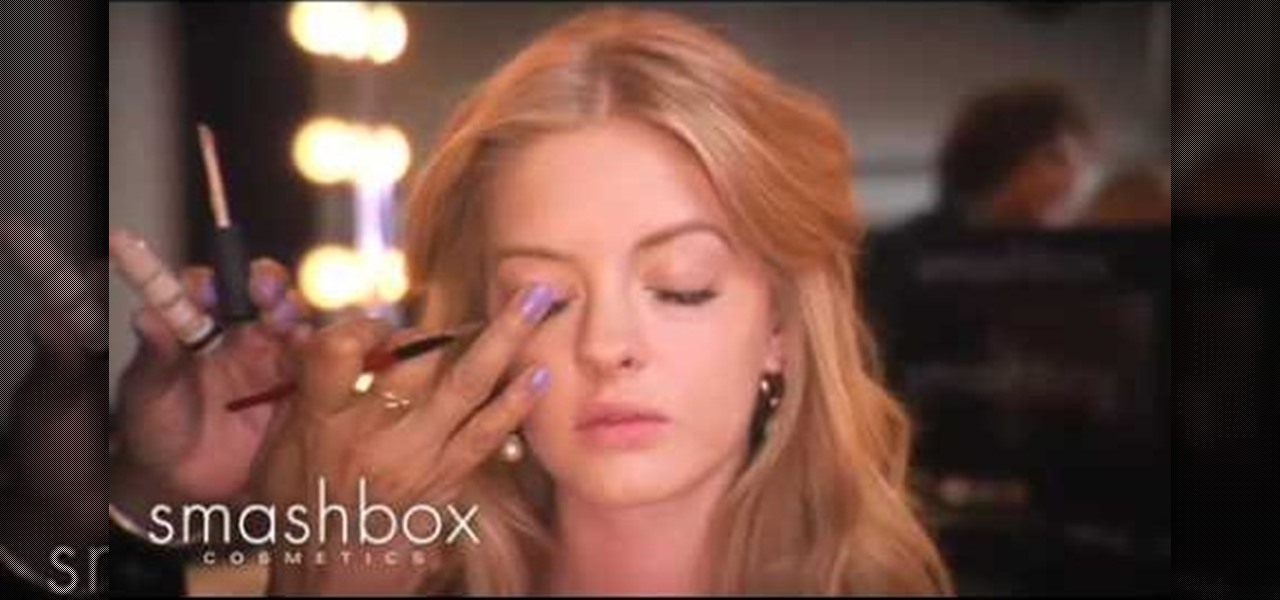
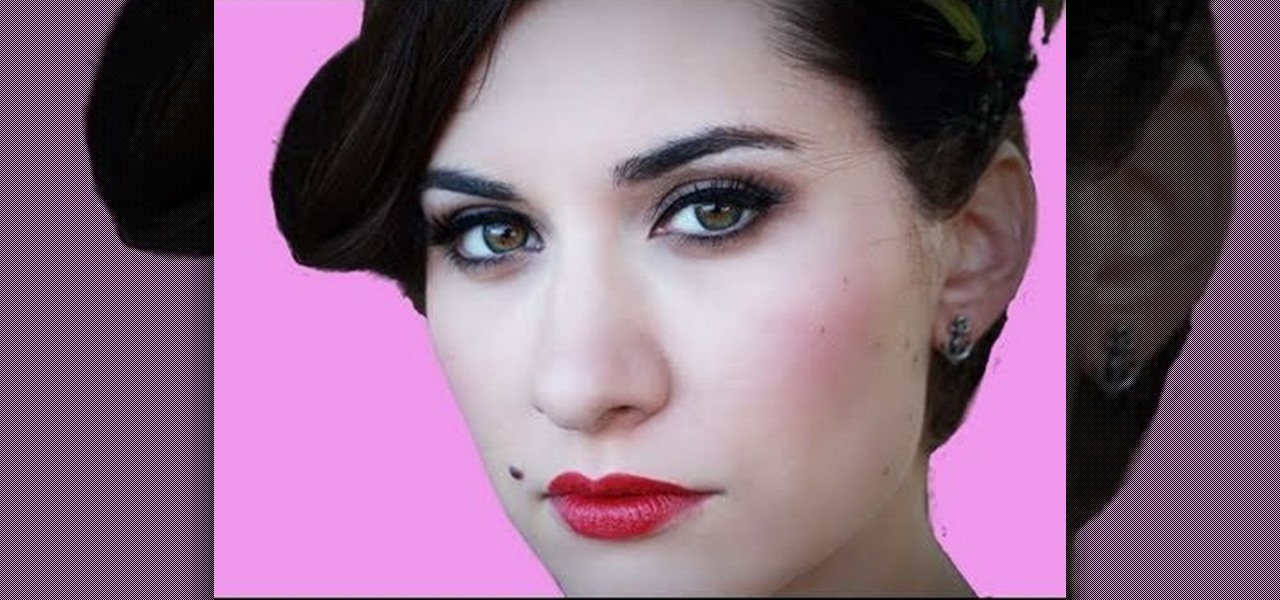
Your wedding day is vastly important and every bride would like the wedding pictures to reflect how beautiful they felt that day. In this tutorial presented by Smashbox Cosmetics, learn how to get the perfect camera-ready makeup look, perfect for your special occasion.
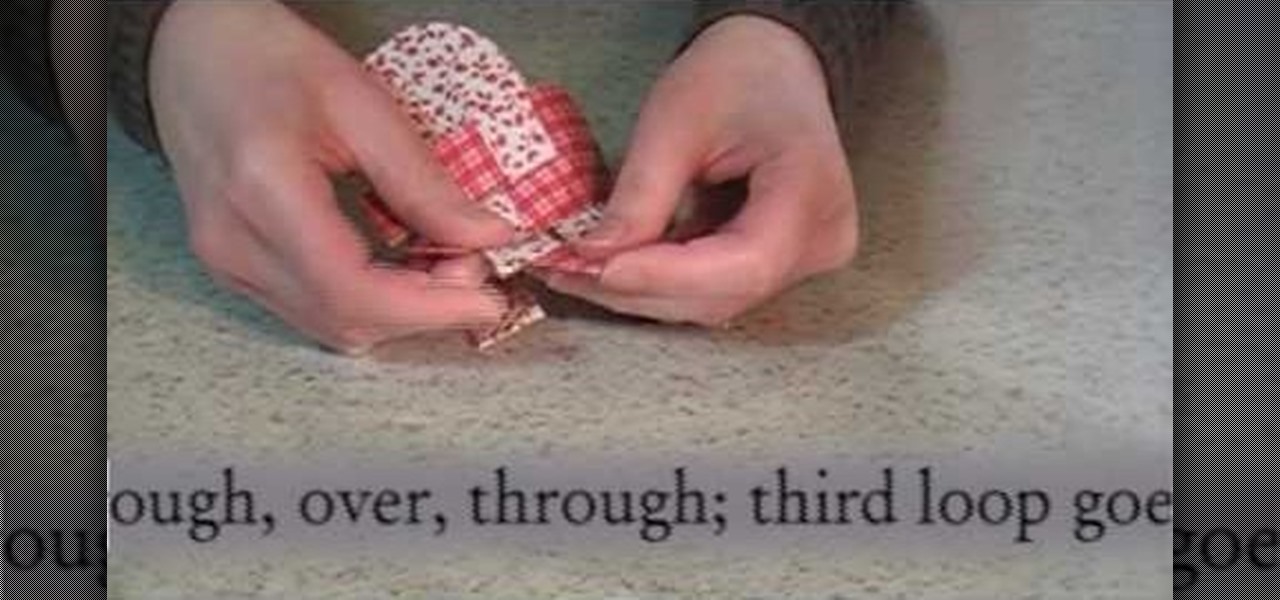
Check out this DIY video tutorial from Curbly, the best place to share pictures of your home, find design ideas, and get expert home-improvement advice.
Check out this DIY video tutorial from Curbly, the best place to share pictures of your home, find design ideas, and get expert home-improvement advice.
Check out this DIY video tutorial from Curbly, the best place to share pictures of your home, find design ideas, and get expert home-improvement advice.
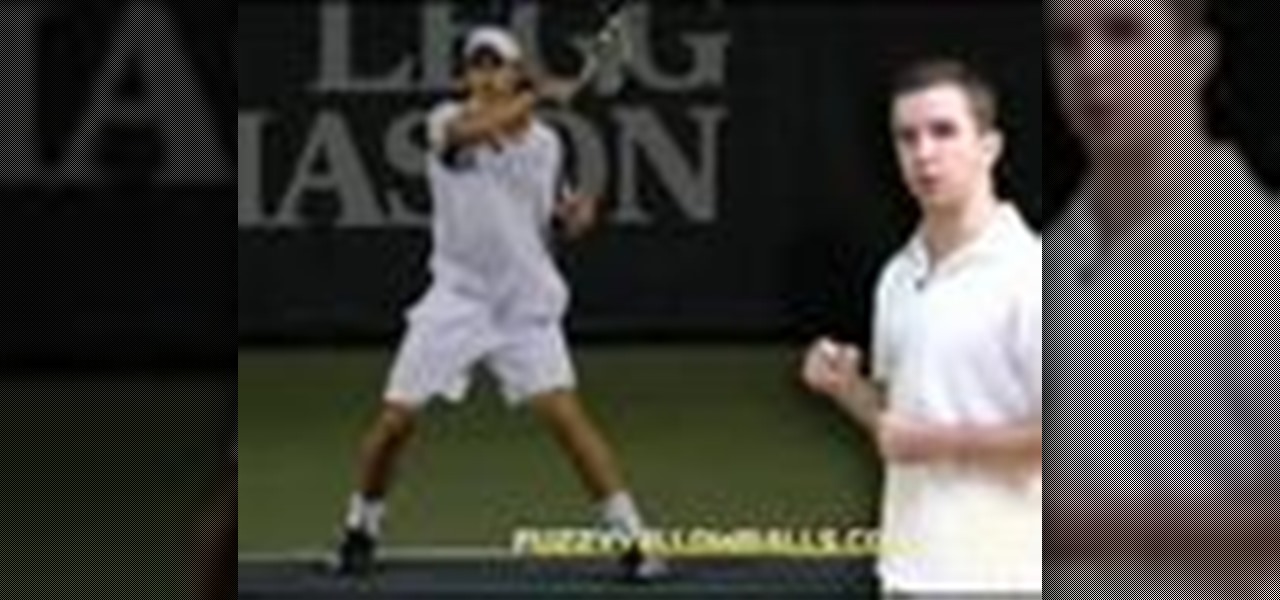
Welcome to a tennis lesson from FuzzyYellowBalls, the the best place to learn how to play tennis online. Our free video tennis lessons teach you how to play the game in a new way that combines technical analysis, visual learning, and step-by-step progressions.
Alright MacGyver, for this week's assignment, you're going to need a picture of a chair, and SketchUp. And maybe some duct tape. We're going to show you how to use Photo Match to create a chair component from a digital image in this SketchUp software tutorial. It's one thing to use Photo Match in SketchUp to adjust perspective with buildings, but you can also use it to work with components, as you'll learn in this video.
This tutorial shows you a few ways to use images to make custom face me components in Google SketchUp 6. Mike demonstrates how to make your own custom Face Me components in SketchUp, using some pretty funny pictures. You will need Photoshop or some soft or image editing software as well as SketchUp to follow this Face Me tutorial.
All you science and astronomy nuts out there, pay attention, this detailed video tutorial series will tell you everything you need to know about capturing digital photos with the Meade Deep Sky Imager. The universe is out there, and you can take a picture of it.
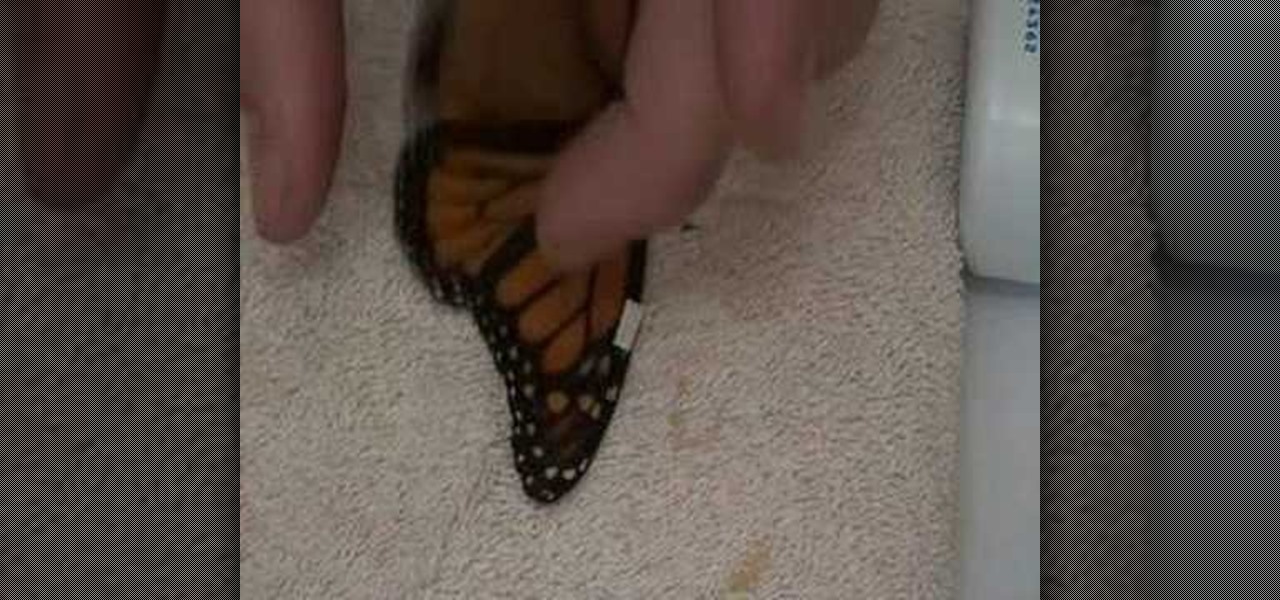
This video tutorial from Live Monarch shows you how to fix a live butterfly's broken wing. You can help restore flight to a butterfly in need -- you can be a hero and make a real difference.
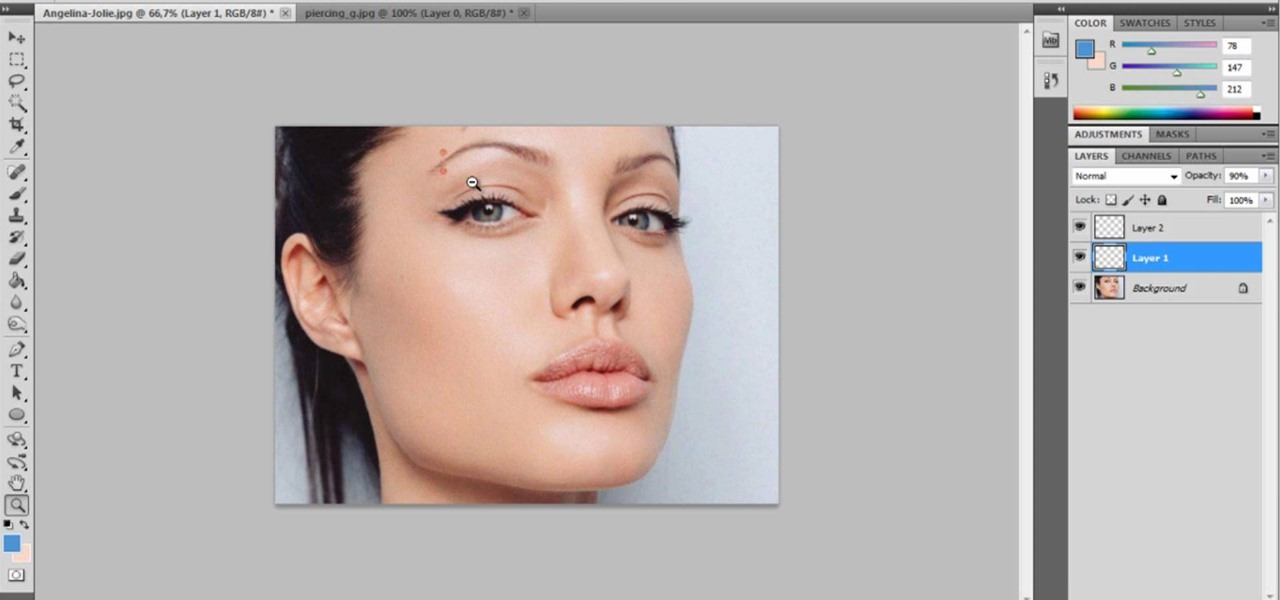
Want to prank a friend by making them look like a punk? Or get revenge by showing the picture to their parents? Or maybe you just want to see what you would look like wiht an eyebrow piercing yourself. Start with a photo of your subject, one with the eyebrow prominently shown, and then follow the steps in this tutorial to add a fake eyebrow piercing using the tools and techniques in Adobe Photoshop.
You want to look like the picture of perfection on your wedding day, right? But let's face it: Weddings are super expensive to hold, and that's not even taking into consideration your dress, hair, and makeup.
In this tutorial, we learn how to make a family photo album from digital photos. iPhoto from Apple has a ton of different options for you to make a great photo album. You can first start out with loading these on your computer and then creating them into a book. After this, you can choose the borders and text that you want to include in this, then drag the pictures in. After this, you can add in captions for each of the photos and then design the layouts of the different pages. After this, yo...
In this video, Daddy Troy teaches us how to star gaze with your kids. This can get your kids interested in space and teach them a thing or two, while still having a good time. First, Google offers a service called Google Earth, which will show your child the entire earth, moon, and mars. Kids can use these programs just like a video game. They can see real pictures as well as their own home or grandma's home. This is free and a lot of fun! Next, you can see satellites with your naked eye in t...
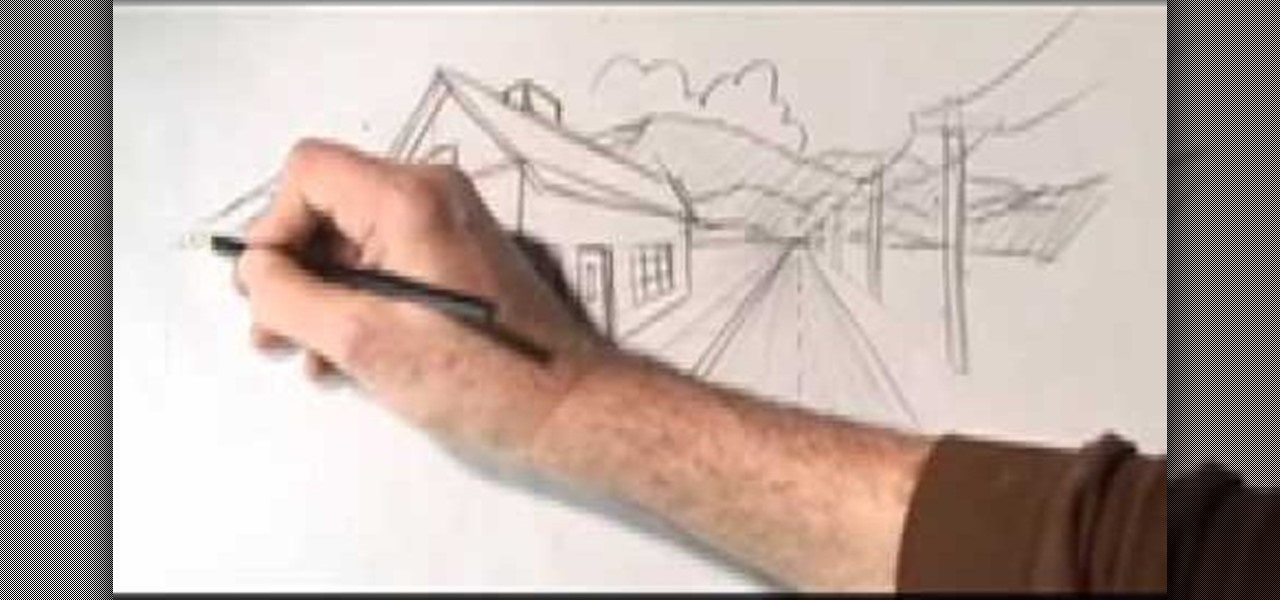
In this video, we learn how to draw two point perspective. Start off with a horizontal line on your paper. After this, draw a small point on the line where your drawing will focus to. From here, you will start to draw lines coming out of this. Next, you will design the rest of the picture around the main focal point you started out with. Add in lines to create lots of detail and make sure to use shading to show depth. Erase any background lines you don't need. Then when you are finished, you ...
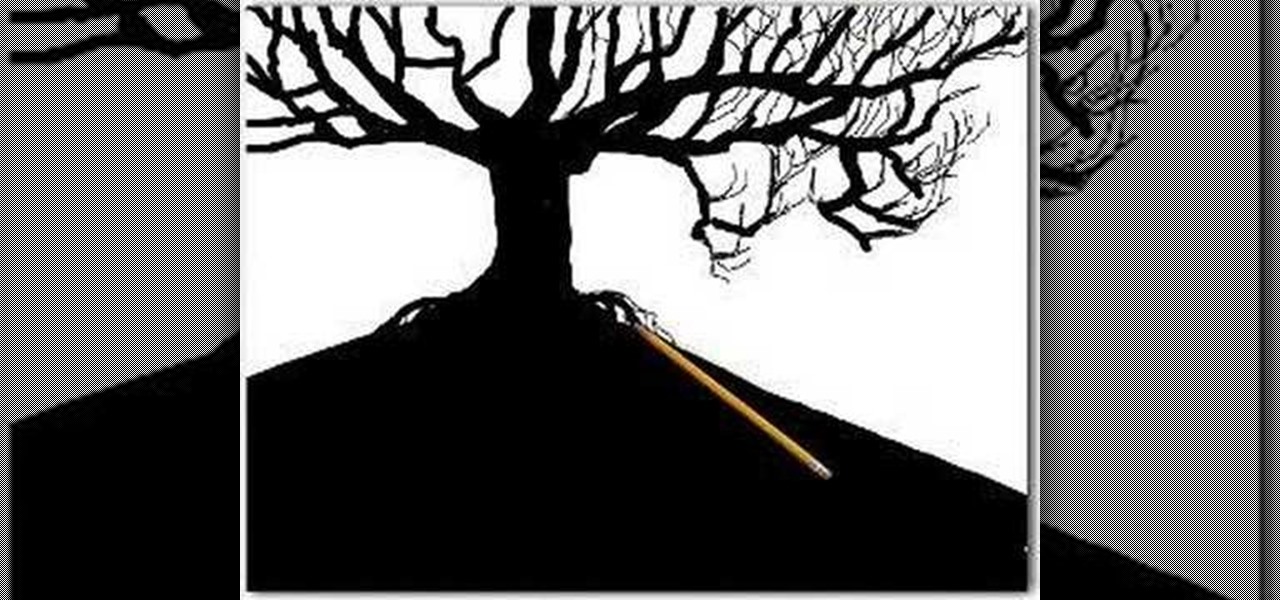
Whether you are pursuing drawing as a professional or as a hobby or you are just a common person, we're pretty sure that you have drawn a tree somewhere in your lifetime. This video merely shows how to do the same in a better way. Though there is no narration (just background music) in this video, it is easy to understand the additive method of drawing. The artist starts off with a broad tree trunk and then starts adding thinner branches to the trunk that spread outwards. Then, even more thin...
The pressure underwater is undeniably strong. If you were to fill a balloon with water and take it underwater, it would not burst but would stay the same size because liquids are not compressed. The pressure is the same, inside and outside of the balloon. If you were to fill that same balloon with air instead, the lower it dives into water, the more it shrinks, until it eventually can't take the pressure anymore and bursts.
Make a Spark frame ripper
In this video, we learn how to use extension tubes in place of a macro lens. First you will need to have your camera and a tube insert that will attach to your lens. Once you have this, you can attach it to the lens by screwing it on with your hands. Then, you can focus extremely close, much more than you would be able to do with a regular lens. After you have attached this, look through the camera and start taking shots close-up. Then, you will be able to see a better picture than you had be...
Want to create your own camera? The simplest one that you can create is a pinhole camera which can be constructed from everyday household items.
The original pin up girls from the '40s and '50s knew how to work the camera and were clearly drop dead gorgeous. Even when Photoshop hadn't been invented yet, and even without all the fancy studio lighting and airbrushing we have now, they were able to look like handmaids of Aphrodite.
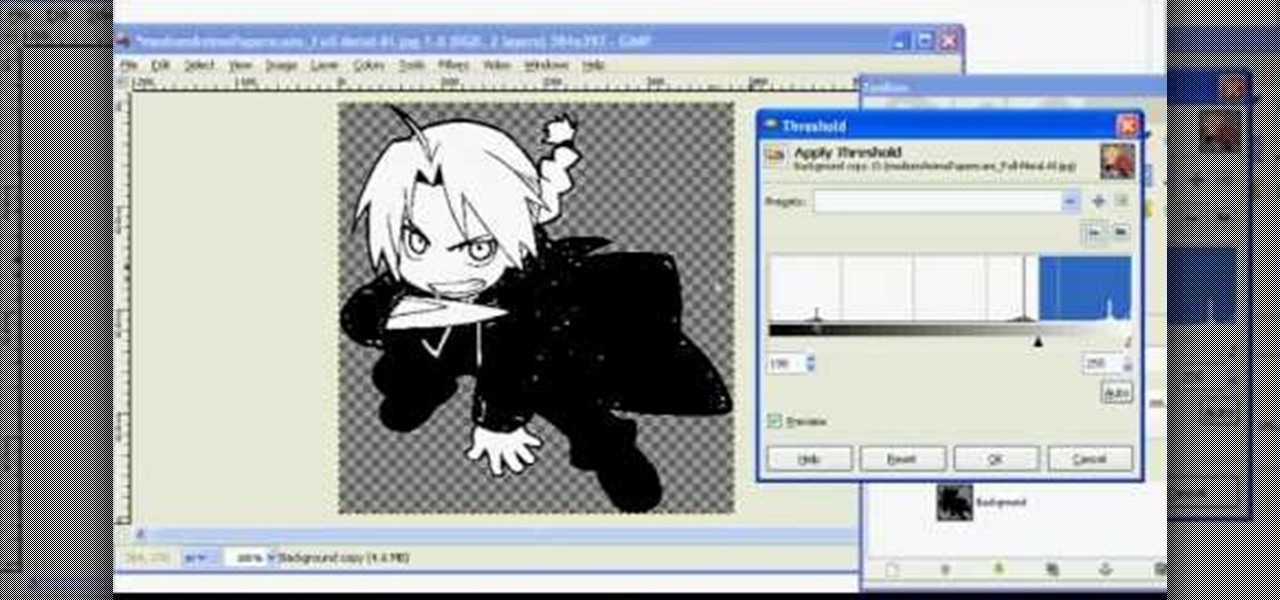
In this tutorial, we learn how to make 2-layer stencils in GIMP. First, cut out the background before you begin. Now, right click on your main layer and then select "add alpha layer". After this, select the magic wand tool and delete all the white areas on the outside of the picture. Now duplicate the layer, then hide the top layer and select the bottom layer. Now, go back to threshold and move it all the way to the right to get an outline of the image. From here, go back up to the top layer ...
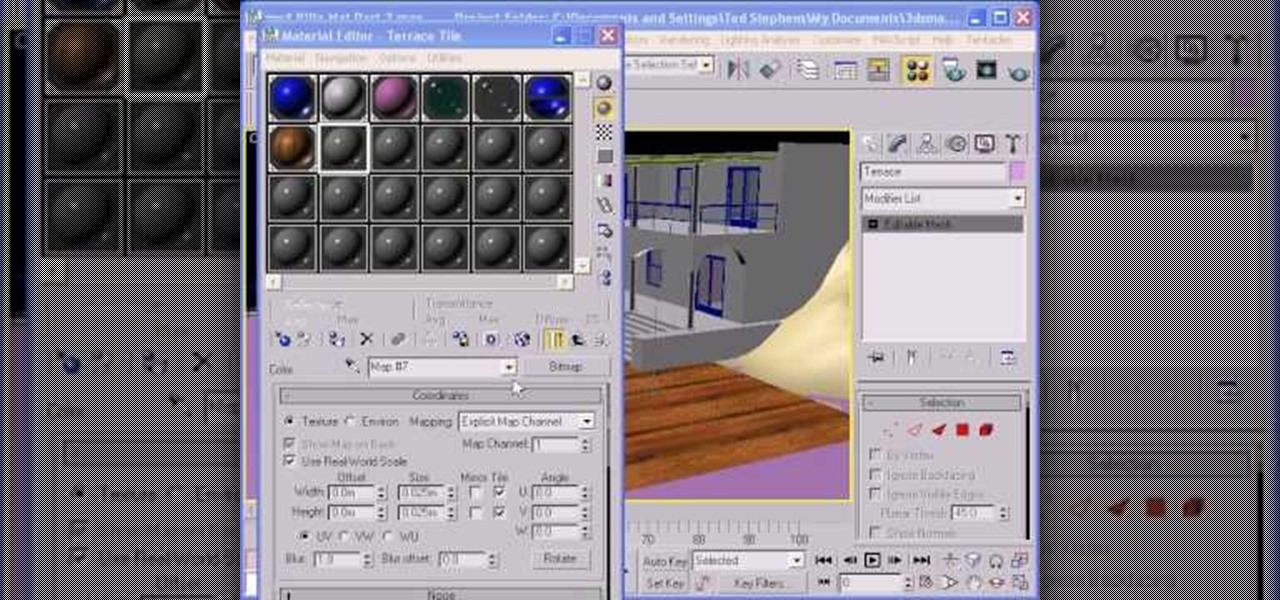
In this video, we learn how to use custom map or UVW map in 3D Studio Max. First, go to the material editor and add a custom map to it using a hardwood deck. Change the material to cedar fence, then change the size as you would like it. As you continue to edit the different surfaces in the picture, it will preview it for you in the main screen. You will be able to see it customized how you would like it to be as you edit it. The material editor can be changed in design and renamed to help you...
Wish there were an easy way to give your digital photos the appearance of an old Polaroid picture? Well, there is. And it's easy! So easy, in fact, that this home-computing how-to from the folks at TekZilla can present a complete overview of the process in just under two minutes. For more information, including step-by-step instructions, and to get started applying a Polaroid effect to your own digital photos, take a look.
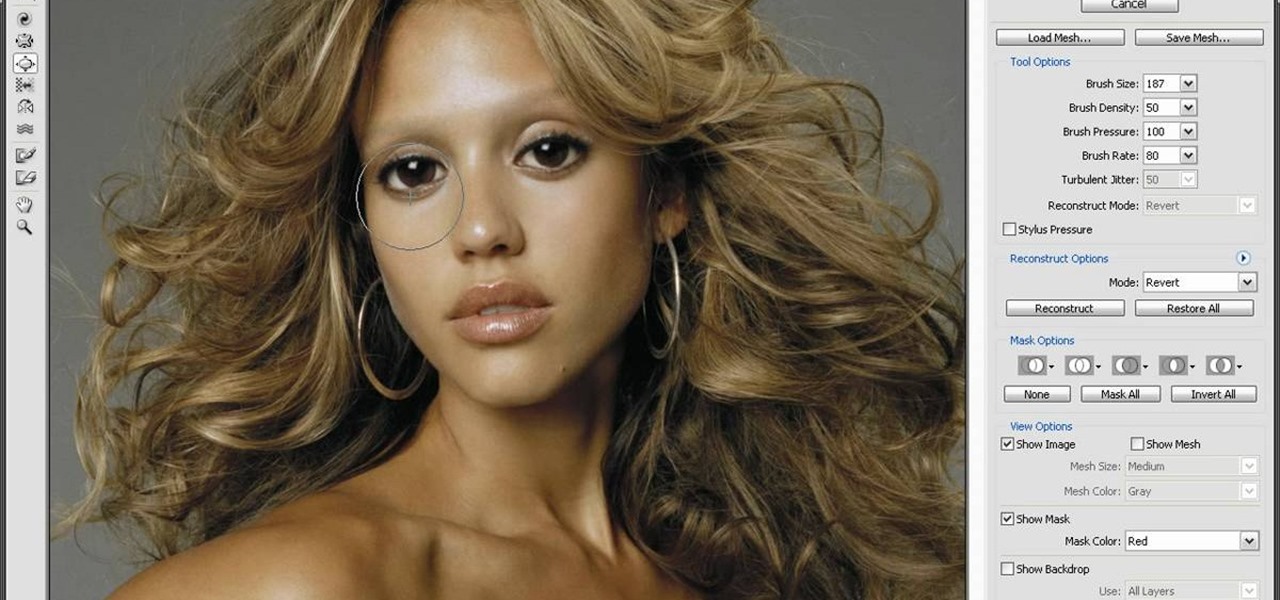
After watching Avatar, a lot of people went nuts over the world that James Cameron created, some even went as far as turning themselves into Na'Vi in Photoshop. Ever wondered how you could? In this great video series from ipaintgirls.com you will learn how to turn a picture of Jessica Alba (yeaaaaa) into a Na'Vi in no time!
In this video, we learn how to use the polygonal lasso tool in Photoshop. This will allow you to create a selection on your photo in a freehand style. First, select the tool from your toolbar, it's the third selection down. Once you select this, go to your picture and find the piece you want to cut out or copy. Press and hold the control and space bar, then highlight the area you want to. This is great to make a selection that has a straight edge. If you just click with it, it will have a dia...
A photographic effect blends the visual effect of creating different 'stills' of photographs and animates them in sequence; and then adds in an audio track to make it sound like the snapping of pictures. This tutorial shows you how to thread all the effects together to add a photographic style to your next intro using the Sony Vegas Pro video editing software.
When we first saw Lady Gaga donning this, well, gaga headpiece at the Grammy Awards, we were wondering what the Fortress of Solitude was doing on her head. The headpiece, composed of what look like stalactites crystalized with thousands of swavorski crystals, looked like an Abstract Expressionist sculpture, and made little sense.
Now that the "Avengers" movie and the "Captain America" movie starring Chris Evans have been confirmed, fanboy hype about Marvel heroes has officially reached fever pitch. Though shooting for "Captain America" has just begun, pictures of Evans wearing his Captain American costume have surfaced, showing a very body contouring costume and a very fit Evans.
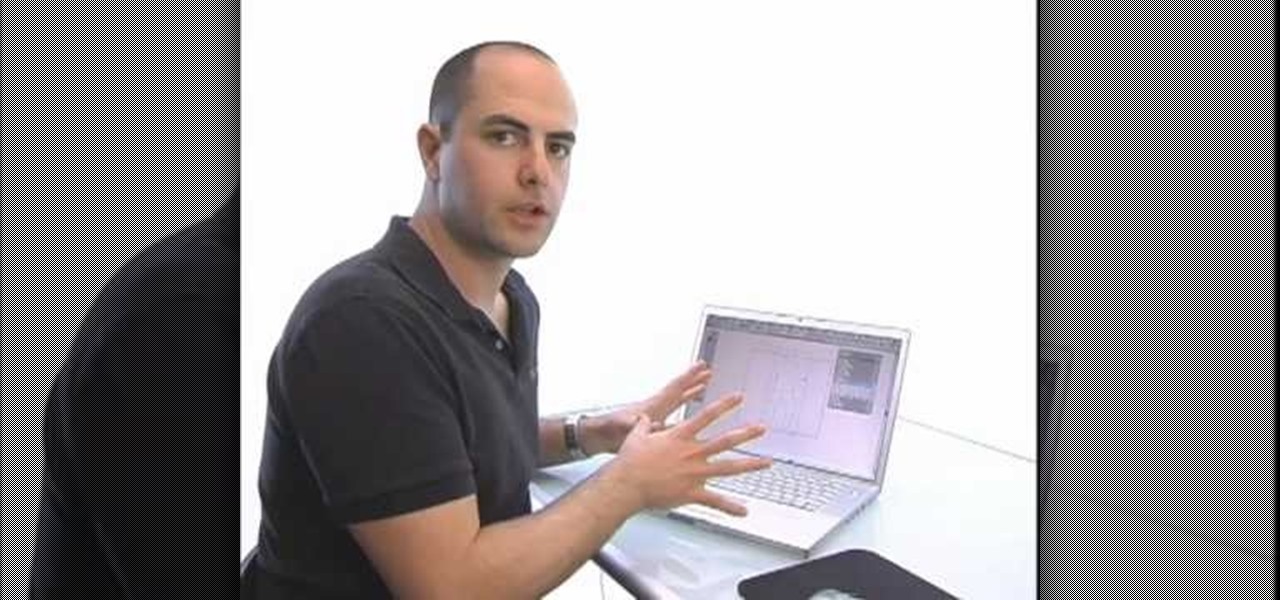
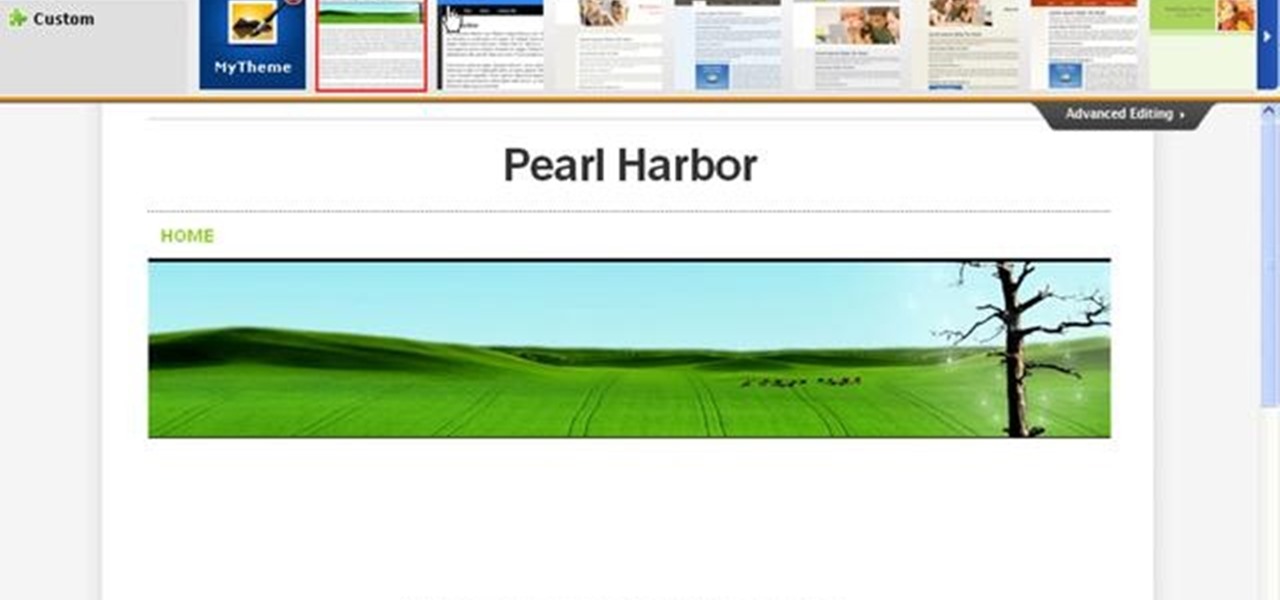
In this video, we learn how to create a free Weebly website. First, type a title in that you want for your website. After this, you will be brought to a new page where you can change the elements and designs. The design can easily be changed until you find one that works for you. After this, you can start to customize the template that you have chose and add in new paragraphs, columns, pictures, and more. Next, you can change the pages and add in links and more information. Adjust the setting...
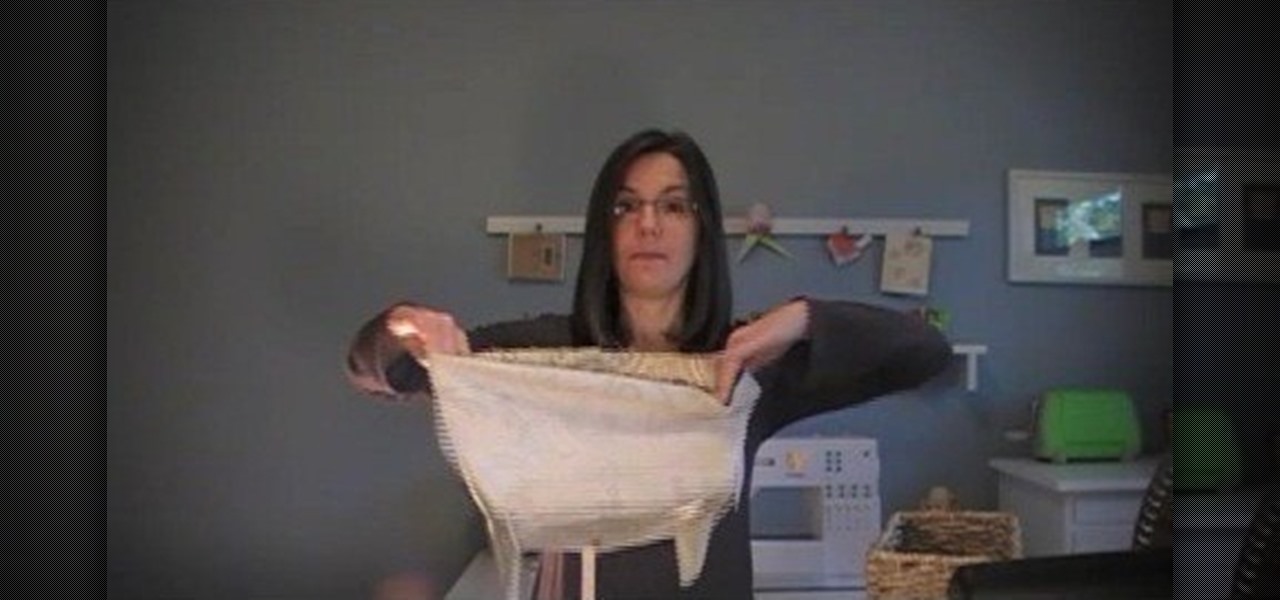
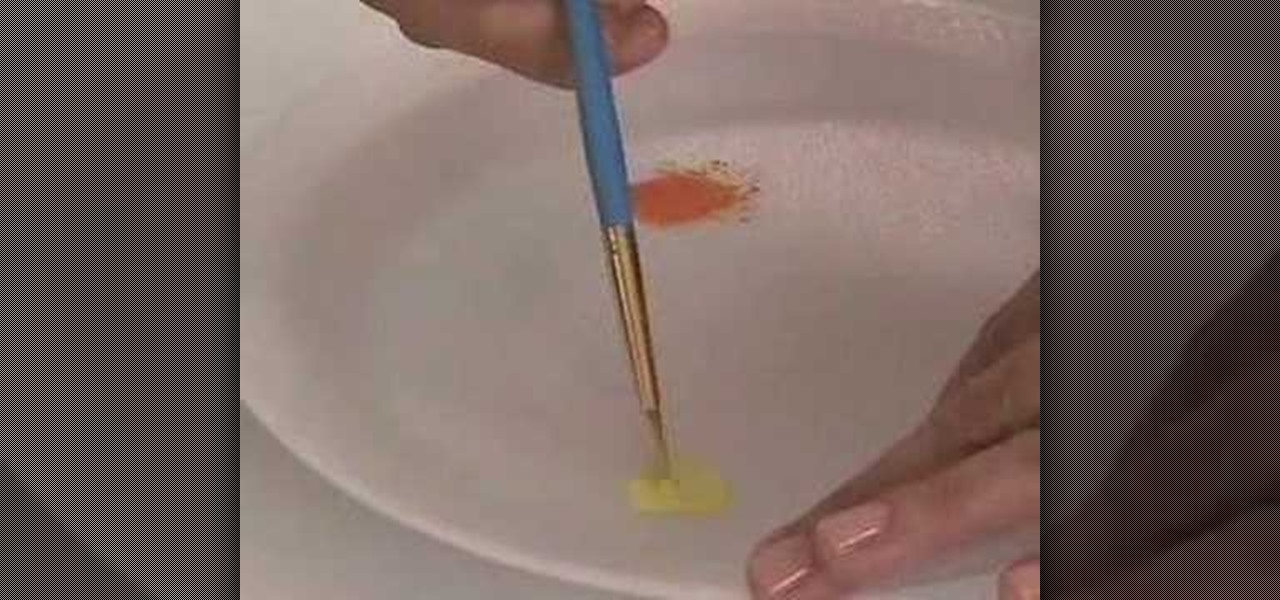
In this Arts & Crafts video tutorial you will learn how to use the cross stitch 'n paint technique. It combines simple back stitching and water color painting. Most of the materials are found in your kitchen. You will need wax paper, paper towels, and a plate to use as your paint palette, some water colors and paint brushes. After choosing your design, back stitch the outline on the fabric. Place the white paper towel over the wax paper and spread the stitched fabric over it. Now you are read...
In this video, we learn how to create a web logo with Photoshop Elements. First, go into Photoshop and select the text tool to enter in your logo words. Now, put your picture logo underneath it and change the font and size that you want for your text. Change the colors as you prefer, then place the logo in the background of your image and create a new layer. Place the icon behind the text so that the text is what stands out the most. Now, use FTP to place this logo up onto your website and sa...
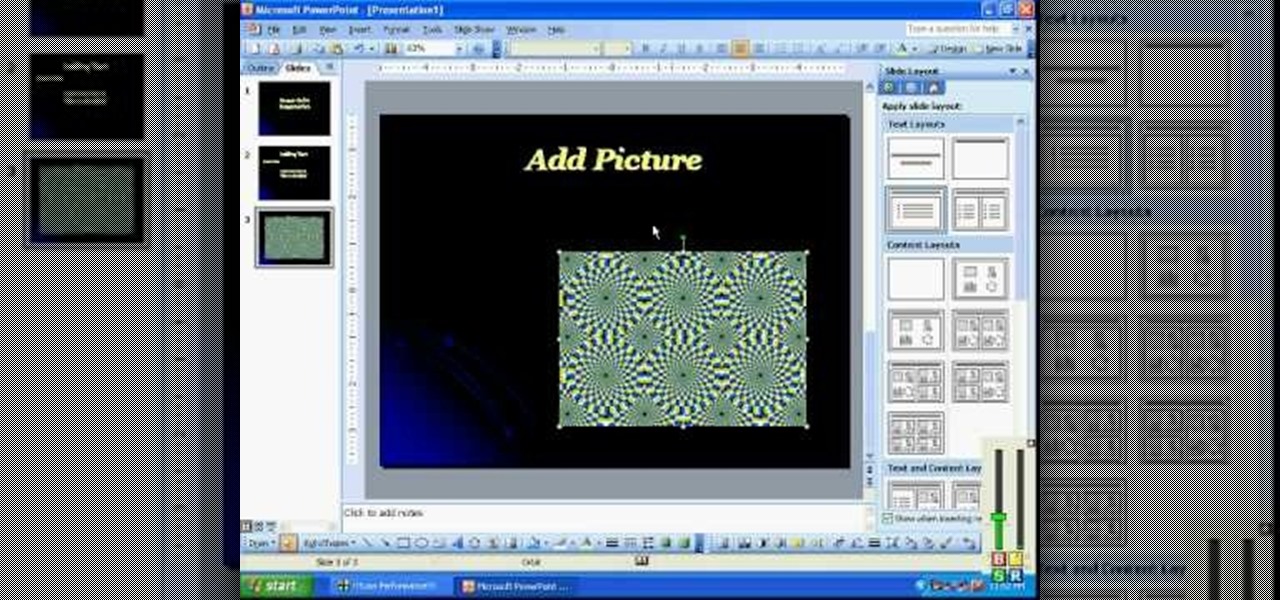
In this video, we learn how to create a PowerPoint presentation. Start off by adding in the title and subtitle of the project. After you do this, you can start to change the fonts and colors, as well as add pictures to the background and add transitions to the next page. When you're done with this, go onto your next page and start to add in all the information you need to on the following pages. When you are finished, you will be able to save your project and then use it for a presentation. T...
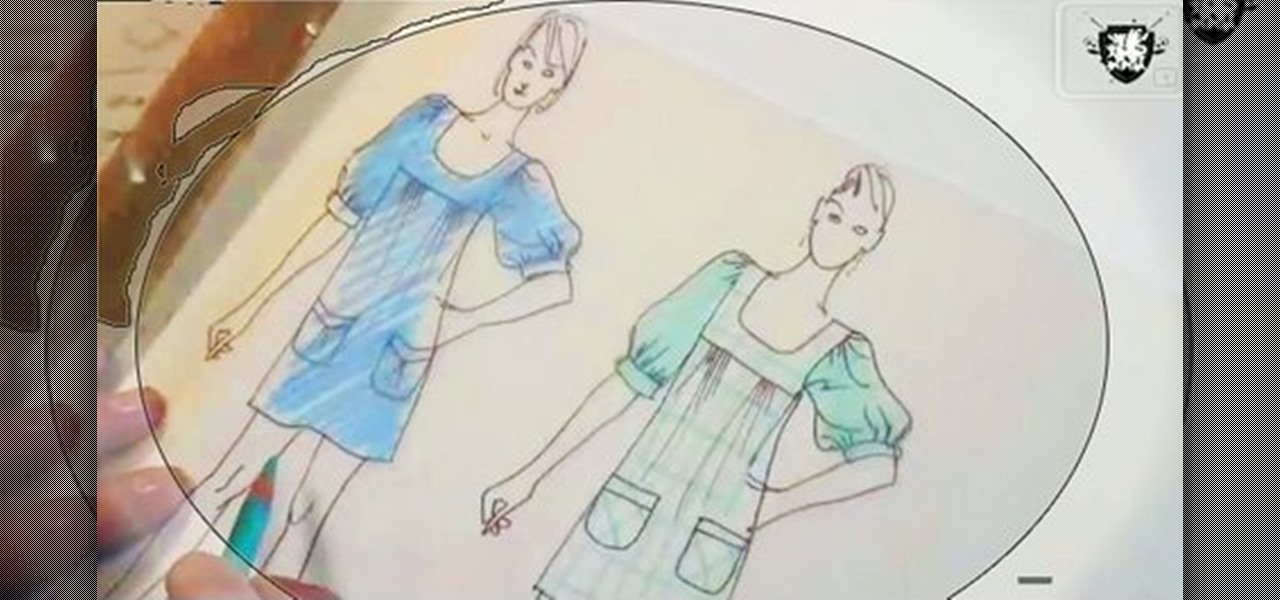
In this video, we learn how to draw a fashion sketch. Start off by using a fine pen and drawing the silhouette of a woman. Draw on the outfit to the woman, adding in all the fine details. Draw in ruffles of the clothing as well as the prints of clothing you are going to use. Use a colored pencil to color in the picture so you know what colors you want the clothes to come out like. Shadow the model slightly to make it look more realistic, then finish up the details of the image. When finished,...
In this tutorial, we learn how to make a glue in and glaze jewelry ring. First, grab a blank ring that has a spot on the top to place a picture. It can have a jewel on it, just pop the jewel out. After this, choose an image from collage art papers, then cut it out. When done with this, place the image inside of the top of the ring and push it down with pliers. After this, place a clothing pin around the ring bottom to hold it in place, then grab you DG3 gel and add it to the top of the image....