David Shrein provides a video recording with step-by-step instructions on how to utilize the DVD ripping software 'Handbrake' on a computer running Mac OS X. He shows how to deal with an initial error message, and then moves onto selecting the DVD. You have to be careful as to what you choose, as different DVDs will have different numbers of chapters and features, which use different settings in Handbrake. He shows how to select the right settings for a movie, and preview a chapter using pict...

In this video tutorial, viewers learn how to make an animated GIF file using Adobe Photoshop. Begin by opening the program. Then click on File and select New. Choose the size of your image and click OK. Now create your picture or text image. Once finished creating your image, click on Window and select Animation. Now click on the button on the right side of lower window and select Make Frames from Layers. change the time of each frame to 0.5 sec. Now edit it and save it. This video will benef...
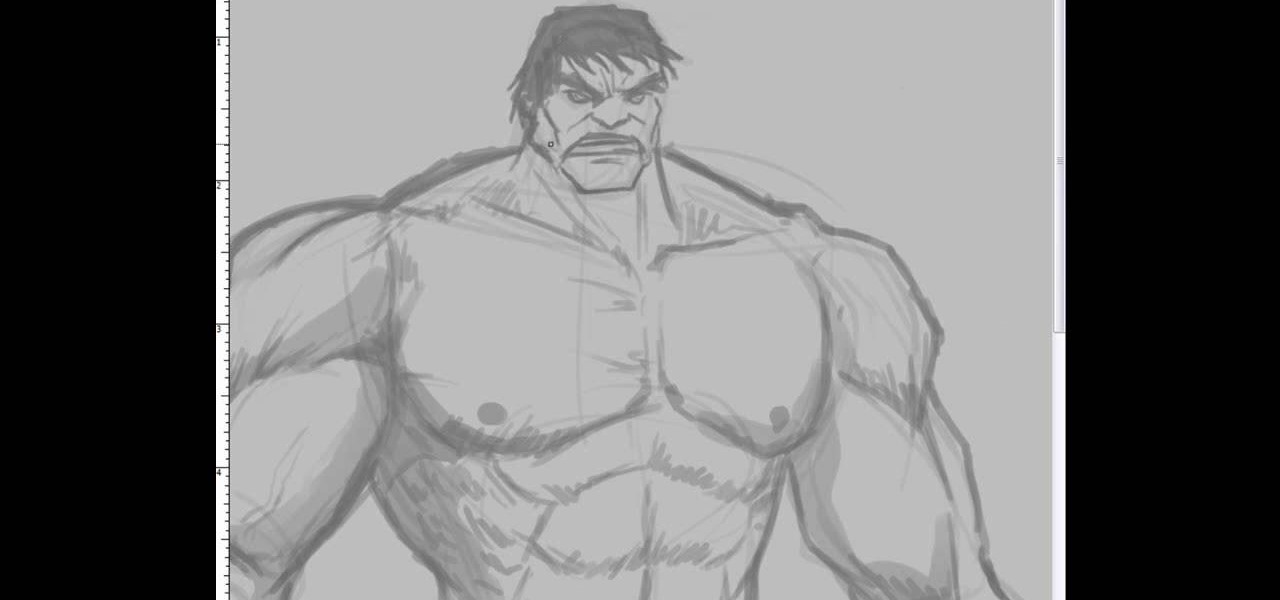
This video illustrate us how to draw the incredible hulk. Here are the following steps:Step 1: First of all take a sheet of paper, pencil and pencil color.Step 2: Now draw a square with round edges representing the face of the hulk. Within the face draw eyes and a big mouth and hairy eyebrows.Step 3: Now from the bottom of the circle draw an oval with wavy structure on it showing the six-pack abs of the hulk.Step 4: Now from the down side of the abdomen extend two legs with muscular legs and ...
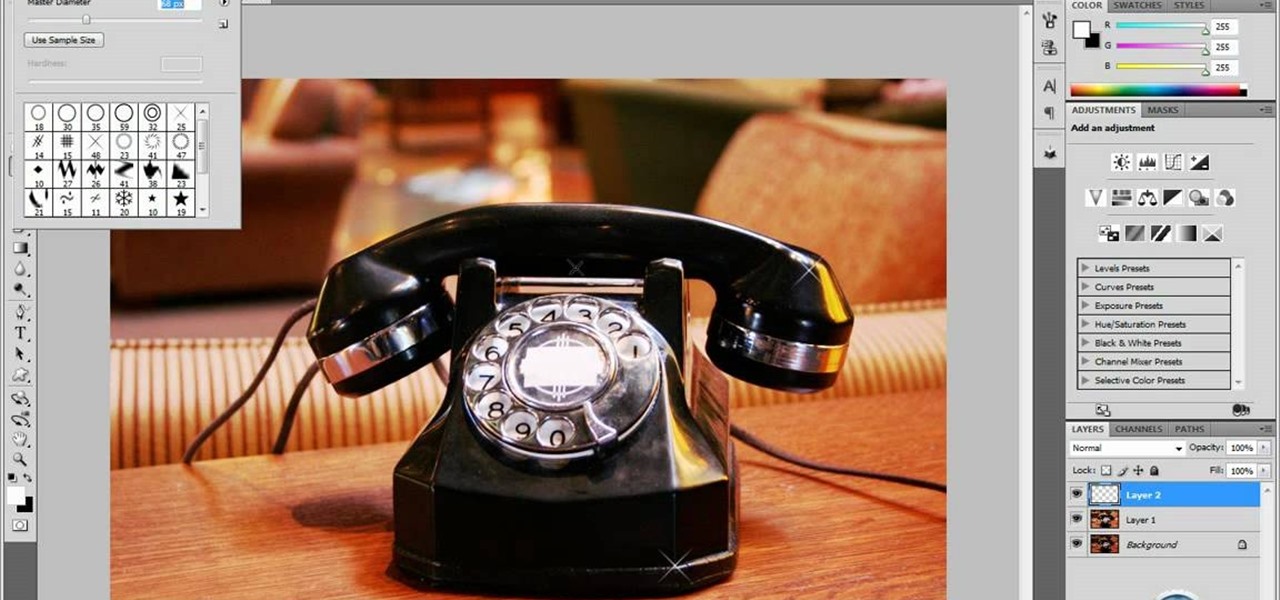
In this tutorial video, YouTube user "inteltuts" discusses ways to use Photoshop CS4 to help make better looking product pictures, as a way to attract costumers to your online products. Using a black telephone as an example, he first shows how the opacity, linear dodge, and brush tools can help make a product image look shiner, sleeker and brighter. He goes onto create what he calls "glints", which are subtle reflections and areas of sparkling light that he places across the image. Lastly, he...
Maria from [www.stamininspirations.blogspot.com stampininspirations.blogspot.com] shows us how to make a 4x4 mini double accordion picture album. You will need a 4 x 9 in. piece of designer paper, a 4 x 9 in. piece of card stock, a 3.5 x 8.5 piece of designer paper, two 3.5 x 12 in pieces of card stock and two 4 x 4 in pieces of chipboard as well as some smaller pieces of designer paper and card stock and some ribbon. Rubber cement, a scorer and some double sided tape are also needed. Maria s...

You will be using a picture of a Nintendo character and perler beads to make the necklace. Start by making an outline of the character using black perler beads. Then begin using colored beads to fill in the character. The color beads allow you to fill in the character and they also allow you to create all the detail on the character. You can shade and use multiple colors in making the characters. After you have put all the beads on the card put a sheet of waxy paper over the character and iro...

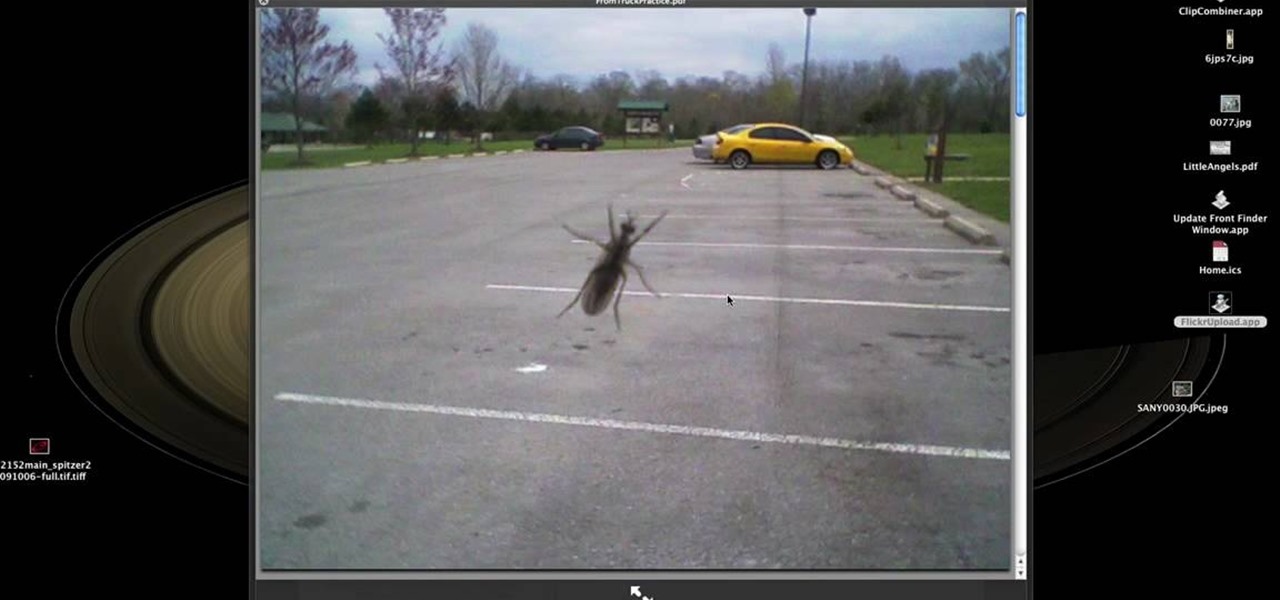
Learn how to create an automator workload that will upload pictures to your Flickr account in this video tutorial. Simply Google "automator Flickr." Upload it to Flickr to allow access to your Flickr account. This means you will have to sign into Flickr and allow for the application to have access to your account. Every time you use the application, you will have to give the photo a title as well as tags. You will then save the photo as an application with whatever title you want. Anytime you...
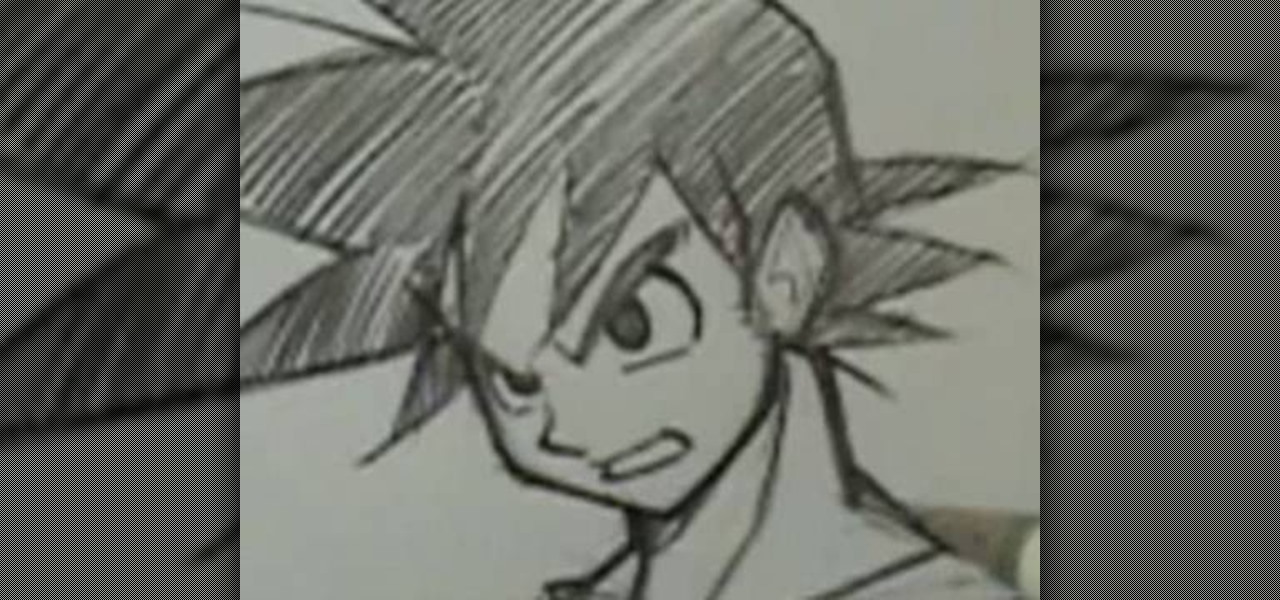
Robert Dejesus demonstrates how to easily draw the picture of Goku in (Dragonball Z) by simply using a pencil This demonstration is created with beginners in mind and also to inspire children to take up drawing. First of all, a thinner, rough profile of the figure is drawn and then followed by thicker shade. The head is drawn from a circle and mended to its real profile as the face begin to appear and the hair is drawn and followed by the neck and torso and the shading is given to highlight t...
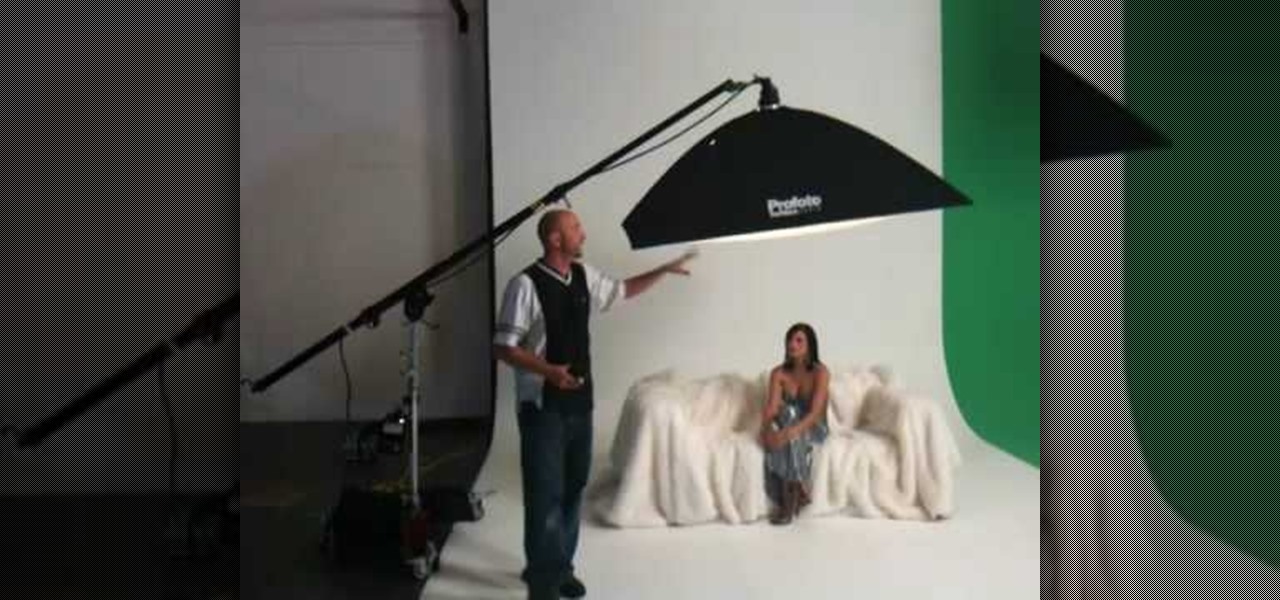
Mike Wallace is going to show you how to set up a softbox in order for a photo shoot. First, you are going to need an 1200 watt generation and with the Profoto one it comes with a pocket wizard built into it so it allows the photographer to meter and trigger with a pocket wizard TT1 on the mini camera. Also, you want to use a Manfrotto Megaboom softbox, and this is much easier then using a ladder because on the ladder you'd need to climb it whenever you wanted to reposition it. With the Megab...
Brittany Black Rainbow demonstrates how to draw an emo boy. Begin with the back ground of hair, draw it like an inverted cone, assuming like one eye is covered by the hair. Draw the second eye and brows, and now draw the nose and mouth. Complete the face. Just draw the neck and the body with a round neck T – shirt with half sleeves and the hands. Now complete the hair. It’s like thorny bush, just draw all these lightly. Give black shade to the hair with pencil itself. Now darken every thing, ...
Six Minute Style host Susan Doherty is on location in Montana at the Nine Mile School house with Kurt Seer who shows how to create a 3 dimensional wreath mobile. He uses birch as his base. You can use any wood you choose. Make a square out of four branches. Knot, tie and twist floral wire at cross sections of the wood frame. Leave a little tail for the decorations. Tie dried rosemary in the wire tail. Tie leaves and greenery around the frame using wire. Not only for Christmas, you can create ...
Would you like your own custom movie poster for that amazing film you're working on? Well this YouTube user made a video to show you exactly how to create your own movie poster right in Adobe Photoshop.
In this video tutorial, viewers learn how to make an LCD viewing hood from a slide viewer. This hood will prevent any shining or glaring of light when looking at the LCD screen. Most LCD covers are expensive or just get in the way. This viewing hood is inexpensive and only cost $6. 95. Users will simply need a slide viewer. Pull off the diffusion screen and cut off the ledge so that it is flat. Sand it to make it smooth and add some felt to cushion it on the screen. This video will benefit th...
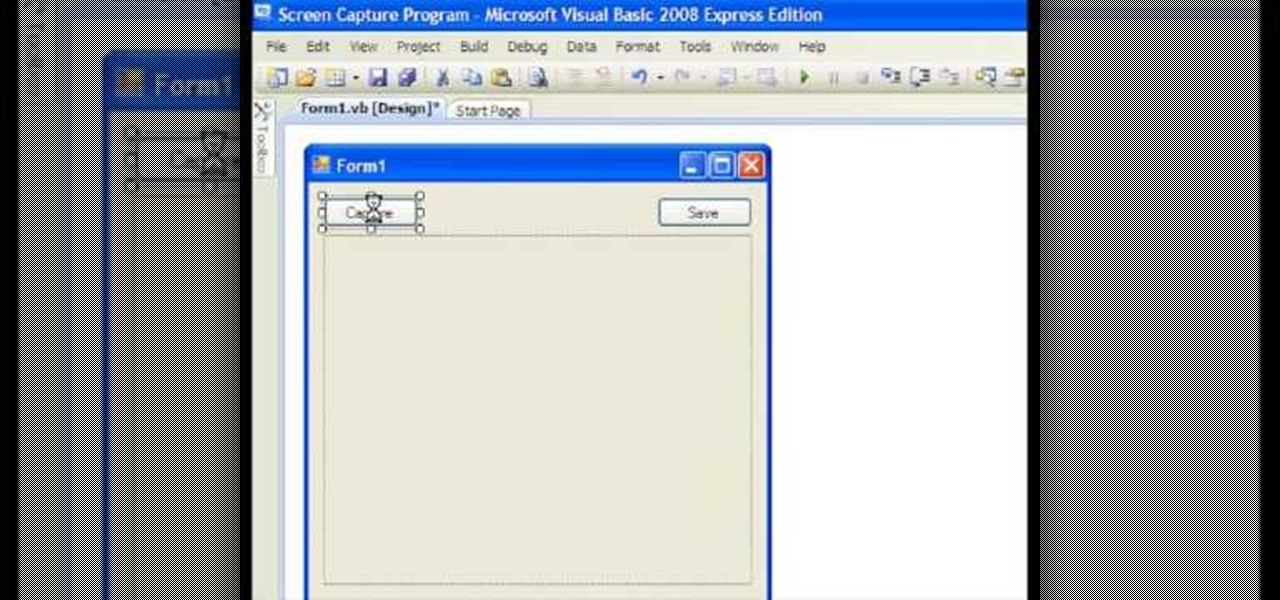
This video shows how to make a screen capture program in Visual basic. The first step to create a screen capture is to open a new project and open a new form window. The second step is to create to temples for either saving or capturing the picture you choose to select. The third step involves following the code structure given by the instructor to enable the correct function for the save or capture button options. The final step is to open the project as a finished work with the correct codi...
First thing to do is to create a new pic image called matrix. The next thing you want to do is to change the width and the height of your picture, as well as the resolution. Pick any background color you want, take the paint bucket tool and fill the background. To get the matrix code, go to Filter, Texture, and then finally Grain. You want to set the intensity to 90, contrast to 50, and grain type should be vertical. To get the grain to be green, you press Ctrl+U, press colorize and drag the ...
In this Software video tutorial you will learn how to have fun with the’ liquefy’ tool in Photoshop. The video is by Yanik Chauvin. Open Photoshop, select a picture that you want to have fun with, go to ‘filter’ and click open the ‘liquefy’ tool. This video is looking at 3 tools under liquefy. They are Forward Wrap Tool, Pucker Tool and Bloat Tool. These tools can be modified by the brush options on the right hand side. The Pucker Tool reduces the size of a feature on the image. The Bloat Too...
In this video tutorial, viewers learn how to add hemp twine to accent a scrapbook photo. Users will only need a line of twine and tape. Put the twine on one side of the picture and tape the back to hold it. Now wrap the twine in a diagonal pattern (right and left). Then wrap it down the middle and tape the back again to hold it. Trim off the extra twine and tape all the strings of twine at the back, so that it won't move. This video will benefit those viewers who want to add an embellishment ...
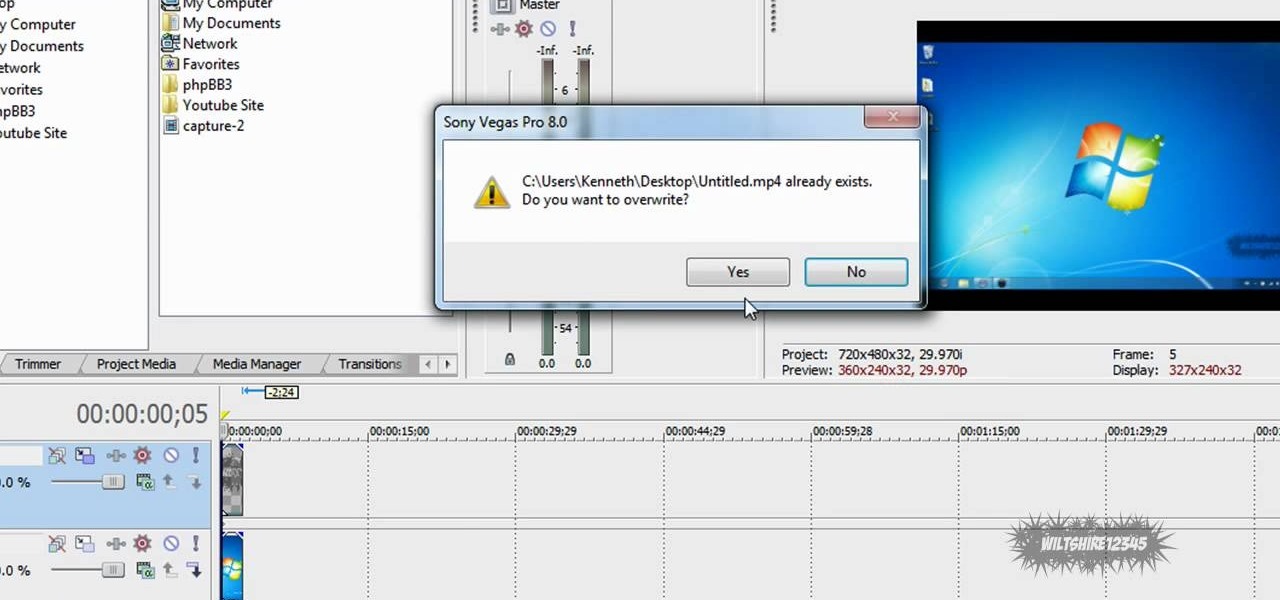
This video in the Software category will show you how to add a watermark to a video in Sony Vegas. This video tutorial is using Sony Vegas Pro8. Import a video into your timeline on which you want to put a watermark. Then go to the video layers on the left bottom, right click and select ‘insert video track’. This will create a blank video layer. Now find a picture that you want to use as a logo and drag and drop it into the blank layer. Edit it to the length of your video. Then go to ‘track m...
This video lesson will show you how to easily make frames and borders in Photoshop. Yanik from Yanik’s photo school presents this video. It’s really easy and fun. Go to select -> all or ctrl+A. Then Go to select -> modify ->contract. Put in the amount of pixels you want your border to be and click OK. 75 may be suitable for most pictures. Then Go to select -> inverse. Now you go into quick mask, ctrl+Q or click the appropriate icon. Click filters -> filter gallery and select the type of effec...
This video shows the method to sync sound using Sony Vegas. This is important in case of double system sound when audio is recorded separate from the picture. The first step involves opening up the poorer source of audio like the audio from the built in microphone in the laptop. Now open the good quality audio like the one from a camcorder just below the first one. Align the two audio using a reference mark. In the given video, it is the clapping of hands recorded on both audio. So, the spike...
This is a simple video of a person drawing a flower with a mechanical pencil on a piece of plain white paper. If you follow along with the video and copy each shape as the artist makes them you will get a similar result and hopefully a picture of a flower that looks the same as the artists. The final product looks like a rose. A beginners video to art, all the viewer needs to is watch, copy and listen to the soothing music that is playing in the background.
Adding motion to graphics using Photoshop can create an exciting and dynamic effects. Select a picture you want to add motion to. First, duplicate the background layer. Then under Filters, select blur, and then select Motion Blur. Then you set the angle of the Motion Blur. You can select any direction and also set the intensity of the blur by setting the distance setting. Then you will need select the eraser tool and select under Options select the brush. Chose a soft edge brush and erase ove...
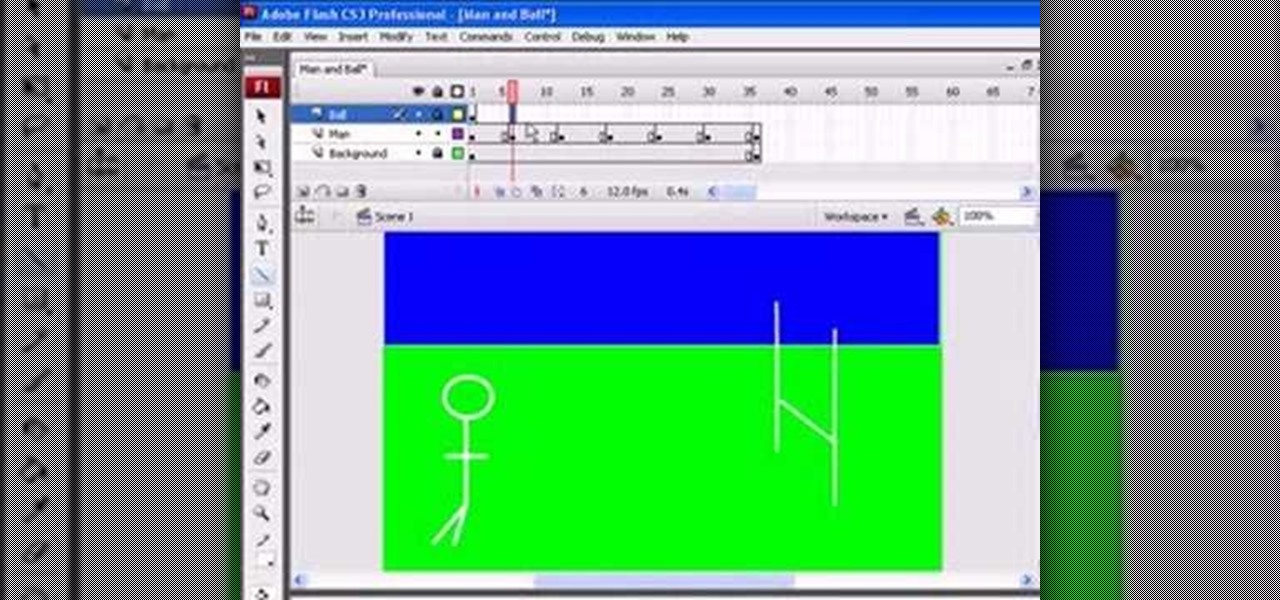
Second part in a series of YouTube videos illustrating just how easy it is to use Adobe Flash CS3 to create simple animations. In a few simple steps, you'll learn to use keyframes to make figures come to life, and state changes to help add the illusion of motion to objects through the picture plane. Add layers, publish to the web, move mountains, it's all at your fingertips and easy as pie after watching this short, informative, and easy to understand video. Keep your eyes peeled - if you wou...
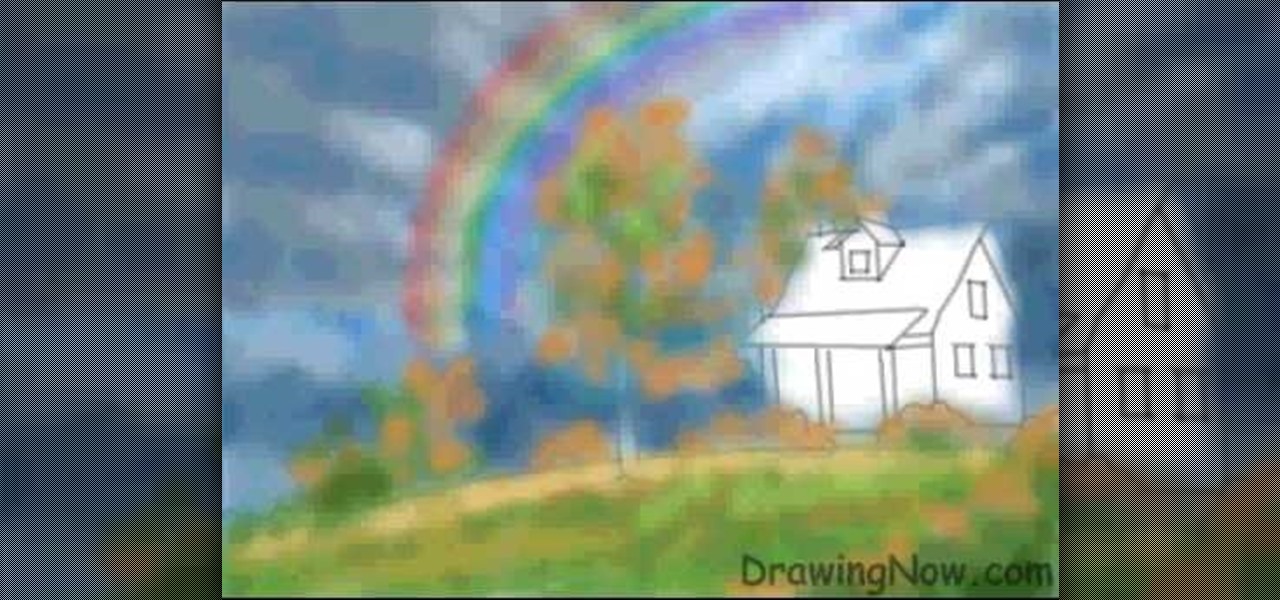
This video is all about how to draw a rainbow. The picture is drawn using a computer paint tool. In a blank white page they started drawing the outline for the trees, shrubs, house.
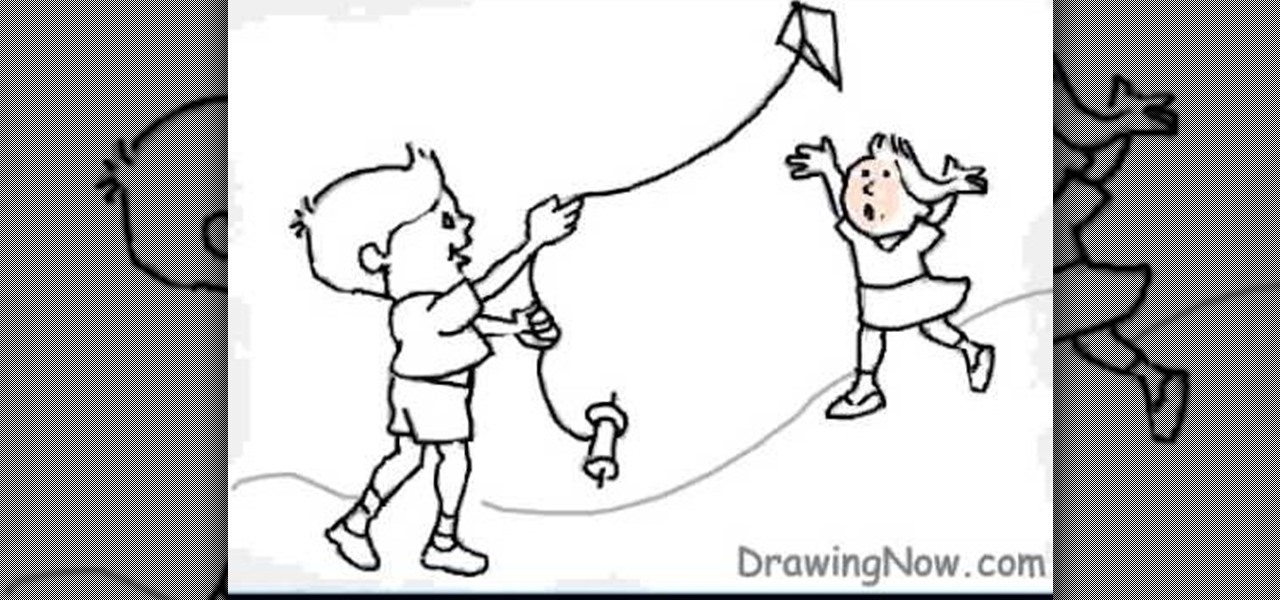
This movie is a silent animated account of how you draw the final picture (which is shown at the beginning of the clip) of two kids flying a kite. The lines are sketched roughly using pencil, and then over-inked. The original lines are erased and leaving outlines. Then you begin coloring in all the spaces just as you wish. There is no commentary and no music, but all the basic detail is there and you can follow easily the way the characters are drawn and colored from start to finish, making i...
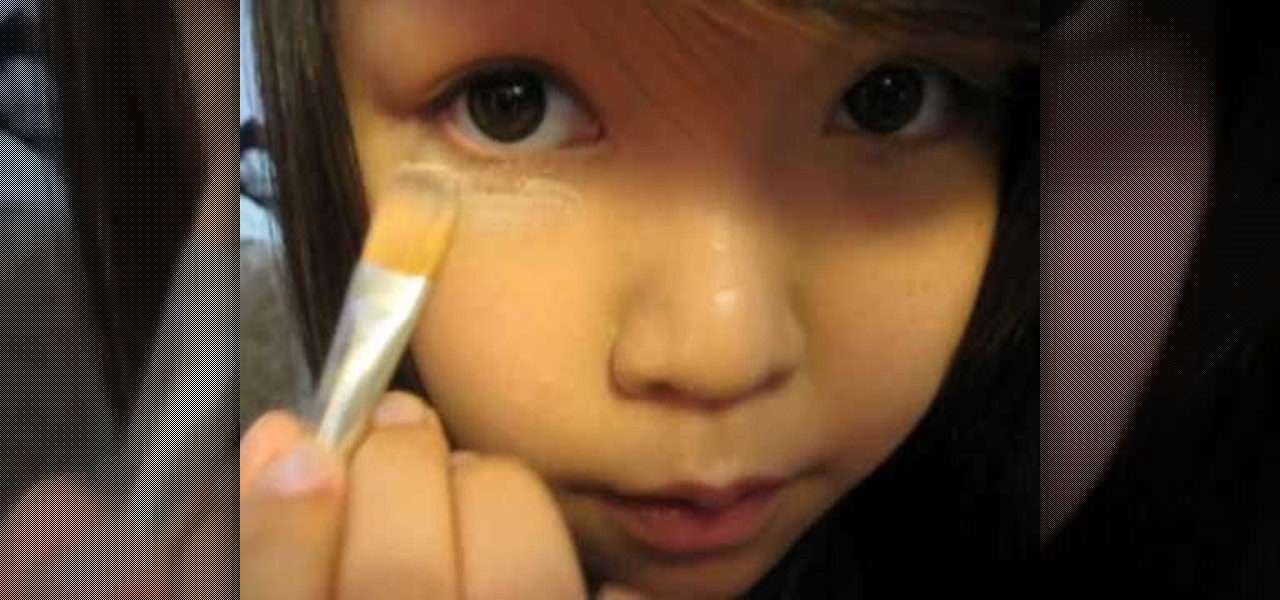
Do you want to achieve a nice, clean look? Flawless skin is the first step in achieve just that. This video will show you exactly how to achieve that flawless look you've always wanted.
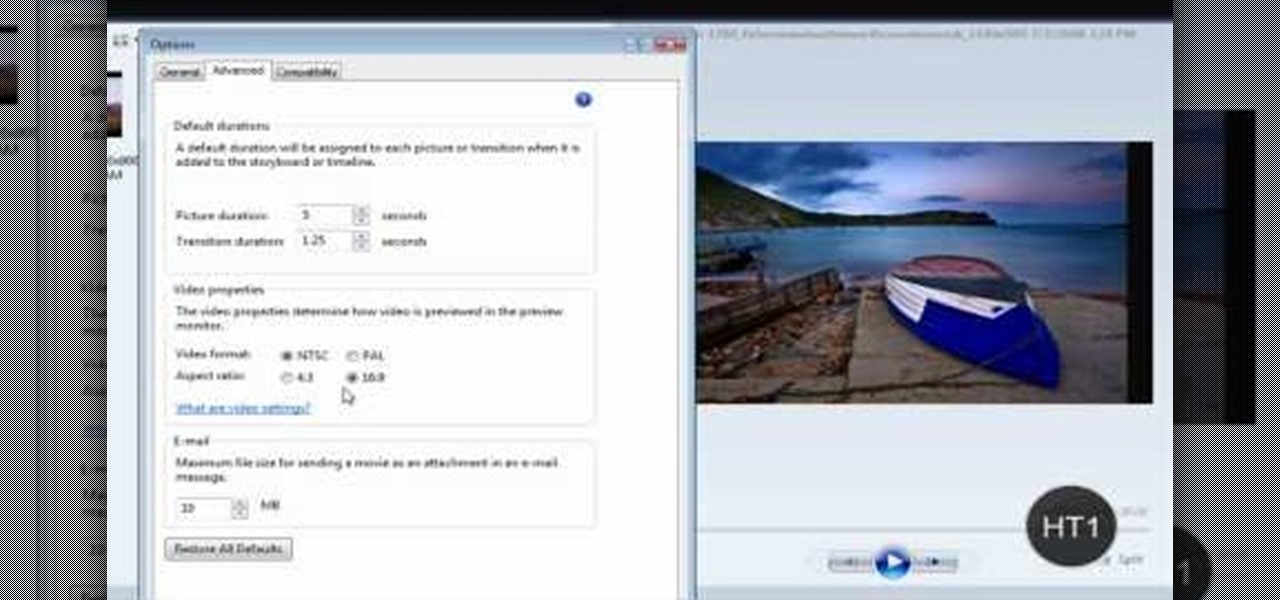
Windows Movie Maker can be used to make HD movies. This step by step clip shows you how. The first step is to import your picture or video and make sure they're in your timeline. When you've finished editing, go to tools and options and choose the advanced tab. In video properties there's video format and aspect ratio. Select NTSC and 16:9. If you're using a cell phone or video camera, you'll be using 4:3 which is pretty small for YouTube and similar sites in order to get full screen. Save th...
Learn how to draw a flower in MS Paint in this video tutorial from Shannon. In the first step, you will need to draw a circle with the shape tool. To create the petals, you will need to draw additional circles surrounding the first circle. Use the paint brush tool in green to create the stem and leaves, which you will draw free-hand. Using the bucket tool, fill in the leaves and the petals of the flower. Shannon also shows in this video how to draw a bird next to the flower with the paint bru...
This video shows the method to recover deleted files in Ubuntu using Testdisk. The demonstration is done by deleting a set of pictures and recovering them later. The test disk is installed at first. Then we click on the terminal icon and go to the list options available. These include selecting the list of drives available, partition table type and the type of file system in the original photos. Then the system asks you to select the part to be analyze and destination folder. The tool then re...
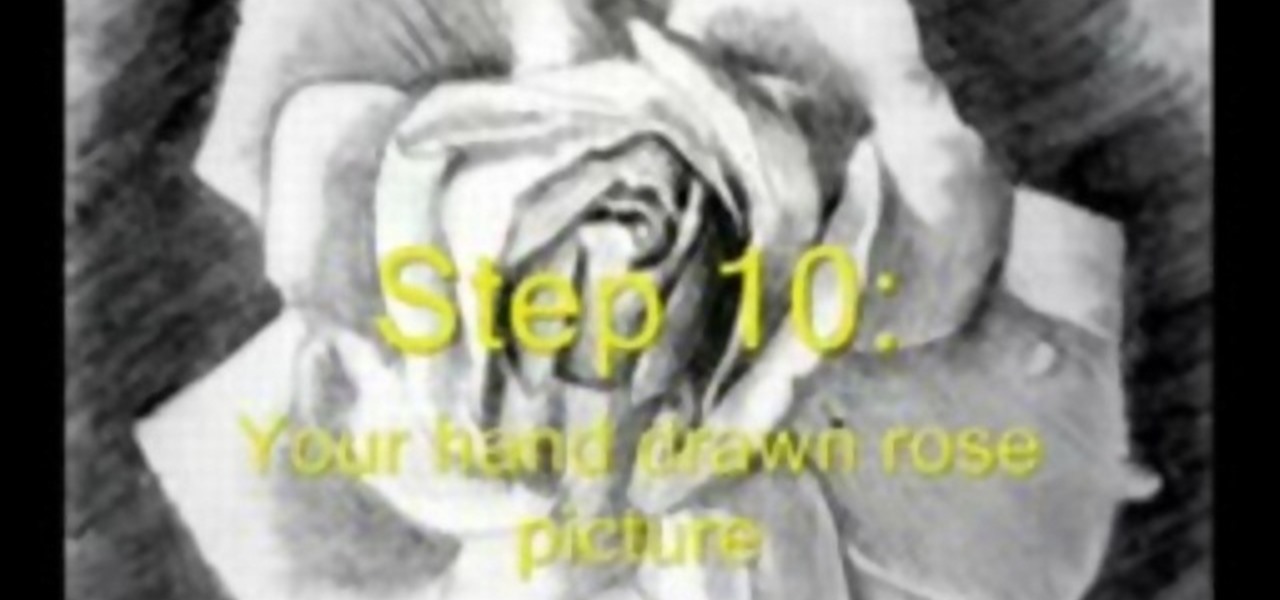
In this video tutorial, viewers learn how to draw a rose. Begin by selecting your favorite rose picture. Sketch the outward point lines from the center (this will outline the petals and stigma of the rose). Sketch the rose pedals with the lines. Erase the guidelines and re-sketch the pedals. Create tones using a 4B pencil. Then smudge the tones using your fingers. Then use a 6B pencil to shade and smudge. Users may choose to add water droplets on the drawing. Finally, use the 6B pencil for a ...
This video is from AskNarek] and in the video he describes how to create a custom HTML Facebook Fan Page Tab. To start the process, Narek gives a web address to create the page. From your home page, you will click on Edit Page and then select the "Static FBML" application. After the application is installed you can search your apps for it. Now Narek shows us how to edit the page into anything you like. You can change the title of the Tab, include a video or picture an...
The present video shows to make a drawing using mainly water. In this particular video, here makes a picture called Alan's war. The video has been created by :01 first second home movies. Taking water in a small tin, with a sharpened opening on it. The opening end is used as a tip of a pencil. The water is squeezed through the opening. By that water , make a sketch of a soldier. As the water keeps the paper wet, put some ink on the water drawing. The ink will spread out through the water wet ...
Learn how to add special lens flare effects to a logo in Pinnacle Studio with this tutorial. You will select the picture to be edited and drag it to the video screen. Select the lens flare effect from the Studio Plus RTFM which is standard with the program, you don't need to purchase any additional effects to create the lens flare. You can preview the effect and change the direction and color of the flare. Once you are happy with how the flare effect looks on your logo, you can save it to a f...
HelpTube1 teaches you how to make HD videos using Camtasia Studio. You need to have Camtasia Studio, QuickTime installed and an AVI file. In Camtasia Studio click Batch Processing, choose MOV, then 30 frames per second, the encoder should be h.264. Quality set to best and key frames Automatic. Size - Dimensions should be 1280x720 HD. For audio you should have mpeg audio, stereo and 48 kHz rate. Click ok and next. You can also include a picture watermark in the next window. Finish this and cho...
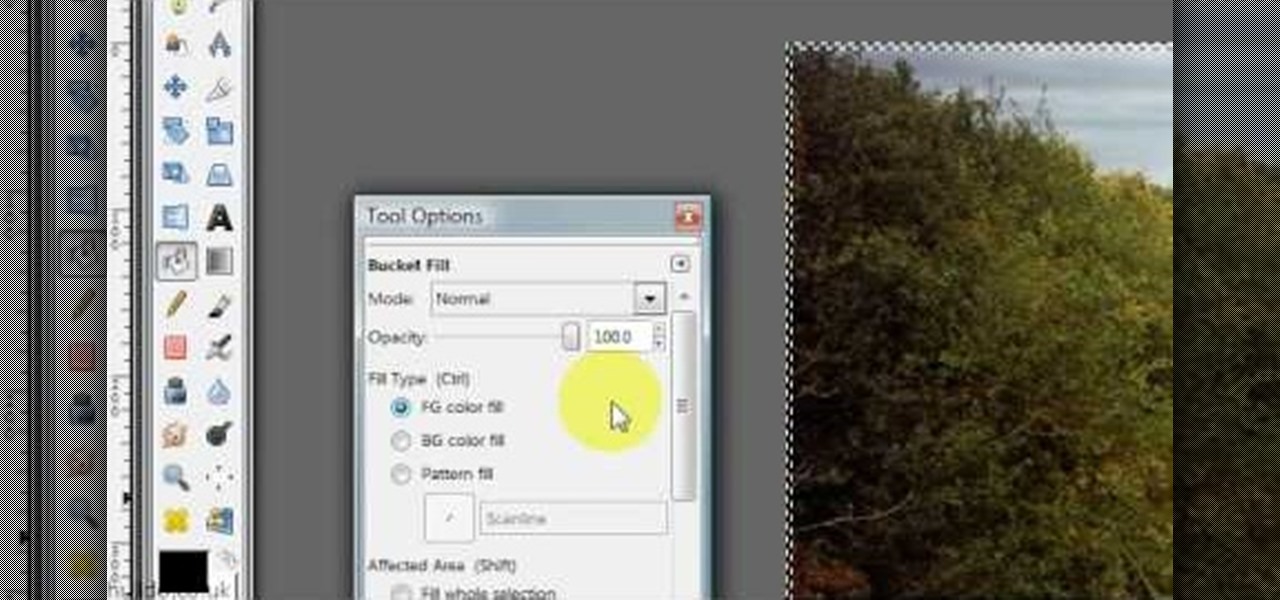
Hulldo teaches you how to give your images a widescreen border using GIMP. Open up a picture and the click new layer. Next go to select - border and make it 3 pixels. Go to tool options and use black for foreground fill. Select none and create a new layer. Go to view and make sure snap to canvas edges is ticked. Go to rectangle select tool and go to its menu. Then select 640x30 pixels. Fill that layer with black and select none. Duplicate this layer. You place this one on the bottom and you a...
In this video from MarketingTwins we learn how to use TweetDeck in order to retweet something on Twitter. In tweetdeck it is very easy to retweet. You hover over someone's picture that tweeted something, and then click the retweet symbol. This will then appear in your text box. If the status bar turns red it means you exceeded the 140 characters, so you should go back in and delete some of the characters in there to fit the 140 in your status box. Once your message is set, just hit enter and ...
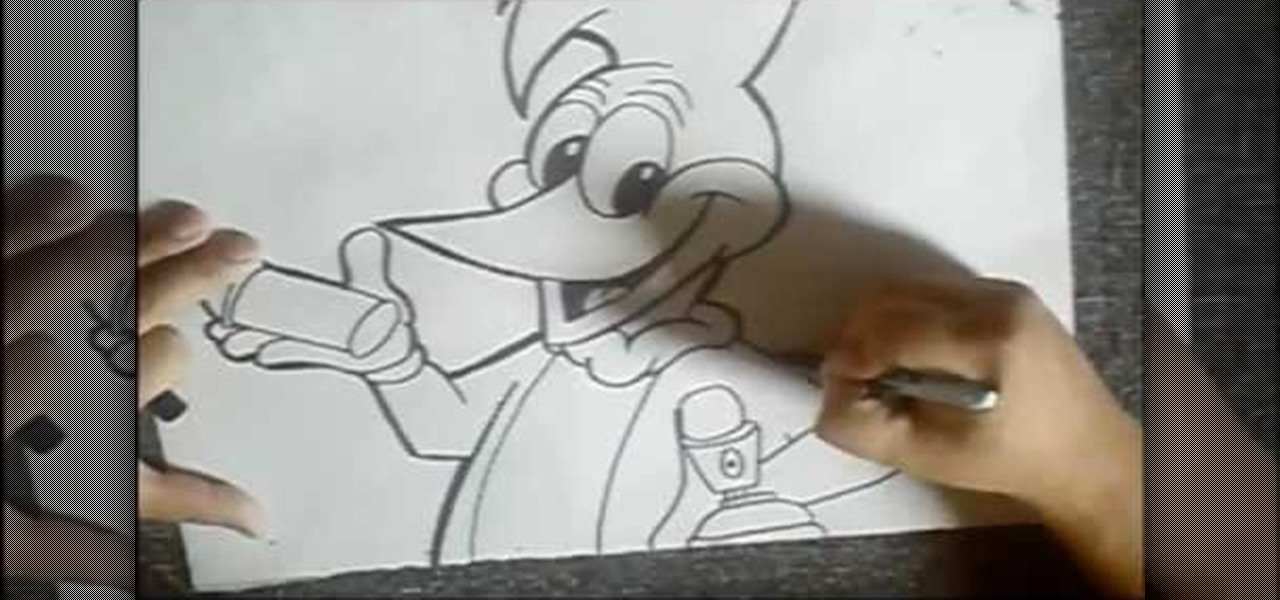
This video shows how to draw the famous cartoon character and is accompanied by funky music, rather than commentary. After all, you can actually see what the artist is doing, so narrative is pretty much unnecessary. You basically start by drawing the eye and then the beak and cheeky smile. From there you complete the picture and shade in to bring the whole thing to 3d life. Because the whole thing is speeded up, you can see how it's done quite clearly but without having to spend a large amoun...
Johnhaydon teaches you how to use Seesmic to manage your Facebook stream. For the Seesmic desktop app you have to go to the bottom left corner of the screen and click the little icon of gears. This will bring up an options menu. Click the Accounts tab. Then click on Facebook and add your details there. Next to each post on Facebook, in Seesmic, to the right, you will see a small icon. Click that and you will have options like commenting. You can also reply to a post by clicking the dedicated ...
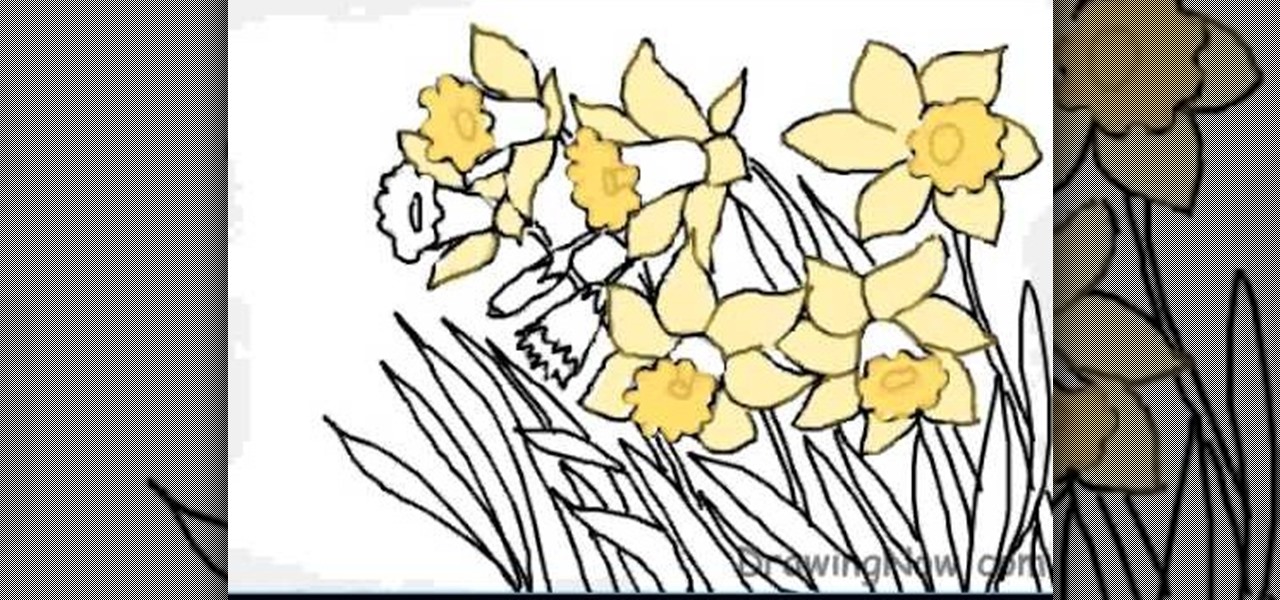
The first step is to draw the daffodil's outer parts carefully. The second step is to draw the circle shape for inner surface of flower.
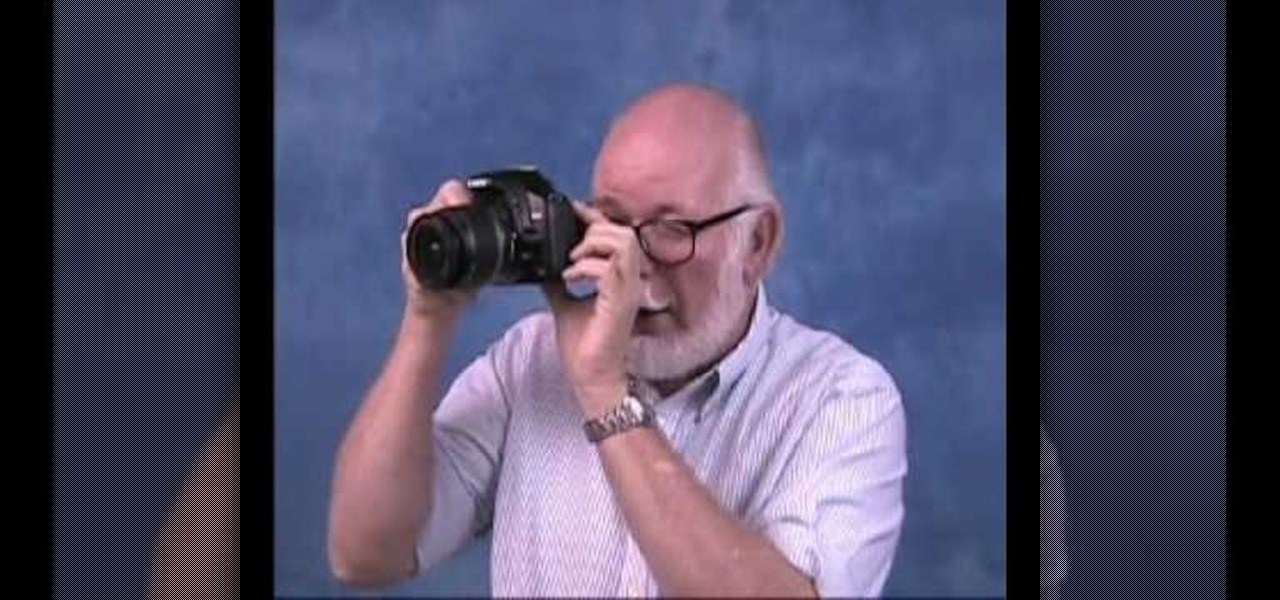
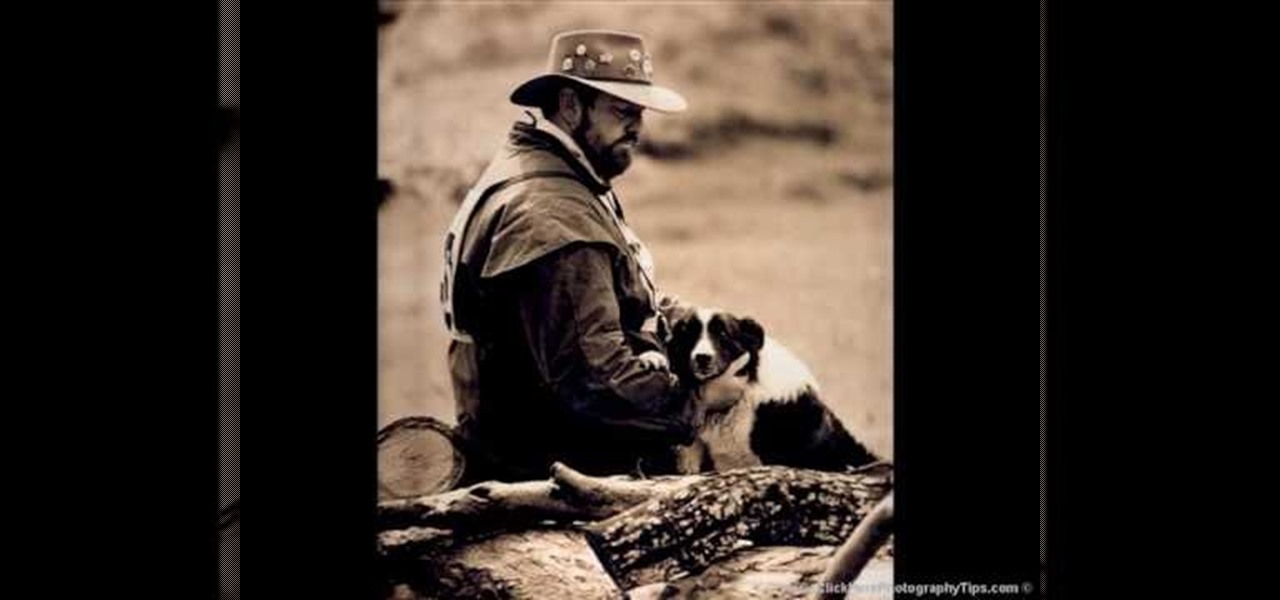
Candid photographs can capture a picture worth a million words... If taken correctly, that is. In this photography tutorial hosted by Click Here Photography, learn how to take candid photography and achieve the best results. Equipment, how to set-up, and additional props are gone over. Learn how to experiment, when to snap, and what lenses are best when trying to capture a stunning candid photograph. Enhance your next candid photo with help from this tutorial.