Getting ready to style some braids or twists in your hair? If so, you may be using extensions, and if so, you're going to need how to properly part your real hair into sections. This video will show you the steps to prepping your natural hair before the braiding process. Sectioning off the hair correctly is very important when trying to achieve the hairstyle that you want.

Blowout your hair with these hair-styling video instructions. You can easily blow dry your hair with a round brush to create that certain "blow-out" hairdo. Heather Kizi from 6 Salon shows you all the required steps to recreate this blown dry hair look at home.
Dyeing your hair is a great way to change your look. But if you don't do it right, the results can be pretty ghastly. If you seek a new do without the harsh chemicals, these steps will give you the locks you’ve been looking for.
To make fantastic hair braid styles, you need to have the right tools. Learn the different combs you need to make braided hairstyles in this free video series.

Braiding hair in rows can be difficult to master. Learn the ins and outs of hair braiding with this free braiding video series.

Watch this video to learn how to transform your frizzy, dry hair to beautiful healthy straight hair and beautiful healthy curly hair.

If you want to shake up your style or pay tribute to the 90s, then bust out that crimping iron. You will bring the party with this fun and funky style that can worn down, up or added to bring a little flare to more traditional styles.
Renato shows some tips on how to dry your hair properly in order to style it. After washing your hair with water, it is important that you are very gentle with your hair and to keep it as straight as possible. While your hair is a bit wet, use mousse on your hair and run it evenly using a comb in order to add more volume into your hair. After that, slowly blow dry your hair by section, separating sections using clips and a large circular brush to run through your hair as you dry it. By follow...
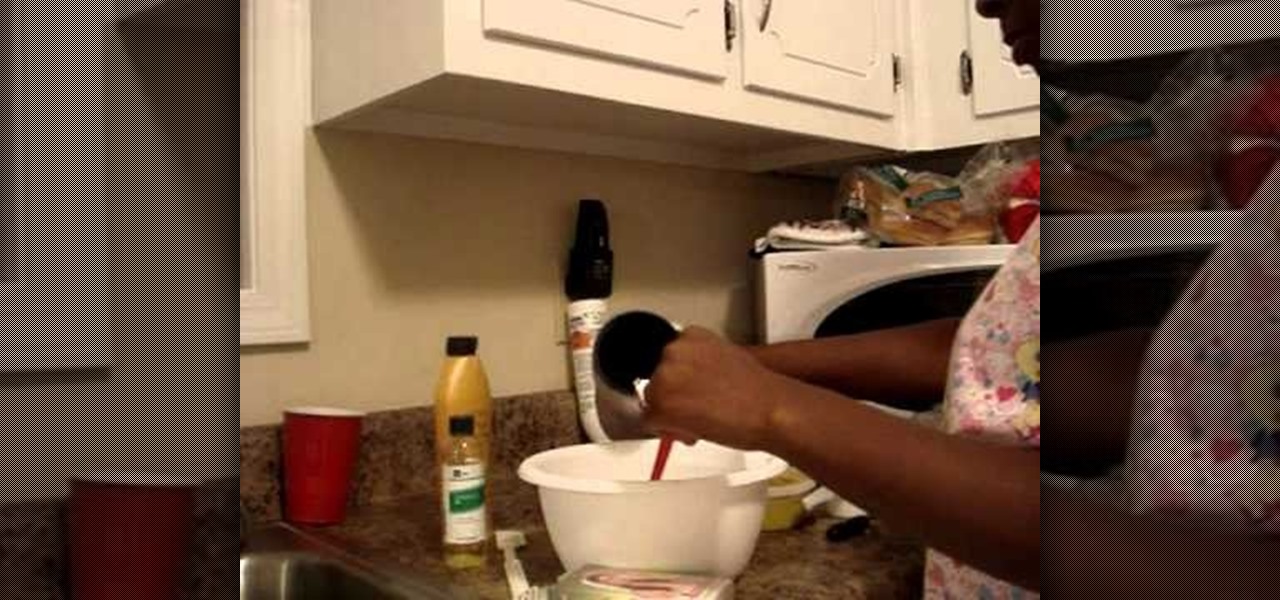
Color your gray hair like a professional hair stylist! Learn how to dye gray hair in this free hair care video series about preparing, mixing, and applying hair color.
In this video series, learn tips for coloring and highlighting your hair. Our expert, Liz Muller, gives you advice about various kinds of hair dye. She offers tips for all over hair color and gray coverage.
In this video clip series, our expert will demonstrate and explain, step by step, a variety of tips and techniques for home care of black hair.
In this series of instructional videos you'll learn how to style hair for long hairstyles. Expert hairstylist Jan Cuni shows you step by step how to tackle long hair with a combination of blow drying techniques and styling secrets. You'll learn how to style your hair, use a blow dryer, and pick the right styling products to maintain your look.
In this series of expert videos, learn more about home hair permanents. You will get a formal introduction to the different materials needed for creating a permanent wave in your hair.
Instead of taking either of those routes, get some haircut tips and techniques in this free video lesson, including short haircut styles and ideas for guys with curly hair, like a layered style.
In this tutorial, we learn how to draw Sonic the Hedgehog in Paint. First, draw a round circle for the head and then connect the spiked hair to the back of it. From here, draw in the arm and the hands as well as the body and the legs. After this, draw on the socks and the feet. Then, draw in the details of the character and the rest of the shading. From here, color in the blue and the whites on the body and then color in green on the eyes. When finished, make sure to save this and then you're...
In this video, we learn how to draw animal paws from the front. First, draw the wrists for the paws and make the bottom part wider. After this, draw on the nails on the very front of the wrists. Make sure to add on a pointed tip for the claw on the top of the nail. After this, start to add in additional lines around the joints in the paws to make it more bold. Then, you will need to add in additional lines on the sides to make it look like hair. This will complete your paws, have fun with the...
In this tutorial, we learn how to draw fold legend Bob Dylan. To start, you will first draw the hair and the head along with the upper body, hands, and guitar. After this, you will start to add in the facial features. Draw on the eyes and add lines to make the face look more realistic. Make sure it looks like he is holding the guitar with his hand, showing one hand around it. After this, you will need to add color to the drawing on both the clothing and the skin. To finish, you will erase any...
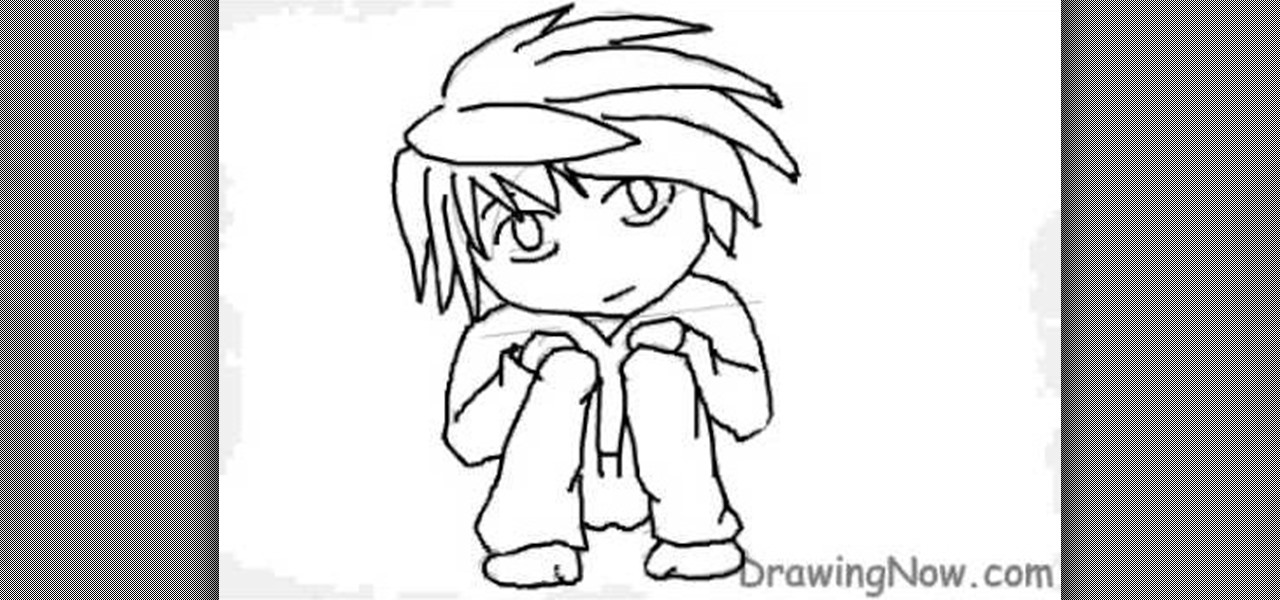
In this video, we learn how to draw a chibi L. As with any drawing, you want to start with the outline of the character to get a feel for where all the parts are going to go. After this, you will use a different drawing material to draw over this and create the final lines for the Chibi L. After this, start to draw in the details of the face and the rest of the body. Also make sure you draw in the hair, adding lines to show where the different strands are. Finish this off by coloring the skin...
In this drawing tutorial, we learn how to draw a chibi Sokka. Start off by drawing a round circle for the head of the character. After this, draw on the ears to the sides of the head. Then, draw on the hair on the back of the head followed by the facial features. After this, draw on the body, but don't draw a neck because this character doesn't really have one. Once you have the outline finished, start to use a darker marker to create the clothing and other details onto the character. Clean u...
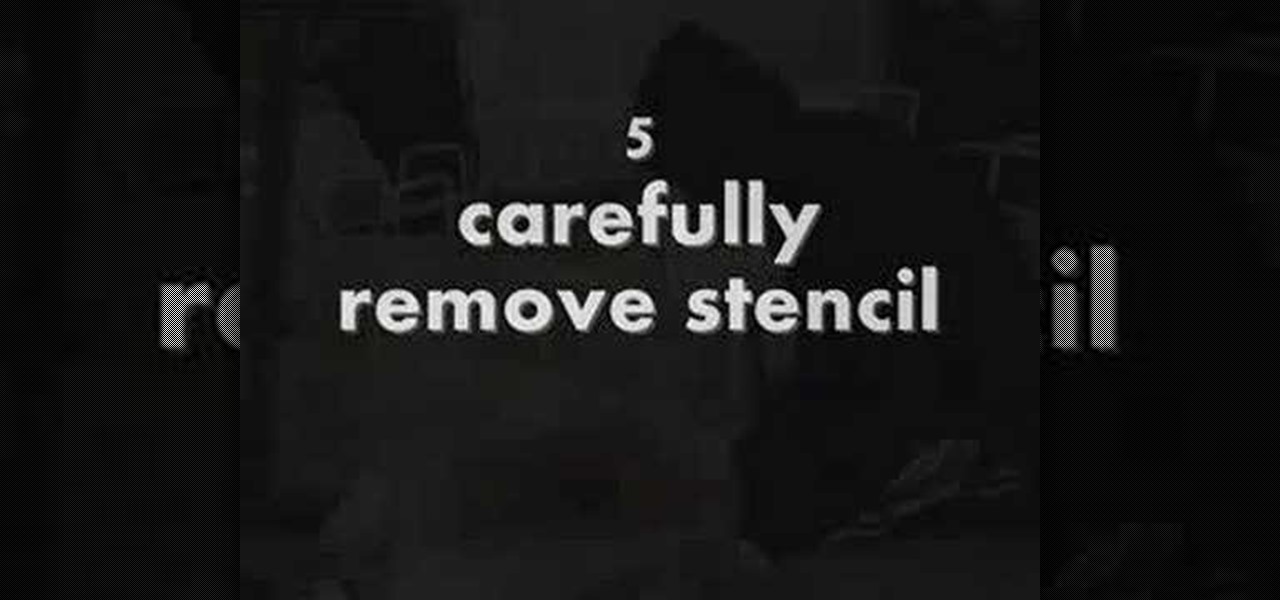
In this tutorial we learn how to stencil your own t-shirt. Start off by grabbing your plain shirt and placing paper inside of it so it doesn't bleed to the back. After this, paint your background on the shirt in your desired color. From here, place what stencil you want on the top of the shirt and then paint inside of it. When you are finished painting it, carefully remove the stencil from the shirt. After this, you will need to let the shirt dry completely so it doesn't bleed at all. You can...
In this tutorial, we learn how to draw a realistic portrait. Using a pencil, you will first draw the out line of the face. After this, add in the details and bold lines to the eye. From here, you will add in the details and shading to the rest of the face. Use your eraser to create smooth lines and white lines to make the features look glossy. Draw in a white line on the bridge of the nose to make it look more realistic. Also make sure to add in lines that are on the face as well as hair that...
In this video, we learn how to make lightning with a spoon and a balloon. First, you will need to gather a spoon and a balloon. Once you have these, blow up the balloon then tie it on the end so it's sealed. After this, rub the balloon on your hair and then slowly move the spoon towards the balloon. Turn the lights out and watch what happens. You will see sparks of electricity start to appear between the balloon and the spoon! This is great to do with children or as a quick experiment to show...
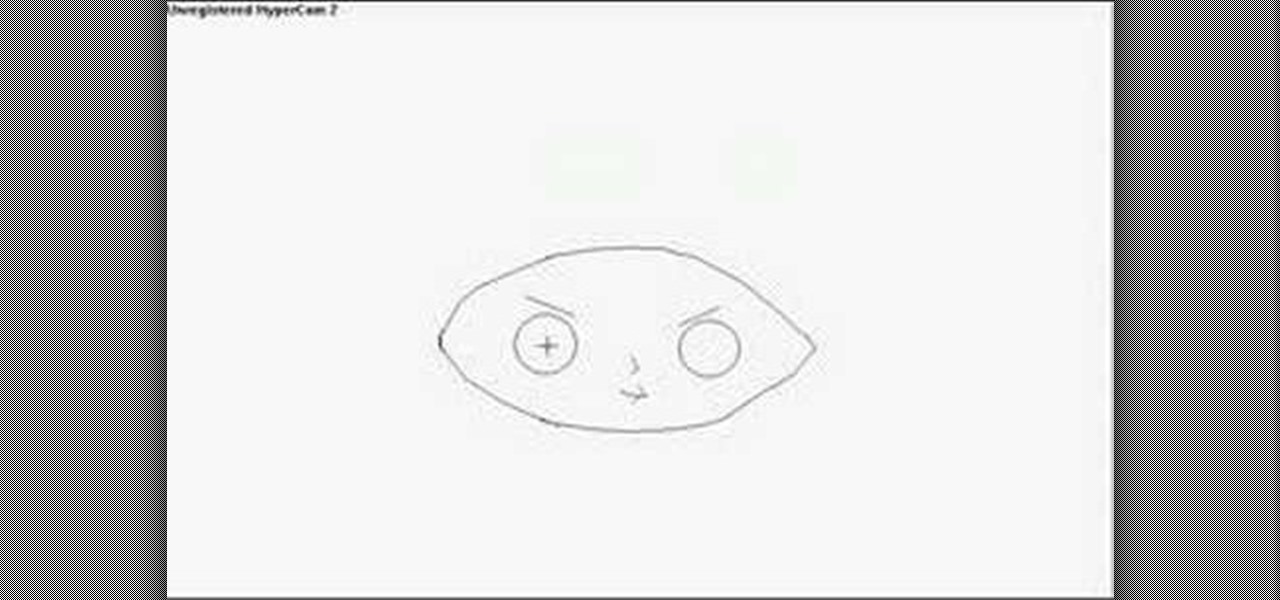
In this tutorial, we learn how to draw a manga girl. Start out with a pen on a piece of paper and draw the eyebrows in the upper middle part of the paper. Color the brows in, then draw in the eyes, along with their creases and the bottom of them. Next, you will draw in around the face and add in the point for the chin. Add in the details for the face, making sure to draw in the eyelashes. When finished with the features, draw bangs on the front of the face, then draw hair all around the sides...
Vault Boy has been around for a long time now, and appeared in the few but proud Fallout games as their mascot and skill-demonstrator. Pay homage to this plucky little guy by creating an XBox 360 Avatar in his likeness using the materials below and following the steps in the video. He looks a little skinny to me, but you can change it if you want right?
In this video, we learn how to draw Neji Hyuga from the Naruto series. Start by drawing the outline of the helmet, then add in a swirl that is on the front of it. After this, draw in the eyebrows and then draw in the eyes as well. Draw in the pupils and lines around the eyes. next, draw in the nose and draw in the mouth as well. Next, you will draw in the shirt and neck for the upper body of the character. To finish the drawing, you will draw in hair on the helmet and down through the face!
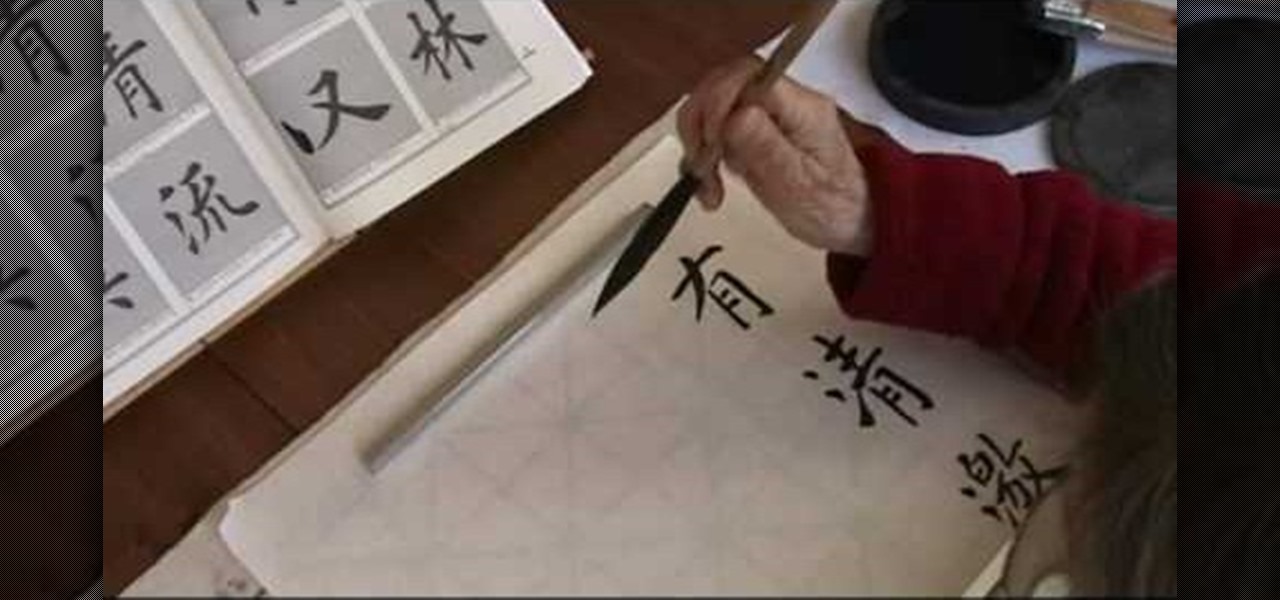
Chinese calligraphy is amongst the most beautiful but also most difficult word art forms in the world, and practitioners spend years honing their skills, even devoting their entire lives to daily practice.
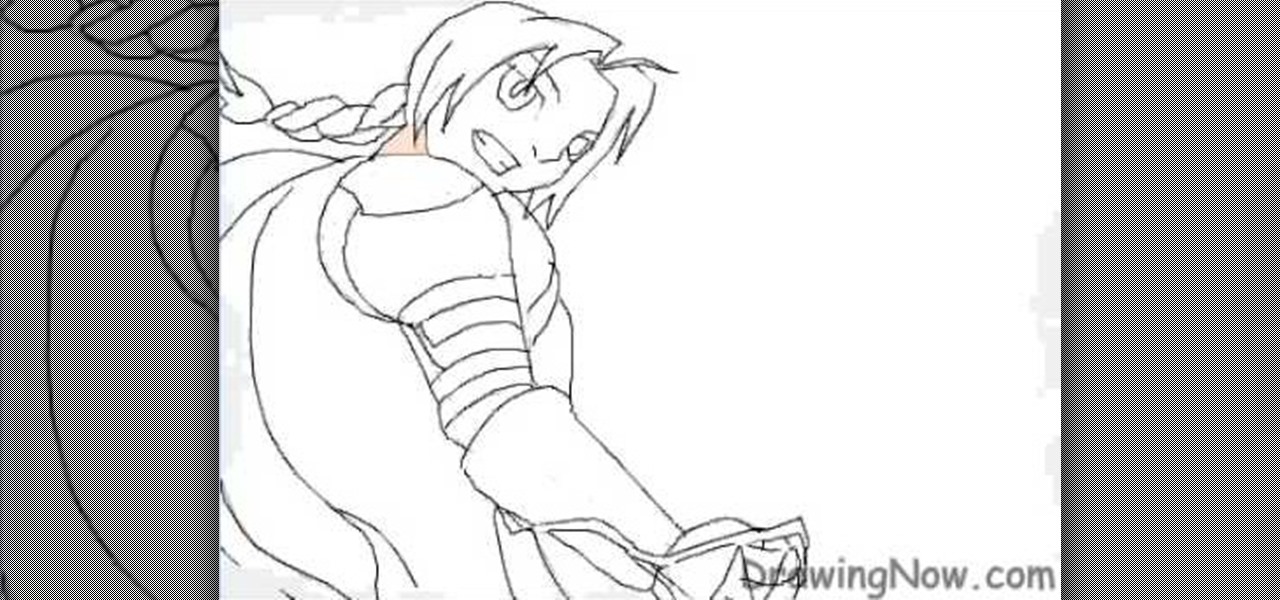
In this video tutorial, viewers learn how to draw the animated character, Edward Elric. Begin by drawing the guidelines of the character in 30% black pencil lines. The head is drawn as an oval shape. The shoulder is guided by a large circle and the elbow by a smaller circle. Connect the shoulder and elbow together with a stick line. Add details with the opaque pencil and erase the guidelines. To color, start with a mid-tone and add shading. Use some transparent tones on the mechanical arm. Hi...
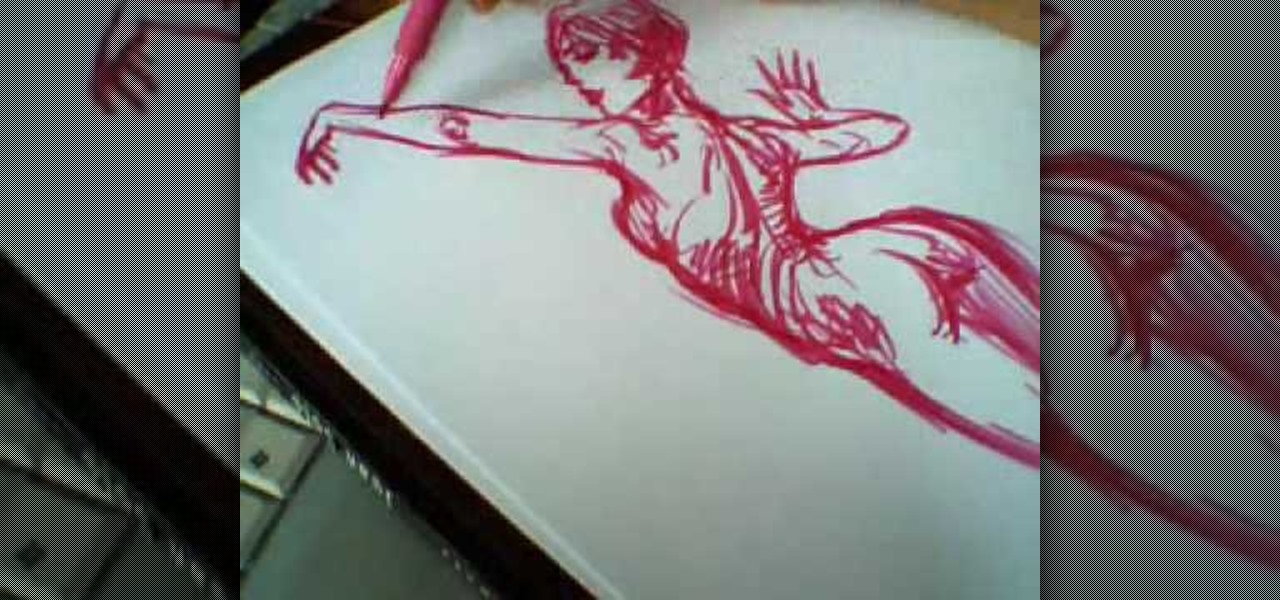
In this video tutorial, viewers learn how to draw a formal dress. Begin by sketching the body of the figure. A formal dress is usually loose, so make the figure's body look thin and slender. The add some glamorous looking hair on the figure to make her look formal. Then add details to the dress by drawing the straps of the dress and cleavage on the chest. For the bottom of the dress, draw vertically curved lines to represent the fold of the dress. Make the dress look long and loose at the bot...
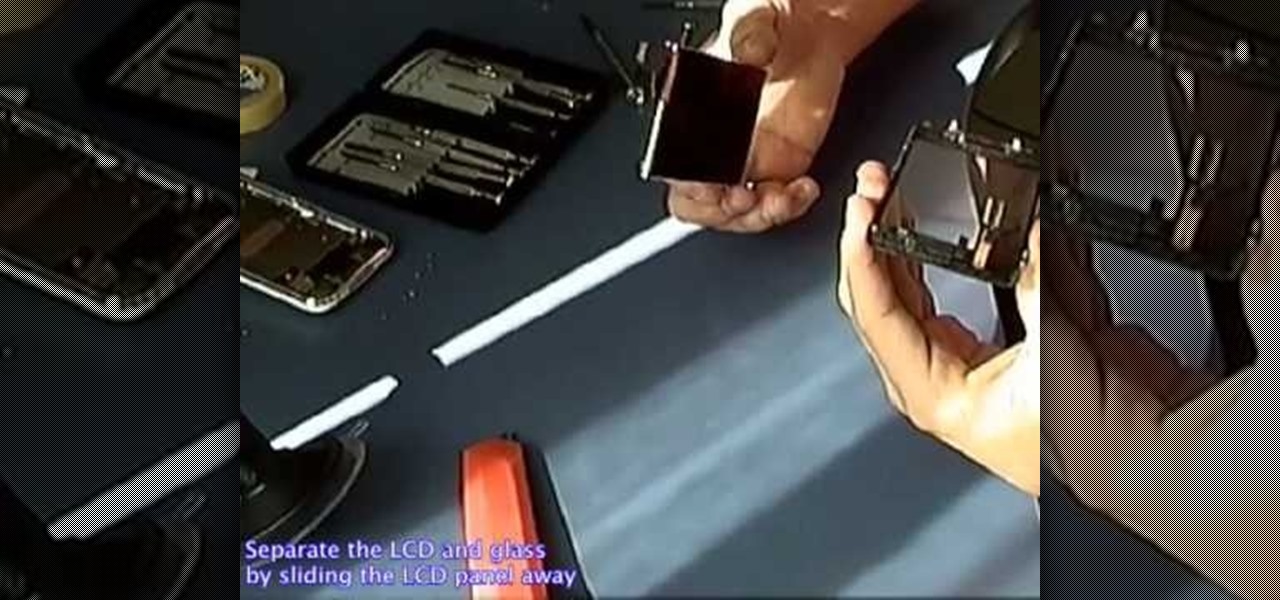
In this Electronics video tutorial you will learn how to repair and change your iPhone 3G touch screen. Remove the 2 Phillips #00 screws from the dock connector end. Use a suction cup to gently pull up the display assembly. Use a spudger to disconnect the black ribbon cable labeled 1, 2 and 3. Remove the screws of the display assembly. Peel up part of the black tape and remove the screws under it. Gently rotate the spudger, lift the LCD from the glass and separate it. Heat the top left of the...
This video helps to draw Bowser Jr. First draw a half circle and join the ends by drawing two curves as shown in the video. Continue the left line, to draw a mouth and end it with a small arc to look like a smile. Then close the line by joining it with the right end. On the top of the half circle draw an arc and above it draw a feather shaped hair as shown. Next you have to draw eyes with eyelashes and make them look dark. Now, draw two short lines which looks like nostrils as shown in the vi...
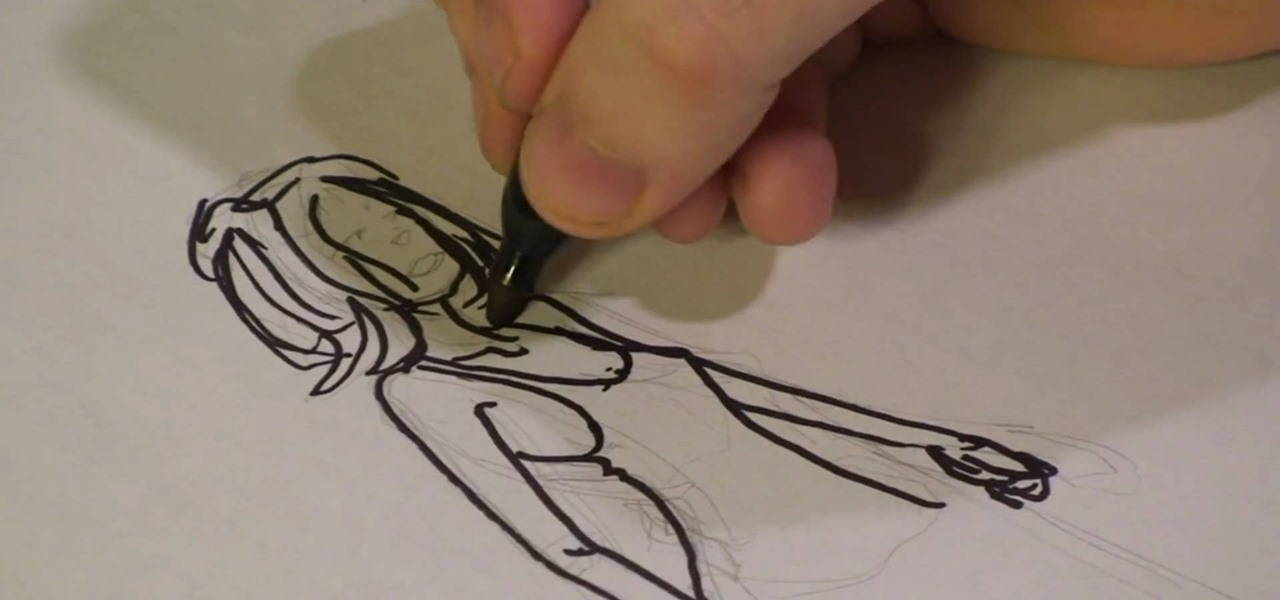
The author demonstrates how to draw a figure of a nude woman from behind through a un-narrated short film demonstrating his drawing in real time.
Drawing Stewie from The Family Guy on your computer is fairly easy. First you're going to make a horizontal oval, then draw what looks like a football shape just in between those lines. Now erase the excess lines outside of the head shape. Next, insert two circles-fairly far apart on the head-with a slanted line above both for the eyebrows. A small line in the middle pointed towards the right makes Stewie's nose, and a simple mouth is completed with a three small lines at the bottom. Draw two...
Michael, a graphic designer, teaches us how to draw a cartoon girl's clothing. He draws this image in some light shaded pencil. He draws her hair, ear and the basic outline of her face. He then draws her basic build which is her chest, her arms and her legs. He uses a marker to highlight his strokes. He uses clean, precise, straight strokes and when drawing cartoon figures, this type of drawing technique is highly recommended. After drawing the girl, you can go ahead and decorate her clothing!
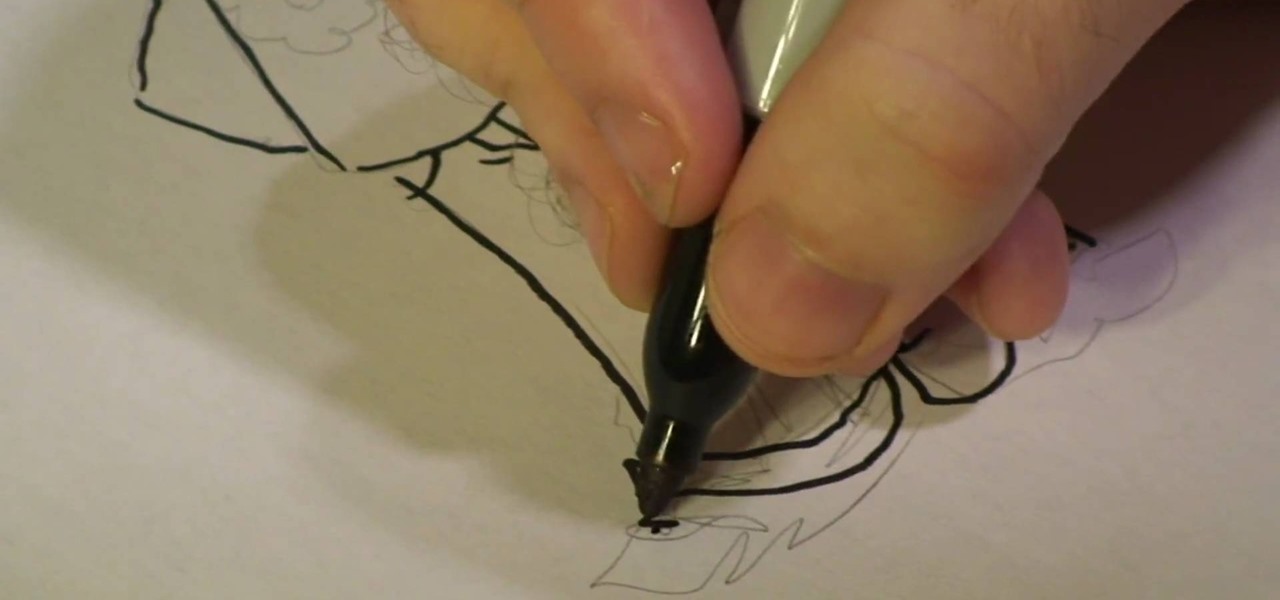
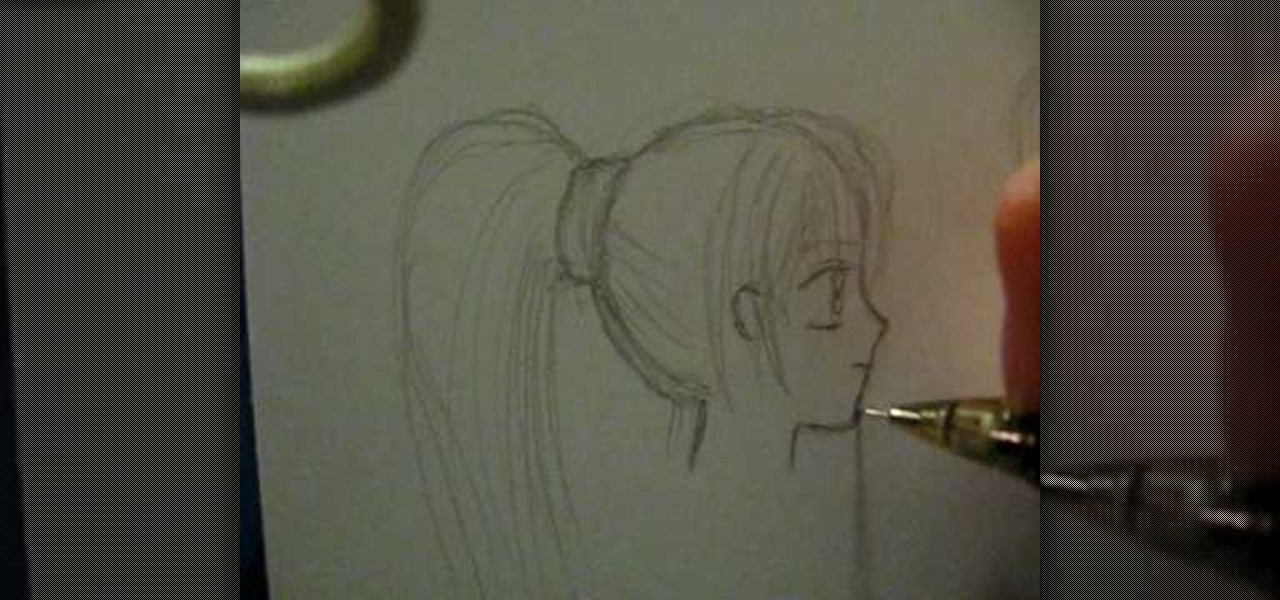
In this how to draw video the artist shows us how to draw an anime face in profile. The artist explains to she doesn't use guidelines to draw the profile, though some people do. She tells us that she used to have a very hard time drawing profiles at first, but practiced a lot and studied profiles so that she was able to get better at it. She says that with hair she likes to draw loosely and lightly. While she talks she continues to draw and demonstrates as she explains. She suggest practicing...
Demodex… what is it? It's a lot of tiny parasitic mites that could be plaguing your pet and attributing to hairlessness. Learn how to care for your pet with help from VetVid. See how to care for and treat Demodex (mites) in dogs with this video tutorial.
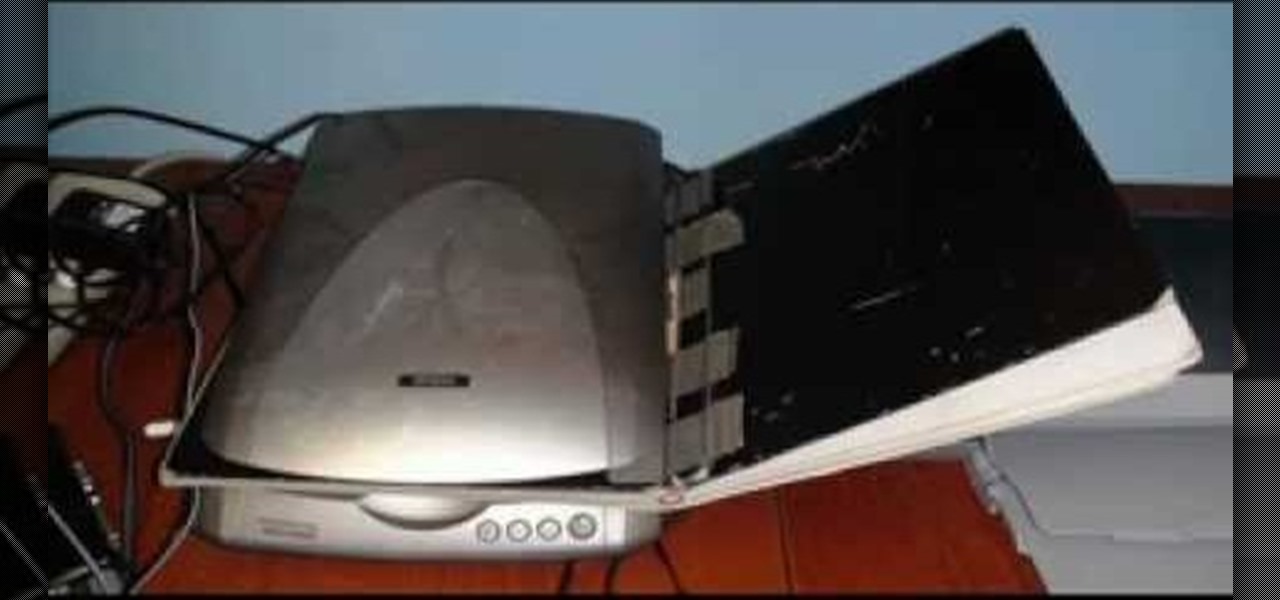
An instructional video by tradigital artist Merrill Kazanjian. Step 1- Scan the image
Learn tips and techniques on how to braid hair including the swirl braid and a few other tips from a hairstyle expert in this free video clip series.
Henna isn't just for body tattoos, it's also for hair! This four-part video will show you the process of applying henna to natural black hair, for a great and colorful new hairstyle! If your hair isn't as black as you want it to be, henna is the way to dye it! Watch and learn.
In this tutorial, we learn how to style your hair in a quiff fashion. First, brush out all of your hair. After this, take your bands and the top of your hair and raise it in the air vertically. Now, tease the back of the section down with the brush, then incorporate your bangs in with it. Next, use a bobby pin to pin down the top, leaving it still puffy up in the air. To help keep it voluminous and high in the air, use hair spray or gel over it. When you are finished, curl the rest of your ha...
In this tutorial, we learn how to French braid your bangs to the side. First, take your hair smoothing cream and place it into your bangs, only using a very small amount. Next, take the top layer of your bangs and divide it into three separate pieces. Once you do this, start braiding down to the side about two or three times. Now, start adding a few pieces of hair on each side, then pull over to the middle. Keep doing this until you get half way through, then do a regular braid a few more tim...