
How To: Dye your hair red like Angelina Jolie fast
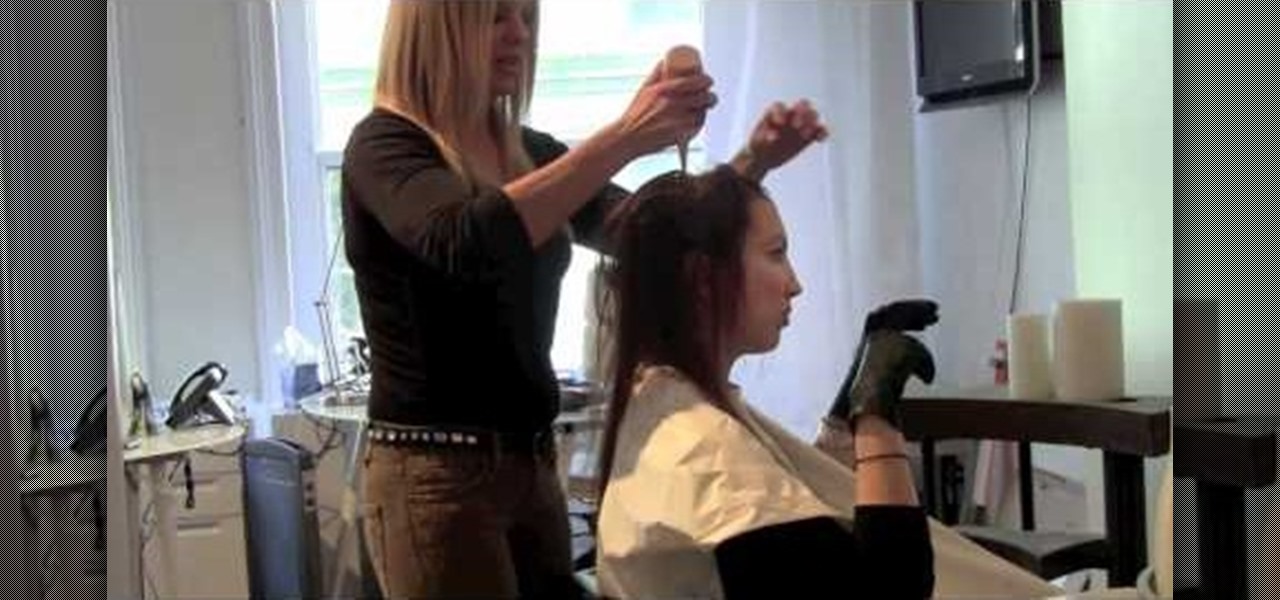
Want to spice things up a bit in the hair department? If you have naturally dark, medium, or light brown hair then going red may be a fun option to consider.

Want to spice things up a bit in the hair department? If you have naturally dark, medium, or light brown hair then going red may be a fun option to consider.

Golden Globes 2011 presenter Megan Fox sparkled in a layered Armani Prive confection on the red carpet, but we were paying special attention to her gorgeous simple yet super sexy makeup.
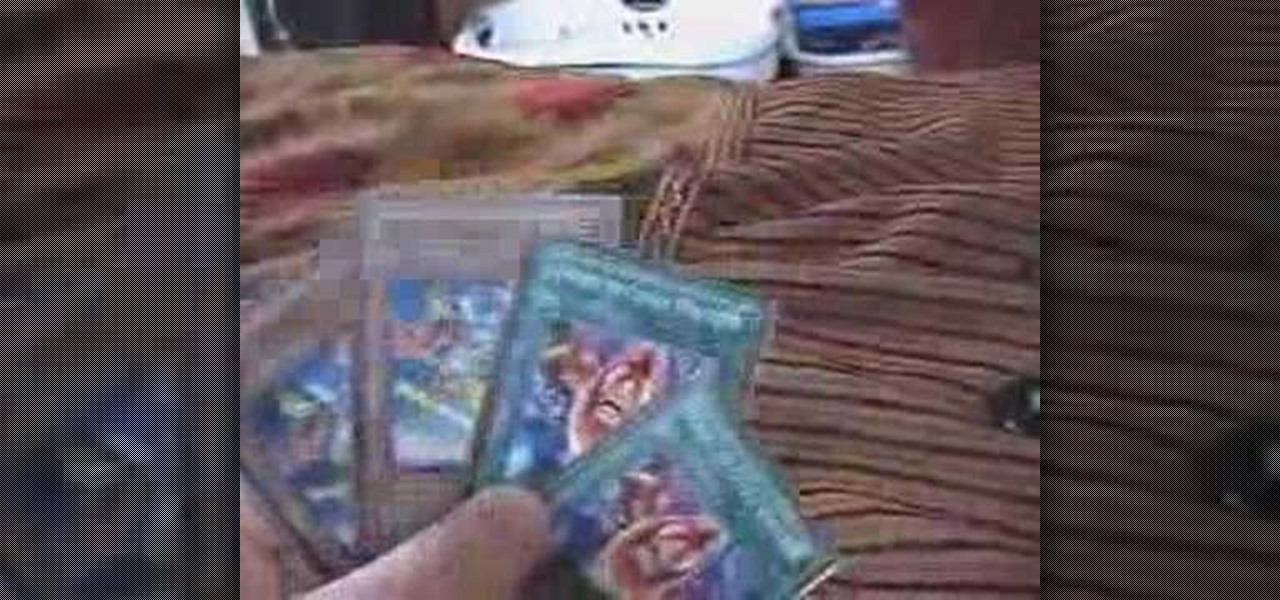
In most collectible trading card games players fail to realize the value of low-level creatures. They aren't sexy, but they can win you games when used correctly. This video will teach you how to build a Yu-Gi-Oh! based on three stars or less creatures that is still pretty damn effective.
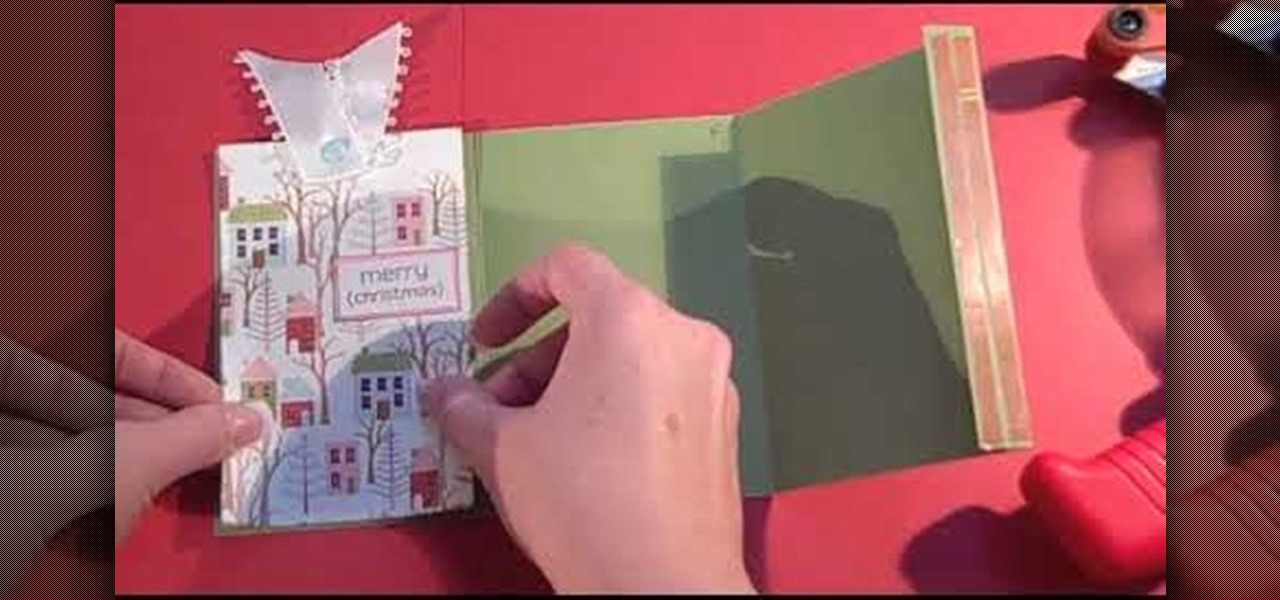
The truth is we really don't like handmade presents. Yes, grandma, we thank you for your reindeer sweater whose nose lights up, but to be honest, there's very little to beats that new headphone set we've been eyeing.
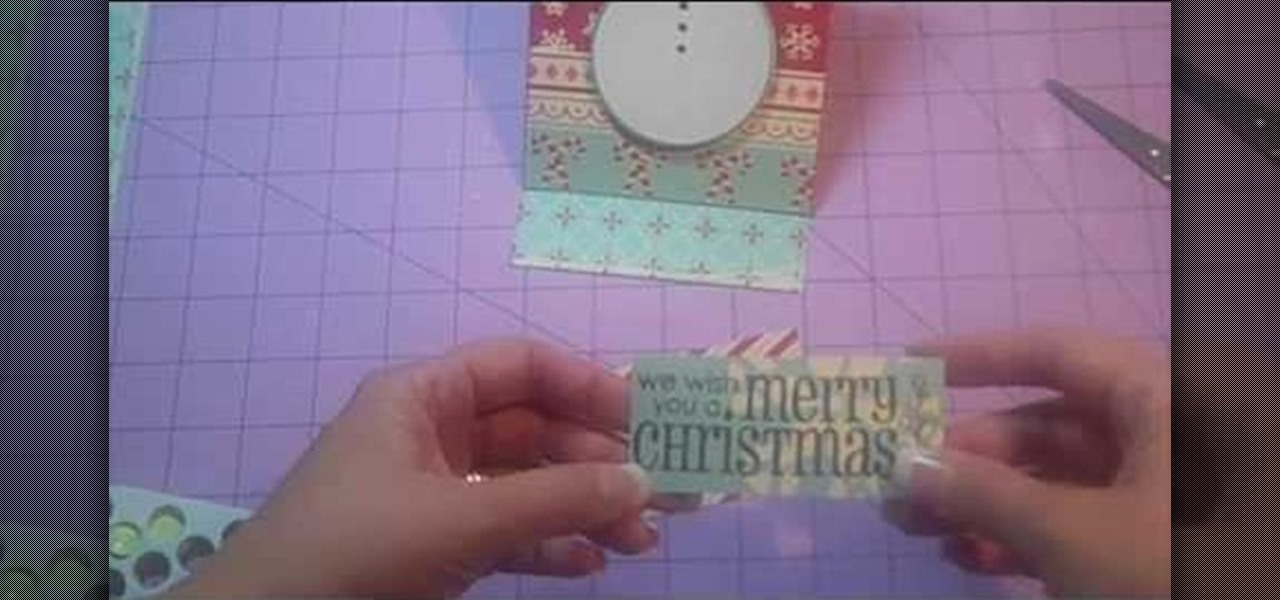
The truth is we really don't like handmade presents. Yes, grandma, we thank you for your reindeer sweater whose nose lights up, but to be honest, nothing beats an iPad.
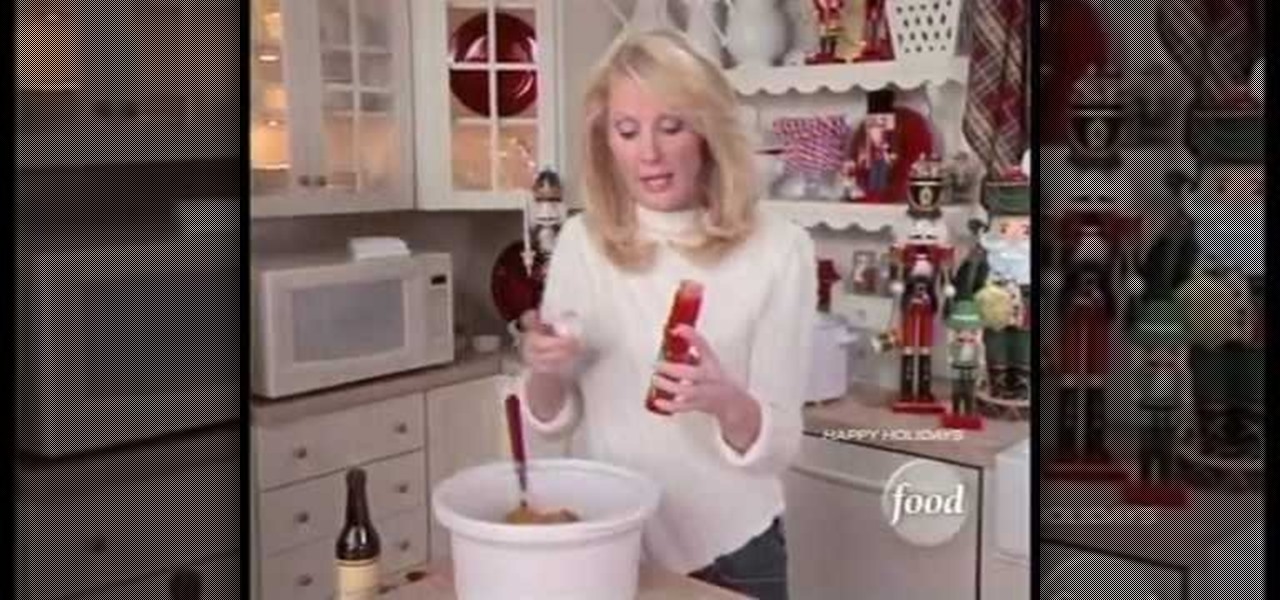
People love to drink during the holidays. Whether it's because you don't feel quite festive without downing a few cranberry martinis or you can't prevent yourself from strangling your visiting relatives without a gin and tonic, cocktails are the bee's knees during this time of year.
Everyone is excited for the newest addition to the TRON franchise, Evolution! This tutorial shows you everything that you need to know in order to get through the first level, Reboot, when playing this game. Best of all? You get your own light cycle!
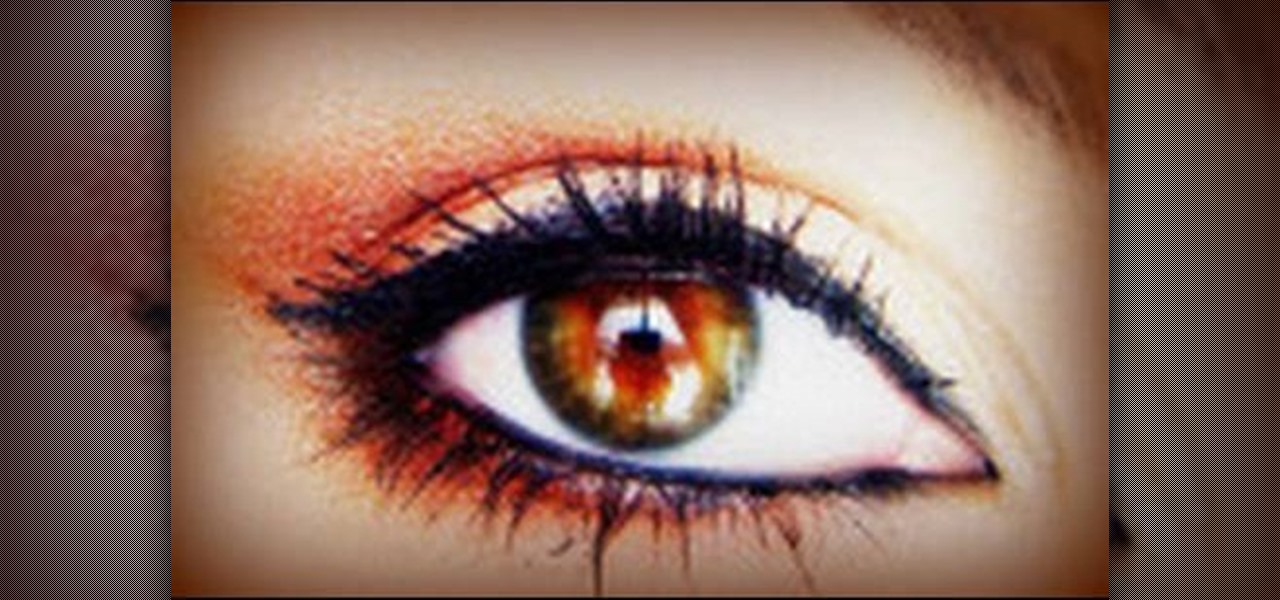
In this tutorial, we learn how to apply a "Moroccan truffle" makeup look. First, apply a light neutral shade all over your eye with a fluffy brush. After this, take a burnt orange and brown color and brush it into the inner crease of the eye where the outer 'v' is. Then, brush a bright orange on top of it and blend everything together. Only blend this until you reach half way to the inner corner of the eye. Then, brush the darker brown shade from the 'v' to underneath the eye. After this, app...

In this tutorial, we learn how to look like Megan Fox for under $10. First, you will apply a white eyeshadow on your eyelid and underneath the eyebrow. After this, you will brush it into the inner crease of the eye as well. Next, brush a brown shadow on the outer edge of the eye and blend it into the crease as well. From here, you will apply black eyeliner on the top and bottom of the eye and then smudge it on the bottom. After this, define your eyebrows and then apply mascara to the top and ...
In this tutorial, we learn how to apply Jennifer Lopez inspired smoky eyes. First, apply a light beige glitter all over the eye. From here, apply a white ice color all over the eyelid and into the crease of the eye. Get the color a little wet to make it stick and show more on the eyelid. Next, take a black eyeliner and draw inside the bottom of the eye and on top of the eye as well. After this, apply mascara or false lashes and you will have a beautiful Jennifer Lopez makeup look! Just top it...
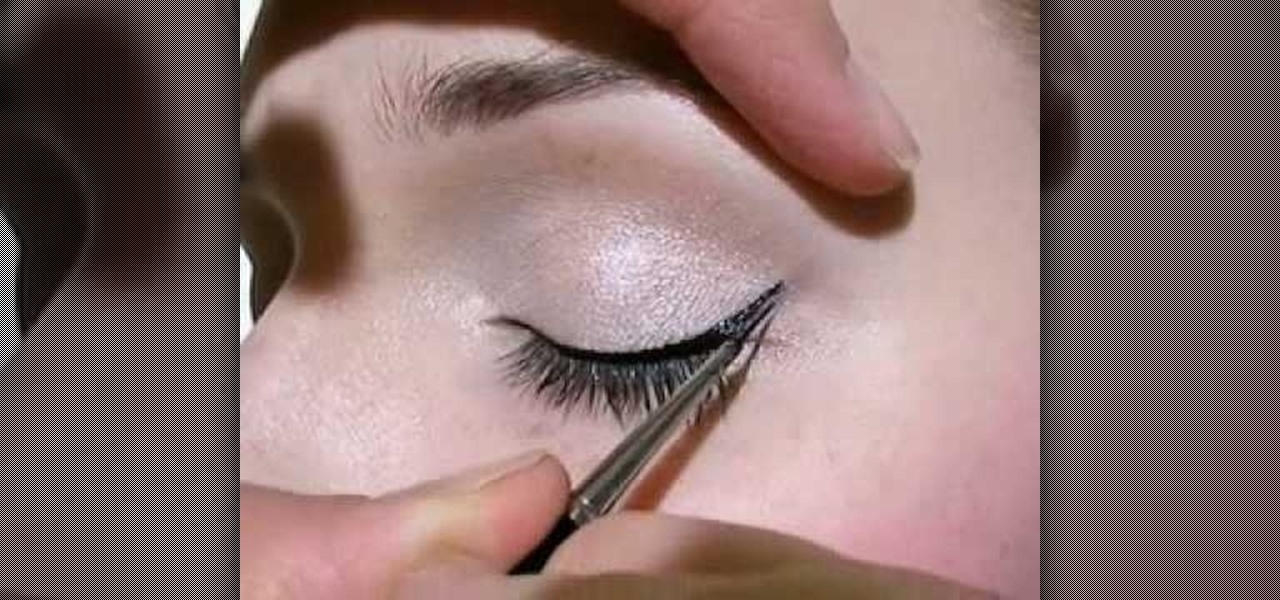
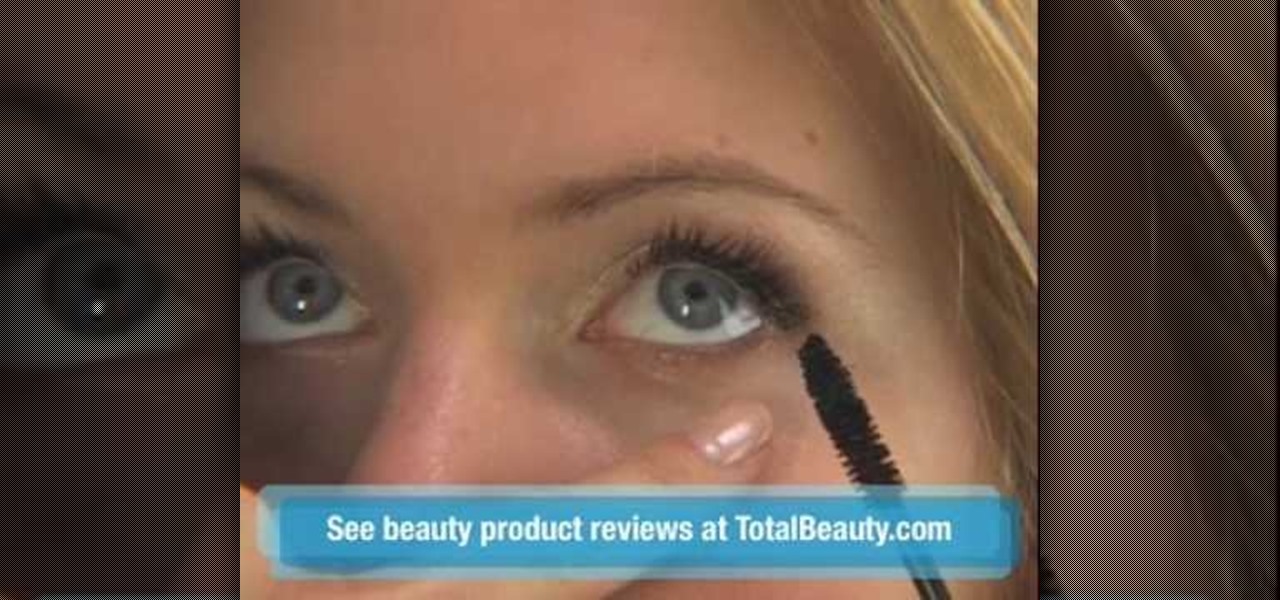
In this tutorial, we learn how to apply hot liquid eyeliner. First, line the eye with a slanted eyeliner brush that has been dipped into the liquid eyeliner. Line from the inside corner to the eye out to the outside of the eye. Pull the lid up gently so you can really push the eyeliner into the lashes to make them look darker and fuller. After this, line the outside corner of the eye and make a light flare if you would like a more dramatic look. This will finish the eyeliner look, have fun wi...

In this video, we learn how to match and apply foundation for dark skin. When you apply your foundation, you want to make sure you apply oil free on your skin to prevent break outs. Use cocoa butter on your skin as well before you apply foundation to make it go on easier. Find your shade by matching the foundation to the color on the palm of your hand. The shade on the bottle might not be right, you need to open it up and test it out on your skin first. When you find one that works for you, y...

Everyone does it. And, apparently, everyone does it late. Procrastination is a problem that affects everyone, from middle schoolers waiting until the last minute to put together their science project to grown men who wait until an hour before to write their marketing pitch.
If you've never been a big fan of alcohol because it tastes too strong and bitter, then you should definitely give sangria a try. Sangria is a native Spanish drink that includes a mixture of a light wine (usually fruit flavored), chopped fruit, spices for an extra flavor kick, and a sweetener like honey or orange juice.
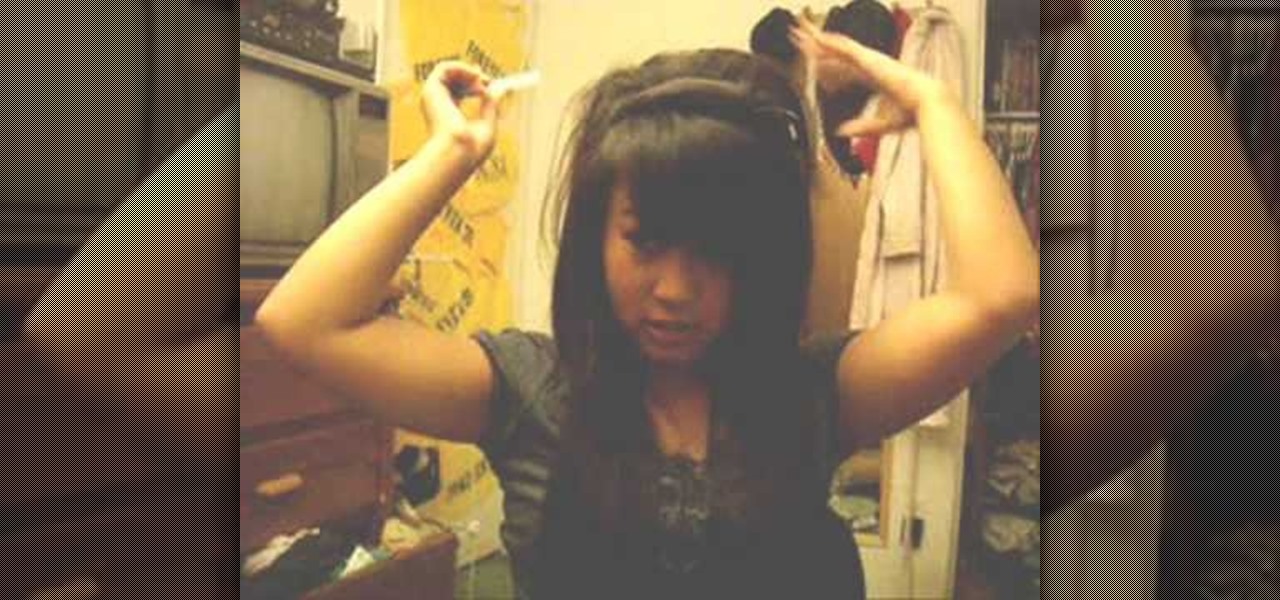
In this tutorial, we learn how to tease hair. To start, you will grab the hair at the top of your head and hold it up straight. After this, you will hair spray your hair in the back and let it dry a little bit. After this, grab a teasing comb and brush your hair down from the direction it grows. Next, you will let it lay down and hair spray it. Continue to do this throughout your entire head until you have done it all over. Then, comb all of your hair back gently with a light brushing. When f...

In this video, we learn how to change hair color in Photoshop CS3 and CS4. First, open up your image and zoom in on the hair. From here, you will click on the selection tool with a circle to select your image. Now, make sure this is the perfect size for the entire image. Right click and make sure it's sized out right. Now, select the hair and a red marker will appear. Select the whole surface of the hair, and as you get to the short hair use a smaller circle tool, don't worry about the smalle...
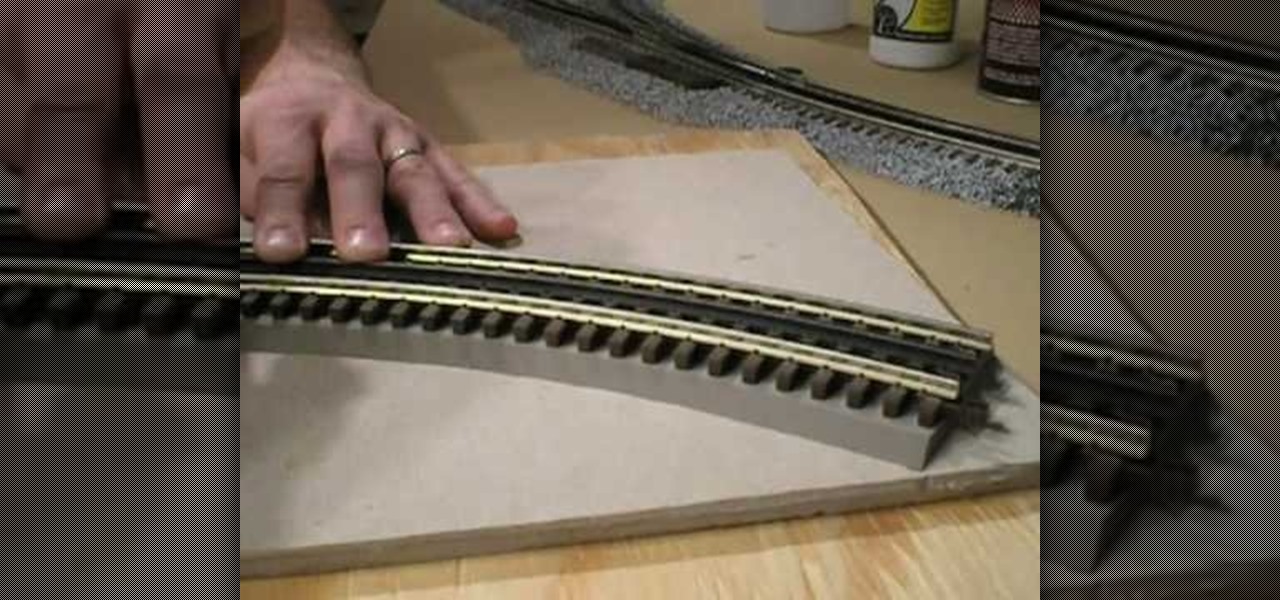
In this tutorial we learn how to lay and ballast O-Scale 3-Rail track. First, lay the track down on a piece of bare plywood. Also, you will paint the wood to prevent it from absorbing liquid when you place glue on it. Put the track down onto a flex bed and then set the flex bed on the wood. From here, place the track onto the road bed and line it up. Make sure the track is centered completely. After this, take a track screw and secure the ends down. Continue to do this throughout the entire t...
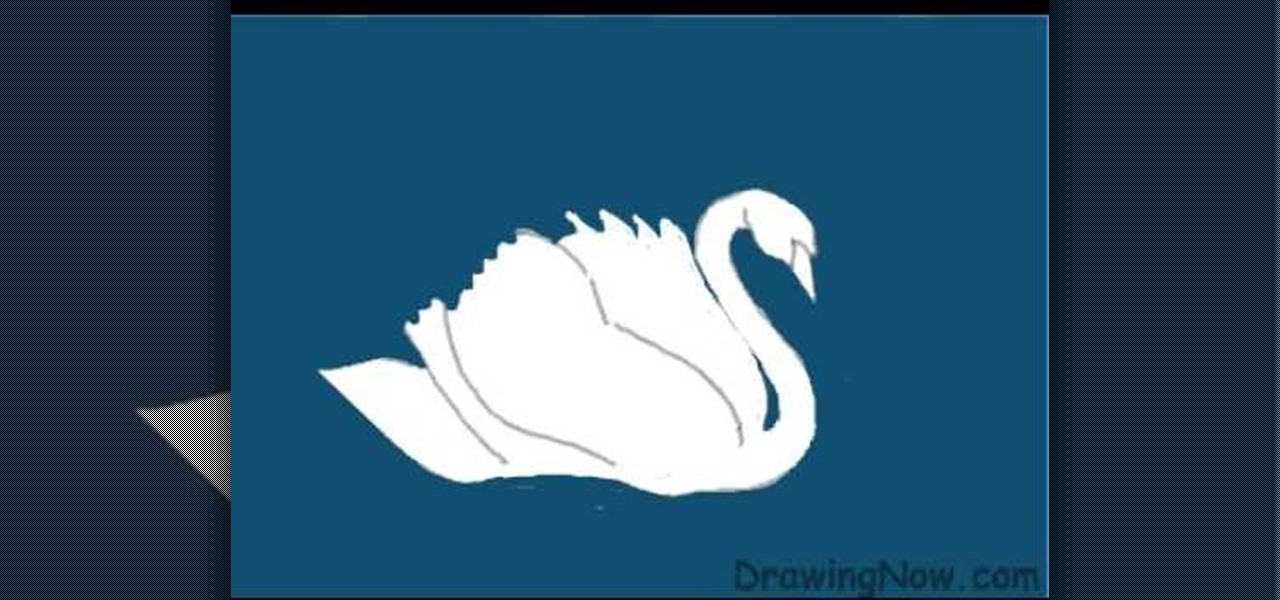
In this video, we learn how to draw a swan. First, draw the head and the neck, then draw an egg shape for the body. Next, draw in the wings for the swan and erase any background lines to make it look more realistic. From here, add in details to the face and make the beak more apparent. Then, you will color in the background and color the swan white, adding in lines for the feathers. After this, use white and grays to create a reflection underneath the swan. Then color the swan with light brow...
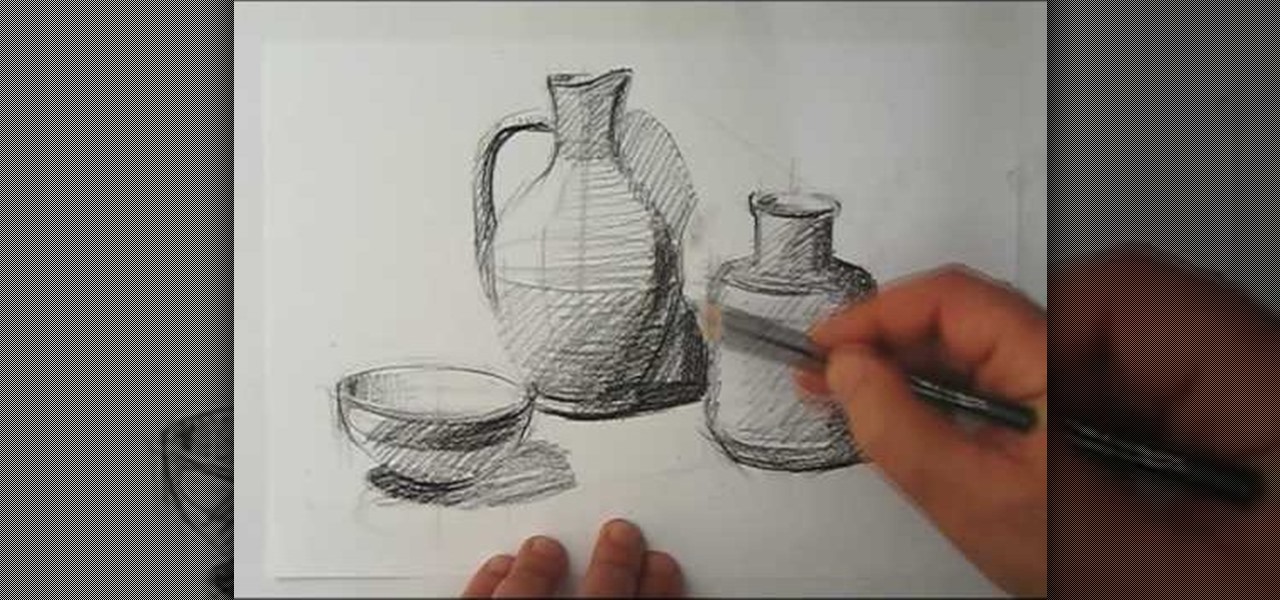
In this tutorial, we learn how to draw a still life. First, you will use the side of the pencil to draw the outline for the still life drawing. After this, continue to draw the outlines for all the objects that are in the model. Start to slowly add in the details, using the light touch of the pencil. As you continue, use the side of your pencil to shade and then use your eraser to blend. Continue to add in additional details as you go, then erase any background lines when needed. Enjoy drawin...

In this tutorial, we learn how to decorate a bronze beauty cake with fondant. Start off by coloring the cake with a light bronze or buttercream color. After you do this, you will need to mix up some medium brown colored icing and place it into a piping bag. When you do this, you will pipe this all around the sides of the cake. When you finish with this, you will color the fondant the same color brown and then roll it into a circled shape to make beautiful flowers. Lay these on the cake and th...
In this tutorial, we learn how to draw a wild magical flower. Start out by using a pencil with a light touch to create the outline for the flower. Make wispy lines to create the leaves and the flowers. Also, draw in the middle of the flower to create additional details. Then, draw in the leaves with the middle vine going down off the page. Continue on the draw in additional flowers off of the vine. Use the wispy edge of the pencil to create a more majestic and magical type of flower. Color in...
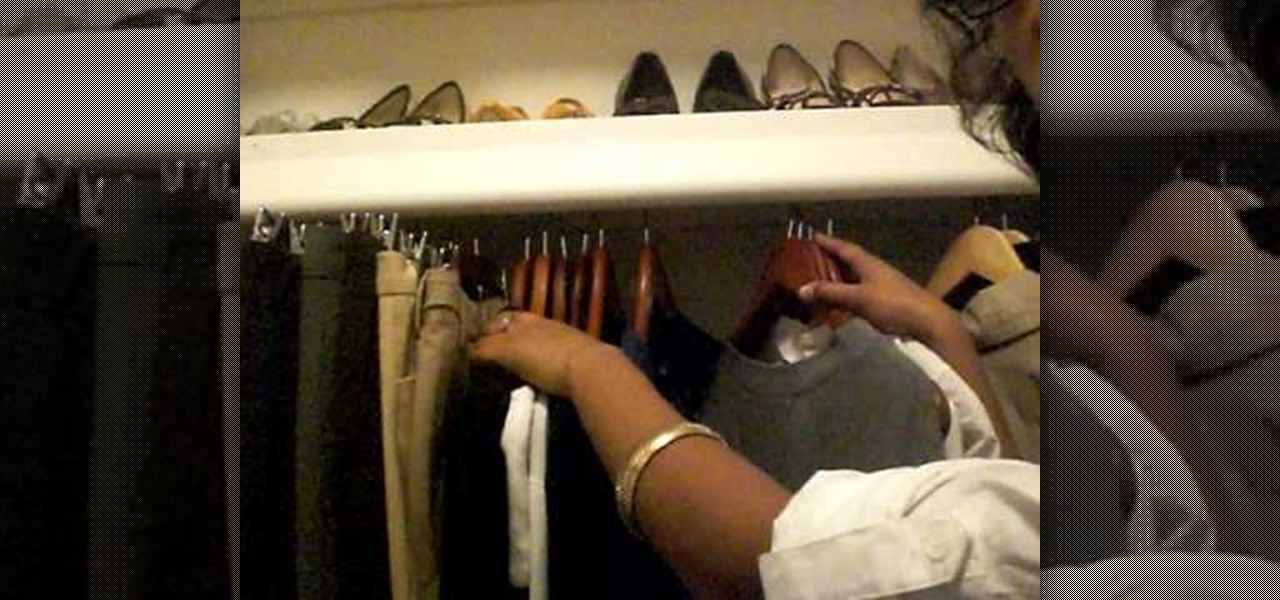
In this tutorial, we learn how to organize your closet by establishing a wardrobe system. If you have tops that you wear during the day, put these on a different colored hanger than your nighttime tops. Color code these in your closet and then hang up your nighttime tops with a light wood or your choice hanger. If you have other random tops, you can hang them according to how you would wear them the most. Dresses can be hung on another color hanger and then pants can be worn on another color ...
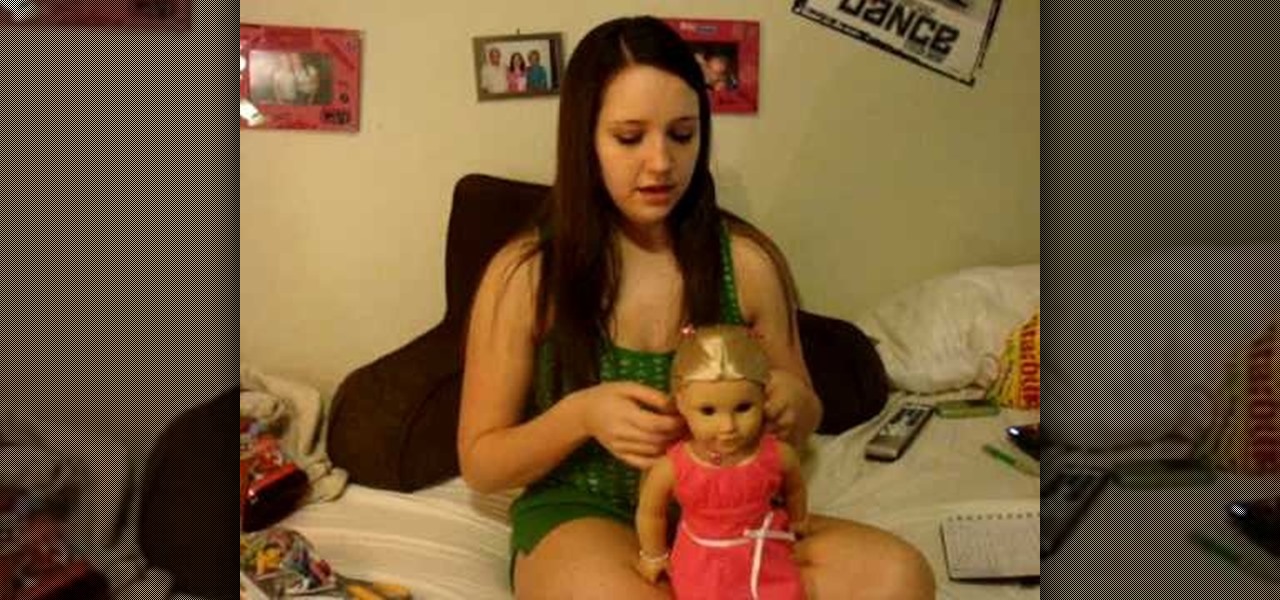
In this video, Sarah tells us how to care for your American Girl Doll. Tip number one is to not put any product on the doll's hair. The next tip is to not wash the hair on the doll unless you absolutely have to. Don't put pressure on her hair as you brush it, use a light touch with a comb. If your doll has frizzy hair, you can clip off the frizzy area with some scissors. If you get a mark on the doll, you can use a Mr. Clean Magic Eraser on her without damaging the skin. If you don't have tha...

In this tutorial, we learn how to draw a scene from Star Wars. Start off by coloring the background peach, then adding orange with the spray paint tool to the bottom. After this, color in clouds to the sky with a light tan. From here, add in a spaceship in the sky and then two large machines on the bottom of the ground. Draw in another spaceship in the far right background. Then, start to add in details to each of the different ships or tractors. Draw a person on the ground carrying a gun wit...
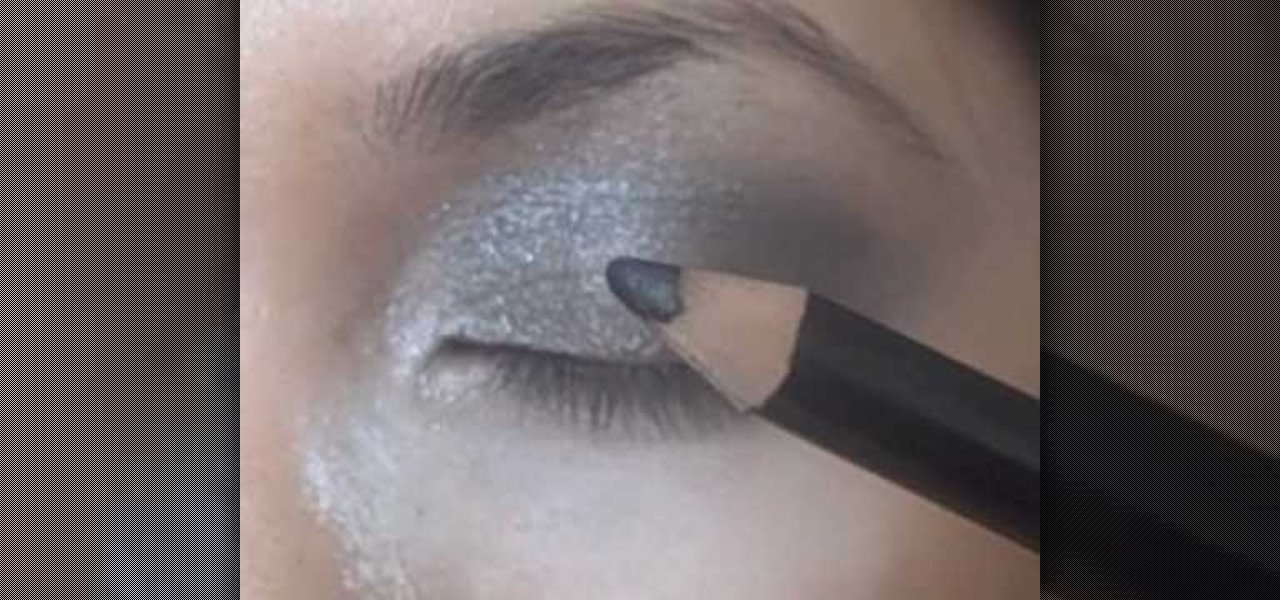
In this tutorial we learn four tricks to make your eyes look bigger. The first tip is to layer on a shimmery light shadow to the eyes and then add on a darker color to the crease of the eye. Curl the lashes and then apply mascara to the eyes after clamping and working up the eye. Next, take some false lashes and apply these to the outer edge of the eye. The lashes will give you a thick and luxurious look. Later when you go to take these off you just need to use simple eye makeup remover. Any ...
In this tutorial, we learn how to draw Danzo. To start, you will draw the outline with the light touch of the pencil. After this, draw in the final outline darker and then erase the background lines. Next, you will add in the details around the character and then add in lines to show creases and make it look more realistic. From here, you will add in shading to make the drawing have some more depth. After this, you will finish up by cleaning any stray lines with an eraser. You can also use th...
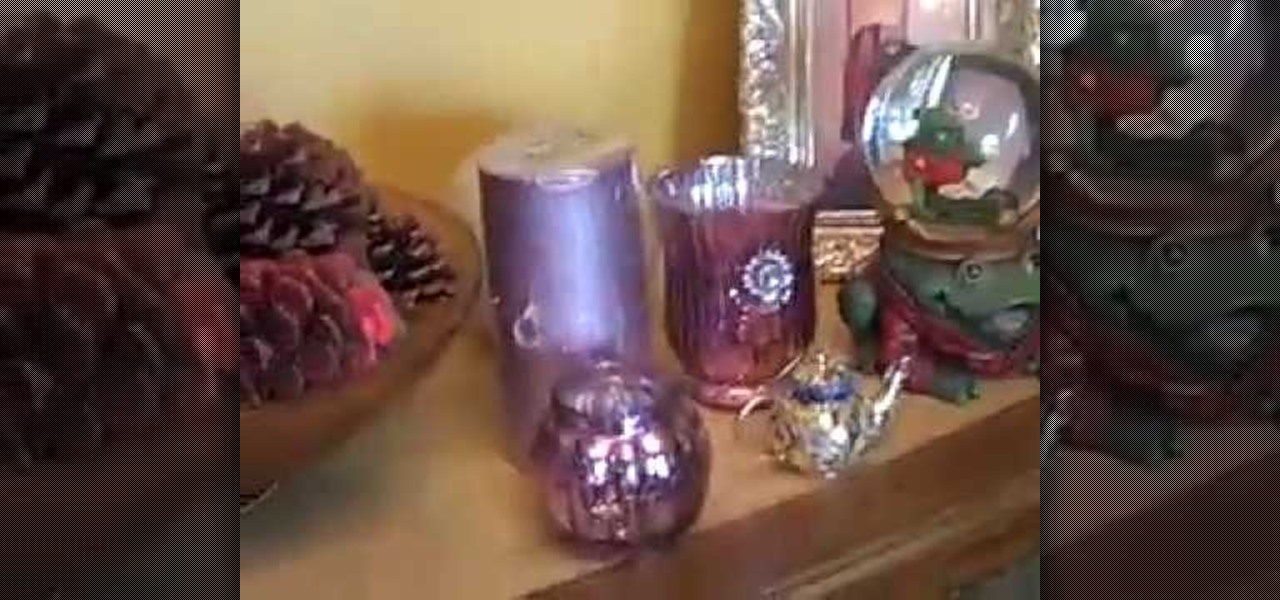
In this tutorial, we learn how to decorate a designer Christmas tree easily. You don't have to go out to the store and buy a bunch of expensive props for your tree, you can decorate it easily with things around your house! You can make the tree as simple or extravagant as you want! You can pick pinecones from outside and stick those in the tree so they are all around. Then, you can place only red bulbs in the tree next to the pinecones. Decorate this with some white lights and you've got a go...
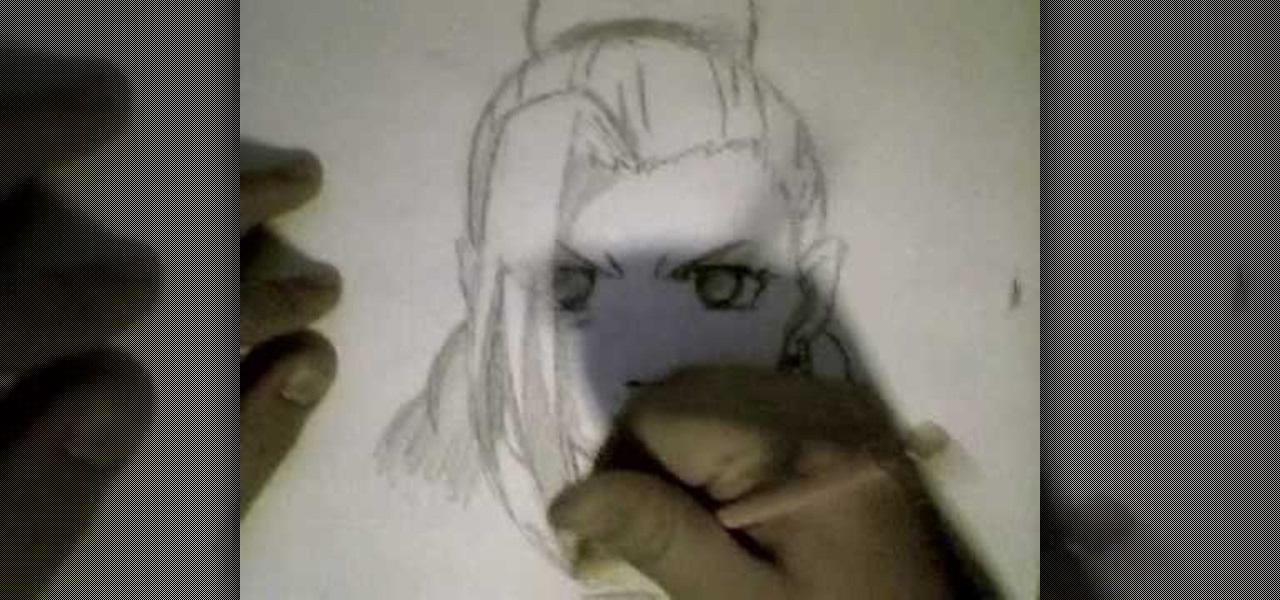
In this video, we learn how to draw Ino from Naruto. Start off by drawing a circle for the head, then drawing lines in the middle to create reference for where the facial features will go. After this, draw in the hair on the top of the head along with the eyes, eyebrows, and creases of the eye. Then, draw the jaw line around the face and erase the lines you used for reference. After this, add in additional lines and hair to make it look more realistic. Use shading around the face to show ligh...
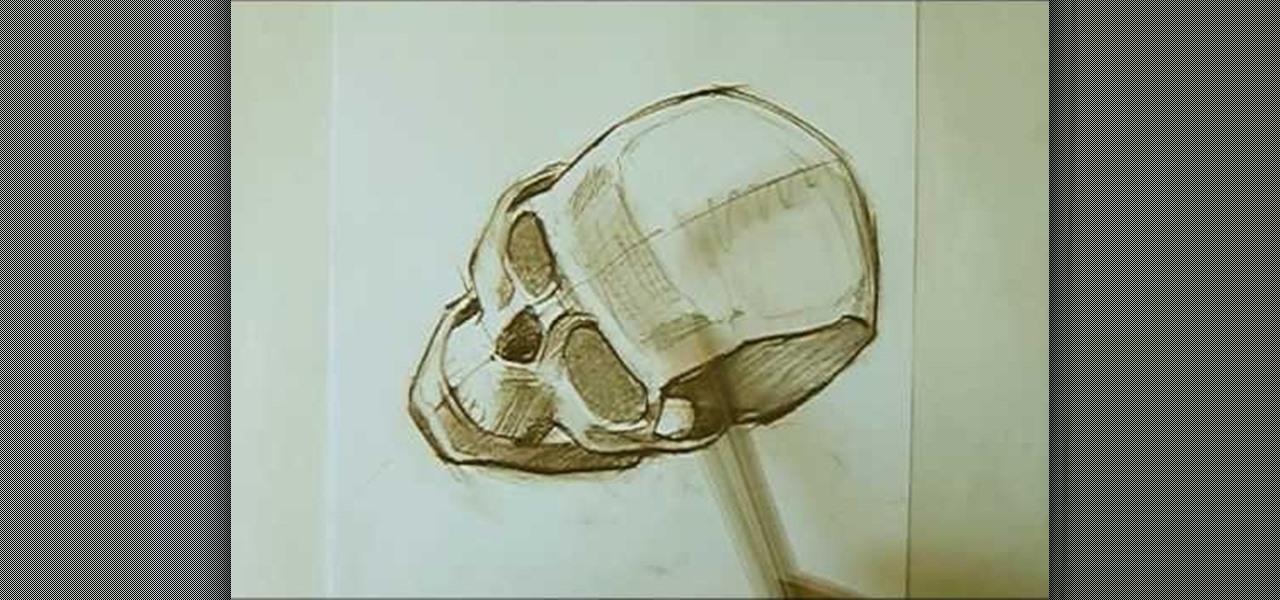
In this tutorial, we learn how to draw a skull with proper proportions. First, draw the outline of the skull with the light touch of a pencil. After this, use the pencil to draw two crossing lines that are the same length. Next, draw in the features of the face and head using the lines on the drawing. From here, you will start to add in the details to the features of the face and erase any background lines. Use the side of your pencil and the top of it to shade in the sockets and lines. To fi...

In this tutorial we learn how to make a Universal Soldier eye. You will need: old head set, cardboard, hot glue gun, screwdriver, pen, flash light, knife, saw, black paint, and masking tape. First take the cardboard and cut it out into two rectangles. Place these around the headset and stick a rectangle in the eye piece. After this, you will connect the flashlight to the side of the head piece. Once finished, you can spray paint the entire eye piece and then wait for it to try. When done, wea...
In this tutorial, we learn how to clear and cover up acne scars. First, you want to treat the pimple with your favorite kind of toner and cleanser. Make sure you don't squeeze your pimples, which will cause your skin to become red and broken out even more. After this, you need to apply a cream to your face that will moisturize your skin and not clog up your pores. To help cover up your acne scars, apply makeup that doesn't clog your pores as well. Make sure to remove your makeup at the end of...

In this tutorial, we learn how to create a nice drawing composition. First, use your pencil to sketch a light outline of the still life objects that you're drawing. After this, you will add in lines on the side of them for their shadows, then shade the area in between the lines in. Next, you will darken up the sides of the shapes to make them appear more in-depth and make them look more real. Use your pencil to blur the pencil markings and make everything look more realistic. When finished, y...
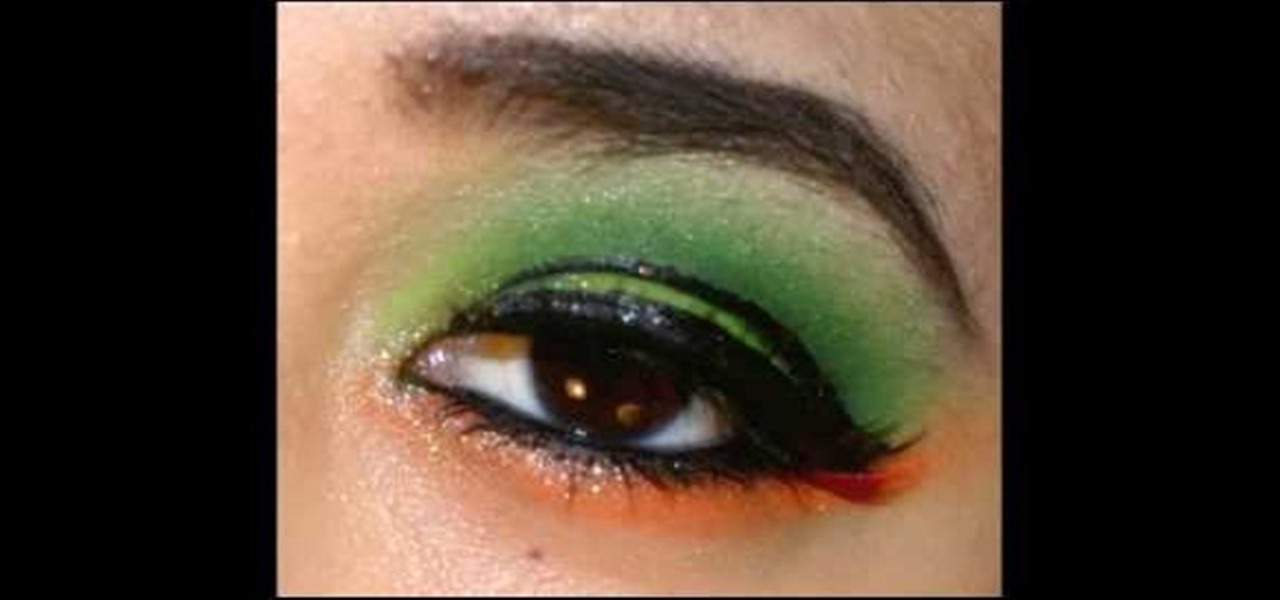
In this tutorial, we learn how to create a neon green and orange look using Kryolan UV. To start, you will brush a shimmery and sparkly white eyeshadow underneath the eyebrow on the brow bone. From here, apply a light green eyeshadow on the eye and into the crease. From here, apply a darker green shimmer shadow to the crease of the eye and blend it into the outer corner. Then, apply a sparkly orange eyeshadow on the bottom lash line, from the inner corner to the outer edge, meeting with the g...

For those of you who are unaware of who Kakashi is, he is a popular character in the media franchise Naruto and is the titular character's teacher.
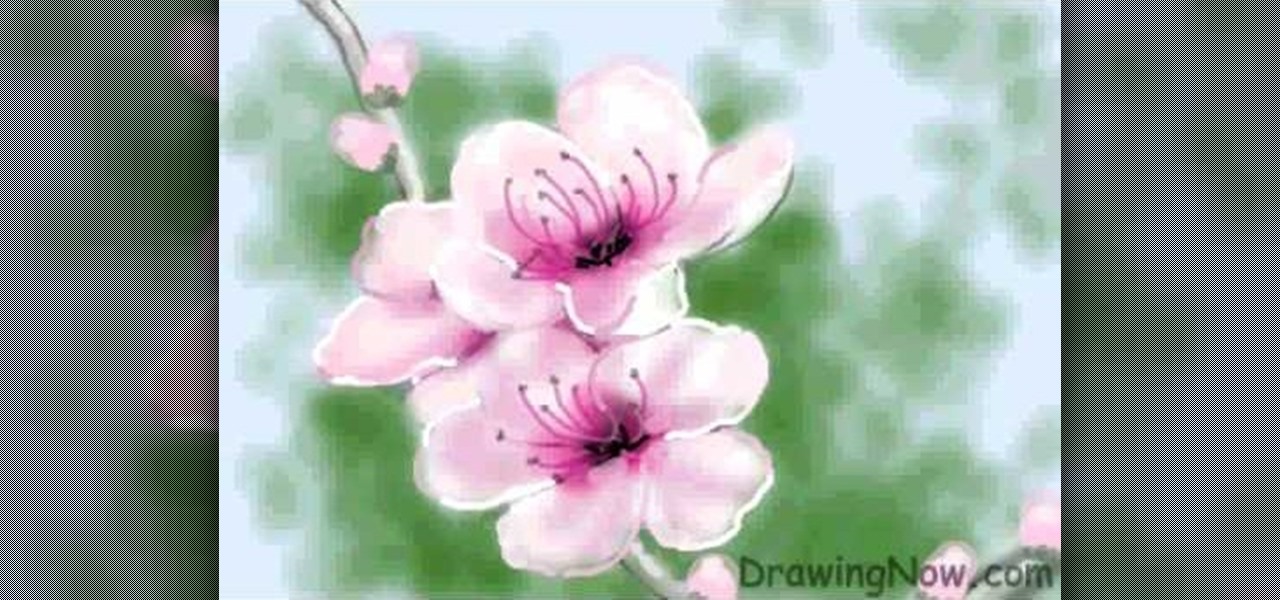
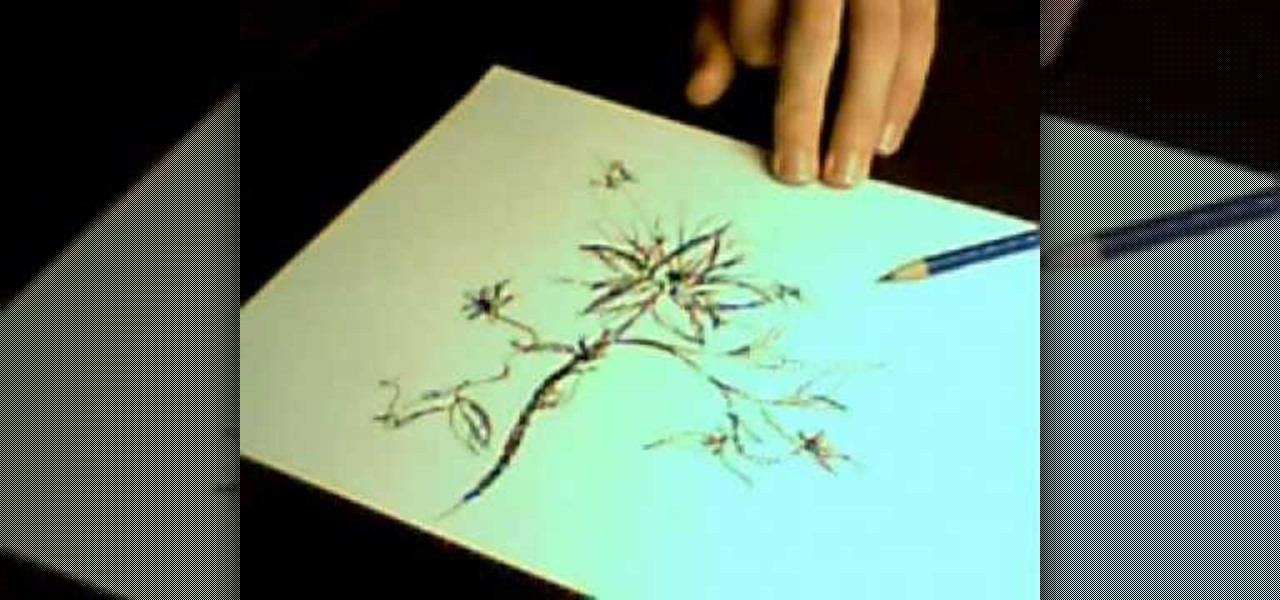
In this tutorial, we learn how to draw a peach blossom. First, draw the vine where the flowers will be. Then, draw the petals for the flowers, creating a basic outline. From here, you will color in the middle of the flowers with black and then a darker color of what the petals will be. After this, color in the petals and then create the background of the drawing. Next, color the vine in where the petals are on. Then, add white to the edges of the petals to show light hitting them. When finish...
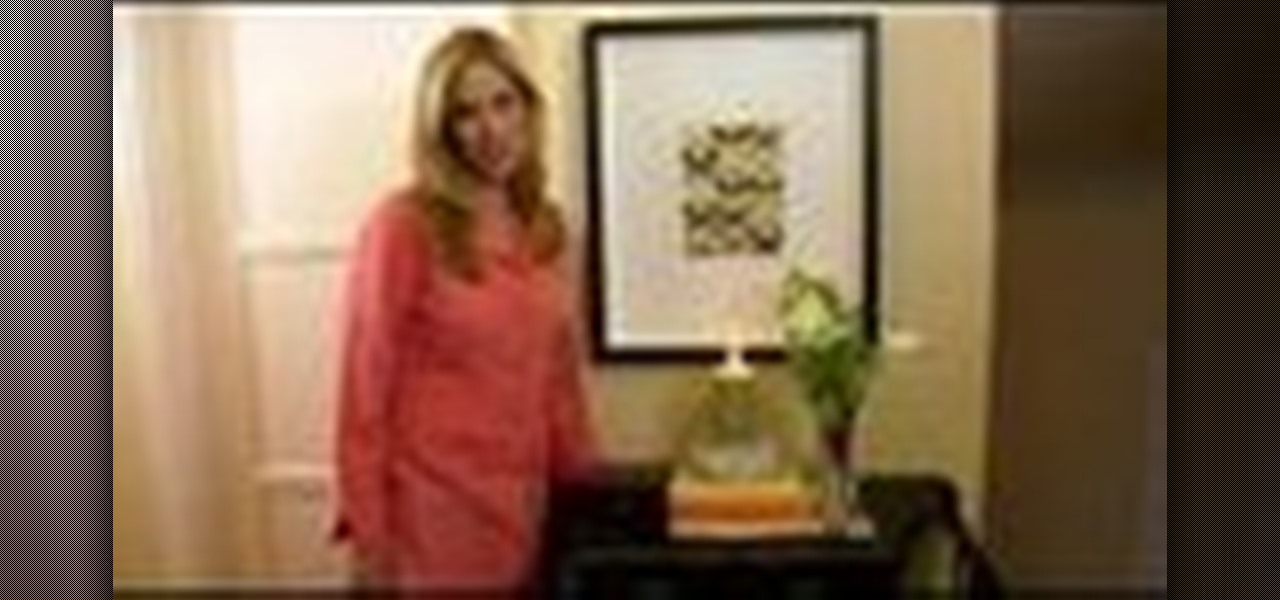
In this tutorial, we learn how to build up your self-esteem with feng shui at home. You can easily change the energy that is in your home to help it bring a more positive vibe to you and others who walk into it! A simple change can be made in even the hallway! If you just put down a beautiful desk with a candle, beautiful plant, and light painting above it you can transform your hallway. This will give you higher self-esteem and a better feeling about yourself as well. Do these little tricks ...

In this video, we learn how to draw Naruto Fuuton Rasen-Shuriken. To start, you will first draw the outline with a light pencil. Then draw it darker over the outline with more details to make the final outline. From here, start to add details into the middle and then draw on the entire body. From here, draw on the clothes and make sure to put the lines on to show the folds and creases of them. Draw on the details of the face and finish off cleaning up any lines that aren't needed. Shade in wh...

In this tutorial, we learn how to draw portraits. First, you will use a light touch of the pencil to draw the outline of the face and hair. Make sure to include the jaw bone and create a line for the chin. Next, use the side of the pencil to draw on the shading underneath the features of the face, which you will gently outline with the pencil as well. As you add more detail, you will increase the color with the pencil to create a bolder image. After this you will draw in the ears and the hair...
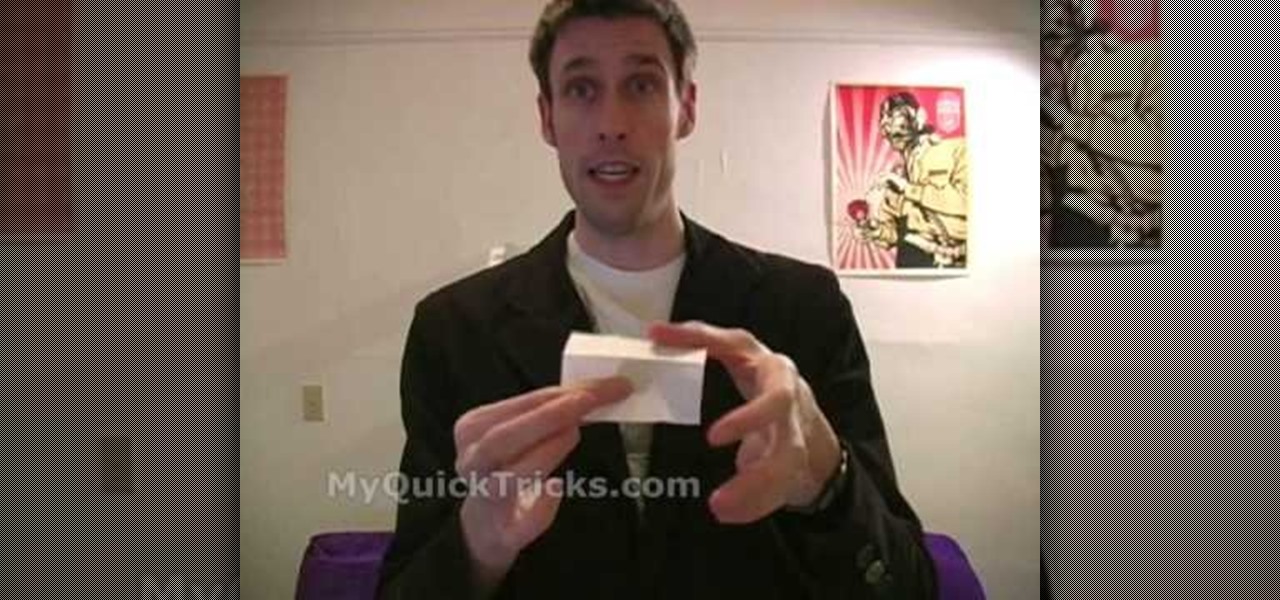
In this video, we learn how to perform "the coin fold" trick. First, borrow a quarter and grab a piece of paper. Take the quarter and fold it up inside of the paper. This will prevent you from doing any slide of hand or trickery. Make sure they can see the coin inside of the paper. Next, you will need to take out your magic wand, which is in your back pocket. Wave it over the paper, and the coin should no longer be inside the paper. To do this, you will need to make sure the coin is inside of...

In this tutorial, we learn how to draw a sphere in 3D. First, draw a circle and a square around it with a light pencil. From here, you will use the side of the pencil to shade in the sides of the circle. Then, draw a half circle next to the circle to make it look like it's shadow. Shade that in and then add in more dark markings to the circle, leaving a small white area on the top of it. After this, draw in the outline of the circle and erase any stray lines. This will complete your sphere, e...